

Once again Cricut has come out with a new fabulous product that we never knew we needed. The Cricut Bright 360! It’s the best crafting lamp of our lifetime.
This baby comes in a floor model and a convenient (fun sized!) desk option… and instead of boring old white it’s actually mist colored. Which is the same exact color as the fabulous new Cricut Maker 3.
So they match!
This little lamp pivots in a full 360 degrees, illuminates your entire workspace with a light that makes midnight feel like noon… and completely revolutionizes the way you craft at night. And seeing as how I’m a night owl (I’m currently writing this post at 10:33pm) I was ready to jump on the band wagon the minute Cricut mentioned a light that would let you craft (and photograph those crafts!) in the middle of the night.
Of course, I had a few questions (and I figure you do to) so let’s jump right into this. I’m going to answer alllll your questions and then we’ll break this bad boy out of the box and make a Cricut Access project with it.
Weeding white iron-on at 10:33 at night? And I’m basically blind? We’re going to put this little light to the test and see how it does! Let’s get started!
What we’ll cover:
- What’s Inside the Box?
- Is it Easy to Use?
- How Bright is it?
- What Size Area does it Illuminate?
- Can I Control the Color of the Light?
- Can I Use this Light to take Pictures?
- How Long will it Last?
- Can I buy Replacement Bulbs?
- What are the Dimensions?
- How much is it?
- What can I use it for?
Update: If the mist color isn’t for you they just released a fabulous Indigo (which is a darker blue). Check it out for yourself here.
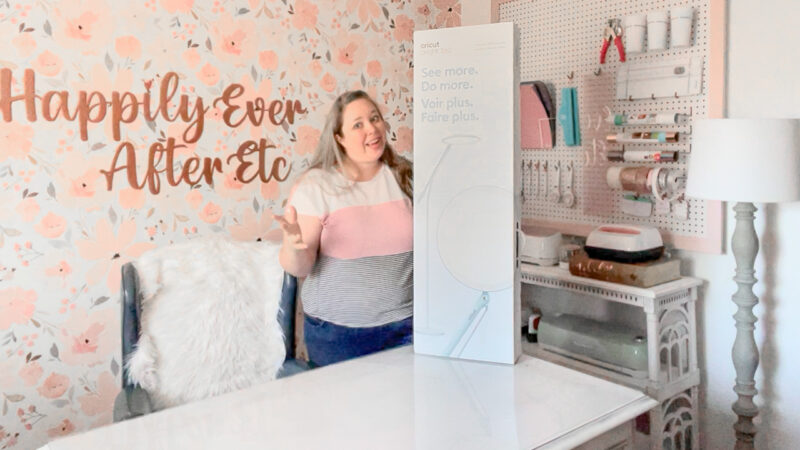
What’s Inside the Box?
- LED Lamp (in 3 pieces)
- Power Cord
- Instructions
That’s really all there is to it… a few pieces of protective styrofoam but at the end of the day this is a pretty straight forward box. One lamp and the instructions you need to put it together! Of course, the lamp itself isn’t complicated so I really only looked at the instructions for fun it clicks together instinctively.
One little caveat though, to assemble this lamp you’ll click the top two portions together and then click the base on as well… literally you’ll hear a click as all the pieces join together. BUT once you click everything together it is permanent. This little lamp does not come back apart. Once it’s a lamp, it’s a lamp forever.
Not that that’s a problem… more of a thing you should know.
Is it Easy to Use?
Short answer? Yes! It’s super easy to use!
It has a heavy base so that it never falls over and two sleek sliders on the stem of the lamp give you complete control over temperature and brightness. So that your light is 100% adjustable.
Plus when they say 360, they mean 360! The entire lamp can pivot around in a complete circle… with ease. It’s so easy to adjust and the lamp head is designed to never get hot and to stay parallel to your project regardless of how you adjust it.
Which is perfect when you’re in the middle of a project… you can reach up and adjust the lamp head with no fear of burning your fingertips. Which I may or may not have done a few times with my regular lamp in the middle of a project.
You live and you learn right?

How Bright is it?
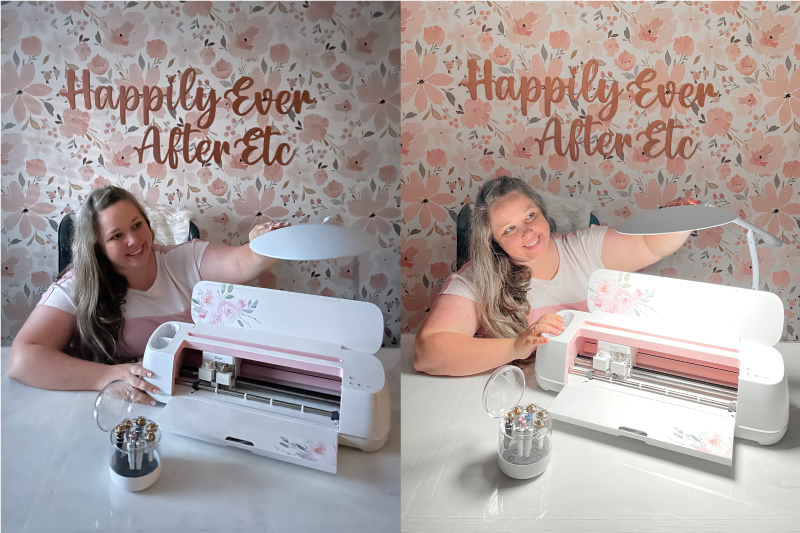
Technically? The desk lamp can illuminate up to 1500 lux while the floor lamp can reach 3000 lux. For those of us who don’t speak tech? It’s bright!
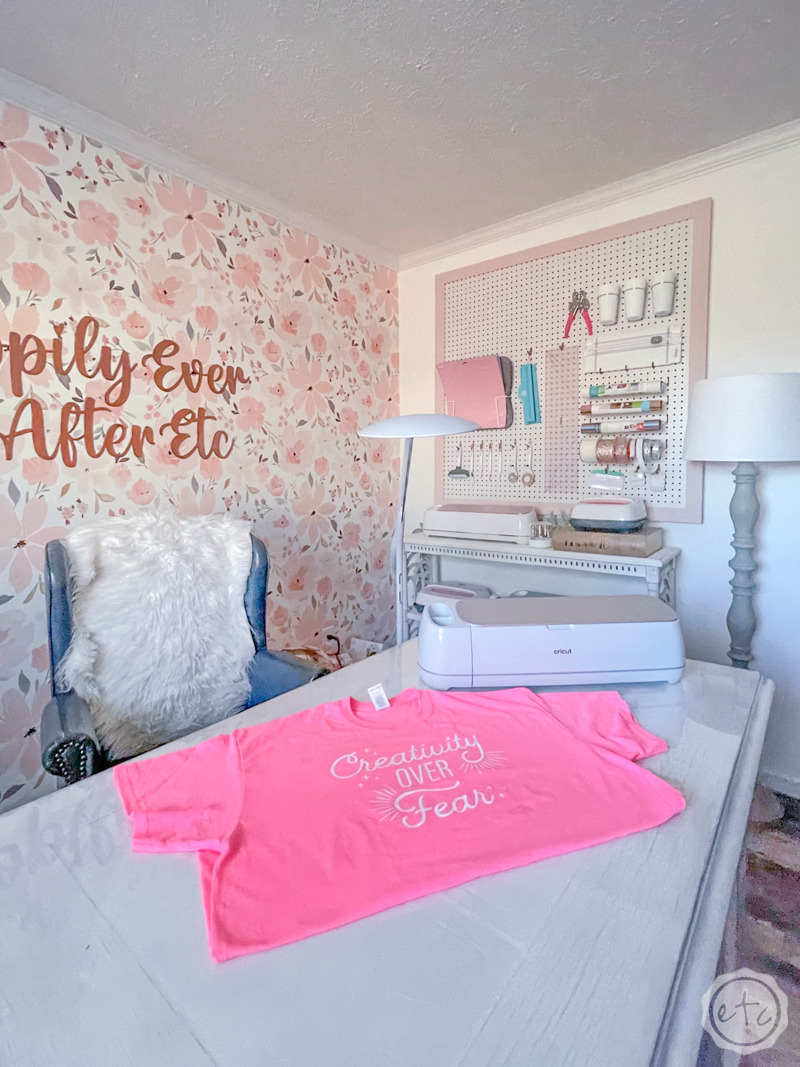
Just look at the comparison photo up above… these photos are completely unedited so you’ll notice a lot of shadows in the first photo (specifically on the machine and my face… not that my face needs to be illuminated). On the other hand once I’ve turned on the light my Maker is completely illuminated. The entire machine is evenly lit and that light extends out across my desk (and yes… onto my face.)
Everyone kept telling me it was bright enough to craft at midnight… and y’all it is. The Cricut access project below was started at 10:33 so by the time midnight rolled around we were definitely weeding white iron-on. I didn’t need to reach for my Bright Pad, I didn’t even need to get within a few inches of the iron-on… I was able to sit back in my desk chair and see every single cut line without any eye strain.
It was ridiculous. I almost started singing a whole new world but I was in the middle of filing a video for y’all so instead I just said how awesome it was over and over.
What Size Area Does it Illuminate?
The big broad head of the light evenly lights up to 4 square feet. Which is A LOT!
I have a large desk and it is able to light up the entire surface… which is ridiculous. My overhead light doesn’t even do that! This is definitely task lighting at it’s best.
Can I Control the Color of the Light?
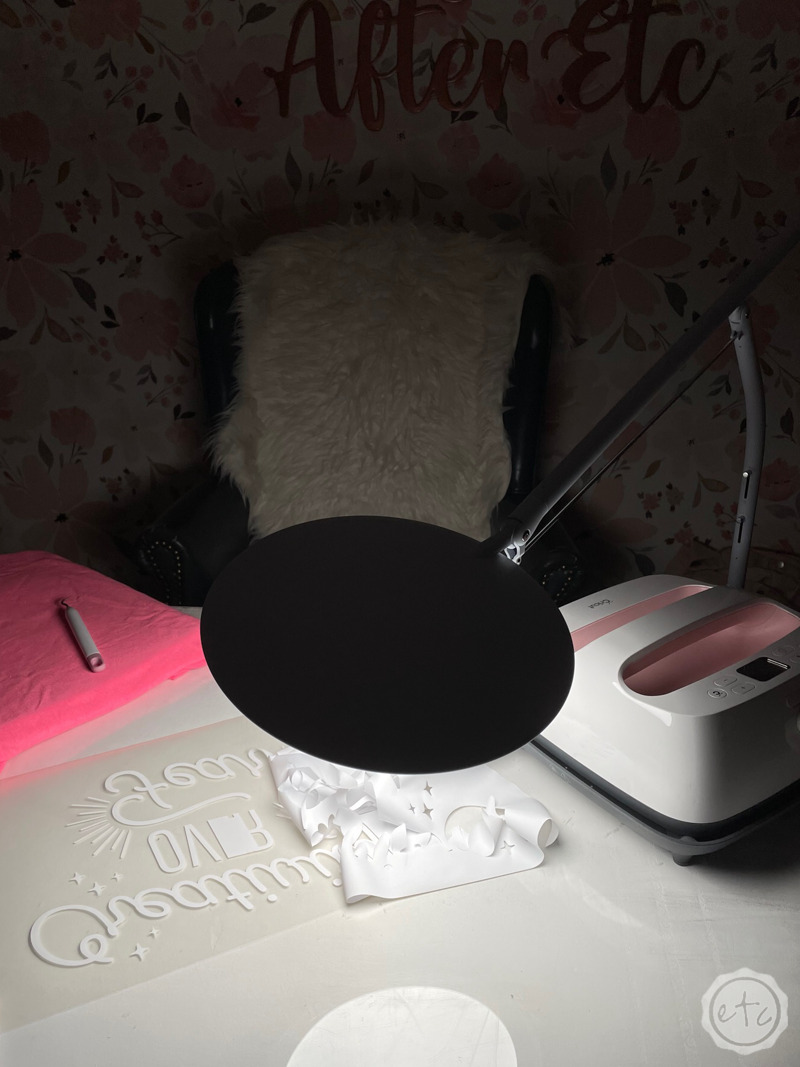
Sure! I mean… you can’t make it pink or anything but you can fully control whether you’re using warm light or cool light in your work space. Which is perfect for those of us who video or take photos as we craft. Just flip the track all the way to daylight and you’re ready for a close up in the middle of the night.
Plus you can adjust it a little warmer or a little cooler… this little light really lets you personalize your light to exactly what you need. Warm to cool, or anything in-between.
Can I Use this Light to take Pictures?
Yes! Yes! Yes! When the light is adjusted all the way to daylight the over all brightness is perfect for making social media photos look professional. Especially because you’ll have rich, accurate colors.
Don’t worry about faded colors, or over exposed, this little light gives you the perfect temperature every time. Another technical spec? This little light performs at 95 on the Color Rendering Index… which means you’re seeing color in the truest form humanly possible.
Which means less photo editing and more time making your projects. Which is something I can definitely get behind.

How Long will it Last?
Can I say forever? Forever.
The Bright 360 was designed to be the first and last crafting lamp you’ll ever need. It was built for longevity with each LED providing over 40,000 hours of run time… which means you won’t have to replace this baby in your lifetime.
Now if you turn it on and leave it on from now until it burns out… I suppose that’s an entirely different problem. But seeing as how 40,000 hours is over four and a half years? And that’s per LED? Well, that’s just ridiculous.
Plus you’d have to surround it with blackout curtains to get any sleep and that seems silly.
Can I Buy Replacement Bulbs?
Short answer: no. But that’s because you won’t need to buy replacement bulbs. Like… ever. The entire head of the Bright 360 is comprised of tiny LED’s which make-up the overall bulb. This makes replacing the LED’s near impossible but since each individual LED lasts for over 40,000 working hours it’s not an issue.
The tiny (but mighty!) LED’s in this cute little lamp will out live all of us.
What are the Dimensions?
The table lamp is definitely smaller (duh) with dimensions of: D: 8.5 in, W: 31–39 in, H: 16.5–27 in (D: 22 cm, W: 79–99 cm, H: 42–69 cm).
The floor lamp on the other hand is taller at: D: 10.5 in, W: 31–39 in, H: 46–56 in (D: 27 cm, W: 79–99 cm, H: 1.2–1.4 m).
How Much is it?
The desk lamp is $199 (and you can grab yours here) while the floor lamp is $249 (grab your floor lamp here).
That seems a little steep until I remembered what normal lamps cost (a normal table lamp? Way more than a hundred bucks, floor lamps are even more). Then I take into account those lamps breaking, needing replaced, not even performing half as well as the Bright 360 and I realize why it’s priced how it is.
Then I called my Mom and she said “nope, that sounds about right for a floor lamp.”
Which made me want to buy a second floor lamp for when I’m working in the living room.
What Can I use it for?
SO many things! I will definitely be using mine for allll my Cricut crafts (especially my no-sew gnomes since I’m always making those at night… go figure) but this little light is really a task light at heart. Which means you can use it for anything you need direct, focused lighting.
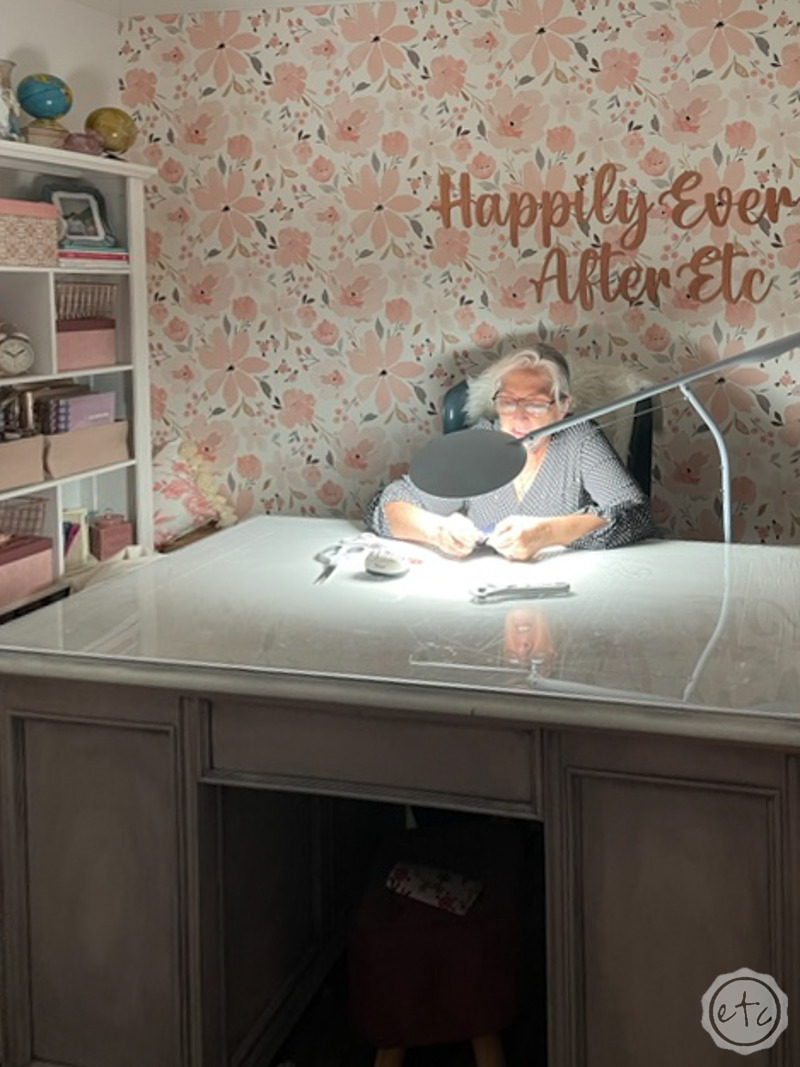
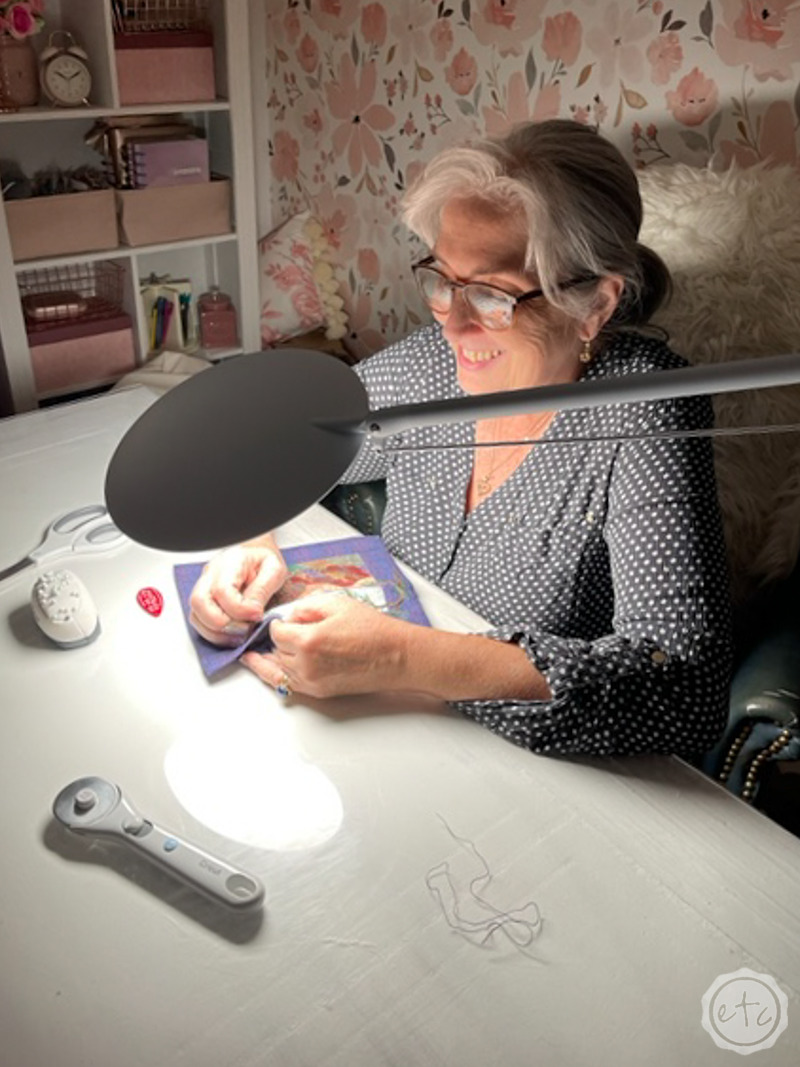
I’m super near sighted (basically blind if it’s not a foot away from my face) and Mom is the opposite… she can’t see anything within a 3 foot radius without her bi-focals. So we both sat down to try a few different projects with the Bright 360.
She tacked needlepoint and sewing (and was able to thread her own needle for the first time in mannnny years) while I made a t-shirt, pulled out my pliars to add jump rings to a few resin projects (mainly these Schitt’s Creek inspired keychains) and even updated my cruise scrapbook since we just got back from whale watching in California.
The Bright 360 worked perfectly for all of our projects… so I think you’re going to see it in a few more videos. It’s so much smaller (and brighter) than the large, bulky light kits I usually use! Plus it looks great in my room… and I won’t have to move it out of the way for pictures! That’s a huge plus alllll on it’s own (how many times have I had to move the light kits to get the perfect shot? Or crop them out of a picture? Not anymore!).
- Weeding Vinyl/Iron-on
- Needlepoint
- Sewing
- Scrapbooking
- Jewelry
- Drawing
- Painting
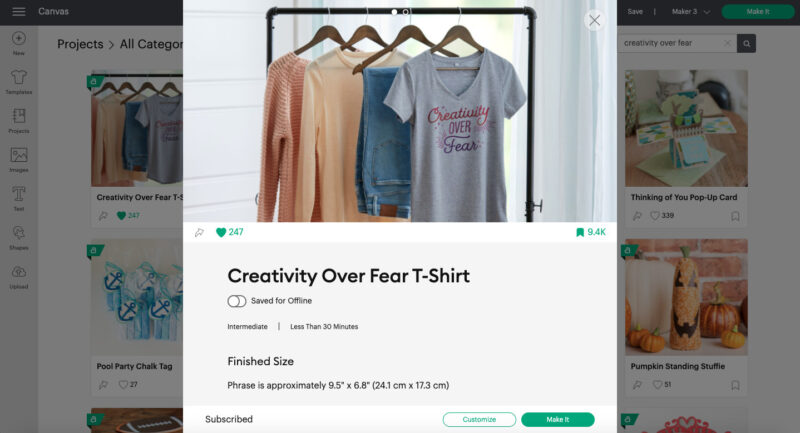
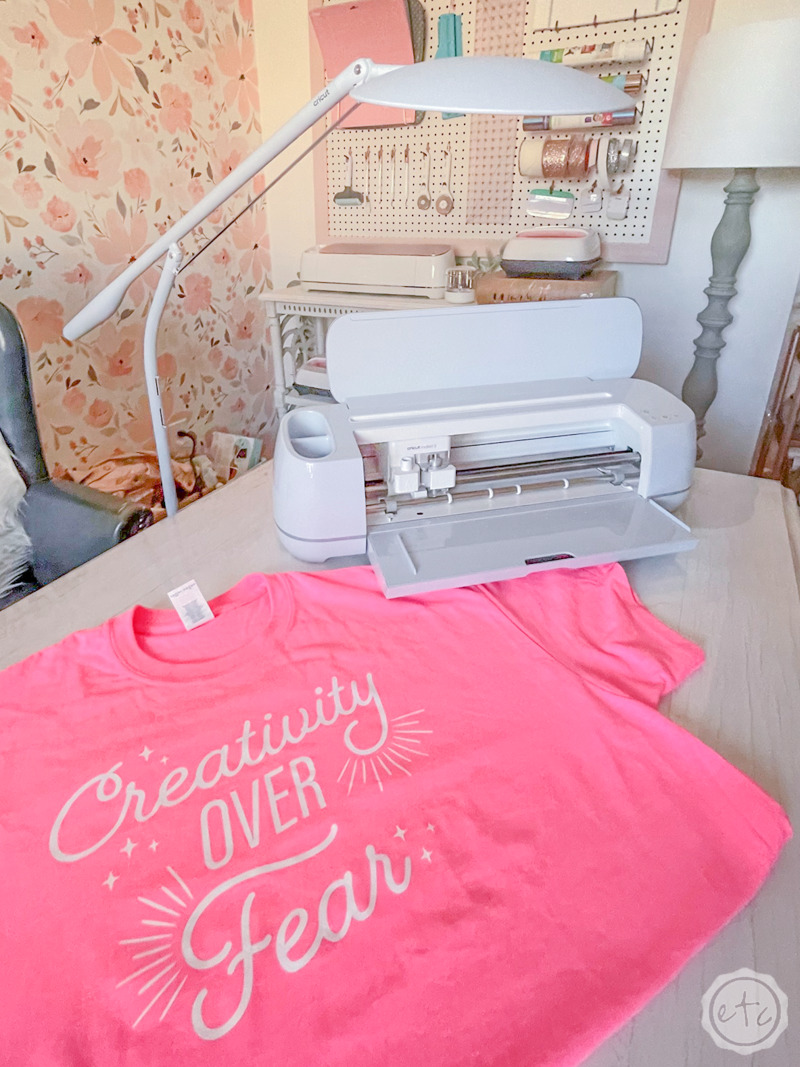
Cricut Access Project: Creativity Over Fear T-Shirt
Alright y’all, ready for the fun part? The actual project! This ones going to be a little different since we’re testing out the Bright 360 instead of a cutting machine… so while I’m using my Maker 3 you could use any Cricut machine you like to whip this baby up.
The main point of the test after all is whether or not we can use our new Bright 360 to weed white iron-on (the hardest material to weed) in the dead of the night with all of the lights off.
So the cutting machine is kind of irrelevant here… as long as it can cut our Cricut access file we’re good to go! I picked my Maker 3 though so that I could use smart iron-on and skip the cutting mat. Ready to get started?
Supplies:
- Cricut Bright 360
- Cricut Maker 3
- Roll Holder
- Smart Iron-On
- Weeding Tool
- Easy Press 2
- Easy Press Mat
- Cricut Access
- Cricut Access Cut File
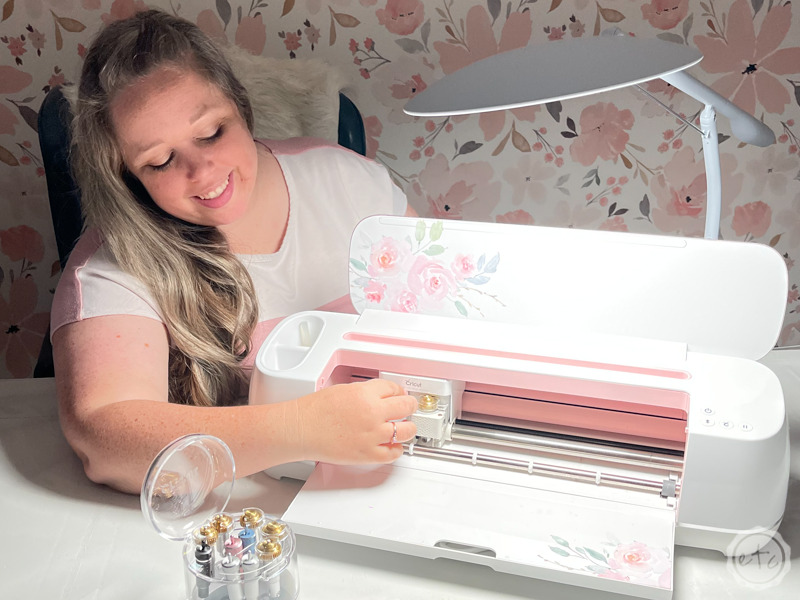
Step 1: Cut Your Design File
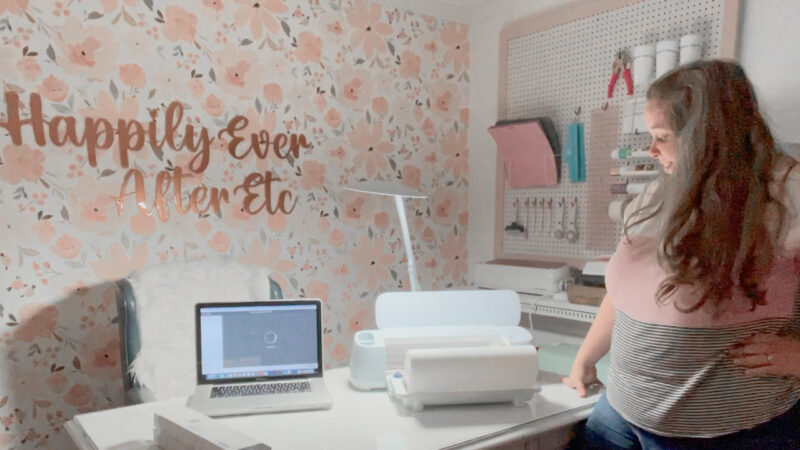
Let’s get to crafting! I went ahead and turned off all the lights in the house… and since it’s after 10:30 at night it’s obviously dark outside (although I keep saying I “turned off the sun” in the video. Sorry about that). Since it’s pretty dark with no lights on in the house I put my Bright 360 all the way up to illuminate my entire workspace and set it to high daylight (which means both sliders are allll the way up).
This worked perfectly to light up my entire work surface. Now go ahead and pull up your Cricut Access File and make any adjustments you like. I turned the entire design one color (since we want to work with white iron-on) and made it a bit bigger since that’s how I like my shirts.
Then I hit cut and watched my Maker 3 do it’s thing. Although it’s faster than lightning so I didn’t get to watch it for long. Since I used smart iron-on I didn’t need a cutting mat but I did grab my roll holder and this particular project called for the fine point blade.
Once it’s done cutting we’ll move on to weeding, let’s do this thing!
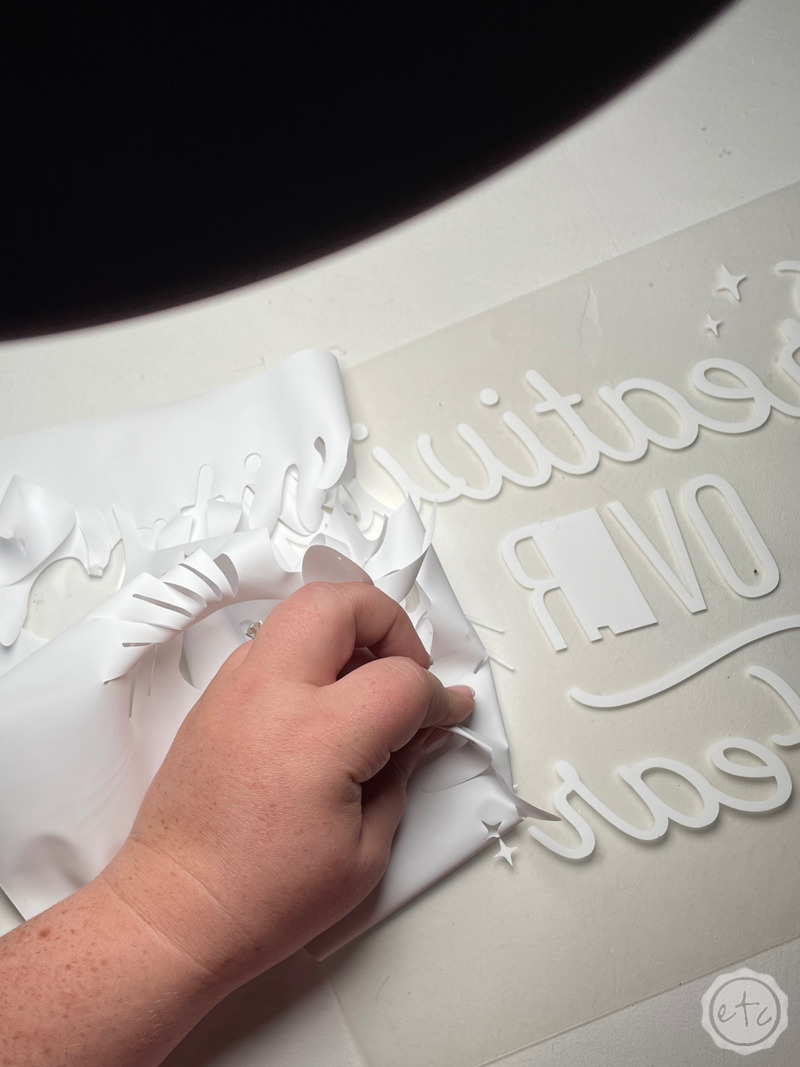
Step 2: Weed your Design File
The moment of truth. So far our tiny but mighty Cricut Bright 360 has kept the entire room bright enough that I didn’t need the overhead light. Honestly I can’t get over how well it lit the video I was filming during the entire beginning of this project… but that’s all irrelevant if it doesn’t help me when I sit down to actually craft.
So let’s grab our design and get to work.
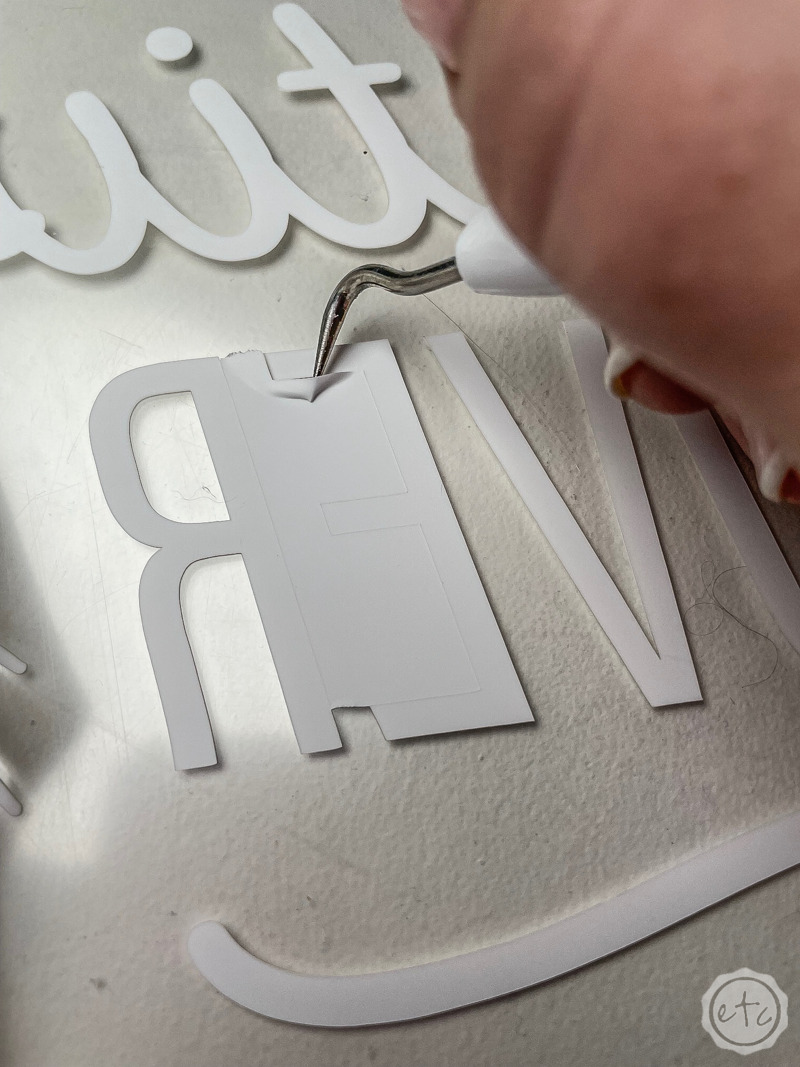
Go ahead and take a weeding tool to remove all the negative portions of the design from the carrier sheet. Keep in mind that the entire design is still mirrored (backwards) and there are quite a few little lines that you need to keep in place as you’re weeding.
I turned my little Bright 360 all the way up and pulled it down close to my project… and it worked perfectly. I could see each and every cut line… while sitting back in my chair. I didn’t even have to put my face within inches of the project to see (and I can’t always say that about my Bright Pad so I’m pretty impressed!).
Go ahead and weed the entire design and then we’ll move on to the next step… and watch the video if you want to see how our fancy new light worked in real time.

Step 3: Apply the Design to your T-Shirt
We are so close to finished! Now that our design is weeded to perfection and ready to rock let’s put it on our t-shirt. Start by setting your easy press to 315 degrees and 30 seconds. Then while your easy press is heating up we can get our t-shirt ready.
I like to place my easy press mat right by my easy press and then place my t-shirt on the mat. You’ll want to make sure that the t-shirt is centered on the mat with the design area over the mat (otherwise you’ll heat up your desk which probably won’t end well).
Then it’s as simple as placing your design on the t-shirt! I fold it in half so that I know where the center is and place it about 4 fingers down from the neckline… then once everything is nice and straight I smooth it onto the shirt. That clear carrier sheet isn’t toooo sticky but it’s sticky enough to hold the entire design in place while we’re working (it’s like magic!). Once you’re happy with the placement you can hit it with the easy press.
Set the easy press and hit the green cricut button… 30 seconds later pick that bad boy up and either return it to it’s stand or move it and repeat.
Once everything has been pressed I like to use a glass or metal cup/jar/ruler (whatever’s on hand) to smooth the entire design down. Then wait for it to cool! Once it’s cool to the touch you can peel the carrier sheet off. Now you’re good to go!
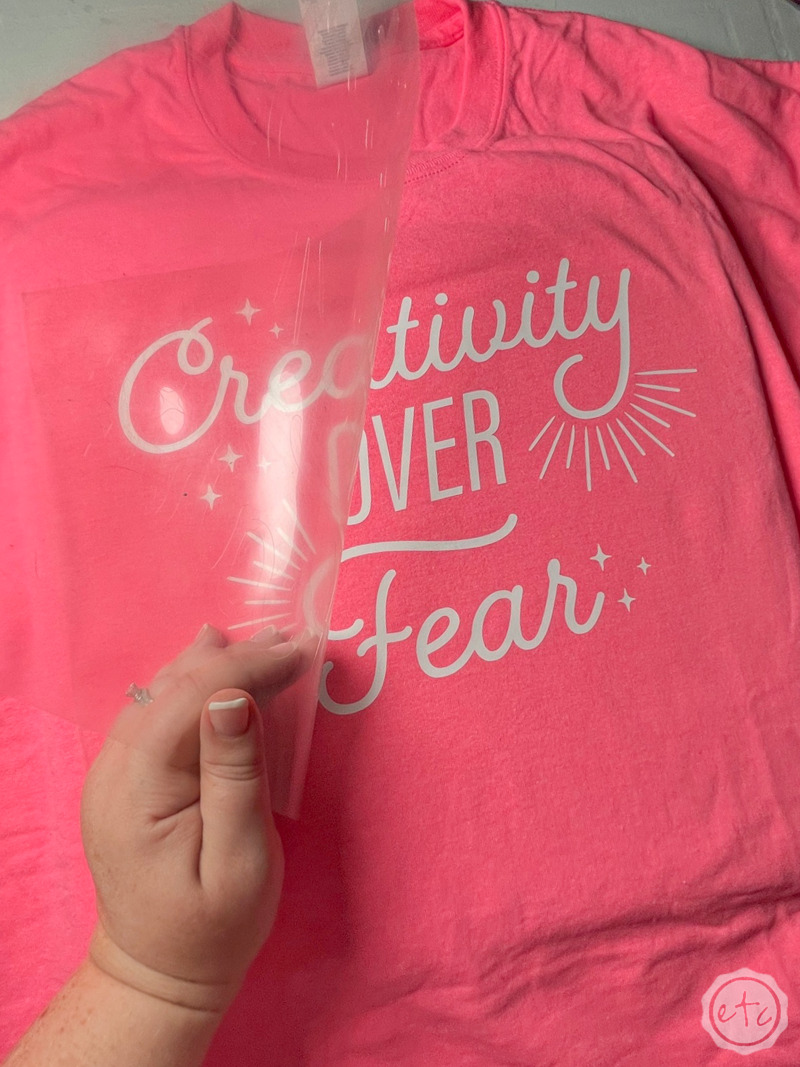

Step 4: Enjoy
This little t-shirt was super easy to make… and while I love my Bright Pad it was really nice not needing it for this project! I think I’ll be flipping my new Bright 360 on for more projects over time… since it make the entire weeding process so easy on this little project.
Let me know what project we should tackle next! White vinyl?

Looking for a walk-through on any other Cricut products? I’ve gone over alllll the basics here:
Get Your FREE PDF Guide!

Don't forget to snag your free PDF Guide to buying your first Cricut!










Leave a Reply