


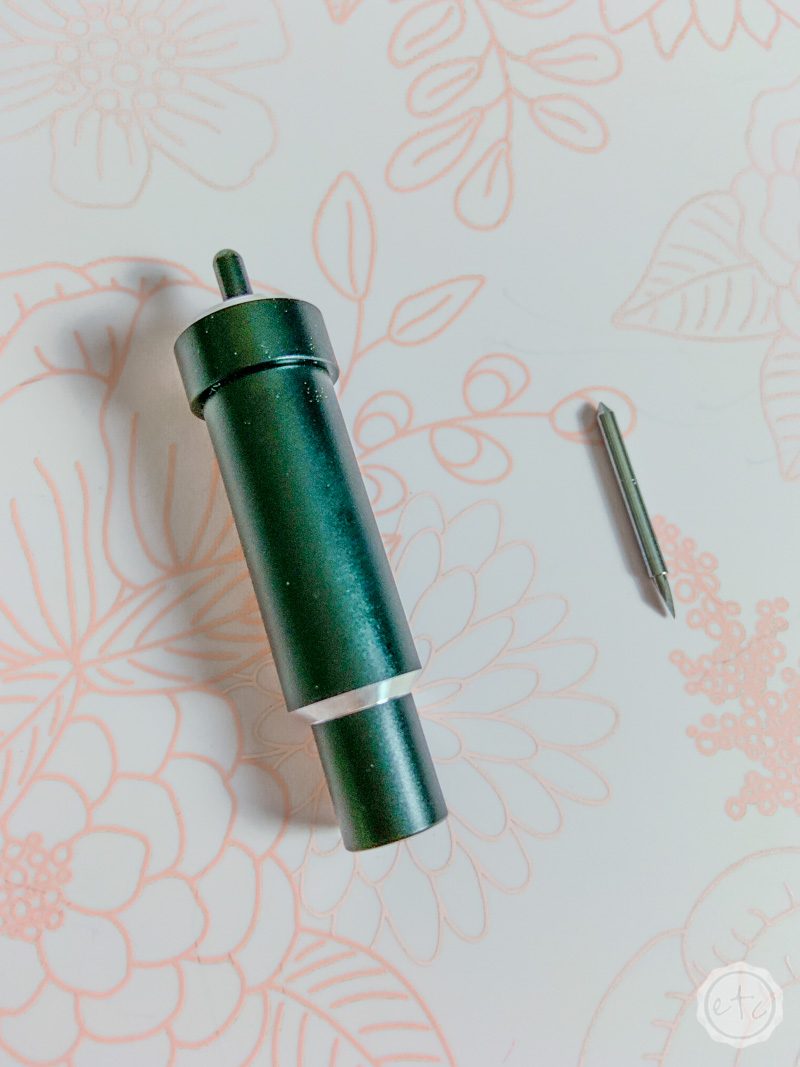
Ready for a deep dive on one of Cricut’s best blades? The deep point blade (the black one!) is one of the original blades and seems pretty old school if you have a Cricut Maker with newer, fancier blades.
It’s definitely not one to over-look though. Depending on your project the deep-point blade could be your perfect answer. It’s very similar to the fine-point blade but this blade is made of a more durable, harder steel allowing intricate cuts in thicker materials such as foam sheets, cardboard and thick cardstock.
Think of it as having the ability to cut delicate, intricate cuts like the fine-point blade but with thicker materials like the knife blade. It’s a bit of a chameleon!
Let’s jump right in… this post is a deep dive into the deep point blade (see what I did there?). We’ll cover all the important things you need to know about what the deep point blade is and what it does… then have fun making the access project at the bottom of the post!

What is the Deep Point Blade?
The deep point blade is the fine point blades big brother. It has a steeper blade angle (60 degrees vs 45) which lets it cut through thicker materials. It’s harder and made of a more durable steel so that it can stand up to harder materials… makes sense!
If you are cutting a project with the fine point blade and find that the cut isn’t going allllll the way through or that the material keeps catching with out finishing the cut? Chances are you need a deep point blade.
This baby works with the Cricut Explore Air 2 and the Cricut Maker so you’re ready to rock regardless of which machine you’re working with. Cricut’s site says it can “create personalized wall calendars from chipboard, cut rubber sheets to make your own stamps, or make custom magnets” which a) tells you a little about what materials this blade was designed for and b) makes me want to run out and buy rubber sheets and magnet material because that sounds really cool!
What can I cut with the Deep Point Blade?
- Magnet
- Chipboard
- Stamp material
- Thick cardstock
- Stiffened Felt
- Poster Board
- Foam sheets
- Cardboard
- Leather
What can I make with the Deep Point Blade?
- Magnets
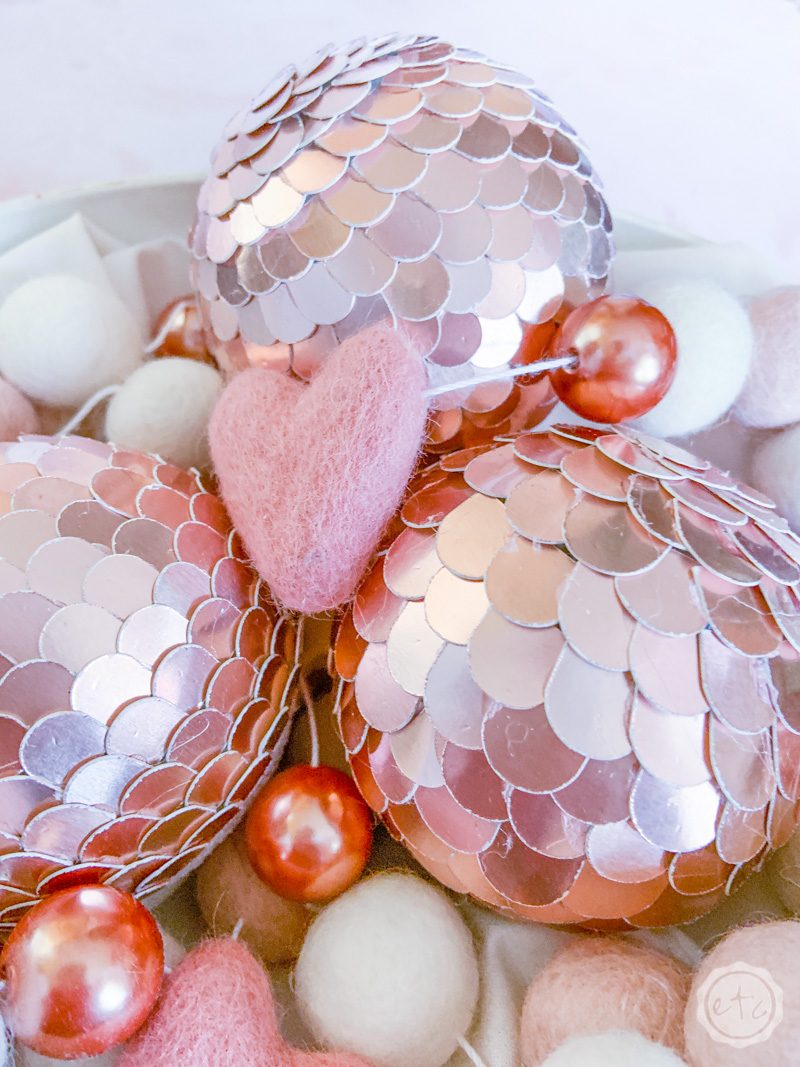
- Decorative Balls
- Stamps
- Felt Paperclips
- Felt Bags
- Leather Journals
- Leather Luggage Tags
Need help picking your perfect machine? I’ve got you covered!

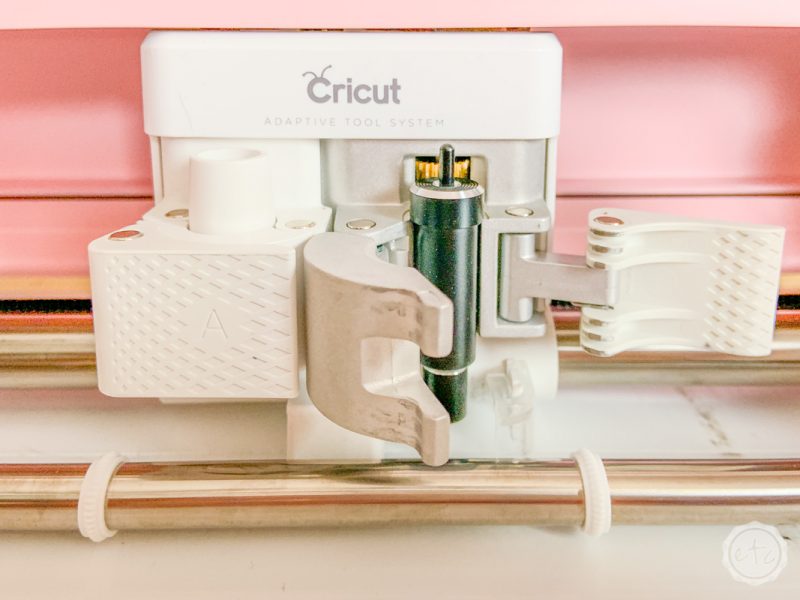
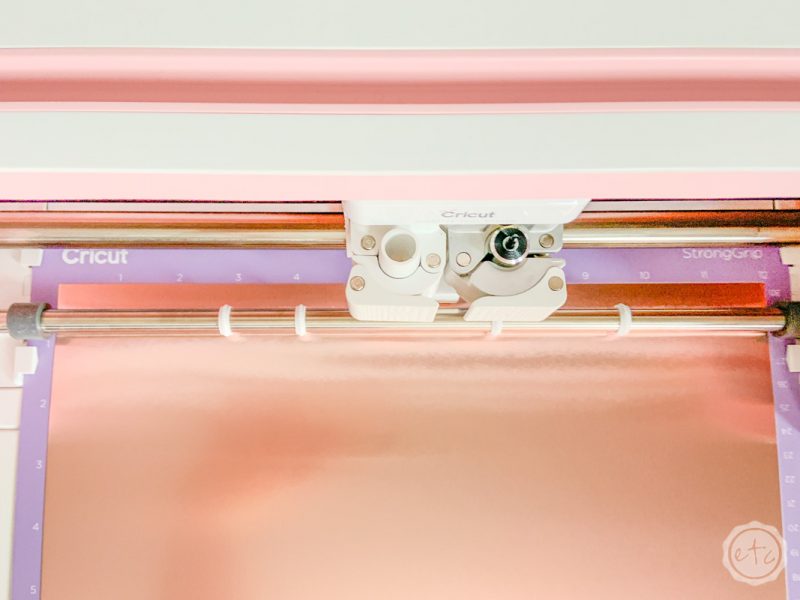
How do I load the Deep Point Blade?
The deep point blade is super easy to load… simply open the tabs on side B and insert your deep point blade before closing the tabs again.
The Cricut Maker and the Explore Air 2 tabs open slightly differently (the Maker’s tabs open all the way while the Explore Air 2’s tabs only open enough to insert the blade) but the result is the same. Simply make sure the top of the blade is snug against the machine in slot B and you’re ready to go.


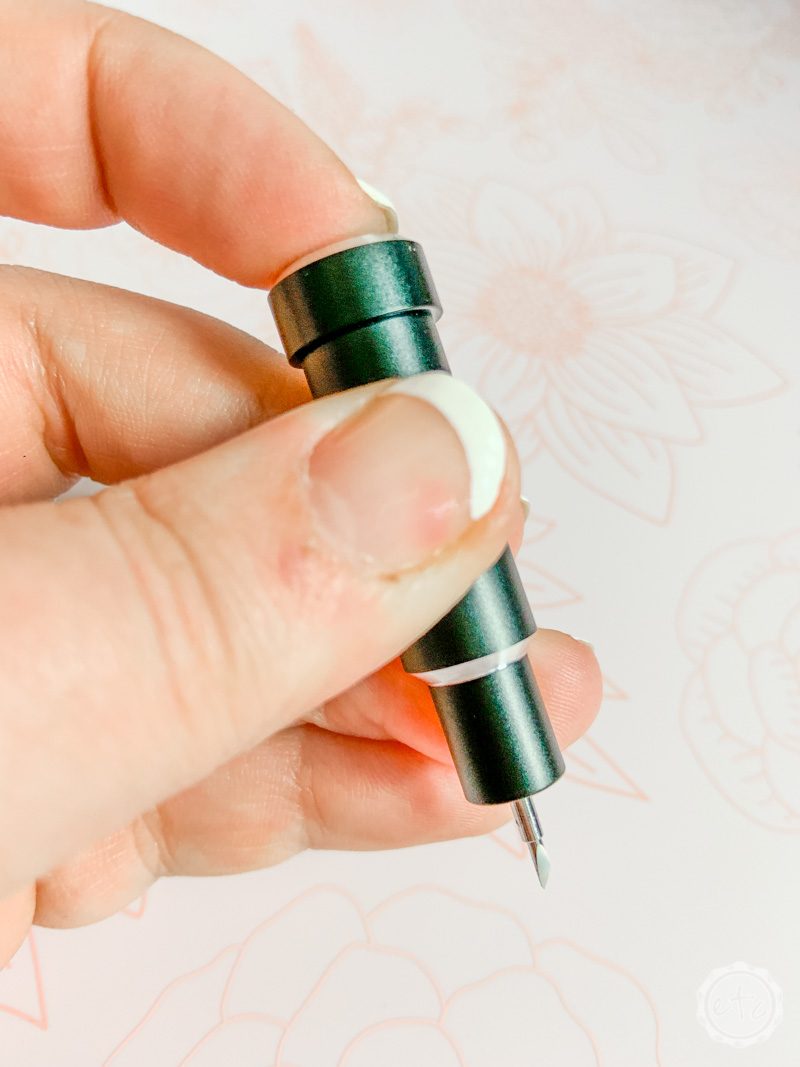
How do I Replace the Blade in the Fine Point Housing?
This is fairly easy to do once you’ve learned it but I’ll be honest… I was completely lost the first time I had to change the blade! If you’ve ever changed the fine-point blade the process is identical… although you’ll want to use a deep point blade instead of a fine point blade.
This little blade stays sharp for so long you’ll probably forget to check it for sharpness… although if you are consistently cutting thicker materials the blades will wear out faster. I typically leave my blade until I start to notice it not cutting all the way through.
Ready to get started? To change the blade first press the button on top of the housing… you’ll notice the blade comes further out of the housing so that you can grasp it. Take a hold of the blade (carefully so you don’t cut yourself) and pull it from the housing.
Then you can pull the little bit protective wax off the new blade and put it over the old blade before throwing it away. That way the old blade won’t hurt anyone even once you toss it in the trash.
Press the button on top of the housing again and this time place the new blade in the housing and push upwards. It should slide into place and once you release the button disappear into the housing same as the old blade.
Easy peezy!
Cricut Access Project:
Alright y’all it’s time to get started on a fun new project! I learn best by doing and while I’d love to jump in with something really fun like magnets I thought we’d start with something a little more accessible. but since I’ve already made about a million vinyl projects I decided to work with poster board this time.
Poster board is technically on the list of materials the fine-point blade can handle but every time I try to rock poster board with the fine-point I have problems. The fine-point blade just doesn’t cut all the way through! So I’ve started using my deep-point blade for poster board as well.
And since we’re trying to keep things accessible I thought we’d try a quick and easy Cricut Access project with our poster board!
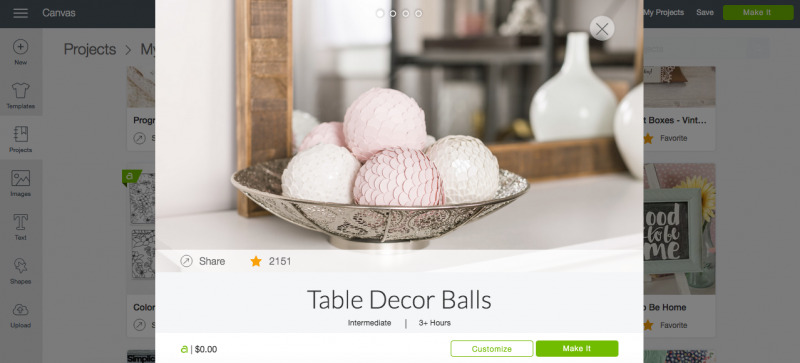
I opened up Cricut Access and typed in poster board into the search bar at the top of the page… so many fun projects make it really hard to choose! I scrolled through the options until I found these cute decorative balls.
Ready to make a few fun table decor balls? Let’s get started!
Supplies
Cricut Maker
Deep Point Blade
Cricut Cut File
Brayer and Applicator
Foil Poster Board
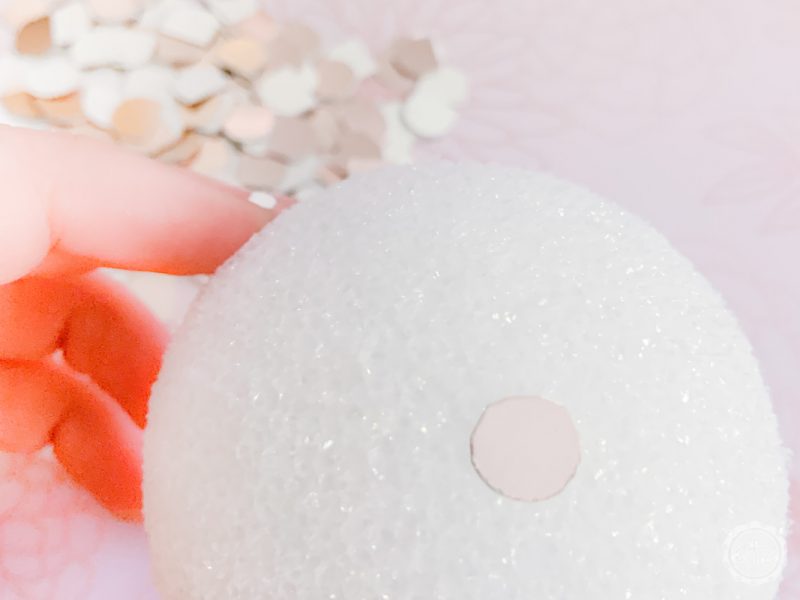
Styrofoam Balls
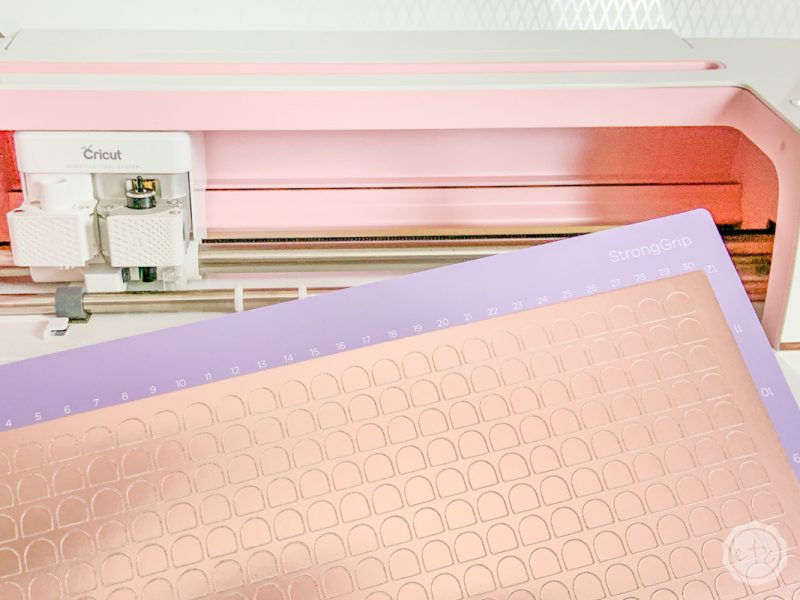
Cricut Strong Grip Mat (That’s the Purple One)
Hot Glue
Hot Glue Gun
Basic Tool Set (reverse tweezers
Step 1: Load Your Mats
Alright y’all it’s time to get down to business. The best part about Cricut Access is that once you pick a file you’re pretty much ready to rock. So start by loading your mat… this particular project calls for looootttts of little tiny scales. So depending on how many decorative balls you’re making you may only need one mat.
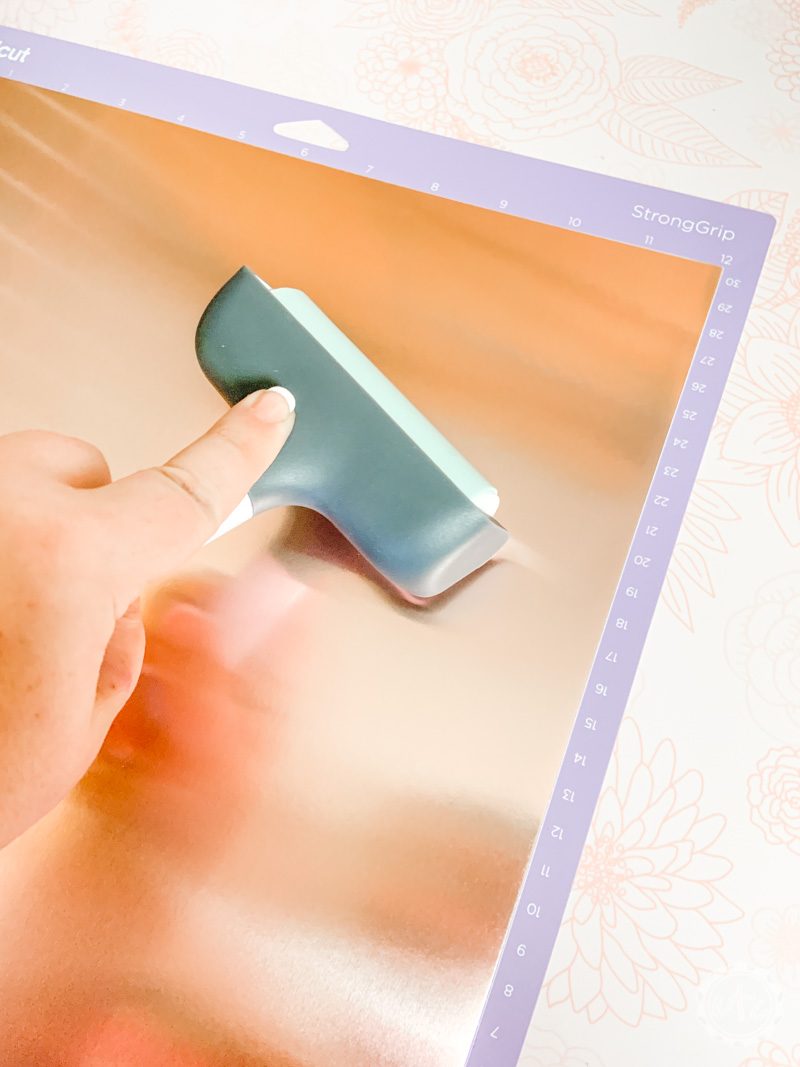
Poster board calls for a strong grip mat (that’s the purple one!) to hold the poster board in place so I went ahead and loaded a purple mats with poster board. Make sure to use your brayer to firmly smooth your poster board onto the mat so that it doesn’t move while it’s being cut.

Step 2: Prepare your Cut Files… and press GO!
Ready for the fun part? Since this is a Cricut Access project and we aren’t designing the project we can simply hit GO and let the Cricut do it’s thing… you don’t even have to hit customize if you don’t want to! Simply hit make it and load the mats the machine asks for!
The way this little file is set up makes it super easy: the cut file is one simple little scale. In order to take your little scale and fill the entire sheet simply change the project copies to 380… which will fill the entire page with copies!
This is the perfect size for a 4 inch ball so if you’re working with a 4″ styrofoam ball go ahead and hit go!

Tip: If you’re using a smaller styrofoam ball (say 3 inches) simply change the size of the scale before hitting go. For a 4″ ball the standard size is 0.53w… which means 0.53 / 4 = 0.1325. Now just take that little number and multiply times the size of your styrofoam ball. 3 inch ball? Change the size to 0.39. Now your little scales will be the perfect size!
Of course, larger scales are easier to apply and faster to put together, but smaller pieces make a cleaner, more professional look.


Step 3: Weed Your Scale Pieces!
The worst part of cutting out 380 tiny scales? Removing 380 tiny scales from the cutting mat! The poster board is super sturdy so it weeds like a dream… simply grab a corner and pull off the negative space.
Then take alllll of your little scales off until your cutting mat is clean. This process took a couple of minutes… since there’s so many dang scales. I tried the tweezers, my fingernails and finally the little spatula to take the scales off and decided that the little spatula worked the best!
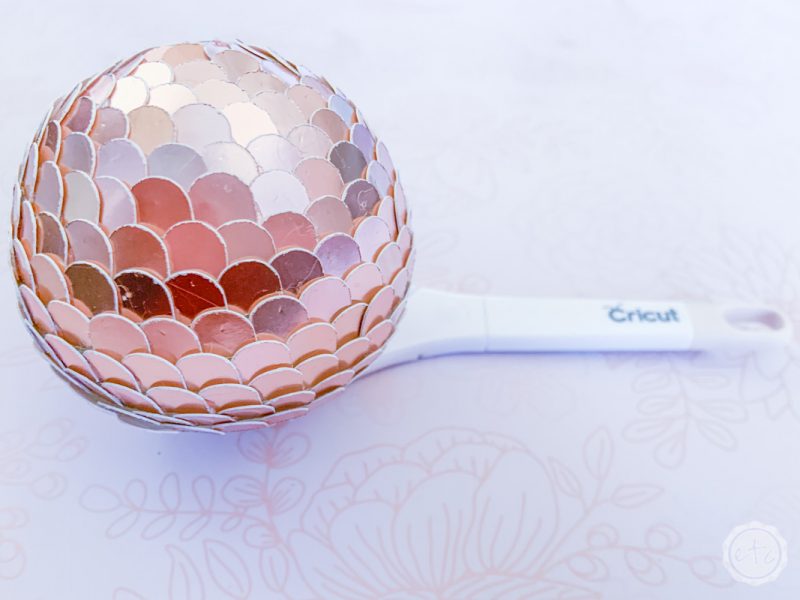
Step 4: Glue the Scales onto your Decorative Ball
Alright y’all now it’s time to get gluing! This part takes… forever. I’m not going to lie. It goes faster once you get use to it but there’s just no way to really speed it up.
Start by gluing one scale in the middle. Once you have the middle scale down glue down 3 to 5 scales in a tight circle. Make sure to overlap their round ends on the side as you move around the sphere. The square ends should point outwatd toward the rest of the uncovered ball.
Once you’ve glued the first row go ahead and move onto the second row making sure to overlap the round bottom of each scale with the scale underneath it. Keep them evenly spaced so that you don’t use too many scales… the ball will start to look crowded!


Keep gluing down the scales… you’ll have quite a few rows to go before you reach the bottom of the ball. I actually used the bottom of my Cricut scissors to set my ball down in between gluing on scales!
It’s a little strange but it worked pretty well! The dang ball just kept trying to roll away from me!

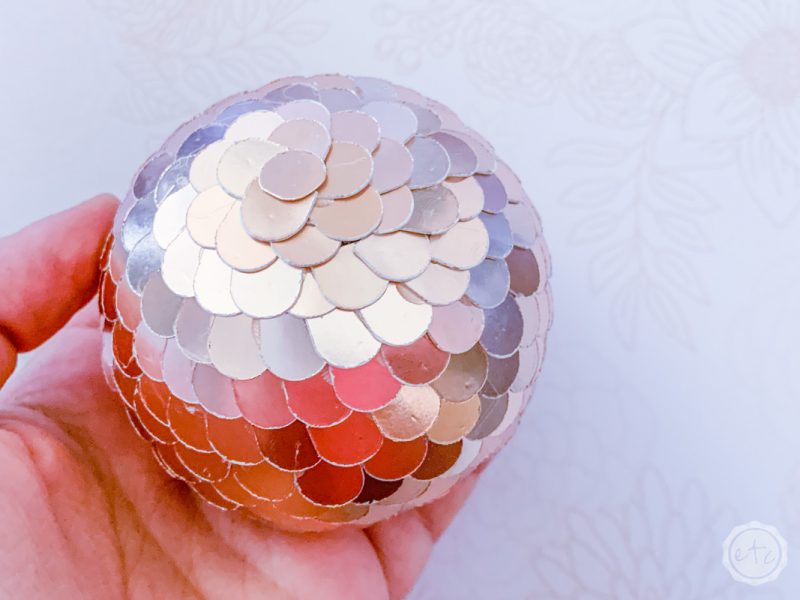
Step 5: Finish Your Decor Ball
By the time you get to the bottom of the ball chances are you’ll be ready to do just about anything else. Luckily it’s an easy task to finish this little guy off.
Simply trim the ends off one of your scales and glue it in place! Volia! Instant cap for your pretty little decor ball. Now you can make him a few friends and enjoy!


Psst… need help setting up your Cricut Maker? Check out this post!


Leave a Reply