


Last week I busted out my cricut to make one of those giant wooden baby names… the really cute ones that go on the wall over a crib? I love them and they’re super expensive to buy ready made since they’re typically cut with a large scale laser. Instead of spending extra money I used my Cricut Maker and a bit of basswood to make my own… of course that was a bit tricky since my Cricut can only cut small basswood sheets.
Think letter size: 9×12 or perhaps even 11×11 depending on which brand you’ve bought. That’s fine though… a little magic and I was able to put all the pieces together for a large baby sign reading: Jasmine Violetta. It turned out suuuppper cute! BUT part of that magic was a few layers of resin.
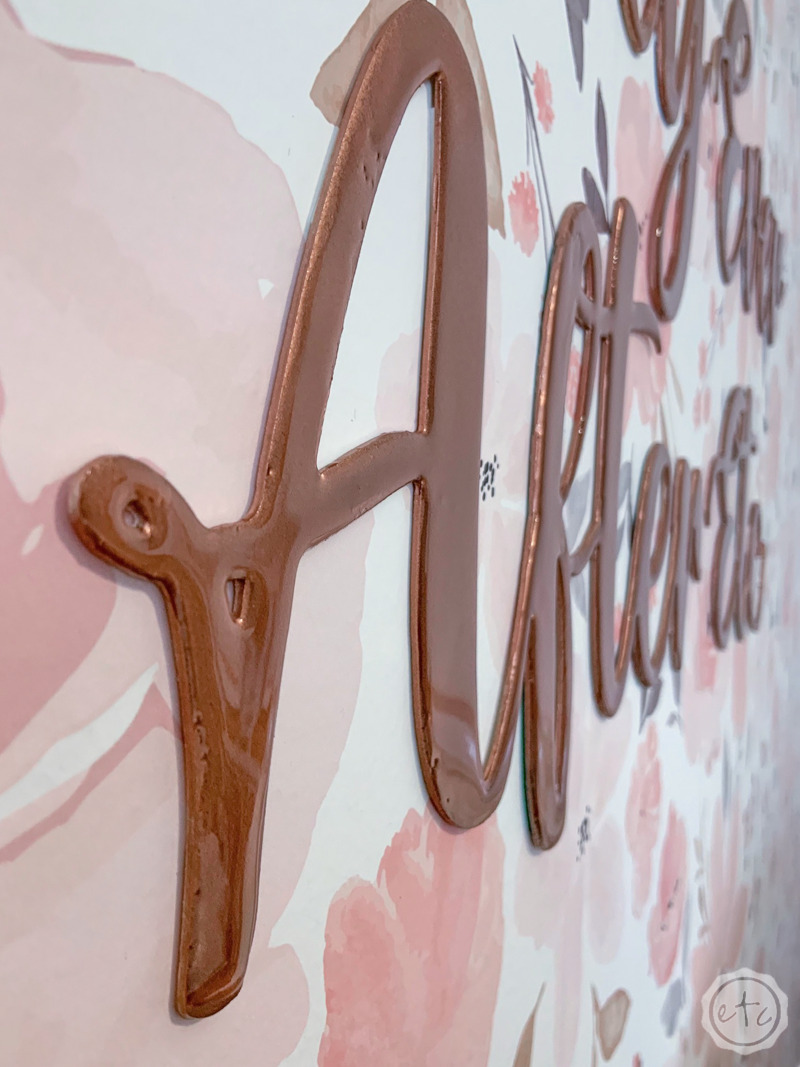
Resin is strong, it will span the distance between the two basswood pieces and if it’s a solid layer of resin it will mask the imperfections underneath (mainly that the letters weren’t one continuous piece). But the basswood sign was large and had no edges… so I couldn’t just pour resin on and build up the layers.
And I didn’t want to put tape around the outside in this particular instance… I wanted a few really thin layers of resin that would make everything look continuous but still thin enough to hang on the wall without fear of being too heavy and falling. So instead of pouring resin we added 3 layers of resin as a topcoat to the existing basswood.
This is the same method I use to topcoat other resin pieces that need a shiny resin layer. Maybe they were matte and I want them to be shiny (like these sweet little resin gnomes that were originally matte) or maybe the resin didn’t cure quite right and I need to seal in the stickiness with a resin topcoat (like I did with my blush and rose gold geode inspired tray), or maybe I want to make the entire piece food safe (like with these resin salad plates or the matching knife rests).
Food safe resins are typically only food safe when they are clear… adding pigments and colorants cancel out the food safe properties of the resin. The easiest way to make the entire piece food safe again? Adding a clear resin topcoat (because we know that the clear resin is food safe)! (PSA: THIS ONLY APPLIES TO FOOD SAFE RESINS… IF YOUR RESIN IS NOT FOOD SAFE ADDING A CLEAR TOPCOAT WON’T DO DIDDLY SQUAT, GOT IT?).
Whoo, that made me nervous. Glad you understand.
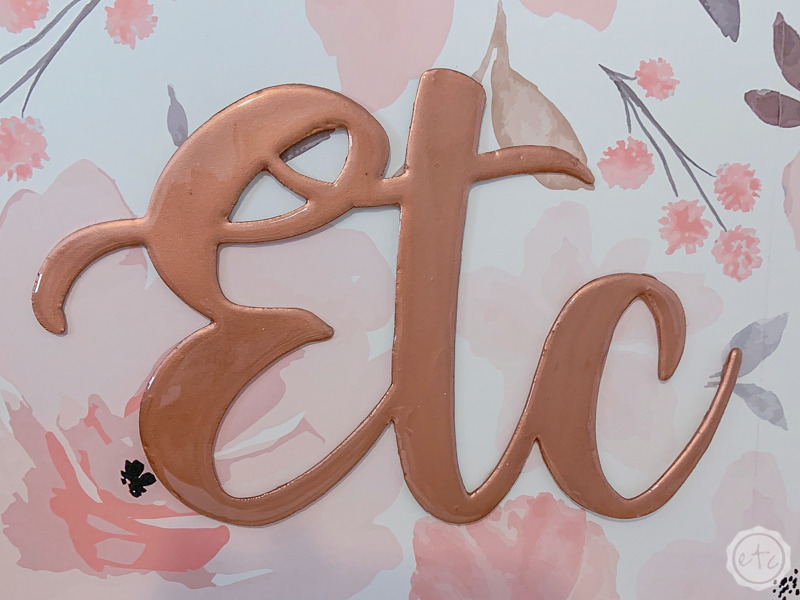
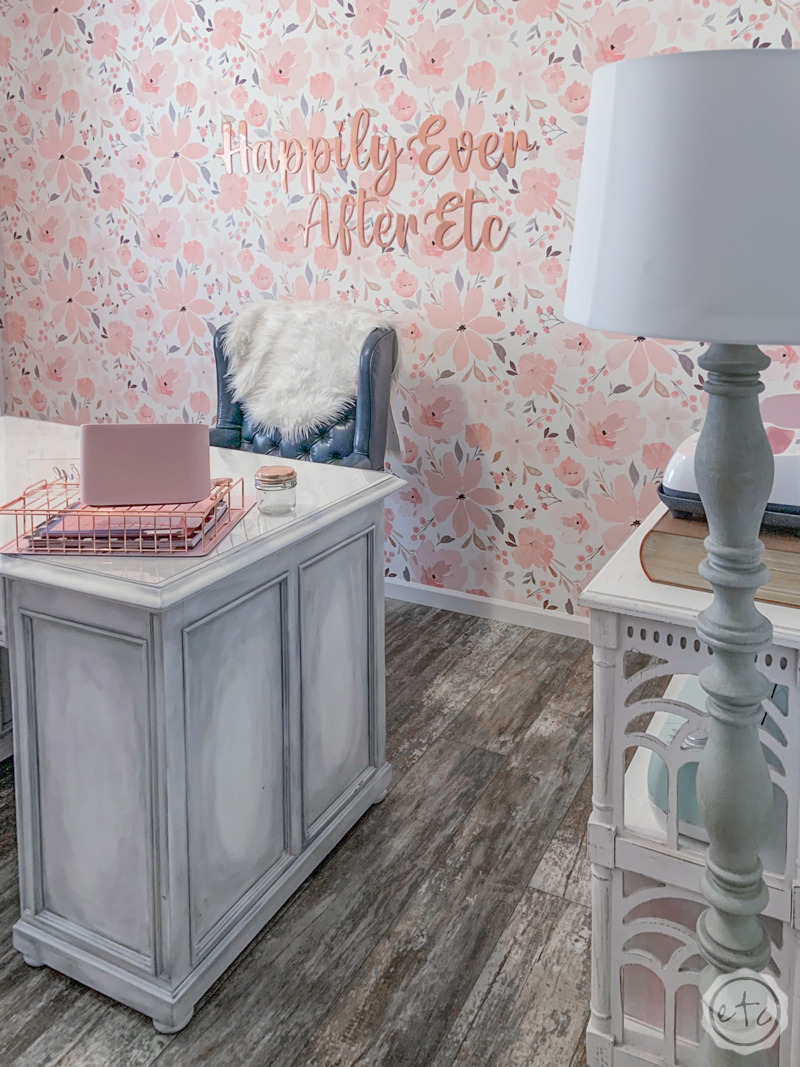
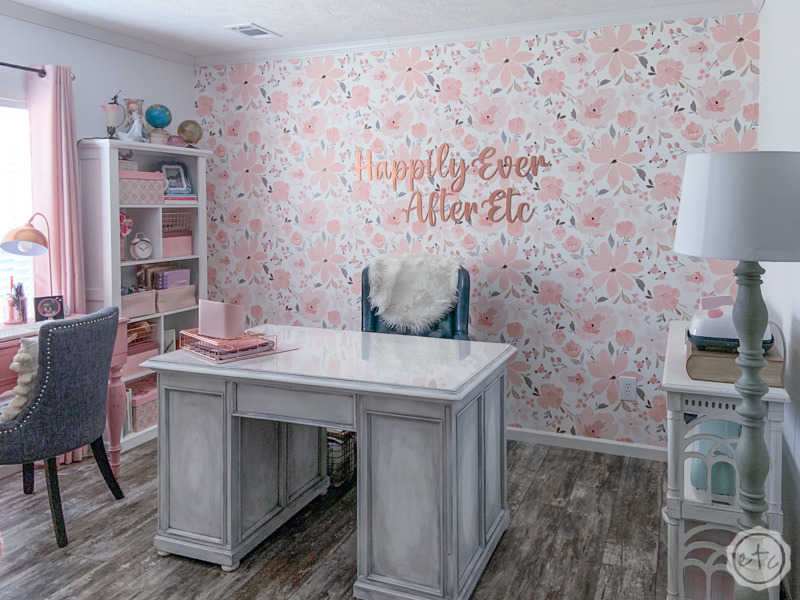
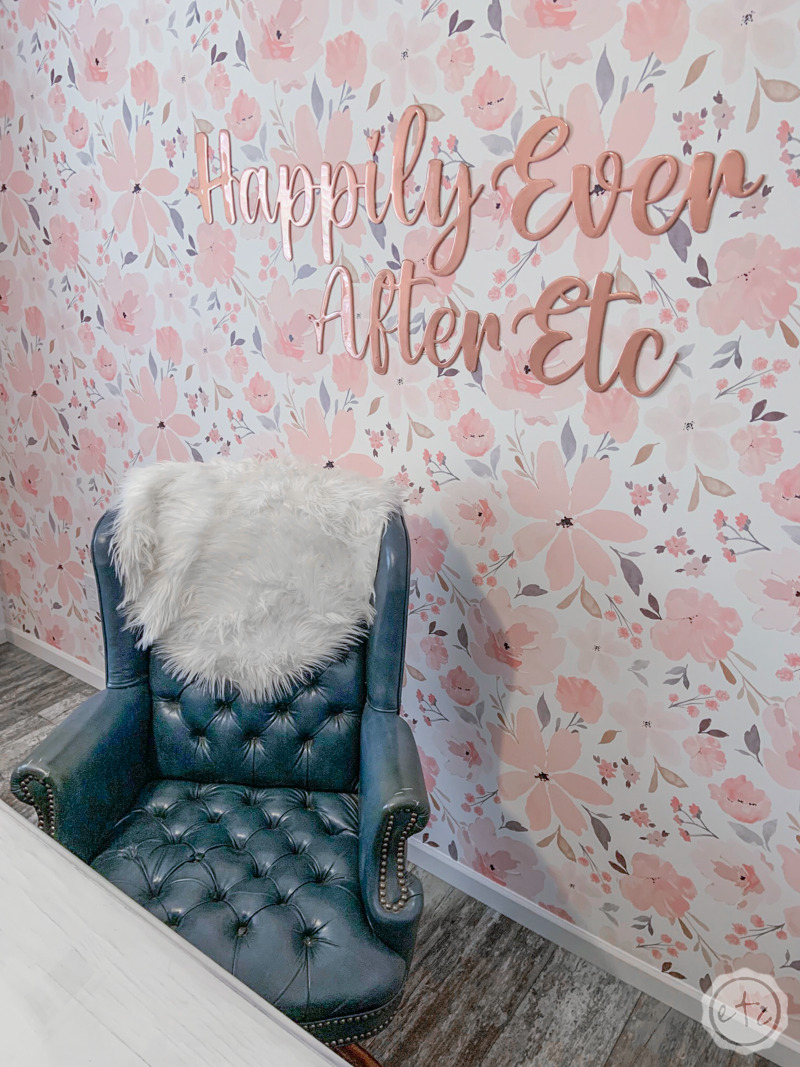
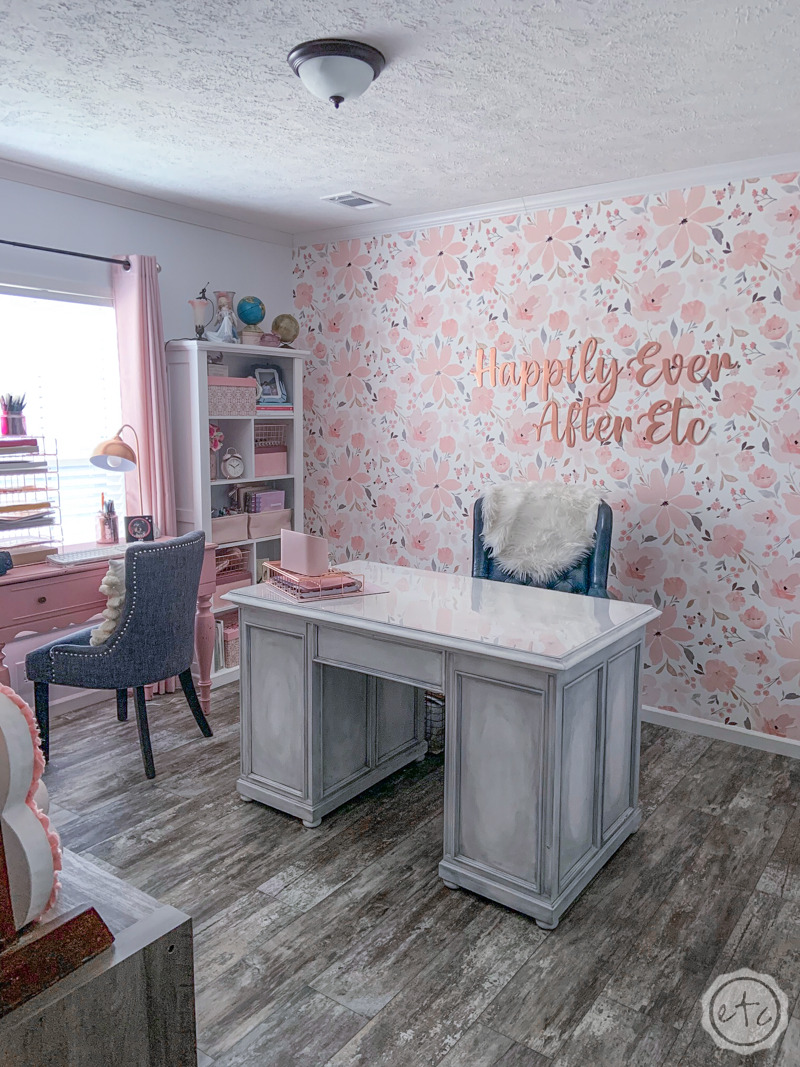
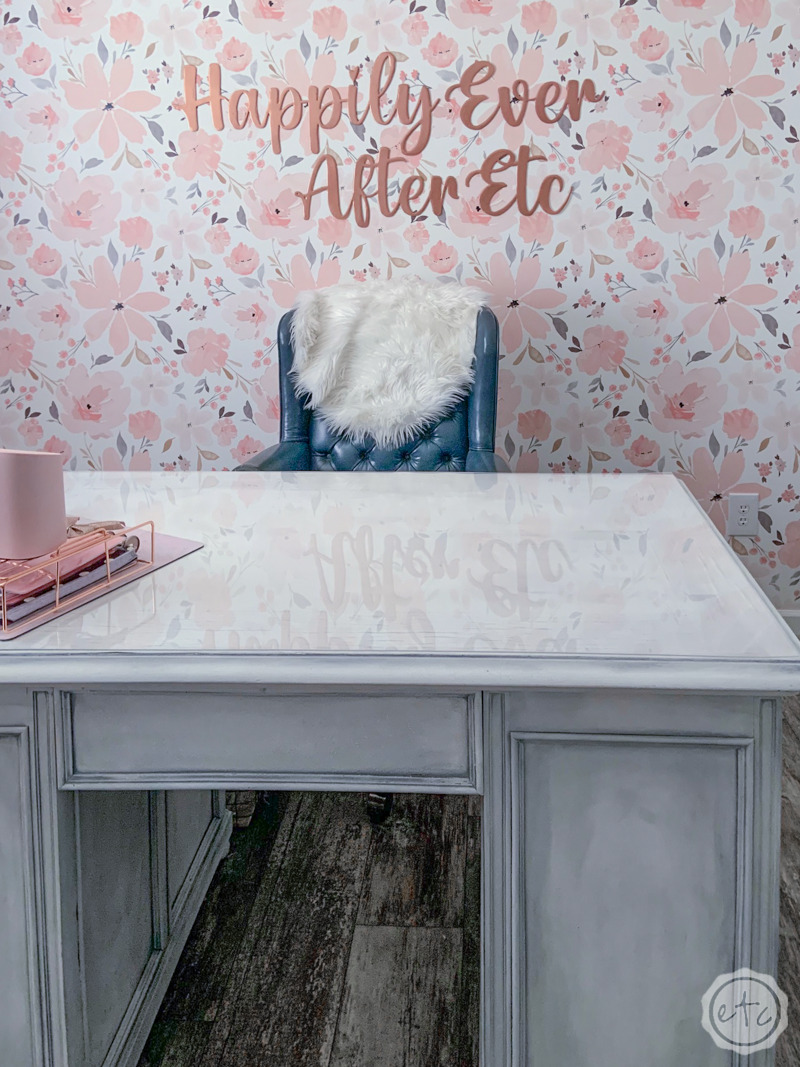
Either way today we’re taking the same technique I used to make our large scale baby name sign and I’m whipping up a large logo for my office wall. This is the main wall I’ll use for filming so I want my logo to be in the background… and since I hung a pretty floral wallpaper already I know that the logo needs to pop! So let’s add a few layers of resin topcoat to make it stronger and to make it oh so pretty.
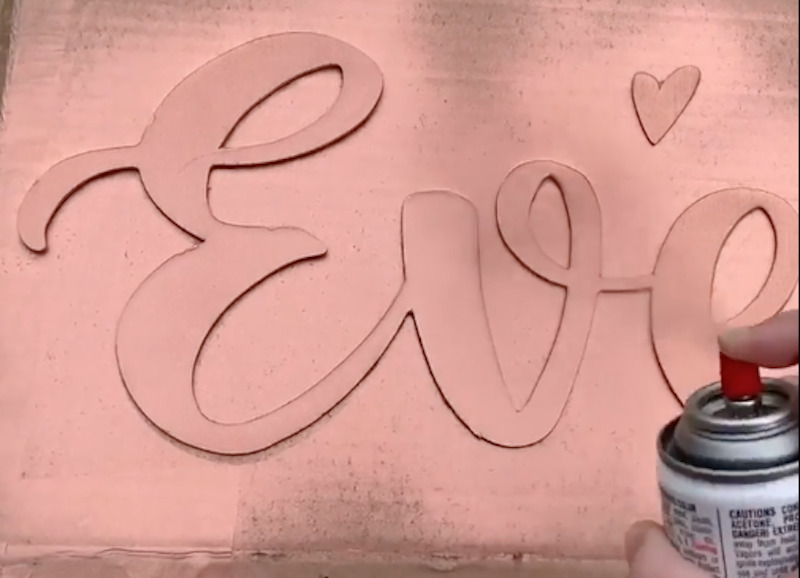
Metallic copper anyone?
I’ll skip the part where I spend hours cutting this baby out with my Cricut Maker since you guys have already seen that process and we’ll get straight to the resin topcoat.
Supplies:
- Total Boat Maker’s Epoxy Resin
- Respirator/Mask (resin graded filters)
- Gloves
- Wagner HT400 Heat Gun
- Freezer Paper
- Silicone Mat
- Baking Pan (or cardboard box)
- Heart Shaped Silicone Mixing Cup
- Small Mixing Cups
- Silicone Measuring Cup/Larger Mixing Cups
- Reusable Silicone Stir Sticks
- Copper Spray Paint

Step 1: Prep your Space
Ready to mix a little resin? Before we jump right into the project let’s prep our work station… gather all our supplies, cover all the surfaces with freezer paper, make sure there are silicone sheets under our piece and a proper place for it to dry when it’s done.
For smaller pieces I put my silicone sheet in a baking tray so that I can carefully carry it to a spot for curing… but for my larger wooden logo pieces I had to use a few long skinny cardboard boxes. Whatever works!
Just remember you need a really well ventilated space to work with resin and since I have 5 dogs and a cat inside (without a workspace and air ventilation system) that place (for me) is my front porch. That means a little extra prep work (and moving resin as it cures work) but it’s totally worth it to be able to turn out resin projects like these. Don’t let a lack of work space keep you from creating!
Once you have your space set up make sure you have all of your supplies: gloves, mask, resin, mixing cups and stir sticks. We’re going to get really sticky for this topcoat so make sure you have all your supplies before you start to mix your resin! You won’t want to remove your gloves to go grab something mid project!
Then it’s time to grab your resin and get started. Resin needs to be room temperature (not too hot or too cold) so I like to leave it inside while I’m setting up so that it doesn’t change temperatures while I’m prepping my space. Resin that’s too hot will cure too quickly and resin that’s too cold will have lots of bubbles.
You’ll also want to keep temperature in mind when picking a day to work on your resin creations… a super cold or rainy day won’t let your pieces cure as quickly while a scorching hot day will cook the pieces faster. You want nice weather for a resin work day!
Now that we have everything in one space let’s jump in (before it gets too cold… it is winter at the moment after all!)
Step 2: Mix your Resin
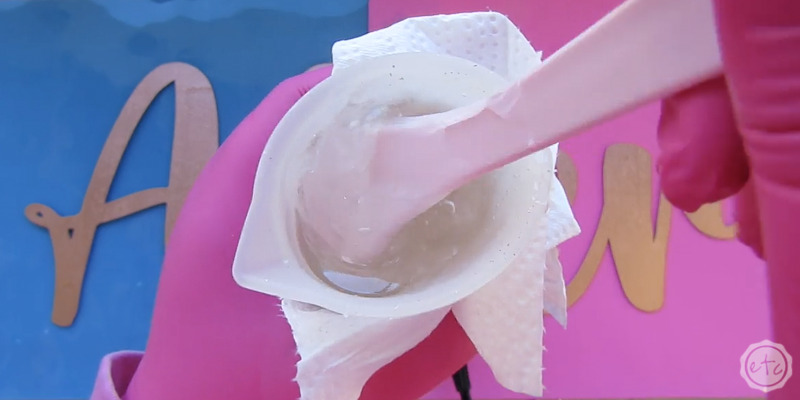
Ready to start mixing? Luckily you don’t need alot of resin for a topcoat: I made about 100ml for this entire office logo. For smaller pieces (like these little resin mountains) you’ll only need about 10ml… and that might be too much but mixing less than that is hard.
You’ll need a small mixing cup!
Today though we’re mixing 100ml so that’s 50ml of part a and 50ml of part b! Don’t forget that as soon as you open that resin bottle you need to have on all of your personal protection equipment: gloves, respirator and even eye protection if you have it.
Now make sure to stir slowly for 3-5 minutes until the resin is thoroughly mixed. Scrape the sides and the bottom of the cup often to make sure alllll of the resin is incorporated into the mixture but try not to lift your stir stick out of the resin. You want to minimize the amount of bubbles in the mixture and the easiest way to make bubbles is to a) mix really quickly or b) lift your stir stick out of the cup over and over.

Bonus Tip: If you’ve never mixed resin before it’s not nearly as intimidating as you’d think! I’ll walk you through all the steps here in my How to Mix Resin for Beginners Tutorial.
Step 3: Topcoat your Piece
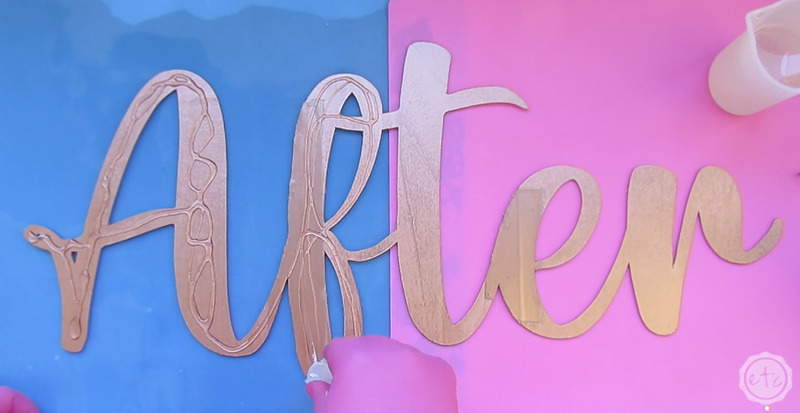
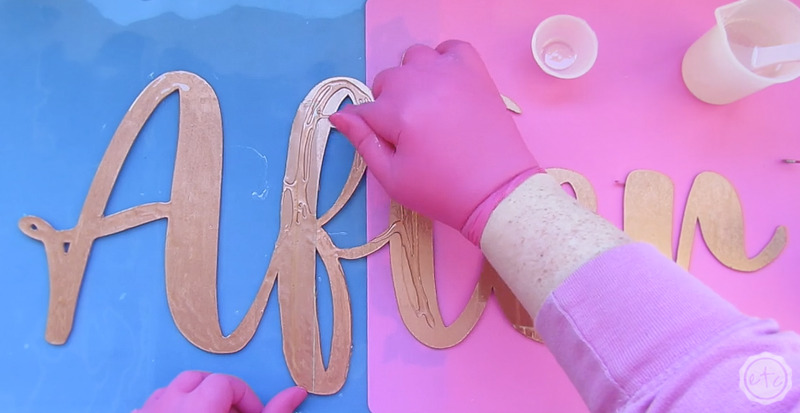
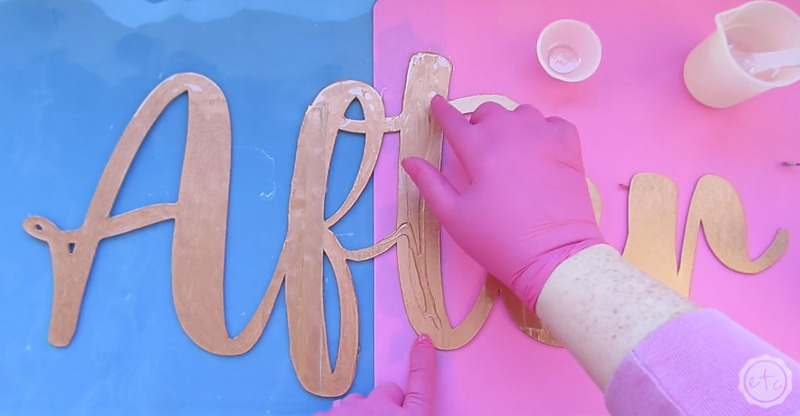
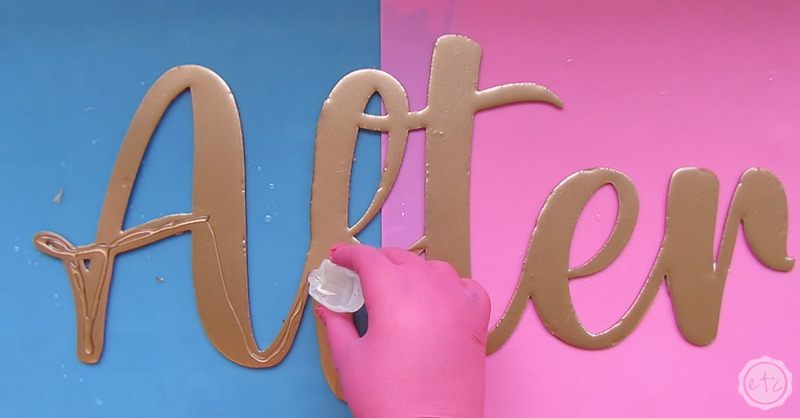
Ready for the fun part? Getting messy! You definitely need gloves on for this part since we’re using our hands… you can use a silicone stir stick or brush as well but I find using my fingers to be the easiest solution. Go ahead and pour a bit of resin onto your piece. You don’t need a lot so pour it in a thin stream.
If you’re working on a small piece you may not want to pour resin at all but simply scoop a bit of resin with your finger and apply it directly to the piece.
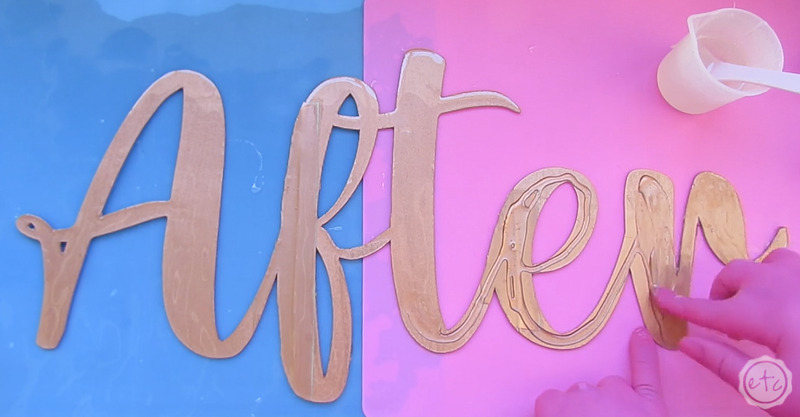
Once the resin is in place use your fingers to coat the entire piece with resin. Make sure it’s edge to edge, corner to corner… if there’s any nooks and crannies make sure it’s in those nooks and crannies. This is where things get good!
You’ve got the steps down now… pour, spread, repeat until the entire surface is covered. Then we’ll move on to the next step.
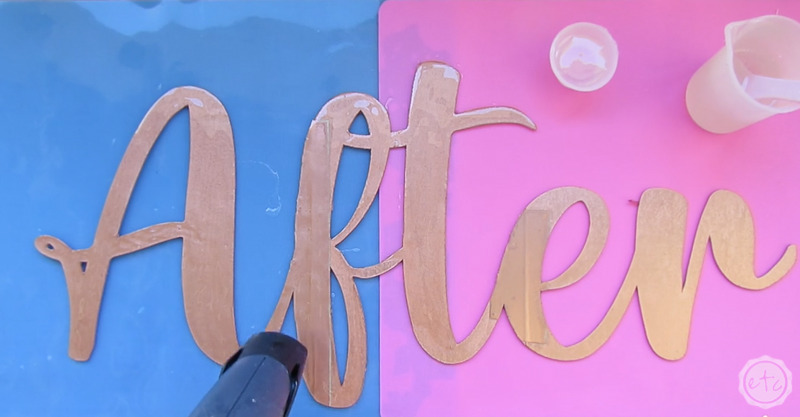
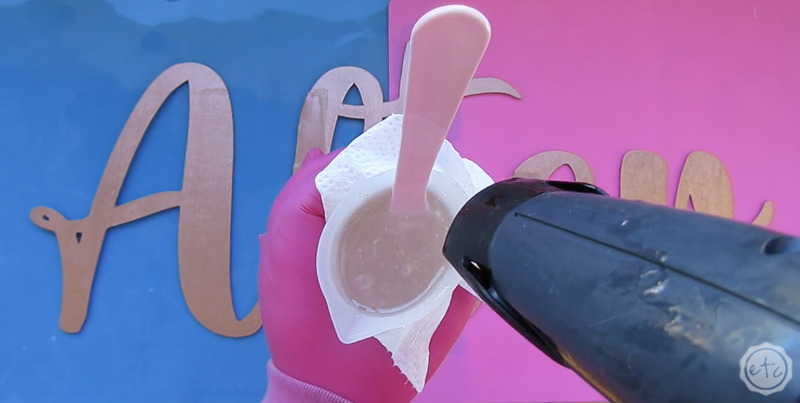
Step 4: Use a Heat Gun to Pop those Bubbles!
Before we’re done with this step we need to pop any bubbles in the surface of our resin. This will give us a crystal clear surface! Make sure to take off your resin covered glove and then quickly wave your heat gun over the surface of the resin.
This will pop any bubbles that have risen to the top but keep in mind that the hotter the resin is the easier it will spread… and we don’t want our resin heating up so much that it spreads off the edges of our piece. So pop the bubbles so do it quickly so things don’t get steamy.
Keep that heat gun moving!
Step 5: Let the Resin Cure Overnight
Once you’ve popped any bubbles you see do a quick glance at your piece for anything else that needs fixed. Any dry spots that aren’t covered by resin? Any stray pieces of dust or dog hair that have settled on the surface? Anything out of place at all?
This is the time to fix these things… once you set your piece to cure you’ll have to break out the dremel and sand that dog hair out of there. Trust me… been there done that. (Check out this post on how to remove problems from resin for help!) Of course, that means I know a trick or two to put things back in order (usually it involves sanding) and you don’t want to sand for hours if you can avoid it by simply removing that dog hair now. Trust me.
Double check everything and then carefully place it in a room temperature, dust free environment to cure overnight. For me that usually means covering it with cardboard and placing it on the floor in my guest bathroom so that I can close the door… but you do what works best for you.
Step 7: Paint your Piece
Okay so here’s the thing… sometimes you can’t paint your piece first. Or maybe adding paint to your resin doesn’t work… I’ve had paints that look beautiful until added to resin and then disaster strikes. Not all paints are compatible with resin after all!
Of course, it’s easier to add your paint directly to the resin but if that’s not working go ahead and add a clear topcoat then paint the topcoat and then seal the entire piece with another topcoat. Volia! Your paint will be the right color and the topcoat will seal it in.
On the other hand you may want to add more details to your piece after the first layer is done curing. I painted this little resin gnomes beard, nose and feet once he was cured since the mold I used wasn’t compatible with “painting” those details in mica powder first. Then once everything was painted with craft paint I added a topcoat to my little gnome to seal all the paint in.
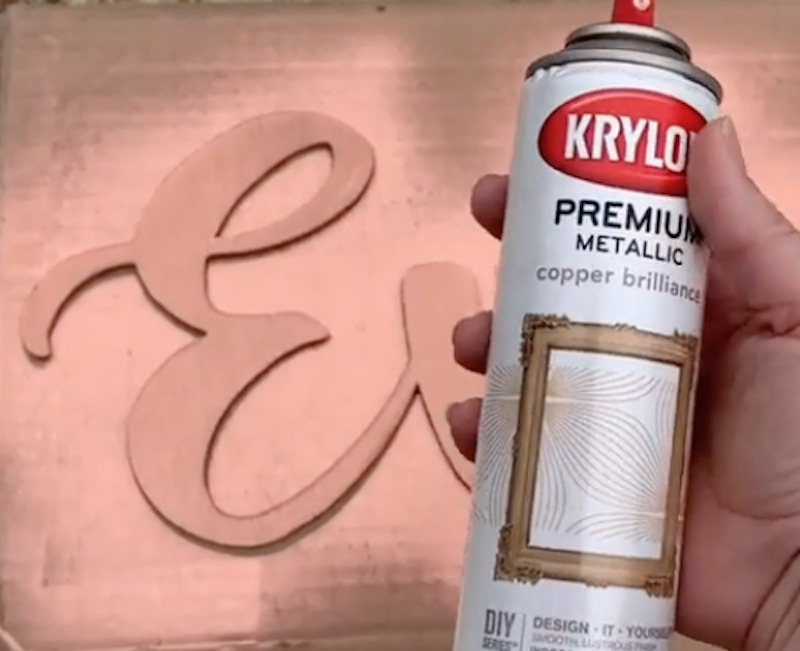
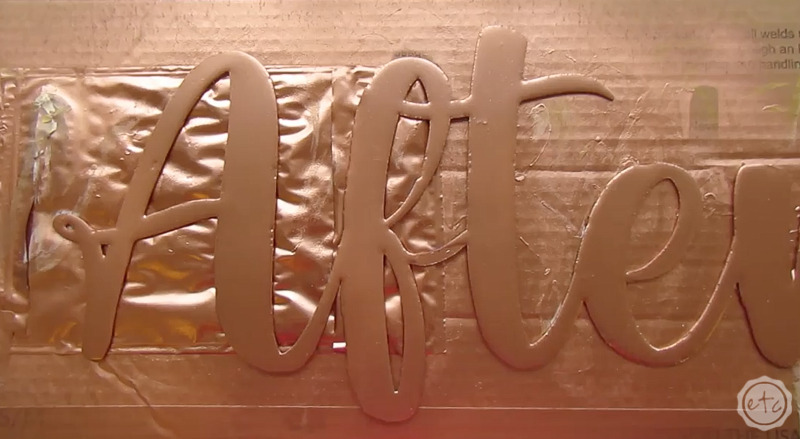
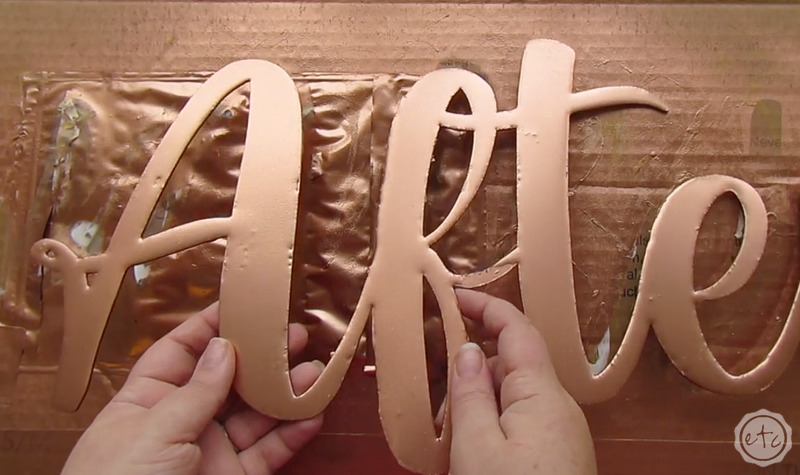
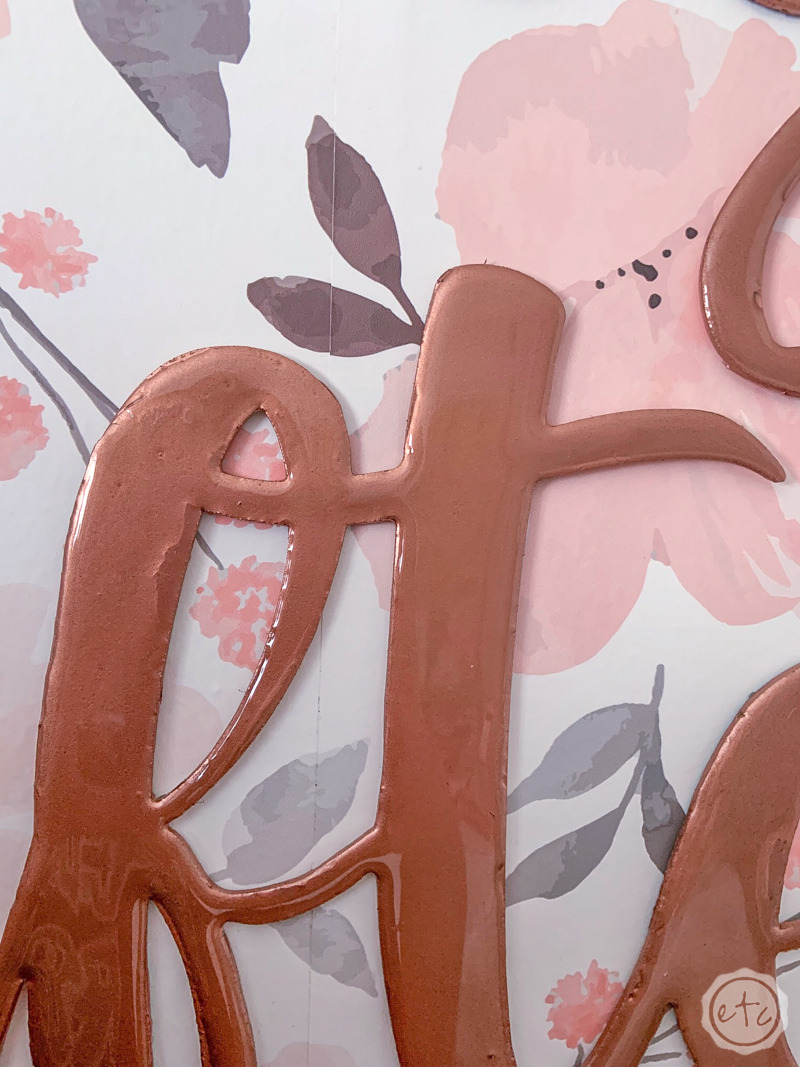
In this particular case I want to use a rose gold metallic mirror finish spray paint for my piece (I’m trying to make this logo look as close to a copper mirror finish as possible)… and I can’t add spray paint into my resin. Instead I painted my piece first and then added a resin topcoat… and then I spray painted that first resin topcoat before adding another resin topcoat.
Since we’re building this layer by layer and I don’t want a really obviously thick clear layer I’m just painting the layers as we go. This will allow me to build up that resin topcoat finish but keep the look of my piece as we go. Copper mirror here we come!
Step 6: Repeat 2-5 Until your Piece is Finished
In this case I’m not only adding a resin topcoat for a glossy shiny finish, I’m also adding a resin topcoat to strengthen my piece. So while you may only need one topcoat layer to make a piece food safe we’re going to add 3 layers of topcoat to our office logo so that it’s super strong.
Of course, one topcoat is the same as the next so just keep adding topcoat layers in the same fashion until you’re happy with your piece.
Then we’re done!
Step 7: Enjoy your Piece!
Once you’re finished adding as many topcoats as you need you’re done! Whether that’s one topcoat or 20 they’re fairly easy to add. Just time consuming since you have to wait for them to cure in between.
But they’re oh-so-worth it!
Just take a look at how the finish my copper mirror like logo turned out! And if you want to see it in action just stick around… I have a feeling it will be in quite a few of my upcoming videos!
In the meantime you can check out my how to hang wallpaper tutorial here, my how to make a large framed pegboard tutorial here or skip to the good part and check out my cricut storage shelf here.


Looking for more resin projects? I’ve got you covered!


Leave a Reply