
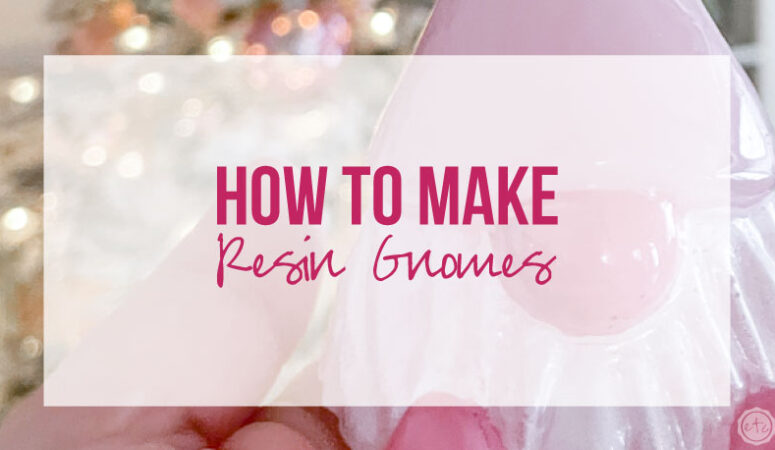


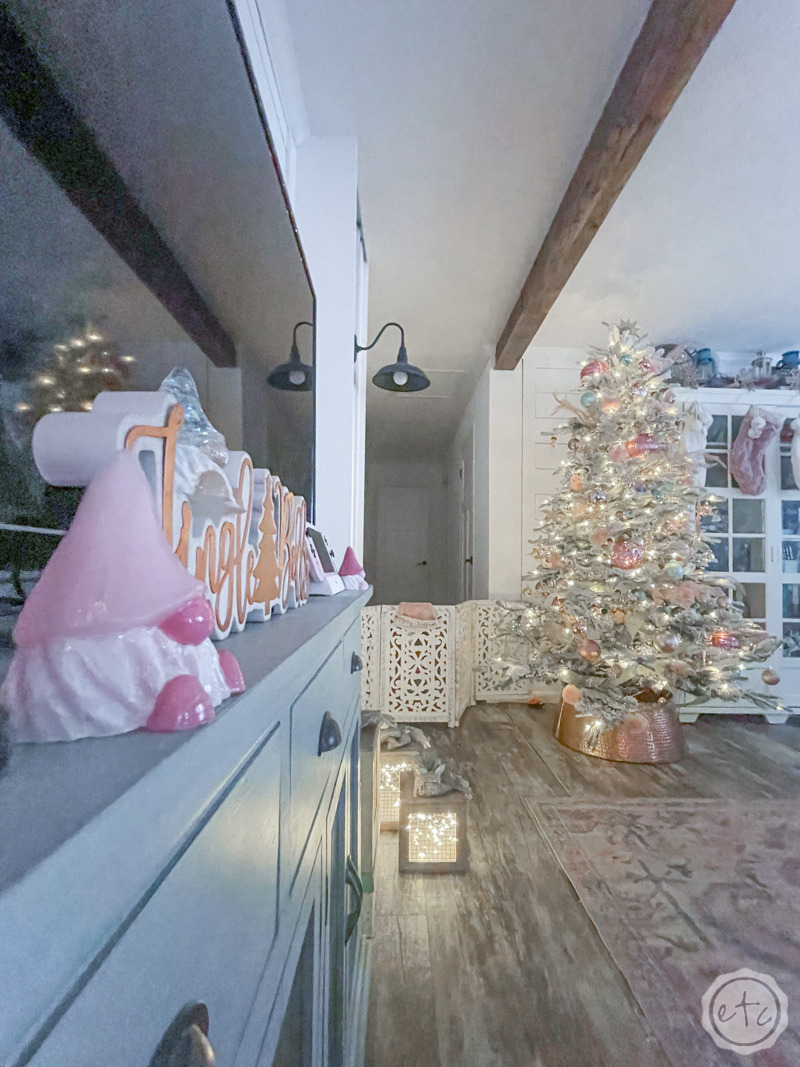
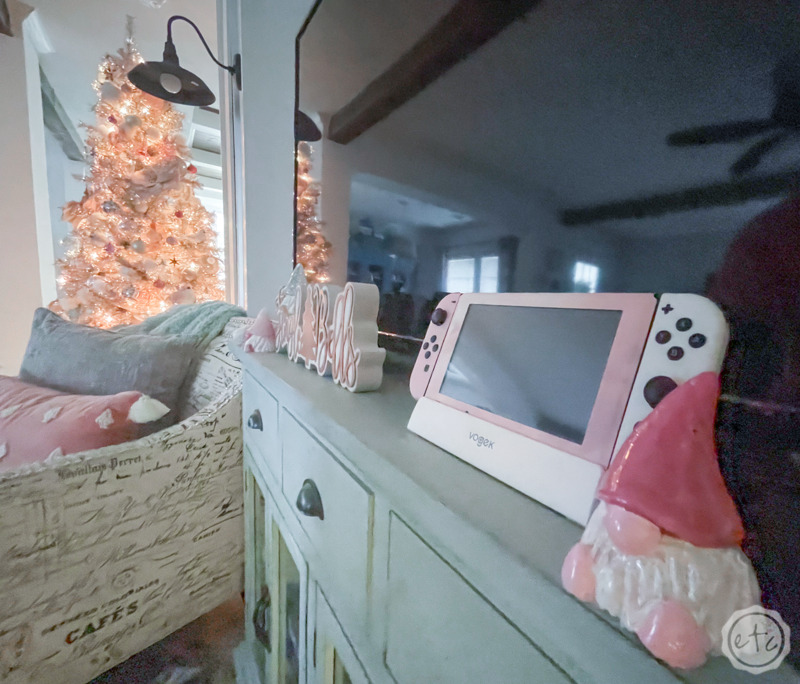
I have a really fun (and easy!) project for you today! We’re going to make a few resin gnomes that can be used for home decor. I actually made mine pink and iridescent to coordinate with the pretty blush and sea foam Christmas I’m doing this year but these guys aren’t actually Christmasy at all!
I could leave them out year round!
Either way they’re super cute, my Mom even liked them and she gets a little overwhelmed with all my resin crafts (especially when they’re pink). She asked what store I bought them in.
I think I’ll make her a few in blues and yellows next week. In the meantime let’s get right into this post and I’ll show you how to start whipping up a few resin gnomes of your own!
(PSSSST… if you now have Christmas gnomes on the mind and can’t shake it don’t worry. I have you covered. Check out these adorable no-sew Christmas gnomes for your holiday fix).
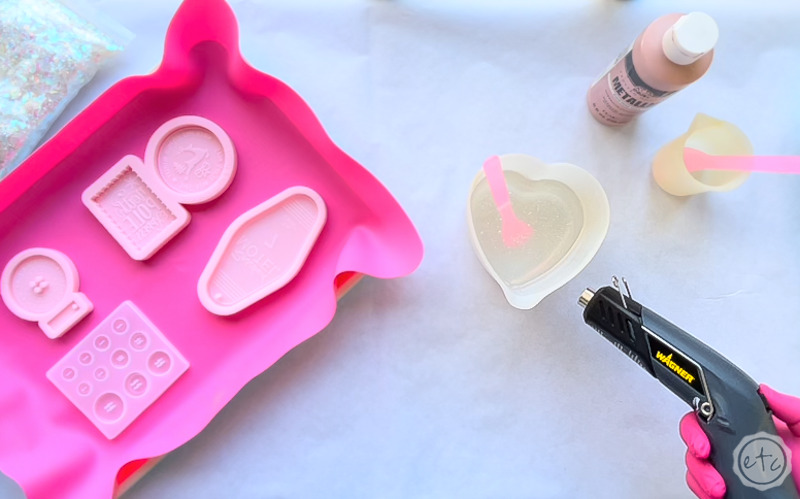
Supplies:
- Total Boat Maker’s Epoxy Resin
- Gnome Silicone Mold
- Respirator/Mask (resin graded filters)
- Gloves
- Wagner HT400 Heat Gun
- Freezer Paper
- Silicone Mat
- Baking Pan
- Heart Shaped Silicone Mixing Cup
- Small Mixing Cups
- Silicone Measuring Cup/Larger Mixing Cups
- Reusable Silicone Stir Sticks
- Toothpicks
- White Craft Paint
- Rose Gold Metallic Craft Paint
- Iridescent Flakes
- Paint Brush
- Paper Towels
Just getting started with resin? Download my free resin supply list and make your first project today!

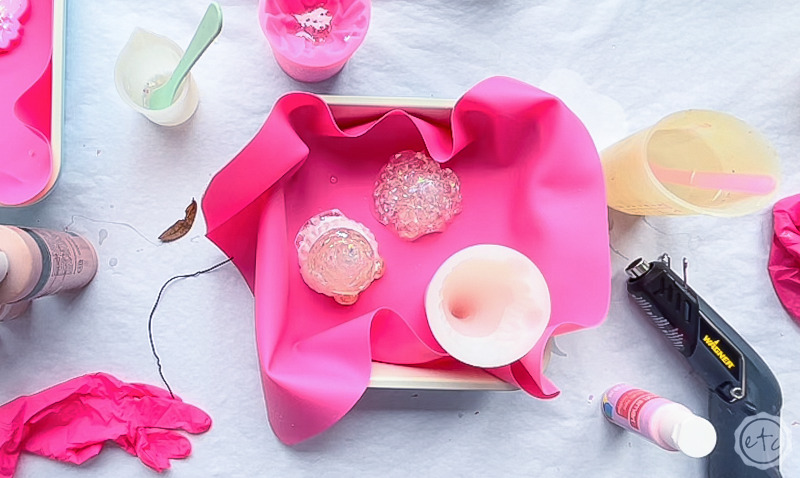
Step 1: Prep your Station
Ready to mix a little resin? Before we jump right into the project let’s prep our work station… gather all our supplies, cover all the surfaces with freezer paper, place all of our molds on silicone (in baking trays) so they can be easily transported into a safe space to cure overnight.
You need a really well ventilated space to work with resin and since I have 5 dogs and a cat inside (without a workspace and air ventilation system) that place (for me) is my front porch. That means a little extra prep work but it’s totally worth it to be able to turn out resin projects like these. Don’t let a lack of work space keep you from creating!
Once you have your space set up make sure you have all of your pigments and glitters. You don’t want to be mid pour and have to go riffling through your glitter collection… make sure you have all your supplies before you start to mix your resin! For these little gnomes I’m going to use an iridescent flake for the first one and craft paints to color the 2nd and 3rd… but I won’t need those on day 1.
Once you’re all set up it’s time to grab your resin and get started. Resin needs to be room temperature (not too hot or too cold) so I like to leave it inside while I’m setting up so that it doesn’t change temperatures while I’m prepping my space. Resin that’s too hot will cure too quickly and resin that’s too cold will have lots of bubbles… so keep that in mind when gathering your supplies.
You’ll also want to keep that in mind when picking a day to work on your resin creations… a super cold or rainy day won’t let your pieces cure as quickly while a scorching hot day will cook the pieces faster. You want nice weather for a resin work day!
Now that we have everything in one space let’s jump in (before it gets too cold… after all it is December at the moment!)


Step 2: Mix your Resin
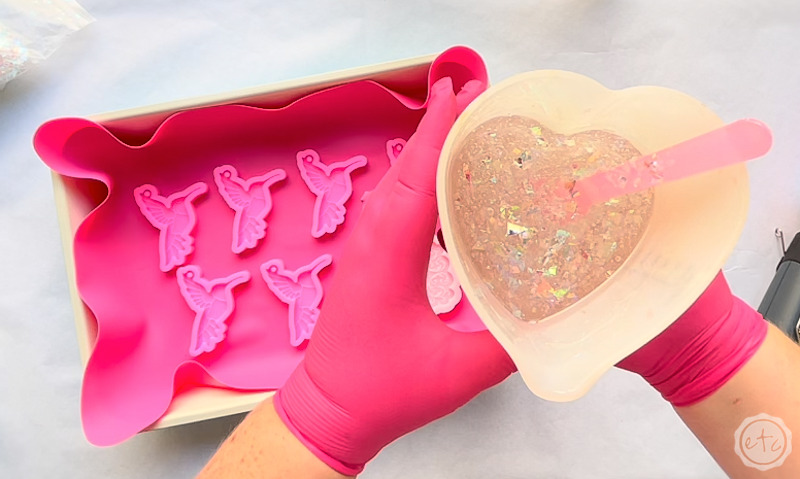
Since I only have one mold for this little gnome (and we want to make a few of them) we’ll start with the iridescent flake piece since it’s the “hardest” and then I’ll make the other two later. The only difference in adding iridescent flakes instead of craft paint is the quantity. You want to add about 10% of paint to resin when working with paints… you can add as many iridescent flakes as you like!
And I like to add a lot!
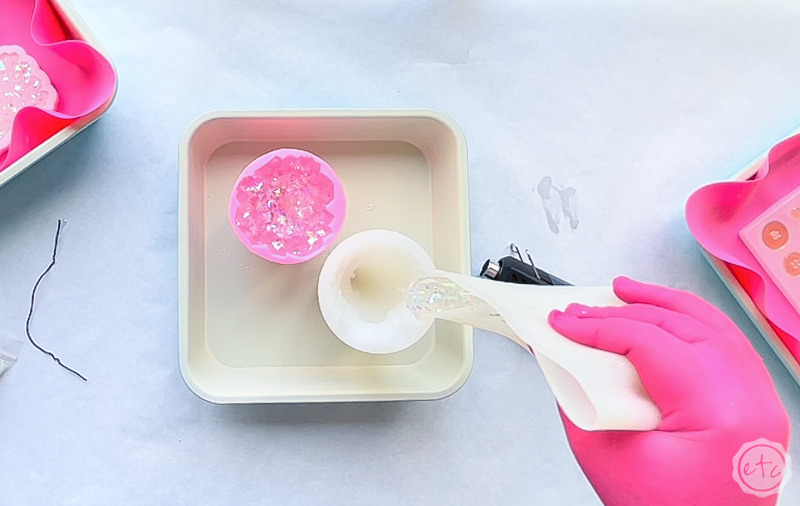
Start by pouring your resin in equal parts (a and b) into your mixing cup. I like to pour my projects in large groups to minimize the amount of times I have to turn my front porch into a resin workshop but this particular mold used about 120ml of resin… so that’s 60ml of part a and 60ml of part b.
Don’t forget that as soon as you open that resin bottle you need to have on all of your personal protection equipment: gloves, respirator and even eye protection if you have it.
Now make sure to stir slowly for 3-5 minutes until the resin is thoroughly mixed. Scrape the sides and the bottom of the cup often to make sure alllll of the resin is incorporated into the mixture but try not to lift your stir stick out of the resin. You want to minimize the amount of bubbles in the mixture and the easiest way to make bubbles is to a) mix really quickly or b) lift your stir stick out of the cup over and over.

Bonus Tip: If you’ve never mixed resin before it’s not nearly as intimidating as you’d think! I’ll walk you through all the steps here in my How to Mix Resin for Beginners Tutorial.
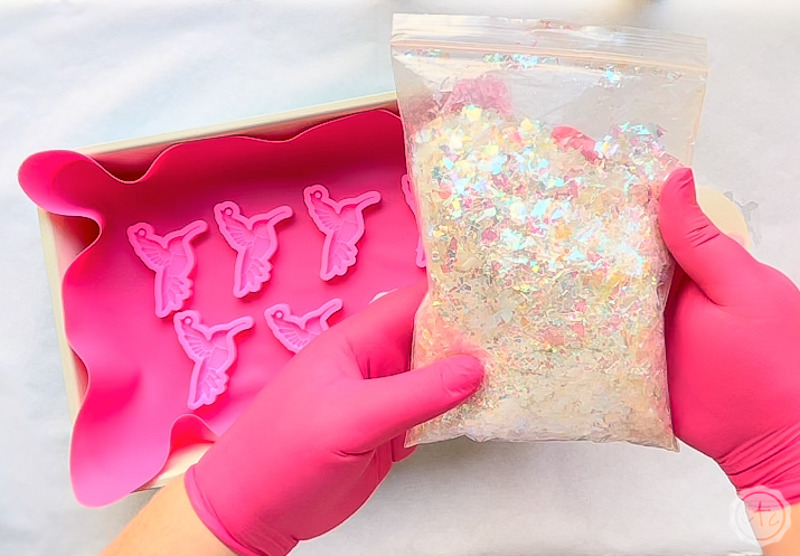
After you’ve mixed your resin for 3-5 minutes and it feels really stirred up we can add our iridescent flakes. These little babies are gorgeous in resin (just check out this crown trinket box where I used them a few months ago, or the iridescent hummingbird ornaments I made last week) but the best part is they’re nothing like glitter.
They stay suspended in the resin and don’t settle to the bottom so you can add them to your resin, stir and go. You don’t have to wait for your resin to thicken up. Which is great since resin pours the best right after it’s been mixed.
I’m getting away from the topic… go ahead and add a pinch or two to your resin and stir it until the flakes are evenly distributed. If you need more go ahead and add more just keep in mind that you can always add more but you can’t take them out!
One more tip? If you already have resin on your gloves take them off and get new ones before grabbing your bag of iridescent flakes… you don’t want to permanently stickify your crafting supplies.
Step 3: Pour Resin into your Silicone Mold
So now you have a big bucket of resin mixed up with beautiful iridescent flakes. What’s next.
Pouring it into the mold! Make sure the mold is clean of all dust and dirt (especially down in that tiny gnome hat) and then start to pour. I always always always try to pour from high up in a thin stream. The thinner the stream of bubbles the less bubbles make it into the mold… and minimizing bubbles is always the name of the game but it’s especially important when your mold is really deep with lots of little edges where bubbles can get stuck.
Unfortunately pouring in a thin stream can be hard with the flakes but just try your best and our in as thin a stream as possible. A thin stream with globs of iridescent flakes is better than a thick stream with bubbles!
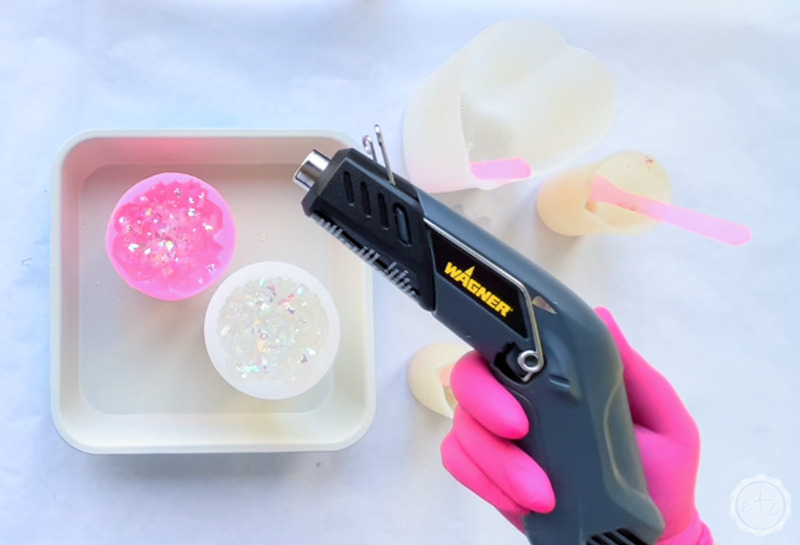
Since this little mold is pretty deep we want to pour in layers so that we can pop the bubbles as we go. If you’re really committed you can let each layer cure in between pours but I typically just pour a bit, pop the bubbles, pour a bit more, pop those… and so on and so forth.


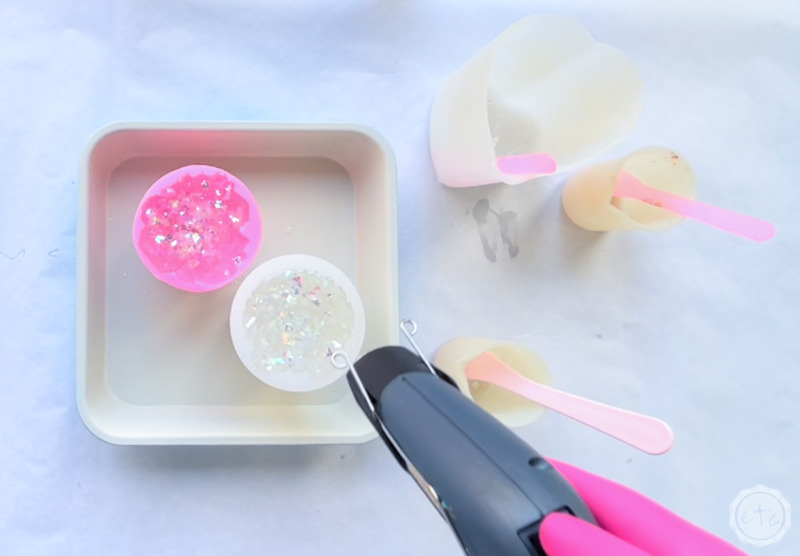
If you see a bunch of bubbles down in a part of the hat that your heat gun isn’t reaching you can always use a toothpick or twist tie to help guide those bubbles to the surface so that your heat gun can pop them. I also find that letting each layer sit for a maximum of 1-2 minutes helps as many bubbles rise to the surface as possible.
It’s a fine line though since the more resin is in a piece the hotter it burns and the faster it cures. So you don’t want to leave it sitting for too long without popping as many bubbles as possible.
And yes the heat from your heat gun will speed up the curing process as it heats the resin.
Don’t worry, just take it one layer at a time and you’ll be fine.
Once you’ve popped all the bubbles set your entire cooking tray in a cool (temperature controlled) location to harden. Honestly? I like to set mine in my guest bathroom so that they’re inside, no one messes with them and I don’t have to smell the cooling resin. It definitely still smells like resin as it hardens (and no one wants to wear a respirator for 24 hours) so you’ll want it to be somewhere out of the way (with a door).
Another tip? Cover your little gnome so that no dust or dirt (or dog hair) can settle in the resin as it cools. (Although the exposed portion won’t be visible so this is less important on this particular piece). Then leave the entire piece for about 24 hours. Once the resin has cured we’ll move on to de-molding!
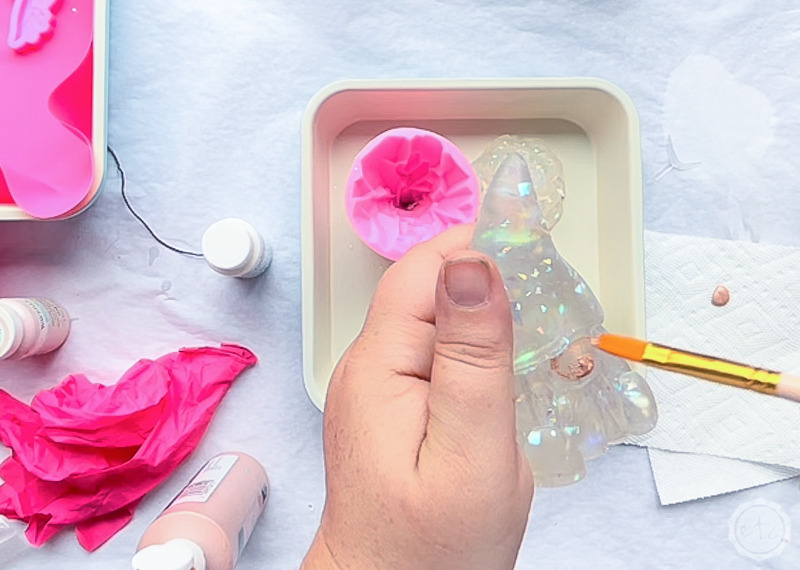
Step 4: De-mold your Resin Piece!
Ready to de-mold this big guy?
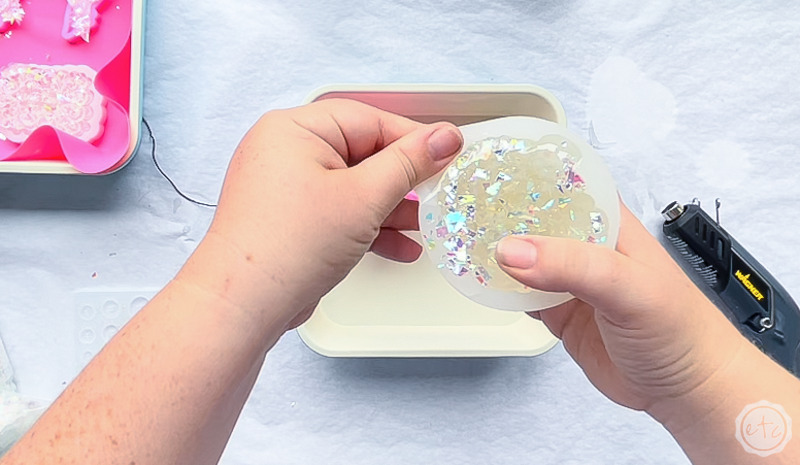
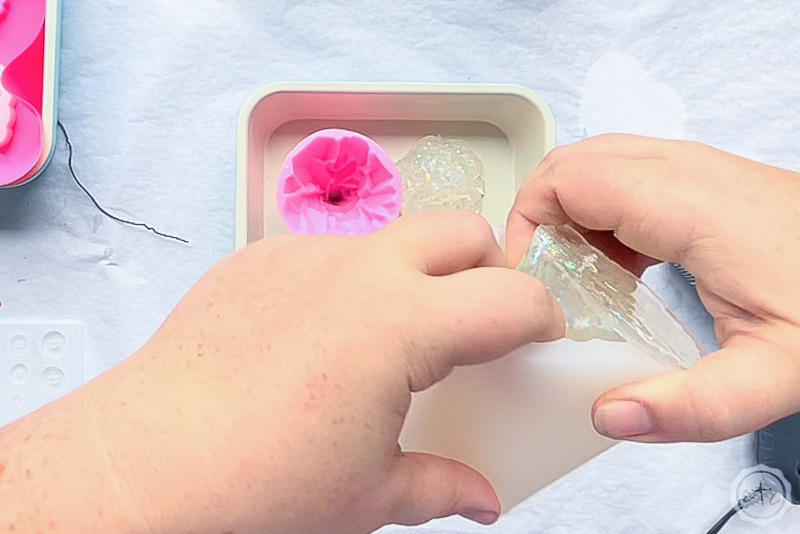
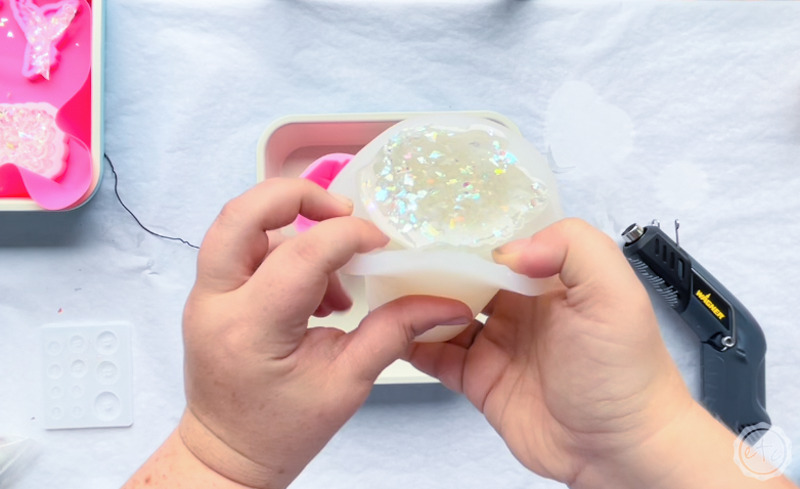
After 24 hours your little gnome should be ready to pop out of his silicone mold. Of course, this is a bit of a deeper mold which makes it a little more intimidating than a shallow mold (like these little postage stamps). But the thing you’ll learn about silicone is that it stretches way more than you ever thought it could.
Just start from the outside and carefully pull the edges of the silicone away from your piece. The silicone will stretch realllllly far if you need it to but you don’t want to stretch it to far out of shape… once you have the edges all pulled back keep working your way down the piece until you can grab the gnome and pull him free from the mold.
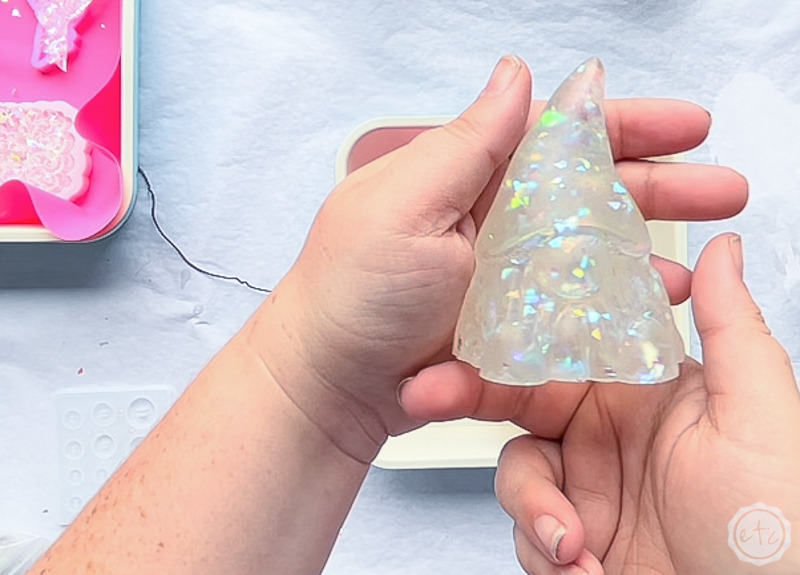
Volia! De-molding finished!
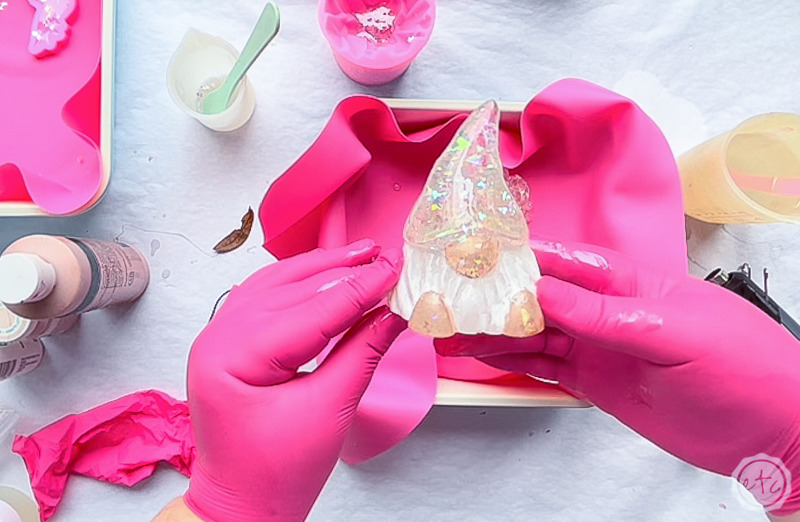
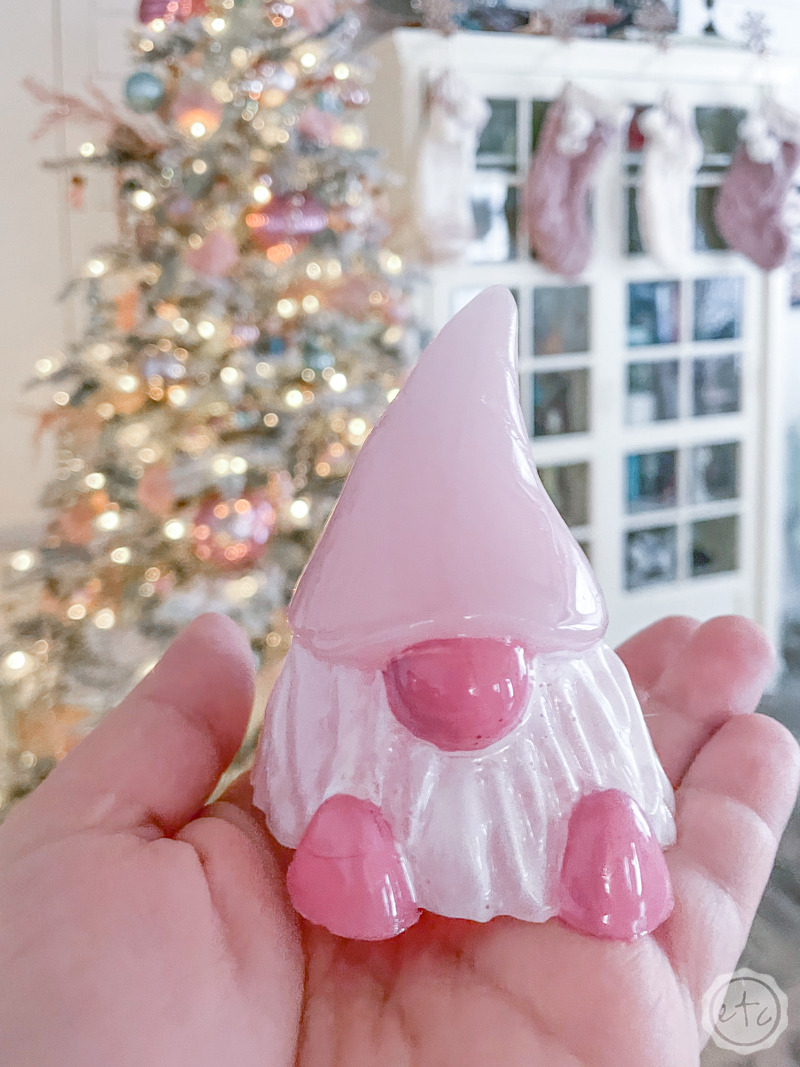
Now you can pour another little gnome (this time I made a light pink gnome but you could make a completely different color!). Once you’re all done making gnomes make sure your silicone mold is clean and then put it away for the next project. If possible try to store all of your silicone molds flat in a temperature controlled place so that they don’t distort and warp over time. Perfect!

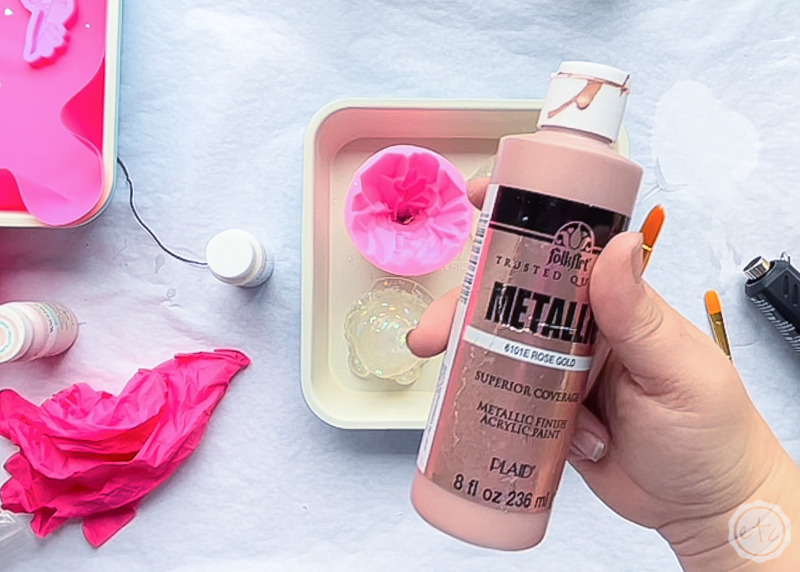
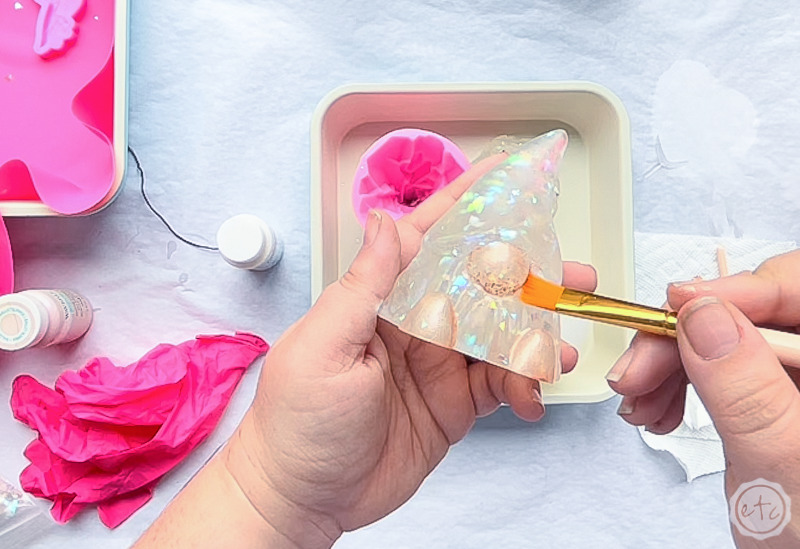
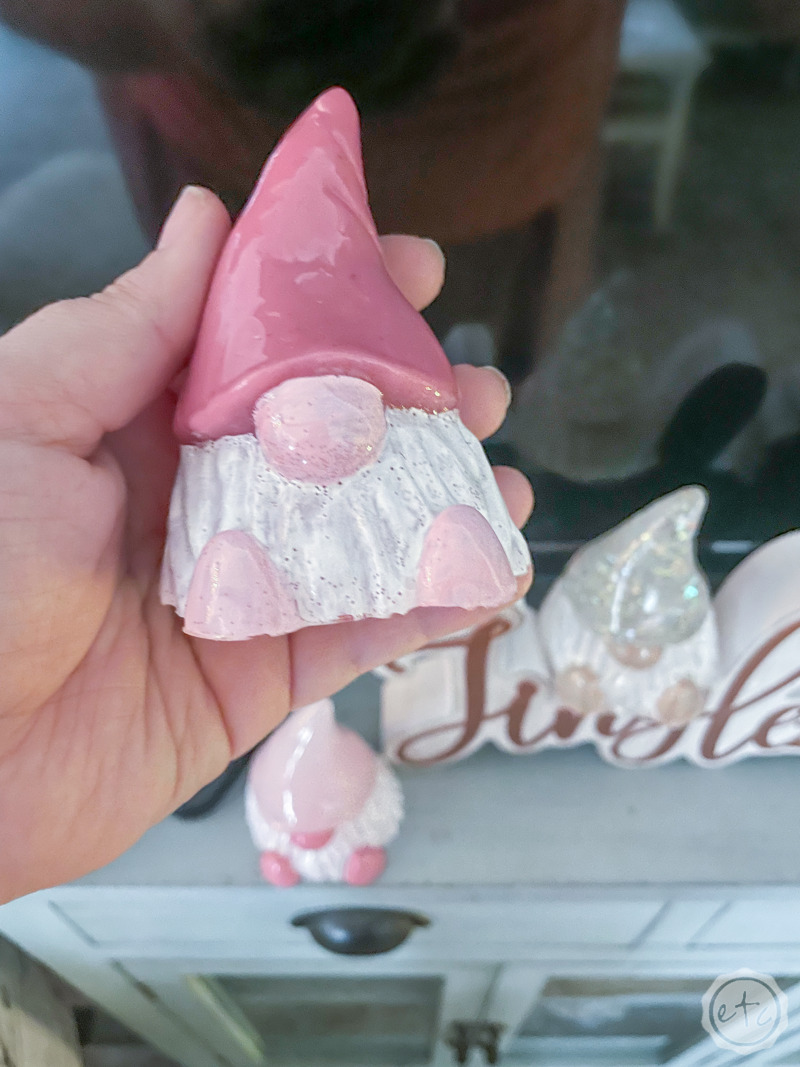
Step 5: Paint the Details
Ready for the fun part? Painting this little guy!
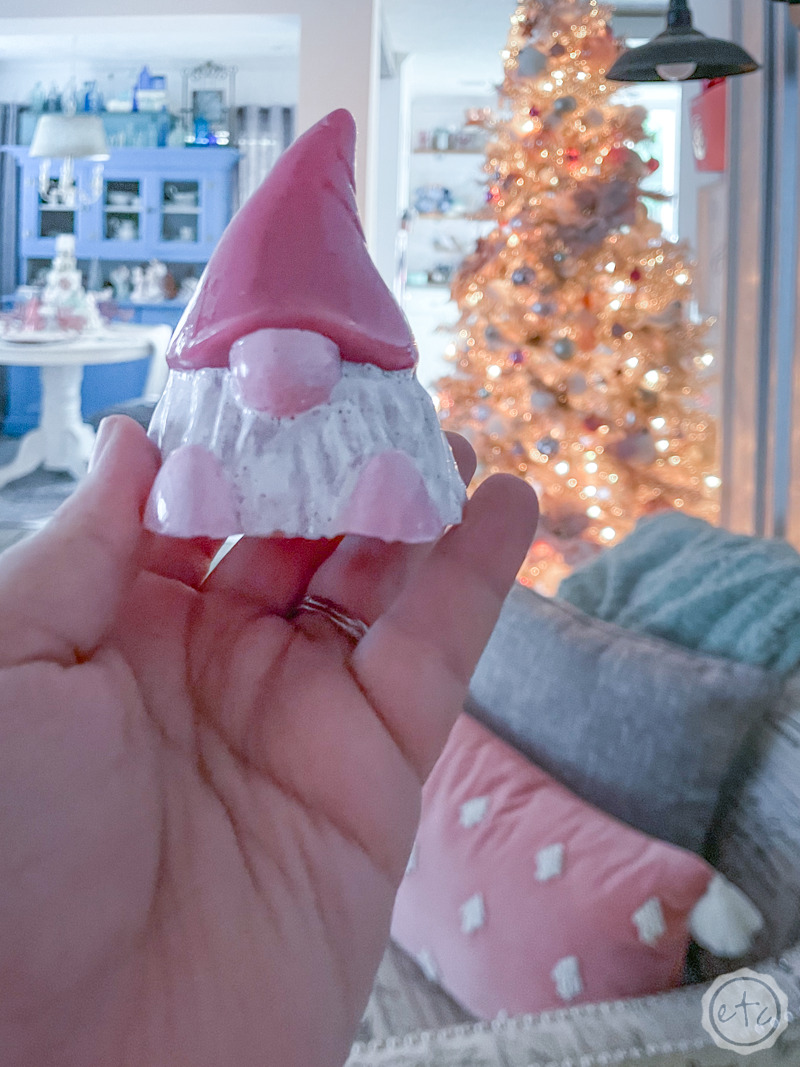
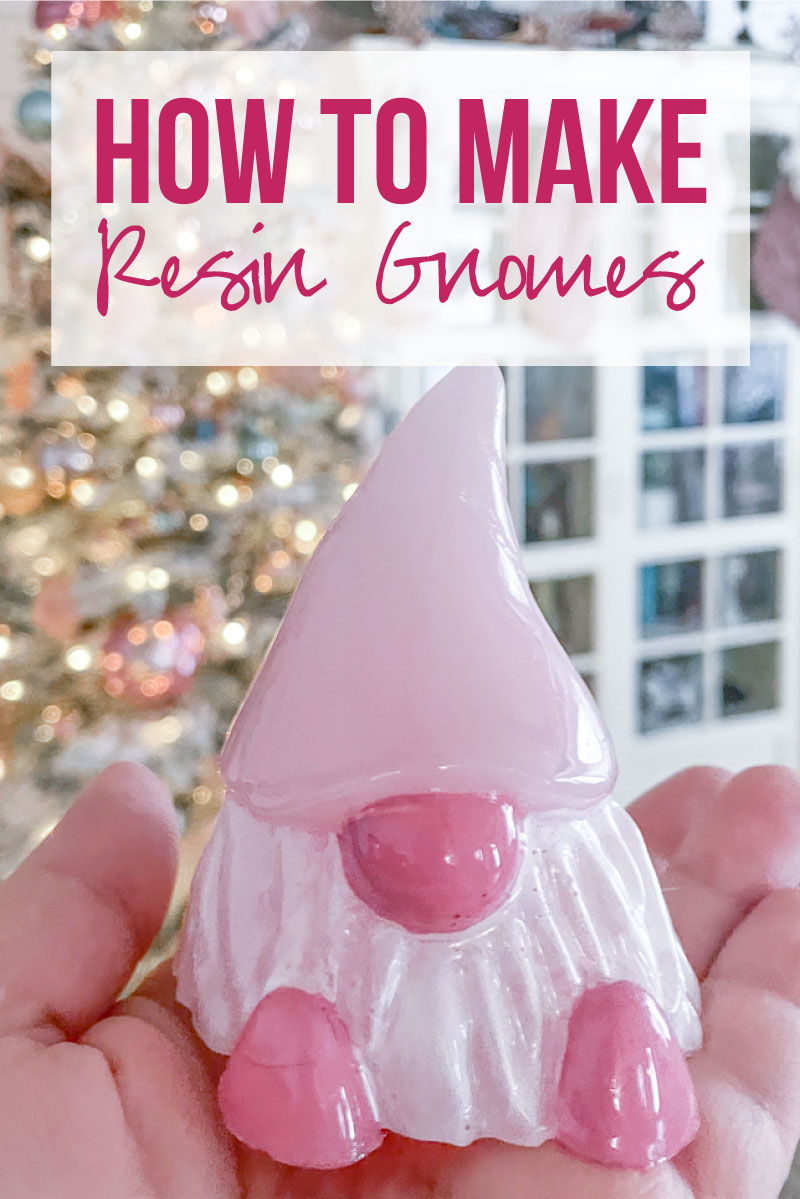
Of course, you could leave him just as he is but see allllll those details? The little nose and the tiny feet? I want to be able to see the difference in all those tiny areas… as well as that big fluffy beard.
So we’re going to paint this guy!
If you don’t want to paint your piece you could also use mica powder to paint your mold before you pour your resin (I used this technique here if you want to see an example) but this mold has a matte finish so I didn’t want to put mica powders on it.
Basically it’s a candle mold instead of a resin mold… it will still work for resin (silicone is silicone after all) but instead of a glossy topcoat a candle mold has a flat matte surface. Which is why our little gnome looks cloudy instead of crystal clear. Since I needed a topcoat anyways paint made the most sense.
Let’s get started!
Painting a resin piece is pretty simple… paint what you want, keep the edges clean, try not to add too much at one time. Paint in thin layers if you want to build up colors but the more you glob on the more streaky it can look… thin layers are definitely your friend!
Once you have the look you want go ahead and set this baby aside for a little bit to dry… it should only take 30 minutes or so. Then we’ll add a topcoat!
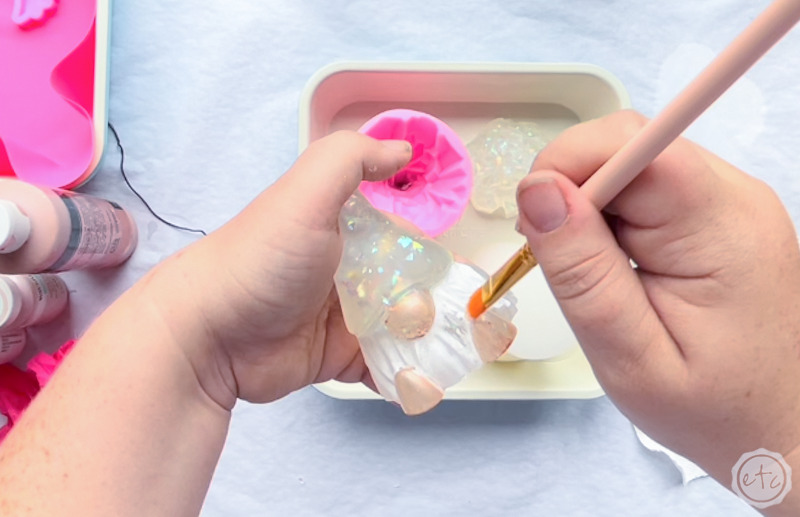

Step 6: Topcoat
This is my all time favorite part… it’s messy, you get to handle the resin directly and you have instant results. Love it!
To topcoat your piece you’ll need gloves and a silicone mat to place your piece on to dry. As far as resin goes you’ll only need a bit… honestly there are plenty of ways to do this but my favorite is with my hands. That way you can really feel the entire piece and make sure the resin goes into all the little nooks and crannies… covering the entire piece.
It also allows you to use less resin.
I start by grabbing just a bit of resin with my finger and smearing it on my little gnome. Yes, I said smearing. Now just use your fingers to thoroughly coat that little gnome with resin. You’ll see the surface start to clear and a glossy shine cover the entire surface. That little bit of resin should cover the entire gnome but if you need a little more go for it… just remember that any excess resin will flow off the piece and onto the silicone mat so extra resin means you’ll have to cut it off your piece later.
If you coat your piece with just a bit of resin though it stays exactly where you want it… on your gnome.
Once you’re done go ahead and set your gnome aside for another 24 hours to cure. If you’re worried you can come back in an hour or two and move your gnome to a different part of the silicone sheet to avoid any resin drips or puddles.

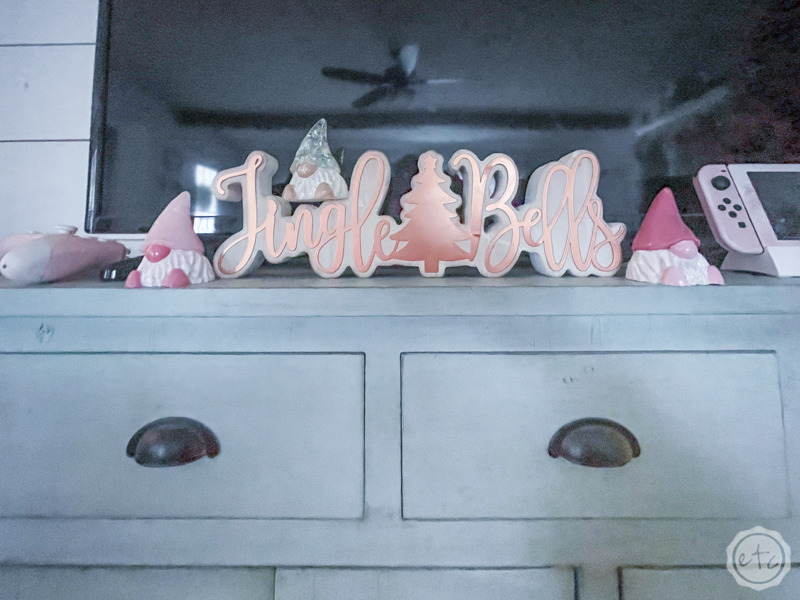
Ready to see these little guys in action?
They look perfect with my Christmas decor so I am enjoying them for the holiday season… once I get my tv mounted on the wall (and out of the way) I think I’ll add a bit of garland for them to nestle into.
In the meantime I’m just thrilled with the way they turned out. Check it out!


Looking for more resin projects? I’ve got you covered!


Leave a Reply