• House Tour
    • Reveals
  • About
    • Smith Life
    • Disclosure and Privacy Policy
      • Terms and Conditions
      • Store Affiliates
  • Contact Me
    • Want a Button?
  • Shop
    • Floral Printable Planners
    • Paint eBooks and Packages
    • Wedding Binders & Extra Printables!
    • Planner Bundles
    • Planner Accessories
    • Home Decor Printables!
  • Cart
    • Bloglovin
    • Facebook
    • Instagram
    • Pinterest
    • Twitter
    • YouTube

Happily Ever After, Etc.

Creating Our Own Fairytale

  • Happily Ever After, Etc.
  • Home
  • Home Decor
    • My Home
    • Paint
    • Before and After
    • Tablescapes
    • Mood Boards
    • Furniture
  • DIY & Crafts
    • New to Cricut – Start Here
    • Cricut
    • Resin
    • Scrapbooking
  • Organization & Planning
    • Organization
    • Planner
  • Holidays
    • Christmas
    • Halloween
    • Thanksgiving
    • Easter
  • Wedding
    • Cricut Wedding Projects
    • Free Wedding Binder
    • Bride Bag- The Ultimate Wedding Planner

How to Topcoat Resin

Hey y'all,

Every once in a while you have a resin piece that needs a topcoat… which is a fancy way of saying a new, thin, glossy layer of resin! Typically resin pieces come straight out of their silicone mold ready to rock… no topcoat needed.

But if you have a matte mold (like a baking mold that doesn’t leave your pieces glossy) then you may need to add a thin topcoat of resin to give it that pretty resin shine!

Of course, the other situation that comes to mind is *ahem* when you need to fix a piece. Say you have a piece of dirt or hair (or a fly!!) in your piece and need to take it out. Once the yuck is out you’ll need to add a topcoat to your piece to add that shine back to the surface.

Topcoat baby!

Luckily it’s an easy process… let’s get started.

Supplies:

  • Amazing Clear Cast Resin
  • Respirator/Mask (resin graded filters)
  • Gloves
  • Wagner HT400 Heat Gun
  • Freezer Paper
  • Silicone Mat
  • Baking Pan
  • Small Mixing Cups
  • Reusable Silicone Stir Sticks

Step 1: Prep your Piece

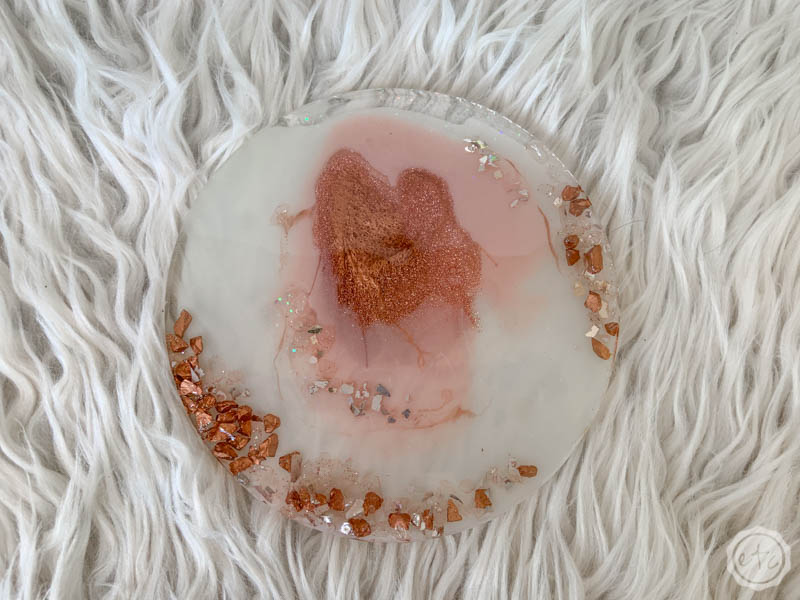
In this case we’re top-coating a large round trivet (the piece on the right!) that needed to be sanded smooth. See how matte and un-shiny the top of the trivet looks?

That’s what we’re going to fix!

At this point you should have sanded your piece and be ready to rock. Make sure to put your piece up on a pedestal of some kind (a silicone cup works well!) so that any resin that falls off the piece will drip onto the surface and not glue your trivet to the surface.

Then you have to decide… you can use a bit of blue tape to completely tape off the underside of your piece (so that drips can be easily removed) or you can pour just enough resin to topcoat the top (and not drip off the sides).

If you’re not confident in your ability to pour resin without it dripping off the sides then just go ahead and tape the back. You’ll be glad you did!

Step 2: Pour your Resin

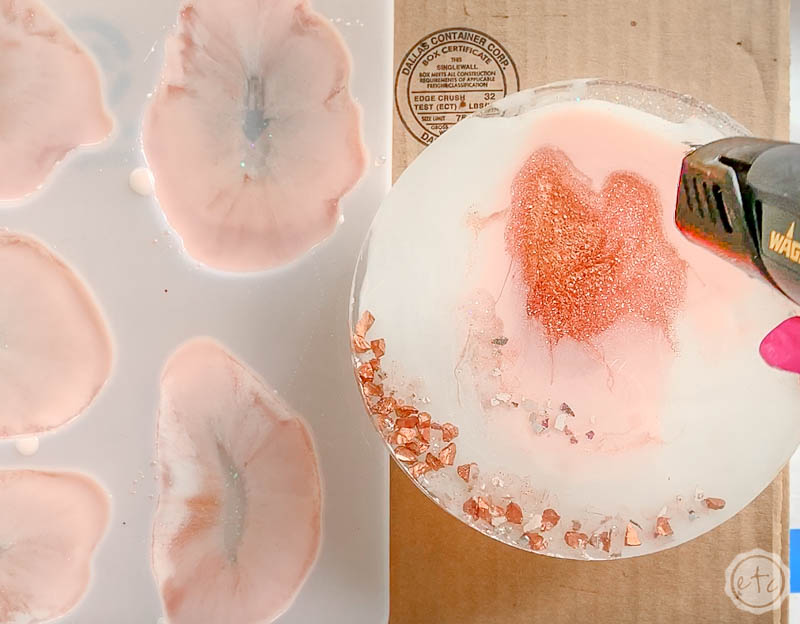
Now it’s time to get pouring! For a trivet this size we’re going to mix about 20ml of resin and pour it onto the center of our trivet.

It will start to spread out on it’s own but you’ll need to use your silicone brush to spread it out… just like peanut butter and jelly baby!

Just make sure to brush the resin out slowly so that it doesn’t spill over the sides… or stir up any extra bubbles!

Once you’ve spread out the resin let it sit for about 5 minutes and then you can use your heat gun to pop any bubbles that have risen to the surface.

Beautiful darling!

Now you can cover the entire piece (to prevent dust/hair/flies/yuck from settling in the new topcoat) and leave it to cure for at least 24 hours.

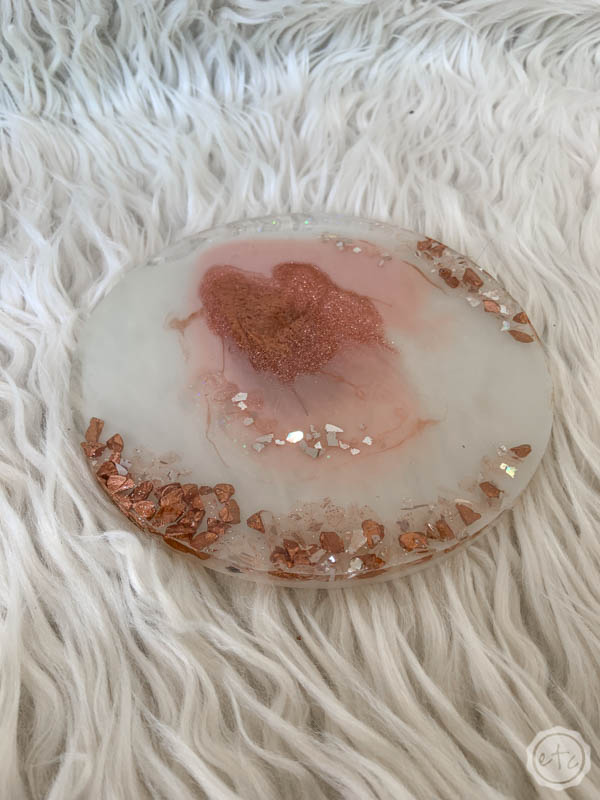
Bright, shiny and new!

Just perfect!

This technique works perfectly for any flat pieces you need to topcoat… and if you need to topcoat a 3-dimensional piece (like these knife rests) you can do the same technique except instead of spreading resin along the surface with a silicone brush you can use gloved fingers to spread resin along all the curves.

Easy peezy!

Looking for more resin tutorials? I’ve got you covered!

You made it through the entire post? That means you're one of my new favorite people! I'd love to be friends and see what else you would like to read about! Leave me a comment and then sign up for your very own FREE paint planner.... so that you can keep track of every single paint color with ease!
Welcome back! I'd love to be friends and see what else you would like to read about! Leave me a comment and then sign up for your very own FREE paint planner.... so that you can keep track of every single paint color with ease!

Show me some LOVE y'all:

  • Click to share on Facebook (Opens in new window) Facebook
  • Click to share on Pinterest (Opens in new window) Pinterest
  • Click to share on X (Opens in new window) X
  • Click to email a link to a friend (Opens in new window) Email

Related

«
»

Resin 4

Comments

  1. Rob says

    January 22, 2023 at 9:44 pm

    You say mix up 20ml for a ‘trivet this size’ but you don’t say what size the trivet is (unless I missed it). Is it the size of a saucer? a dinner plate?

    Reply
    • Happily Ever After, Etc. says

      January 22, 2023 at 9:47 pm

      The one in this post is roughly the size of a salad plate… you don’t need much for a topcoat. 20ml would work for a saucer, a salad plate or a dinner plate. You’ll have a bit too much for the smaller sizes but it’s fairly difficult to mix 10ml of a 1:1 ratio resin so 20ml is usually my go-to for topcoats. Hope that helps!

      Reply
  2. Jax says

    May 30, 2023 at 12:20 pm

    Your supply list mentions freezer paper but not mentioned in method? But you did use silicone brush Can this be cleaned or is it a throwaway job?
    Ta

    Reply
    • Happily Ever After, Etc. says

      May 30, 2023 at 12:25 pm

      I use freezer paper to protect my work table in every resin project (it’s under the cardboard box in this case) that way if any resin happens to get dropped off the cardboard it won’t hurt my table.

      As for the silicone brush it is re-useable. All silicone pieces can be left to dry and then the resin will peel right off. I actually moved to silicone baking sheets instead of cardboard for my resin projects after this post. I put them on baking trays and they’re easy to move around.

      Hope that helps!

      Reply

Leave a Reply Cancel reply

Your email address will not be published. Required fields are marked *

sidebar betsy I'm Betsy, Home Decor Enthusiast, Yorkie Mama, Crafter, Blogger, Picky Eater, Chief Mess Maker, Antique Hoarder and Graphic Designer. You can generally find me working on (attacking with a paintbrush) the 3 bed, 2 bath home we are currently renting! Our home might not be perfect but it is ours & if you hang out long enough you'll see that what we lack in know-how we make up for in passion!
Shop My Craft Room

Shop My Home

Featured Articles

15 Fabulous Ideas to Organize your Laundry Room
25 FREE Printables For Your Home!
What to do with EXTRA Paint with Happily Ever After Etc
10 Ways to Make Your Bed EXTRA Comfy with Happily Ever After Etc.
Ready to Pick your Perfect Paint Color? We'll help you with our 6 Day FREE E-Course

Hey y’all,

Profile

I'm Betsy, Home Decor Enthusiast, Yorkie Mama, Picky Eater, Chief Mess Maker, & Graphic Designer...

A Little Note!

Many of the links on Happily Ever After, Etc. are affiliate links. If you purchase a product after clicking an affiliate link, I receive a small percentage of the sale for referring you, at zero cost to you! How awesome is that? Purchasing through affiliate links is an easy, painless way to help out your favorite bloggers. Thank you so much for your continued love and support! Read the full disclosure here!

Instagram

Follow on Instagram

Copyright © 2025 · Darling theme by Restored 316

Copyright © 2025 · Darling Theme on Genesis Framework · WordPress · Log in · Privacy Policy