• House Tour
    • Reveals
  • About
    • Smith Life
    • Disclosure and Privacy Policy
      • Terms and Conditions
      • Store Affiliates
  • Contact Me
    • Want a Button?
  • Shop
    • Floral Printable Planners
    • Paint eBooks and Packages
    • Wedding Binders & Extra Printables!
    • Planner Bundles
    • Planner Accessories
    • Home Decor Printables!
    • Cart
    • Bloglovin
    • Facebook
    • Instagram
    • Pinterest
    • Twitter
    • YouTube

Happily Ever After, Etc.

Creating Our Own Fairytale

  • Happily Ever After, Etc.
  • Home
  • Home Decor
    • My Home
    • Paint
    • Before and After
    • Tablescapes
    • Mood Boards
    • Furniture
  • DIY & Crafts
    • New to Cricut – Start Here
    • Cricut Projects
    • Resin
    • Scrapbooking
  • Organization & Planning
    • Cricut
    • Organization
    • Planner
  • Wedding
    • Cricut Wedding Projects
    • Free Wedding Binder
    • Bride Bag- The Ultimate Wedding Planner

How to Make Quick and Easy Resin Snowflake Ornaments

Hey y'all,

I have made so many beginner level resin projects this Christmas because (let’s face it) it’s been a hard year. And sometimes you just want a simple, easy, gorgeous at the end project. Something you don’t have to stress over, that’s fun to make and turns out a-m-a-zing.

Like these cute little resin presents that I put on my Christmas tablescape, or the resin Christmas trees that are right at home in my mercury glass tree forest… or even better the Christmas Light Bulbs that I used for super cute gift wrap.

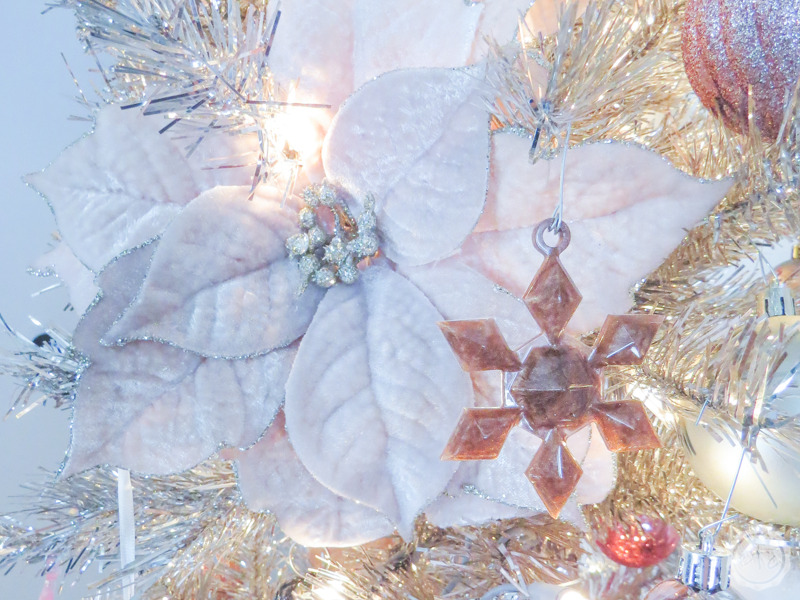
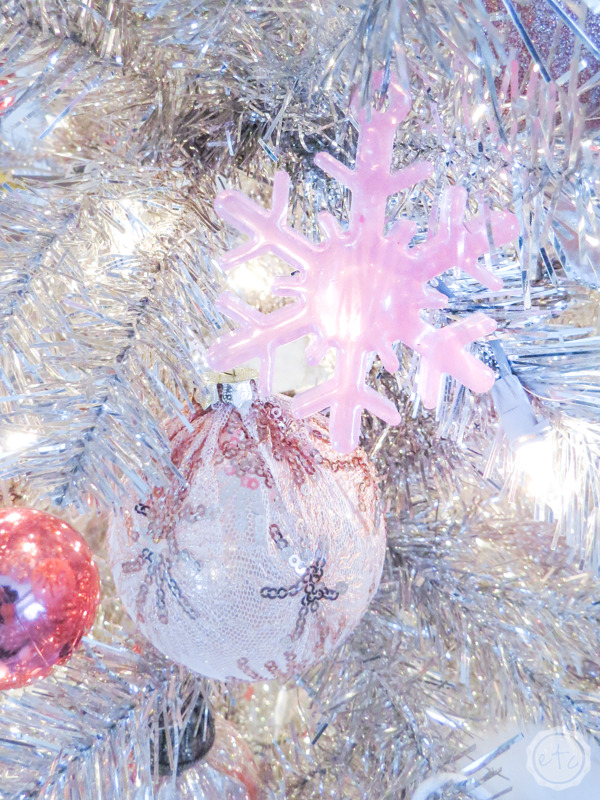
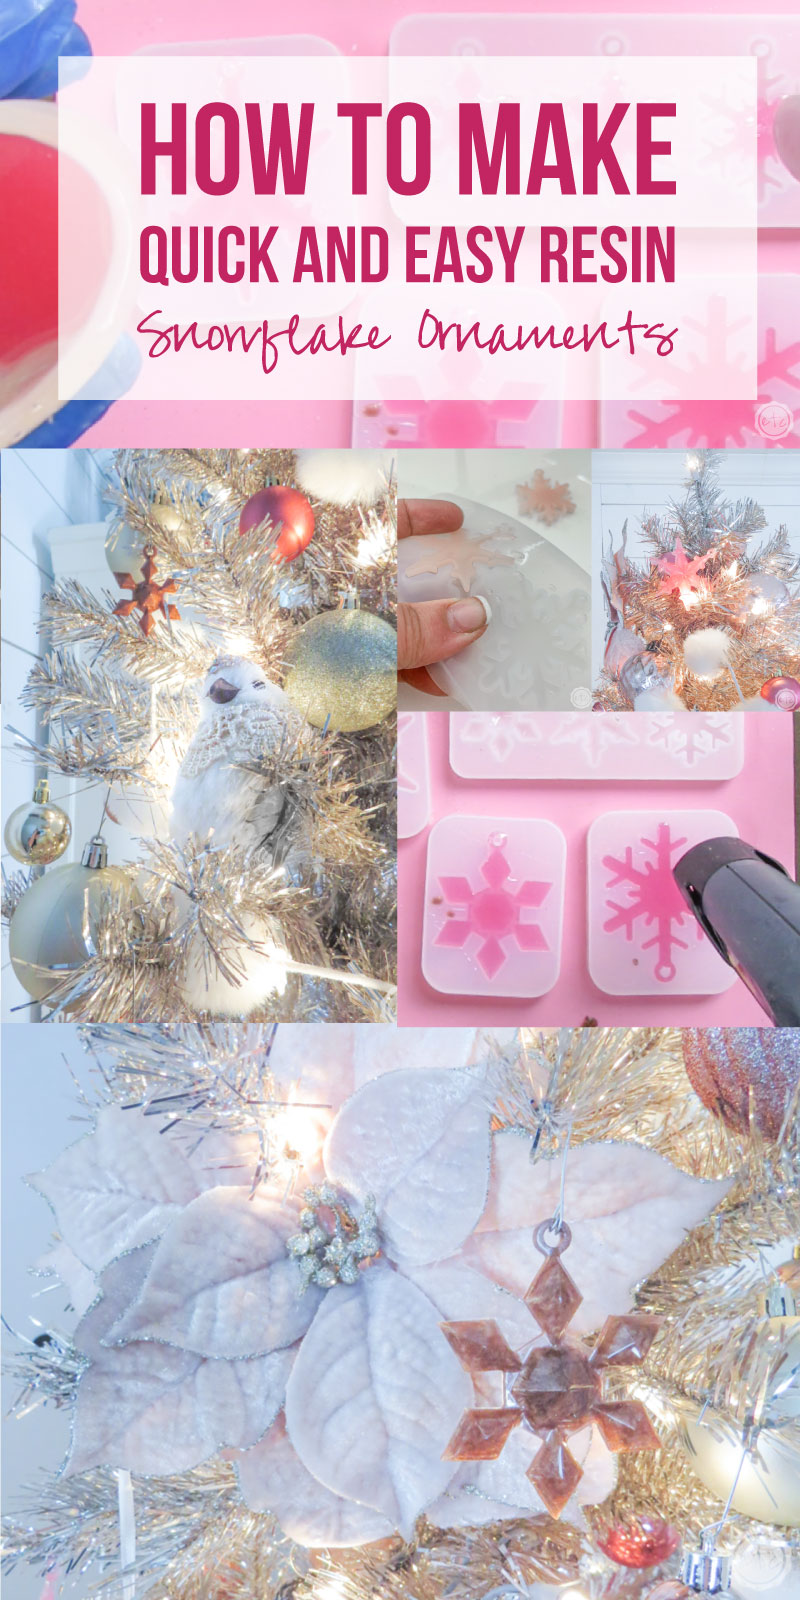
Out of allllll my super fun, super easy, resin Christmas projects these little snowflake ornaments were probably the best of the bunch. They’re easy to make, they cure fast and the molds are the bomb… they leave these little snowflakes with the shiniest surface! Which means these little snowflakes shine and reflect light like little crystals on your Christmas tree.

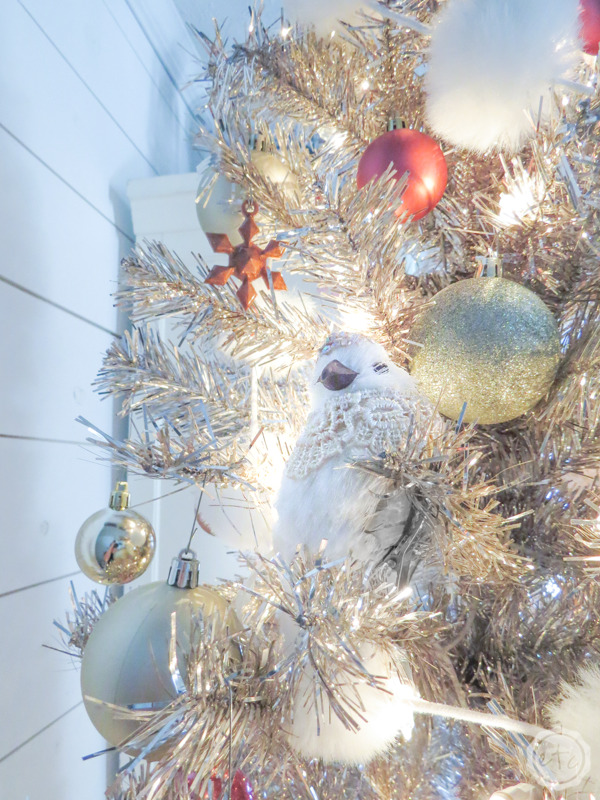
And to think I almost didn’t make them since I made similar shrinky-dink snowflakes last year! The shrinky-dink snowflakes are super cute but they’re definitely smaller (which is perfect on my small flocked tree) but these resin snowflakes are much better for my full sized Christmas tree in the living room.

It’s all relative my friends.

Ready to get started?

Supplies:

  • Amazing Clear Cast Resin
  • Respirator/Mask (resin graded filters)
  • Gloves
  • Wagner HT400 Heat Gun
  • Freezer Paper
  • Silicone Mat
  • Silicone Mixing Stick
  • Small Mixing Cups
  • Silicone Measuring Cup/Larger Mixing Cups
  • Reusable Silicone Stir Sticks
  • White Craft Paint
  • Hot Pink Craft Paint
  • Blush Craft Paint
  • Copper Oil Based Paint
  • Snowflake Silicone Mold
  • Long Ornament Hooks

Just getting started with resin? Download my free resin supply list and make your first project today!

Easy Resin Snowflake Tutorial

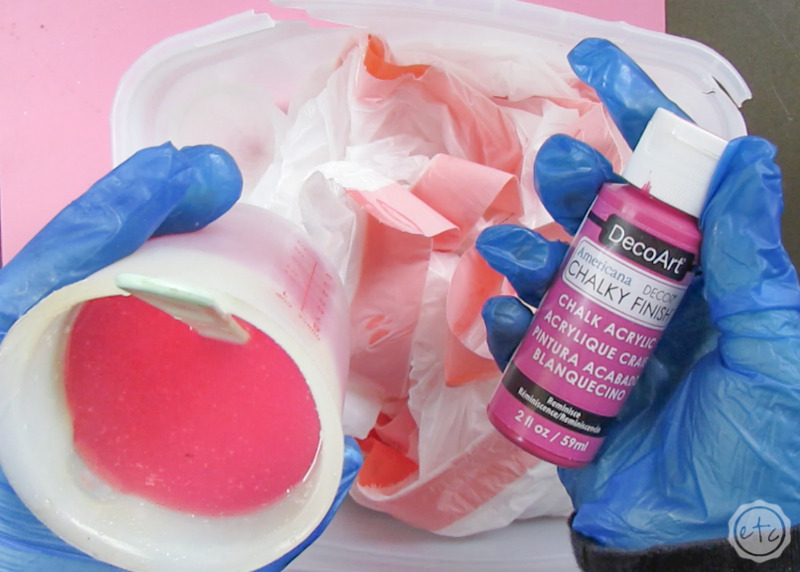
Step 1: Mix your Resin

Alright y’all I’ll be honest… after making so many big projects it was strange to mix resin in my little cups! I usually keep small molds around when I’m doing larger projects (like this adorable freestanding we wish you a merry Christmas piece… or even this resin Christmas wreath I made for the front door) so that I don’t have to waste left over resin. I just pour it into my smaller mold.

In fact… you might notice that the photo of me mixing this pink resin is from a different project. My little resin Christmas tree project! Way to kill two birds with one stone.

BUT I wanted four sets of snowflakes: blush, hot pink, white and copper. So while I made plenty with the left overs of larger projects I did mix a few smaller cups of resin specifically for these snowflakes!

It was refreshing.

In this case about 80ml was enough resin to fill all 3 large snowflakes and all 3 medium snowflakes.. and while the molds have 3 sizes I decided not to use the smallest size since it didn’t have a pre-drilled hole and was so small it would have been lost on the tree anyways. Don’t worry… I’ll use the small ones for something in the future!

Bonus Tip: If you’ve never mixed resin before it’s not nearly as intimidating as you’d think! I’ll walk you through all the steps here in my How to Mix Resin for Beginners Tutorial.

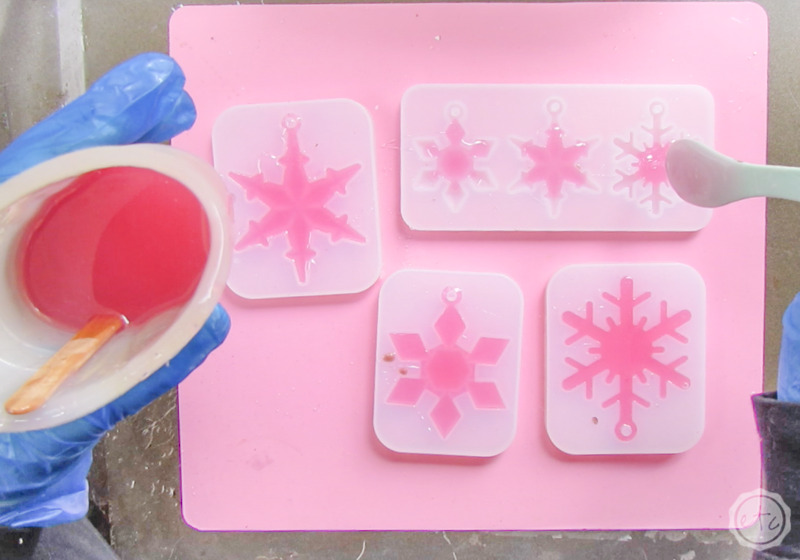
Step 2: Pour your Resin

Or in this case… spoon your resin into the molds with your stir stick? When it comes to molds with lots of little angles and small spaces you want to be super careful not to get a bunch of bubbles.

So instead of pouring my resin in I like to keep complete control and use my stir stick instead. I simply spoon a little bit of resin into the mold, making sure to pour it off my stir stick high enough that it enters the mold in a thin stream.

It’s a little tedious but so much easier then fishing all those bubbles out of the mold! Plus it will help you not to overfill the molds and make a mess with the resin (which I may or may not do when pouring resin right from the cup!).

Make sure that the resin fills in each and every bit of the mold, paying special attention to the loop at the top of the snowflake that will become your pre-drilled ornament hook.

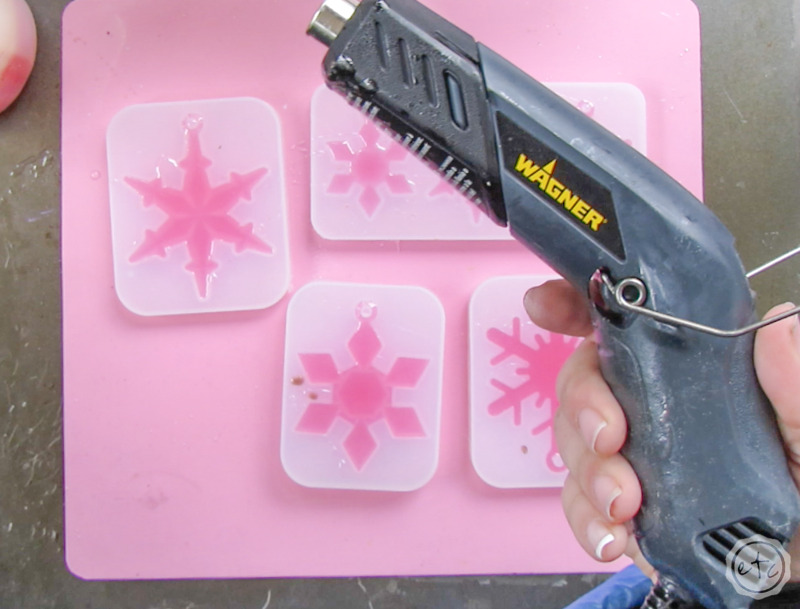
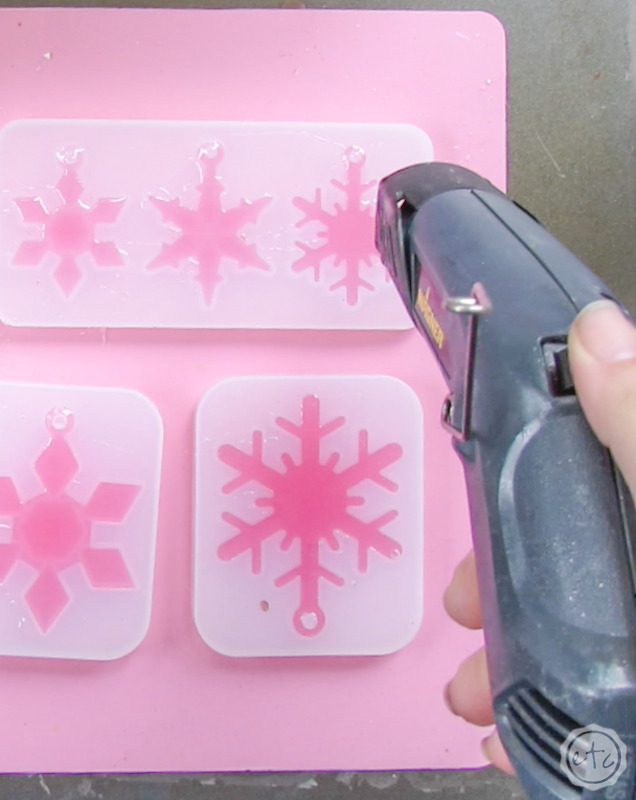
Step 3: Pop those Bubbles

Alright y’all… even with all of our precautions there are always bubbles to pop! Hopefully most of them will be small, micro bubbles that will pop easily but either way the heat gun will take care of most of them!

Simply pass the heat gun over your molds on high and watch the bubbles pop. Make sure to use a heat gun for this and not a torch since a torch gets too hot and can melt the silicone of your mold.

Once you’ve gotten all the micro bubbles make sure to look closely at the entire snowflake. If there are any bubbles trapped in the arms of the snowflake or the loop of the ornament hook you can use a toothpick to coax them to the surface to be popped with your heat gun.

That darn loop at the top of the snowflake was the most stubborn for me… and tried to keep a couple bubbles that I wasn’t a fan of! Watch out for that sneaky little bugger… and then carefully set these snowflakes in a dry, clean, room temperature space to cure for 24 hours.

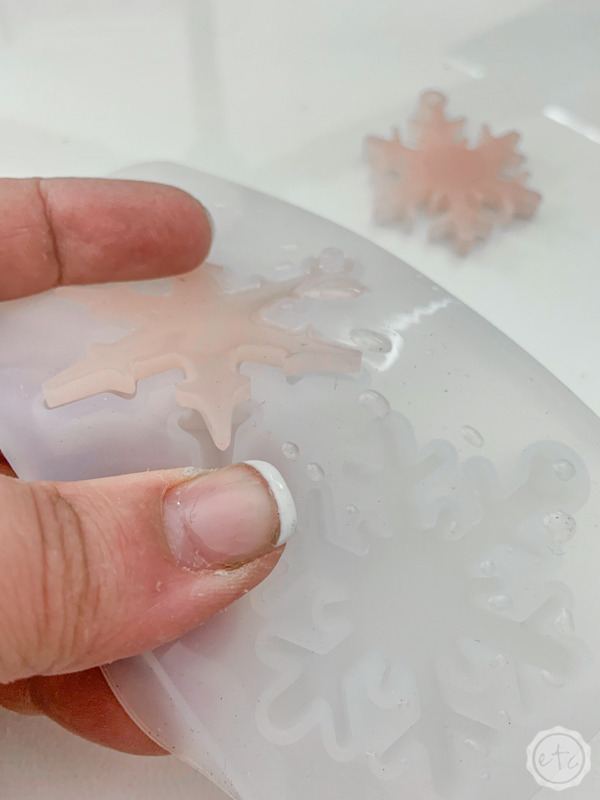
Step 4: De-mold your Snowflakes

Ready for the fun part? Taking these little snowflakes out of their molds!

Removing resin from a mold is pretty simple… just peel the silicone back and the resin will pop right out! However since these little molds have a few twists, turns and loops you might have to coax it at places. Just pull from the back, push from the front and if your snowflake isn’t 100% cured you might want to wait a minute… otherwise it will bend a little too much under all the movement.

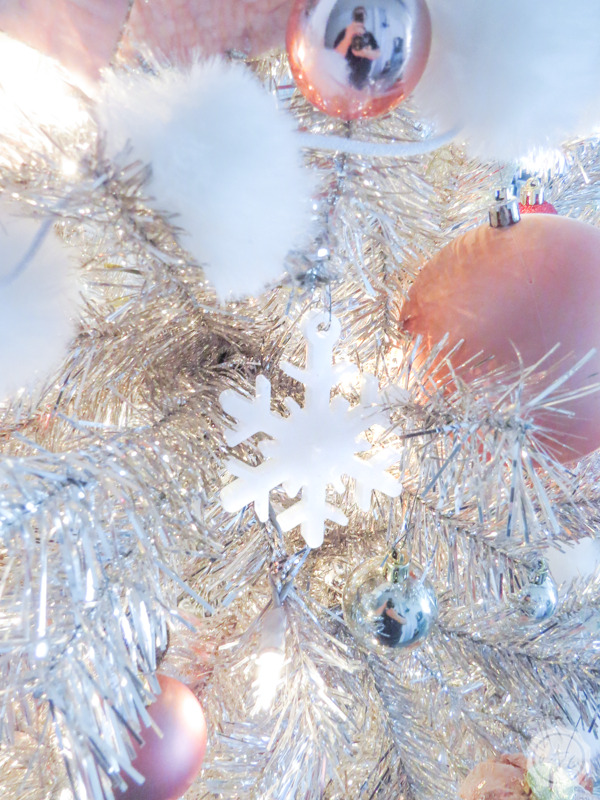
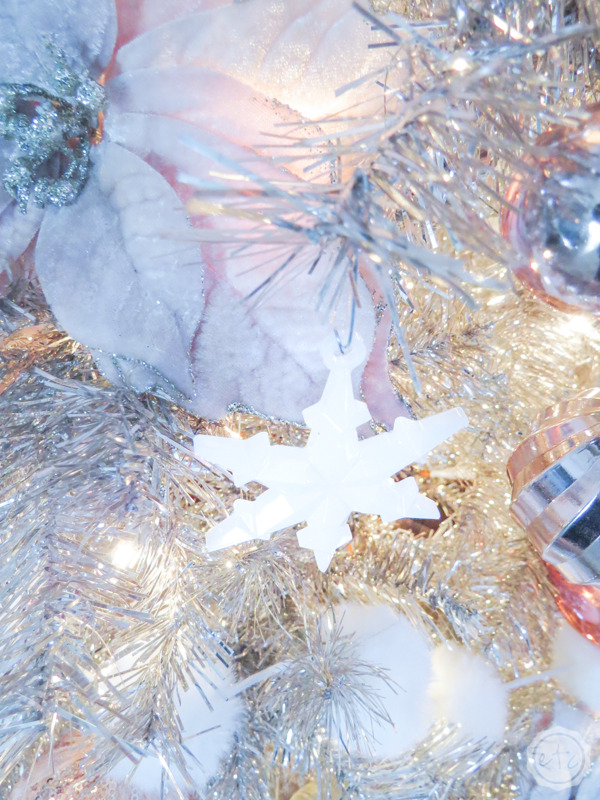
Either way these little babies came out pretty easy (all things considered!) and all that was left was to hang them on my tree!

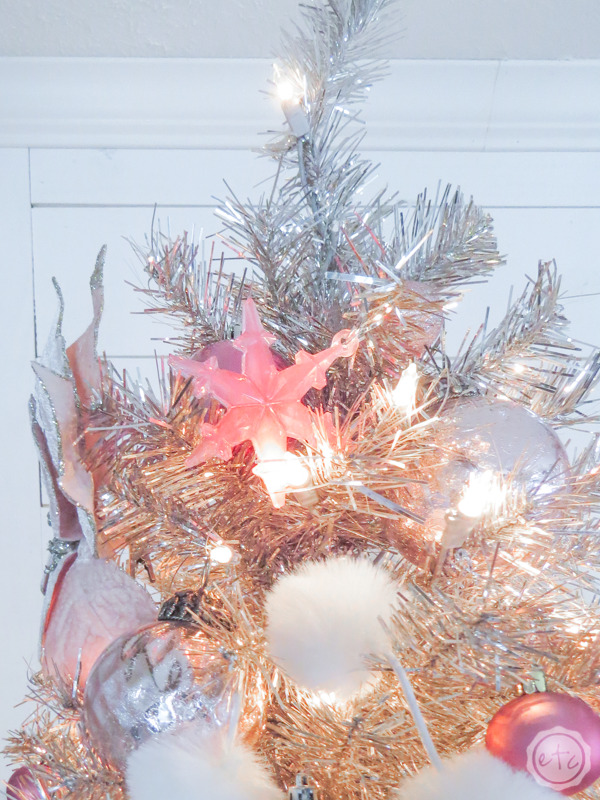
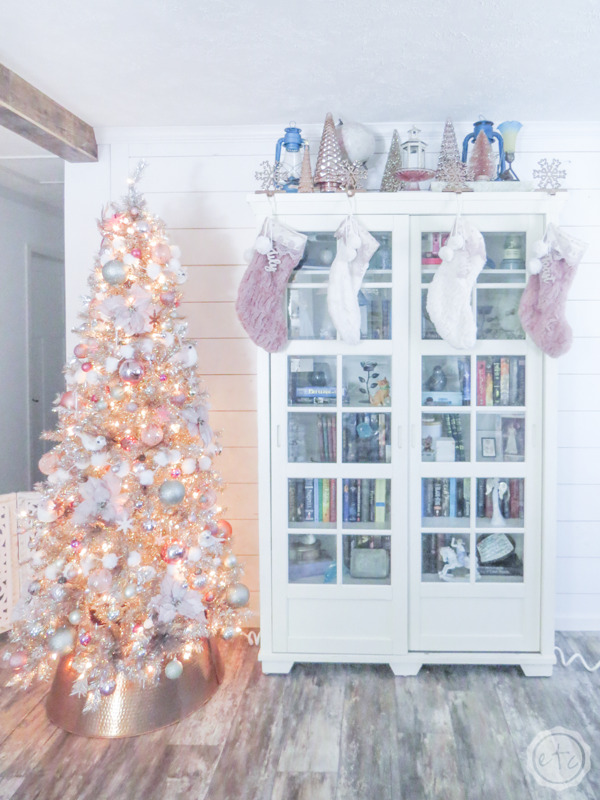
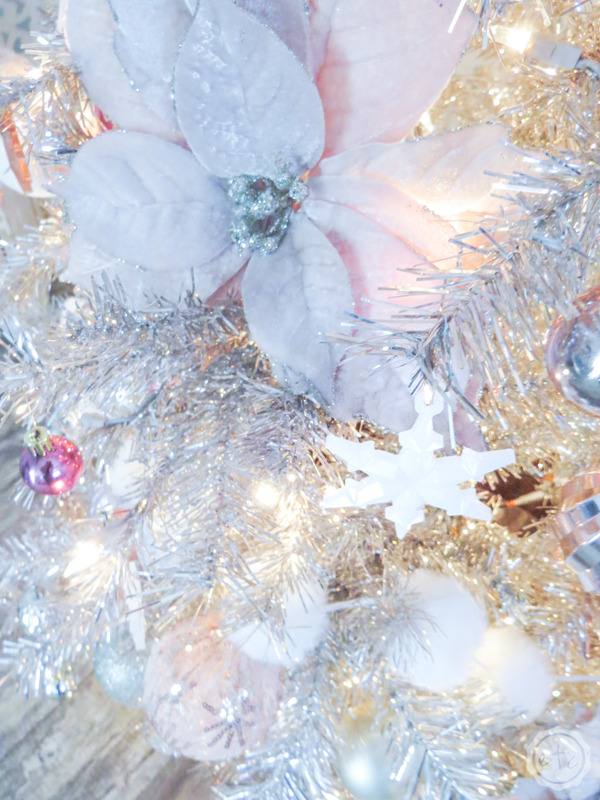
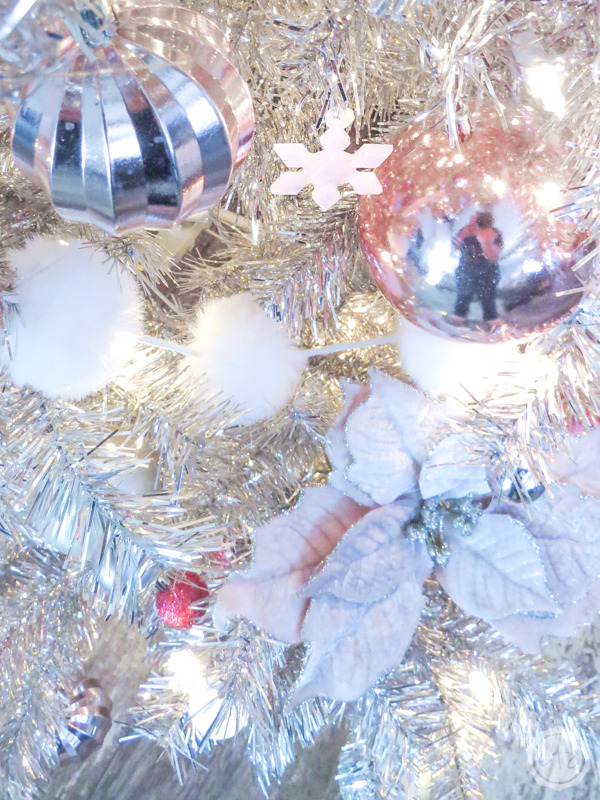
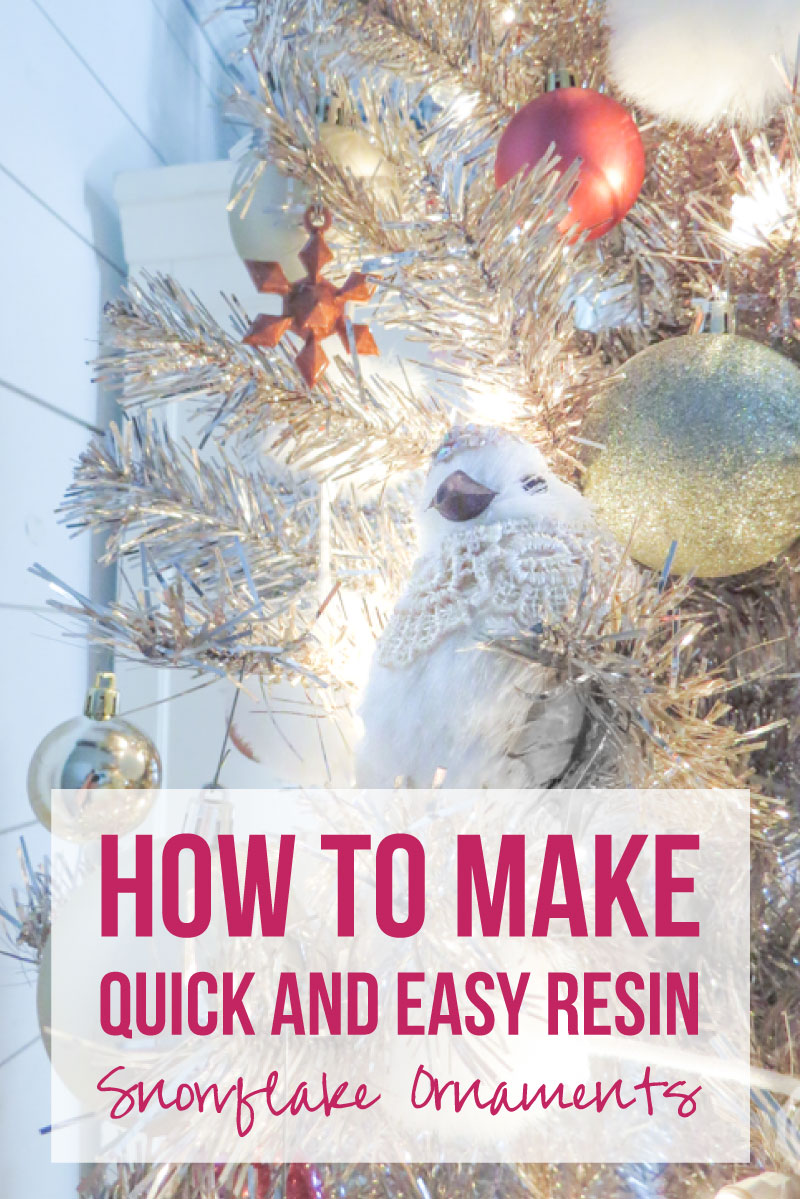
They went up on the rose gold tree in my living room and I absolutely love how they turned out.

Of course, I say that about all my projects so don’t take my word for it… take a look yourself!

Bonus Tip: In case you didn’t know resin is toxic. So while I love these on my Christmas tree I was very careful about how I put them on. I bought extra long hooks and used pliers to wrap the ends around the resin snowflakes a few times (so there’s no way they’ll slip off!) then I made sure to wrap the hooks around the branches several times as well. I wanted to make absolute sure that these snowflakes wouldn’t get bumped or pulled off the tree.

I also made sure not to put any on the lower branches of my tree… just in case! Basically I want to make absolute sure that there isn’t any chance of my dogs getting a hold of one of these snowflakes and using it as a chew toy or worse… an afternoon snack. If you have pets, children or anyone who likes to chew on random objects then be very vigilant about putting these ornaments on your tree in a safe and secure way.

They’re absolutely adorable, but they’re not worth a trip to the emergency room.

Looking for more rose gold holiday goodness? These posts are for you!

You are invited to the Inlinkz link party!

Click here to enter
You made it through the entire post? That means you're one of my new favorite people! I'd love to be friends and see what else you would like to read about! Leave me a comment and then sign up for your very own FREE paint planner.... so that you can keep track of every single paint color with ease!
Welcome back! I'd love to be friends and see what else you would like to read about! Leave me a comment and then sign up for your very own FREE paint planner.... so that you can keep track of every single paint color with ease!

Show me some LOVE y'all:

  • Facebook
  • Pinterest
  • Twitter
  • Email

Related

«
»

Holidays, Resin 0

Leave a Reply Cancel reply

Your email address will not be published. Required fields are marked *

sidebar betsy I'm Betsy, Home Decor Enthusiast, Yorkie Mama, Crafter, Blogger, Picky Eater, Chief Mess Maker, Antique Hoarder and Graphic Designer. You can generally find me working on (attacking with a paintbrush) the 3 bed, 2 bath home we are currently renting! Our home might not be perfect but it is ours & if you hang out long enough you'll see that what we lack in know-how we make up for in passion!
Shop My Craft Room

Shop My Home

Featured Articles

15 Fabulous Ideas to Organize your Laundry Room
25 FREE Printables For Your Home!
What to do with EXTRA Paint with Happily Ever After Etc
10 Ways to Make Your Bed EXTRA Comfy with Happily Ever After Etc.
Ready to Pick your Perfect Paint Color? We'll help you with our 6 Day FREE E-Course

Hey y’all,

Profile

I'm Betsy, Home Decor Enthusiast, Yorkie Mama, Picky Eater, Chief Mess Maker, & Graphic Designer...

A Little Note!

Many of the links on Happily Ever After, Etc. are affiliate links. If you purchase a product after clicking an affiliate link, I receive a small percentage of the sale for referring you, at zero cost to you! How awesome is that? Purchasing through affiliate links is an easy, painless way to help out your favorite bloggers. Thank you so much for your continued love and support! Read the full disclosure here!

Instagram

The number one question people ask when they watch The number one question people ask when they watch my new home tour on YouTube? Why is there so much clutter... um excuse me I like stuff! The second question? How did you frost the doors? Don’t worry... I wrote out the whole process, check out the step by step tutorial on the blog!
With Christmas fast approaching I’m having secon With Christmas fast approaching I’m having second thoughts... about taking down my holiday decorations! I absolutely love all the blush and rose gold this year and think I might have to add more pink to my every day decor. Until then maybe it will just stay Christmas at the Smith house! Tutorials for both the “Merry Christmas” resin sign and the “Dear Santa” Cricut sign are in my profile! #pinkchristmas #pinkchristmastree #pinkchristmasdecor
Well y’all Christmas is coming up quick... which Well y’all Christmas is coming up quick... which means I need to get a move on with all that wrapping! I got a jump start this morning after whipping up a few little resin light bulbs! Check out the full tutorial over on the blog if you’d like to wrap your presents with a few resin goodies this year... and tell me in the comments below. Are you finished wrapping or (like me) are you still getting started? #pinkchristmas #pinkchristmasdecor #resinchristmas #giftwrappingideas
Ready for another fun and easy resin project? Thes Ready for another fun and easy resin project? These little Christmas trees are the perfect beginner level project so if you’ve never done resin before don’t let it intimidate you!! Grab your heat gun and jump in... I’ll walk you through it! Check out the full blog post for these little guys on the blog (link in profile!)
If you haven’t joined Michelle at @weekendcraft If you haven’t joined Michelle at @weekendcraft SVG membership then WHAT ARE YOU WAITING FOR?! I am obsessed with all the cute svg’s and y’all she is doing a live craft night every month to walk you through making one of her designs... and the first craft night is tomorrow! She’ll be making this “Merry everything and Happy always” SVG and it’s so cute! You don’t want to miss it! See you there! 

(Also who noticed the sneak peek at my new kitchen?!)

#cricutsvgfiles #christmassvg #cricutsled
Well y’all I’m getting this close to unpacked Well y’all I’m getting this close to unpacked in my new house!! And since I’m a blogger Christmas is going up! So here’s the question... do you want a 1 month house update or do you want to wait for the Christmas tour? #lulamaefarmhouse #rosegoldchristmastree #newhouse
Well it’s still a work in progress but I finally Well it’s still a work in progress but I finally have a house!! They have to put it together and do all the detailing before I get keys... but we’re in the end game now! Check out my stories for a sneak peek at the moving process... full YouTube video coming soon!
#ad how amazing did these little fall coasters tur #ad how amazing did these little fall coasters turn out?! Plus I absolutely love the matching tray! The best part? This is such a quick and easy resin project... a silicone mold, a little resin and your trusty heat gun and I promise you can make this baby!! Link in profile for the tutorial!! #fallresin #resinforbeginners #cheetahprint
Okay... is it bad if you just want to make coaster Okay... is it bad if you just want to make coasters in the same mold with the same technique but different colors?? They turn out soo differently! Just a sneak peek of my fall coasters and the blush ones I made last year!
Happy #nationaldogday to the fur babies that are ( Happy #nationaldogday to the fur babies that are (literally) behind (beside... or underneath!) all Of my projects! These sweet little cuddle muffins make everything better 😊🐶😘
GIVEAWAY CLOSED Our winner is @kamikvega Check you GIVEAWAY CLOSED
Our winner is @kamikvega Check your inbox girl, this little machine is headed your way! Thanks to everyone who participated... I can’t wait to see where we go from here!

🥳📦🥳 GIVEAWAY🥳📦🥳
If you have loved all of the Cricut projects I make here is your chance to win a Cricut Joy of your very own! If you’re ready for a little craftiness (maybe a little time to relax) then this giveaway is for you! I’m teaming up with a few of my cavities crafty bloggers so that one of you can win your very own mini crafting machine. Good Luck!!!!

TO ENTER GIVEAWAY:
1.) Follow
@creativeramblings 
@weekendcraft 
@craftylumberjacks 
@this.is.tisa 
@justcallmehomegirl 
@happilyeverafteretc
@lovebird_heartworks 
2.) Like this post
3.) Tag a friend in the comments.
.
.
.
Hurry! Giveaway ends Saturday 8/29/20 at 11:59PM PST. Winner will be notified via Direct Message. Share or tag a friend who'd love to win a Cricut. .
.
.
This contest is in no way affiliated with or sponsored by Instagram or Cricut. To enter you must have a U.S shipping address.
A little peek into the fun summery Tablescape I pu A little peek into the fun summery Tablescape I put together for a little garden party! Want to check out the full table? Wondering where to find all the pieces... click the link in my profile for all the details!
#ad Did you know you can put infusible ink onto al #ad Did you know you can put infusible ink onto aluminum? It's sooooo simple... honestly it's one of the easiest projects I've ever done. Even if you've never used your Cricut before you. can. do. this. I'll show you how every step of the way! Follow along with the full tutorial video over on YouTube! The best part? These little aluminum signs look amazing as part of a larger project! Check out how I added mine to a larger resin wave project on the last slide! @officialcricut #cricutcreated https://lnk2.io/wvMllZf
Okay so It’s no secret that I’ve been obsessed Okay so It’s no secret that I’ve been obsessed with resin for a while now but this week I’ve been playing around with resin waves! Including this tiny resin sea shell! Check out the link in my profile for the full tutorial!
After a lot of struggle, loss and frustration I am After a lot of struggle, loss and frustration I am finally dotting the i’s and crossing the t’s on my next chapter. Yesterday I went and signed the million and one papers to close on my new house! I cannot wait to share the moving (and decorating) process with all of you... next step: keys! #firsttimehomebuyer #newhouse
Load More... Follow on Instagram

Copyright © 2021 · Darling theme by Restored 316

Copyright © 2021 · Darling Theme on Genesis Framework · WordPress · Log in · Privacy Policy

loading Cancel
Post was not sent - check your email addresses!
Email check failed, please try again
Sorry, your blog cannot share posts by email.