


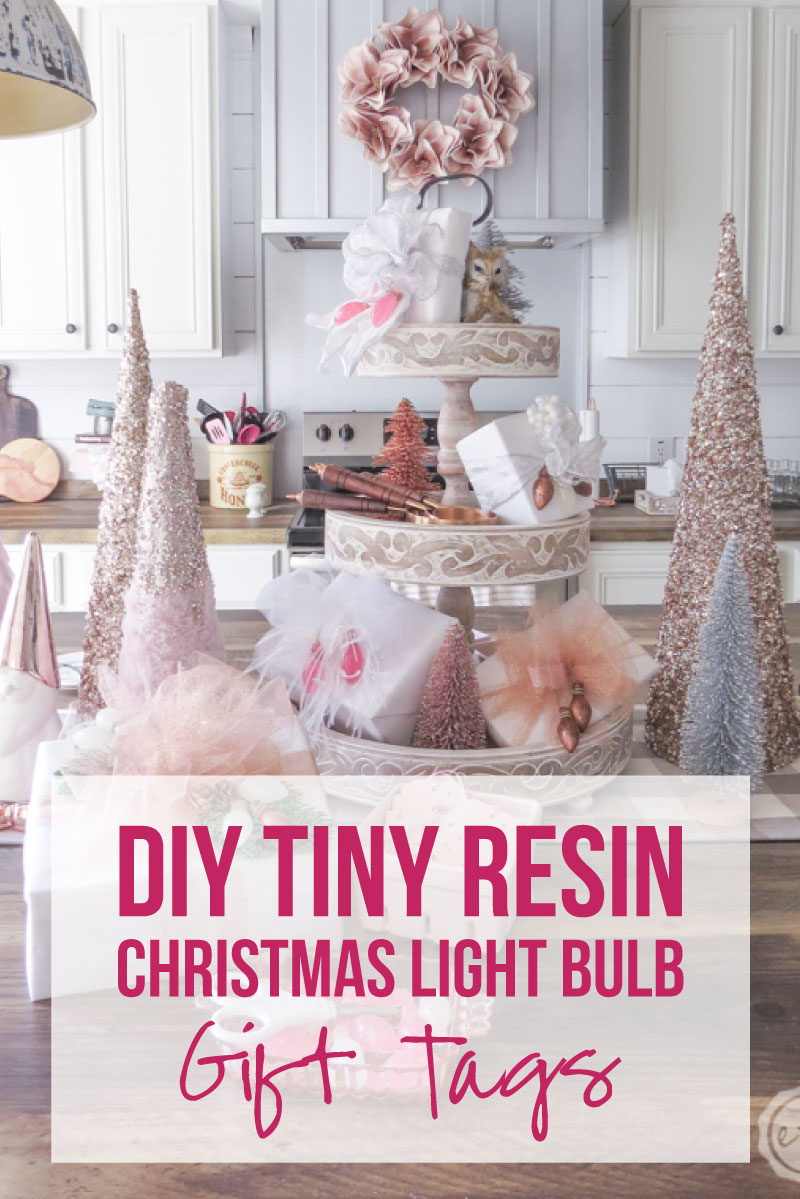
Growing up we always wrapped our presents with cute wrapping paper, added a bow and slapped on a sticker to write the recipient’s name. Which was perfectly fine… adorable even! And since I never knew any different there was no reason to imagine I was “missing out” on themed packages with matching bows and adorable add-ons and embellishments like greenery or little 3-d Christmas light bulbs.
So when I started to see all this fancy gift wrap and fancy printable gift tags I was hooked. I know it’s not needed but it’s just so cute! I started to play with free printable gift wrap and I’ve even put together a few round-ups of free gift tags: like this set of 47 adorable gift tags or even these 25 holiday gift tags.
So this year I thought I’d take things a step further and take a few adorable little resin Christmas Light bulbs! This is a quick and easy resin project that even beginners can do… and with a bit of twine or hot glue these Christmas bulbs can easily be added to any package.
Instant Christmas fun!
Ready to get started?
Supplies:
- Amazing Clear Cast Resin
- Respirator/Mask (resin graded filters)
- Gloves
- Wagner HT400 Heat Gun
- Silicone Christmas Lights Mold
- White Craft Paint
- Copper Oil Based Paint
- Dark Pink Craft Paint
- Freezer Paper
- Silicone Mat
- Baking Pan
- Small Mixing Cups
- Silicone Measuring Cup/Larger Mixing Cups
- Reusable Silicone Stir Sticks
- Feather Clip
- Rose Gold Mesh Ribbon
- White Mesh Ribbon
- Green Pinecone Pick
- Twine
- White Poinsettia Pick
- White Kraft Wrapping Paper
- Scotch Tape
BONUS TIP: While I’m using these little resin lightbulbs as adorable gift wrap you could easily hang them on your Christmas tree as ornaments! Or stick with the gift wrap and check out these resin ornament ideas instead: Resin Snowflake Ornaments, Iridescent Hummingbird Christmas Ornaments.
Just getting started with resin? Download my free resin supply list and make your first project today!

Step 1: Mix Your Resin
For these little Christmas Light Bulbs you need very little resin… they’re so tiny that even their molds are tiny! Typically I’ll pull out a tiny mold like this and use resin that’s left from a different project (like this adorable freestanding we wish you a merry Christmas piece… or even this cute Merry Christmas resin mold that I turned into a decorative sign for my wall).
Keeping a small mold around for left over resin is always a good idea when you’re working on a larger project… that way you don’t waste any expensive resin! So even though I made white, pink and copper light bulbs I never mixed any resin specifically for this project.
The white was left over from my resin present project, the pink was left over from my little resin Christmas trees and the copper was from this resin Christmas wreath I made for the front door.
But after making quite a few of these little light bulbs I can make a guesstimate that about 80ml of resin would fill all 12 light bulbs in this little mold. So this is my long winded way of saying: go ahead and mix 80ml of resin!

Bonus Tip: If you’ve never mixed resin before it’s not nearly as intimidating as you’d think! I’ll walk you through all the steps here in my How to Mix Resin for Beginners Tutorial.

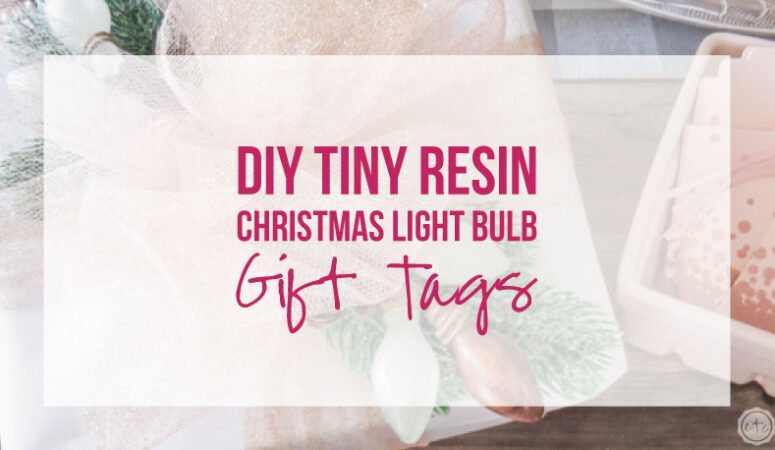
Step 2: Pour Your Resin
Alright… let’s get right into the fun stuff! Pouring your little light bulbs. Since these molds are so dang tiny it is very easy to overfill the molds.
Which I did on almost every. single. pink. light. bulb.
You can always cut off the excess resin once it cures or even sand it down if need be… but it’s so much easier if you don’t have to.
Instead pinch the sides of your silicone mixing cup and carefully pour resin slowly (and in a thin stream) into each mold. The more control you have over the resin the easier it will be to fill each mold and then move on. PLUS pouring slowly in a thin stream helps to eliminate bubbles so we’re really killing two birds with one stone here.
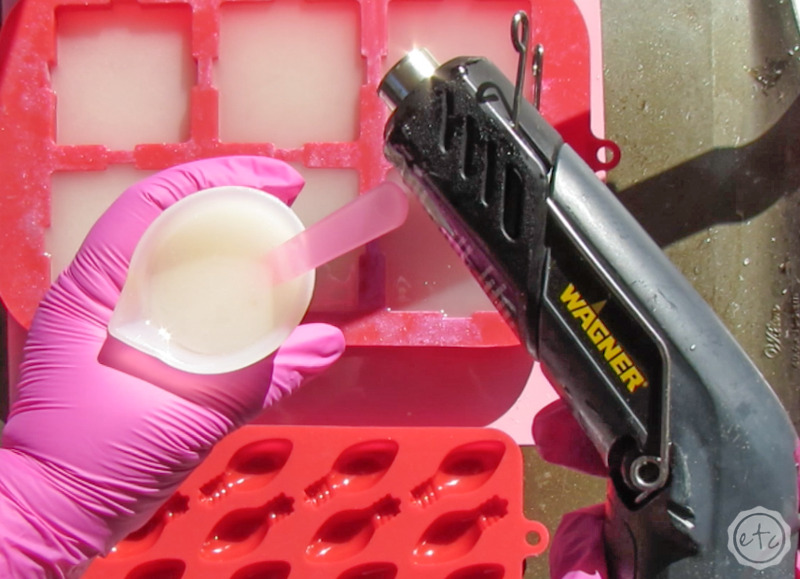
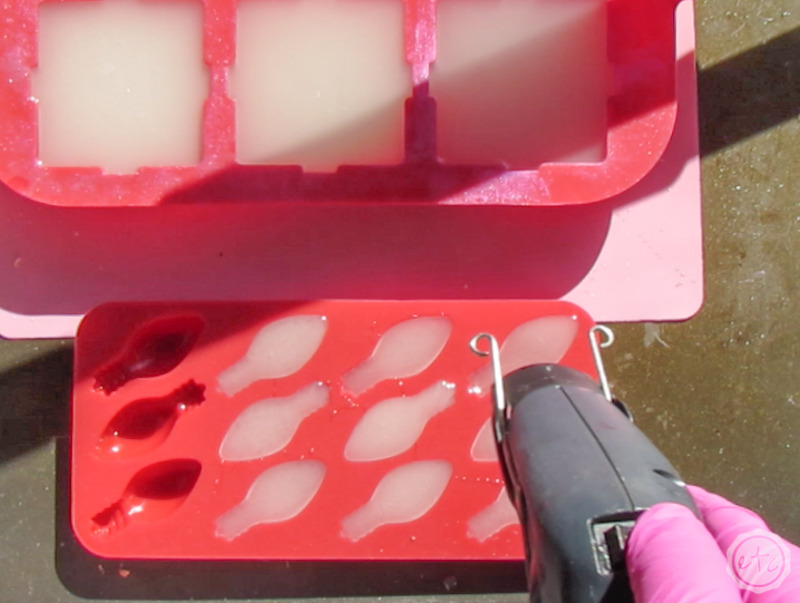
Step 3: Pop those Bubbles!
Once each of the molds is full go ahead and grab your heat gun. Now pop annnnny bubbles that have risen to the surface of the resin.
These molds are pretty smooth so you shouldn’t have tooo many problems but pay special attention to the top of the light bulbs. The little groves for the top of the bulb is the one spot on this mold where bubbles might gather. If you see any staying down at the bottom of the mold (which will be the front of the bulb) you can use a toothpick to bring it to the surface so that you can pop it with your heat gun.
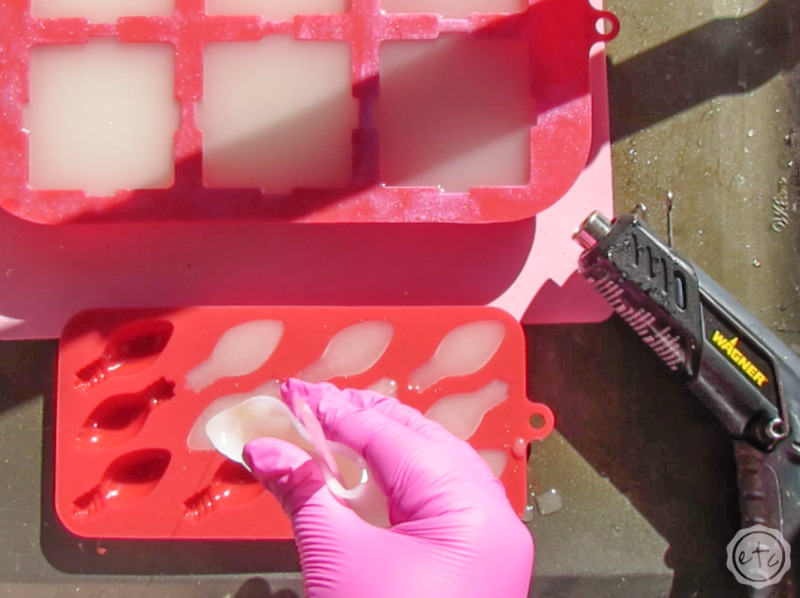
Of course, that’s a little harder with solid colored resin so the other option is to check on these little guys after about 10-15 minutes… and then hit them with your heat gun again. Often letting the resin sit will help to bring any latent bubbles to the surface… so it’s always good practice to zap the bubbles immediately after pouring and after they’ve been sitting for a little while.
Then take your piece and move it to a clean, dry, room temperature area to cure. And FYI this is why I work on a baking tray… it makes it super easy to pick up my pieces and move them from my well ventilated front porch (where I work) to the craft room where they’ll cure.
Make sure to cover these babies with a bit of cardboard so no dust or cat hair falls into them (and double check that they’re level!) and then leave them to cure for 24 hours. Then we’ll move on to the next step!
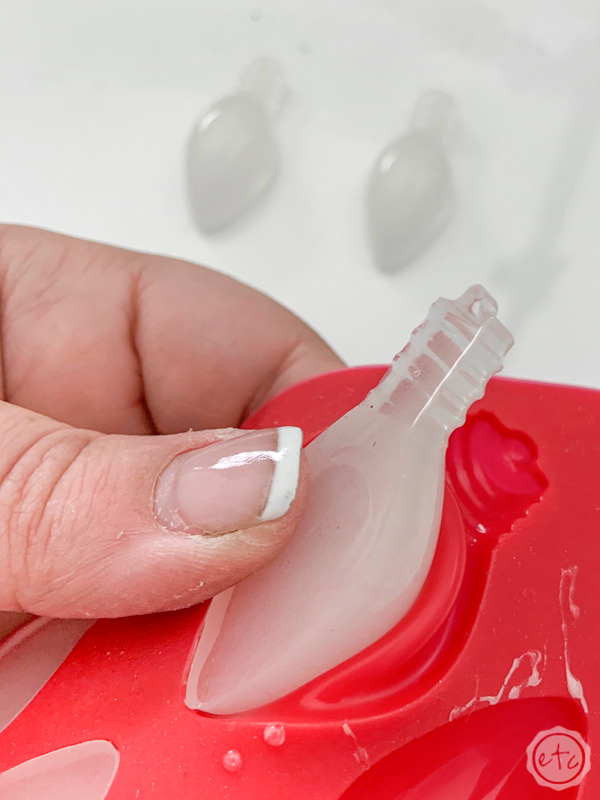
Step 4: Demold your Light Bulbs
This is the best part! Popping those little babies out of their molds! Because these little light bulbs are so small and so smooth they really pop right out of their molds.
I wasn’t brave enough to try it but I’m half convinced that I could have turned this mold over like an ice cube tray and twisted to release all the bulbs.
Maybe I’ll give it a shot with the next round of bulbs!
It kind of sounds like fun!
Of course, if you want to remove these cuties from their molds the easy way you just need to pull on the edge of the silicone until you see the light bulb release… then simply peel the light bulb out of the mold.
Easy peezy lemon squeezy.

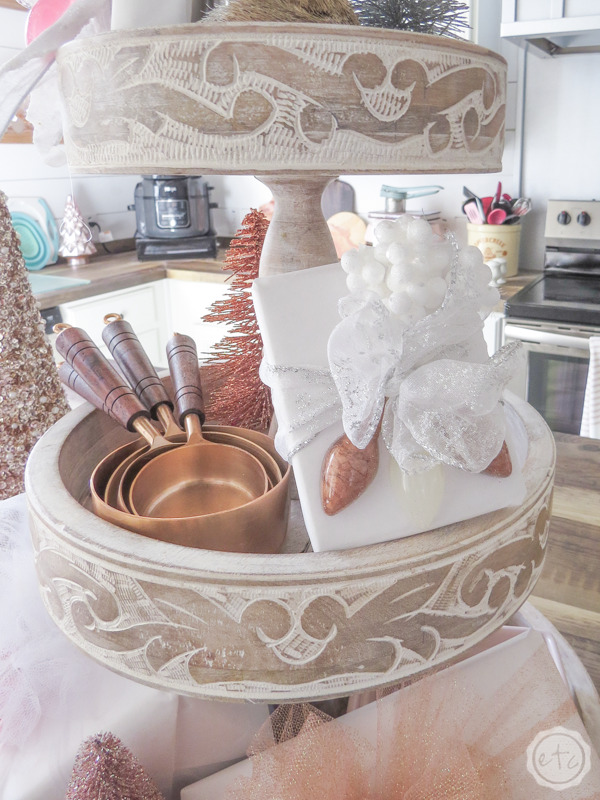
Step 5: Add your Light Bulbs to your Presents!
Ready for the fun part? Making these little resin Christmas Light Bulbs into gift wrap!
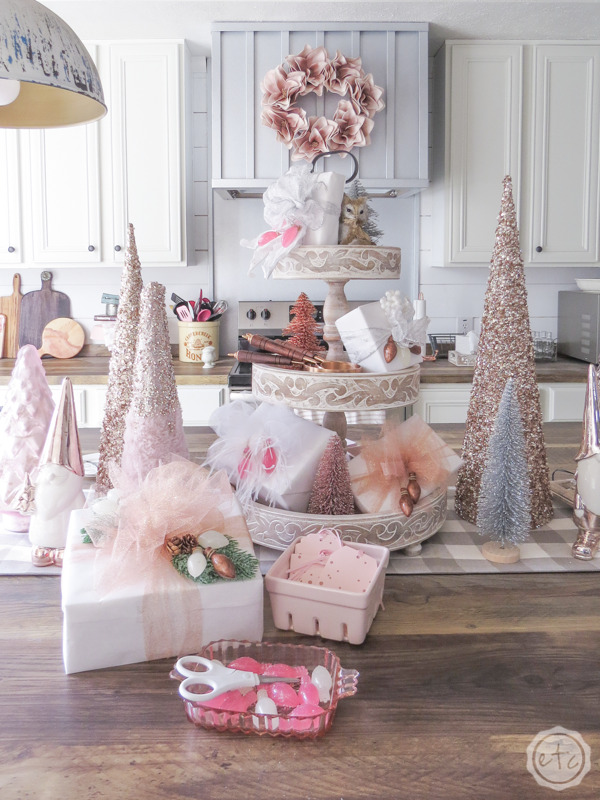
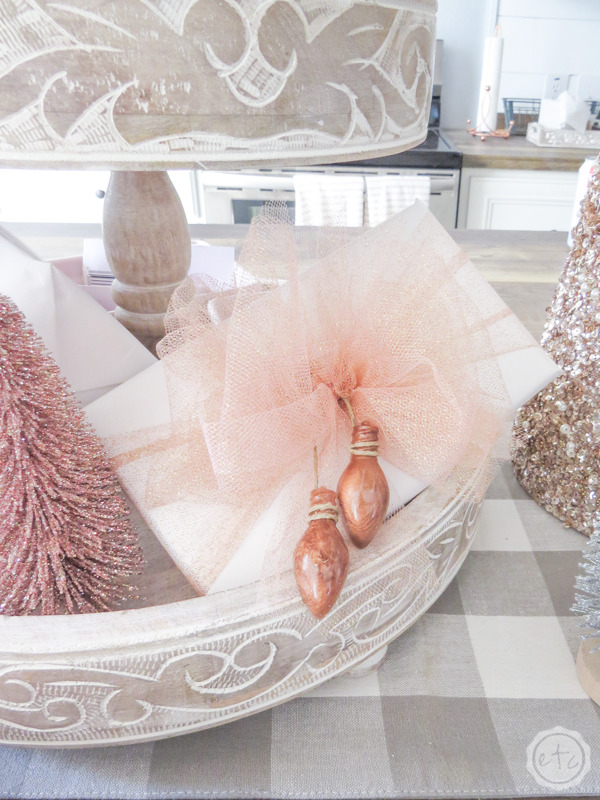
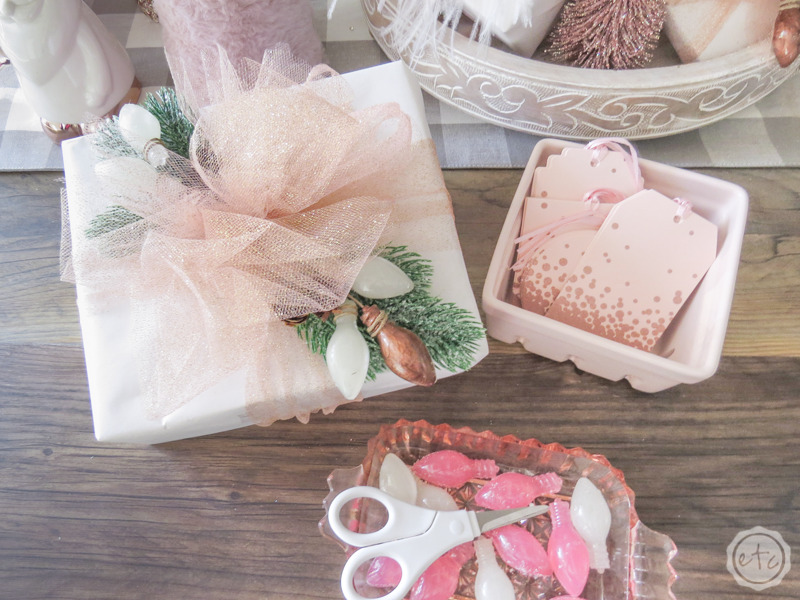
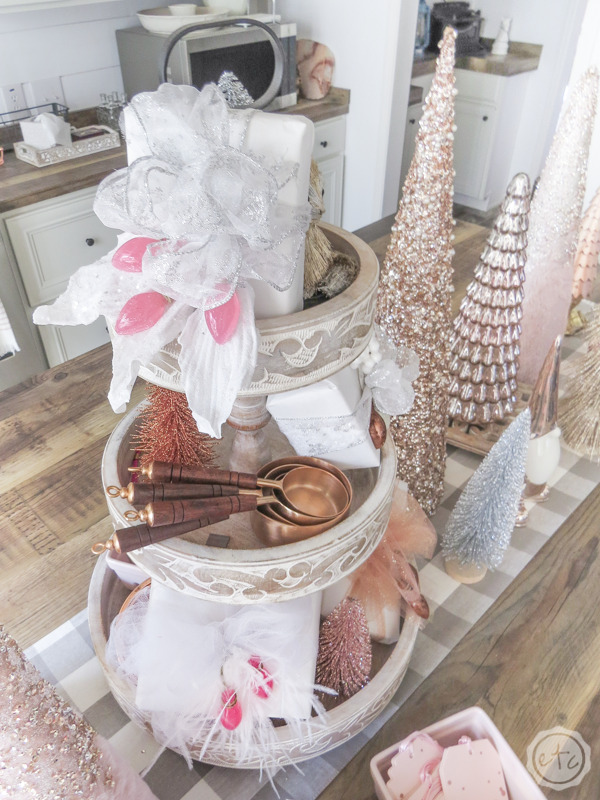
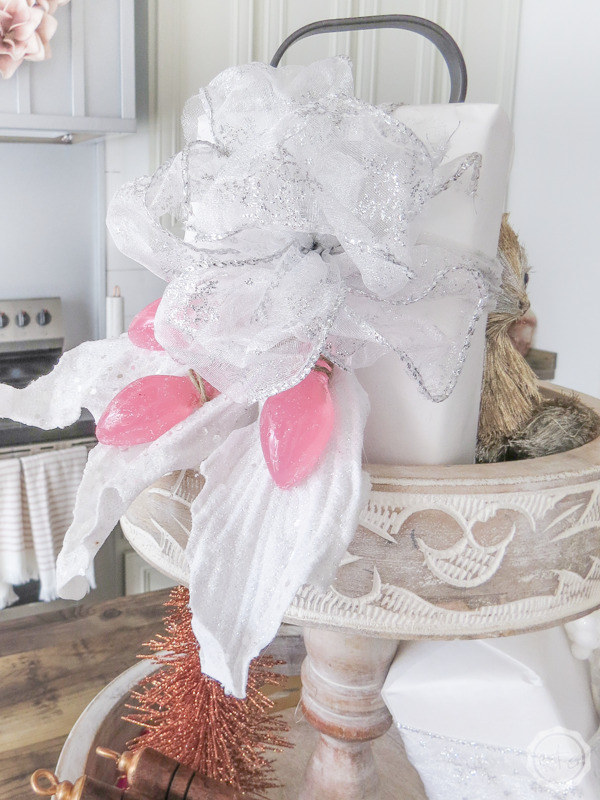
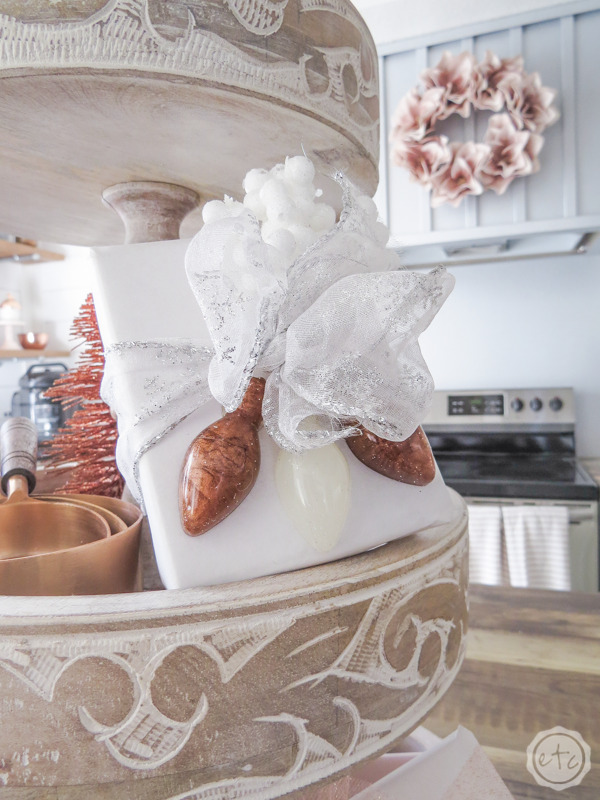
In order to make things consistent but still mix it up a little I decided to wrap all of my presents with white kraft paper and use a combo of 3 different bows and 3 different embellishments.
For my bows I went with a rose gold mesh ribbon, a white mesh ribbon and a sparkly white and silver snowflake ribbon. For the embellishments I grabbed a green pine-cone pick, a fluffy white feather and a few white sparkly poinsettia picks.
Then it was simply a matter of tying bows onto each of my presents and adding an embellishment.
Once the embellishments were added I picked a light bulb that matched and either hot glued it directly to the kraft paper or tied it to the bow with a bit of twine!
And I may *cough cough* be biased but I kind of love how the whole thing turned out! Just take a look!
Bonus Tip: Just a little heads up… while I don’t put any presents under my Christmas tree I know a lot of you do. Which means that presents are easily accessible for potential little fingers and mouths. Just keep in mind that resin is toxic. Period. If there is any chance that one of your fur babies, children or crazy family members may try to eat a light bulb do not put these under the tree where they might be picked up and chewed on.
It’s just not worth it!
Send them to friends without little ones or keep them out of reach until Christmas morning when you hand them out. And if that isn’t do-able then you may *tear rolls down my cheek* want to skip the resin gift wrap.
These little cute light bulbs are a sweet way to add Christmas cheer to your presents but that will be kind of a moot point if your pup tries to eat one!


Looking for more resin projects? I’ve got you covered!


Leave a Reply