
This post comes to you from our sponsor Wagner and contains original ideas and opinions by me! You’ll also find affiliate links for your convenience.

With the holiday’s right around the corner I have enjoyed seeing allllllll of the pretty holiday decorations start to make an appearance. Like a few Christmas ornaments at work! Specifically a few pretty initial ornaments with rose gold edges!
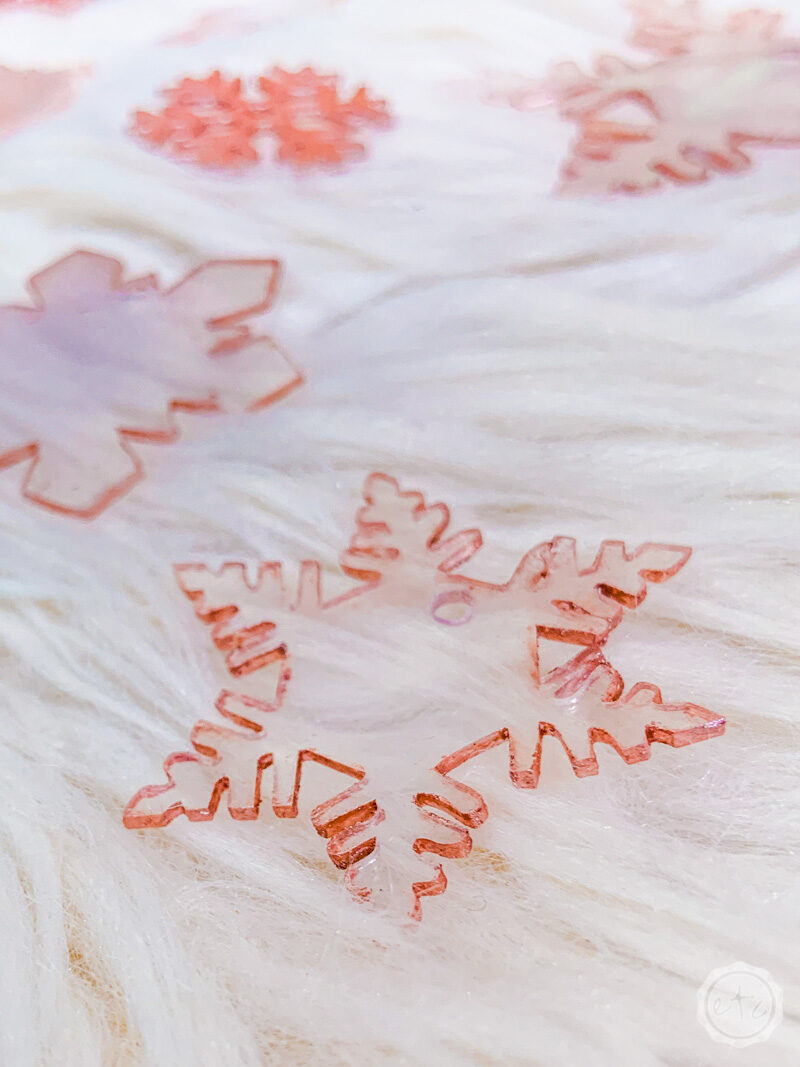
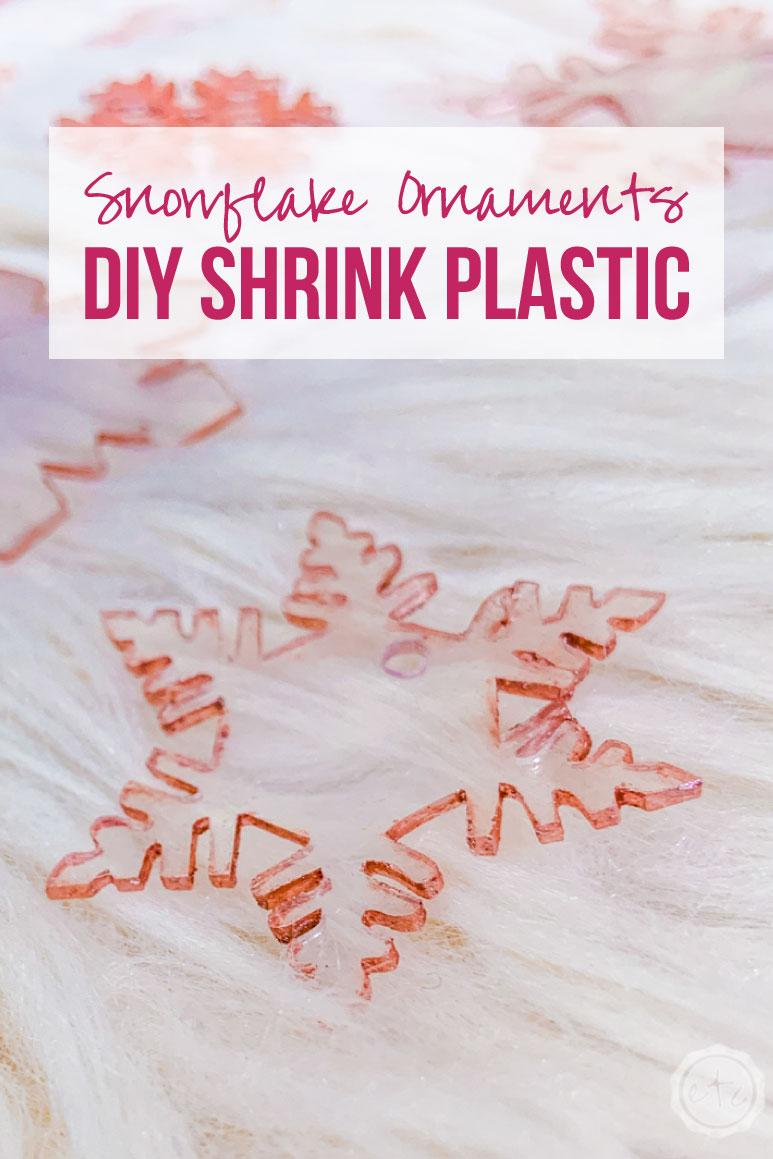
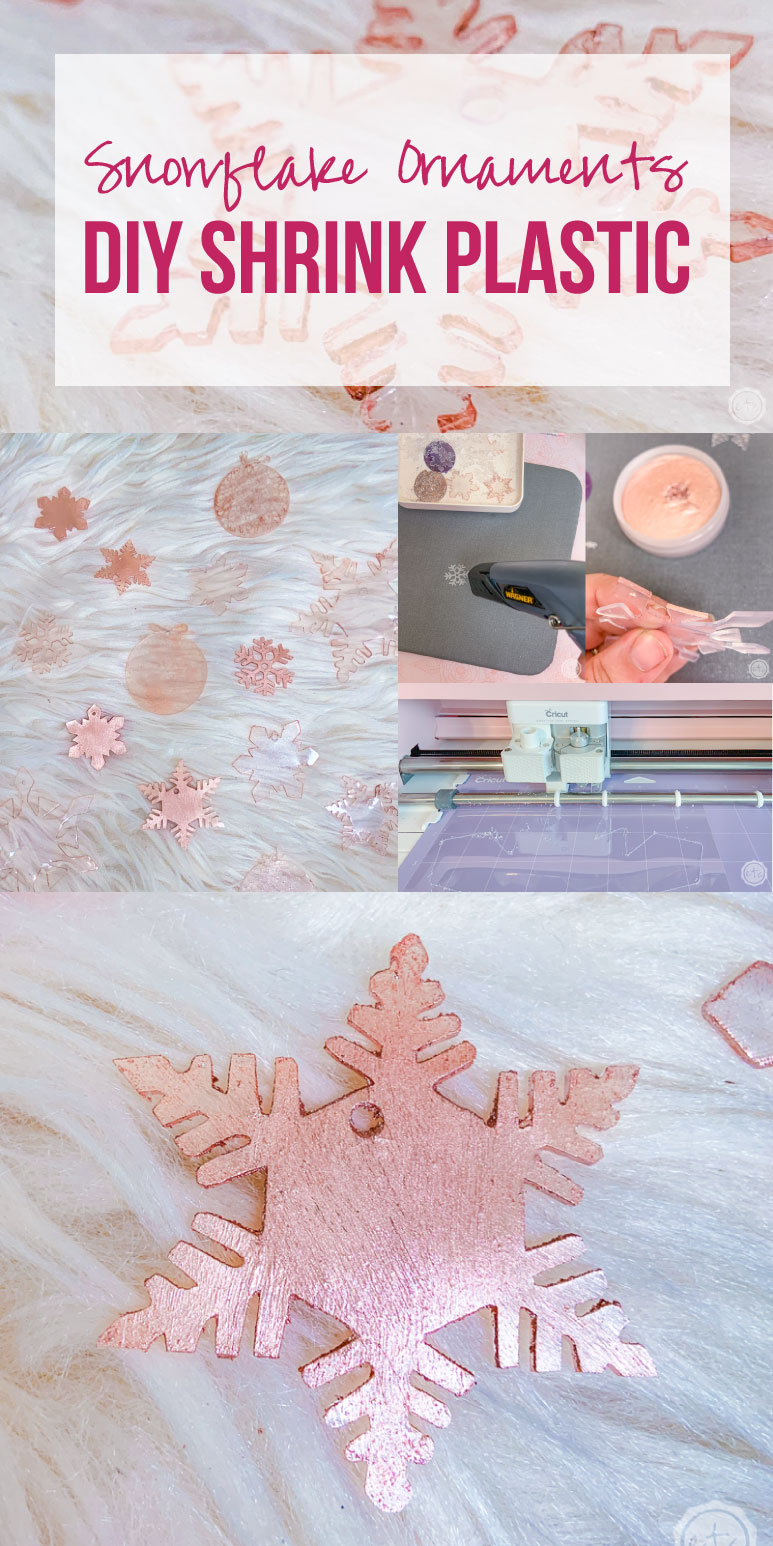
I loved the look of the clear ornaments with the gilded edges but I didn’t really love how large they were (about 4 inches tall) or the fact that they were initials. So I decided a few classy, snowflakes with rose gold gilded edges were the answer! All we need is a little shrink plastic, a heat gun and a bit of rose gold wax!
Easy peezy!
Let’s get started!

Supplies:
- Shrink Plastic (Crystal Clear or Frosted)
- Ornament Hooks
- Wagner HT400 Heat Gun
- Heat Mat (or something to protect your surface)
- Tweezers/weeding tool/something metal
- Hole Punch
- Rose Gold Craft Wax
- Paint Brush
- SVG Files (for your Cricut or for handing cutting) (FREE at the bottom of this post!)
- Scissors or Cricut Maker
- Cricut Strong Grip Mat (that’s the purple one!)
- Fine Point Cutting Blade
- Aluminum Foil
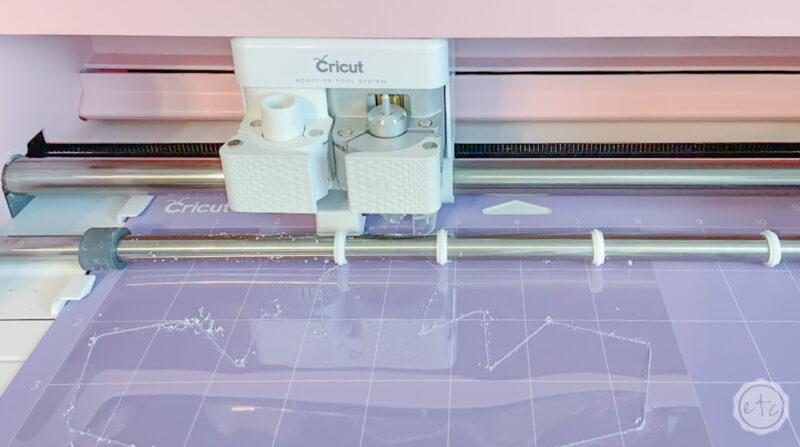
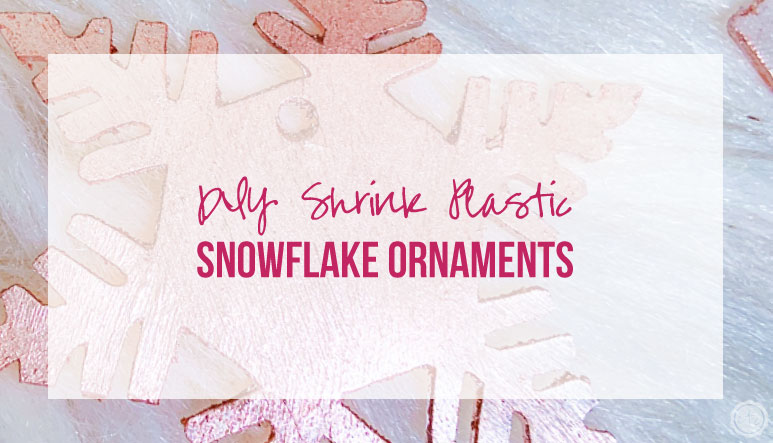
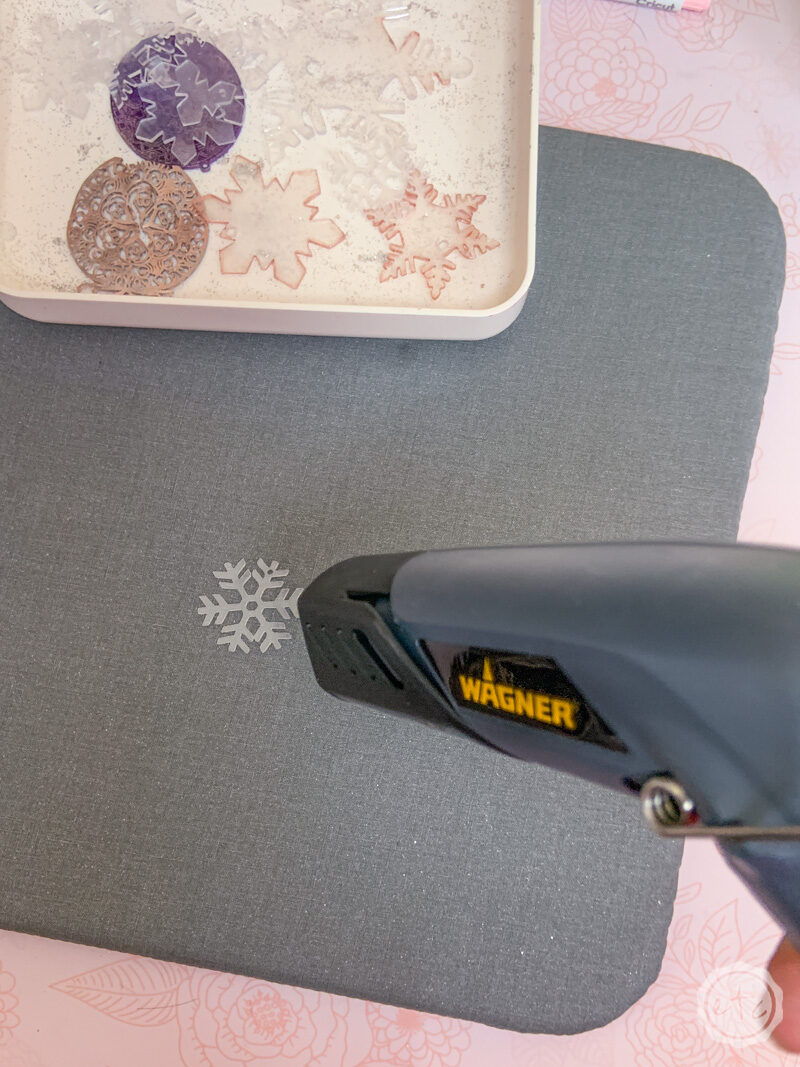
Step 1: Cut Snowflakes
Alright y’all the first step here is to cut out your snowflakes! I tried quite a few snowflakes before discovering that the more arms your snowflakes have the more the arms will want to stick together when they shrink (I know… makes total sense) so in this case the simpler the better.
I used my Cricut Maker to cut quite a few large, medium and small snowflakes out of my shrink plastic. The large ones were about 8 inches wide (before shrinking), the medium ones were about 6 inches before shrinking and the tiny ones were about 3.5 inches.
Surprisingly the small ones did the best followed closely by the medium sized snowflakes!
Alright, now that we have our shrink plastic and the sizes let’s get to cutting. You can either print out the snowflakes on printer paper and use them as a stencil to cut out your snow flakes by hand or use your Cricut.
I set my Cricut Maker to the “acetate” setting and then adjusted the setting from there. I found that with a standard cutting blade and a strong grip mat my machine cut clean through set to 324 pressure and 6 passes.
I did try the deep point blade (thinking it would cut better with fewer passes) but had no luck… go figure!

Tip: Don’t forget to use a hole punch before you shrink these guys if you plan on adding ornament hooks to them! Just punch a hole in a spot where the ornament hook will be able to reach and you’ll be good to go!
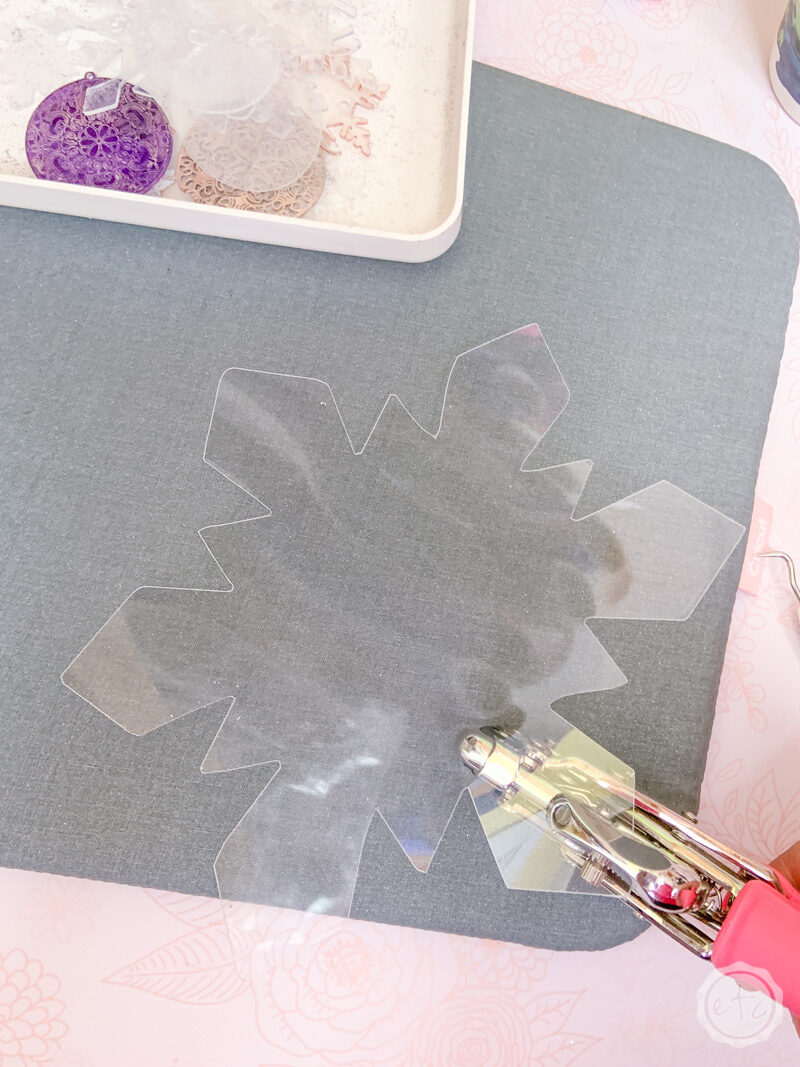

Step 2 : Shrink the Snowflakes!
Ready to shrink? When it comes to shrinking your snowflakes you have two options: the oven or a heat gun. While the oven works for some projects I find that the heat gun gives you more control which is great for the arms on these snowflakes!
Trust me, if you put them in the oven half of the the little arms will just curl in on themselves!
Instead, put down your heat mat and make sure your surface is protected. I used a cricut easy press mat because I know it’s graded for high levels of heat but you can easily use a cutting board etc.
Then grab your pre-cut shrink plastic snowflakes and your heat gun. I’m using the Wagner HT400 heat gun (isn’t that a mouthful!) because it has two heat settings 450 and 680 which is perfect for shrink plastic.
Turn your heat gun onto the high setting and start to go in circles all around the snowflake. It will take about 10 seconds before yous tart to see the snowflake start to shrink.. then it will start to fold in on it self.
Keep heating the snowflake from all sides (top, bottom, sides) and move your heat gun around. If you leave your heat gun in one place too long it will burn a spot on your mat!
Typically once the snowflake folds in on itself you’re almost done… just keep heating it until the snowflake lays perfectly flat. If the little arms get stuck together use your tweezers/weeding tool/metal tool to gently pull the arms apart while keeping the heat on.
Don’t take the heat off until it’s perfect since the snowflake will start to set once the heat is off!
Once the snowflake is flat you’re good to go! Let the snowflake cool before touching it and moving on to the next snowflake.
One last thing… sometimes perfectly flat is a relative term. If your snow flake is slightly curved but all of the little arms are fairly flat turn off your heat gun and use your metal tweezers to scoot the snowflake onto a flat surface. Then place a book/tile/piece of wood… anything flat, with no texture, onto the snowflake for about 10 seconds to press it flat.
Beautiful!
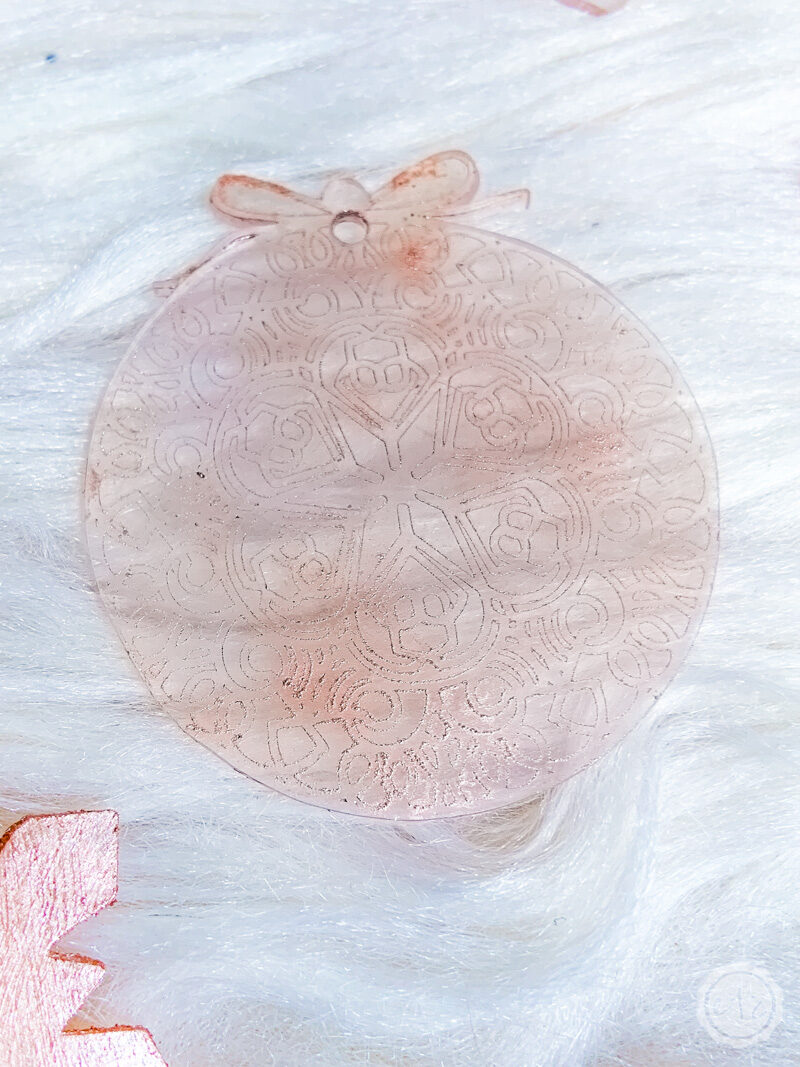
Bonus Tip: I used a rose gold wax to color my snowflakes and give them a fun texture. If you would rather color these babies the old fashioned way you can use alcohol based inks, color pencils or permanent markers to color in the shrink plastic before shrinking it!
Colored pencils work best on frosted shrink plastic while alcohol based inks and permanent markers work on either! I tested this out with purple permanent markers on the round ornament in the tray below.

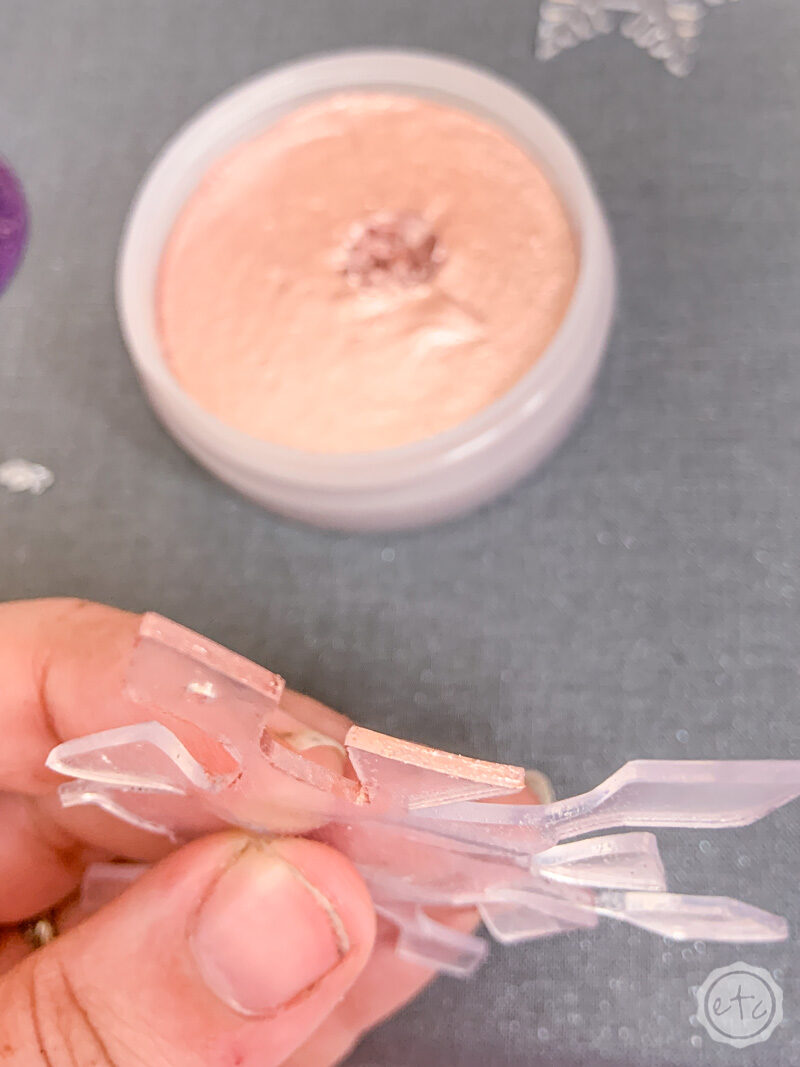
Step 3: Wax Edges
Ready for the wax? I grabbed a teeny tiny paint brush and my tub of wax to gild the edges of these little snowflakes. The wax dries to a hard finish but is easy to wipe off the front while it’s wet.
So I basically put wax the sides with no worries about hitting the front and then wiped it off the front. And if the wax is being a little stubborn just add a bit of water to soften it and you’ll be good to go!
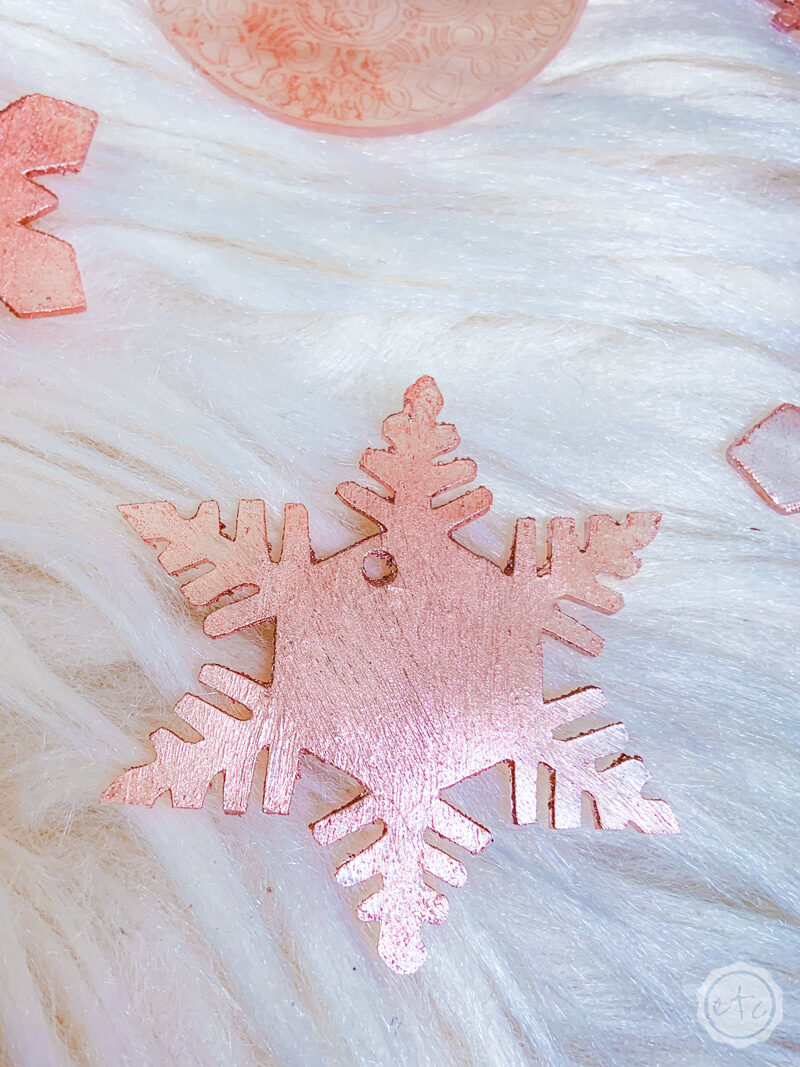
I absolutely love the look of the gilded edges but I wanted a little variety so I decided to gild the fronts of a few as well… and by gild I mean I painted the front. The wax is definitely thicker than paint so make sure you direct all your brush strokes in one direction and feel free to add a second layer once the first one is dry.
The second coat definitely helps even out the color!
Take a look.

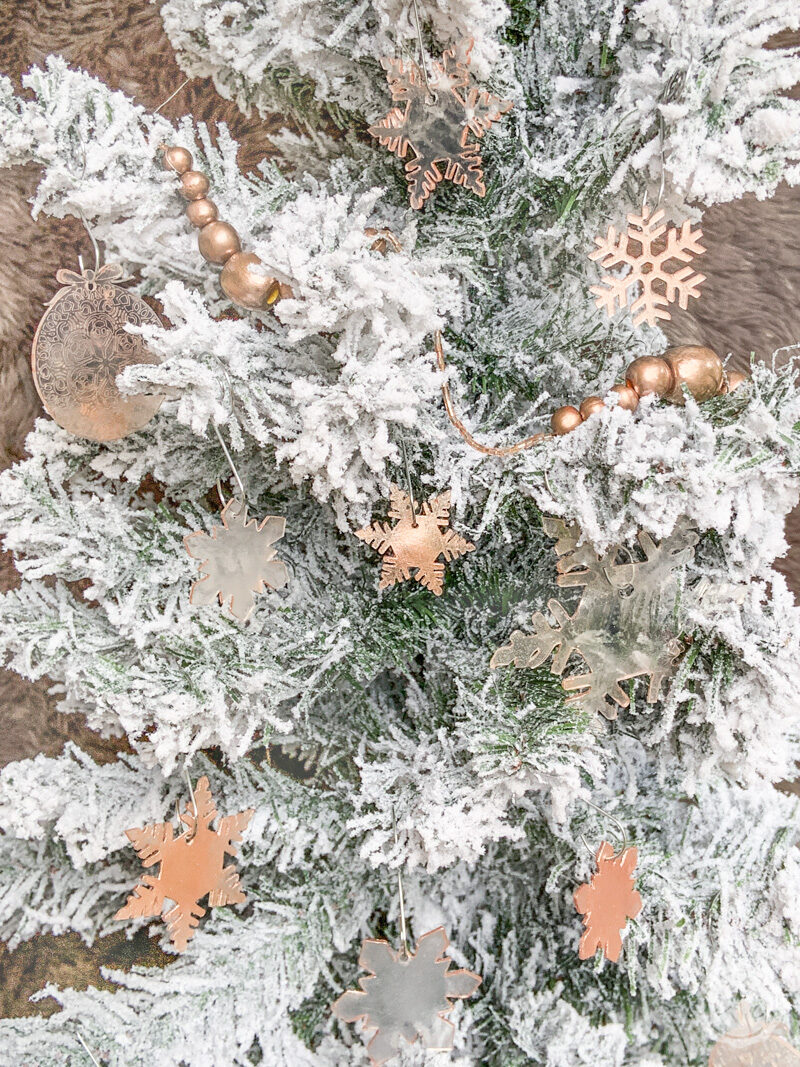
Step 4: Add Ornament Hooks and Decorate!
We’re so close to finished!!! Now that these babies are shrunk and waxed all we need to do is add ornament hooks and hang these babies on the tree.
Ready for the final reveal?
I absolutely love how these little snowflakes turned out!


Looking for more rose gold holiday goodness? These posts are for you!


[…] use my heat gun. Special embossing gun for embossing powder? Nope I just use my heat gun. Special toaster oven for shrink plastic? Nope I just use my heat […]