


These little resin gingerbread houses are the perfect holiday project! They’re super cute and easy to make (even for complete beginners). They’re adorable as standalone decor (I placed them on my entertainment system for a few days and they were so cute!) BUT my true goal in making them was to add them to my Christmas Village House wreath (aka the Anthropologie Wreath Dupe everyone’s been making… the darn thing is $200 so I’m making my own for $20!).
The best part of this entire project? While I was scouring the internet for a silicone house mold for my wreath dupe my Mom was on a cruise in Spain and called to tell me she bought me a silicone house mold from El Corte Ingles. It’s like we have one brain… she had no knowledge of the wreath or my plans so it was a complete surprise.
Either way we’re going to worry about the wreath in a later post… today we’re just making the adorable houses!
Let’s get started!
Supplies:
- Thickset Deep Pour Epoxy
- Silicone Christmas Tree Mold
- Respirator/Mask (resin graded filters)
- Gloves
- Wagner HT400 Heat Gun
- Freezer Paper
- Silicone Mat
- Baking Pan
- Heart Shaped Silicone Mixing Cup
- Small Mixing Cups
- Silicone Measuring Cup/Larger Mixing Cups
- Reusable Silicone Stir Sticks
- Toothpicks
- Paper Towels
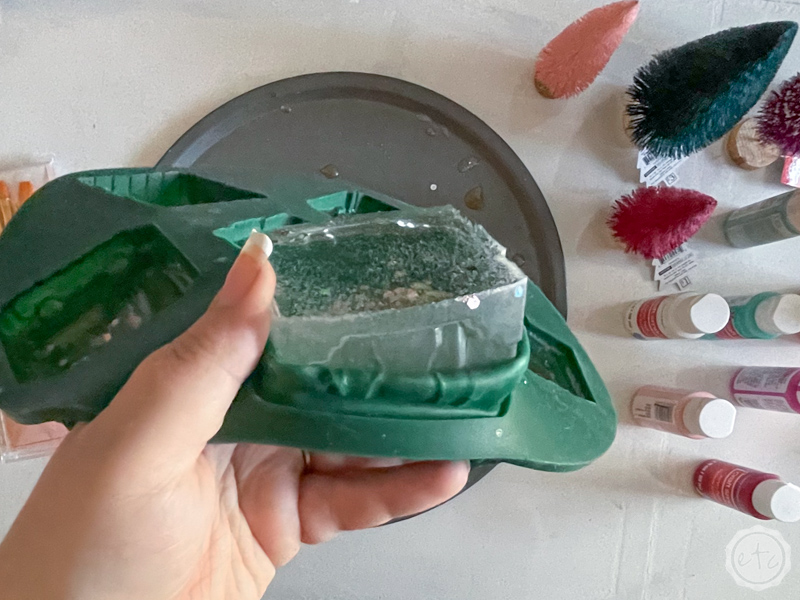
- Silicone Gingerbread House Mold
- Pink Chunky Glitter
- Rose Gold Chunky Glitter
Just getting started with resin? Download my free resin supply list and make your first project today!

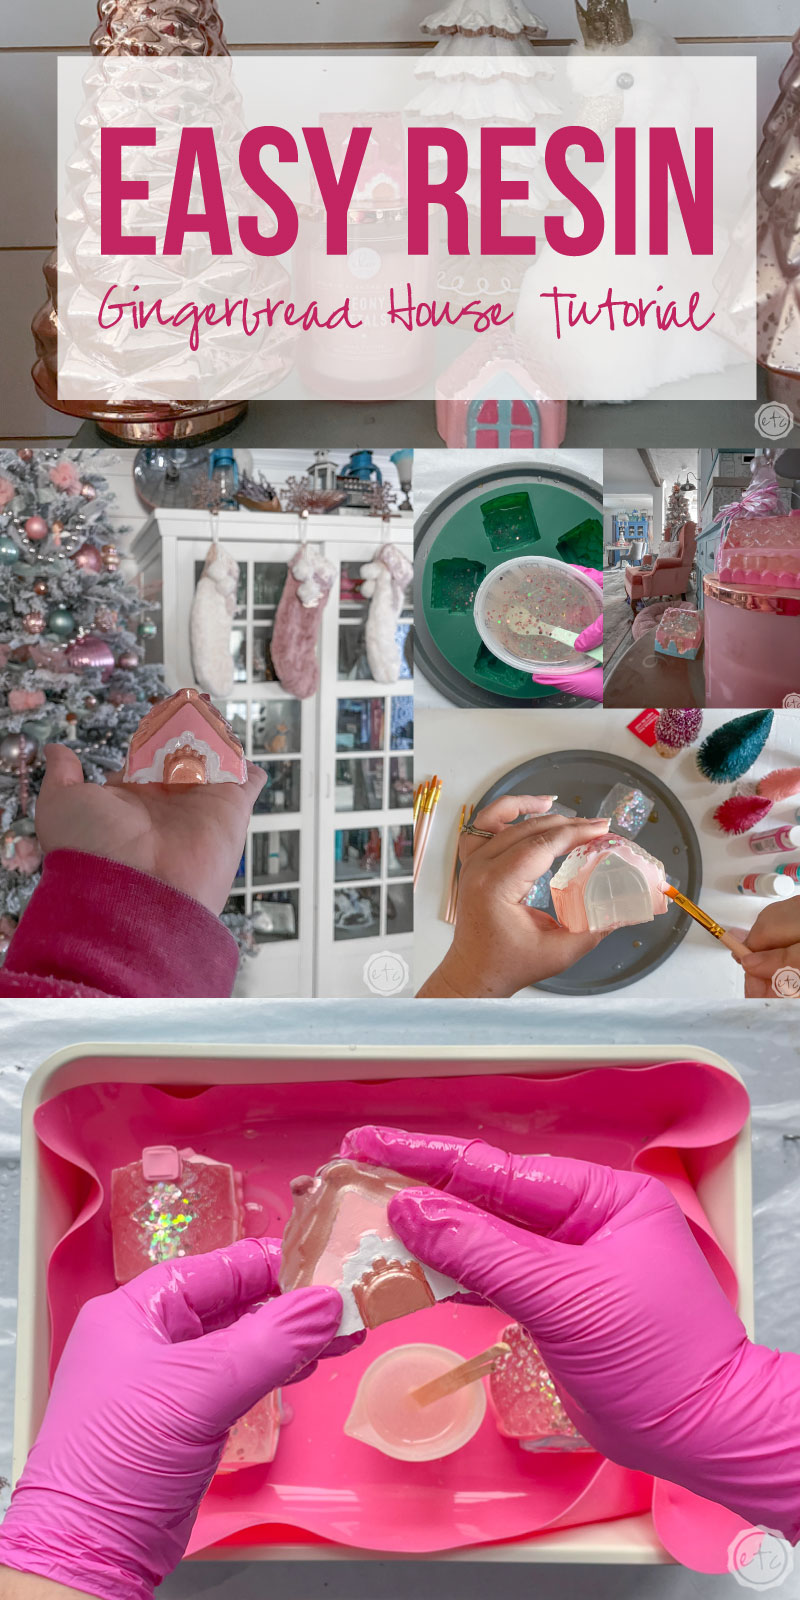
Step 1: Mix Your Resin
Alright y’all let’s jump right into this little project… the mold itself stands up fairly well so I placed it on a tray and lined my table with freezer paper (to protect my workspace) then a set of gloves and a respirator (to protect my face) and we’re good to go! Since each of these little houses is quite chunky I decided to use thickset epoxy which is perfect for deep pours.
I prefer it for any project where the pour is 2-3 inches deep as it prevents bubbles and can be poured in one go. If you try to pour a regular epoxy (like Makerpoxy) 2-3 inches deep in one go it will overheat and warp… it’s not meant for a deep pour. Of course, you can fix that by pouring your Makerpoxy in 2-3 smaller layers but for the sake of time I’m using Thickset epoxy which we can pour in one go.
Much easier!
Each house takes about 200ml of resin so depending on how many houses you want to make you’ll need quite a bit of resin. I started by mixing about 450ml and had enough for 2.5 houses. If you want to make the entire mold (all 6 houses) I would mix about 700ml. That way you know you’ll be able to fill each mold all the way to the top.
Thickset epoxy is a 3:1 ratio. Which means we need 3 parts of A for every 1 of part B. These are equal parts so 3 ml of part A for every 1 ml of part B.
So if we need 400 ml we’ll pour 300 part A and 100 part B.
Luckily the math is not that hard… but if you want to simplify it you can use pumps like I do. They’re already set for the 3:1 ratio so instead of 3 pumps of A for every one pump of B you’ll pump A once and B once… the pumps themselves will measure everything equally. Which is killer.
Go ahead and pump resin into your first mixing cup (one pump of a and one pump of b… if you have the 3:1 ratio pumps) and then use a silicone stir stick to mix everything for 3 minutes. Then transfer the entire mixture to a new cup and mix for an additional 3 minutes. The Thickset epoxy will give you these directions right on the side of the bottle so if you’re ever confused on what to do for a new type of resin don’t worry… the instructions are right there.
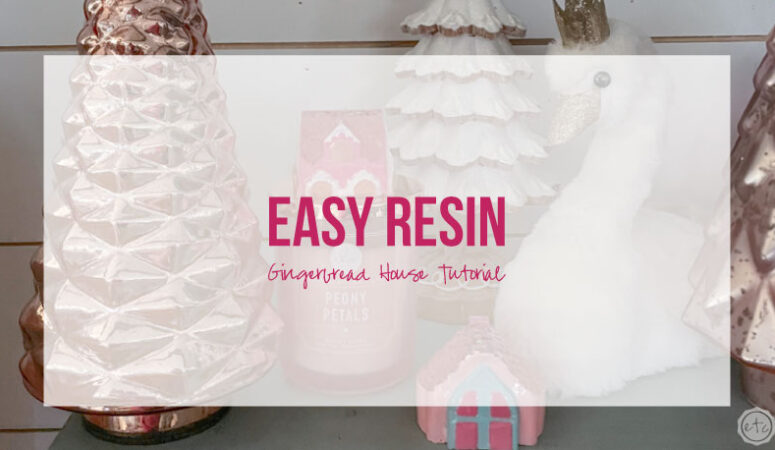
From here you can stick with the clear resin or add a bit of sparkle… I added light pink glitter (both fine and chunky) as well a chunky rose gold glitter to my resin for a sparkly effect. The glitter will settle down onto the roofs of the houses which is perfect for the snowy peak look I’m going for. If you don’t want to paint all the details of your houses you could make them a solid color but I want to see the details. The doors, the windows, the shutters! So once these babies are cured we’ll paint all the details of our gingerbread houses and seal them with a clear coat.

Bonus Tip: If you’ve never mixed resin before it’s not nearly as intimidating as you’d think! I’ll walk you through all the steps here in my How to Mix Resin for Beginners Tutorial.
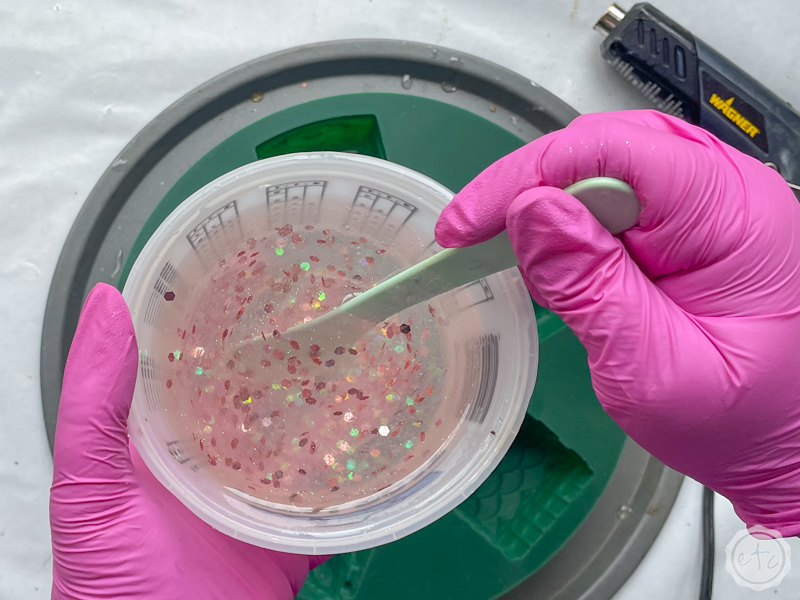

Step 2: Pour your Resin
Perfect! Now that we’ve gotten through the longest resin mixing explanation ever let’s pour our resin into the molds! The thickset epoxy will eliminate most of the bubbles but we still want to prevent as many bubbles as possible.
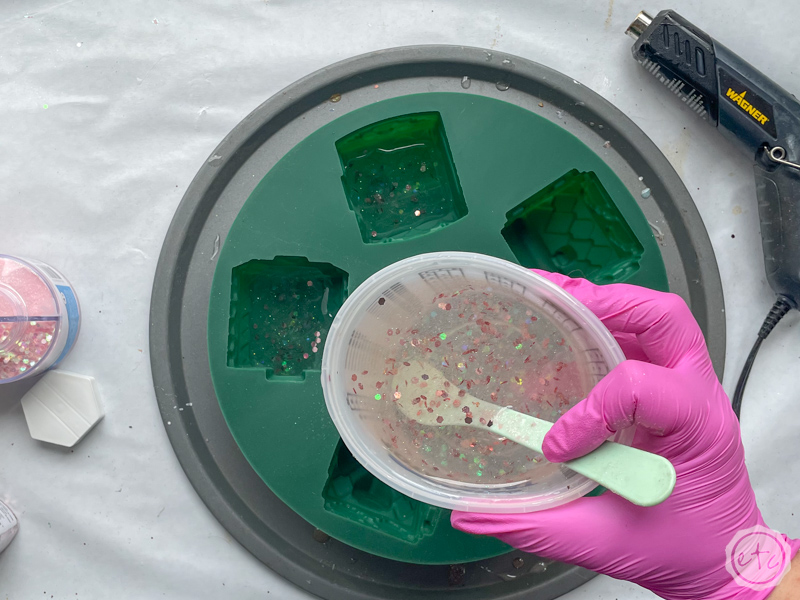
So go ahead and pour your resin in a thin stream from high up… this will help bubbles from leaving the container and settling into your mold.
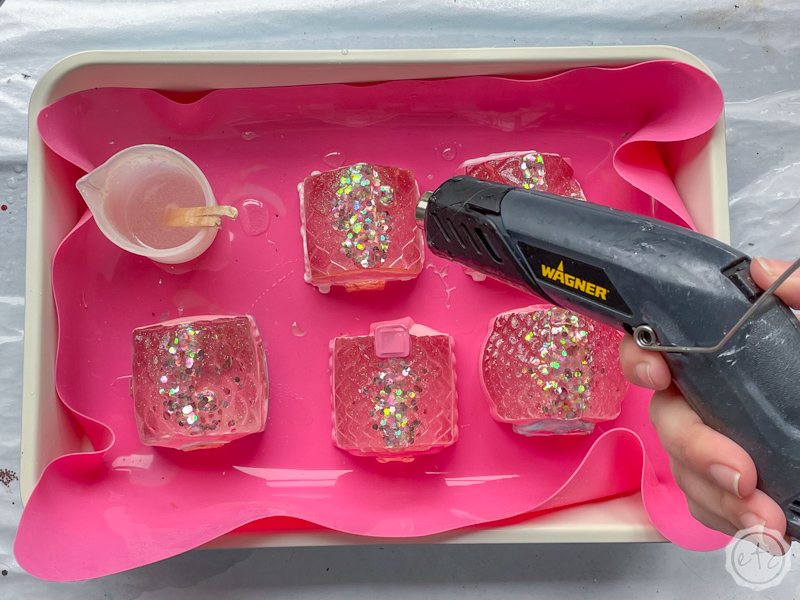
I also like to fill my molds in layers… fill the mold about 1/3 deep and then use your heat gun to pop any bubbles that have risen to the surface! Make sure you’re using a heat gun and not a torch as a torch can melt the silicone and you’re good to go… pour, pop, repeat!
Once you’ve filled your mold allllll the way to the tippy top you can set it aside for 24-48 hours to cure (this deep pour epoxy does take longer to cure than standard 1:1 epoxy). Which means it stays liquid longer… I do bring all of my pieces inside a temperature controlled room to cure but I didn’t want to carry a heavy, 700ml of liquid resin tray inside immediately so I placed a paper bag over the top (to prevent dust, leaves… small bugs… from landing in my curing resin) and left it for a few hours. Then once it wasn’t as liquid I moved everything inside (placed it behind a closed door) and left it to cure.

Step 3: Un-Mold your Resin Pieces
Ready for the fun part!! Taking all our little village houses out of their molds!
This mold releases super easy but it’s still fun!
Start by peeling the silicone away from each resin piece… once you have enough space around your houses to grab the bottom you can pull them out of the mold and set them aside.
Easy peezy lemon squeezy!
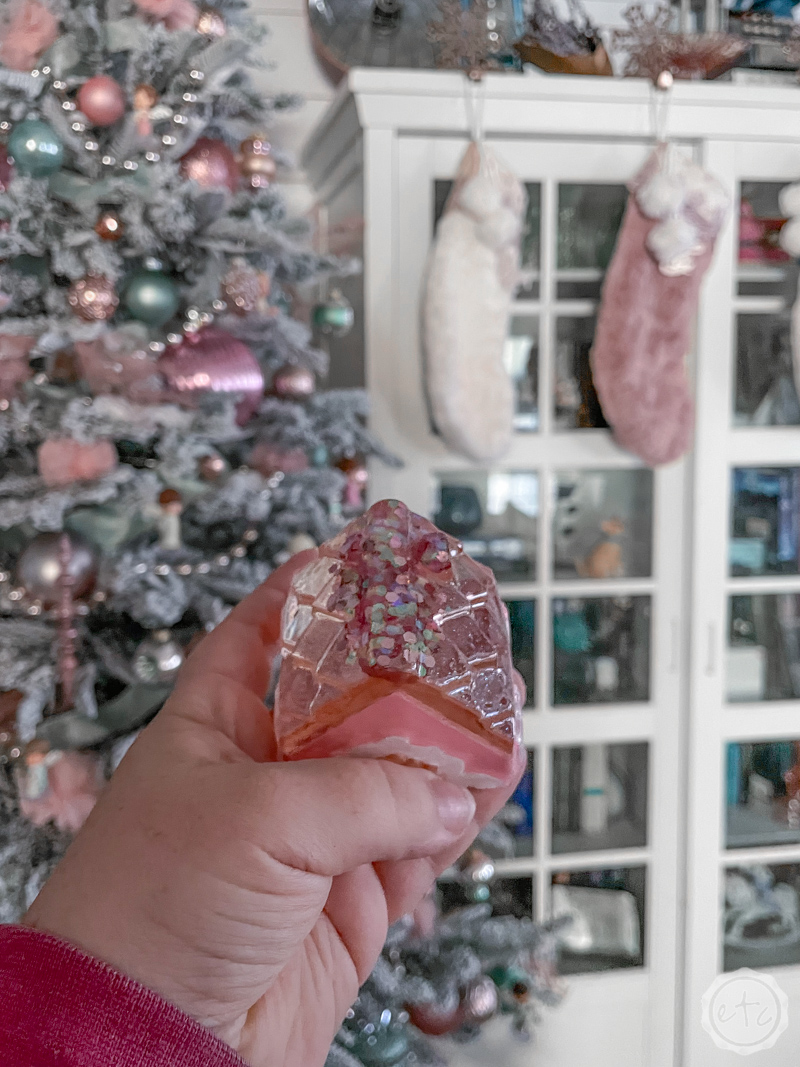
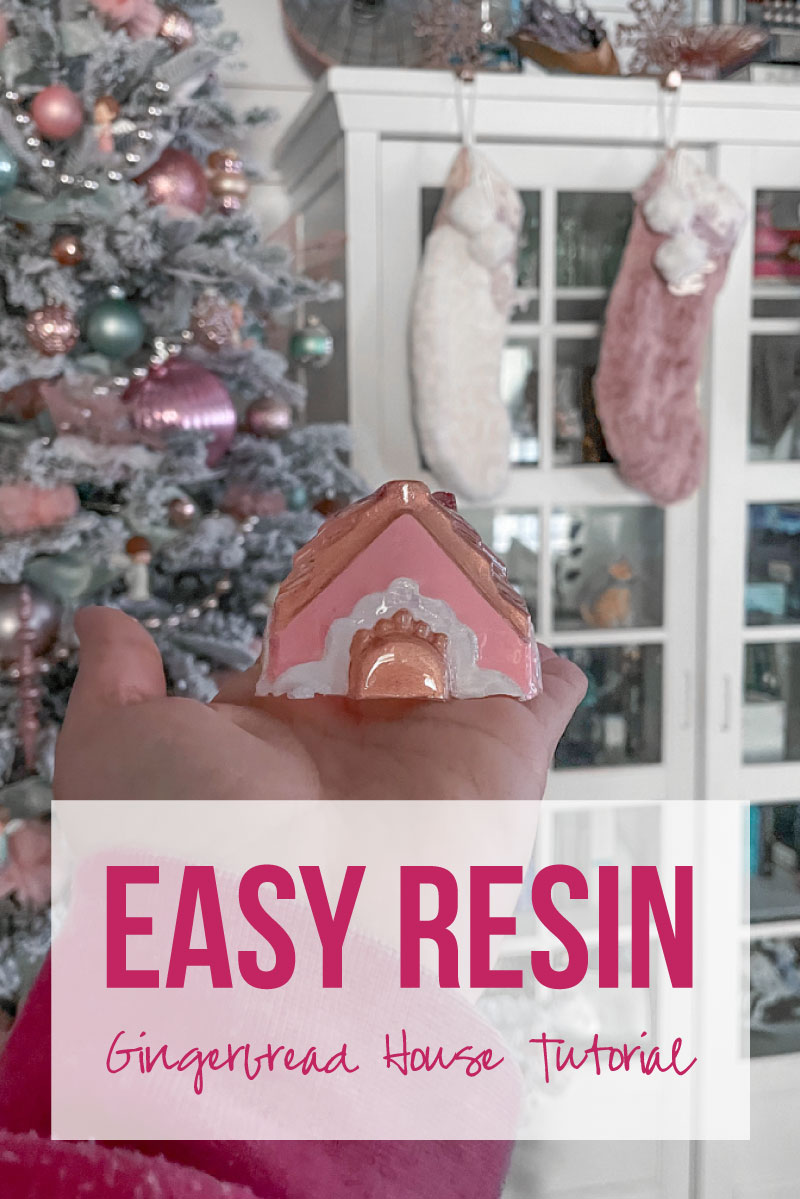
You can see that the finish on these babies is more mat or frosted than shiny, glossy resin… that’s because this mold is technically for baking or soap making. So it doesn’t have the glossy finish that leaves resin shiny. That’s ok. We’ll add a top coat to shiny everything up in a minute… we want that crystal clear finish so we can see our glitter roofs after all.
But first… paint!

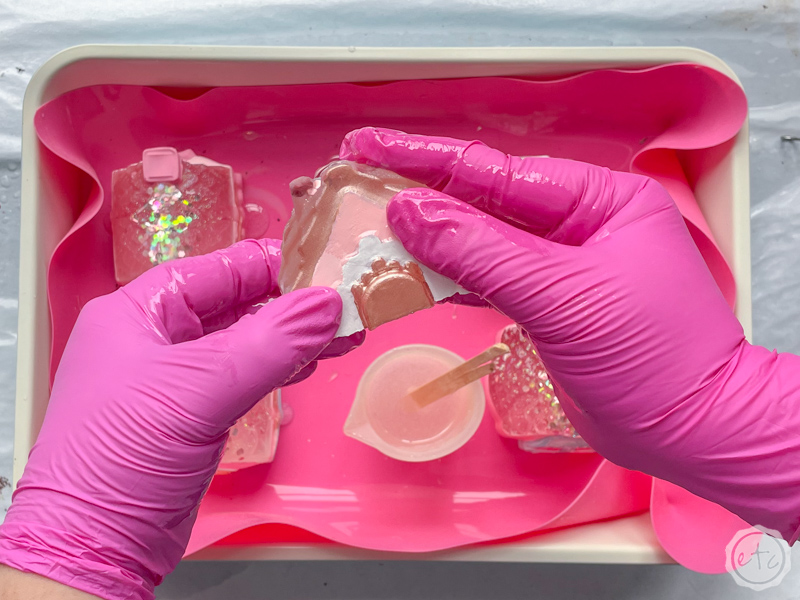
Step 4: Paint your Resin with 2-3 Layers of Paint
I’ll be honest… painting these babies is a little time consuming. You’ll need a few colors of acrylic paint, a few tiny paint brushes and lots of patience.
I watched so many episodes of the Rookie while painting these!
Luckily it’s not hard… just tedious.
Pick a color scheme and then start to paint the details. You’ll need a few layers (at least 2) before the paint will look fabulous and not streaky and translucent but it’s soooo worth it.
Of course, the best part about painting resin is that until you’ve added a clear coat it’s completely removable… so if you get paint where you don’t want it just grab a q-tip and some water and take it off. Easy peezy!
Once you’ve painted everything we’ll move on to a topcoat!

Step 5: Topcoat your Piece with a Thin Resin Layer
This is where the magic happens!
In order to seal in the paint and make the glitter roofs shine we need a thin resin layer over everything. I used Makerpoxy for this so it would cure faster but you can use Thickset if that’s what you have on hand. Go ahead and mix about 40ml (I ended up using 20 but it’s easier to have a bit too much than to run out).
Now add a bit of resin to each house and massage it in. You can use a stir stick or a paint brush (or a silicone brush) for this if you’re more comftorable but I find that a good pair of gloves is easiest. You can make sure every single nook and cranny is covered and it’s easy to spread the resin around with your fingers.
Just make sure to keep the resin away from your skin and to throw the gloves away as soon as you’re done. Then carefully hit each house with your heat gun to get rid of any texture (from your gloves) and smooth everything out… quickly though. Too much heat and the resin will slide right off those houses.
A quick pass is all you need!
Then set the houses aside to cure!
You may notice the silicone mat I’m using for this step… resin doesn’t stick to silicone so you’ll be able to pick the houses up super easy once they’re cured. If you use paper or a tray the resin will glue itself to whatever it’s on and you may have to sand/cut it off. The silicone mat is so. much. easier.
Step 6: Enjoy!
Volia!
Now you’re done!
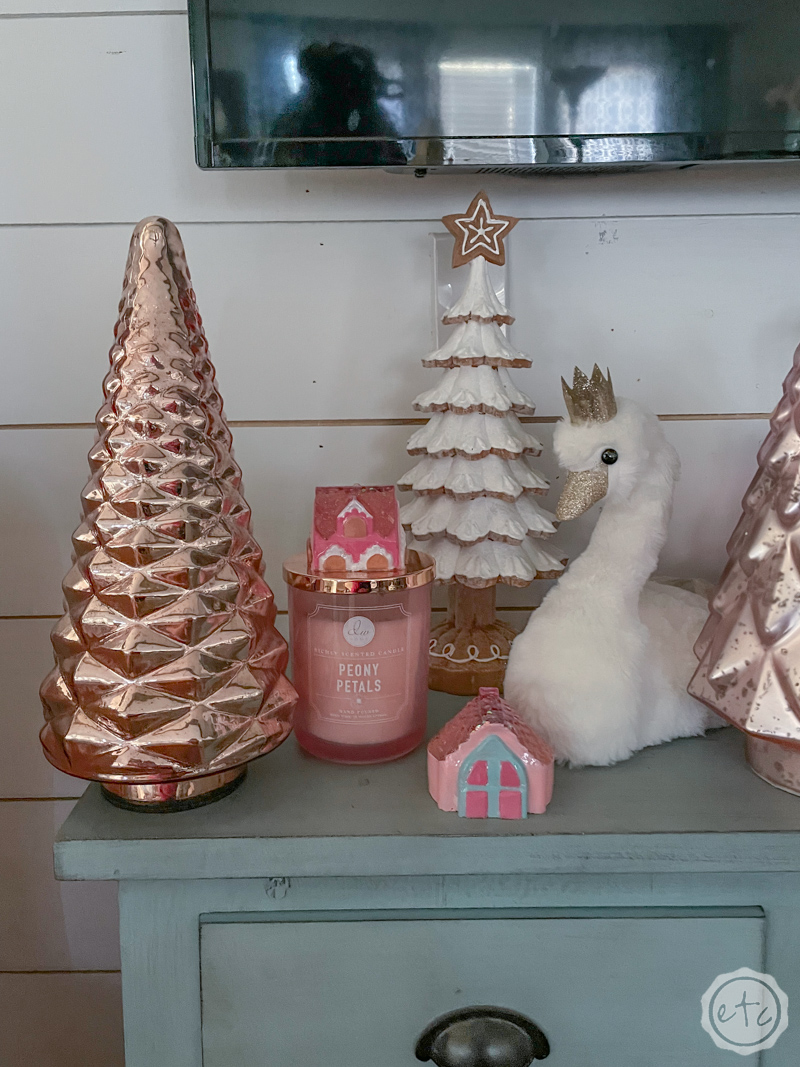
They turned out soooo cute! I love the glitter roofs and all the details! I can’t WAIT TO FOR YOU TO SEE how they turned out on my Anthropologie Dupe Wreath… it’s so cute!
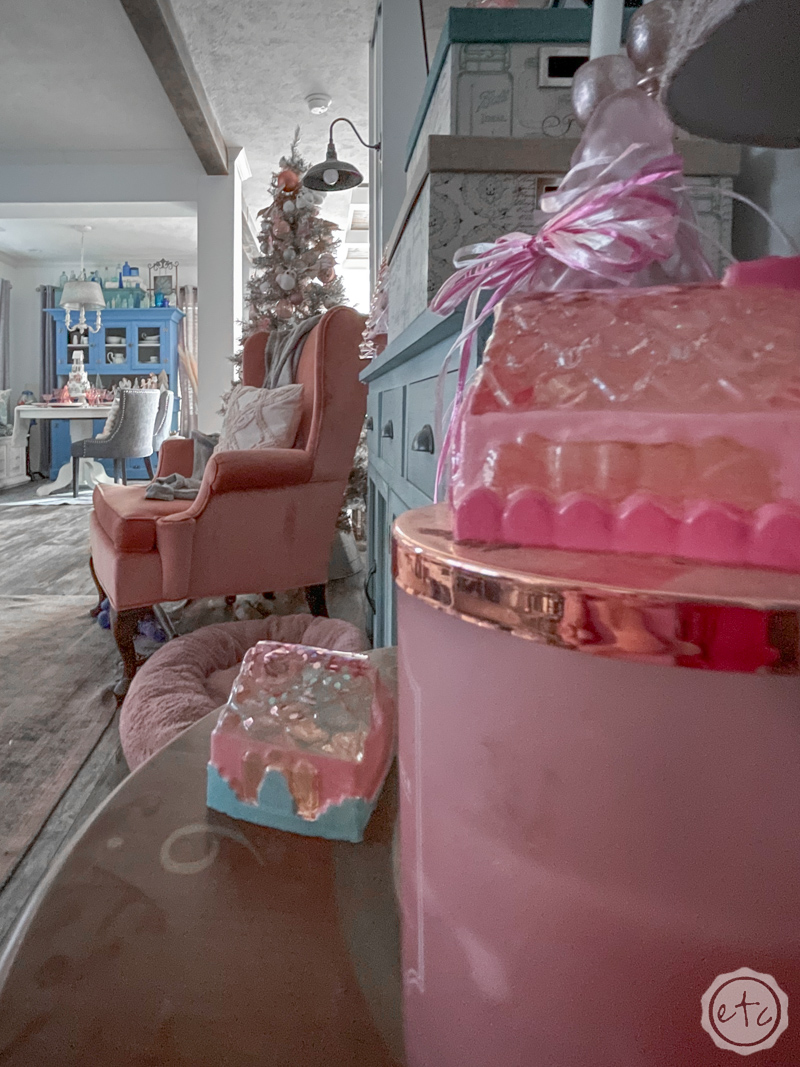
In the meantime here they are by themselves. They look so cute with the little resin gnomes I made last year!
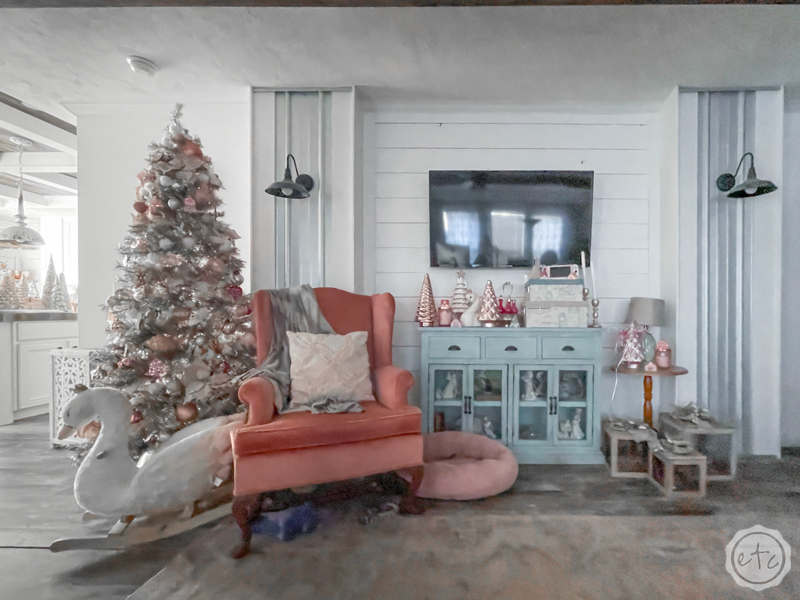
Of course, if you want to check out the rest of the room you can head over to my 2022 Christmas Home Tour… I’ll see you there!


Looking for more resin projects? I’ve got you covered!


Leave a Reply