


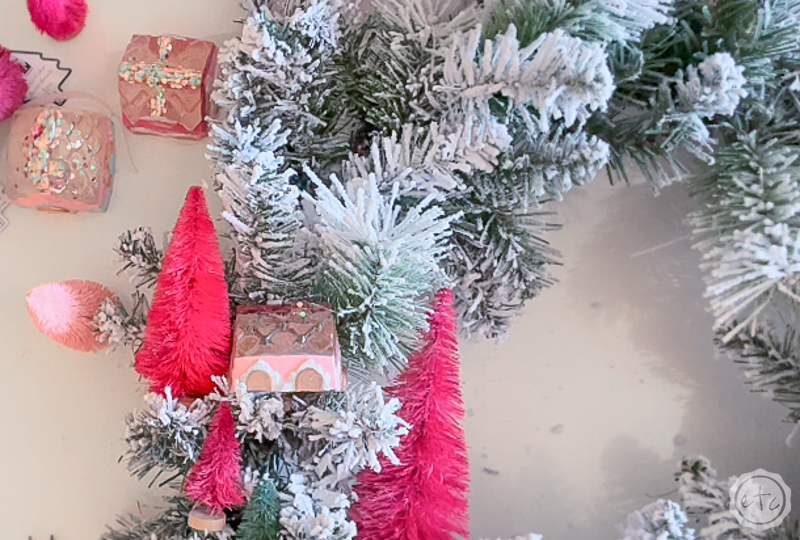
Every so often something hits the stores that you just fall in love with BUT you don’t quite… fall in love with the price tag. That’s what happened for a lot of us this season when Antropologies Christmas Village Wreath hit the shelves with a $200 price tag. It’s sooo cute with the little gingerbread houses and bottle brush trees but y’all… I am not paying that kind of money when I know I can make it for less.
So I set out to whip up an entire set of adorable resin village houses (follow the complete tutorial for the resin gingerbread houses here if you’d like to used them as well) and then it was as easy as grabbing a wreath form and a few trees.
Go ahead and grab all your supplies… then we’ll get started putting this baby together!
Supplies:
- Resin Gingerbread Houses
- Bottle Brush Trees
- Flocked Wreath (I found mine at Wal-Mart but they’re out of stock now)
- Jewelry Wire
- Jewelry Pliers
- Glue Dots

Love the wreath? Check out the video tutorial!

STEP 1: Glue Wire to your Gingerbread Houses
I struggled with this step… first of all the houses are heavy and need to be securely fastened. BUT I don’t want them to be permantly attached to the wreath in case I want to take them off and use them for something else in the future (not as likely now that I see how cute the wreath is!).
So I ended up using floral/jewelry wire and glue dots (which I knew would come off the resin if need be). If I wanted this to be more stable… I would use hot glue or uv resin to secure the wire to the gingerbread houses.
Either way your first step is to cut a length of wire and glue it to the back of your gingerbread house.


Step 2: Attach your Houses to your Wreath
Now that our wire is secured let’s go ahead and add our first house to the wreath! Go ahead and spread the branches of your wreath so that you can nestle the house all the way to the back of the wreath form.
Then wrap the wire around the wreath form and secure it in the back.
At this point the house is on the wreath but it’s not very sturdy. It’s actually kind of floppy.
I fixed this by cutting a longer piece of floral/jewelry wire and wrapping it all the way around the house and a few nearby branches. Not only does this help the house to blend into the branches but it sandwiches the house into the wreath so that it’s stable and unable to flop around (or fall off).
You can see from the photo below that if you wrap the wire far enough back on the branches it is only mildly noticeable from the underside… you can’t see it from the front of the wreath at all. The wire should be hidden on the top, side and bottom by the branches… but one side will be exposed as you need a place to twist the wires shut.
That’s ok.
Twist the wires shut and then place a tree directly next to your house… now twist the wires around the tree to secure it to the house.
Volia!
Tree and house are all snuggled up tight to your wreath!


Step 3: Add the Rest of the Trees (and Resin Houses!)
Now all you need to do is keep going! I placed all five of my houses first and secured them. Then I added the rest of the trees… placing them and making sure I liked how they looked before securing them with floral wire.
Once everything is attached you can stand up your wreath and make sure nothing moves… if something does move in the new vertical position then go ahead and fix it now before you hang it up.
We DO NOT need a resin house falling to the floor from our wreath and being found by a pet or child. Remember resin is toxic and you don’t want little hands (or paws) helping themselves to a resin snack. If you’re not confident in your pieces being secure then forgo the resin for a cardboard house instead.
Cardboard is much safer than resin!
Once everything is safe and secure you’re good to go! You can hang your wreath on the front door but I wanted mine on my stove hood in the kitchen. It looks so cute behind the Christmas forest on my island.
There are resin trees in my DIY Snow Globes after all… and the mercury trees are always my favorite part of my Christmas Home Tour! Check it out!


Leave a Reply