• House Tour
    • Reveals
  • About
    • Smith Life
    • Disclosure and Privacy Policy
      • Terms and Conditions
      • Store Affiliates
  • Contact Me
    • Want a Button?
  • Shop
    • Floral Printable Planners
    • Paint eBooks and Packages
    • Wedding Binders & Extra Printables!
    • Planner Bundles
    • Planner Accessories
    • Home Decor Printables!
    • Cart
    • Bloglovin
    • Facebook
    • Instagram
    • Pinterest
    • Twitter
    • YouTube

Happily Ever After, Etc.

Creating Our Own Fairytale

  • Happily Ever After, Etc.
  • Home
  • Home Decor
    • My Home
    • Paint
    • Before and After
    • Tablescapes
    • Mood Boards
    • Furniture
  • DIY & Crafts
    • New to Cricut – Start Here
    • Cricut Projects
    • Resin
    • Scrapbooking
  • Organization & Planning
    • Cricut
    • Organization
    • Planner
  • Wedding
    • Cricut Wedding Projects
    • Free Wedding Binder
    • Bride Bag- The Ultimate Wedding Planner

3 Alcohol Ink Techniques for Working with Resin

Hey y'all,

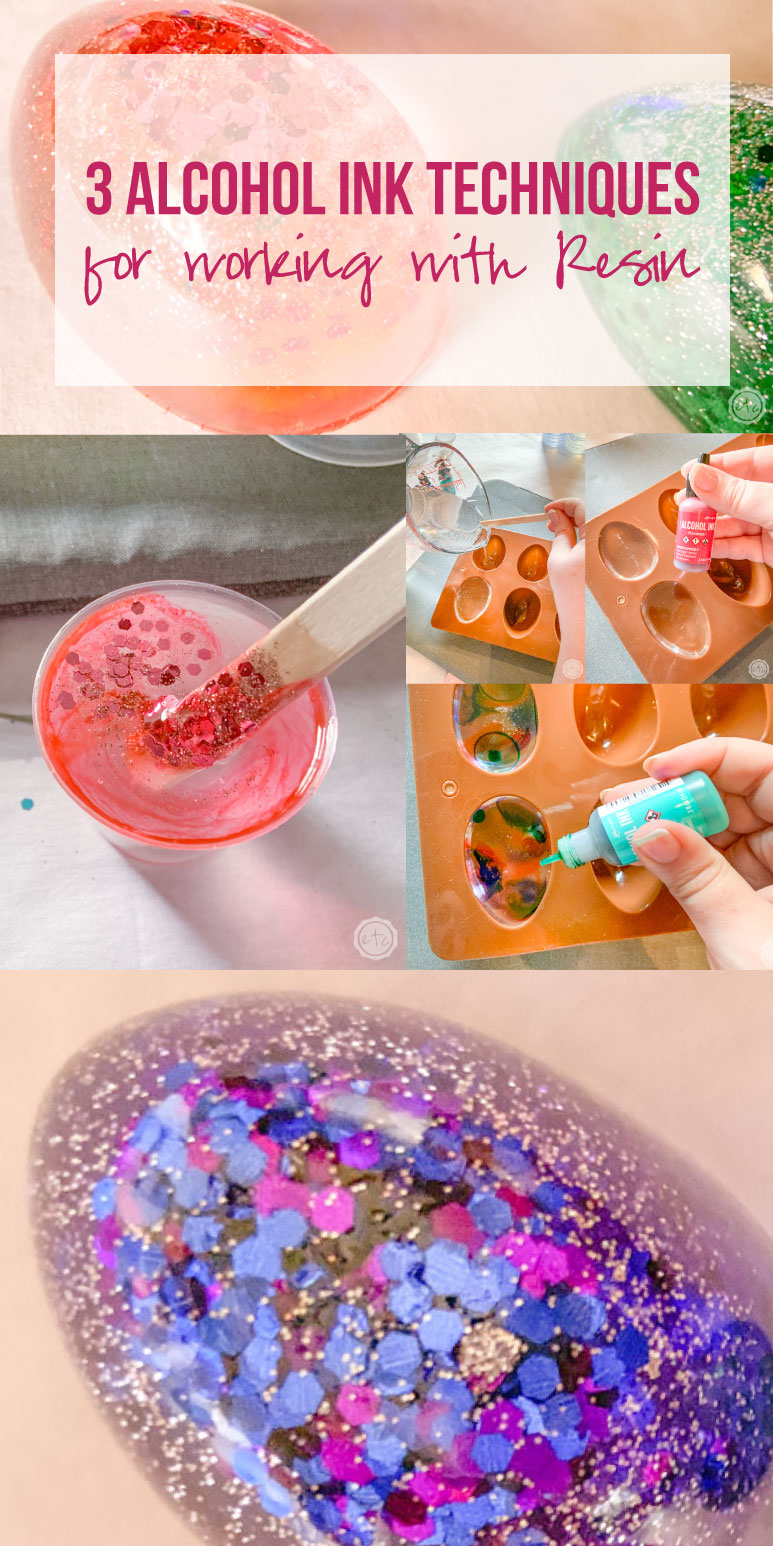
With all of the fun resin projects popping up you’re sure to have seen a few alcohol ink masterpieces by now. Of course, there are a million ways to combine materials (which is half the fun… no two projects look alike!) so I thought I would share 3 different beginner level resin pours that you can do with resin and alcohol ink.

First we’re going to do a simple project where we mix 3 separate alcohol ink colors in a full mold of resin for a marbled effect, then we’ll add glitter to our mixture and make a few simple glitter dyed resin pieces, then we’ll finish strong with a showstopper: alcohol ink mixed with white ink that looks like a million cells.

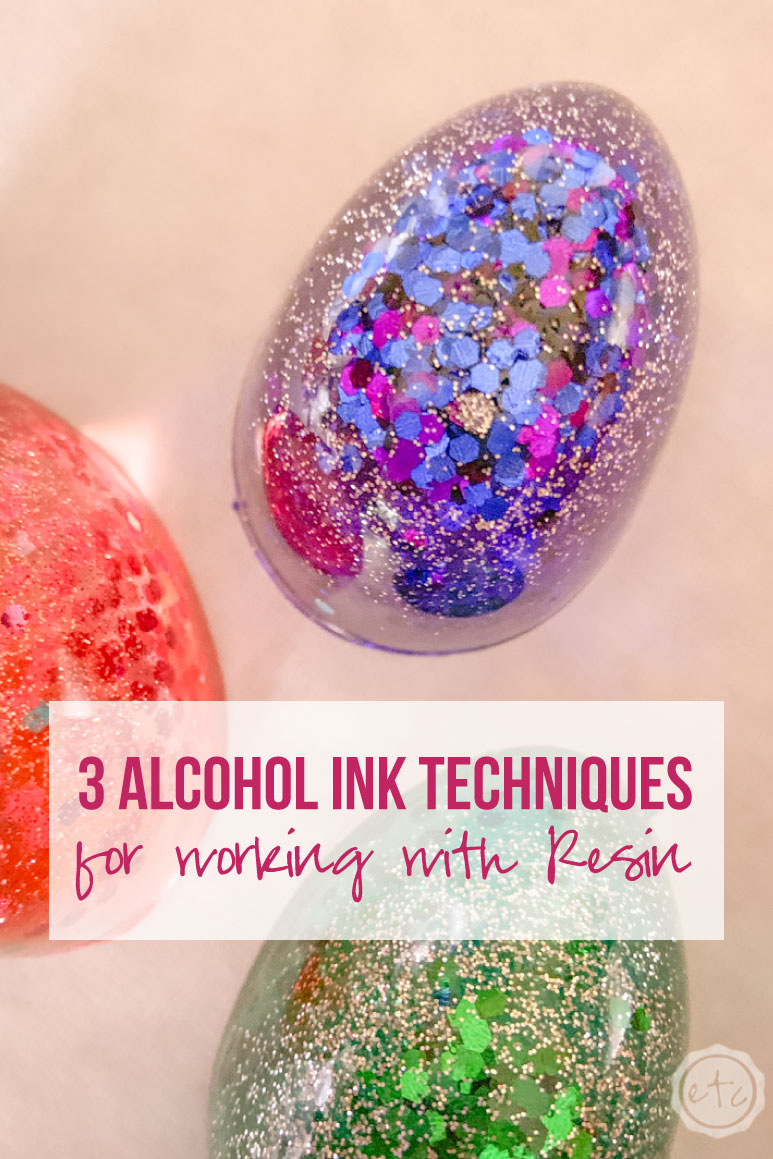
You can use all 3 of these techniques with any resin project however I used them to make a few adorable Easter Eggs for my Easter table. Check out the other resin Easter Eggs I whipped up HERE.

Or check out my Vintage Easter Tablescape (featuring these little Easter eggs!) HERE.

Ready to get started?

Supplies:

  • Amazing Clear Cast Resin
  • Respirator/Mask
  • Gloves
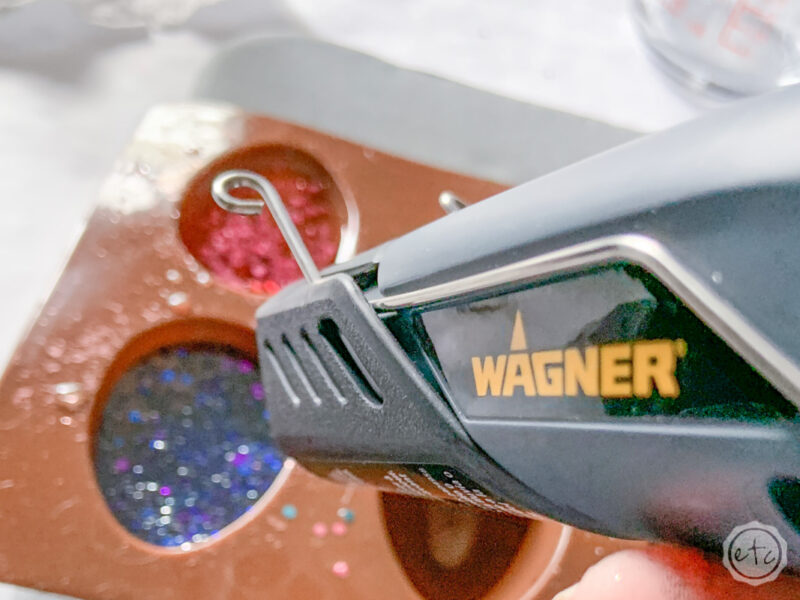
  • Wagner HT400 Heat Gun
  • Silicone Egg Mold
  • Freezer Paper
  • Small Mixing Cups
  • Silicone Measuring Cup/Larger Mixing Cups
  • Popsicle Sticks
  • Toothpicks
  • Plastic Spoons
  • Inclusions: Alcohol Ink, Fine Glitter, Chunky Glitter
Feeling a little intimidated by all the resin? Not sure what the heck inclusions are? Don’t know what to buy to get started with resin? This particular post will teach you everything you need to know about making resin Easter Eggs but if you want to go back to the beginning check out my Resin 101 Post. It’s a complete guide to getting started with all things resin.

How to Prepare Your Resin

Start by prepping your surface, cover the table you’re using with freezer paper and gather all of your supplies. Resin doesn’t give you a lot of wiggle room on the drying time so once you start you won’t want to dart off to the other room to grab glitter… get everything you’ll need now.

Then put on your respirator so you’re ready to rock.

Regardless of which technique you use you’ll need to mix a little resin! So here’s the 411:

Start by mixing your resin in a 1×1 ratio. Each egg takes about 35 ml of resin so you’ll need about 17.5 ml of part a and 17.5 ml of part b. Mix these together for 2 minutes to form your resin mixture.

Then you can either pour this resin directly into the mold or add your glitter/ink depending on which technique you’re working with.

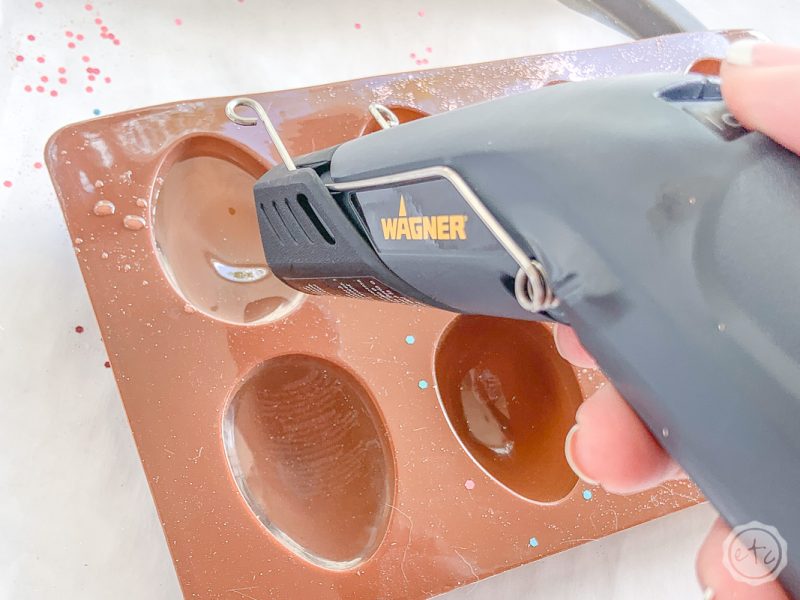
Once the resin is in the mold you can use your heat gun to pop all of the bubbles that rise to the surface… you want to pop all the bubbles in the resin so that you have a crystal clear finish.

Beautiful darling!

Need a little help? Start at the beginning with my easy how to mix resin tutorial!

This amazing clear cast resin has a 30 minute dry time and a 24-48 hour cure time so if you’re doing multiple layers make sure to wait 30 minutes in between and you’ll need at least 24 hours before you take your pieces out of their molds.

Now that we understand the basics of our resin are you ready to get started with the techniques?

Project 1: Mixed Alcohol Ink

This little technique is probably the easiest (although honestly all 3 are pretty easy!). You’ll start by filling your the mold space completely with resin.

Just make sure not to overflow the mold!

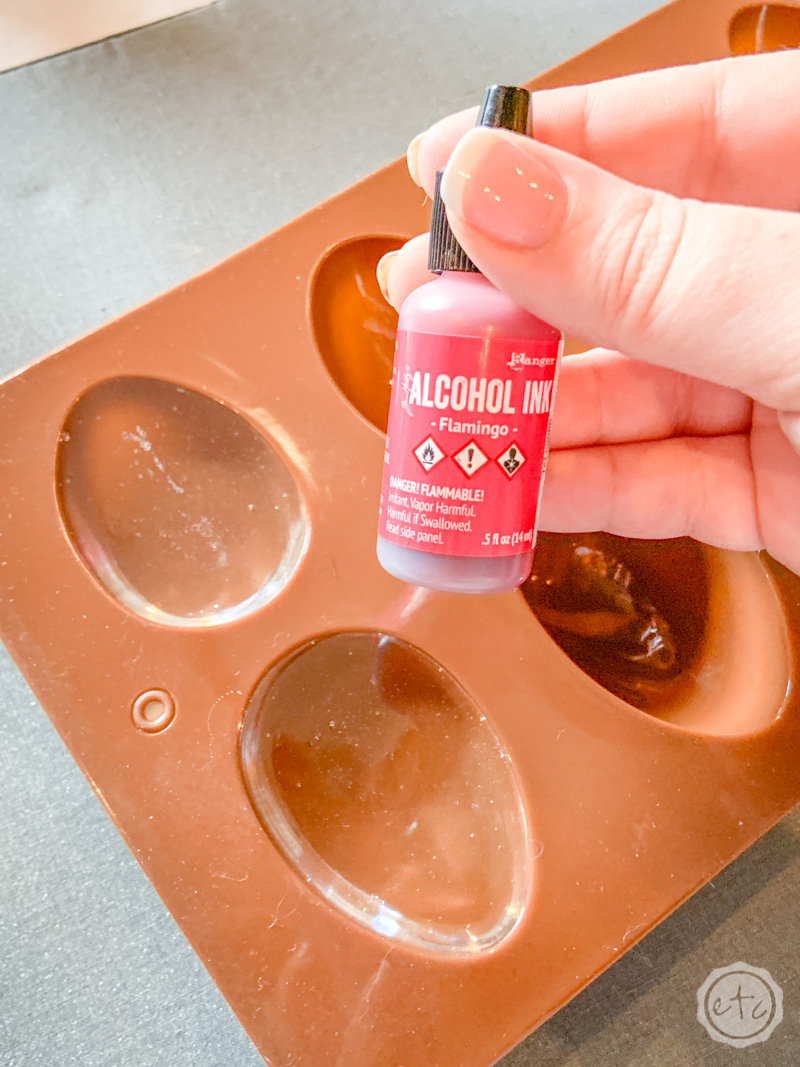
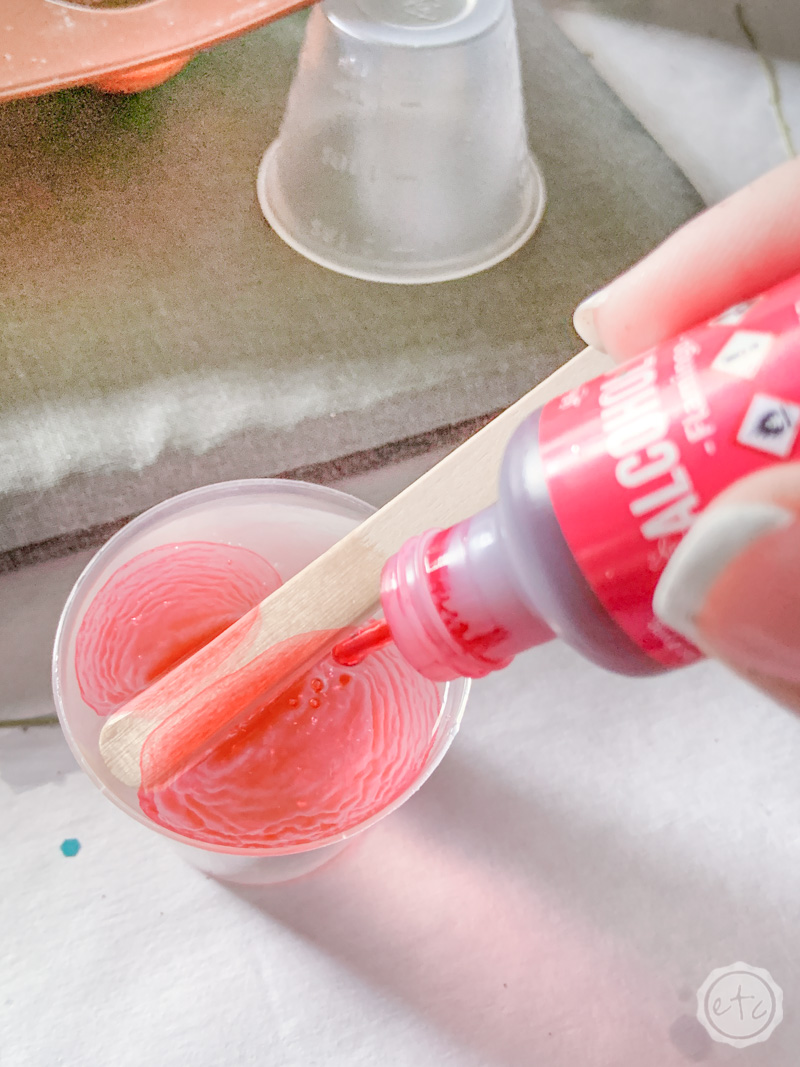
Now grab your alcohol ink and pick your first color. I went with the pink ’cause it’s my favorite.

Go ahead and drop 3-4 drops in the resin and watch the color spread out.

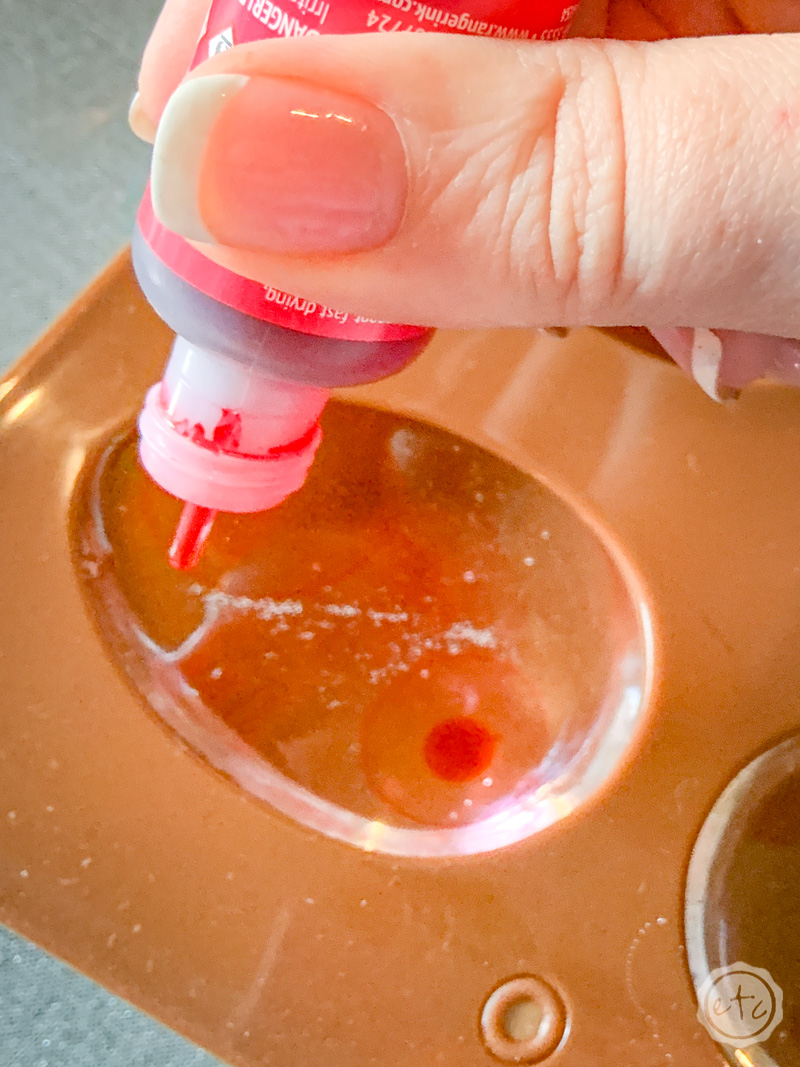
Ready for step 2? Pick a different color (the blue) and add 3 to 4 drops. Try not to overlap directly but the outsides of each drop will start to mingle, swirl.

Since I’m using a set of 3 alcohol inks that are designed to go together I don’t have too worry too much about color contamination but if you have lots of colors to choose from make sure to pick 3 that won’t get muddy when they mix.

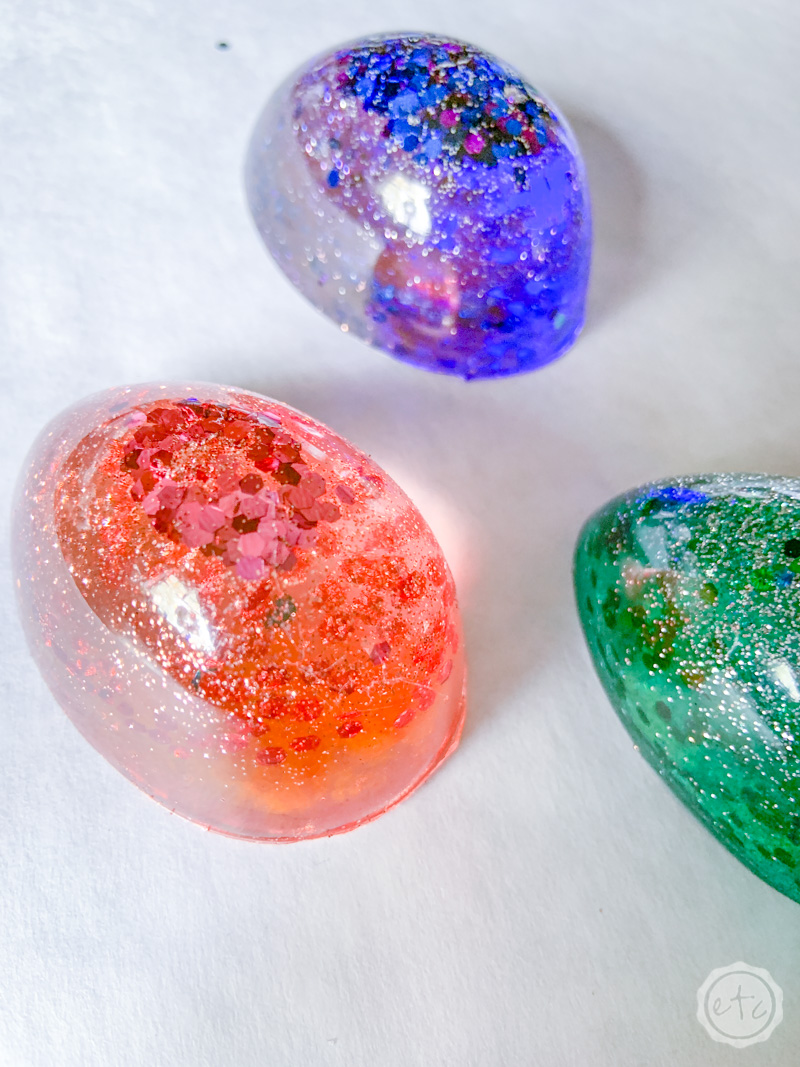
Now add the 3rd color… and watch the colors start to mix! You’ll get a beautiful marbling that is stunning in the finished product.

Project 2: Glitter Alcohol Ink

This technique reminds me of all the fun projects I did as a little girl… maybe it’s the glitter but I absolutely love how they turned out!

Plus they are soooooo simple to make.

For these little eggs we’re going to take one cup of resin, add 3-4 drops of resin and a bit of glitter. I like to add a fine glitter as well as a chunky glitter so that there’s a bit of difference between them.

Go ahead and add these directly to the cup and them mix them in…

Once the glitter, alcohol ink and resin are thoroughly mixed go ahead and pour the mixture directly into the mold.

That’s it!

Go ahead and pop all the bubbles with your heat gun (the bubbles are a bit harder to see with all of the glitter but I promise they’re still there. Just heat up the resin in passes for about 10 seconds to get them all).

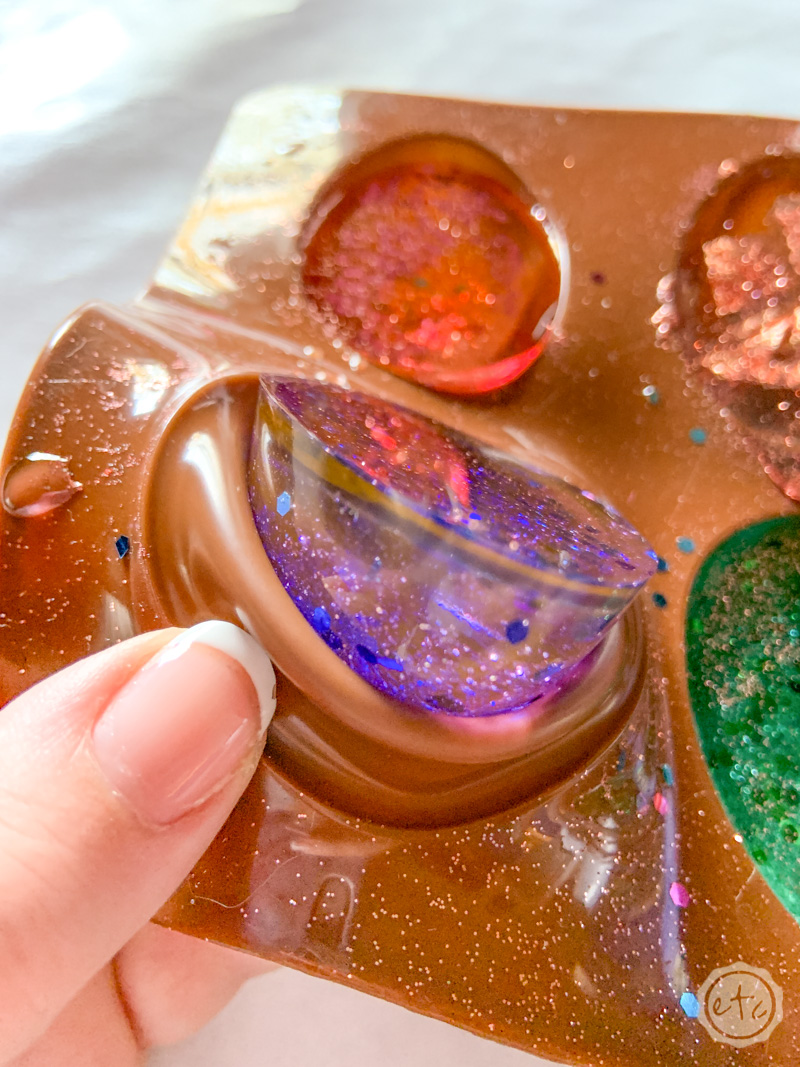
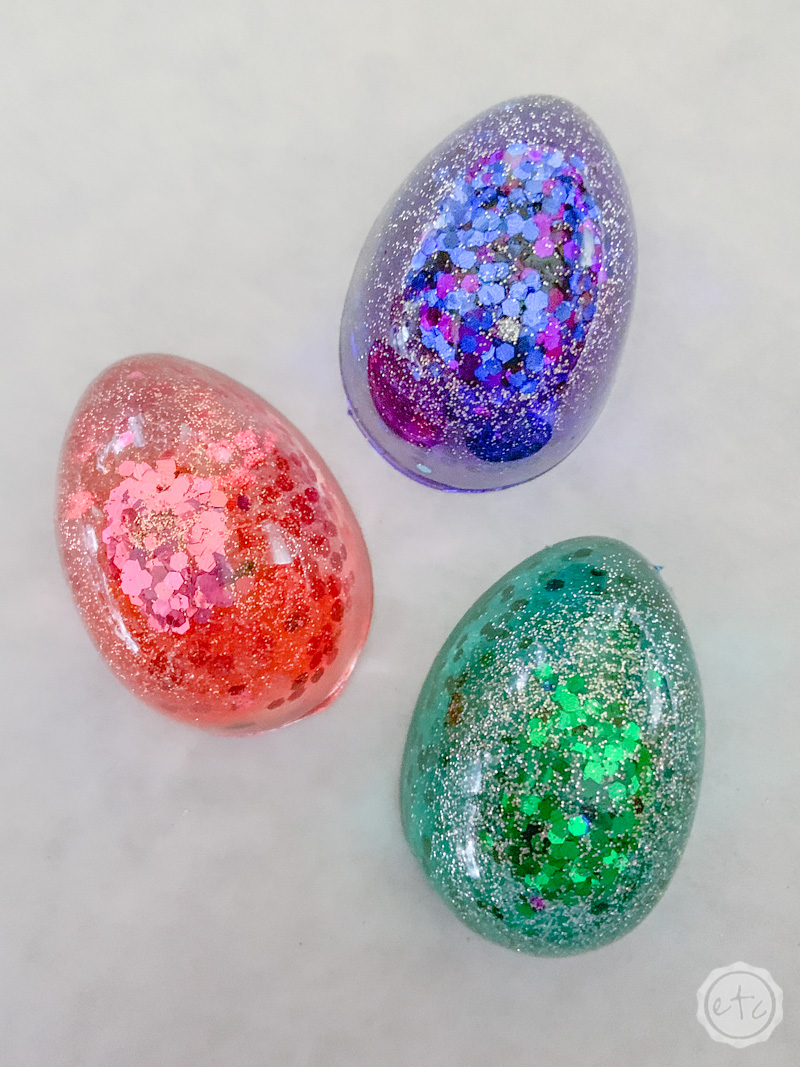
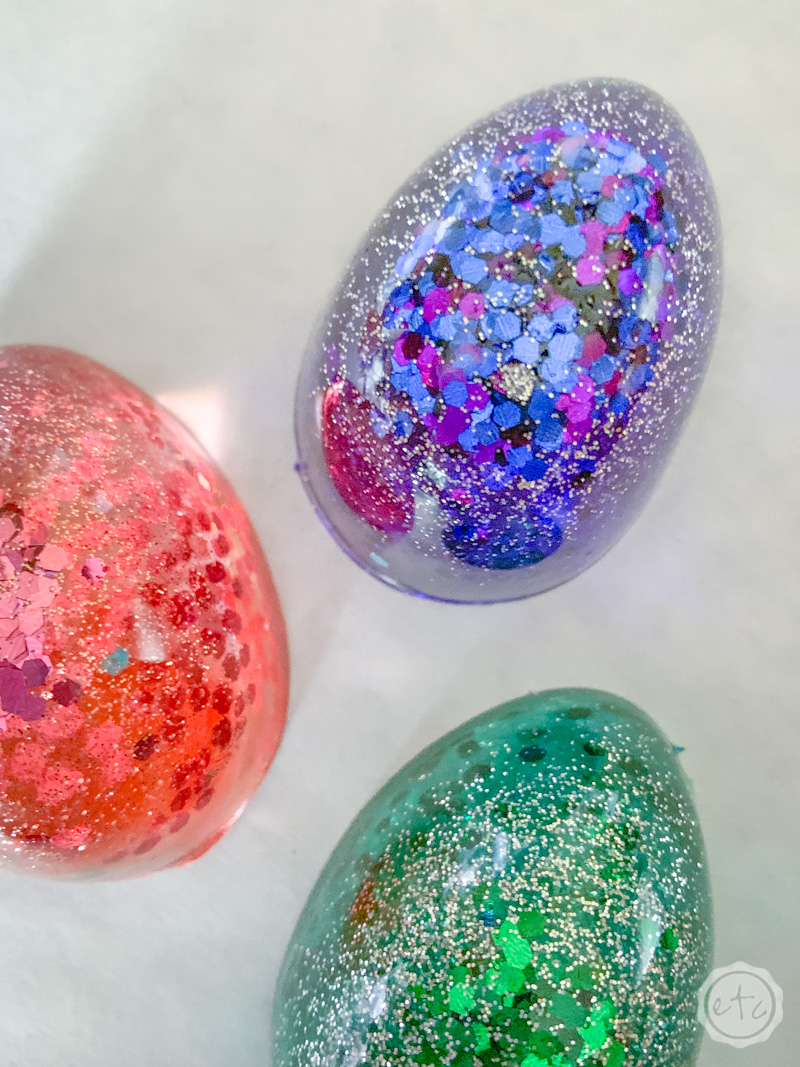
I went ahead and made 3 different eggs with this technique… one with the pink alcohol ink, one with the blue and one with the green. I used coordinating glitter in each so they would match.

Don’t they look amazing?

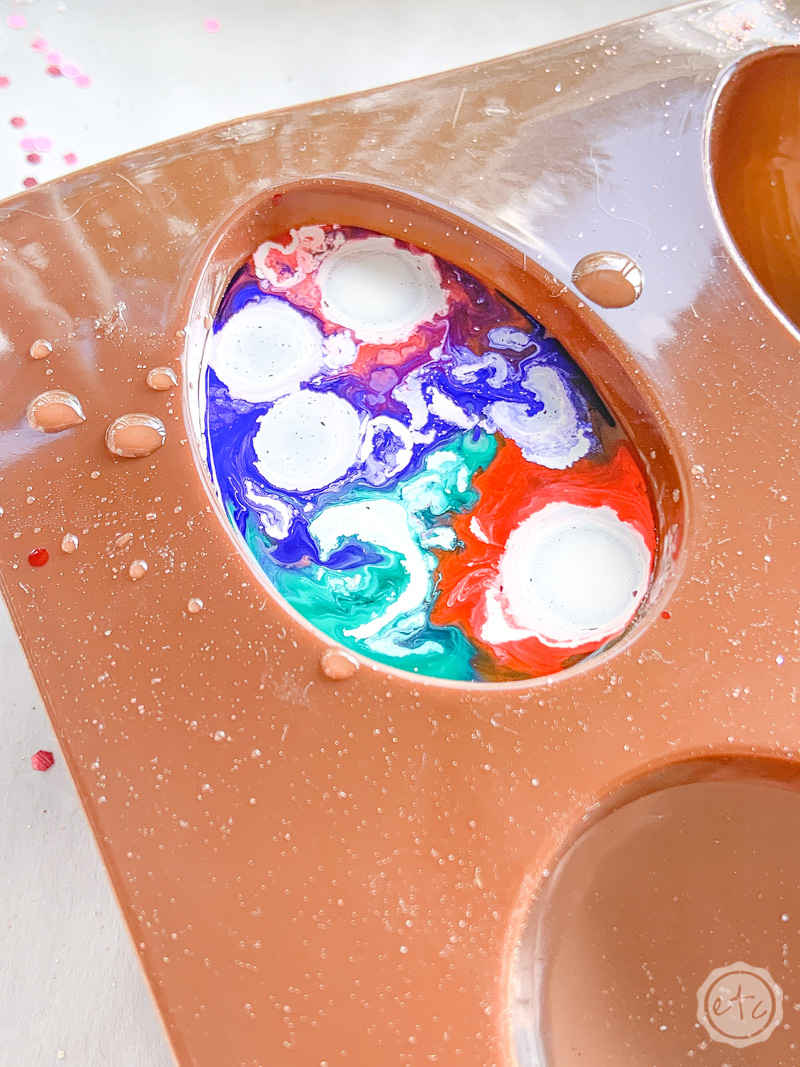
Project 3: White Alcohol Ink

Ready for technique number three?

This little project is pretty close to technique number one… with one small change: white alcohol ink.

Go ahead and mix your resin, pour it into the mold and pop all the bubbles with your heat gun!

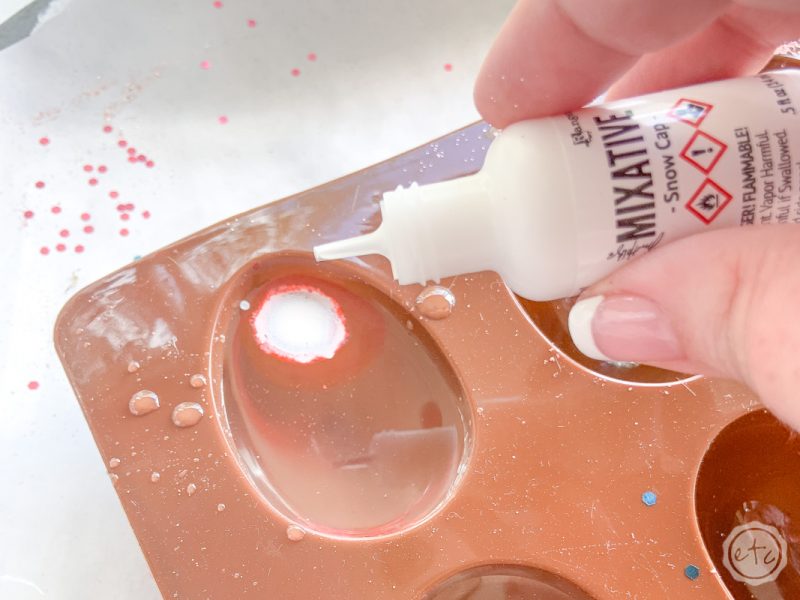
Now we’re ready for the alcohol ink. Go ahead and drop in your first color (I started with the pink) and then place a drop of while on top of the pink. Keep doing this until you’ve built up about 6 layers of color (6 pink and 6 white)… going back and forth.

Pink, white, pink, white, pink, white repeat!

The white will help the alcohol ink mix and react in the resin. (These eggs are pretty deep… you get even cooler reactions in a shallow mold)

Once you’ve done the pink add a new color next to it… all the way around the egg until you’re done! Now you can leave the egg as it is or take a toothpick and swirl the colors a bit… just make sure not to mix the colors so much they turn brown.

We’re swirling… not mixing cake batter!

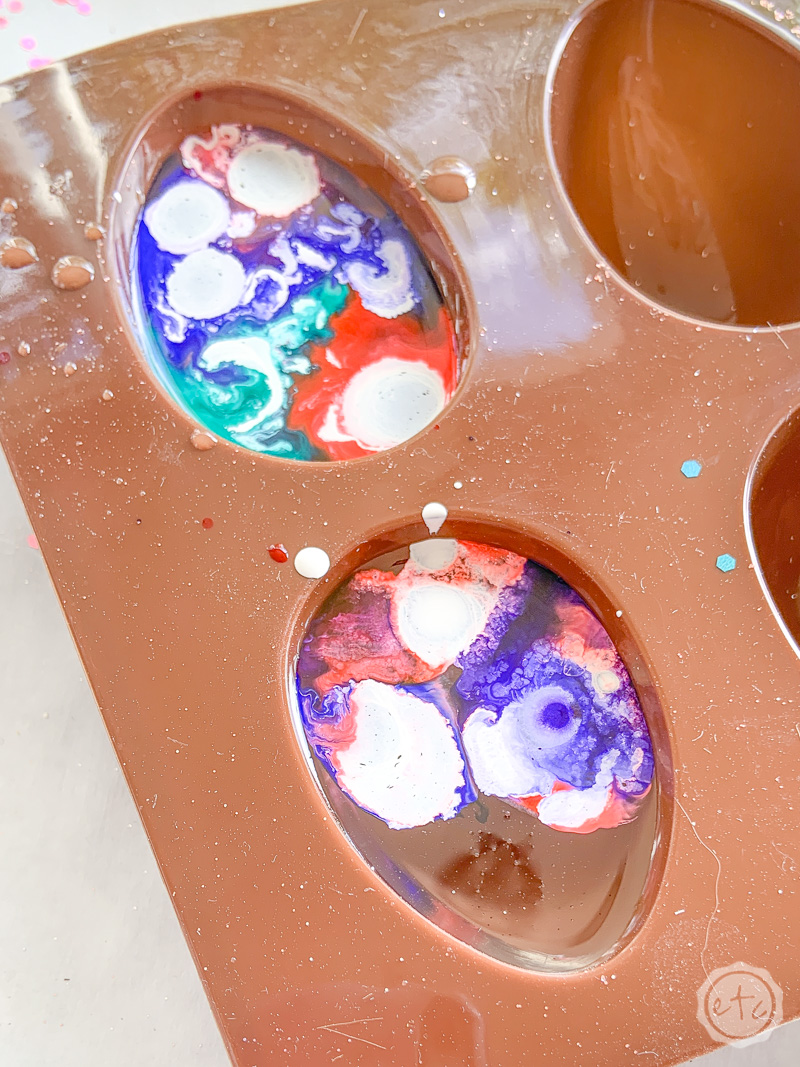
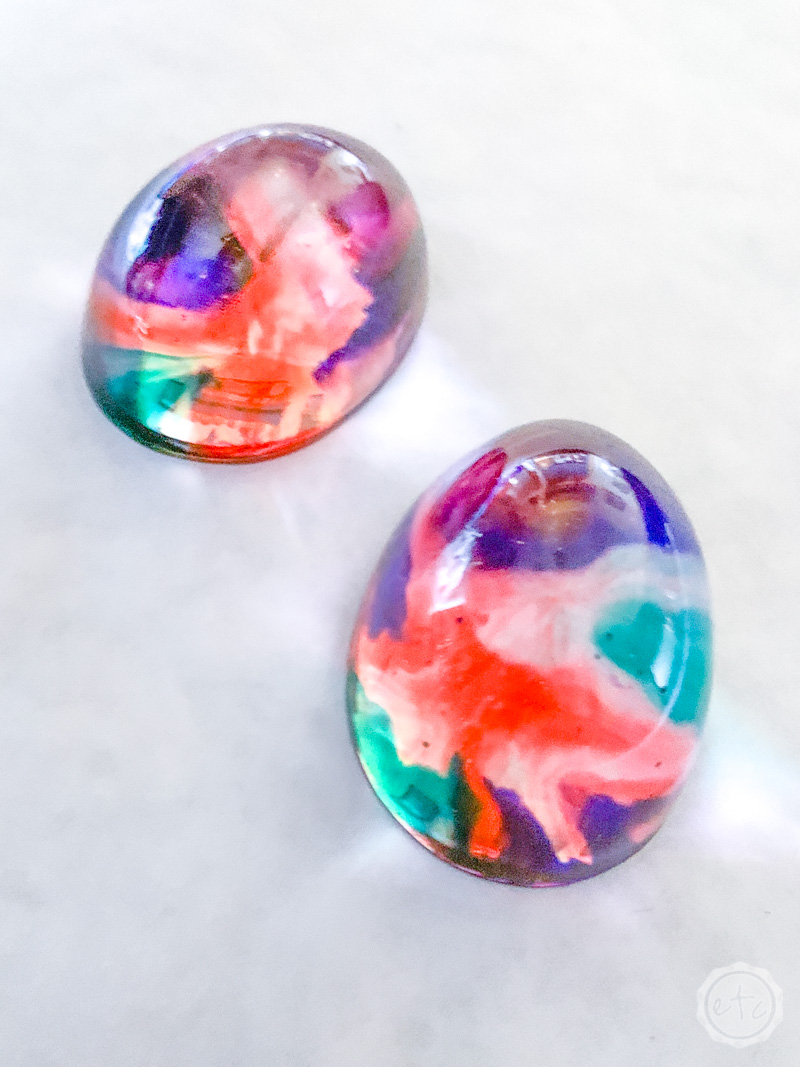
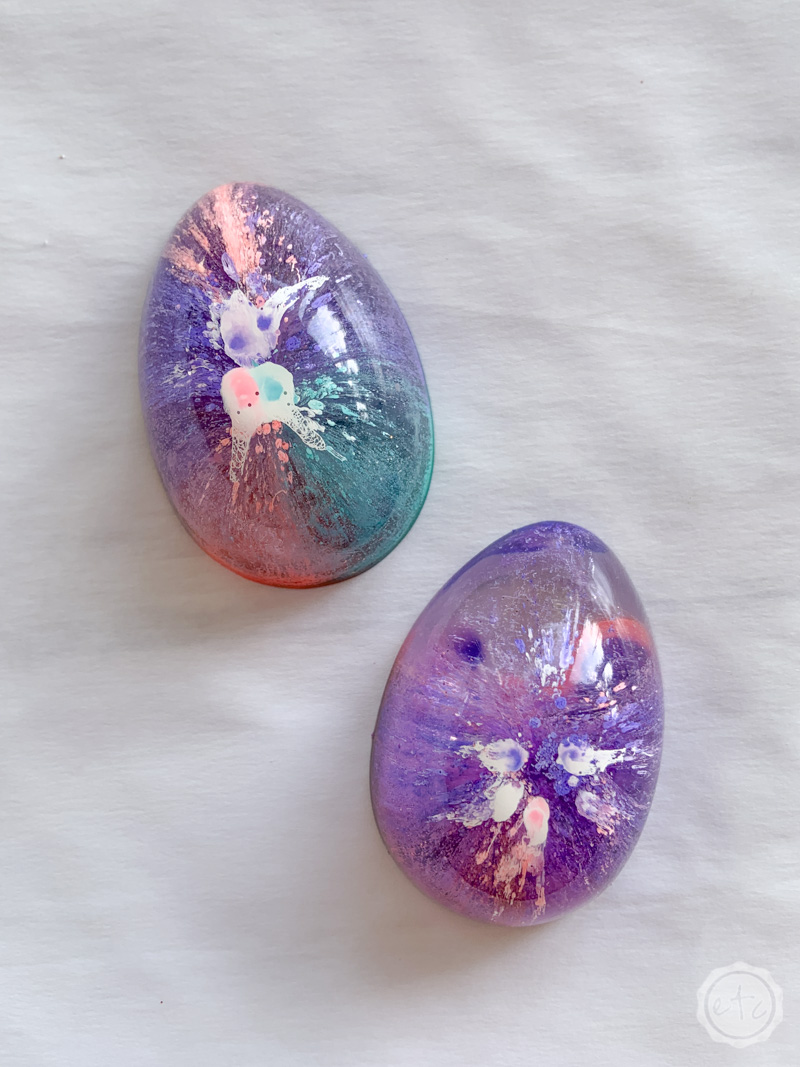
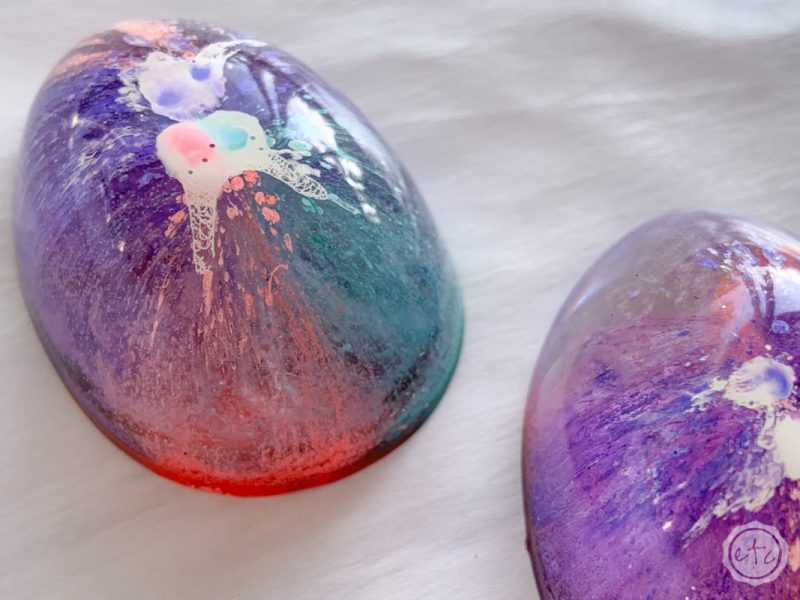
Ready for the final result?

Aren’t they pretty?! I can’t wait to see what projects y’all make with these techniques… leave a comment down below to let me know!

Looking for more resin projects? I’ve got you covered!

You are invited to the Inlinkz link party!

Click here to enter
You made it through the entire post? That means you're one of my new favorite people! I'd love to be friends and see what else you would like to read about! Leave me a comment and then sign up for your very own FREE paint planner.... so that you can keep track of every single paint color with ease!
Welcome back! I'd love to be friends and see what else you would like to read about! Leave me a comment and then sign up for your very own FREE paint planner.... so that you can keep track of every single paint color with ease!

Show me some LOVE y'all:

  • Facebook
  • Pinterest
  • Twitter
  • Email

Related

«
»

DIY & Crafts, Holidays, Resin 5

Trackbacks

  1. DIY Resin Easter Eggs - Happily Ever After, Etc. says:
    March 11, 2020 at 11:54 pm

    […] my first round of eggs I decided to make 2 alcohol ink eggs (you can check out my 3 favorite techniques for working with alcohol ink in resin here), 2 with bunny charms, 2 with butterfly stickers and 2 with dried flowers (you can check out my […]

    Reply
  2. DIY Resin Easter Eggs - Happily Ever After, Etc. says:
    March 11, 2020 at 11:54 pm

    […] my first round of eggs I decided to make 2 alcohol ink eggs (you can check out my 3 favorite techniques for working with alcohol ink in resin here), 2 with bunny charms, 2 with butterfly stickers and 2 with dried flowers (you can check out my […]

    Reply
  3. How to Mix Resin for Beginners - Happily Ever After, Etc. says:
    March 12, 2020 at 1:30 am

    […] mold. Later on you’ll learn techniques where you can mix fun things into your resin first (like the second alcohol ink technique I used in this tutorial) but for today we’re going straight into the […]

    Reply
  4. Resin 101: Working with Resin for Beginners - Happily Ever After, Etc. says:
    March 18, 2020 at 9:36 pm

    […] to try a few things? Check out these 3 fun alcohol ink techniques you can use in your next resin […]

    Reply
  5. How to Make Resin Succulents - Happily Ever After, Etc. says:
    May 2, 2020 at 3:06 pm

    […] are plenty of ways to use alcohol inks in resin (you can check out my favorite 3 resin & alcohol ink techniques here) but for these little guys we’ll keep it […]

    Reply

Leave a Reply Cancel reply

Your email address will not be published. Required fields are marked *

sidebar betsy I'm Betsy, Home Decor Enthusiast, Yorkie Mama, Crafter, Blogger, Picky Eater, Chief Mess Maker, Antique Hoarder and Graphic Designer. You can generally find me working on (attacking with a paintbrush) the 3 bed, 2 bath home we are currently renting! Our home might not be perfect but it is ours & if you hang out long enough you'll see that what we lack in know-how we make up for in passion!
Shop My Craft Room

Shop My Home

Featured Articles

15 Fabulous Ideas to Organize your Laundry Room
25 FREE Printables For Your Home!
What to do with EXTRA Paint with Happily Ever After Etc
10 Ways to Make Your Bed EXTRA Comfy with Happily Ever After Etc.
Ready to Pick your Perfect Paint Color? We'll help you with our 6 Day FREE E-Course

Hey y’all,

Profile

I'm Betsy, Home Decor Enthusiast, Yorkie Mama, Picky Eater, Chief Mess Maker, & Graphic Designer...

A Little Note!

Many of the links on Happily Ever After, Etc. are affiliate links. If you purchase a product after clicking an affiliate link, I receive a small percentage of the sale for referring you, at zero cost to you! How awesome is that? Purchasing through affiliate links is an easy, painless way to help out your favorite bloggers. Thank you so much for your continued love and support! Read the full disclosure here!

Instagram

The number one question people ask when they watch The number one question people ask when they watch my new home tour on YouTube? Why is there so much clutter... um excuse me I like stuff! The second question? How did you frost the doors? Don’t worry... I wrote out the whole process, check out the step by step tutorial on the blog!
With Christmas fast approaching I’m having secon With Christmas fast approaching I’m having second thoughts... about taking down my holiday decorations! I absolutely love all the blush and rose gold this year and think I might have to add more pink to my every day decor. Until then maybe it will just stay Christmas at the Smith house! Tutorials for both the “Merry Christmas” resin sign and the “Dear Santa” Cricut sign are in my profile! #pinkchristmas #pinkchristmastree #pinkchristmasdecor
Well y’all Christmas is coming up quick... which Well y’all Christmas is coming up quick... which means I need to get a move on with all that wrapping! I got a jump start this morning after whipping up a few little resin light bulbs! Check out the full tutorial over on the blog if you’d like to wrap your presents with a few resin goodies this year... and tell me in the comments below. Are you finished wrapping or (like me) are you still getting started? #pinkchristmas #pinkchristmasdecor #resinchristmas #giftwrappingideas
Ready for another fun and easy resin project? Thes Ready for another fun and easy resin project? These little Christmas trees are the perfect beginner level project so if you’ve never done resin before don’t let it intimidate you!! Grab your heat gun and jump in... I’ll walk you through it! Check out the full blog post for these little guys on the blog (link in profile!)
If you haven’t joined Michelle at @weekendcraft If you haven’t joined Michelle at @weekendcraft SVG membership then WHAT ARE YOU WAITING FOR?! I am obsessed with all the cute svg’s and y’all she is doing a live craft night every month to walk you through making one of her designs... and the first craft night is tomorrow! She’ll be making this “Merry everything and Happy always” SVG and it’s so cute! You don’t want to miss it! See you there! 

(Also who noticed the sneak peek at my new kitchen?!)

#cricutsvgfiles #christmassvg #cricutsled
Well y’all I’m getting this close to unpacked Well y’all I’m getting this close to unpacked in my new house!! And since I’m a blogger Christmas is going up! So here’s the question... do you want a 1 month house update or do you want to wait for the Christmas tour? #lulamaefarmhouse #rosegoldchristmastree #newhouse
Well it’s still a work in progress but I finally Well it’s still a work in progress but I finally have a house!! They have to put it together and do all the detailing before I get keys... but we’re in the end game now! Check out my stories for a sneak peek at the moving process... full YouTube video coming soon!
#ad how amazing did these little fall coasters tur #ad how amazing did these little fall coasters turn out?! Plus I absolutely love the matching tray! The best part? This is such a quick and easy resin project... a silicone mold, a little resin and your trusty heat gun and I promise you can make this baby!! Link in profile for the tutorial!! #fallresin #resinforbeginners #cheetahprint
Okay... is it bad if you just want to make coaster Okay... is it bad if you just want to make coasters in the same mold with the same technique but different colors?? They turn out soo differently! Just a sneak peek of my fall coasters and the blush ones I made last year!
Happy #nationaldogday to the fur babies that are ( Happy #nationaldogday to the fur babies that are (literally) behind (beside... or underneath!) all Of my projects! These sweet little cuddle muffins make everything better 😊🐶😘
GIVEAWAY CLOSED Our winner is @kamikvega Check you GIVEAWAY CLOSED
Our winner is @kamikvega Check your inbox girl, this little machine is headed your way! Thanks to everyone who participated... I can’t wait to see where we go from here!

🥳📦🥳 GIVEAWAY🥳📦🥳
If you have loved all of the Cricut projects I make here is your chance to win a Cricut Joy of your very own! If you’re ready for a little craftiness (maybe a little time to relax) then this giveaway is for you! I’m teaming up with a few of my cavities crafty bloggers so that one of you can win your very own mini crafting machine. Good Luck!!!!

TO ENTER GIVEAWAY:
1.) Follow
@creativeramblings 
@weekendcraft 
@craftylumberjacks 
@this.is.tisa 
@justcallmehomegirl 
@happilyeverafteretc
@lovebird_heartworks 
2.) Like this post
3.) Tag a friend in the comments.
.
.
.
Hurry! Giveaway ends Saturday 8/29/20 at 11:59PM PST. Winner will be notified via Direct Message. Share or tag a friend who'd love to win a Cricut. .
.
.
This contest is in no way affiliated with or sponsored by Instagram or Cricut. To enter you must have a U.S shipping address.
A little peek into the fun summery Tablescape I pu A little peek into the fun summery Tablescape I put together for a little garden party! Want to check out the full table? Wondering where to find all the pieces... click the link in my profile for all the details!
#ad Did you know you can put infusible ink onto al #ad Did you know you can put infusible ink onto aluminum? It's sooooo simple... honestly it's one of the easiest projects I've ever done. Even if you've never used your Cricut before you. can. do. this. I'll show you how every step of the way! Follow along with the full tutorial video over on YouTube! The best part? These little aluminum signs look amazing as part of a larger project! Check out how I added mine to a larger resin wave project on the last slide! @officialcricut #cricutcreated https://lnk2.io/wvMllZf
Okay so It’s no secret that I’ve been obsessed Okay so It’s no secret that I’ve been obsessed with resin for a while now but this week I’ve been playing around with resin waves! Including this tiny resin sea shell! Check out the link in my profile for the full tutorial!
After a lot of struggle, loss and frustration I am After a lot of struggle, loss and frustration I am finally dotting the i’s and crossing the t’s on my next chapter. Yesterday I went and signed the million and one papers to close on my new house! I cannot wait to share the moving (and decorating) process with all of you... next step: keys! #firsttimehomebuyer #newhouse
Load More... Follow on Instagram

Copyright © 2021 · Darling theme by Restored 316

Copyright © 2021 · Darling Theme on Genesis Framework · WordPress · Log in · Privacy Policy

loading Cancel
Post was not sent - check your email addresses!
Email check failed, please try again
Sorry, your blog cannot share posts by email.