


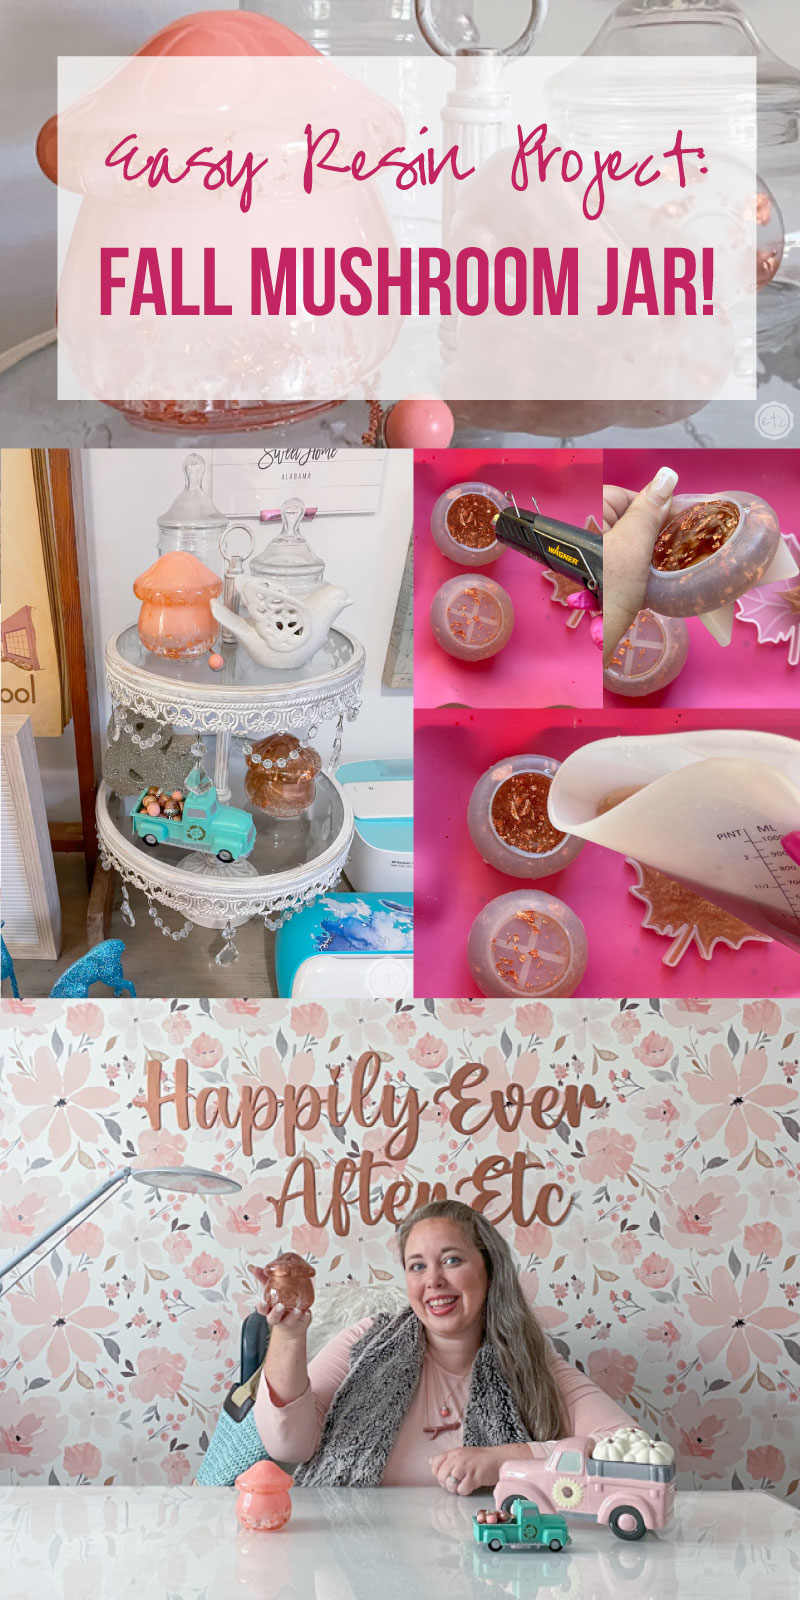
I have an entire BAG full of silicone molds I saw had to have and then never used. Literally an entire bag. So I’m trying hard not to buy any new molds until I work my way through a few of the ones I stashed away… but when I saw this little mushroom jar silicone mold it was an instant add to cart.
There’s just something about mushrooms and now I can make one out of resin? And I can put things in it?
I had to have it!
This is such a fun and easy project and it turns out so stinking cute! The hardest part is the un-molding and silicone is way more forgiving than I am so if you’ve been looking for a resin project to try this is it.
Let’s do it!
Supplies:
- Total Boat Maker’s Epoxy Resin
- Mushroom Jar Silicone Mold
- Copper Testers Brand Paint
- Rose Gold Foil Flakes
- Respirator/Mask (resin graded filters)
- Gloves
- Wagner HT400 Heat Gun
- Freezer Paper
- Silicone Mat
- Baking Pan
- Heart Shaped Silicone Mixing Cup
- Small Mixing Cups
- Silicone Measuring Cup/Larger Mixing Cups
- Reusable Silicone Stir Sticks
- Toothpicks
- Paper Towels
Just getting started with resin? Download my free resin supply list and make your first project today!

Step 1: Mix Your Resin
First things first… before we start mixing we need to prep our work station. That means freezer paper for our workbench, gloves for our hands and a respirator for our face! Seriously y’all… I know this is a small project but put a respirator on your face.
I work outside (since you need a well ventilated space for resin and this is my easiest solution!) so I grab a baking pan and silicone sheet to easily transport my piece once it’s cured. You do not want to carry a tiny bear mold full of liquid resin over your living room rug to find a place to cure…. a baking pan with edges is your friend here.
It can’t stay on the front porch to cure or things might get wonky (both temperature and dust wise… have you ever found a fly in your cured resin? I have!)
Once you have on your safety gear and are in your well ventilated space we’ll start mixing!
This little guy does take a bit of resin since he’s a jar… you’ll need to pour the top and bottom to complete the entire piece. I mean without the top it just looks like a cup…
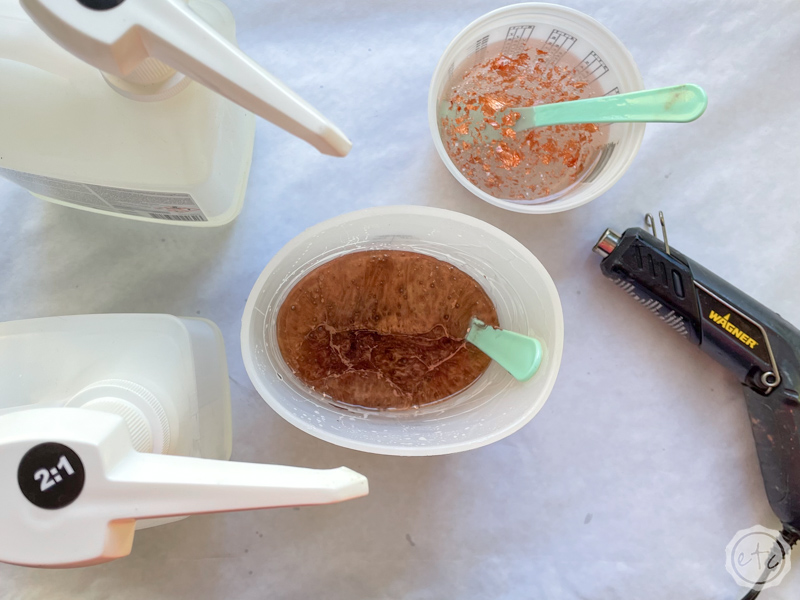
You’ll need about 300ml of resin so that’s 150ml of part a and 150ml of part b. MakerPoxy is a 1:1 ratio so you’ll need equal parts of a and b. Add both to your mixing cup and then mix those together slowly and thoroughly for 3 minutes, pop any bubbles that have come to the top and we’re good to go!
Quick reminder… once you’ve mixed your resin for the initial 3 minutes you can add your colorant. You can do solid pieces but I decided to spice things up a bit and split my resin into two containers. I added a few drops (10% colorant to 90% resin) of copper paint to the first container and a few rose gold foil flakes to the second container. Then mix until each container looks consistent!
Perfect, darling!

Bonus Tip: If you’ve never mixed resin before it’s not nearly as intimidating as you’d think! I’ll walk you through all the steps here in my How to Mix Resin for Beginners Tutorial.


Step 2: Pour your Resin into your Silicone Mold
This is where the magic happens! Start by slowly pouring your resin into your mold. I like to pour in a thin stream from high up to help minimize bubbles! I pour a little of one color and a little of the other… then pop any bubbles in the mold.
Repeat this process until the mold is alllllllll the way full to the top making sure to use a heat gun and not a torch. A torch is too hot and will melt your pretty mushroom jar silicone mold to goo.
Not good!
Once your piece is full you can cover it with a bag or a box and set it aside to cure for 24 hours. If you need to move your piece into a different room (like I do) for curing it might be worth covering your piece for a few hours (if it’s in a safe place) and moving it once it’s cured just a smidge… the resin is very easy to spill at this stage.
The silicone mat underneath will prevent any problems but we don’t want to lose any of our resin at this stage!


Step 3: Un-Mold your Piece
Time to break that little mushroom jar out of it’s silicone prison! Start by pulling the silicone away from the sides and introducing as much air to the piece as possible. Then roll it down the sides and pull it off.
Volia!
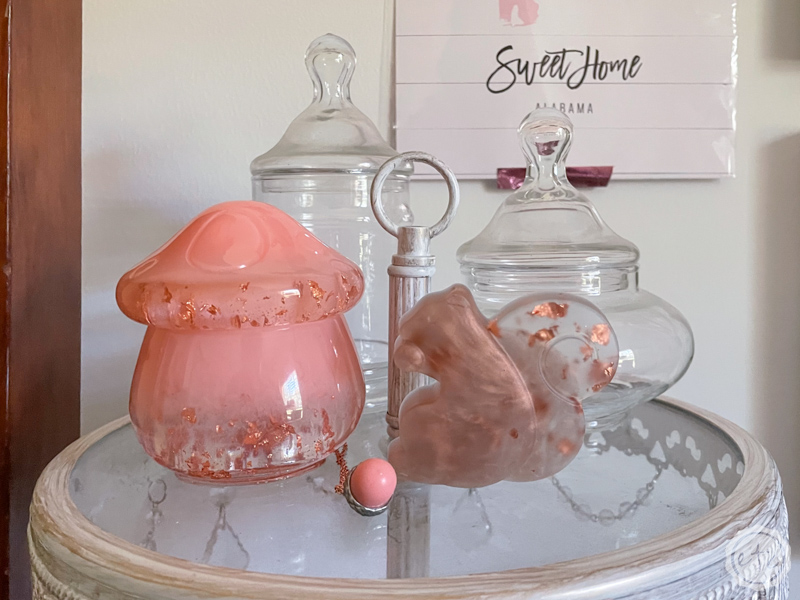
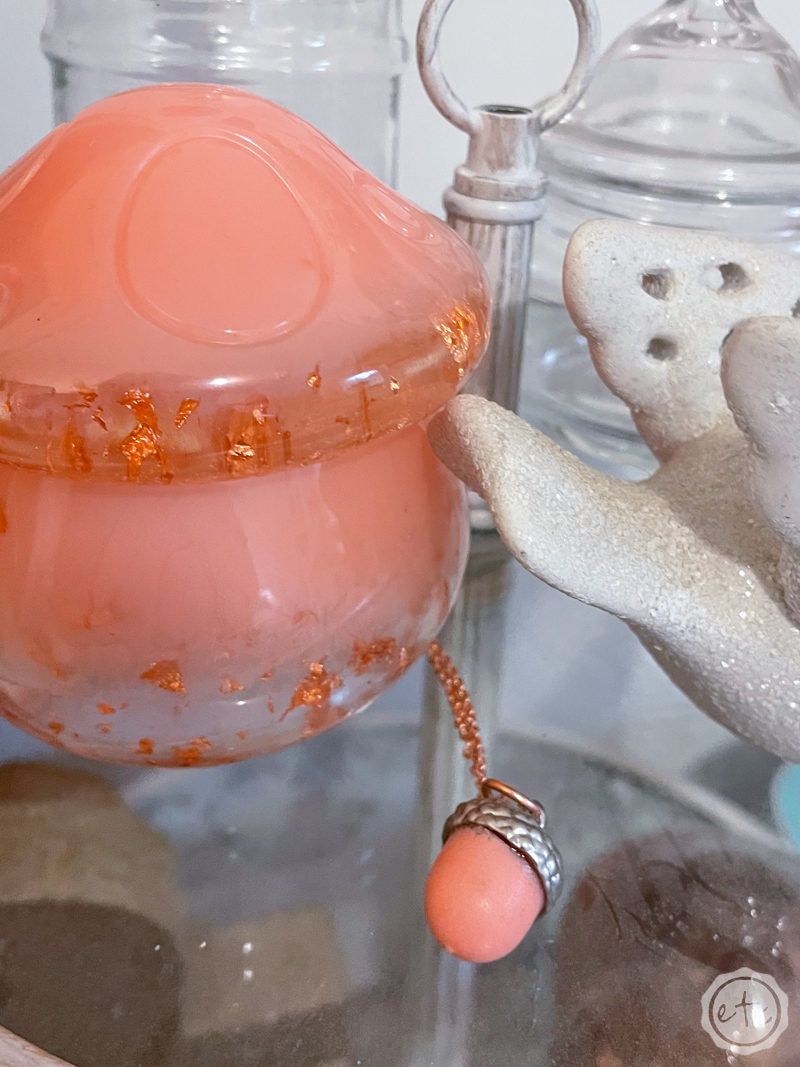
How cute are these?
I love love love how they turned out! I made a pink one to match and I’ve added them to my fall decor (right next to my little truck full of resin acorns and my tiny resin squirrel). I think this is my new all time favorite resin piece!
I made a similar crown inspired trinket box last year but this one is so. much. cuter!


Looking for more resin projects? I’ve got you covered!


Leave a Reply