

Ready for a fun Cricut Christmas project with a bit of a twist? First I saw a set of fun sublimation blanks that I just had to try and then I took it one step further with a fun set of Sublimation themed Christmas sheets. One day I’ll have my own sublimation printer but in the mean time ordering sublimation sheets with their own designs is the next best thing.
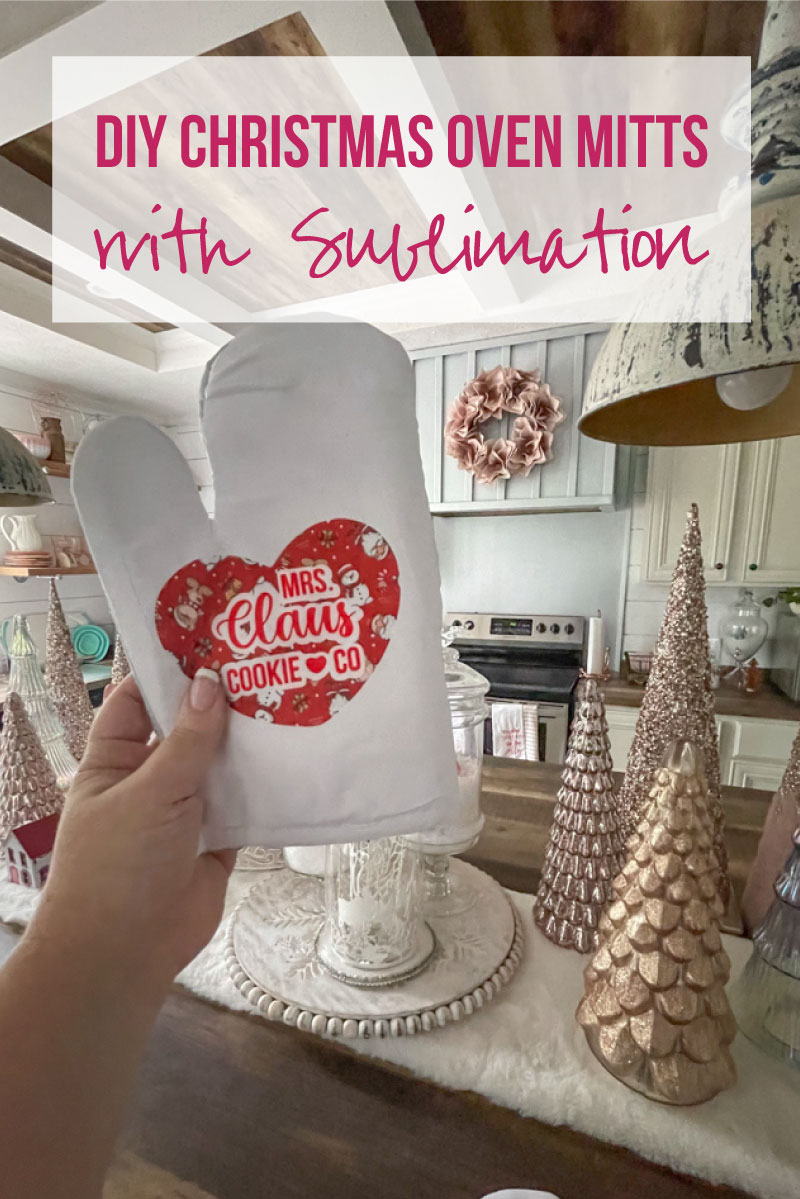
Now I can make my very own oven mitts with cute little Christmas characters on them!
Score!
The sublimation sheets themselves are very similar to Cricut’s own infusible ink. They’re not as thick and the sticky carrier sheet they come on isn’t as sticky but the ink is just as clear and vibrant. Sublimation is just like Cricut… it comes in all different levels of quality. These sheets are just fine… and so are the oven mitts!
Of course, if you’re not into sublimation (why are you here??) I’m linking up with a few friends to share an entire collection of Christmas projects down below! We have enough projects to deck your halls way past the 12 days of Christmas so check it out… there’s bound to be something you like!
Ready to get started?
Supplies:
- Cricut Maker 3
- Oven Mitt Sublimation Blanks
- Christmas Sublimation Sheets
- Red Infusible Ink
- Fine-Point Cutting Blade
- Cricut Cutting Mat (I like to use the fabric grip mat but the standard grip mat works fine for either material)
- Easy Press 9×9
- Easy Press Mat
- Heat Resistant Tape
- Scissors
Just getting started with resin? Download my free resin supply list and make your first project today!
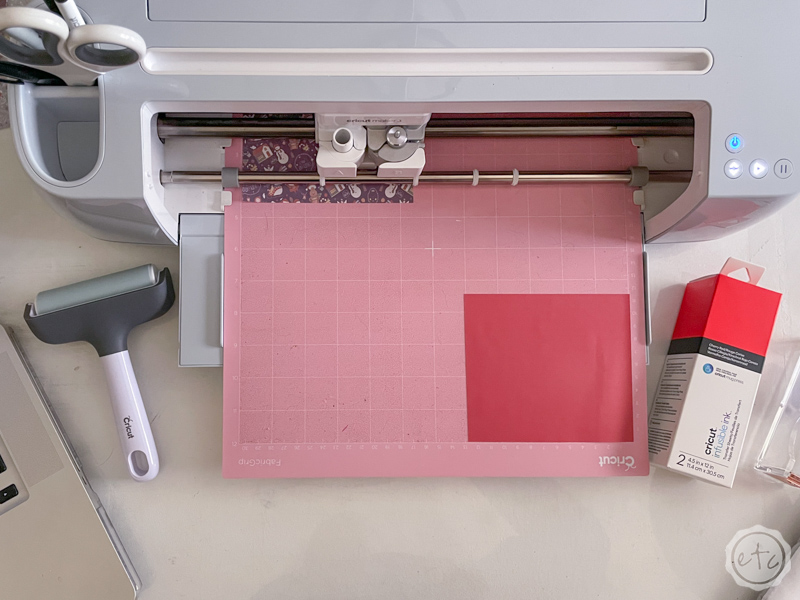
Step 1: Cut your SVG’s with your Cricut
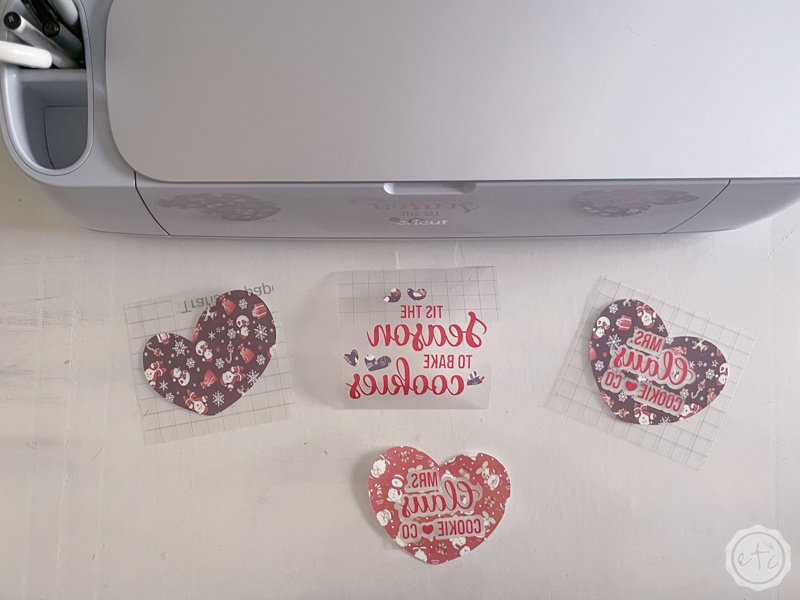
You can use any cutting machine but my Cricut is always my go-to for quick and easy projects like this. Start by uploading all of the FREE SVG’s at the bottom of this post to Cricut Design Space (you can check out my full uploading cut files to Cricut Design Space tutorial here if you’re not sure how) and then we’ll cut each design out of our sublimation sheet or infusible ink. Both materials are very similar… once they’re printed they’re basically identical.
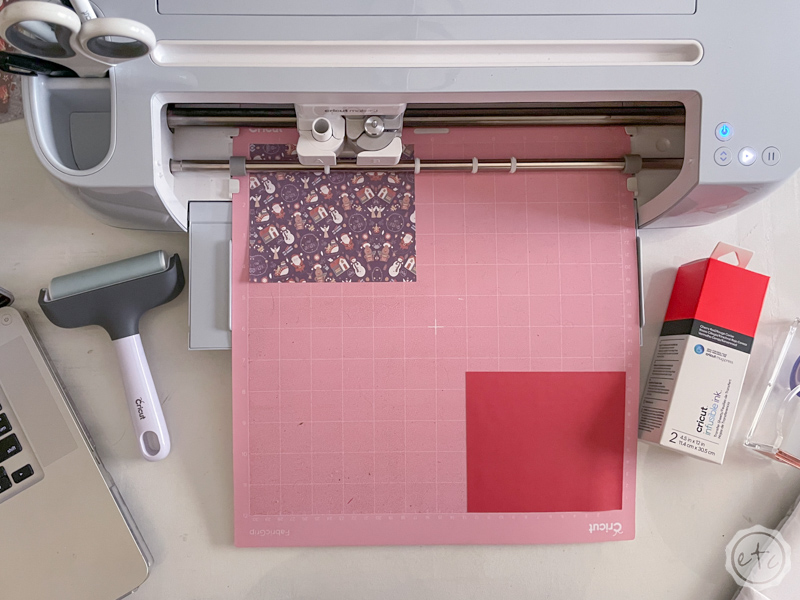
I’m not cutting a large design for any of these little oven mitts so instead of adding an entire sheet of sublimation paper or infusible ink to my cutting mat I’ll just add what I need. The sublimation sheets themselves are only 4 inches wide so you couldn’t add an entire 12 by 12 sheet if you wanted too!
On the other hand I didn’t have a 12 x 12 sheet of infusible ink in the red color I was looking for… but I did have a red sheet from the custom World of Warcraft mugs I made for my little brother! They worked perfectly… I added one to the top left corner and then flipped the cutting mat around and added the second piece to the upper left hand corner of the other side. Using both sides of a cutting mat makes it super quick to cut your design, simply cut, spin and go!
Make sure you use clean, dry hands when loading your ink onto your cutting mat (you don’t want it to smear!) then mirror your design in Cricut Design Space load the first side of your cutting mat (that coordinates with the first cutting mat on your screen) and hit go!
Volia!
Step 2: Weed your Ink Sheet
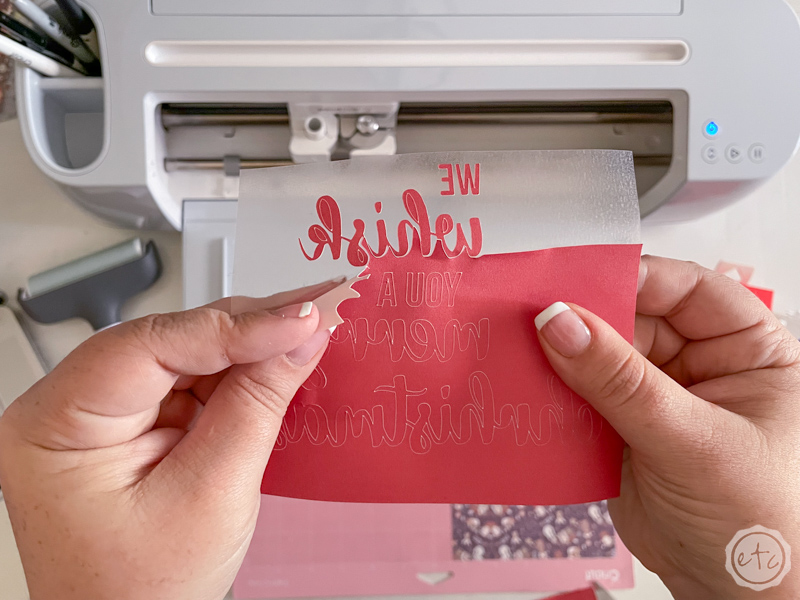
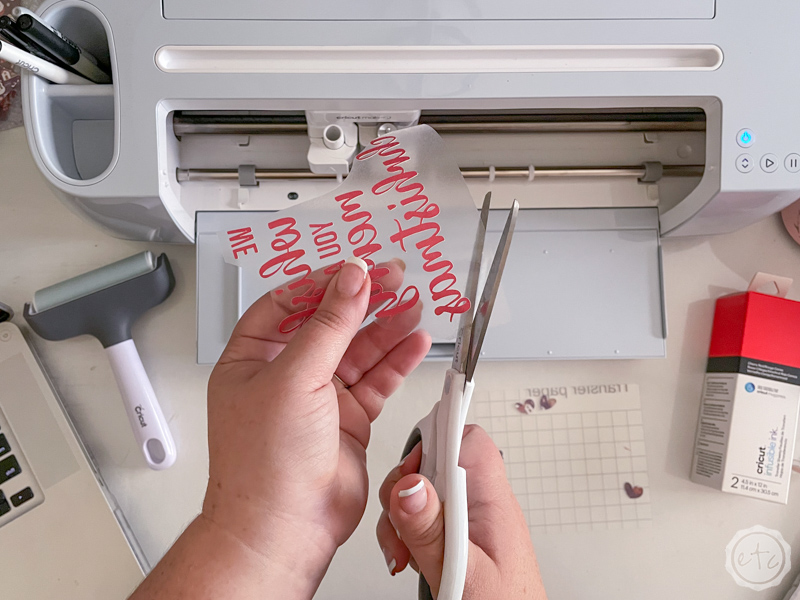
Now that everything is cut and ready to go let’s start by weeding our pieces! You don’t want to tear these so put the pointy weeding tools away… we’ll weed these sublimation sheets with our fingers. Carefully remove all of the negative space around your letters and shapes.
Go ahead and do the same for your infusible ink sheet… we’ll need both the patterned sublimation sheet and the infusible ink sheet weeded in order to combine them! Once you’ve weeded both pieces (I saved the left over’s from my sublimation sheet as there was a lot of usable space left for another project) we’ll put the two pieces together for the next step.
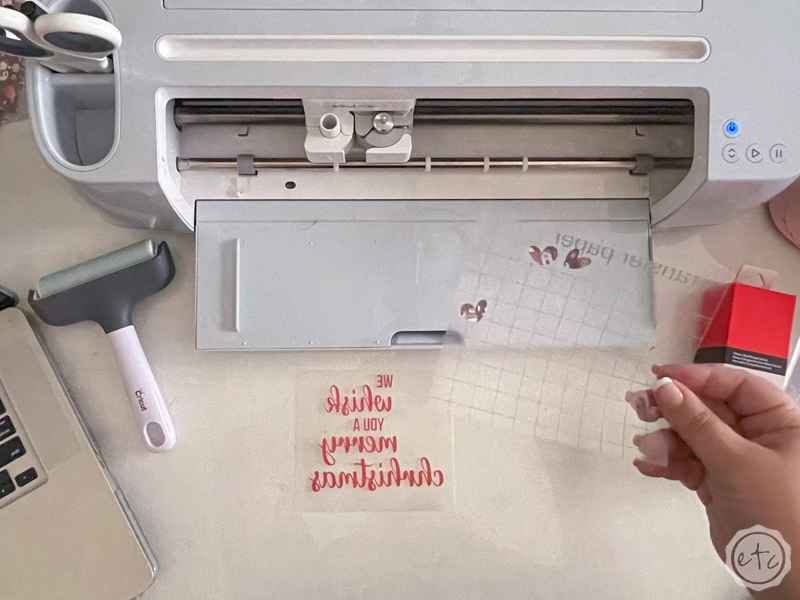
Step 3: Combine All Sublimation and Infusible Ink Sheets into One Layer
This is the fun part… you can only heat infusible ink (or sublimation sheets) once… if you try to do these 2 sheets in 2 layers the first layer will lose part of it’s color and potentially bleed ink onto your heat press. Which wouldn’t be great.
So we need to add all of our pieces onto one background layer so that we can press the entire design as one big design at the same time.
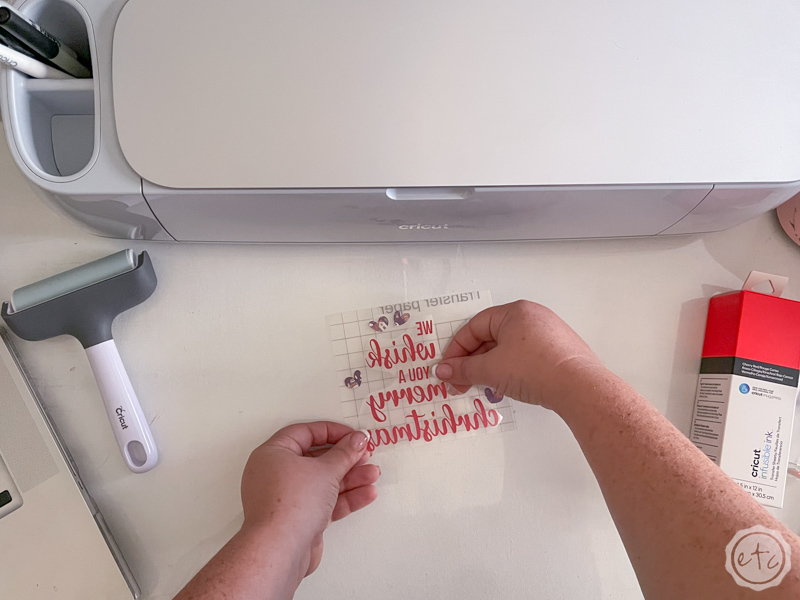
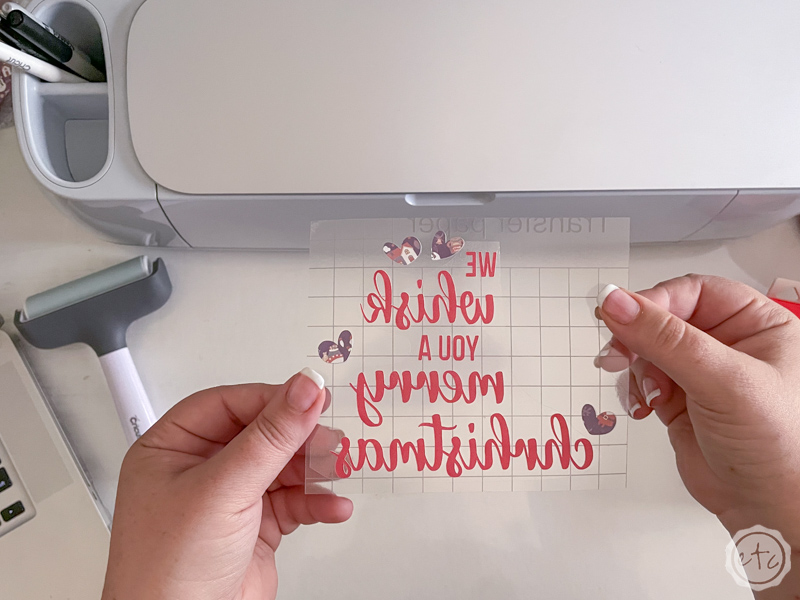
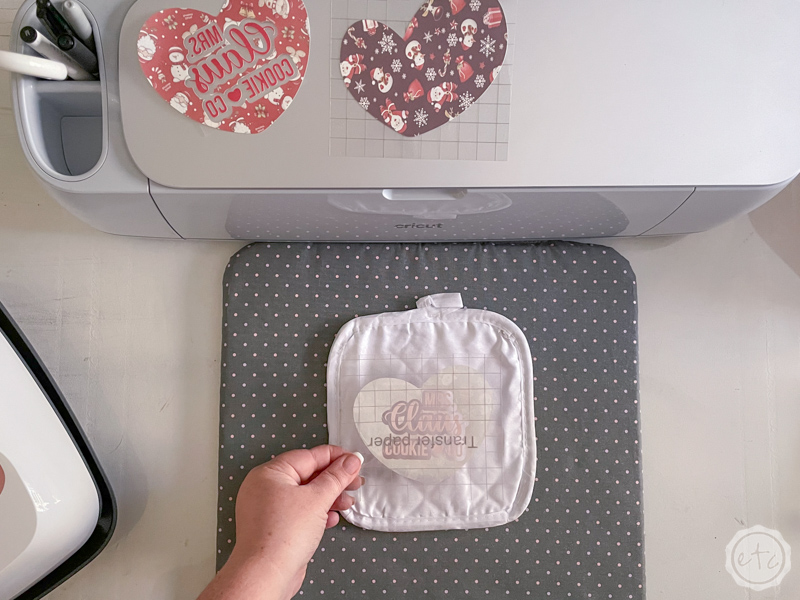
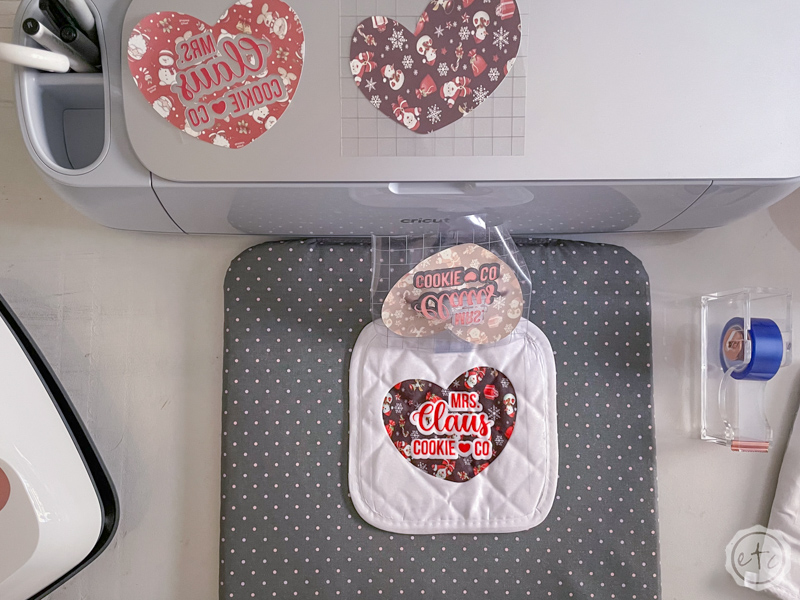
You can do this one of two ways… carefully pick up all the pieces on one background and place them on the other. OR my favorite way… carefully cut the carrier sheet around the top layer off. Then line it up and press it down onto the carrier sheet of the back layer.
VOLIA. Instant two layers on one.
This doesn’t work for alllll designs but I’ve found that it does work for 90% of all designs. Which are pretty good odds. Once you have your layers merged we’ll go ahead and heat those babies up!
Step 4: Use a Heat Press to Apply your Sublimation & Infusible Ink Sheets
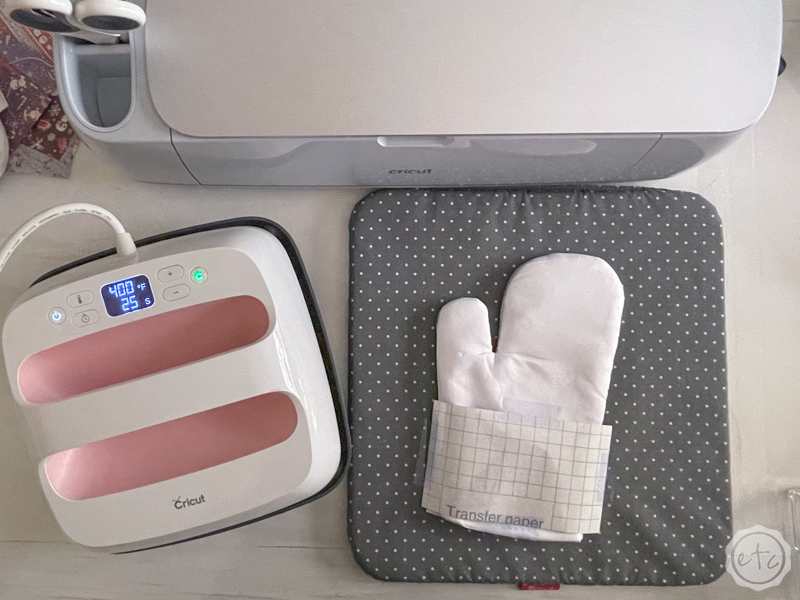
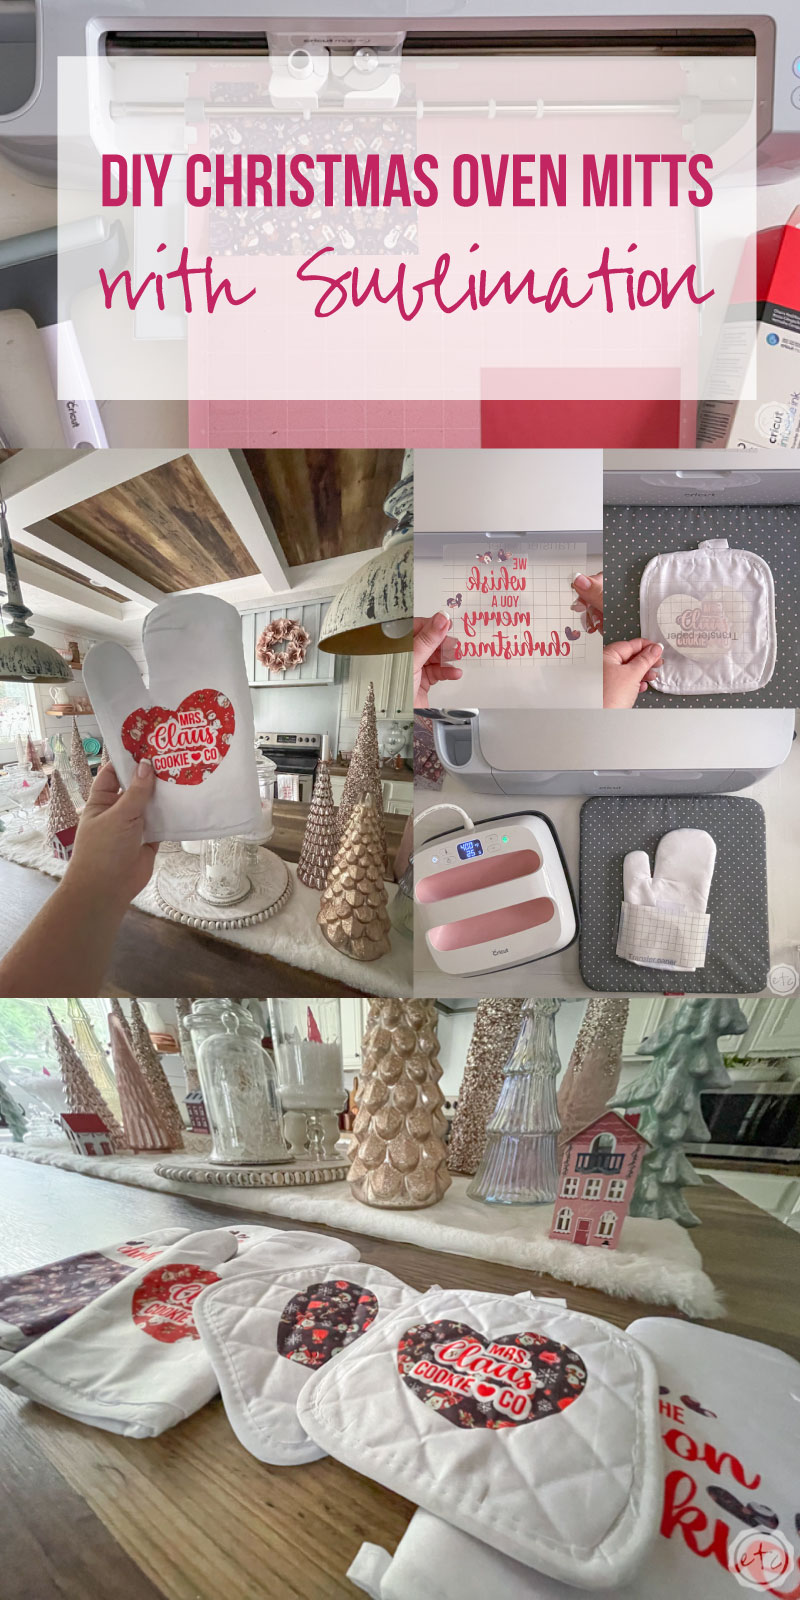
Let’s break out the big guns! The infusible ink sheets say we need 385 degrees for 40 seconds and our sublimation sheets say we need 420 for 15 seconds… so I went in the middle with 400 degrees for 25 seconds!
Go ahead and set your easy press then let it heat up… while it’s working on it you can set your easy press mat and your oven mitt with all of it’s layers.
You really don’t want your design to move while your heating it so I always use a piece of heat resistant washi to hold my design in place. Then once everything is set you can go ahead and heat it up! Make sure you place your easy press directly over the sublimation sheet (making sure it covers everything) and hold firm, consistent pressure. If you move around at all you could end up with a fuzzy, hazy design. So hold still!
When your 25 seconds is up place the easy press back on it’s base and then wait for the carrier sheet to curl back away from your design… it should be cool to the touch before you remove the washi tape and reveal your new masterpiece.
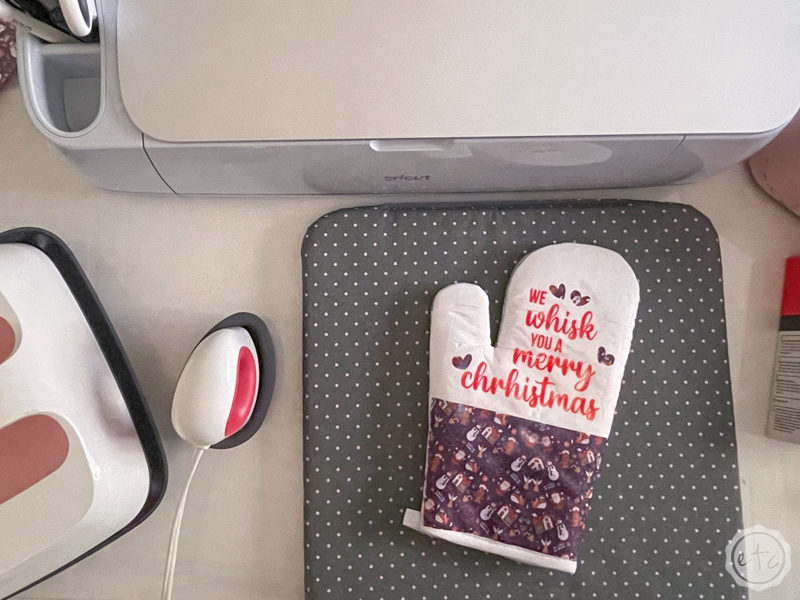
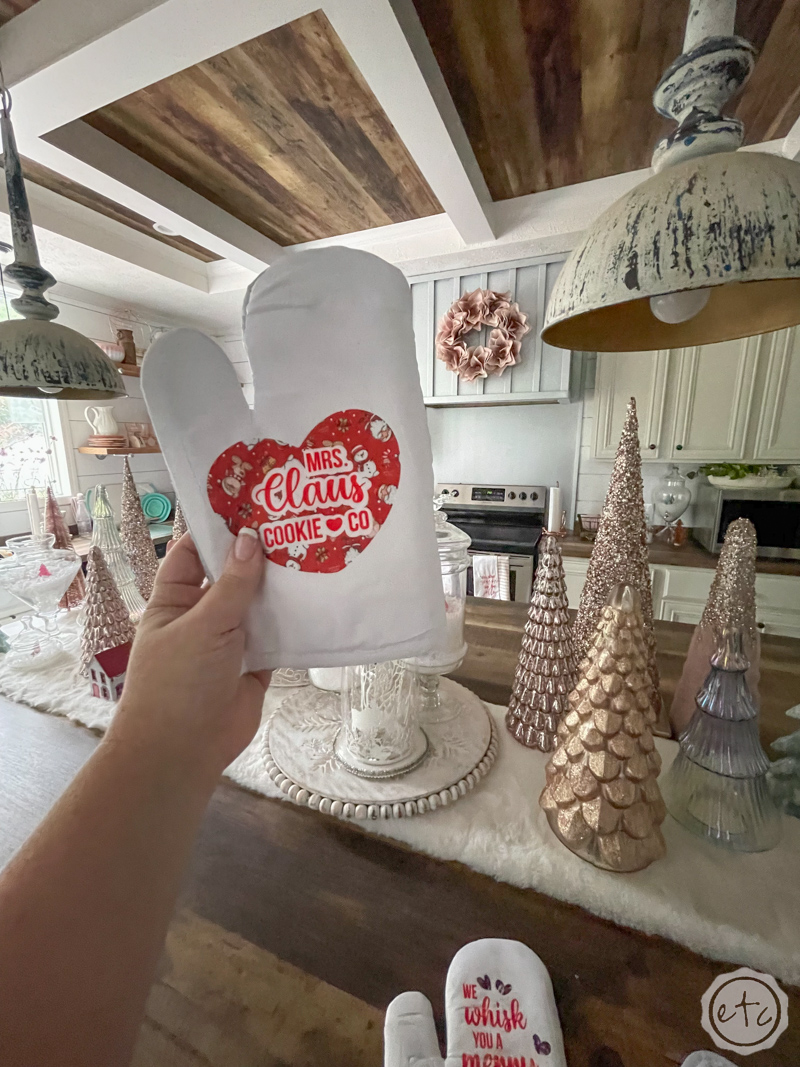
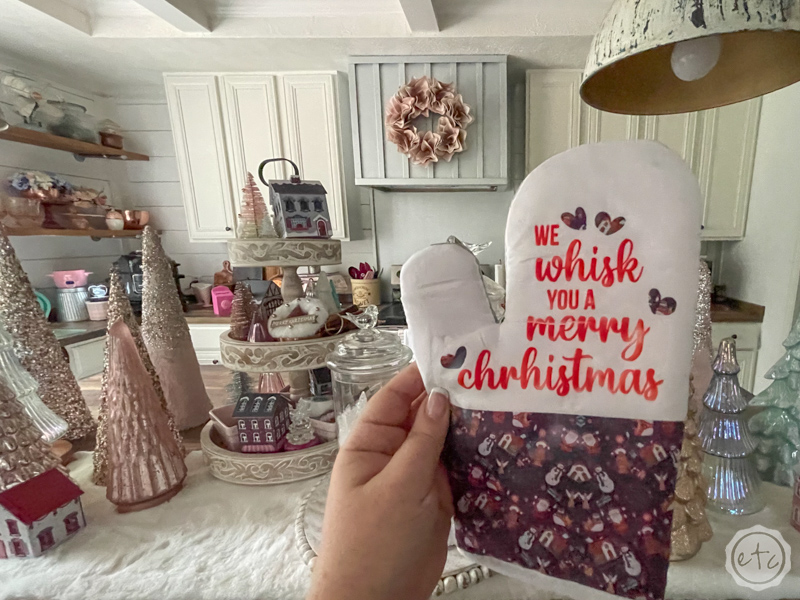
In this case I did my design and then I cut a straight piece of my sublimation design and added it to the bottom of my oven mitt. I didn’t do anything special to it… just taped it, heated it, loved it.
Perfection!

Step 5: Repeat until all of your Oven Mitts are Complete
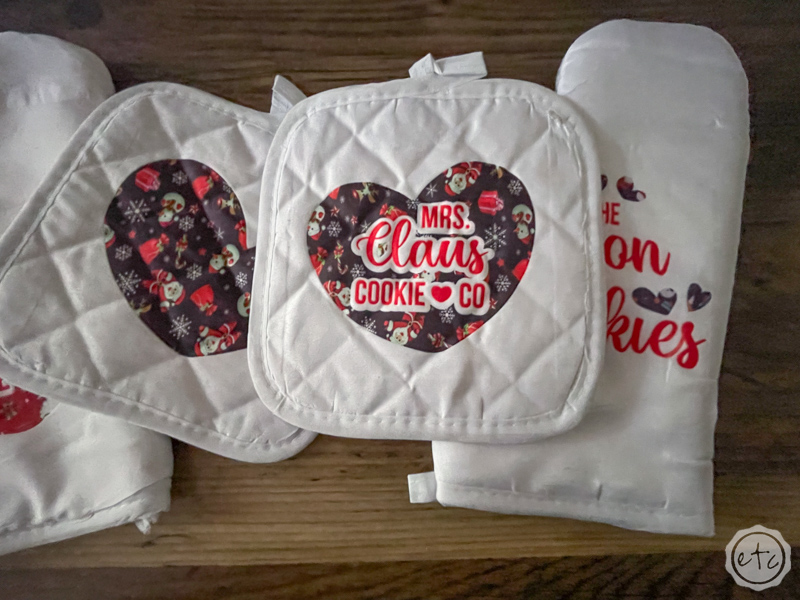
Once the first piece was finished I worked on the other designs in the collection!
I wanted a whole set of these babies! Cut design, weed design, merge onto one cutting sheet, apply to oven mitt… repeat!
LOVE, LOVE, LOVE!
One final tip… when I made the first oven mitt above I used standard pressure and there’s a spot where all of the design didn’t transfer. So I used A LOT of pressure for the next one and it’s MUCH better. Brighter colors, clearer designs, crisper edges. The whole nine.
More pressure for the sublimation sheets is definitely better.
Step 6: Enjoy!
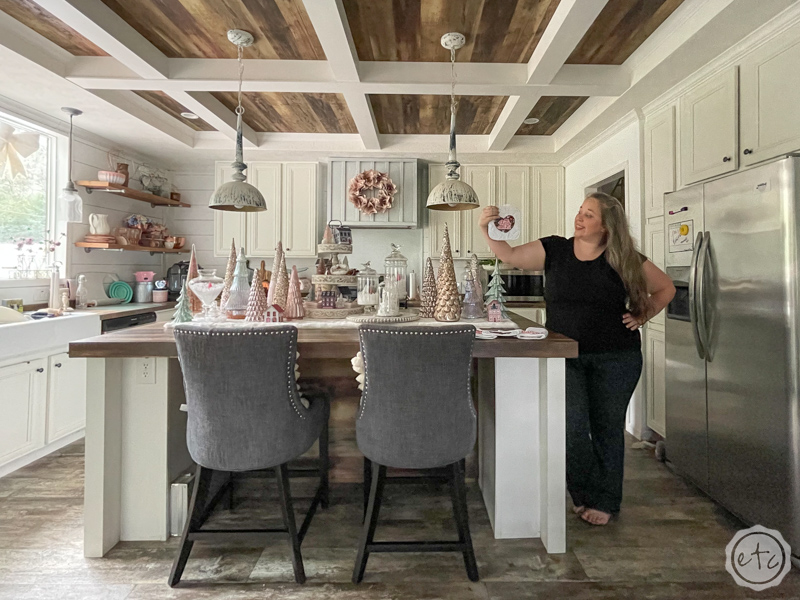
Now that we’re done we can go ahead and use our little oven mitts! Or gift them… I’m giving mine to my mama for Christmas! They turned out so cute and I think I’ll make a pink and seafoam version to match my own kitchen next.
That’s one of the best parts of making your own pieces with your Cricut… you can pick whatever color or design you like best!
Enjoy!


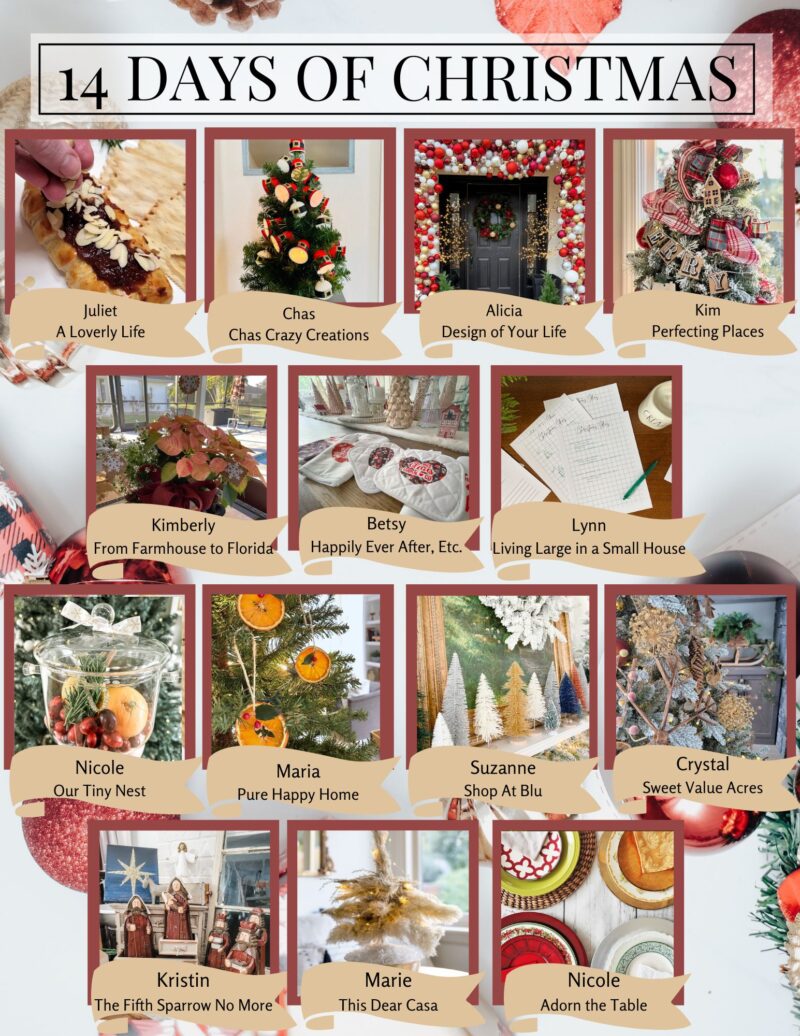
12 Days of Christmas (Projects!)
Ready for all of those fun projects I promised? Here are a few of my favorite blog friends to share fabulous tips and tricks to make your holiday season bright. Juliet over at A Loverly Life put this little collaboration together and I can’t wait to check out each and every project below.
Happy Crafting!
- Juliet with Easy 15 Minute Baked Brie Recipe
- Chas with Mini Red Solo Cup Lights
- Alicia with a DIY Ornament Arch Tutorial
- Sue with Simple Tips to Decorate a Mantle
- Kristin with How to Paint a Christmas Star
- Lynn with Christmas Lists and Holiday Organizing Made Simple
- Kimberly with Poinsettia Decorating Ideas
- Kim with DIY House Ornaments for a Kitchen Christmas Tree
- Nicolle with DIY Simer Pot Gift
- Crystal with Winter Tree Decorating
- Marie with a Pampass Grass Christmas Tree
- Nicole with 4 Christmas Place Setting Ideas
- Maria with a Simple Dried Orange Slice Ornament




Oh my goodness! These are great! I really need to be home full time doing theses projects! Pinned!
What a fun idea! Also, your kitchen is so cheerful and adorable. -Marie This Dear Casa
These are adorable! I really need to ask Santa to bring me a Cricut! Thanks for sharing this super cute idea!