• House Tour
    • Reveals
  • About
    • Smith Life
    • Disclosure and Privacy Policy
      • Terms and Conditions
      • Store Affiliates
  • Contact Me
    • Want a Button?
  • Shop
    • Floral Printable Planners
    • Paint eBooks and Packages
    • Wedding Binders & Extra Printables!
    • Planner Bundles
    • Planner Accessories
    • Home Decor Printables!
    • Cart
    • Bloglovin
    • Facebook
    • Instagram
    • Pinterest
    • Twitter
    • YouTube

Happily Ever After, Etc.

Creating Our Own Fairytale

  • Happily Ever After, Etc.
  • Home
  • Home Decor
    • My Home
    • Paint
    • Before and After
    • Tablescapes
    • Mood Boards
    • Furniture
  • DIY & Crafts
    • New to Cricut – Start Here
    • Cricut Projects
    • Resin
    • Scrapbooking
  • Organization & Planning
    • Cricut
    • Organization
    • Planner
  • Wedding
    • Cricut Wedding Projects
    • Free Wedding Binder
    • Bride Bag- The Ultimate Wedding Planner

DIY Large Christmas Present Boxes for your Porch

Hey y'all,

I have an amazing project for you today… fun Christmas present boxes for your porch! These babies are oversized and light up! Plus they’re inexpensive and take up a lot of real estate… my favorite kind of holiday project.

These boxes are pretty easy to make but they are pretty time consuming (it took me about a day and a half to finish them) so make sure you have some time before getting started. Or be prepared to work on them in stages… whatever works better for you.

Ready to get started?

Pssst… looking for even more outdoor decor ideas? Scroll to the bottom to find a few fun ideas from my favorite bloggers!

Supplies:

  • 3 Sheets of 2 foot by 4 foot Plywood Panels
  • 10 8 feet long 1×2 ‘s
  • Chicken Wire
  • Wire Cutters
  • Aarow Staple Gun
  • Worx Portable Work Table
  • Kreg Jig K4
  • 96 3/4″ Pocket Hole Screws
  • 2 Boxes Pocket Hole Pegs
  • Dremel Saw Max
  • Sand Paper/Sanding Block
  • Craftsman Brad Nailer
  • 1/2 Long Brad Nails
  • Ryobi Power Drill
  • Large Clamp
  • Gray Paint
  • Paint Brush
  • Spackle
  • Lights/Ornaments/White Fabric/Holly Leaves/Star Pillows

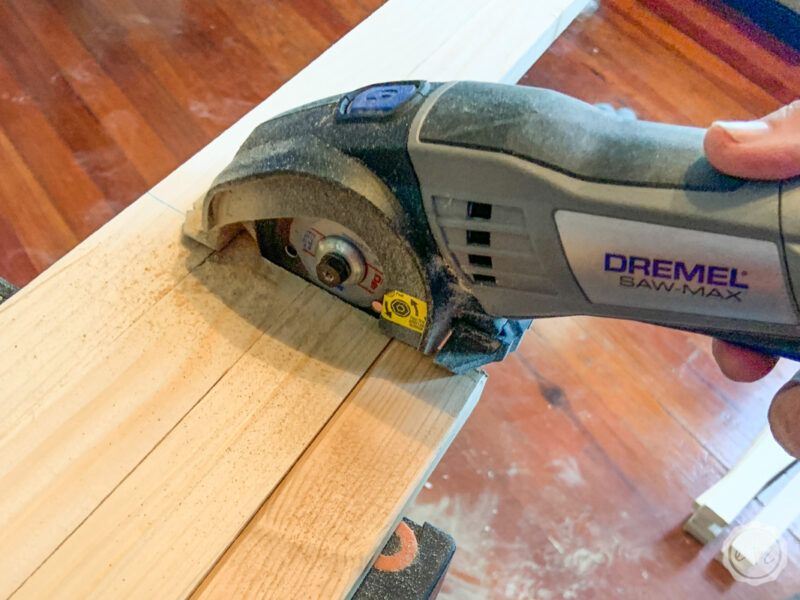
Step 1: Cut Your Wood

Alright y’all the very first step in this project is to cut down our 1×2’s. We’re making 3 boxes that will measure 10 inches, 14 inches and 18 inches wide… so we need to cut down the 1×2’s into corresponding sizes.

Since each box will have four sides and each side needs 4 pieces of wood we’ll need 16 cut lengths for each box. So cut 16 10 inch pieces, 16 14 inch pieces and 16 18 inch pieces.

Get the picture?

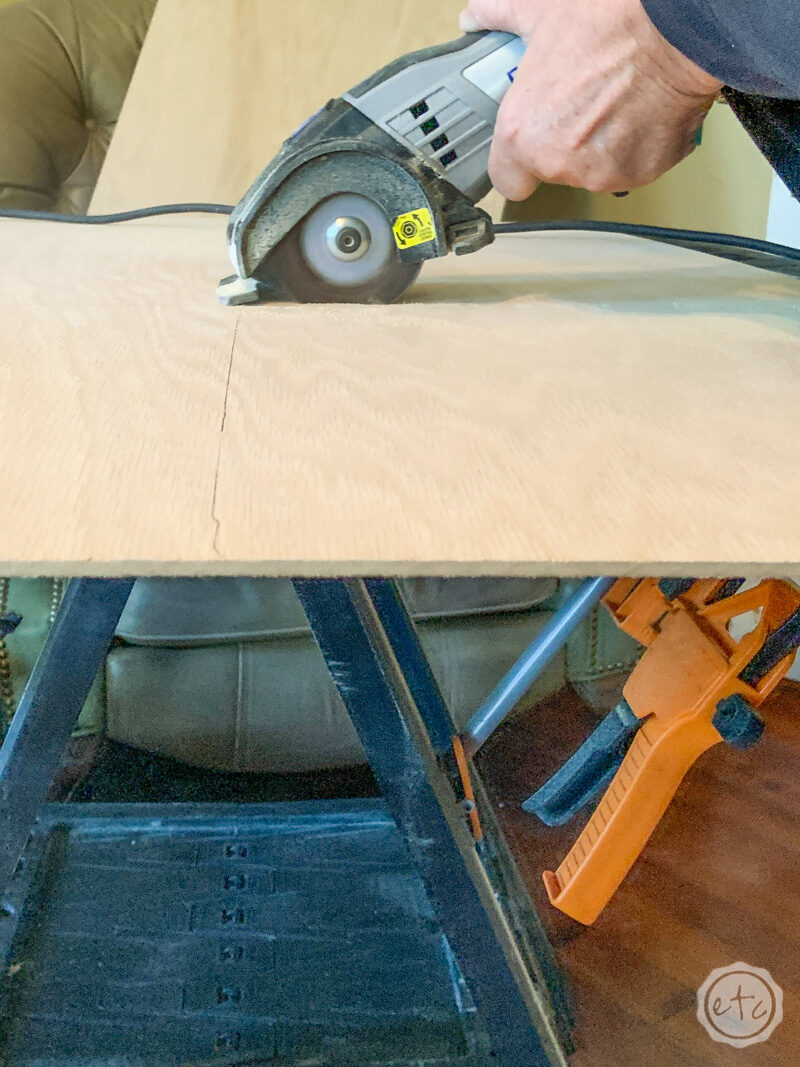
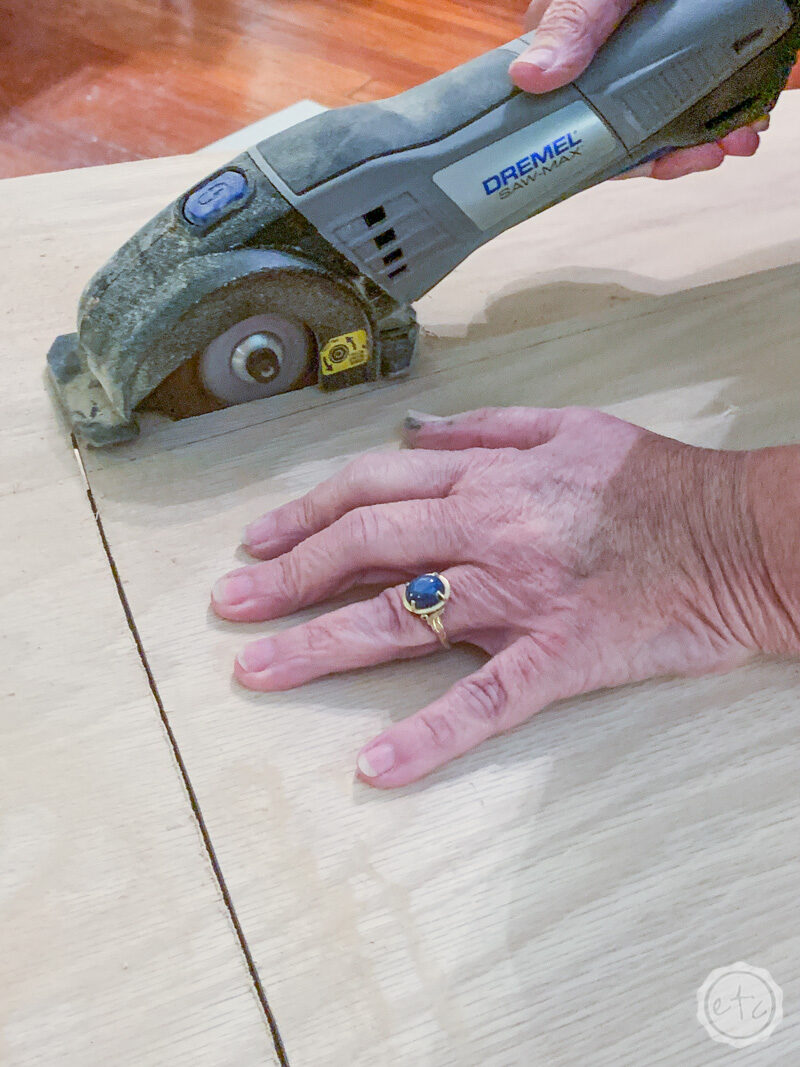
In order to make this as easy as possible I lined up 4 1×2’s at a time and clamped them tight with the built in clamps on my little worx work table. (Say that five times fast!) Then I measured out 10 inches and cut straight across all 4 boards with my little dremel saw max.

Keep going until you’ve cut out all 48 pieces. Then sand the edges smooth so that you don’t have any splinters (or rough edges!).

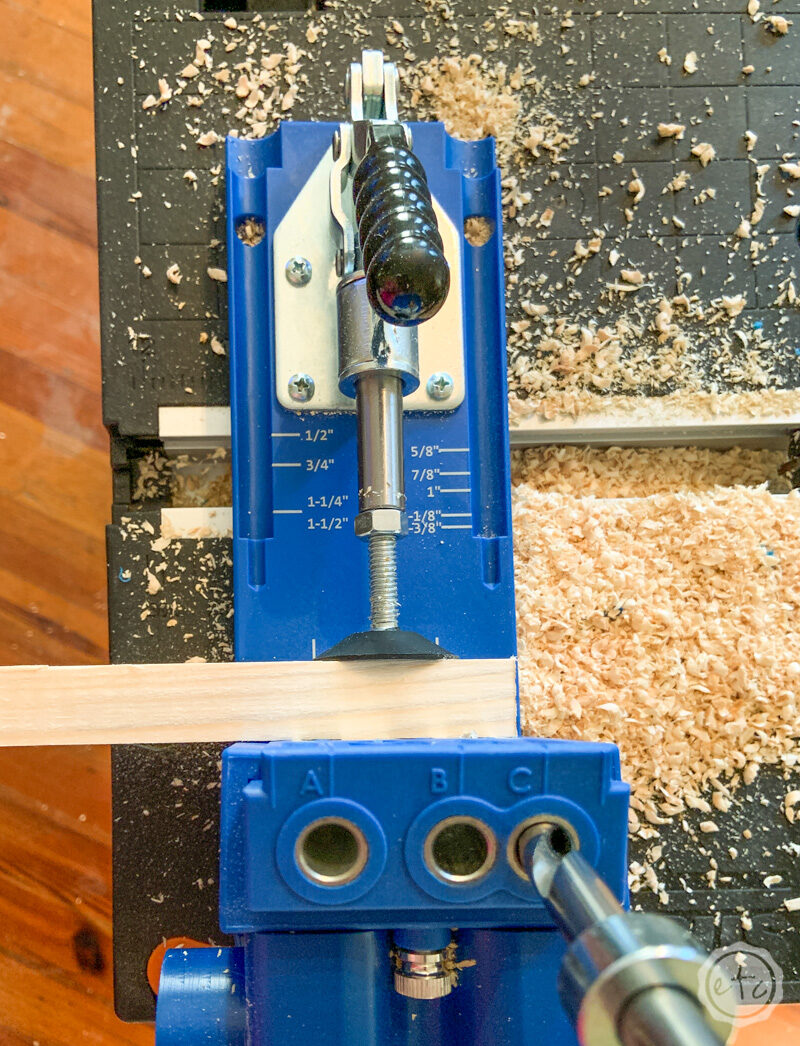
Step 2: Drill Your Holes

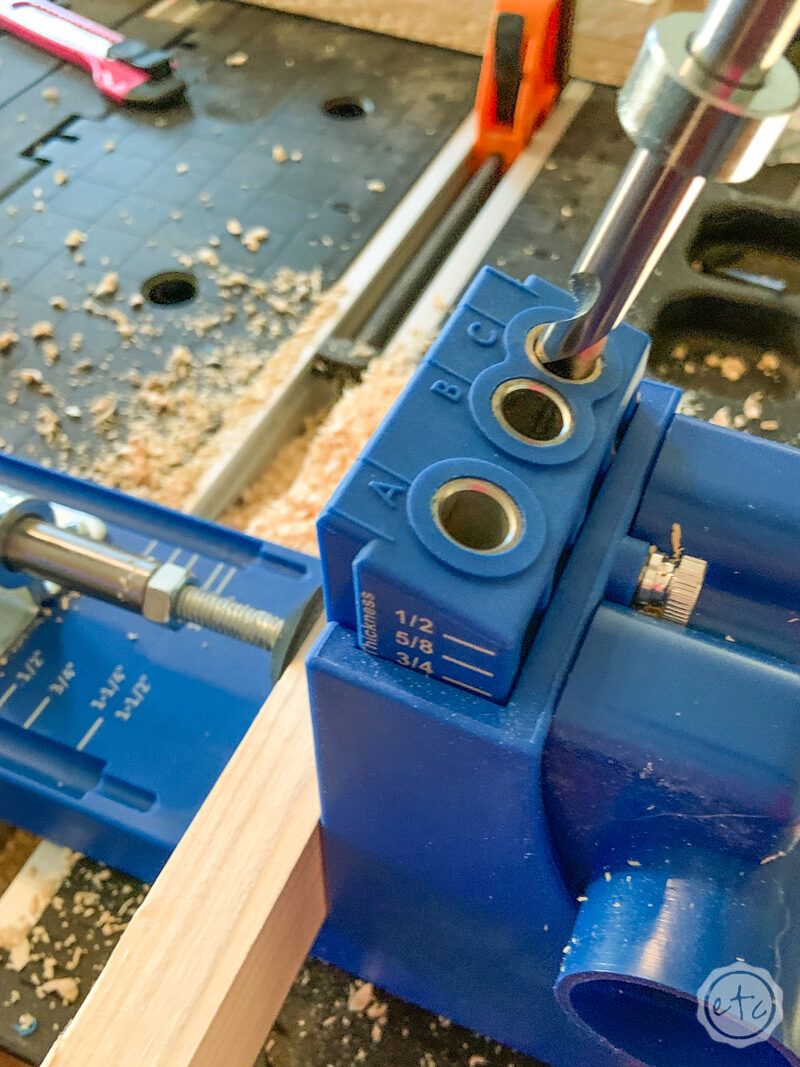
Now that our boards are all cut we can go ahead and drill our holes. I used my Kreg Jig to make pocket holes so that they would be hidden once the boxes were put together.

I love the k4 model because you can clamp the kreg jig to the work surface and then easily slide the boards in and out without having to individually clamp each board!

So much easier.

Simply set the kreg jig to 3/4 of an inch, set your drill bit collar to 3/4 of an inch and drill 2 pocket holes into the right side of all 48 pieces.

While I don’t have a step by step tutorial on how to use the K4 you can see the full break down on this little beginner kreg jig 320. The k4 uses the same concept except for the clamping (like I said earlier!).

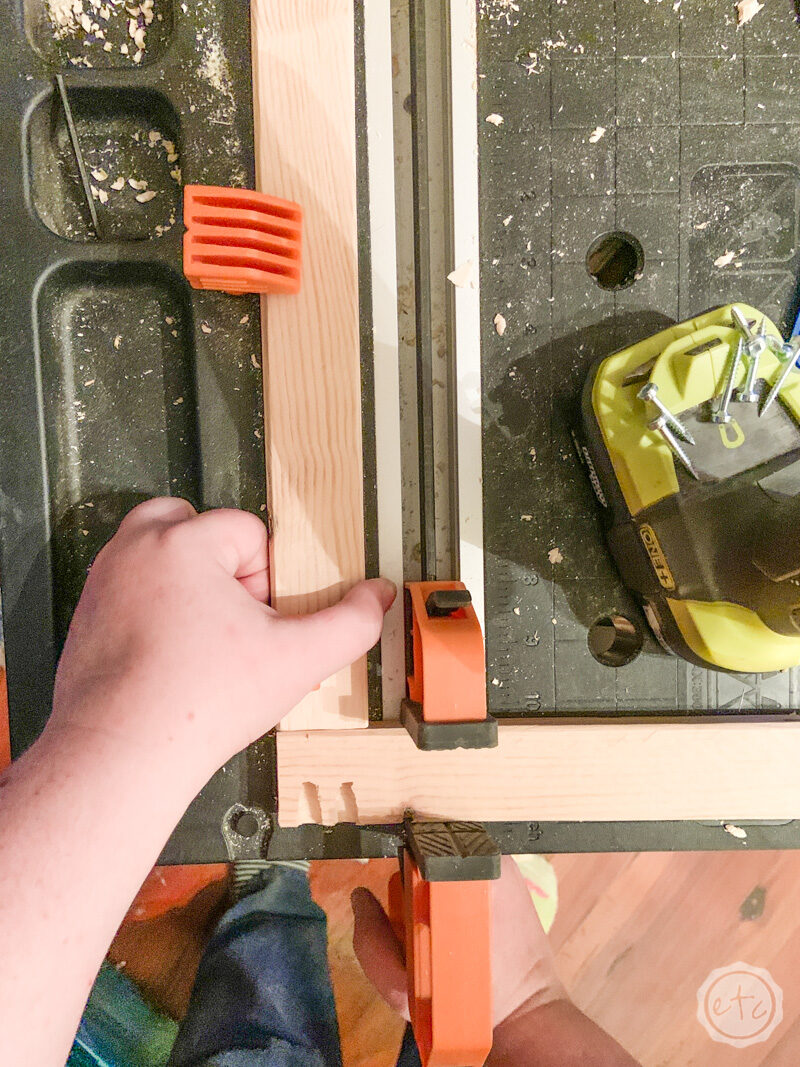
Step 3: Attach Your Boards Together

Now it’s time to put our sides together! Go ahead and clamp your boards together at a 90 degree angle with the drill holes going into the end of the next board. This is going to be a box so make sure you’re drilling into the side of the board with no drill holes. The drill holes for the the next board should be up above with the outside kreg jig holes on the left so that the screws will go into the next board on the right.

We’re making a square y’all.

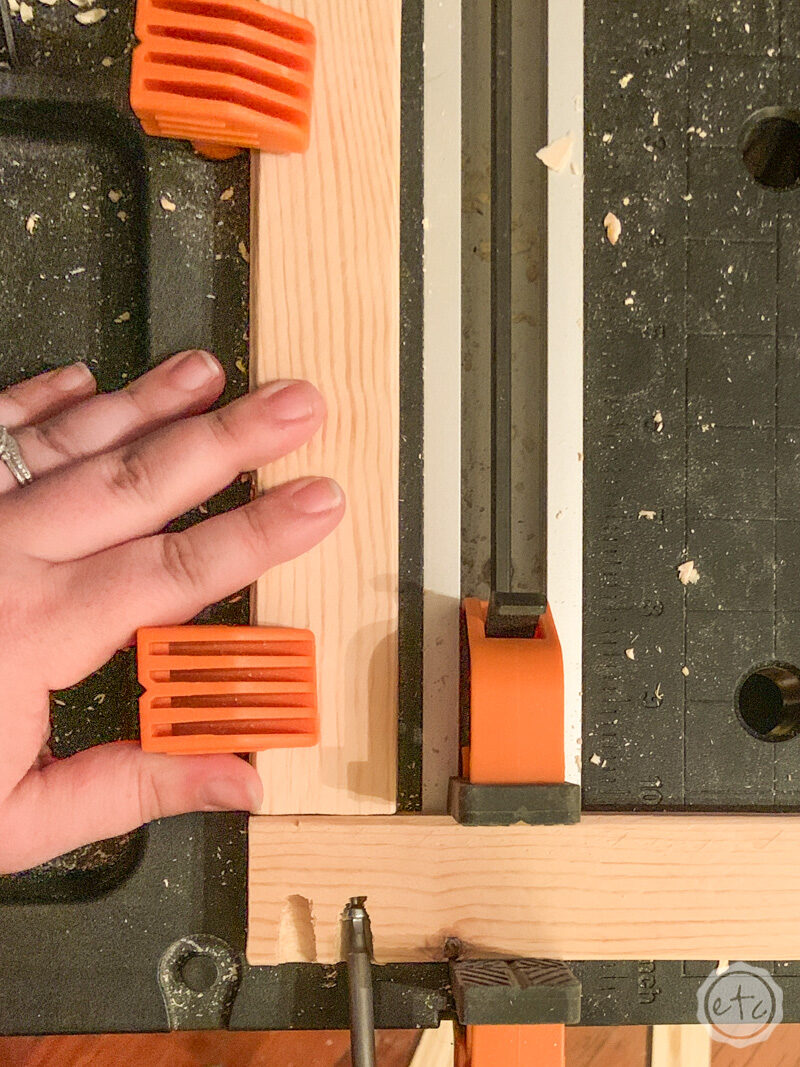
Once you have this little guy clamped in (technically I’m using the built in clamp on my table for the bottom board, and the top part is just a guide that the boards can slide under and help keep the right angle, but do whatever keeps your boards the sturdiest) go ahead and insert both screws.

Your kreg jig kit will include a long screw driver attachment for your drill so that you can drive the screws deep down into the screw holes. It’s also magnetic so that you can just pop the screws on the end and drive them home.

Go ahead and put all 4 sides of one box together… then move on to the next. You should have 4 10 inch boxes, 4 14 inch boxes and 4 18 inch boxes when you’re all done.

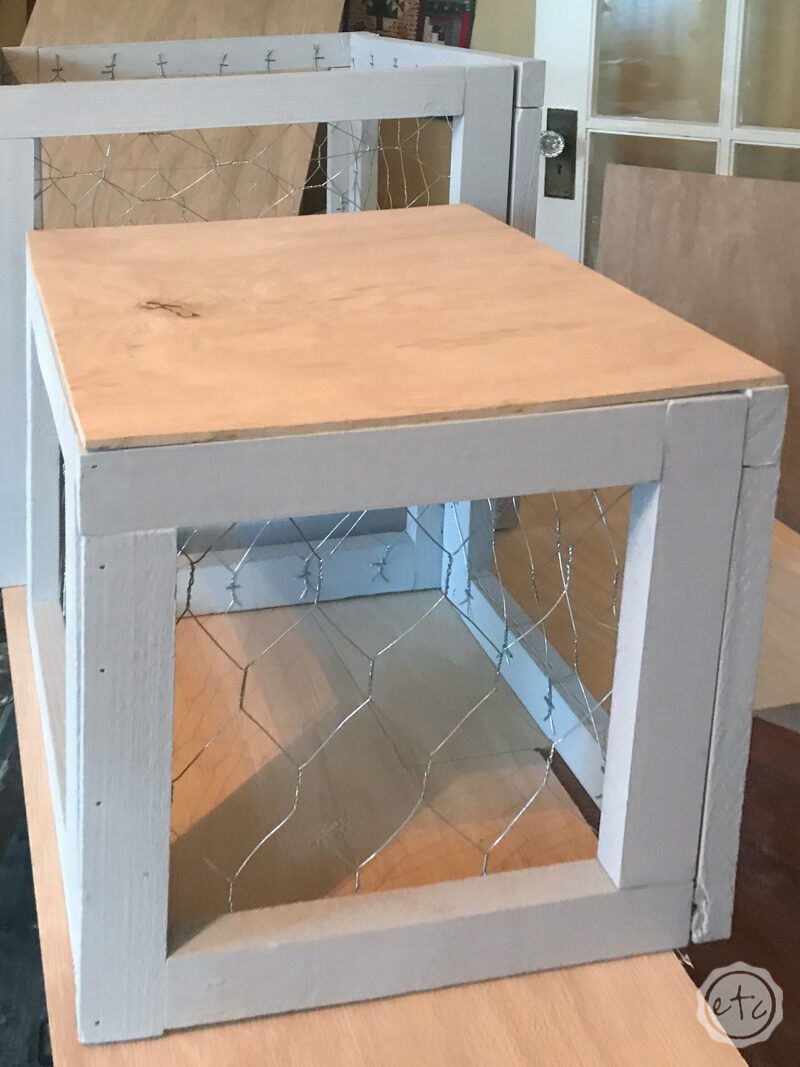
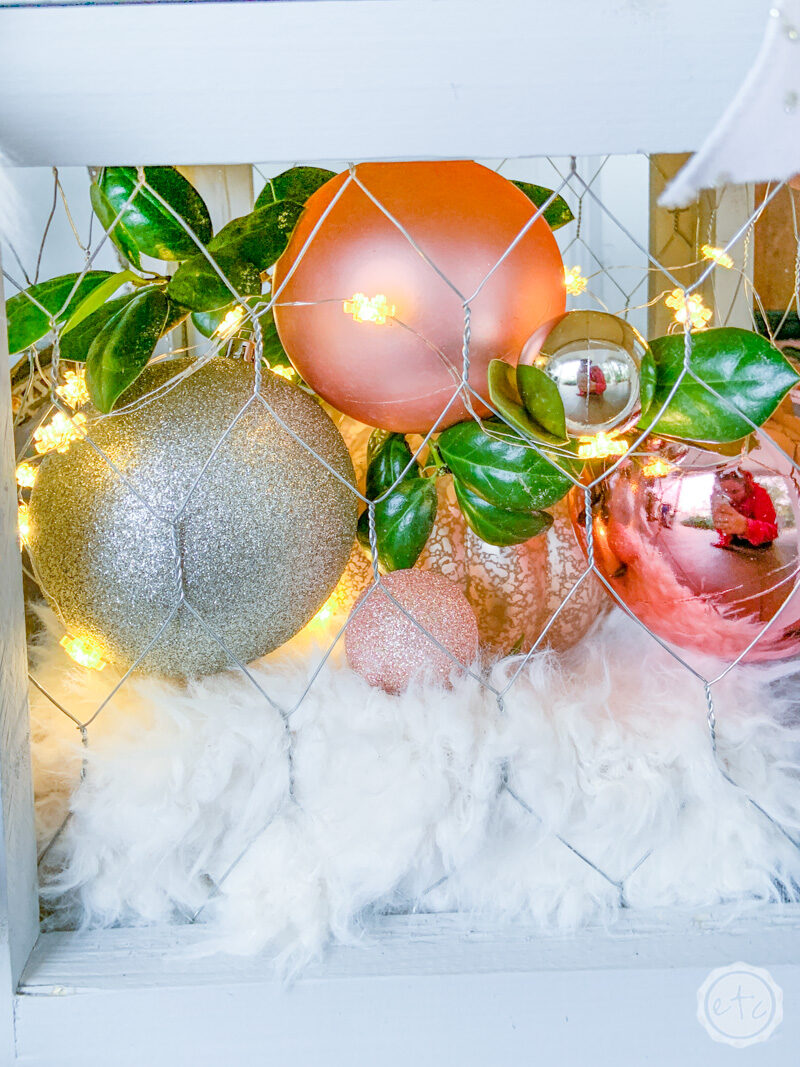
If you want to cover those large kreg jig holes with pegs now is the time to do that… then go ahead and paint those babies gray! Once your boxes are painted you can go ahead and add the chicken wire to the back. (You can follow the steps in this farmhouse frame tutorial for adding chicken wire to a frame if you need help).

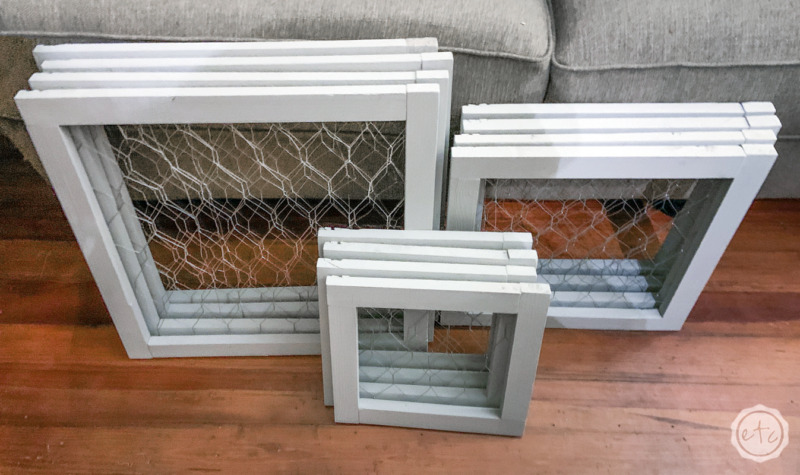
Ta-da! See how the kreg jig holes are almost non existent? It’s the pegs.

Step 4: Form Your Box

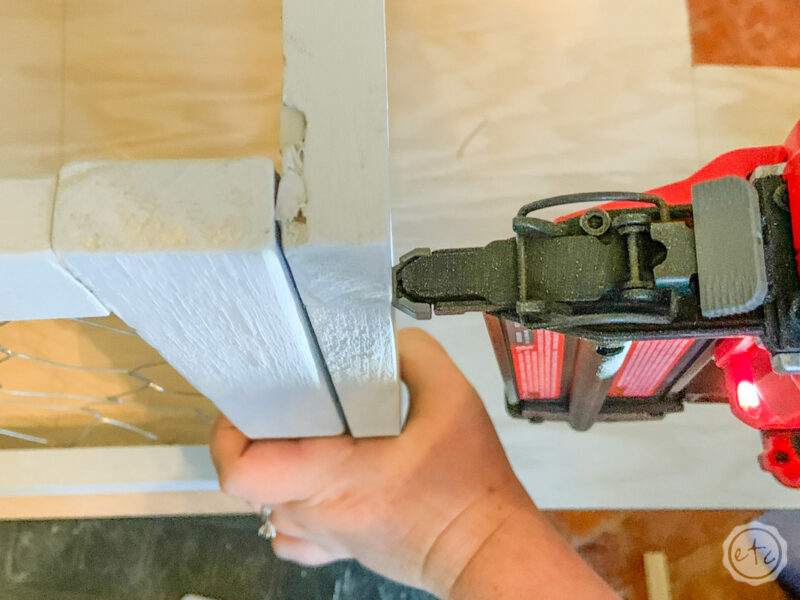
Now it’s time for the big guns… literally. Girls get out your brad nailers because it is time to put these boxes together.

Yes, we could have drilled more pocket holes so that we didn’t have to nail into the face of our boxes but since there wouldn’t be a good way to sink that fourth set of screws in to secure the final side of the box we decided to go with the brad nailer instead.

This baby will push those brads in far and deep so that they aren’t visible on the front of our boxes… and we can fill the tiny holes left by putty.

So start by holding two sides of your box together (like in the photo above) and then secure them with brads. I went with five. One in at the top, one at the bottom and 3 spaced evenly down the side.

BONUS TIP: When you add your brads to the top and bottom of the box sides please pay attention to the kreg jig holes. You do not want to fire a brad into a screw… it won’t end well for anyone. Think Iron Man vs Captain America but on a much smaller scale. Brad vs Screw.

Once you’ve done one side go ahead and work your way around until all 4 sides are added and you have a box! Then do the other two boxes before moving on to the next step!

Step 5: Cut the Top and Bottom

Now it’s time to get the saw max back out. I decided to use plywood for the top and bottom of these boxes (because I wanted to keep the project cost effective) but you could easily go with a thicker material to match the box sides if you wanted.

For each box we’ll need a top, a bottom and a few pieces of spare wood to build a lip for the inside of the top.

I simply placed each of the boxes on the plywood and traced around the bottom. Because of the way we nailed the boxes together they aren’t a perfect 10×10, 14×14 or 18×18… and unless you’re super cool they’re probably not 100% straight either.

That’s okay (these little boxes are pretty forgiving) but it makes tracing the boxes for the top and bottom easier… since then they’ll fit perfectly.

Go ahead and cut out all of the pieces and then paint them. I went ahead and nailed the bottom of my boxes on right away (so I didn’t get the top and bottom mixed up) and then moved on to the top.

Now you can simply place the top onto the box… that’s fine. But I wanted to make sure the tops stayed snug as a bug in a rug. So I took a few of the scrap pieces of wood and stapled them in place so that the tops wouldn’t shift in the wind, or when moved, or when a cat tries to sit on them.

You know… whatever.

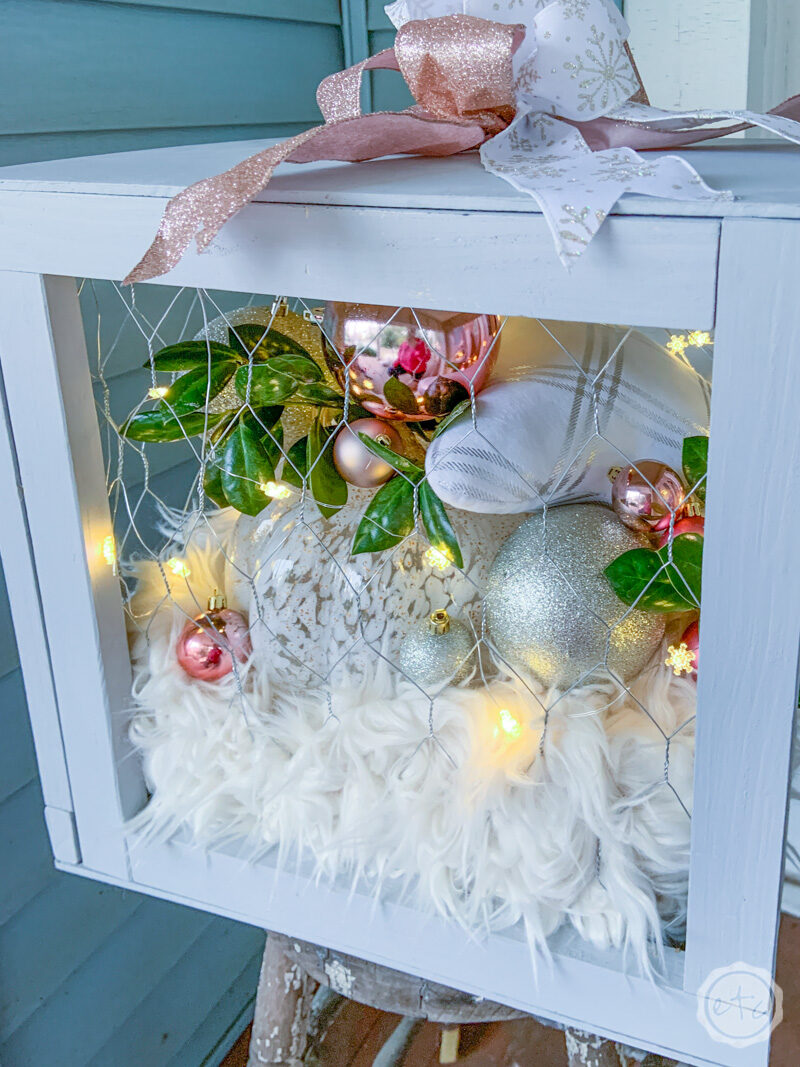
Then I went a step further and added two screw holes in the center of each present top so that I would have a place to thread the wire for the bows on top of each box!

Score!

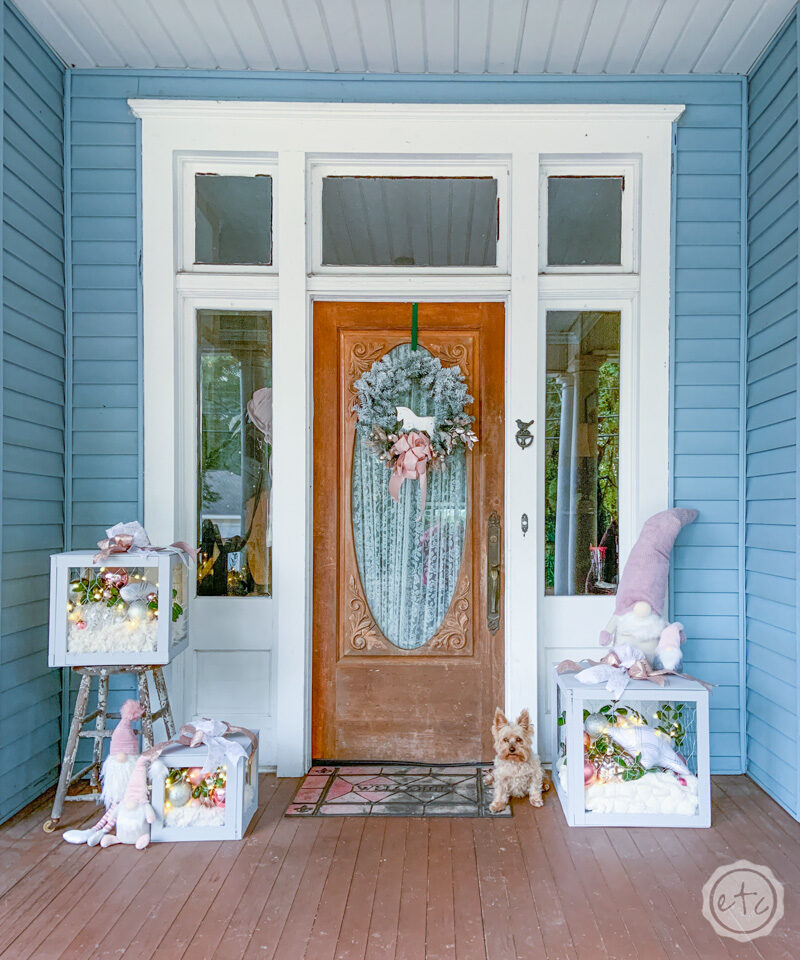
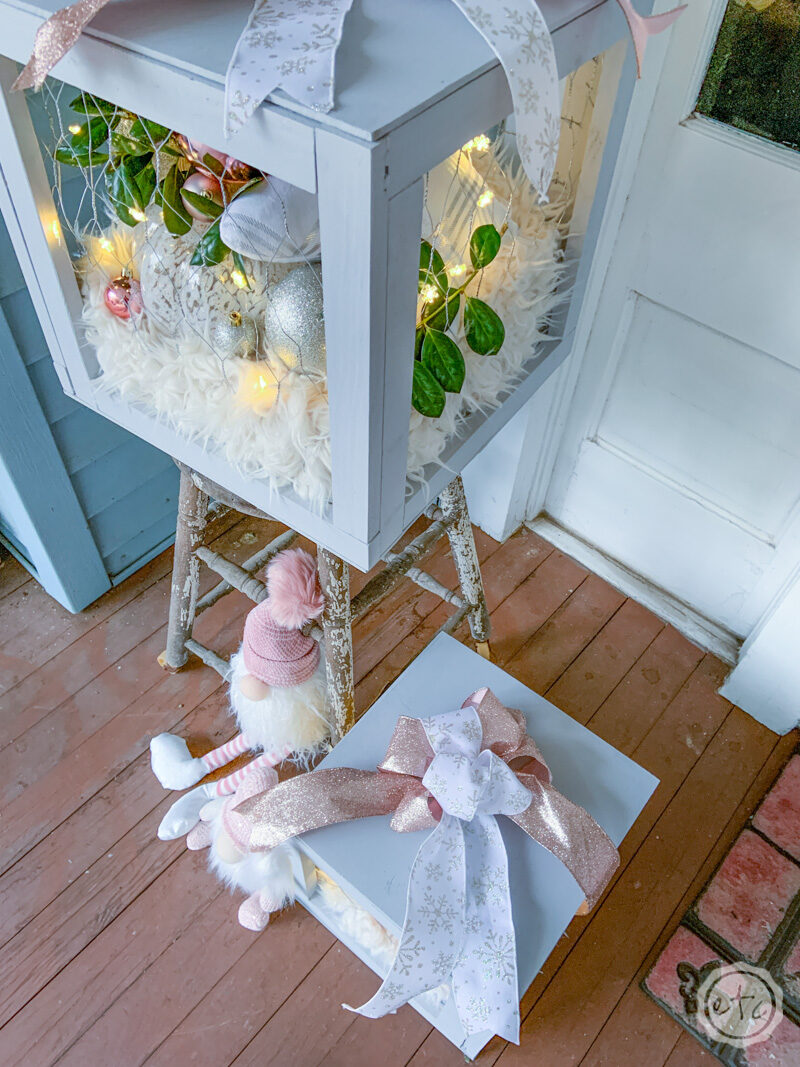
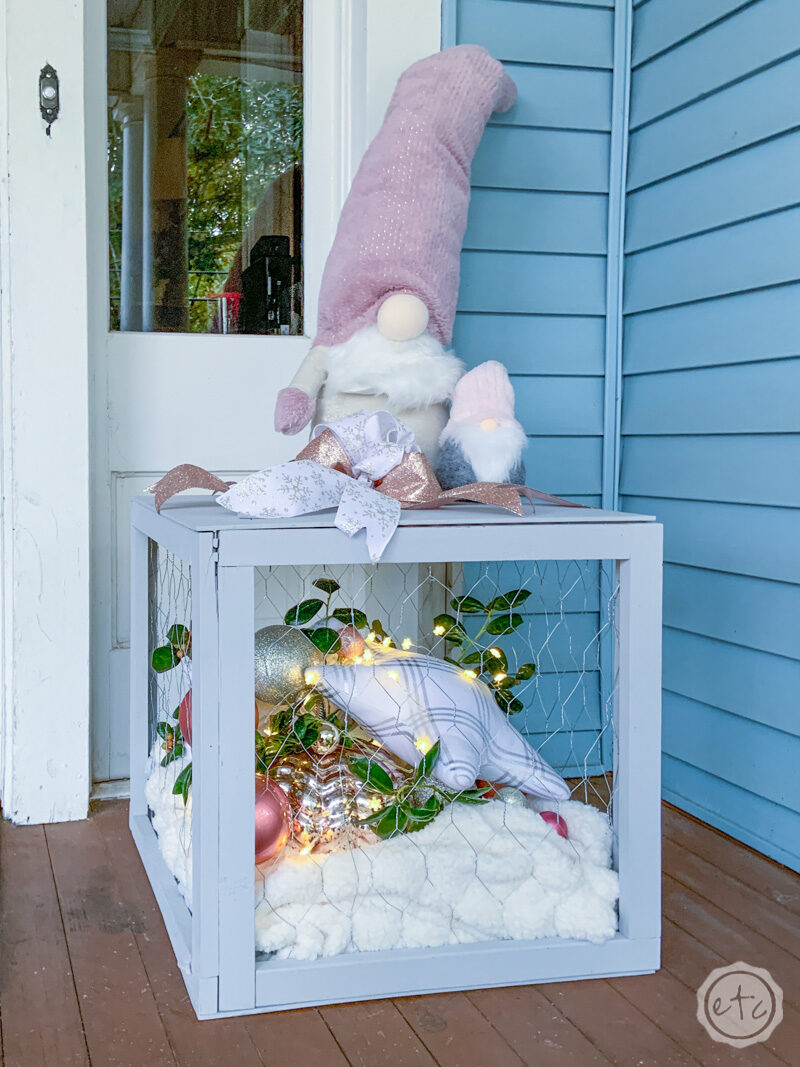
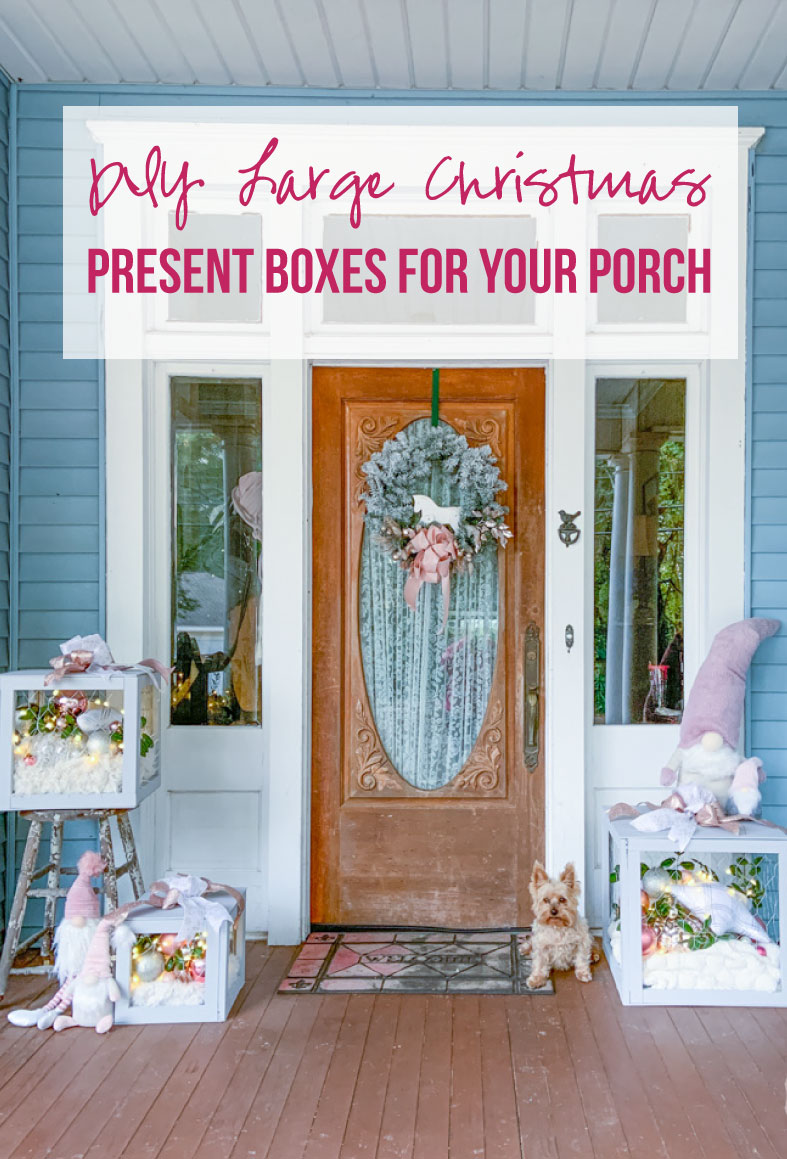
Once your box top is finished you’re ready to rock! Go ahead and place them on your porch and decorate them to your hearts content.

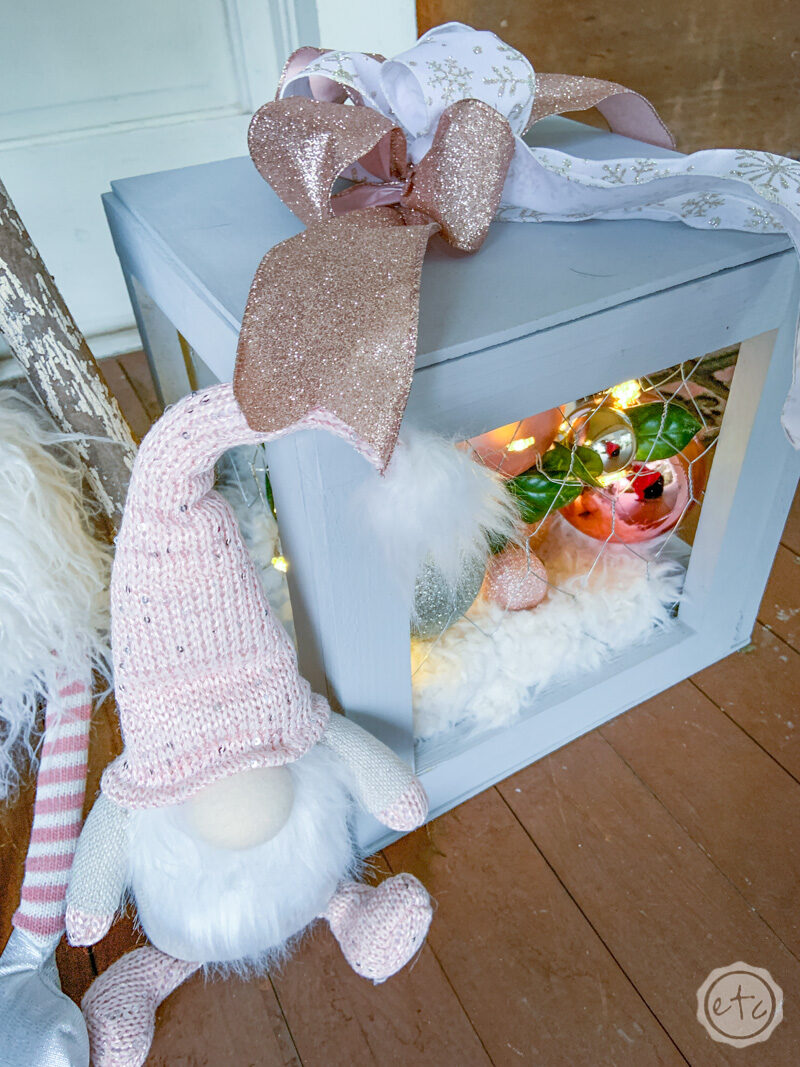
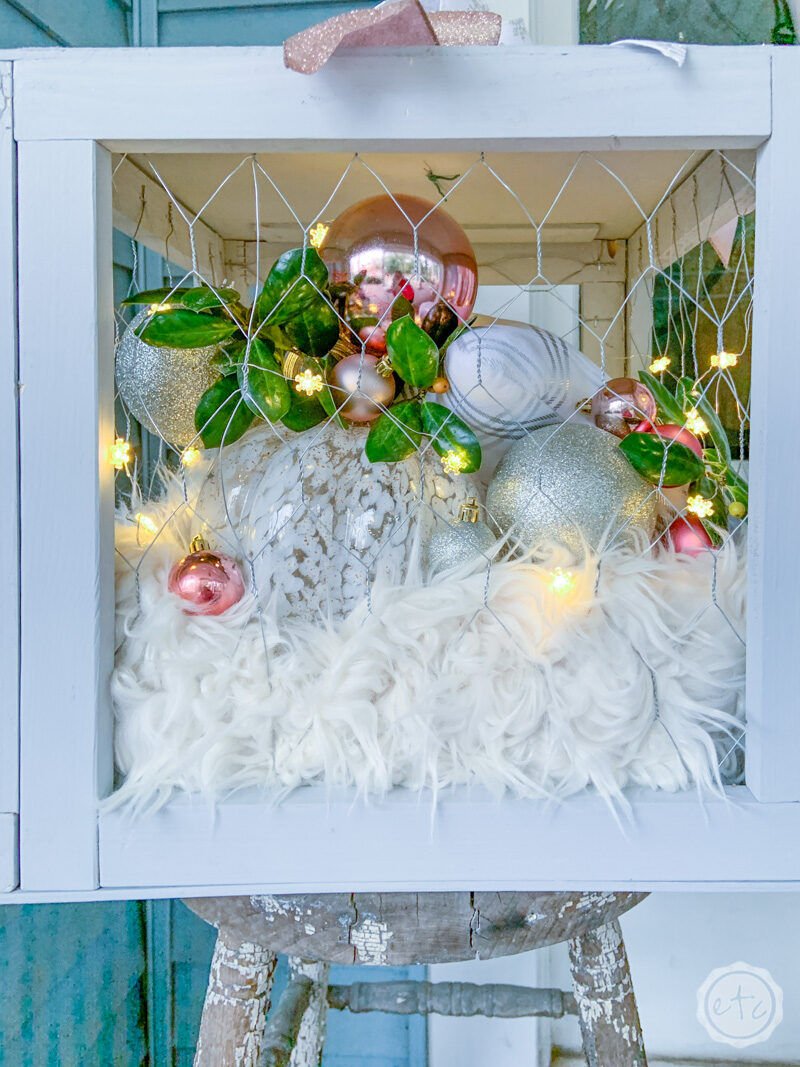
I decided to fill mine with white fur fabric (because let’s face it these babies are big and I didn’t have enough stuff to actually fill the entire box!) then a combination of battery operated Christmas lights, large ornaments, holly leaves from my backyard and fun star shaped pillows from the Target dollar spot.

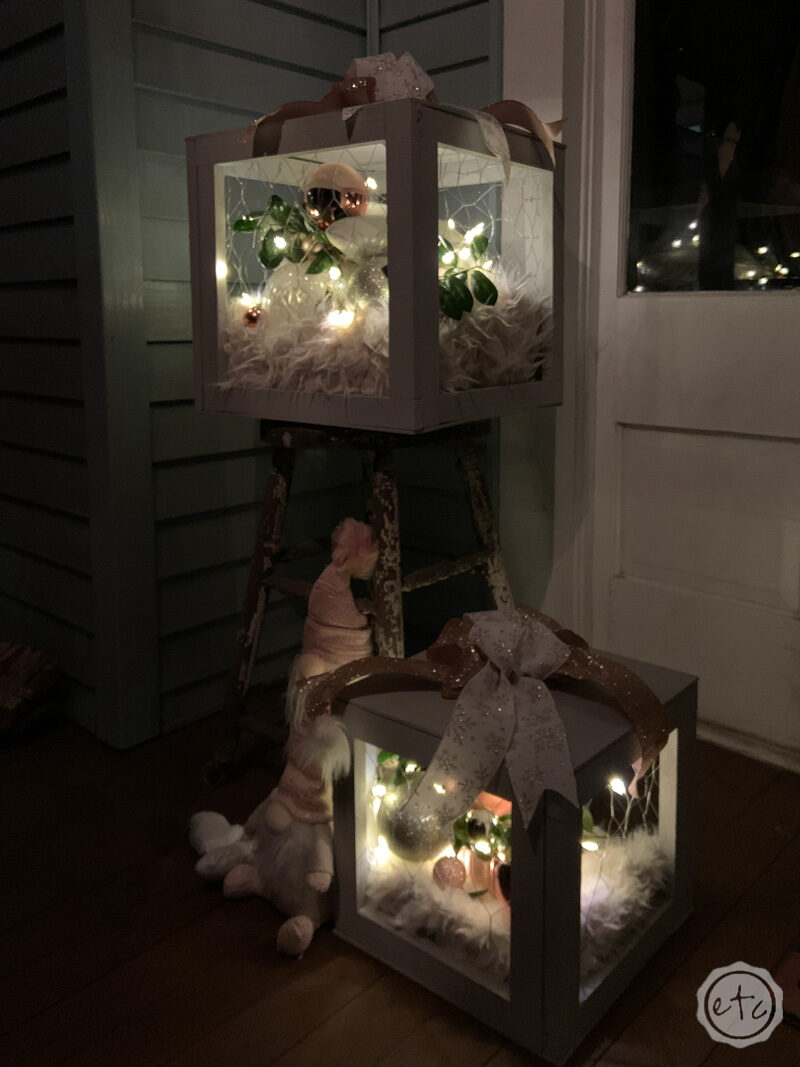
Ready for the final reveal?

They look even better at night!

I love the glow from the boxes as you drive by. They’re just so festive!

Psst. Looking for the tutorial for the wreath on my front door? You can find it here. The gnomes are from a certain store that I visit way to often (TjMaxx) but you can find similar ones here.

Looking for more rose gold holiday goodness? These posts are for you!

You are invited to the Inlinkz link party!

Click here to enter

Ready for a few more fun Outdoor Decor projects? Let’s get those porches looking amazing y’all! My friends in blog land (aka a few of my favorite blog friends) have put together an entire set of ideas for you to try!

Of course, this isn’t a stand alone project. We’ve been bringing you new and exciting holiday content all season long… and this is week 4 of our holiday extravaganza! This week we’re all sharing our favorite quick and easy outdoor decor. Check out all the fun below:

See More Holiday Outdoor Decor Projects

Get Your FREE Wedding Binder

Trying to plan your perfect wedding?

Here's 42 FREE printables to help you get organized!

Success! Now check your email to confirm your subscription.

There was an error submitting your subscription. Please try again.

Powered by ConvertKit
You made it through the entire post? That means you're one of my new favorite people! I'd love to be friends and see what else you would like to read about! Leave me a comment and then sign up for your very own FREE paint planner.... so that you can keep track of every single paint color with ease!
Welcome back! I'd love to be friends and see what else you would like to read about! Leave me a comment and then sign up for your very own FREE paint planner.... so that you can keep track of every single paint color with ease!

Show me some LOVE y'all:

  • Facebook
  • Pinterest
  • Twitter
  • Email

Related

«
»

DIY & Crafts, Holidays 6

Comments

  1. Christine says

    November 26, 2019 at 5:46 am

    Oh my goodness!!! The Christmas present boxes are absolutely stunning!!! I wanted to make some for my front porch and I had never thought about using chicken wire! Such a great idea!! Love that you were able to add decorations and lights inside them! Genius project!! Pinned!

    Reply

Trackbacks

  1. 10 Minute Blush Gnome Ornaments - Happily Ever After, Etc. says:
    December 1, 2019 at 9:00 pm

    […] a little Scandinavian, a little fuzzy and I am definitely here for it. And when I shared the large DIY present boxes for my porch last week (with a little peek at the fun gnomes I picked up at TJMaxx) you were as here for it as I […]

    Reply
  2. DIY Wood Projects for Christmas - 1905 Farmhouse says:
    December 5, 2019 at 10:41 pm

    […] Large Christmas Present Wood Porch Boxes-Happily Ever After […]

    Reply
  3. 30 DIY Holiday Decor Projects You Can Make! - Hazel + Gold Designs says:
    December 16, 2019 at 8:45 pm

    […] these beautiful large Christmas present boxes for your front […]

    Reply
  4. The Best DIY Christmas Décor Projects ~ Southern Yankee DIY says:
    February 15, 2020 at 11:05 pm

    […] I hope all my presents are this big this year, from Happily Ever After ETC […]

    Reply
  5. Easy No Sew Easter Bunny Gnomes - Happily Ever After, Etc. says:
    March 5, 2020 at 6:50 pm

    […] adored the gnome ornaments we made for Christmas (not to mention the large gnomes I mixed in with the DIY present boxes on my front porch) and now that those are safely tucked away for the season I was just a little depressed. So I […]

    Reply

Leave a Reply Cancel reply

Your email address will not be published. Required fields are marked *

sidebar betsy I'm Betsy, Home Decor Enthusiast, Yorkie Mama, Crafter, Blogger, Picky Eater, Chief Mess Maker, Antique Hoarder and Graphic Designer. You can generally find me working on (attacking with a paintbrush) the 3 bed, 2 bath home we are currently renting! Our home might not be perfect but it is ours & if you hang out long enough you'll see that what we lack in know-how we make up for in passion!
Shop My Craft Room

Shop My Home

Featured Articles

15 Fabulous Ideas to Organize your Laundry Room
25 FREE Printables For Your Home!
What to do with EXTRA Paint with Happily Ever After Etc
10 Ways to Make Your Bed EXTRA Comfy with Happily Ever After Etc.
Ready to Pick your Perfect Paint Color? We'll help you with our 6 Day FREE E-Course

Hey y’all,

Profile

I'm Betsy, Home Decor Enthusiast, Yorkie Mama, Picky Eater, Chief Mess Maker, & Graphic Designer...

A Little Note!

Many of the links on Happily Ever After, Etc. are affiliate links. If you purchase a product after clicking an affiliate link, I receive a small percentage of the sale for referring you, at zero cost to you! How awesome is that? Purchasing through affiliate links is an easy, painless way to help out your favorite bloggers. Thank you so much for your continued love and support! Read the full disclosure here!

Instagram

The number one question people ask when they watch The number one question people ask when they watch my new home tour on YouTube? Why is there so much clutter... um excuse me I like stuff! The second question? How did you frost the doors? Don’t worry... I wrote out the whole process, check out the step by step tutorial on the blog!
With Christmas fast approaching I’m having secon With Christmas fast approaching I’m having second thoughts... about taking down my holiday decorations! I absolutely love all the blush and rose gold this year and think I might have to add more pink to my every day decor. Until then maybe it will just stay Christmas at the Smith house! Tutorials for both the “Merry Christmas” resin sign and the “Dear Santa” Cricut sign are in my profile! #pinkchristmas #pinkchristmastree #pinkchristmasdecor
Well y’all Christmas is coming up quick... which Well y’all Christmas is coming up quick... which means I need to get a move on with all that wrapping! I got a jump start this morning after whipping up a few little resin light bulbs! Check out the full tutorial over on the blog if you’d like to wrap your presents with a few resin goodies this year... and tell me in the comments below. Are you finished wrapping or (like me) are you still getting started? #pinkchristmas #pinkchristmasdecor #resinchristmas #giftwrappingideas
Ready for another fun and easy resin project? Thes Ready for another fun and easy resin project? These little Christmas trees are the perfect beginner level project so if you’ve never done resin before don’t let it intimidate you!! Grab your heat gun and jump in... I’ll walk you through it! Check out the full blog post for these little guys on the blog (link in profile!)
If you haven’t joined Michelle at @weekendcraft If you haven’t joined Michelle at @weekendcraft SVG membership then WHAT ARE YOU WAITING FOR?! I am obsessed with all the cute svg’s and y’all she is doing a live craft night every month to walk you through making one of her designs... and the first craft night is tomorrow! She’ll be making this “Merry everything and Happy always” SVG and it’s so cute! You don’t want to miss it! See you there! 

(Also who noticed the sneak peek at my new kitchen?!)

#cricutsvgfiles #christmassvg #cricutsled
Well y’all I’m getting this close to unpacked Well y’all I’m getting this close to unpacked in my new house!! And since I’m a blogger Christmas is going up! So here’s the question... do you want a 1 month house update or do you want to wait for the Christmas tour? #lulamaefarmhouse #rosegoldchristmastree #newhouse
Well it’s still a work in progress but I finally Well it’s still a work in progress but I finally have a house!! They have to put it together and do all the detailing before I get keys... but we’re in the end game now! Check out my stories for a sneak peek at the moving process... full YouTube video coming soon!
#ad how amazing did these little fall coasters tur #ad how amazing did these little fall coasters turn out?! Plus I absolutely love the matching tray! The best part? This is such a quick and easy resin project... a silicone mold, a little resin and your trusty heat gun and I promise you can make this baby!! Link in profile for the tutorial!! #fallresin #resinforbeginners #cheetahprint
Okay... is it bad if you just want to make coaster Okay... is it bad if you just want to make coasters in the same mold with the same technique but different colors?? They turn out soo differently! Just a sneak peek of my fall coasters and the blush ones I made last year!
Happy #nationaldogday to the fur babies that are ( Happy #nationaldogday to the fur babies that are (literally) behind (beside... or underneath!) all Of my projects! These sweet little cuddle muffins make everything better 😊🐶😘
GIVEAWAY CLOSED Our winner is @kamikvega Check you GIVEAWAY CLOSED
Our winner is @kamikvega Check your inbox girl, this little machine is headed your way! Thanks to everyone who participated... I can’t wait to see where we go from here!

🥳📦🥳 GIVEAWAY🥳📦🥳
If you have loved all of the Cricut projects I make here is your chance to win a Cricut Joy of your very own! If you’re ready for a little craftiness (maybe a little time to relax) then this giveaway is for you! I’m teaming up with a few of my cavities crafty bloggers so that one of you can win your very own mini crafting machine. Good Luck!!!!

TO ENTER GIVEAWAY:
1.) Follow
@creativeramblings 
@weekendcraft 
@craftylumberjacks 
@this.is.tisa 
@justcallmehomegirl 
@happilyeverafteretc
@lovebird_heartworks 
2.) Like this post
3.) Tag a friend in the comments.
.
.
.
Hurry! Giveaway ends Saturday 8/29/20 at 11:59PM PST. Winner will be notified via Direct Message. Share or tag a friend who'd love to win a Cricut. .
.
.
This contest is in no way affiliated with or sponsored by Instagram or Cricut. To enter you must have a U.S shipping address.
A little peek into the fun summery Tablescape I pu A little peek into the fun summery Tablescape I put together for a little garden party! Want to check out the full table? Wondering where to find all the pieces... click the link in my profile for all the details!
#ad Did you know you can put infusible ink onto al #ad Did you know you can put infusible ink onto aluminum? It's sooooo simple... honestly it's one of the easiest projects I've ever done. Even if you've never used your Cricut before you. can. do. this. I'll show you how every step of the way! Follow along with the full tutorial video over on YouTube! The best part? These little aluminum signs look amazing as part of a larger project! Check out how I added mine to a larger resin wave project on the last slide! @officialcricut #cricutcreated https://lnk2.io/wvMllZf
Okay so It’s no secret that I’ve been obsessed Okay so It’s no secret that I’ve been obsessed with resin for a while now but this week I’ve been playing around with resin waves! Including this tiny resin sea shell! Check out the link in my profile for the full tutorial!
After a lot of struggle, loss and frustration I am After a lot of struggle, loss and frustration I am finally dotting the i’s and crossing the t’s on my next chapter. Yesterday I went and signed the million and one papers to close on my new house! I cannot wait to share the moving (and decorating) process with all of you... next step: keys! #firsttimehomebuyer #newhouse
Load More... Follow on Instagram

Copyright © 2021 · Darling theme by Restored 316

Copyright © 2021 · Darling Theme on Genesis Framework · WordPress · Log in · Privacy Policy

loading Cancel
Post was not sent - check your email addresses!
Email check failed, please try again
Sorry, your blog cannot share posts by email.