• House Tour
    • Reveals
  • About
    • Smith Life
    • Disclosure and Privacy Policy
      • Terms and Conditions
      • Store Affiliates
  • Contact Me
    • Want a Button?
  • Shop
    • Floral Printable Planners
    • Paint eBooks and Packages
    • Wedding Binders & Extra Printables!
    • Planner Bundles
    • Planner Accessories
    • Home Decor Printables!
    • Cart
    • Bloglovin
    • Facebook
    • Instagram
    • Pinterest
    • Twitter
    • YouTube

Happily Ever After, Etc.

Creating Our Own Fairytale

  • Happily Ever After, Etc.
  • Home
  • Home Decor
    • My Home
    • Paint
    • Before and After
    • Tablescapes
    • Mood Boards
    • Furniture
  • DIY & Crafts
    • New to Cricut – Start Here
    • Cricut Projects
    • Resin
    • Scrapbooking
  • Organization & Planning
    • Cricut
    • Organization
    • Planner
  • Wedding
    • Cricut Wedding Projects
    • Free Wedding Binder
    • Bride Bag- The Ultimate Wedding Planner

10 Minute Blush Gnome Ornaments

Hey y'all,

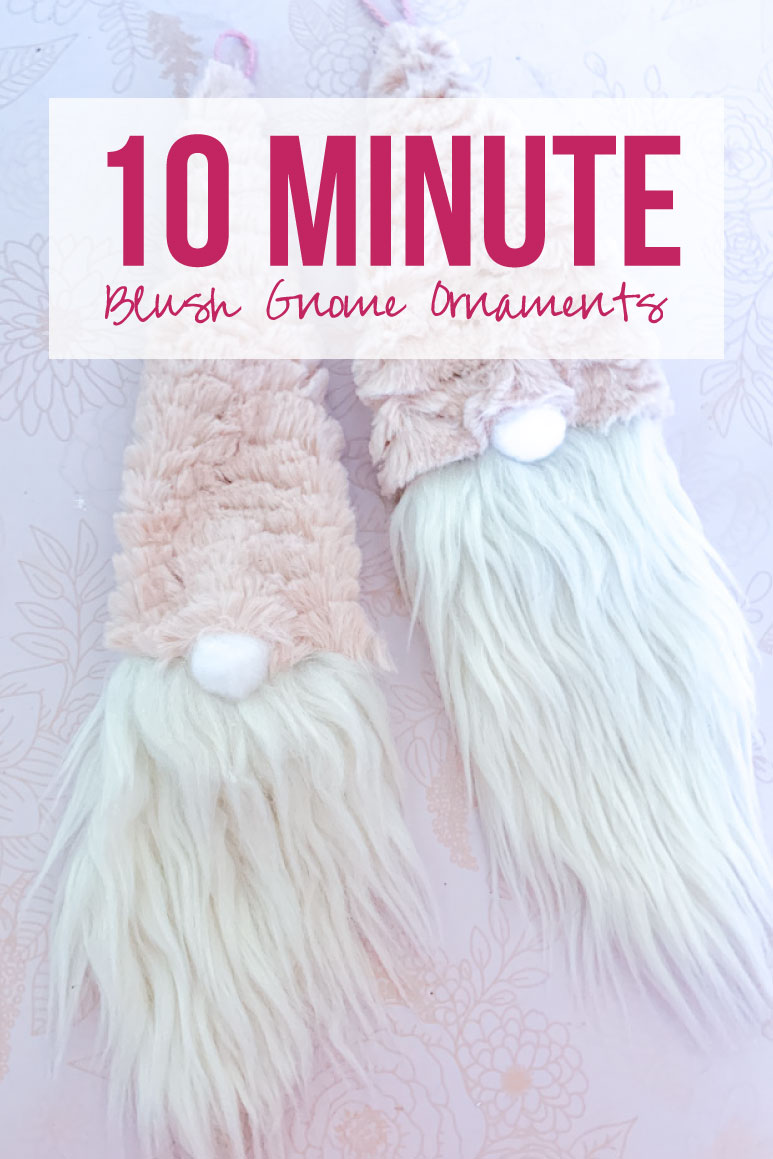
I am absolutely in love with this years trend of fun gnomes! They’re a little Scandinavian, a little fuzzy and I am definitely here for it. And when I shared the large DIY present boxes for my porch last week (with a little peek at the fun gnomes I picked up at TJMaxx) you were as here for it as I am.

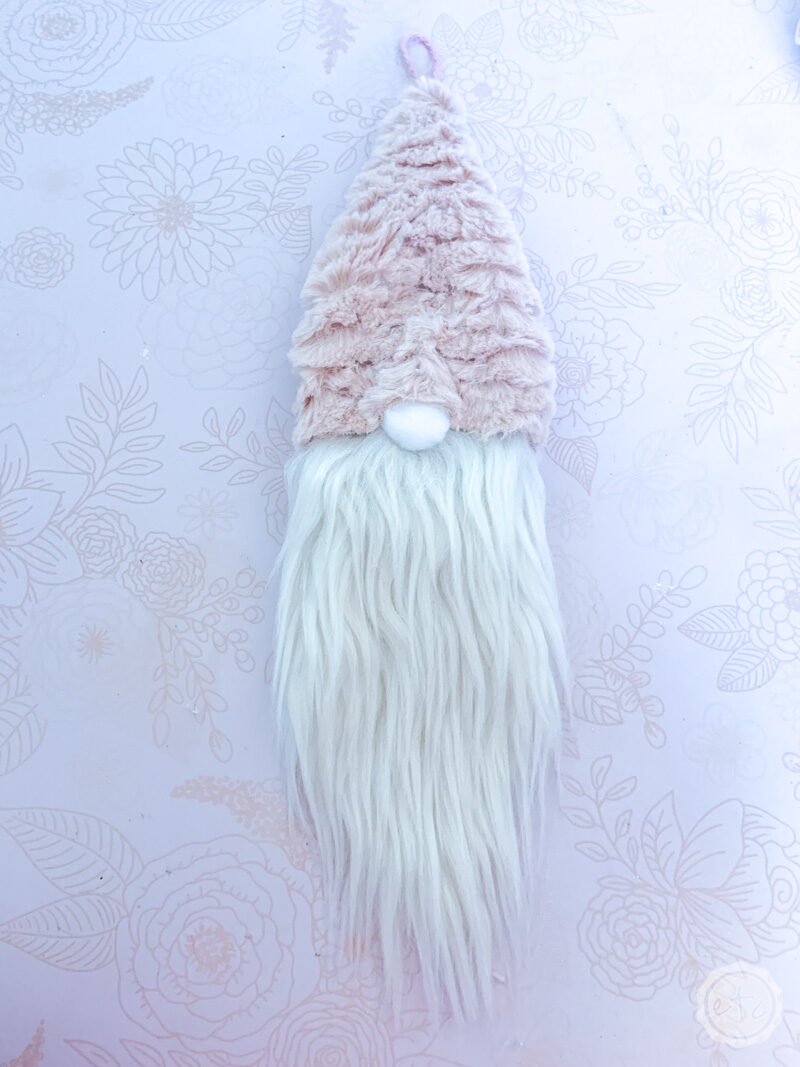
So I thought I’d whip up a few fun DIY gnome ornaments for my tree!! The best part is that these babies only took about 10 minutes to make and I already had all of the materials. The little hats used left over fabric from my diy santa hats, the twine was from my fun baby mobile and the wood slices were from a succulent garden.

The best part? This is only one fun ornament coming your way! Scroll down for an entire group of fun diy ornaments from my blog friends!

Ready for all the info?
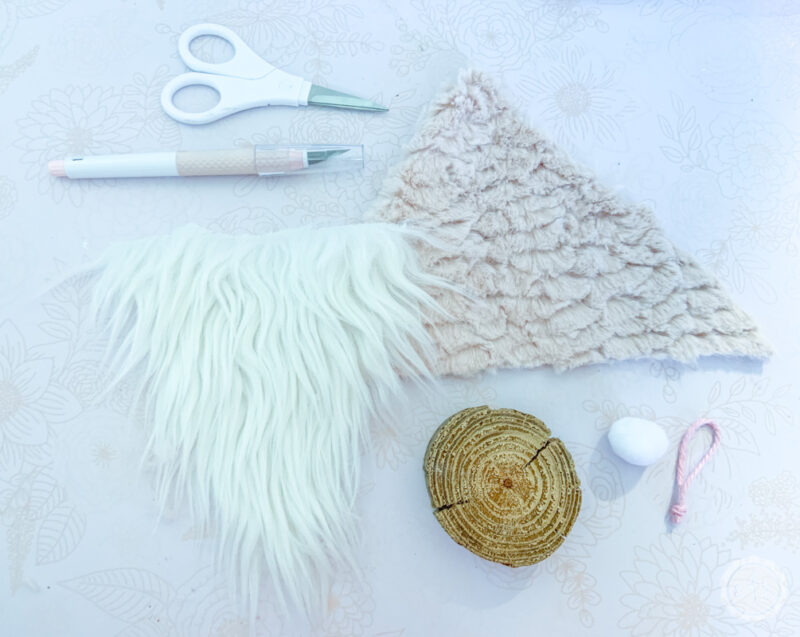
Supplies:

  • Blush Fabric
  • Faux Fur Fabric
  • 1 Wood Slice (2-3 inches wide)
  • 1 Piece of Twine
  • 1 Pom Pom/Wooden Bead
  • Hot Glue and Hot Glue Gun
  • Scissors
  • True Control Knife

Step 1: Cut Your Fabric

Alright y’all let’s get started. You’ll want to cut a triangle out of your white faux fur and your pink fuzzy fabric. You can make it a short and stout triangle or a long skinny triangle depending on what kind of gnome you’d like.

Just make sure that the bottom of each triangle wraps all the way around your wood slice so that you have room to secure it.

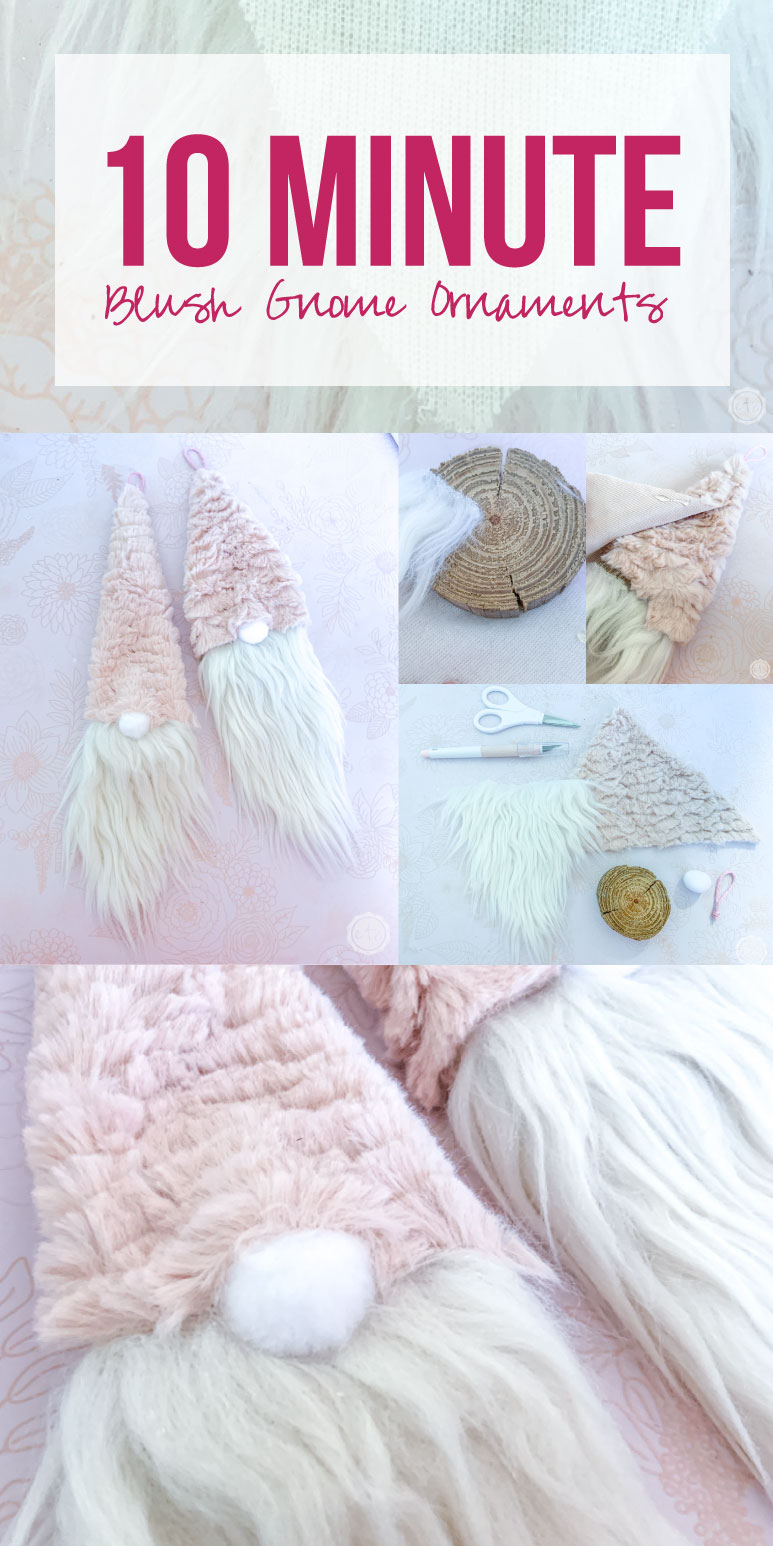
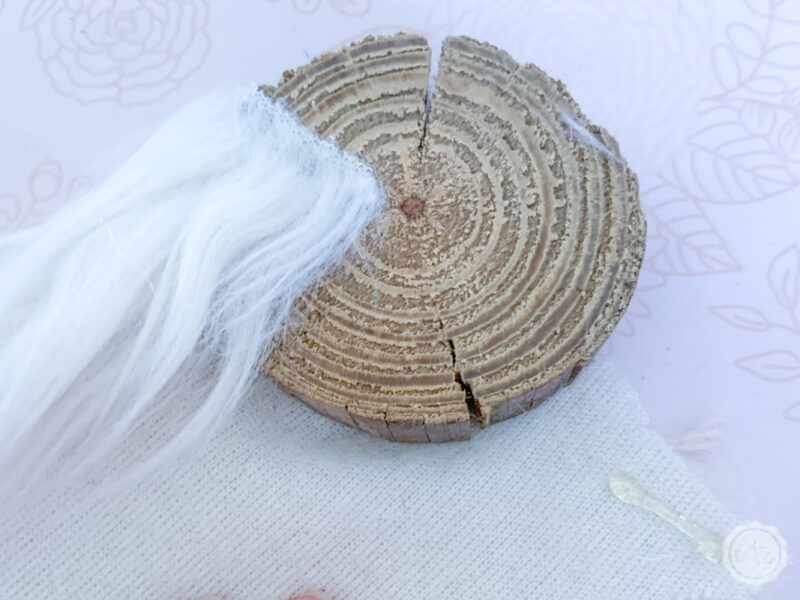
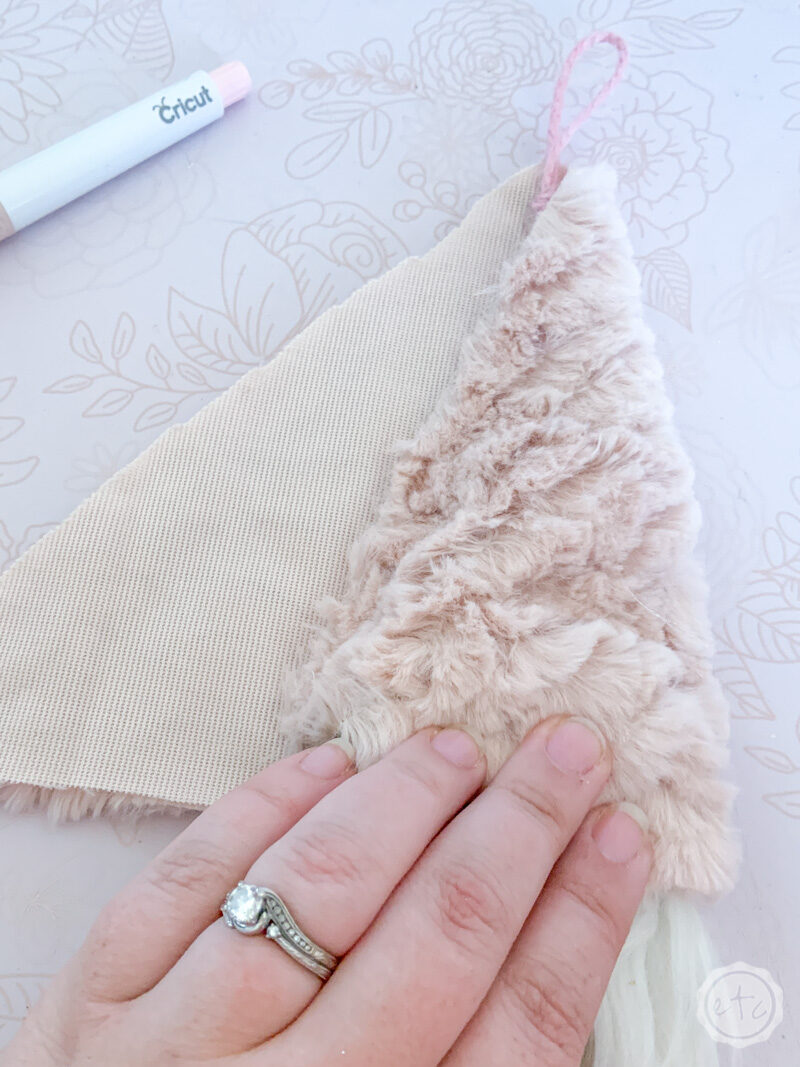
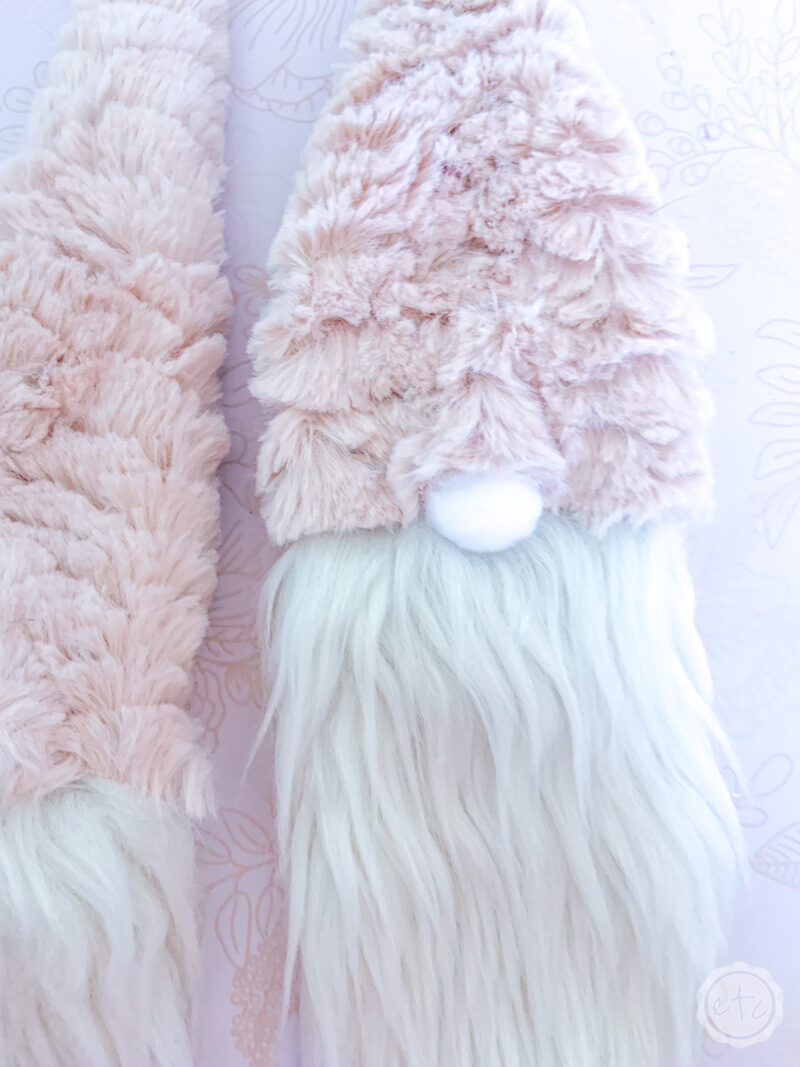
My only other tip is to be careful of how you cut your faux fur. Use an exacto knife to cut straight through the backing of the fabric then pull the fibers apart. Take a look at the photo below.

I used scissors to cut the piece of faux fur on the left so the faux fur fibers are cut straight across. The piece of faux fur on the right still has long fluffy fur (perfect for a gnomes beard!) since I only cut through the backing with an exacto knife.

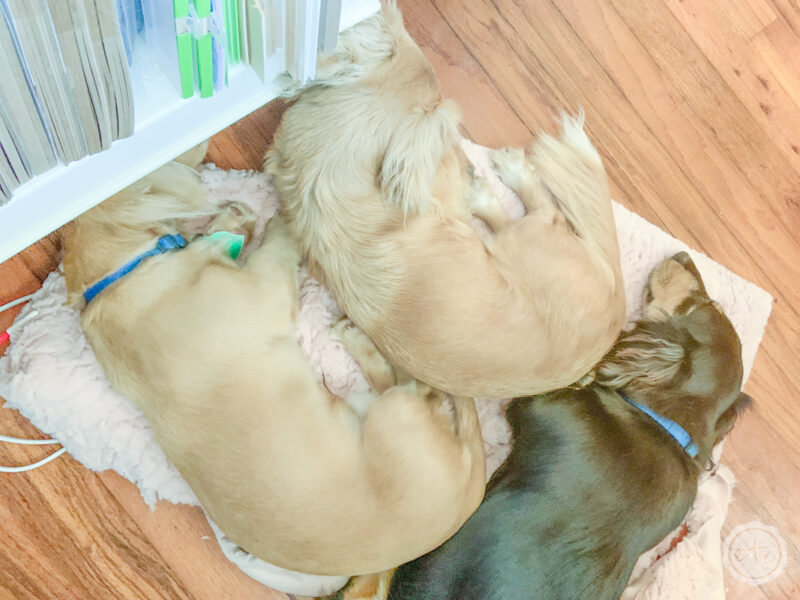
Just a tip… once you cut your fabric make sure to put it away. If you toss it next to you on the floor you might turn around in a minute to find a small heard of dachshunds using it for a dog bed.

At least they’re cute!

Step 2: Hot Glue Your Gnome Together

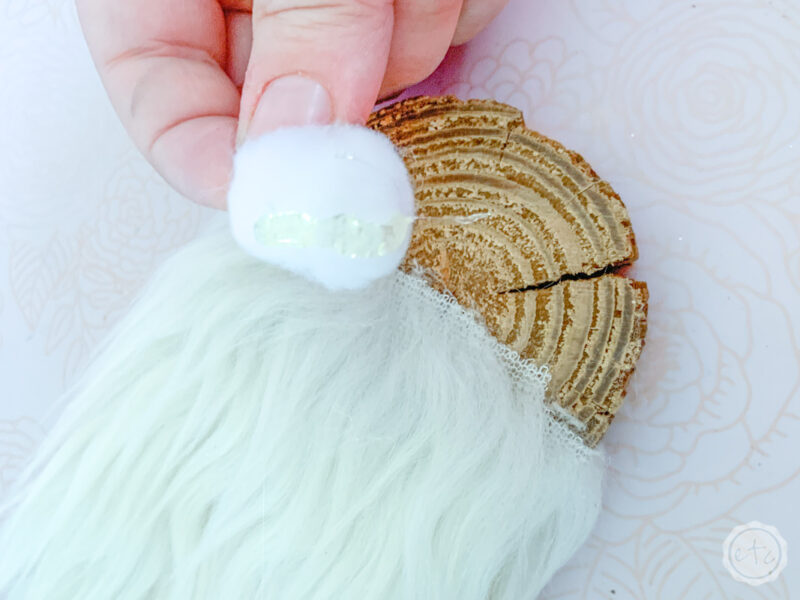
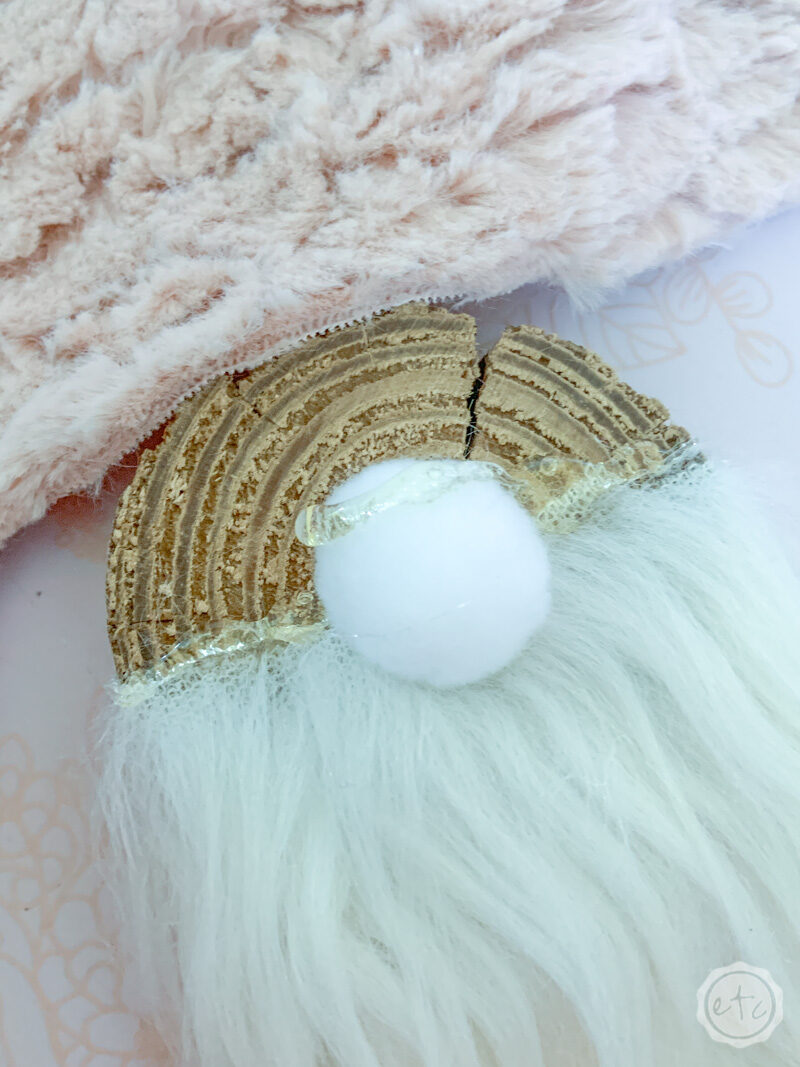
Ready to put this little guy together? Start by hot gluing the beard onto your little wood slice. Put a little hot glue on the front of your wood slice and glue down the middle of your fuzzy beard fabric.

Then simply wrap the ends of the beard fabric around and hot glue it to the back of the wood slice.

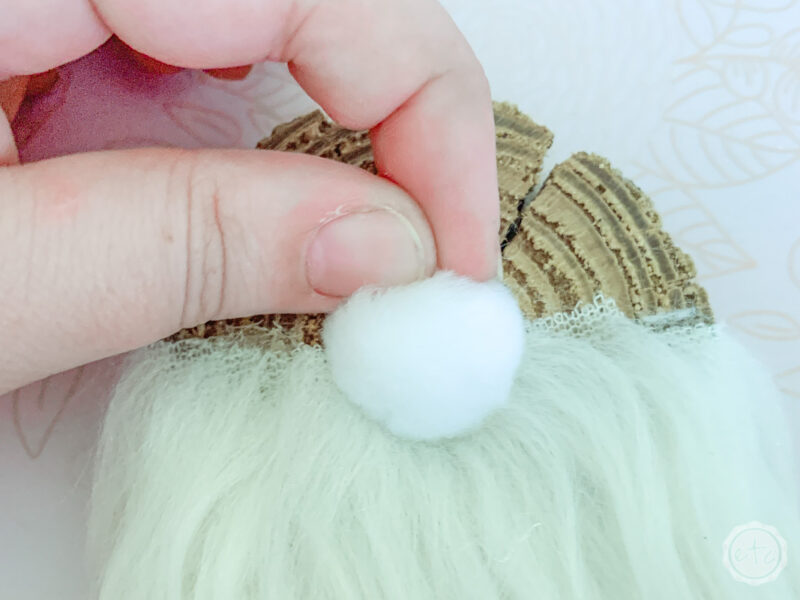
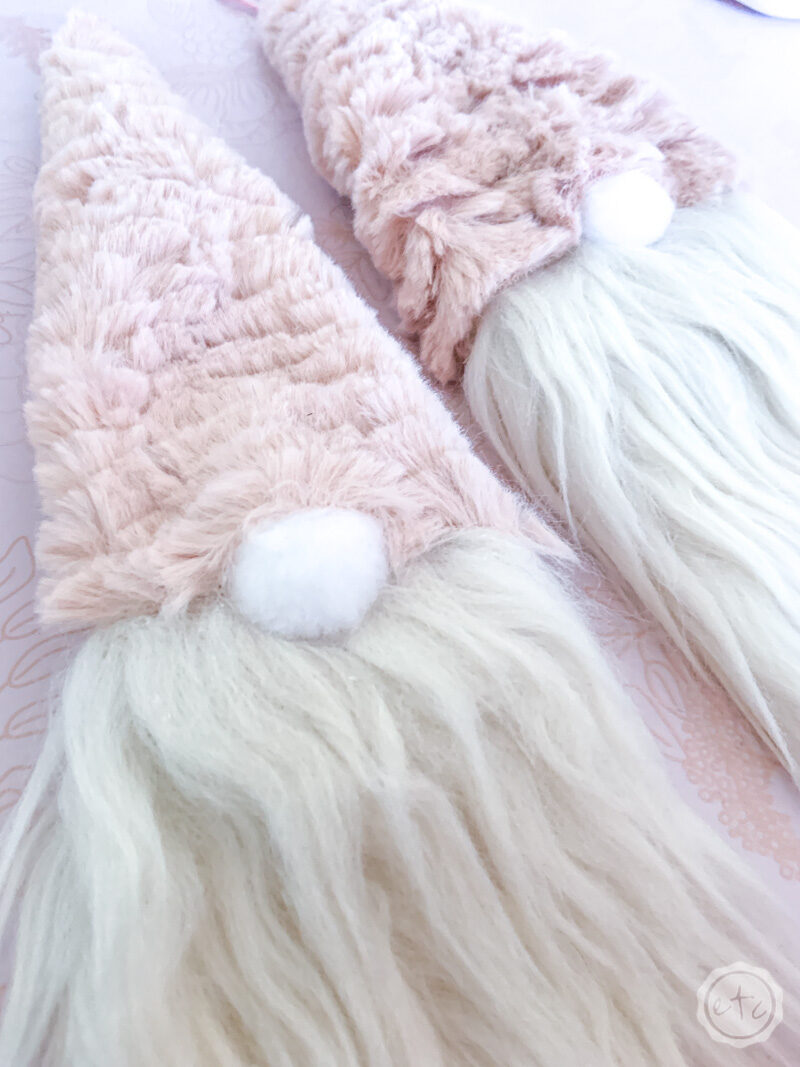
Then move on to gluing down the nose! I picked a fluffy pom pom for my nose but these little guys also look really cute with a wooden bead! Simply hot glue the nose down in the middle of the front… just keep in mind that if you want a bigger nose glue it further down into the fuzzy fabric. For a tiny button nose glue it further up (so that only a little bit will peek out of the hat).

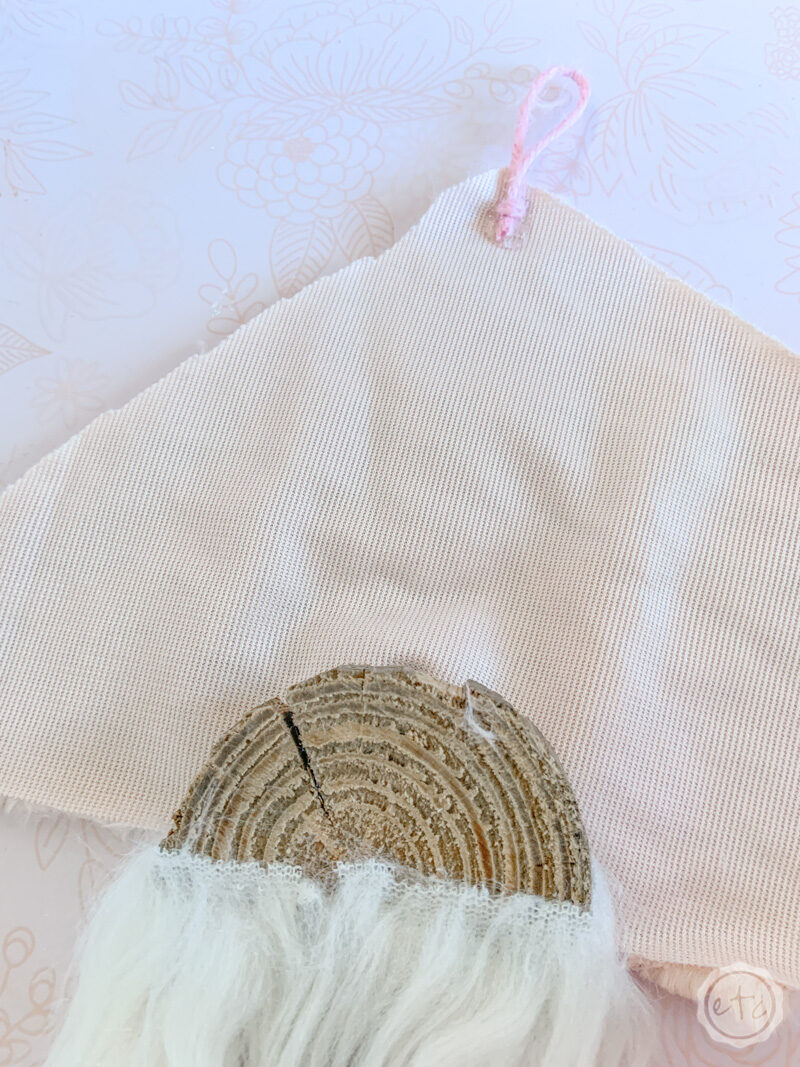
Now let’s glue down our hat! Go ahead and place a line of glue in a straight line across the top of the beard, the nose and through to the other side. Then snug down the hat on top of the nose, smoothing the fabric out on either side of the nose and onto the gnomes cheeks.

Then flip the little gnome over so that we can close up the hat!

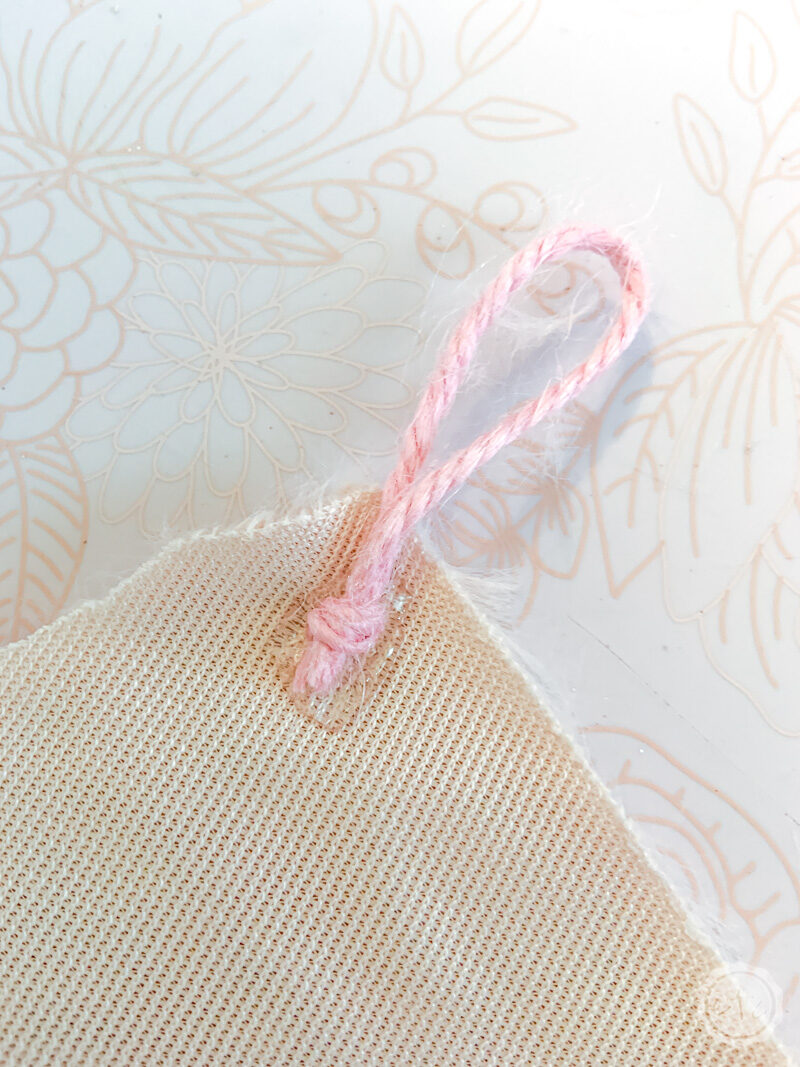
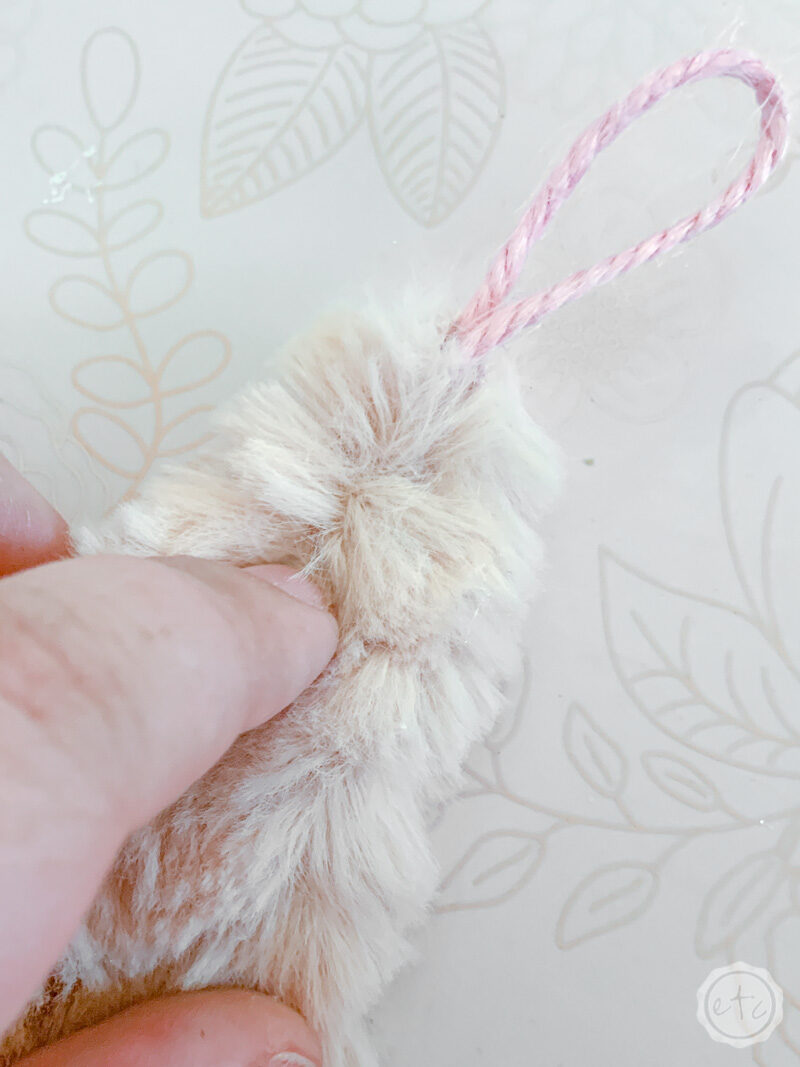
When we get to the back we need to take a second to hot glue our twine at the top of the hat. This little loop will let us hang our gnome on the tree. Just knot a small piece of twine and then hot glue it at the top of the hat’s peek.

Make sure to push the twine down into the hot glue (I used the tip of my exacto knife so that the hot glue didn’t burn my fingers).

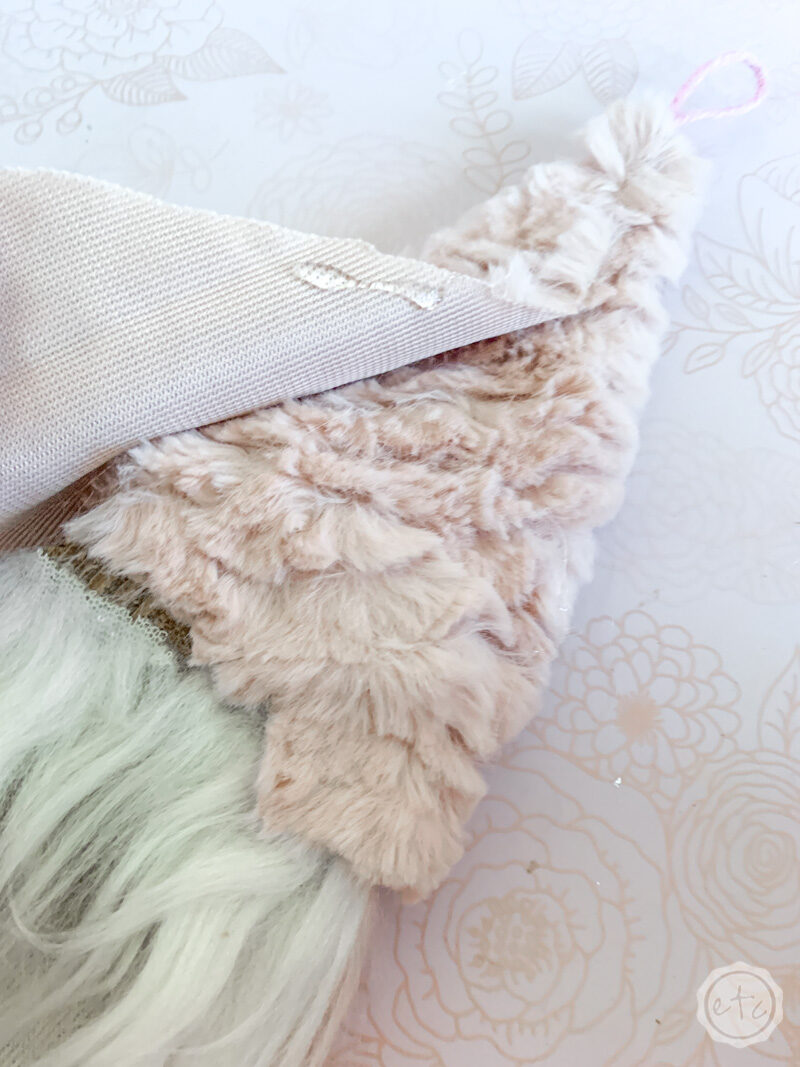
Once the twine is set you can fold over the first side of the hat and hot glue it in place. Then you can fold over the second side of the hat. Make sure when you fold over the second side of the hat that you cover the twine completely and then glue the entire side of the fabric down so that it’s not flapping around.

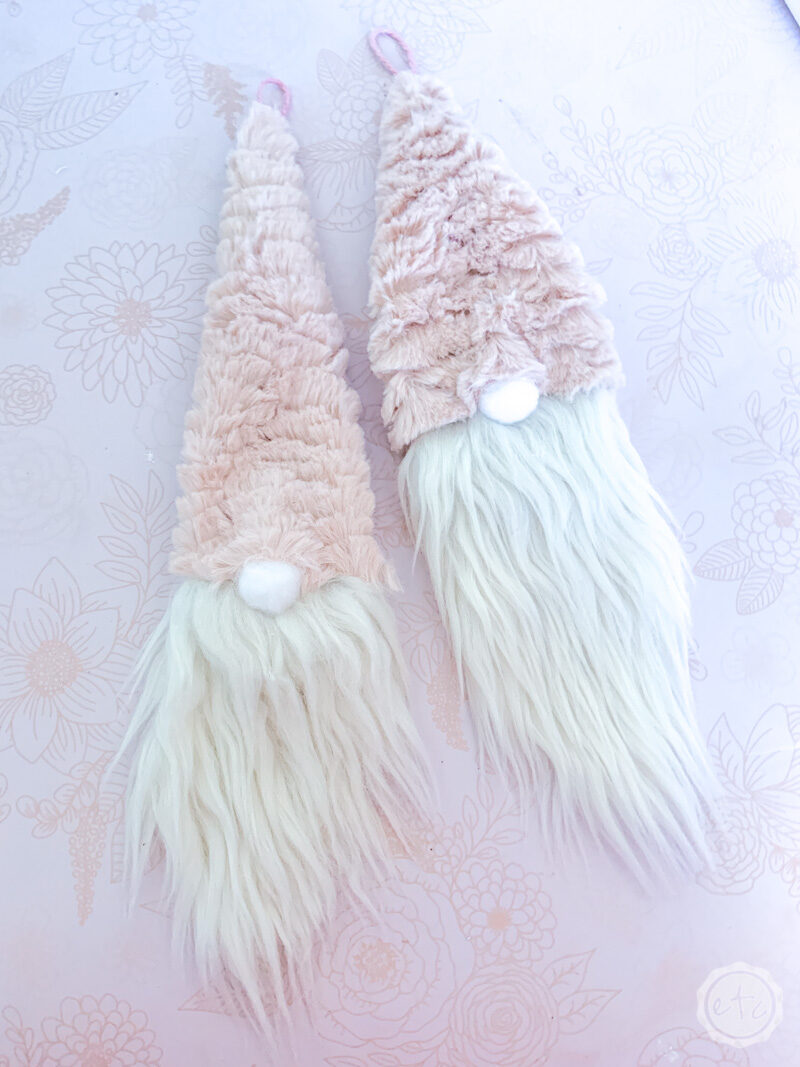
Once you’ve glued the entire hat down you’re finished! Now you can go hand your gnome on your tree… or you can make a few fun gnome friends! Luckily these guys are fast and easy to make… and usually if you buy supplies for one you have supplies for an army.

If you really want to go crazy you can give them different hats or details.

How cute did these little gnomes turn out!?

Looking for more rose gold holiday goodness? These posts are for you!

You are invited to the Inlinkz link party!

Click here to enter

Ready for a few more ornaments? Here’s a few fun ideas for your tree from my favorite bloggers! We’ve been sharing fun holiday projects with you for the last 5 weeks but this ornament project is the last one of the season. I hope you were inspired and got lots of ideas! Enjoy!

See More DIY Holiday Ornaments Projects

Get Your FREE Bucket List Printable!

Our Christmas Bucket List will help you check off each and every piece of holiday cheer!

Success! Now check your email to confirm your subscription.

There was an error submitting your subscription. Please try again.

Powered by ConvertKit
You made it through the entire post? That means you're one of my new favorite people! I'd love to be friends and see what else you would like to read about! Leave me a comment and then sign up for your very own FREE paint planner.... so that you can keep track of every single paint color with ease!
Welcome back! I'd love to be friends and see what else you would like to read about! Leave me a comment and then sign up for your very own FREE paint planner.... so that you can keep track of every single paint color with ease!

Show me some LOVE y'all:

  • Facebook
  • Pinterest
  • Twitter
  • Email

Related

«
»

DIY & Crafts, Holidays 6

Comments

  1. Jenny says

    December 2, 2019 at 5:24 am

    These gnomes are just the cutest and so easy to make. Great tutorial!

    Reply
  2. Meegan says

    December 5, 2019 at 10:49 am

    Absolutely as cute as can be! The color is just darling, too.

    Reply
  3. STEPHANIE ABBOTT says

    December 5, 2019 at 10:57 am

    Cute gnome’s!. Adding these to my round up. Great color choices. 🙂

    Reply
  4. Joy M GUILBEAU says

    December 17, 2019 at 7:19 pm

    This is the most adorable gnomes! I will make these. TFS

    Reply

Trackbacks

  1. "Deck the Halls!" It's Round-Up Time! · design inside the box says:
    December 17, 2019 at 11:11 am

    […] […]

    Reply
  2. Easy No Sew Easter Bunny Gnomes - Happily Ever After, Etc. says:
    March 5, 2020 at 5:53 pm

    […] absolutely adored the gnome ornaments we made for Christmas (not to mention the large gnomes I mixed in with the DIY present boxes on my front porch) and now […]

    Reply

Leave a Reply Cancel reply

Your email address will not be published. Required fields are marked *

sidebar betsy I'm Betsy, Home Decor Enthusiast, Yorkie Mama, Crafter, Blogger, Picky Eater, Chief Mess Maker, Antique Hoarder and Graphic Designer. You can generally find me working on (attacking with a paintbrush) the 3 bed, 2 bath home we are currently renting! Our home might not be perfect but it is ours & if you hang out long enough you'll see that what we lack in know-how we make up for in passion!
Shop My Craft Room

Shop My Home

Featured Articles

15 Fabulous Ideas to Organize your Laundry Room
25 FREE Printables For Your Home!
What to do with EXTRA Paint with Happily Ever After Etc
10 Ways to Make Your Bed EXTRA Comfy with Happily Ever After Etc.
Ready to Pick your Perfect Paint Color? We'll help you with our 6 Day FREE E-Course

Hey y’all,

Profile

I'm Betsy, Home Decor Enthusiast, Yorkie Mama, Picky Eater, Chief Mess Maker, & Graphic Designer...

A Little Note!

Many of the links on Happily Ever After, Etc. are affiliate links. If you purchase a product after clicking an affiliate link, I receive a small percentage of the sale for referring you, at zero cost to you! How awesome is that? Purchasing through affiliate links is an easy, painless way to help out your favorite bloggers. Thank you so much for your continued love and support! Read the full disclosure here!

Instagram

The number one question people ask when they watch The number one question people ask when they watch my new home tour on YouTube? Why is there so much clutter... um excuse me I like stuff! The second question? How did you frost the doors? Don’t worry... I wrote out the whole process, check out the step by step tutorial on the blog!
With Christmas fast approaching I’m having secon With Christmas fast approaching I’m having second thoughts... about taking down my holiday decorations! I absolutely love all the blush and rose gold this year and think I might have to add more pink to my every day decor. Until then maybe it will just stay Christmas at the Smith house! Tutorials for both the “Merry Christmas” resin sign and the “Dear Santa” Cricut sign are in my profile! #pinkchristmas #pinkchristmastree #pinkchristmasdecor
Well y’all Christmas is coming up quick... which Well y’all Christmas is coming up quick... which means I need to get a move on with all that wrapping! I got a jump start this morning after whipping up a few little resin light bulbs! Check out the full tutorial over on the blog if you’d like to wrap your presents with a few resin goodies this year... and tell me in the comments below. Are you finished wrapping or (like me) are you still getting started? #pinkchristmas #pinkchristmasdecor #resinchristmas #giftwrappingideas
Ready for another fun and easy resin project? Thes Ready for another fun and easy resin project? These little Christmas trees are the perfect beginner level project so if you’ve never done resin before don’t let it intimidate you!! Grab your heat gun and jump in... I’ll walk you through it! Check out the full blog post for these little guys on the blog (link in profile!)
If you haven’t joined Michelle at @weekendcraft If you haven’t joined Michelle at @weekendcraft SVG membership then WHAT ARE YOU WAITING FOR?! I am obsessed with all the cute svg’s and y’all she is doing a live craft night every month to walk you through making one of her designs... and the first craft night is tomorrow! She’ll be making this “Merry everything and Happy always” SVG and it’s so cute! You don’t want to miss it! See you there! 

(Also who noticed the sneak peek at my new kitchen?!)

#cricutsvgfiles #christmassvg #cricutsled
Well y’all I’m getting this close to unpacked Well y’all I’m getting this close to unpacked in my new house!! And since I’m a blogger Christmas is going up! So here’s the question... do you want a 1 month house update or do you want to wait for the Christmas tour? #lulamaefarmhouse #rosegoldchristmastree #newhouse
Well it’s still a work in progress but I finally Well it’s still a work in progress but I finally have a house!! They have to put it together and do all the detailing before I get keys... but we’re in the end game now! Check out my stories for a sneak peek at the moving process... full YouTube video coming soon!
#ad how amazing did these little fall coasters tur #ad how amazing did these little fall coasters turn out?! Plus I absolutely love the matching tray! The best part? This is such a quick and easy resin project... a silicone mold, a little resin and your trusty heat gun and I promise you can make this baby!! Link in profile for the tutorial!! #fallresin #resinforbeginners #cheetahprint
Okay... is it bad if you just want to make coaster Okay... is it bad if you just want to make coasters in the same mold with the same technique but different colors?? They turn out soo differently! Just a sneak peek of my fall coasters and the blush ones I made last year!
Happy #nationaldogday to the fur babies that are ( Happy #nationaldogday to the fur babies that are (literally) behind (beside... or underneath!) all Of my projects! These sweet little cuddle muffins make everything better 😊🐶😘
GIVEAWAY CLOSED Our winner is @kamikvega Check you GIVEAWAY CLOSED
Our winner is @kamikvega Check your inbox girl, this little machine is headed your way! Thanks to everyone who participated... I can’t wait to see where we go from here!

🥳📦🥳 GIVEAWAY🥳📦🥳
If you have loved all of the Cricut projects I make here is your chance to win a Cricut Joy of your very own! If you’re ready for a little craftiness (maybe a little time to relax) then this giveaway is for you! I’m teaming up with a few of my cavities crafty bloggers so that one of you can win your very own mini crafting machine. Good Luck!!!!

TO ENTER GIVEAWAY:
1.) Follow
@creativeramblings 
@weekendcraft 
@craftylumberjacks 
@this.is.tisa 
@justcallmehomegirl 
@happilyeverafteretc
@lovebird_heartworks 
2.) Like this post
3.) Tag a friend in the comments.
.
.
.
Hurry! Giveaway ends Saturday 8/29/20 at 11:59PM PST. Winner will be notified via Direct Message. Share or tag a friend who'd love to win a Cricut. .
.
.
This contest is in no way affiliated with or sponsored by Instagram or Cricut. To enter you must have a U.S shipping address.
A little peek into the fun summery Tablescape I pu A little peek into the fun summery Tablescape I put together for a little garden party! Want to check out the full table? Wondering where to find all the pieces... click the link in my profile for all the details!
#ad Did you know you can put infusible ink onto al #ad Did you know you can put infusible ink onto aluminum? It's sooooo simple... honestly it's one of the easiest projects I've ever done. Even if you've never used your Cricut before you. can. do. this. I'll show you how every step of the way! Follow along with the full tutorial video over on YouTube! The best part? These little aluminum signs look amazing as part of a larger project! Check out how I added mine to a larger resin wave project on the last slide! @officialcricut #cricutcreated https://lnk2.io/wvMllZf
Okay so It’s no secret that I’ve been obsessed Okay so It’s no secret that I’ve been obsessed with resin for a while now but this week I’ve been playing around with resin waves! Including this tiny resin sea shell! Check out the link in my profile for the full tutorial!
After a lot of struggle, loss and frustration I am After a lot of struggle, loss and frustration I am finally dotting the i’s and crossing the t’s on my next chapter. Yesterday I went and signed the million and one papers to close on my new house! I cannot wait to share the moving (and decorating) process with all of you... next step: keys! #firsttimehomebuyer #newhouse
Load More... Follow on Instagram

Copyright © 2021 · Darling theme by Restored 316

Copyright © 2021 · Darling Theme on Genesis Framework · WordPress · Log in · Privacy Policy

loading Cancel
Post was not sent - check your email addresses!
Email check failed, please try again
Sorry, your blog cannot share posts by email.