


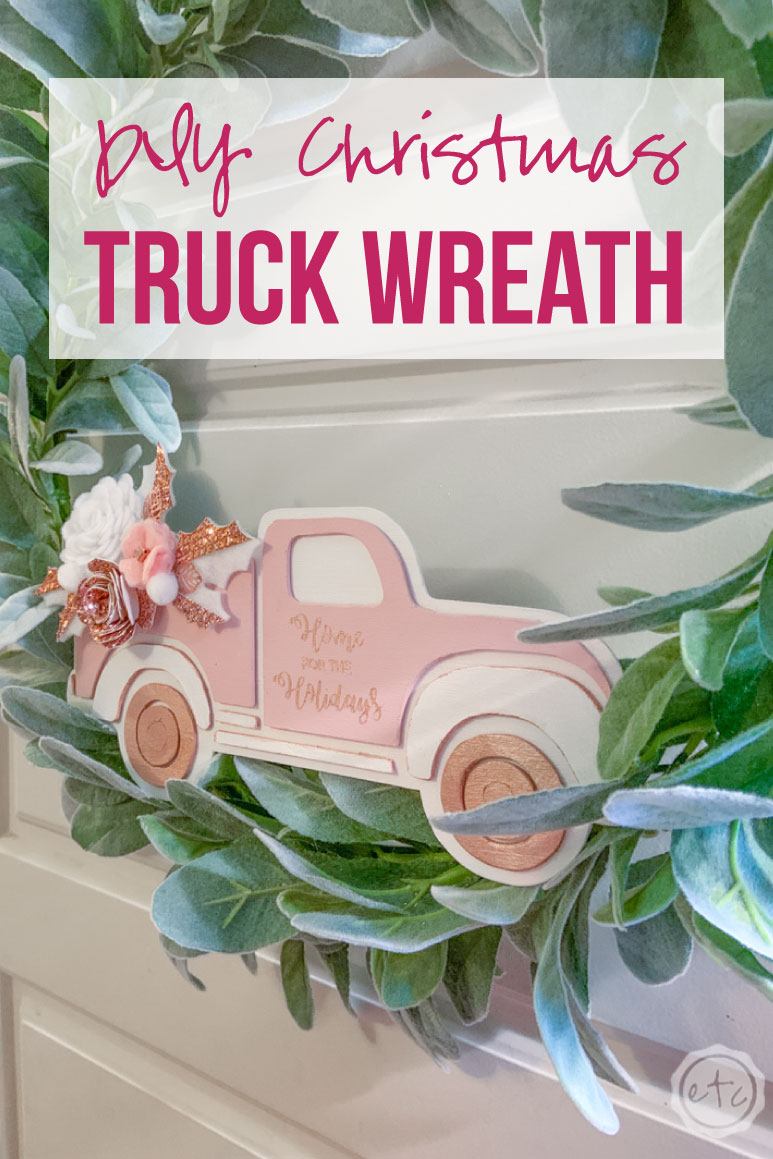
I am super excited to share this fun little holiday project with you today… because it turned out amazing and is my absolute favorite Christmas project of all time. Plus it combines my favorite items: a vintage truck, rose gold wax, holly leaves and felt flowers.
Score!
Of course, the best part is that this little guy is a complete DIY… which means you’ll start with a few pieces of felt, a piece of basswood, paint and a bit of hot glue and at the end you’ll have an adorable holiday truck that’s perfect for adding to any holiday wreath.
Ready to get started?
(PSST… looking for more fun projects that you can use to decorate your door? Scroll to the bottom of this post to find a bunch of fun DIY door decor projects from my blog friends! We’re hanging out every sunday in November to bring you fun holiday projects so stay tuned for awesome decor ideas!)
Supplies:
- Cricut SVG Files (FREE at the bottom of this post)
- Cricut Maker
- Fine-Point Cutting Blade
- Standard Cutting Mat (that’s the green one! Even though I used the fabric mat for this project)
- Cricut Easy Press
- Knife Blade
- Rotary Blade
- Strong Grip Cutting Mat
- Basswood
- Brayer
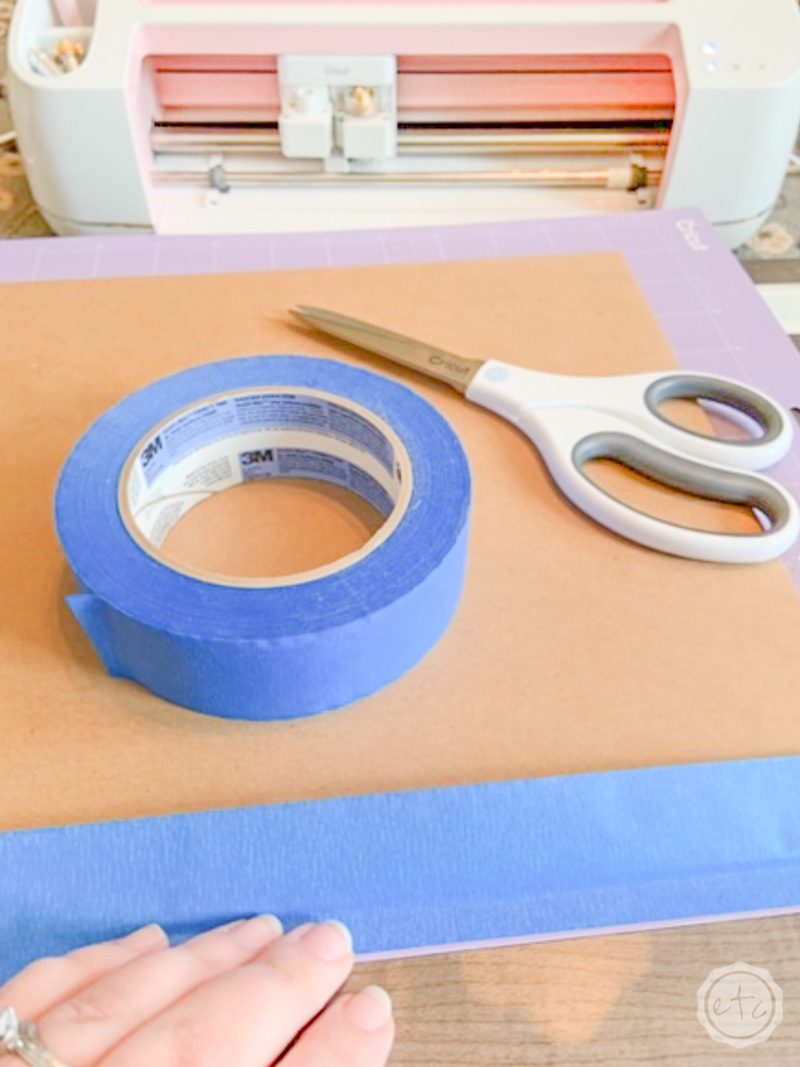
- Painters Tape
- Stencil Vinyl
- 3 pieces of felt (rose gold glitter, white and light pink)
- Beads for Flower Centers
- 2 Pom Poms
- Metal Leaves
- Blush Paint
- White Paint
- Rose Gold Paint
- Rose Gold Craft Wax
- Glue Dots
- Hot Glue & Hot Glue Sticks
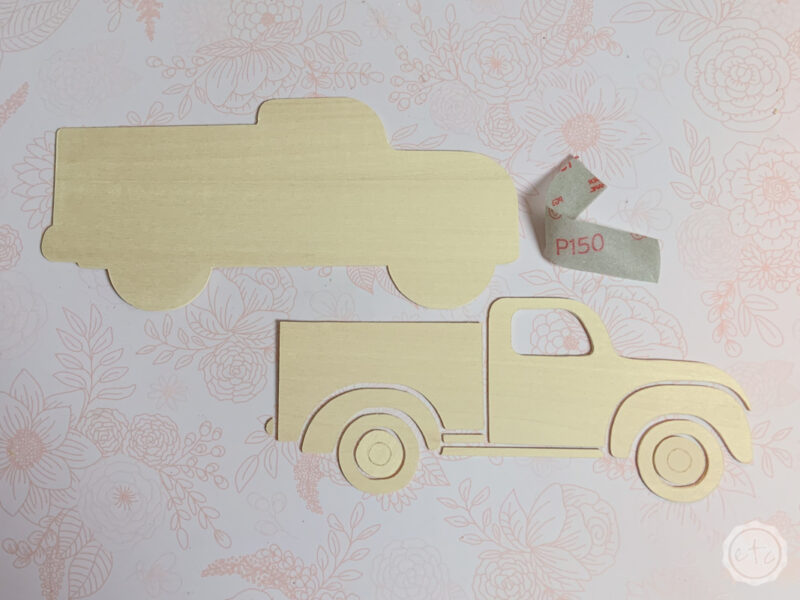
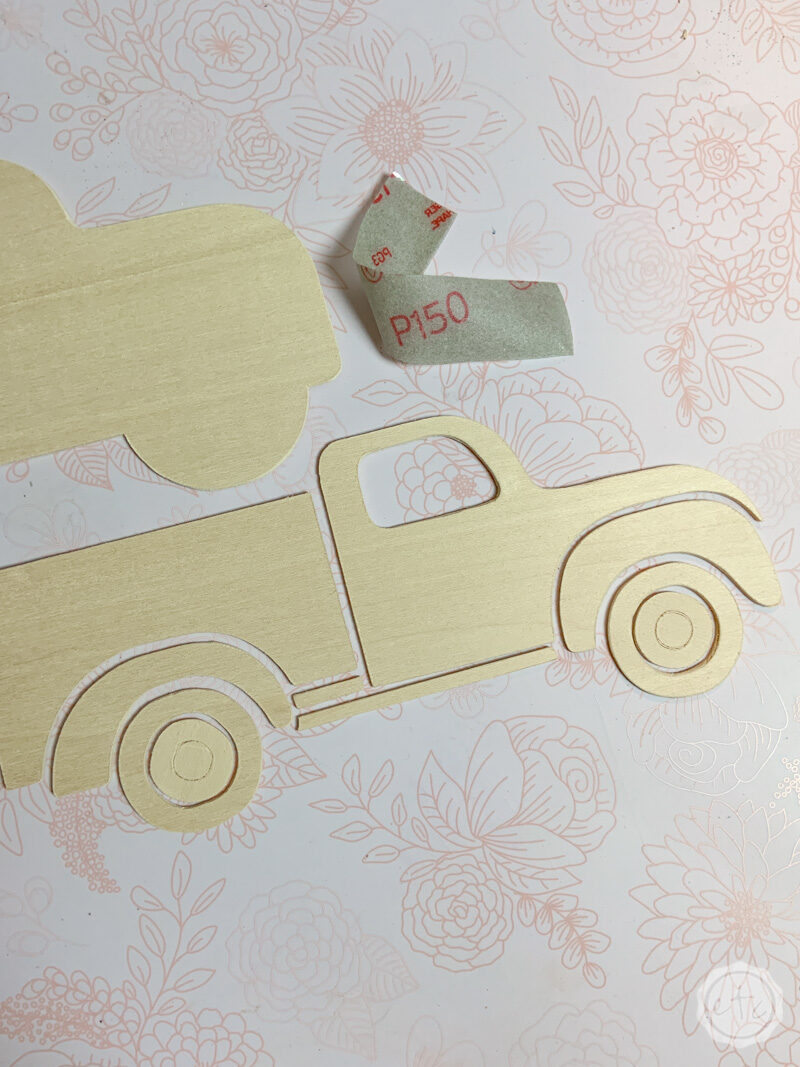
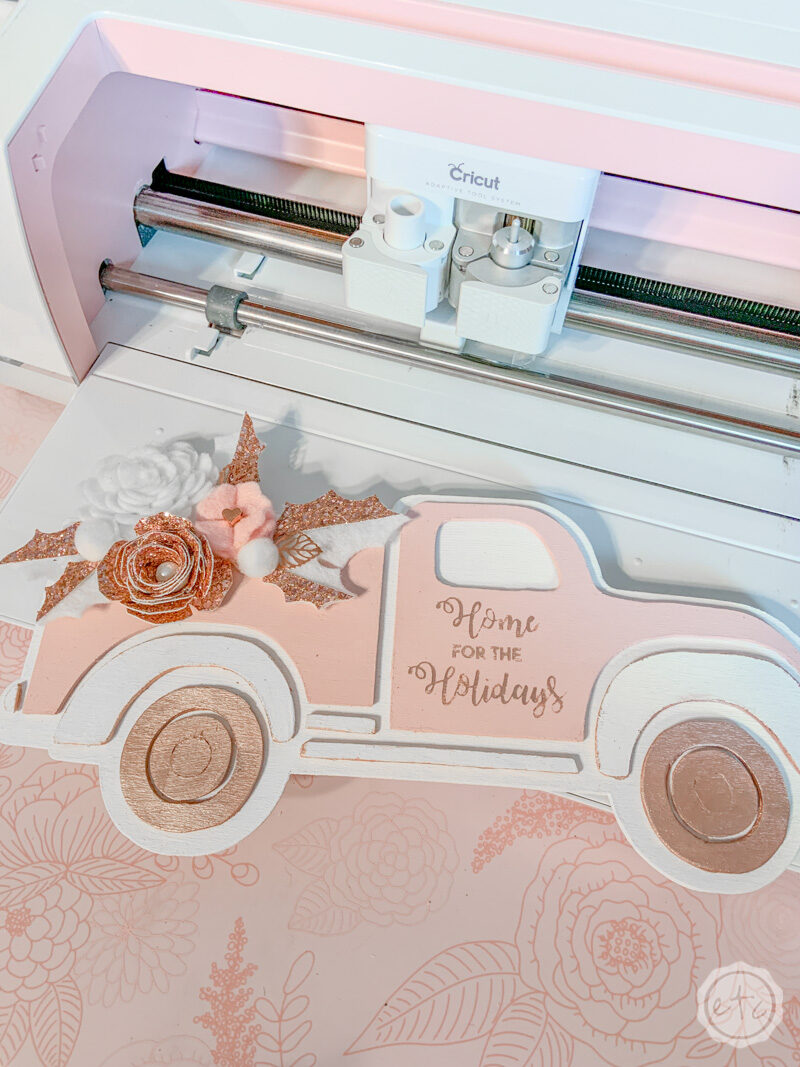
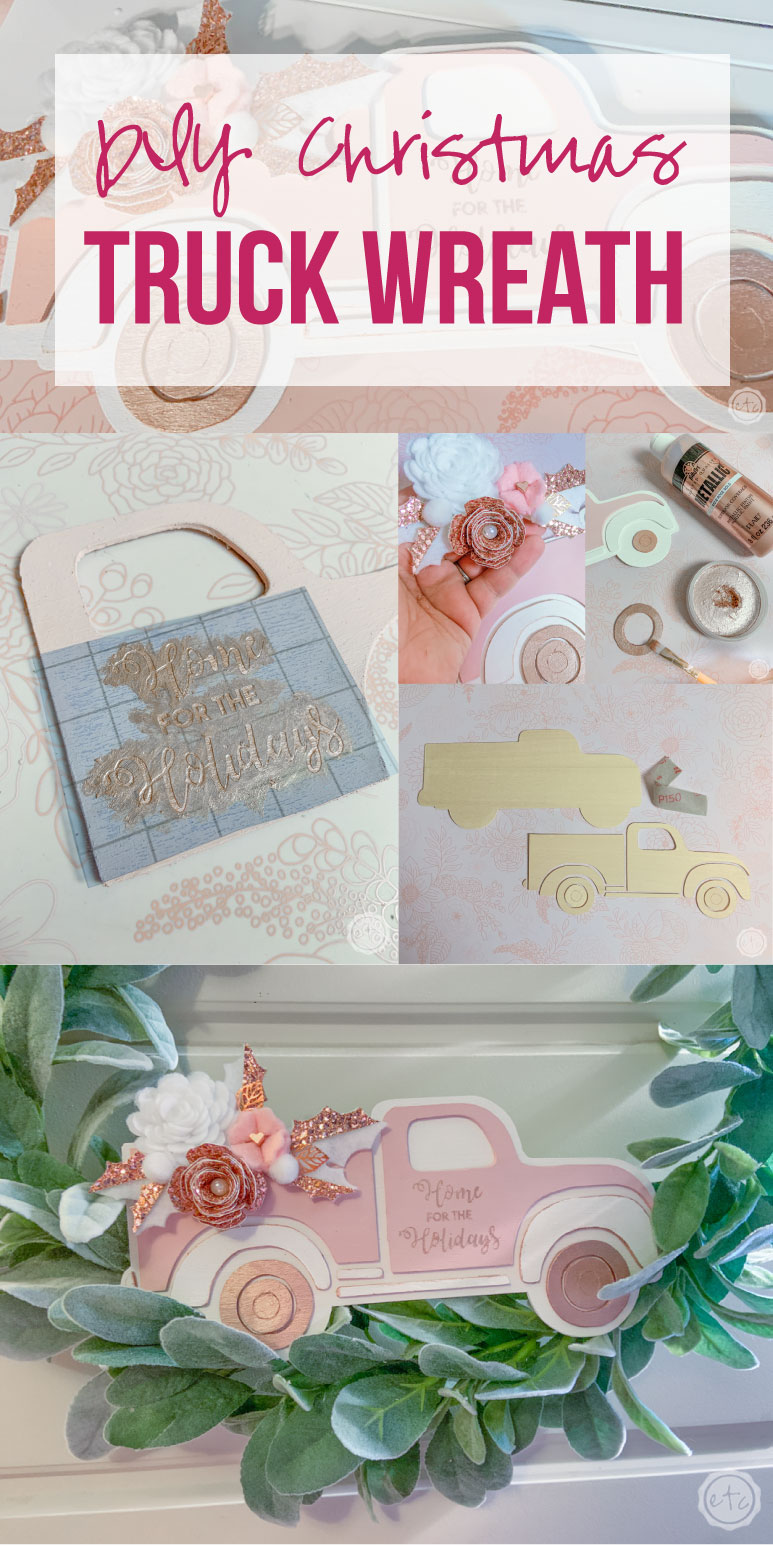
Step 1: Cut Basswood with your SVG Truck File!
I absolutely love my Cricut Maker… because it lets me do cool things like cut wood! I knew I wanted a truck for this project so I sent a few minutes gathering inspiration and then set about creating the SVG files for this little truck.
Luckily you can skip all of that and grab the free SVG files for this project at the bottom of this post! Once you load the SVG files into Cricut Design Space you’ll be ready to start.
Hit go on your Maker (if you haven’t purchased a Cricut yet but are thinking about it make sure to note that only the Cricut Maker can cut wood… here’s my quick and easy guide to picking the Cricut that’s right for you to help you get started) and then set your material to cricut basswood.
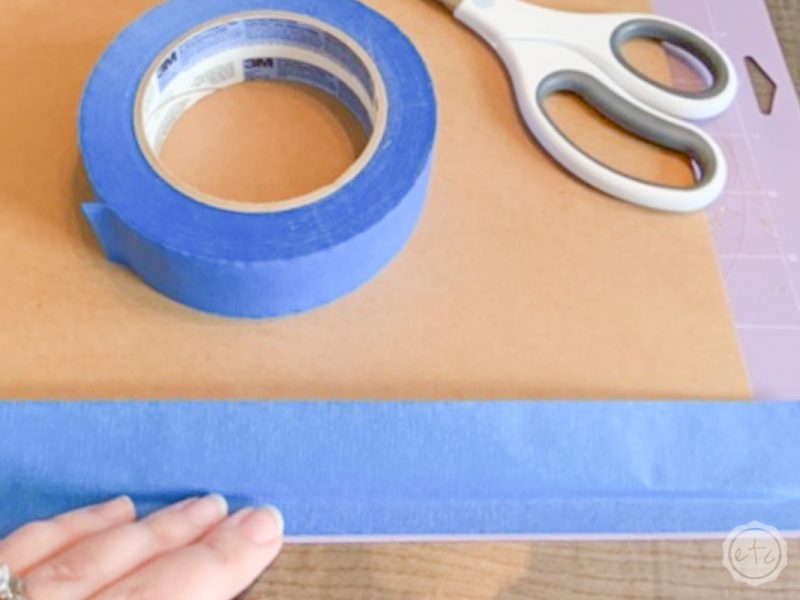
Go ahead and load your strong grip mat (that’s the purple one) with your basswood. Use your brayer to really secure the basswood to the mat and then add painters tape around all 4 sides of the basswood so that it’s securely added to the mat. At this point you might notice that the basswood is only 11 x 11 instead of 12 x 12… that’s to give your star wheels room on the right.
The star wheels are the little white circles on the rod to the front of your cricut maker… you’ll want to slide these babies alllll the way over the the right. They have a tendency to make indentations in certain material (like basswood) so you want them to be out of the way when you hit go.
See how they’re pushed all the way over? That’s perfect!

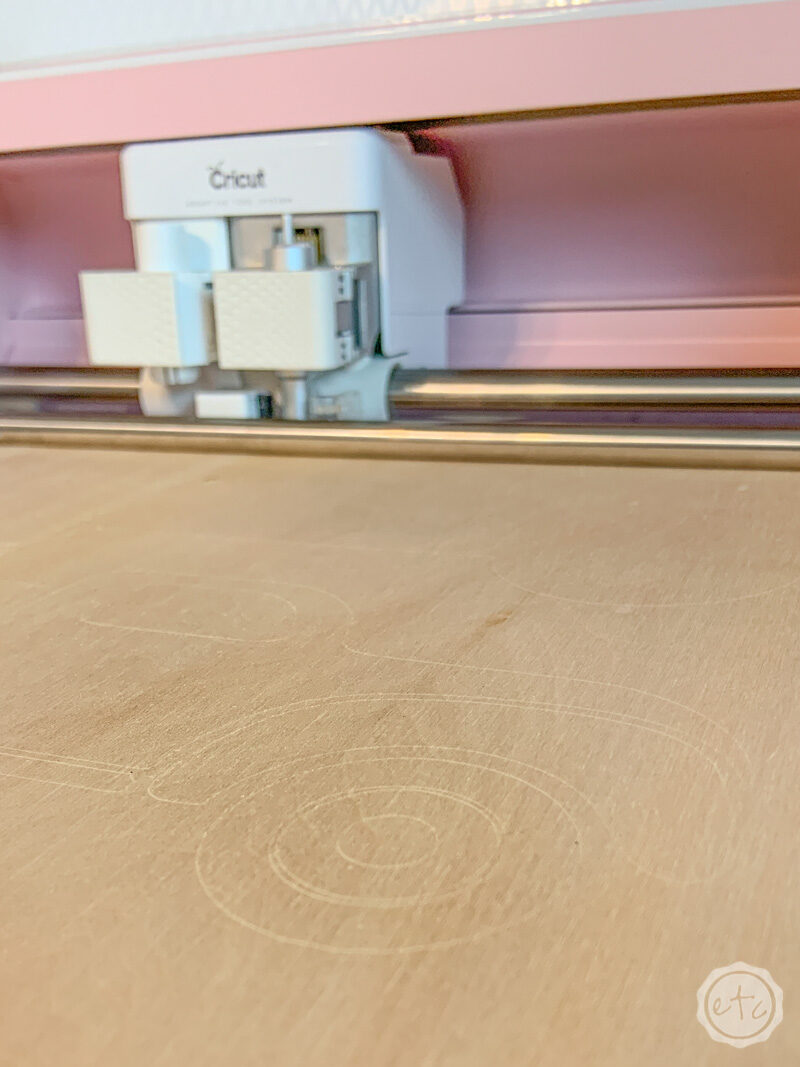
Now all that’s left to do is load your knife blade and hit go! Basswood takes quite a few passes for your Cricut to cut all the way through the wood (about 14 passes!) so be prepared for basswood to take a minute when you hit cut… this specific cut file took about an hour and a half for the full basswood pattern to cut.
Make sure the wood is cutting correctly and then step back and relax while it finishes! (Tip: This is a great time to make your felt flowers so they’re ready when you get to the last step! The 3 flowers I used for this project are included in the SVG cut file but if you need help with cutting out felt flowers you can follow the tutorial at the bottom of this rotary blade post.)

BONUS TIP: The cricut cuts basswood like a boss but basswood itself is a fairly soft wood… which means sometimes it’s kind of splintery once it’s cut. If this happens just use a bit of sand paper to sand away any rough edges before you get started painting!).
Step 2: Paint your Truck
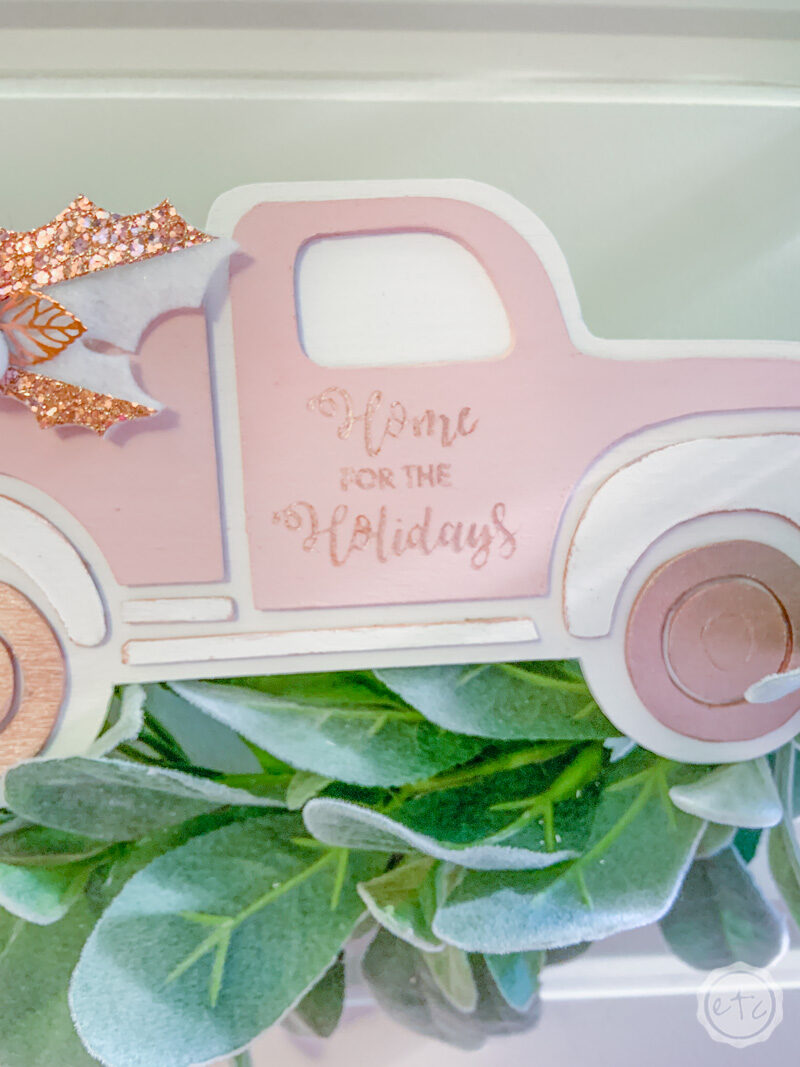
Ready to spice up this little truck? Now that it’s cut out and sanded it’s time to make it b-e-a-utiful. I decided to stick with my pretty blush color theme and paint this truck with a mix of blush pink, white and metallic rose gold.
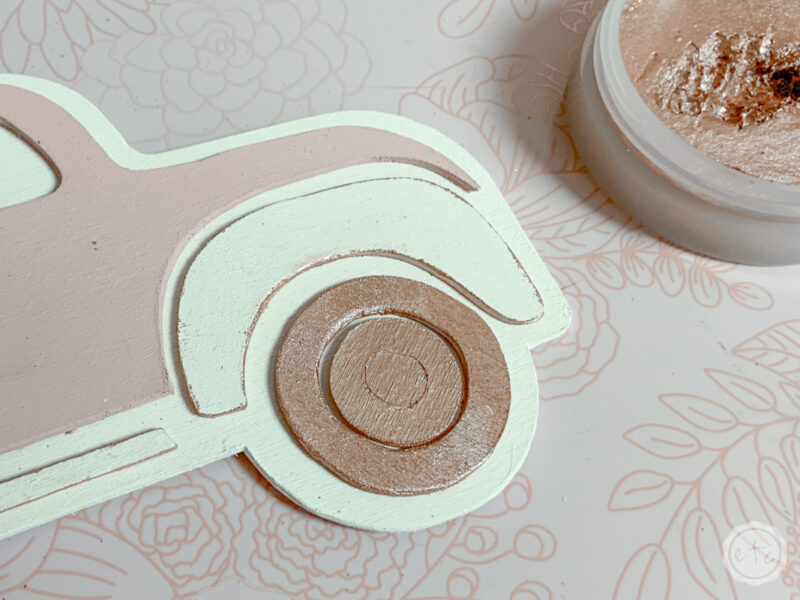
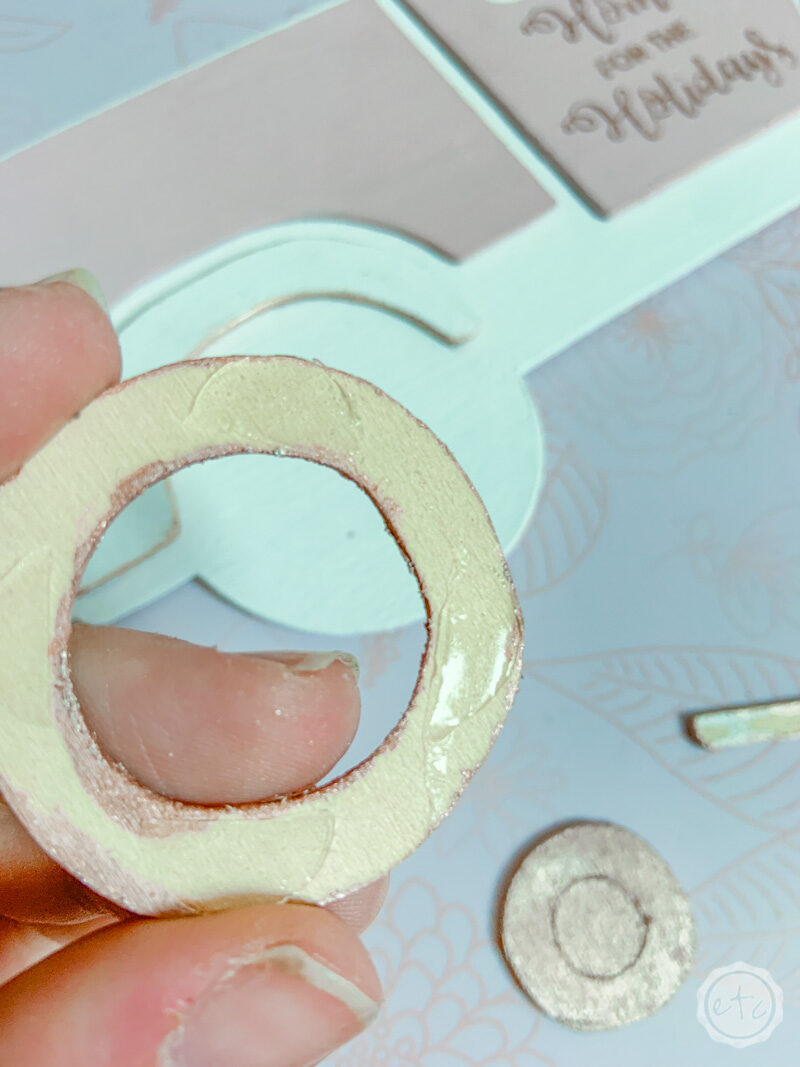
I started by painting the truck blush pink. The cab of the truck and the truck bed received two coats of blush so that they were evenly covered. Then I painted the wheels with a little bit of rose gold paint… all of the other little pieces (the tail light, the hub caps for the wheels etc) as well as the background of the tuck I painted white.
Easy peezy!
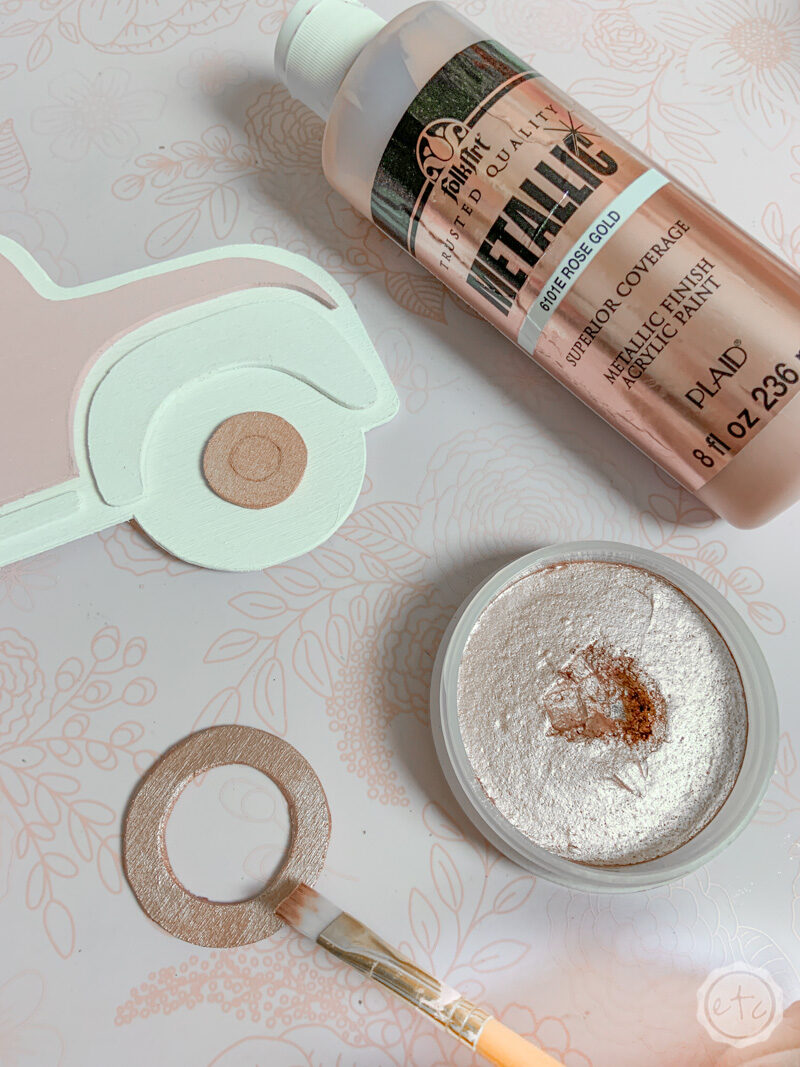
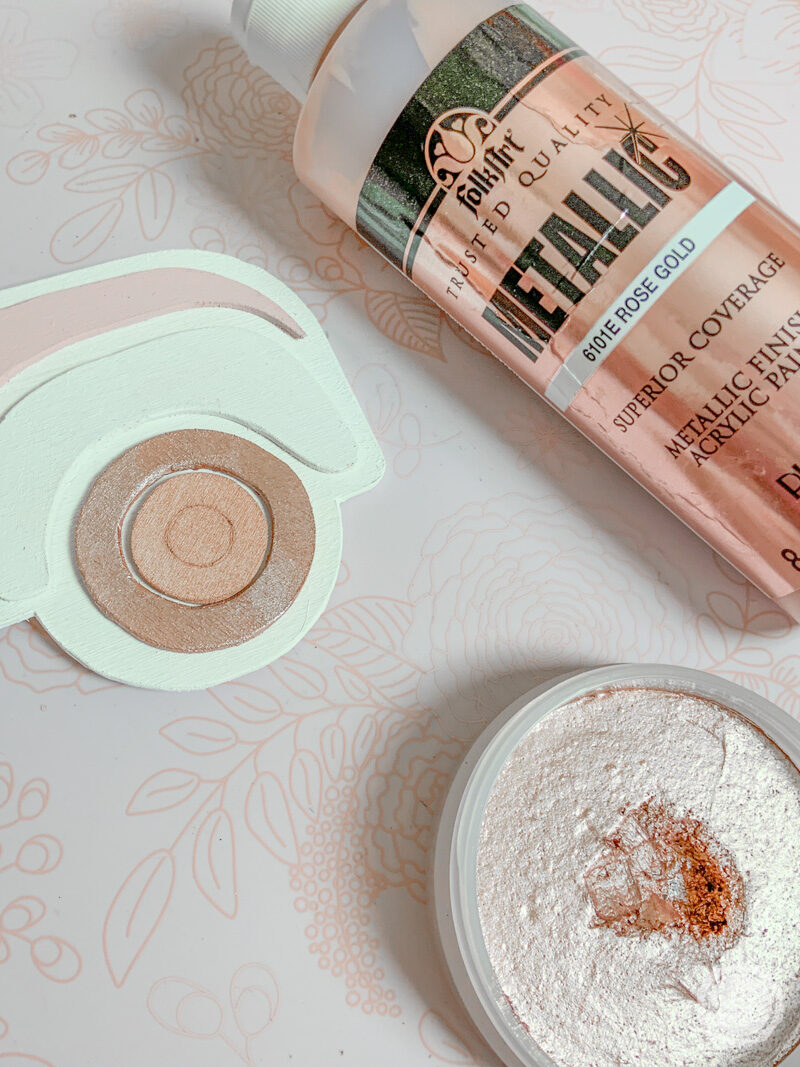
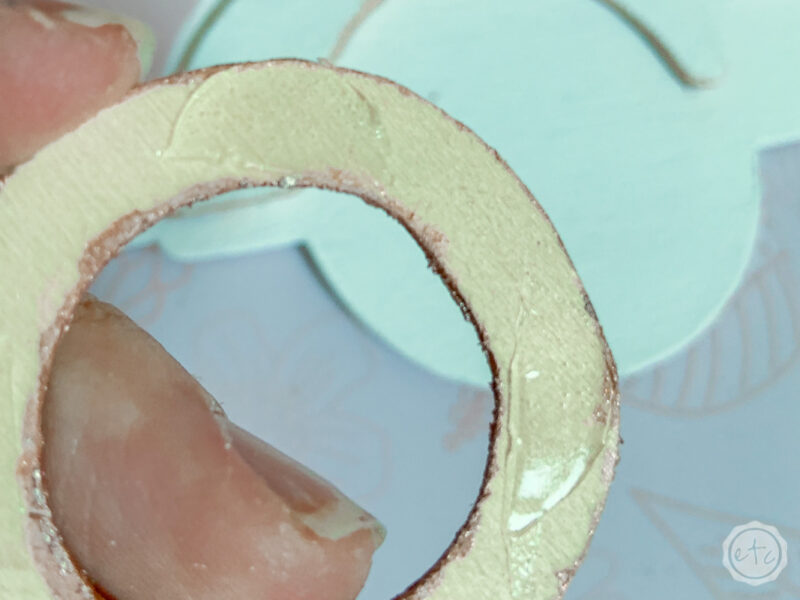
I wanted to add a little extra pizzaz to my truck so instead of simply painting the wheels rose gold I decided to add a bit of rose gold wax. I took the one layer of rose gold paint and added a second coat of rose gold crafting wax. It has the prettiest metallic shine and really makes those little rose gold details pop!
Which is perfect for the wheels of this little truck as well as the white tiny pieces we already painted. The tiny white pieces on a white background is a recipe for disaster… so I painted the edges of all the white pieces with the rose gold wax so the little pieces would stand out.
Beautiful darling.

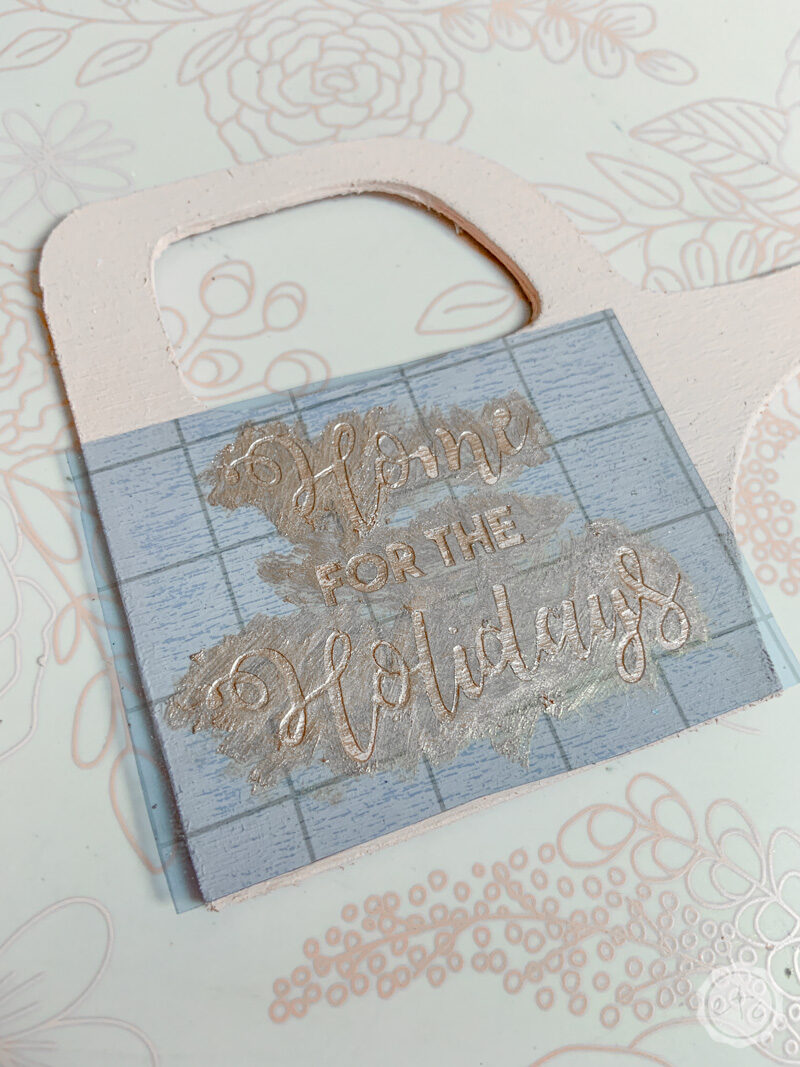
Stencil the “Home is for the Holiday’s” saying on the door!
Okay now that our truck is painted we can go ahead and add a cute little saying on the door of the truck. I decided on “Home for the Holiday’s” and whipped up an SVG file so that I wouldn’t have to paint this phrase on my little truck by hand.
Once the SVG was finished I went ahead and cut it out of stencil vinyl using my cricut. (the SVG is included in the project file for this little truck so you’ll be good to go if you download the file).
Of course, if you’ve never used stencil vinyl I have an entire tutorial you can follow but it’s really easy. Go ahead and load the stencil vinyl face up onto a standard grip mat, set the material to the pre-programmed “stencil vinyl” setting and cut this baby out with your standard cutting blade… easy peezy!
Once the stencil is cut out you’ll want to weed out all the negative space. Essentially since we want the words to be on our truck we’ll need to remove the words leaving only the negative space behind on our stencil. Just use a weeding tool to lift out the actual words leaving behind the strange little negative pieces (like the tiny inside part of the e).
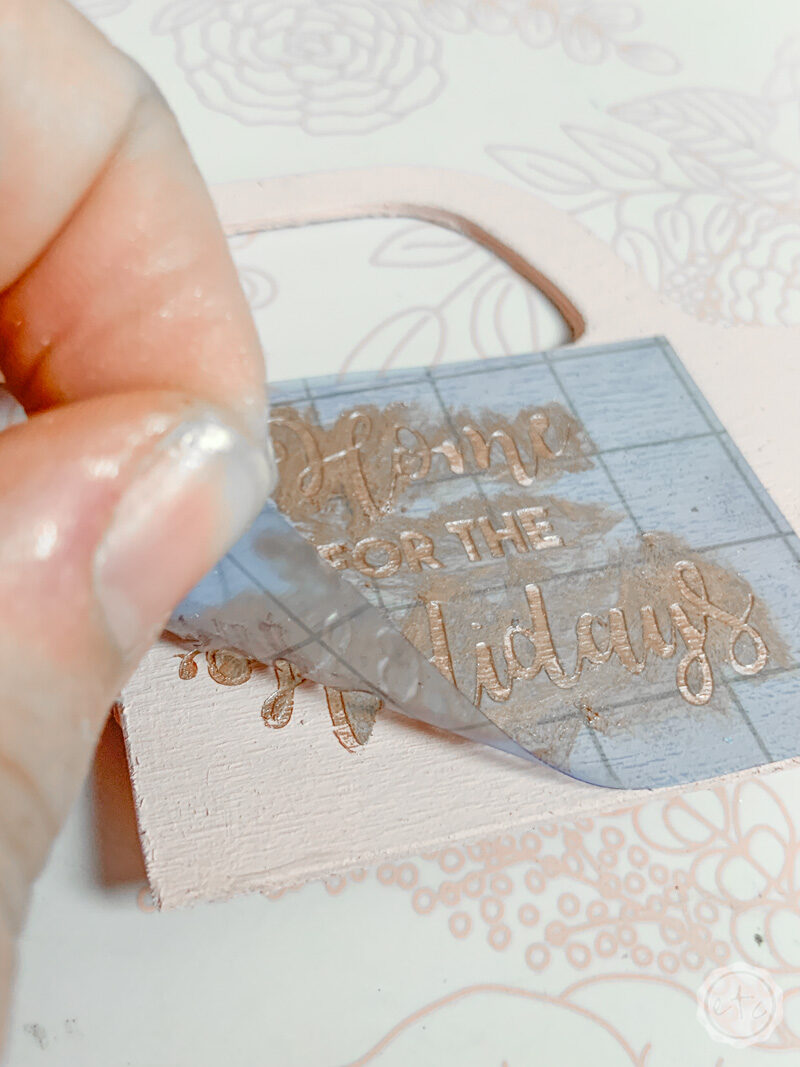
Finished with your stencil? Center it on the door panel to your truck and firmly press down! You can either use transfer tape to move the stencil vinyl onto your project or move each little piece one at a time… just be careful if you use transfer tape that all those little pieces transfer (trust me, that inside e portion is small!).
Now that your stencil is in place you can go ahead and paint it in! I decided to fill mine in with the same rose gold wax that I used for the wheels of my truck (I wanted them to match!) although you could easily paint the words or even use a heat gun to emboss them!
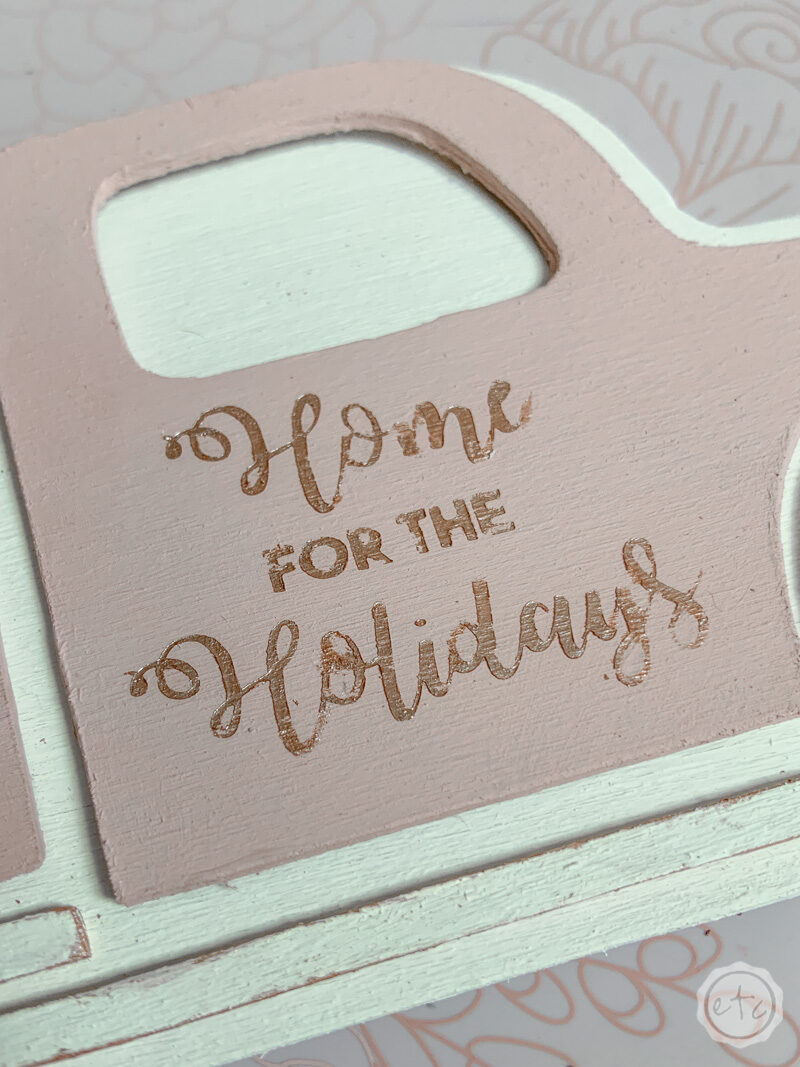
Once you’ve filled in your stencil go ahead and remove the stencil to reveal your finished quote! Beautiful darling!
Glue your truck together!
Now’s the fun part… putting your truck pieces all together into one finished truck sign! Before you start gluing all the little pieces in place go ahead and put all the pieces together in their proper place.
That way you can set the spacing and make sure you’re gluing the pieces in the right spots.
Once you have all of the pieces in the right spots go ahead and start to glue them in place. I used glue dots since they’re sturdy but can still be cut apart for the tinier pieces.
I simply placed a glue dot on the corners of each piece before firmly pressing it into place. Easy peezy!
Once my entire truck was put together I went over the whole thing with my brayer… just to make sure everything was glued down nice and tight.
Score!
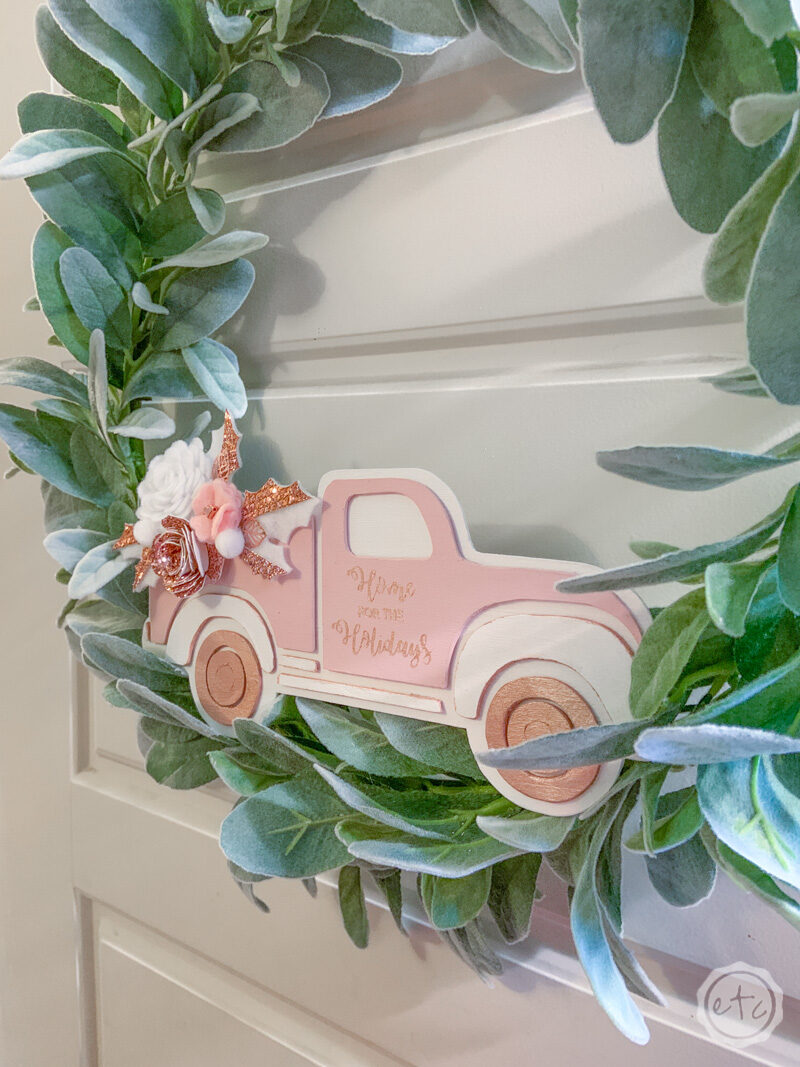
Finish your felt flowers and holly leaves!
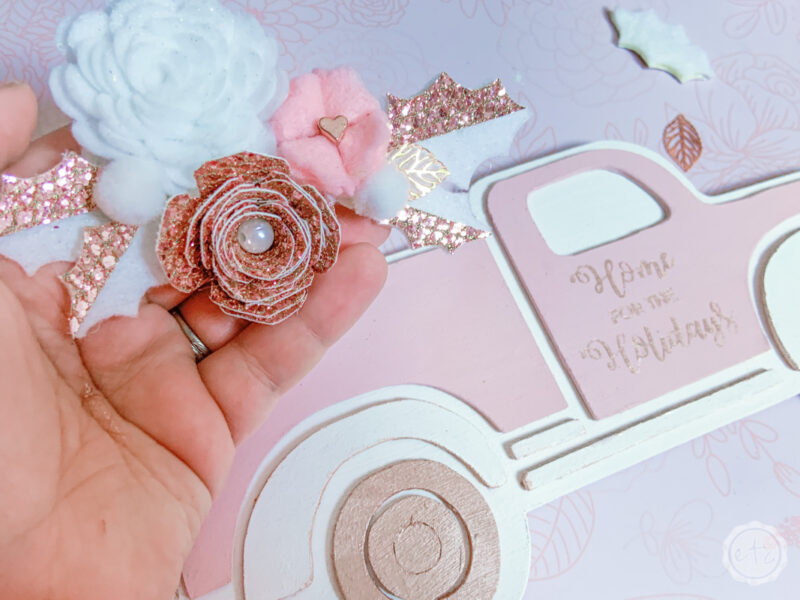
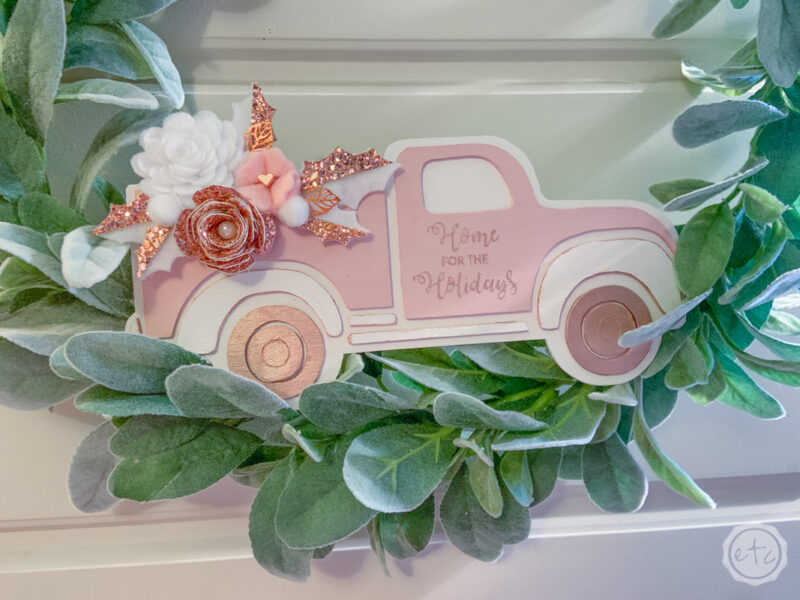
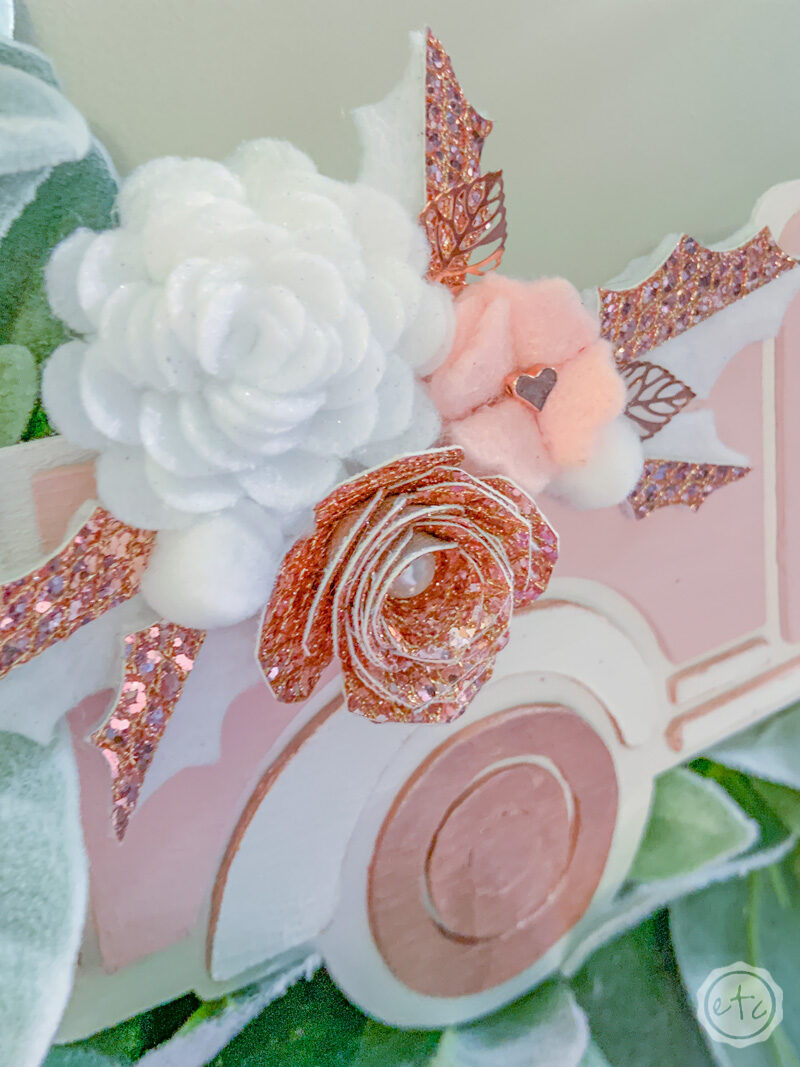
Alright y’all now it’s time for the final finishing touch… our felt flowers in the truck bed! You’ll find the SVG files for these babies in the truck SVG file for this project. I used 1 large spiral flower in rose gold, 1 large spiral flower in white and a tiny folded flower in pastel pink.
You can find the directions for making these flowers at the bottom of this post (on how to use your rotary blade… since I used my cricut’s rotary blade to cut out my felt flowers!). There are also a few cut files in the svg file for the holy leaves!
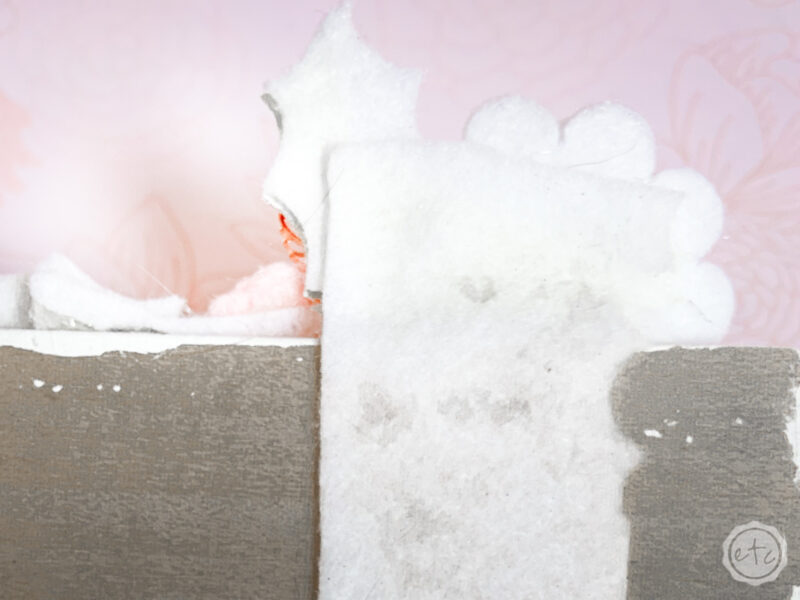
The holy leaves are super easy to assemble… simply cut them out with your cricut then use a bit of hot glue to secure them together. I decided on white for the larger leaf and rose gold glitter for the top layer so it was simply a matter of gluing the rose gold layer on top of the white. I made 5 leaf’s in 3 different sizes for a bit of variation!
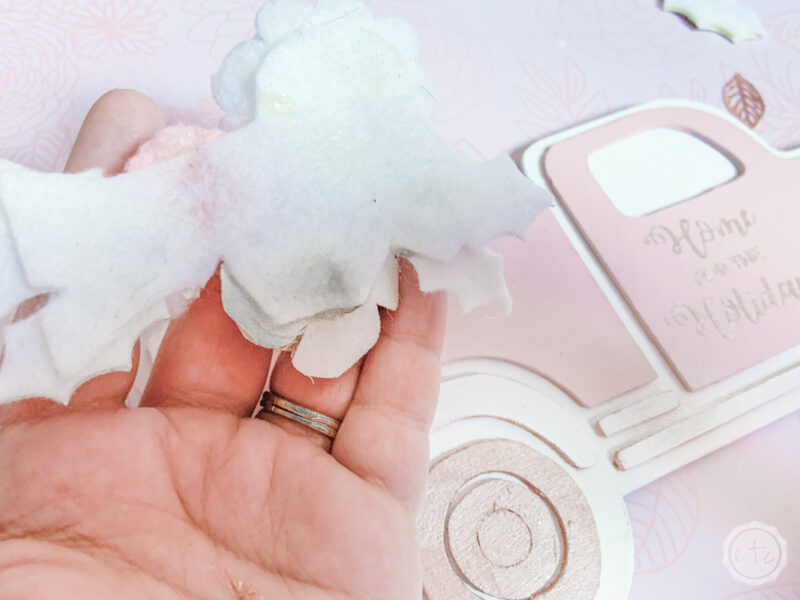
Alright y’all, at this point you should have five holy leaves and 3 left flowers. I cut out a rectangle of felt (about 3 inches long by an inch and a half high) and started to glue my flower arrangement onto the felt square.
There is no rhyme or reason at this point I simply glued them in a configuration that looked good! You can follow my configuration or decide on a new one of your own. The last finishing touches to the flower arrangement were a few white pom poms for holly berries and a couple rose gold metal leaves for that extra pizzaz.
Once you have all your pieces glued together go ahead and trim away any of that rectangular piece of felt that’s visible from the front… and then glue the entire rectangle right onto your truck bed!
That should be pretty sturdy but my white flower stuck up a bit from my truck bed so for a bit of added security I cut another felt rectangle and glued it to the back of the white flower and then to the back of the truck… super sturdy!
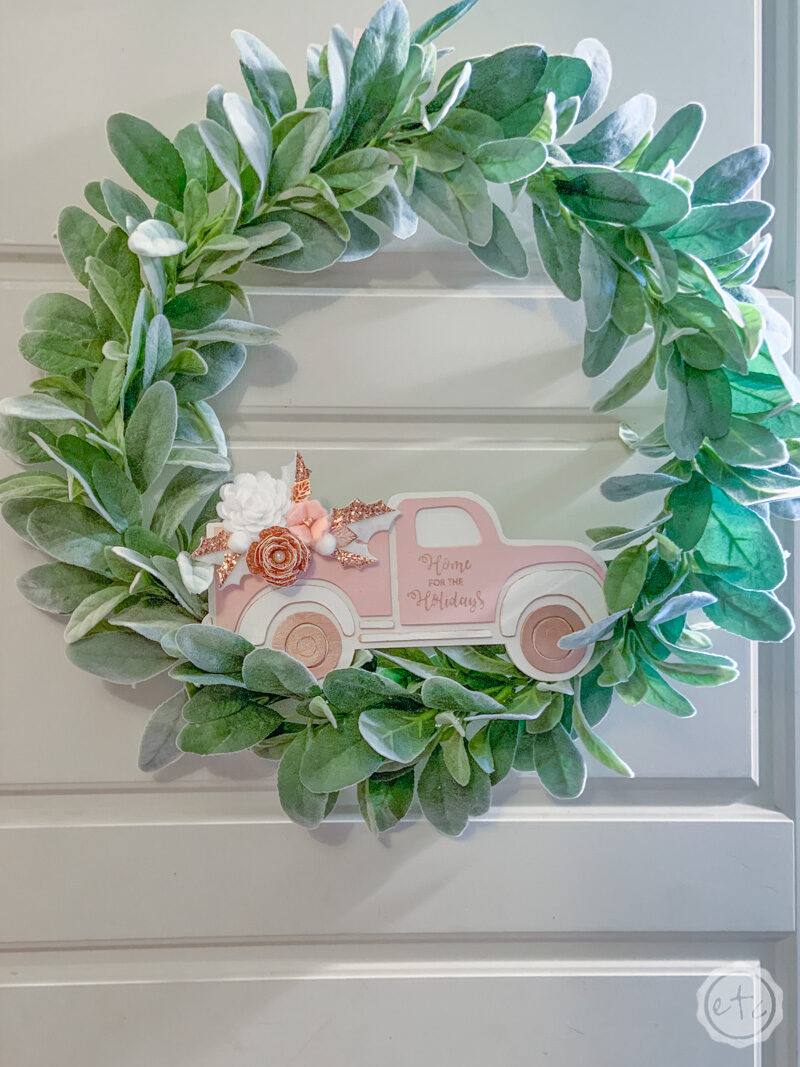
Add to your Wreath!
Now all that’s left is adding this baby to your wreath! I used a bit of clear thread to tie these two together and I am thrilled with the result.
Take a look!
Looking for a few more fun pieces of door decor? Want to spruce up your front door with a holiday wreath? I’ve teamed up with a few of my favorite bloggers to bring you new and exciting holiday content all season long… starting with door decor!


Looking for more rose gold holiday goodness? These posts are for you!


Your Christmas truck wreath is so pretty! The rose gold looks amazing on the greenery. The Cricut is amazing!
Absolutely gorgeous!!! Such a unique and stunning wreath, great job!!!
This is the cutest little truck and it looks fantastic and fitting on the wreath!
I was so excited to see your wreath. I love all the details, down to the hub caps pf the truck. The rose gold flower adds just the right touch!
This turned out super cute Betsy!