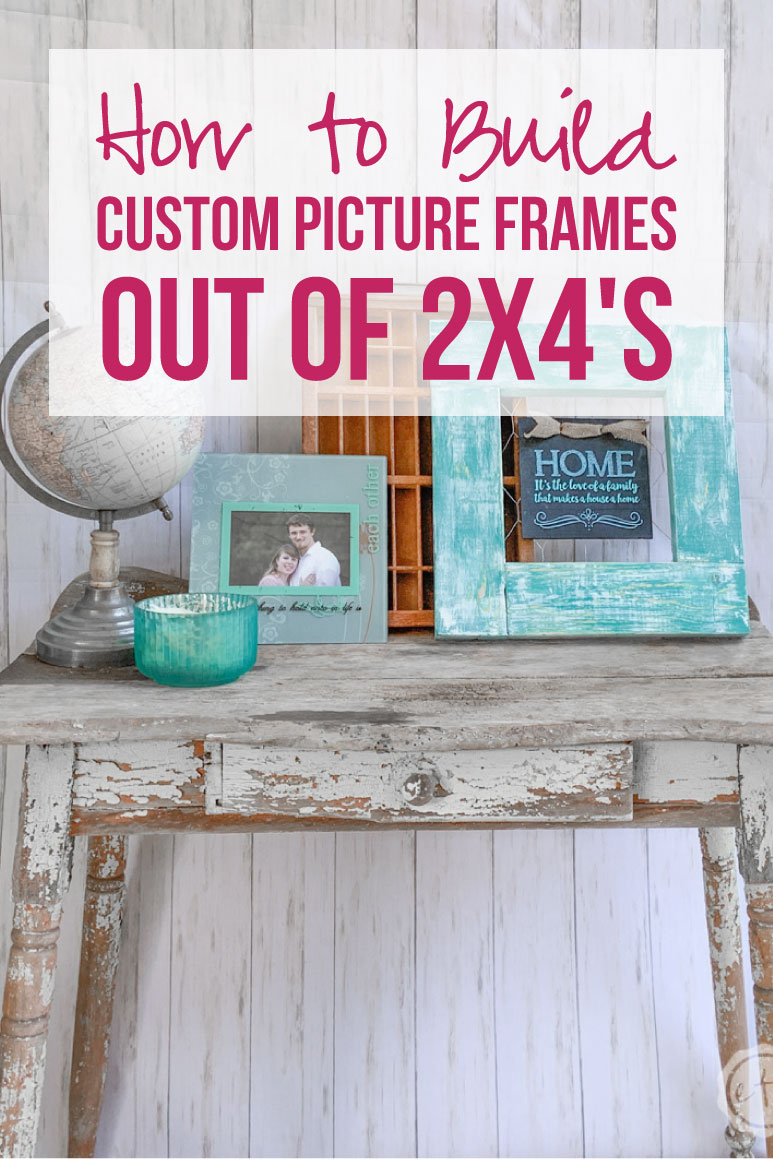


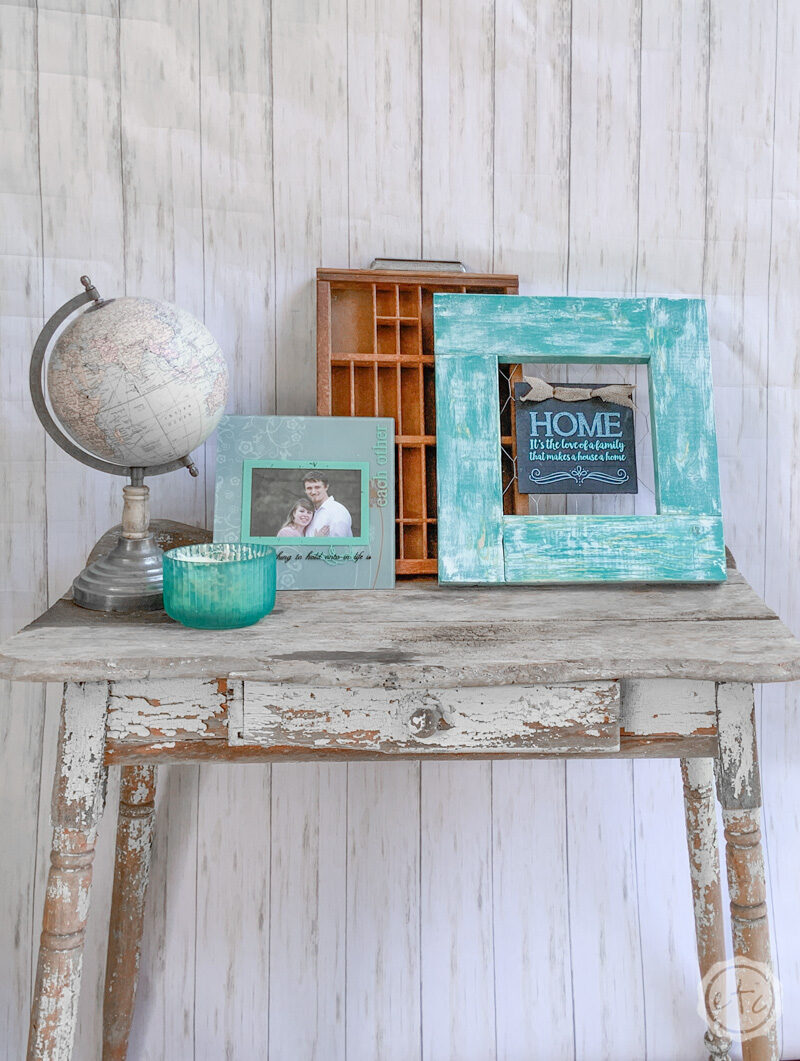
Today I have a fun, inexpensive tutorial for how to make chunky rustic completely custom picture frames! These frames are perfect for show casing one of your perfect photos… and they’re large enough that a few of them in a row makes for a beautiful gallery wall.
The best part? I already have most of the supplies on hand (Chalk paint? Check! Kreg jig? Check! Chalkboard paint? Check! Power drill? Check!) So when it’s all said and done the only things I needed to buy to complete these frames were 2 2×4 boards and a bit of chicken wire… meaning I whipped these custom picture frames up for about $4.50 a piece.
Now that’s a bargain!
Ready to get started?
Supplies:
- 2 8 foot long 2×4’s (cut into 1 foot sections)
- 32 2.5″ Long Pocket Hole Screws
- Chicken Wire
- Nail Gun and Staples
- Sanding Block
- Power Drill
- Wire Cutters
- Kreg Jig Pocket Hole Guide
- Clamp
- WORX Work Table
- Dremel Saw Max
- Plywood
- Hot Glue Gun and Glue
- Dixie Belle “Mermaid Tail” Chalk Paint
- Dixie Belle “Fluff” Chalk Paint
- Paint Brush (2″ angled cub purdy)
- Chalkboard Paint
- Tiny Clothespins
- Burlap Ribbon
How to Build Custom Picture Frames out of 2×4’s
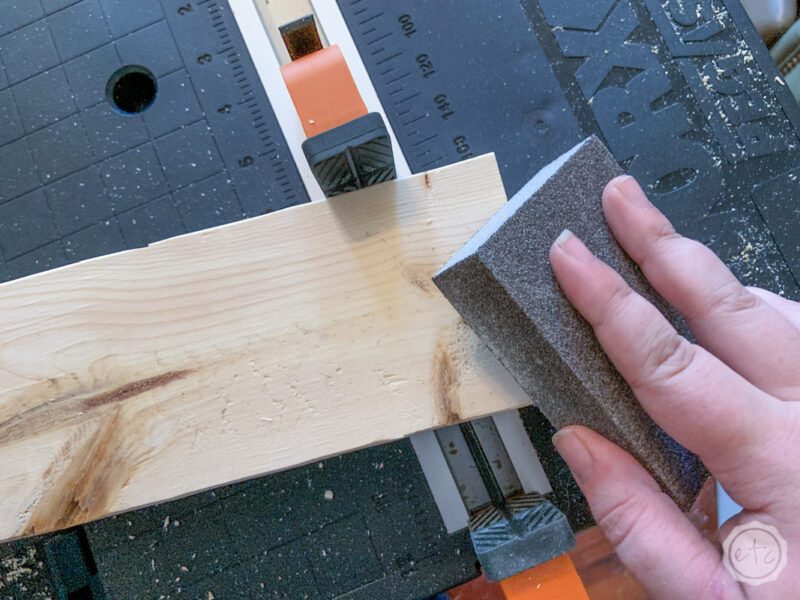
Step 1: Cut and Sand your Boards
Ready to get started? I picked up 2 2×4 boards at the hardware store… mine are 8 feet long and I had the fella at the store cut them into 1 foot sections for me.
Keep in mind that we need 4 1 foot sections for one frame… so 2 boards cut into 1 foot sections will make 4 frames. If you only want to make 1 frame you only need 1 2×4.
But remember that an 8 foot long 2×4 isn’t really 8 feet long… it’s 7 feet and some odd inches. SO my 16 1 foot sections are really 14 1 foot sections and 2 slightly shorter than 1 foot sections.
I just made 1 frame a little smaller than the rest (and I’m fine with that) BUT if you want all 4 of your frames to be identical you’ll need a 3rd 2×4.
Of course, having the guy at the hardware store (aka my BFF) cut my boards means that I didn’t have to cut my boards (time saver! yes, please!) but I did sand alllllll the edges when I got home so that my frames would be nice and smooth.
Then it was time to get down to business.

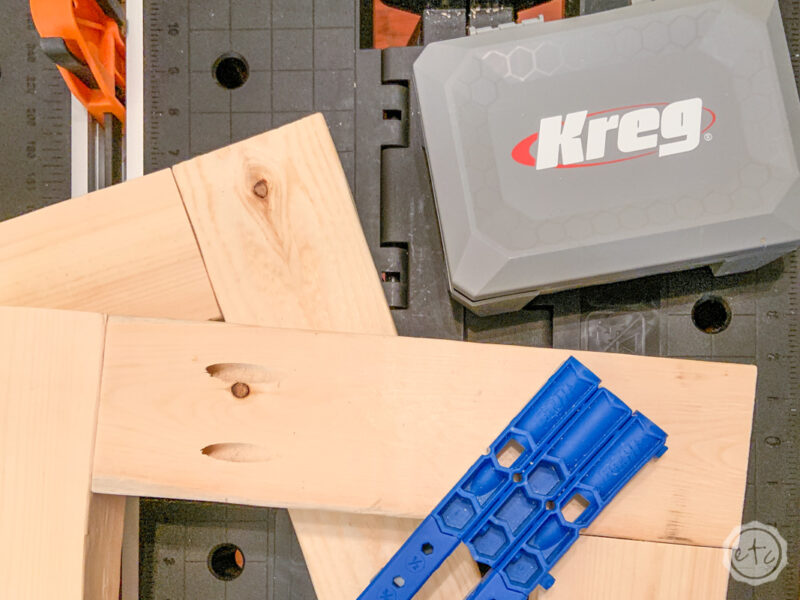
Step 1: Drill your Pocket Holes
Go ahead and drill two pocket holes on each and every one of your 1 foot long 2×4’s. Make sure that you set your Kreg Jig to 1 1/2 before you get started and that if you have any black writing on your boards that side is facing up.
The face of your frame will be face down (you’re drilling your pocket holes into the back of your frame) so making sure that any black writing is on the same side as your pocket holes is the perfect solution.
Black writing on the face of your pretty custom picture frames would be heartbreaking after all your work!
Not sure how to use your Kreg Jig? Confused on how to set it up? I’ve got you covered! Check out this easy “How to use a Kreg Jig to make Pocket Holes” tutorial to get started.

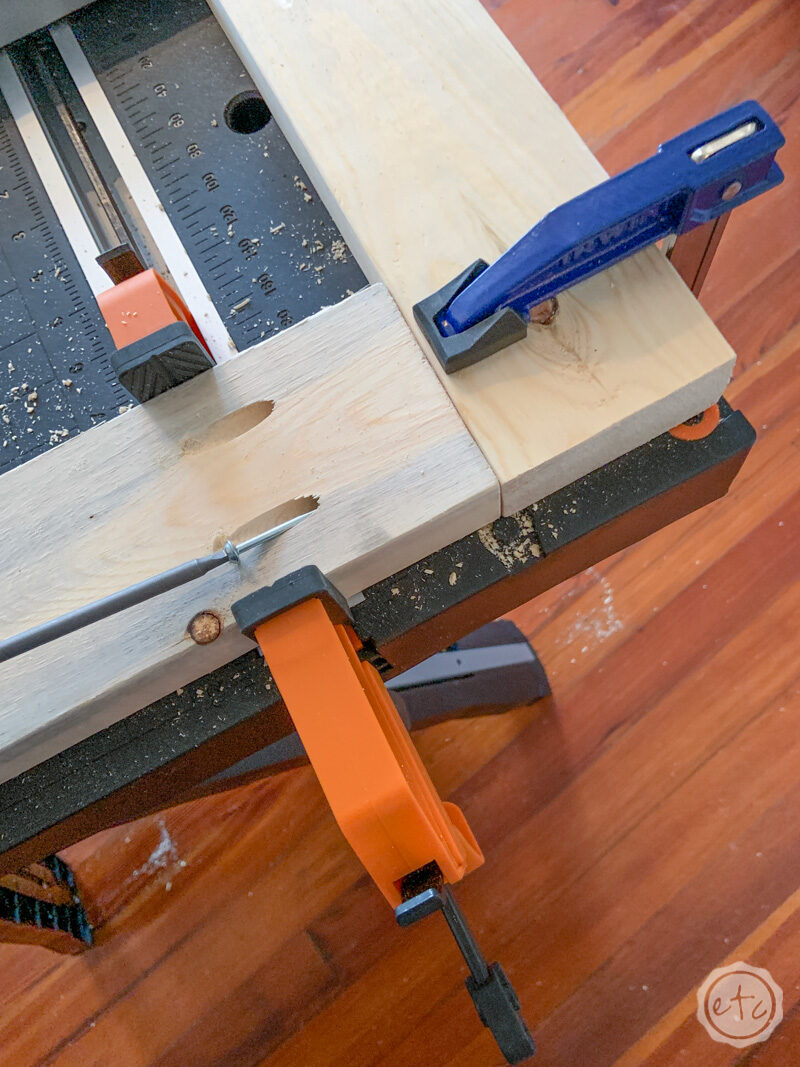
Step 2: Build your Frames using Pocket Hole Screws
Now that you have a beautiful stack of 2×4’s (complete with pocket holes) it’s time to put your frame together.
Lay out two of your boards so that you have a ninety degree angle with one pocket hole board facing the blank end of the next board. Just like the picture up above.
Make sure to clamp both boards down tight since they’ll want to move when you start to screw them together. One more tip? Make sure the edges are flush so that your frames boarders will be smooth.
Go ahead and screw the first two boards together using your 2 1/2 inch long pocket hole screws. Then turn add the third and fourth boards and repeat the process for each new board!
Once you screw the third and fourth board in place you should have a nice little (ok, not so little) square frame made out of 2×4’s.
Score!
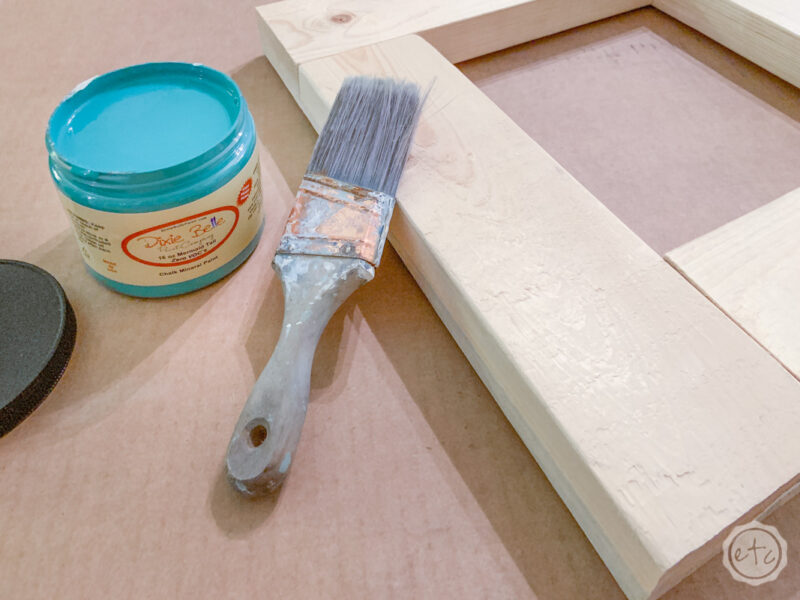
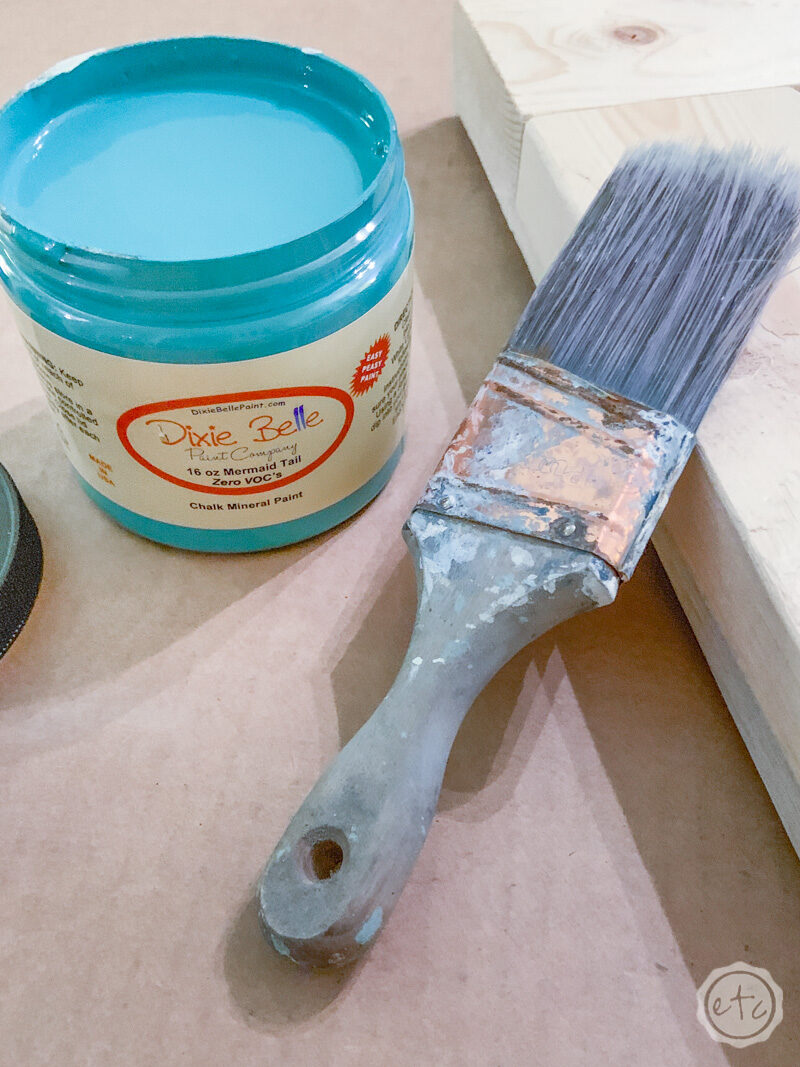
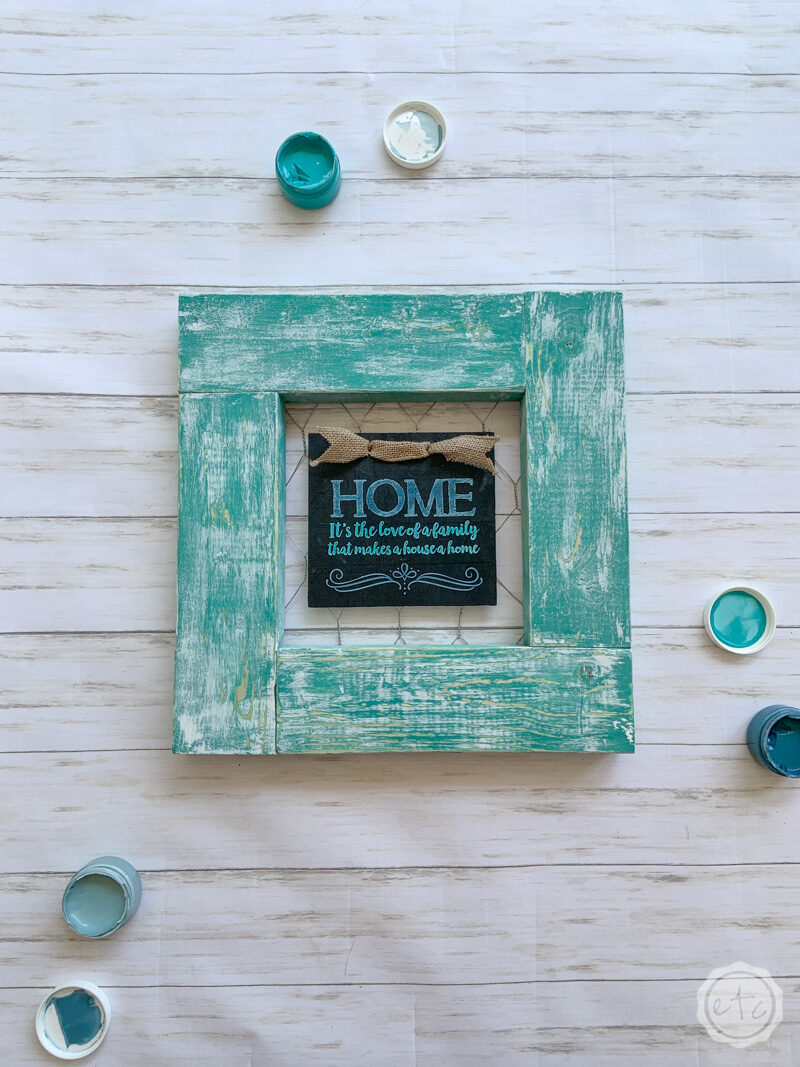
Step 3: Paint Your Frames
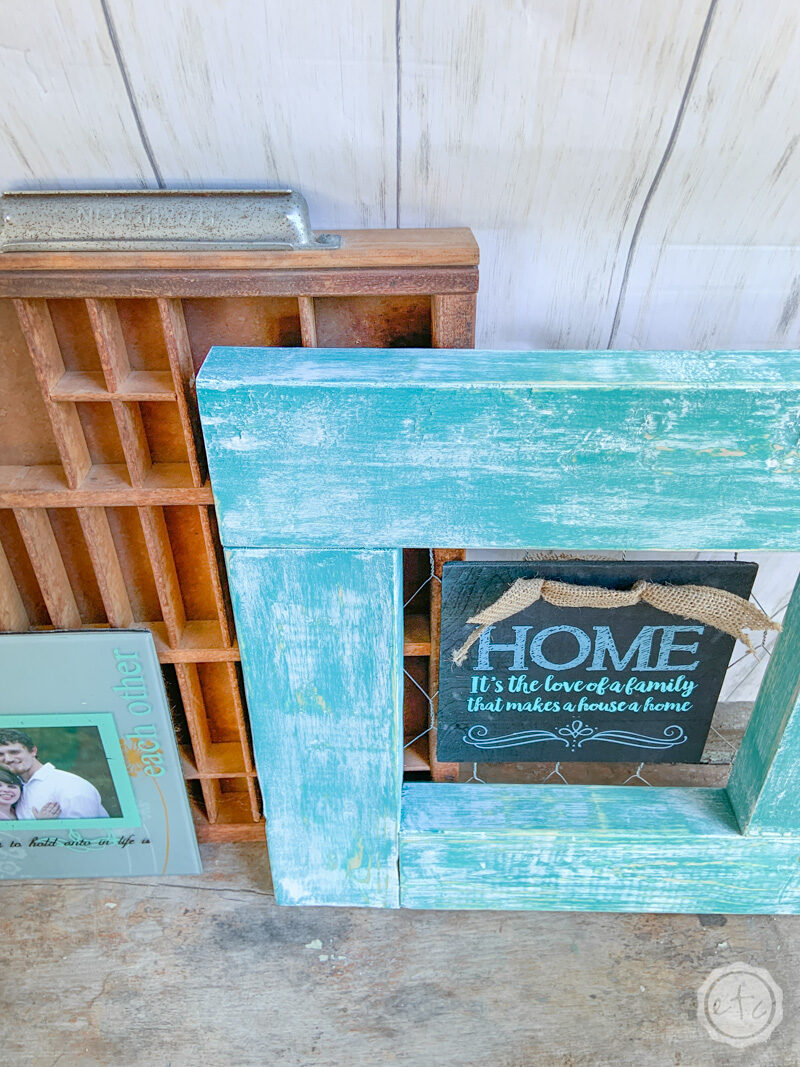
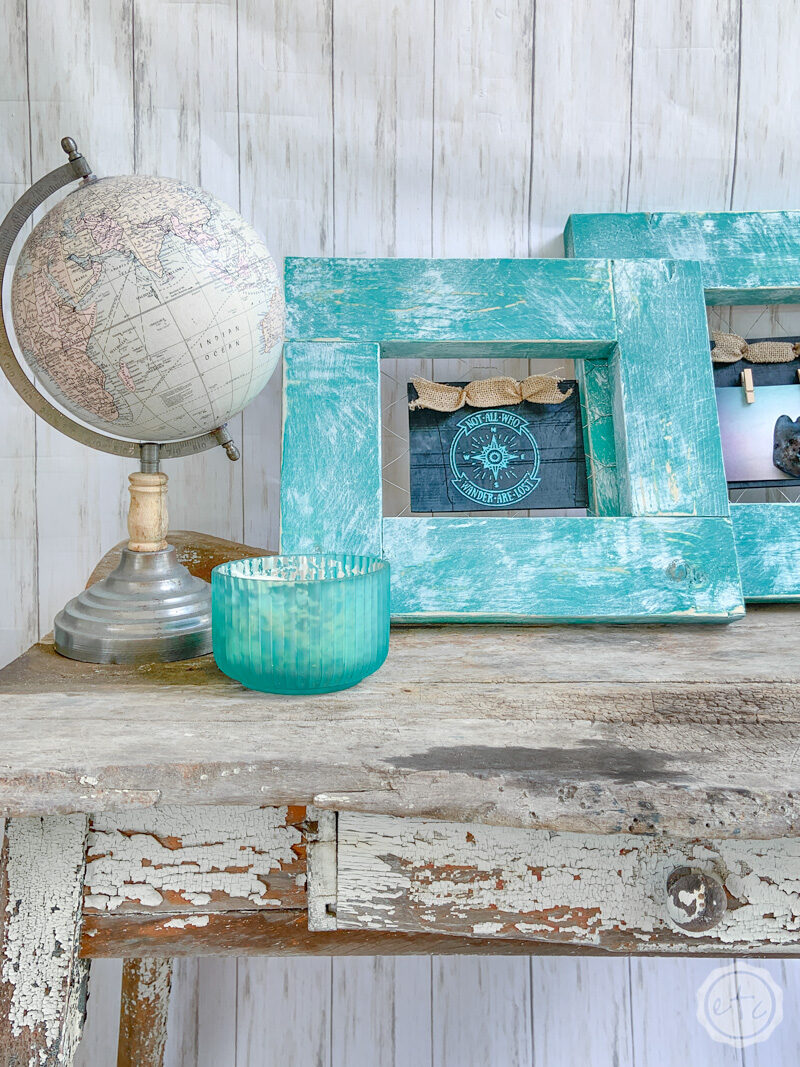
Now that our frame is put together it’s time to paint these bad boys. You could put an endless number of finishes on this little diy picture frame but I decided to go with a coat of Dixie Belle’s mermaid tail chalk paint followed by a dry brush layer of their fluff white.
The paint dries super fast (and covers like a boss) so once the teal layer was on it only took a couple minutes to dry before I could start dry brushing the white over top.
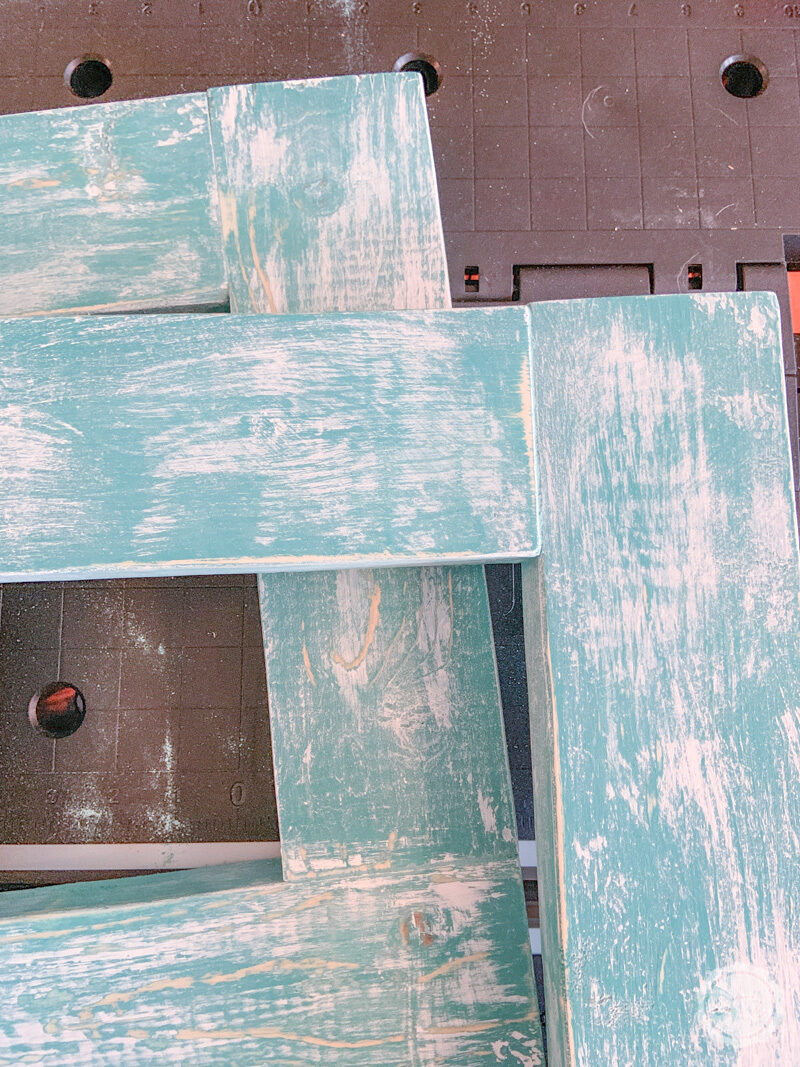
The final step was to take my sanding block and sand the entire frame so that the white was softened just a tad. You can sand as little (or as much) as you like but I decided to sand just until I saw the natural wood of the 2×4’s peeking through in spots… then I moved on to the next section.
Keep in mind that these 2×4’s are imperfect so the natural wood tone is going to show up not only on the edges and seams but also on the wood grain where the boards are a little uneven.
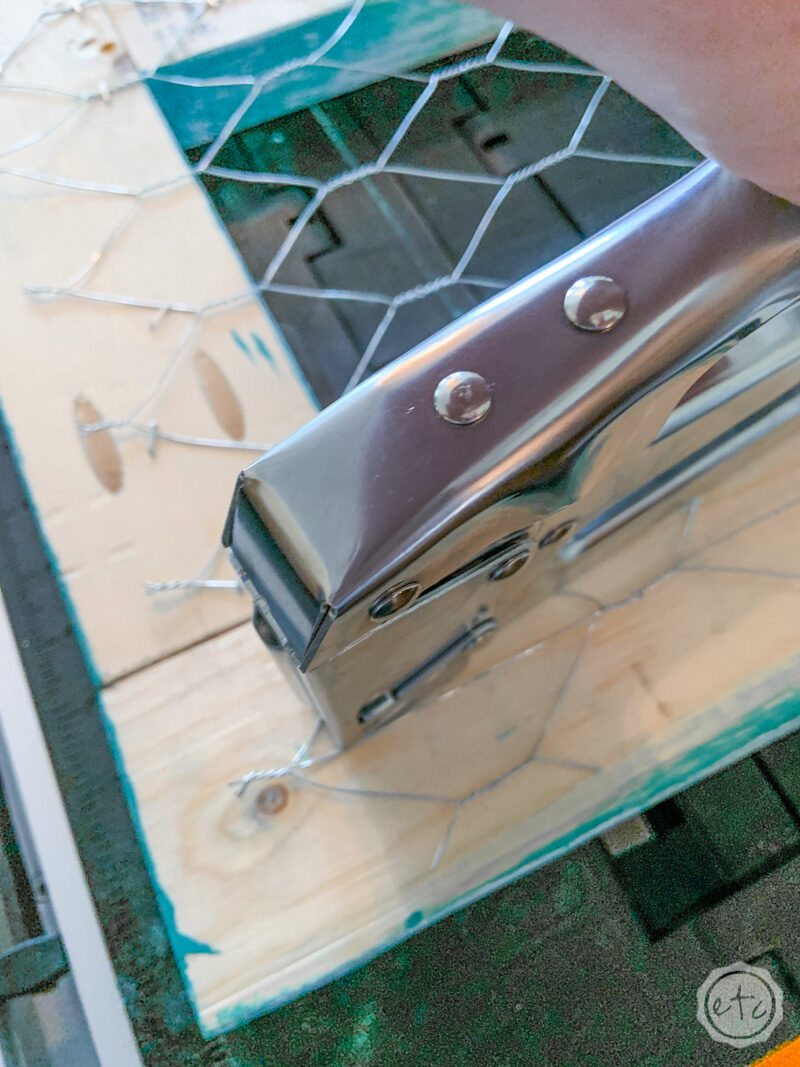
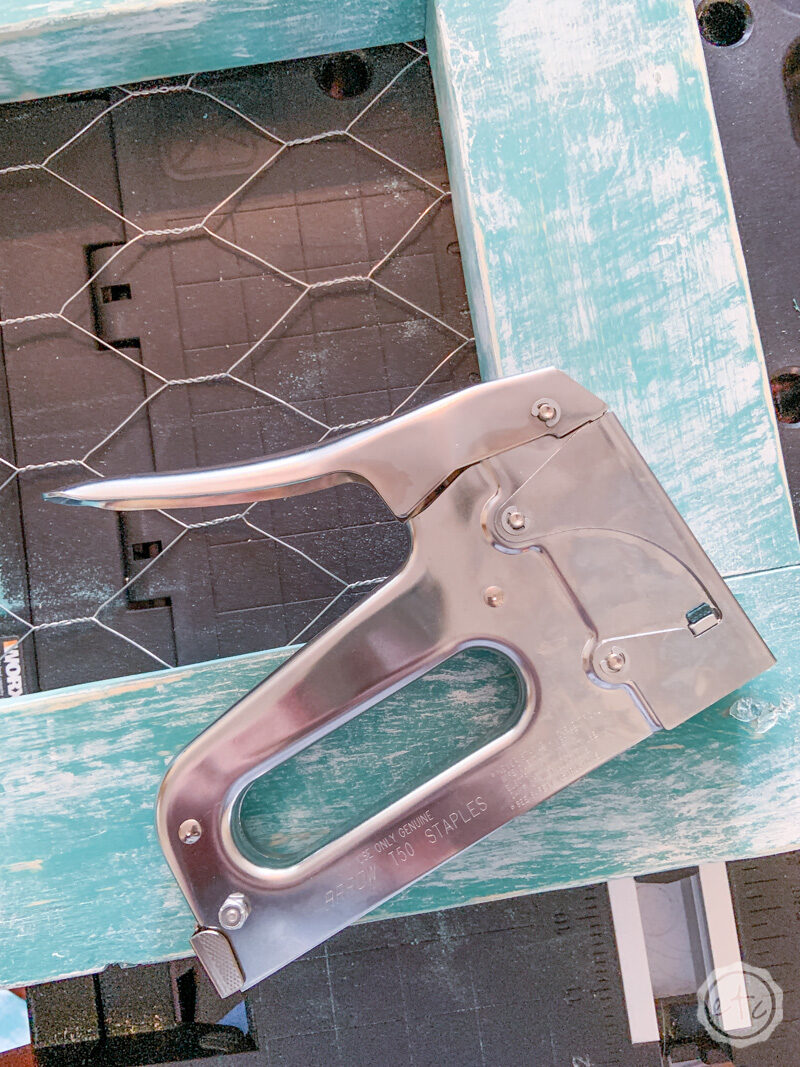
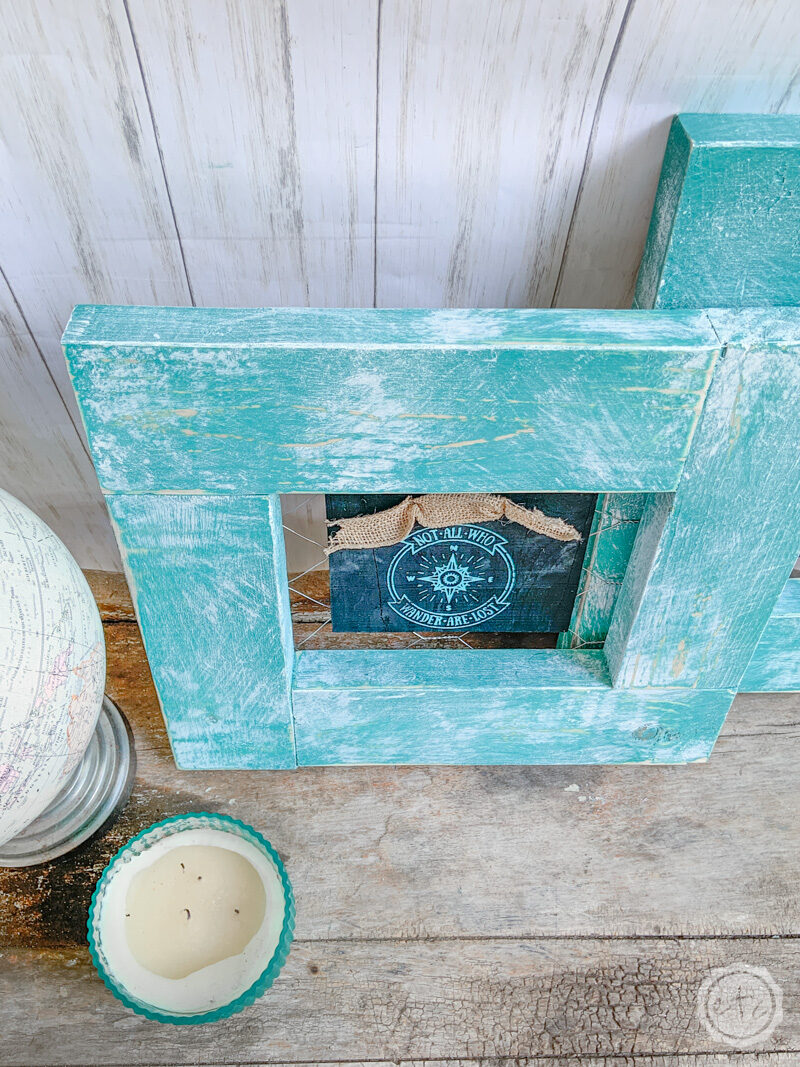
Step 4: Staple Chicken Wire to the Back of your Frame
Once your paint is all the way dry it’s time to move on to the next step… chicken wire! Go ahead and cut your chicken wire to fill your frame.
Simply turn your frame over and cut a piece of chicken wire large enough to fill up the entire back of your frame. Don’t forget you need a large enough piece not just to cover the hole but also to hold your staples.
When you’re cutting the chicken wire make sure to clip the wires down so that they won’t accidentally scratch your wall to pieces (trust me… it’s a bad look!). Then it’s time to start stapling!
I like to staple just like I upholster… so staple your first staple in the top center of your frame. Then pull your chicken wire tight and staple in the bottom center of your frame.
Make sure the chicken wire is stretched and place a staple in the middle of the left side… then the middle of the right side. Then keep pulling the chicken wire while placing staples alllll the way around the back of your little DIY picture frame.
Now we’re getting somewhere… our little frame is starting to look like a little frame! Now we just need a solid base for the middle of our frame. Somewhere to put a picture!

BONUS TIP: Make sure not to staple directly into the top of a pocket hole since you’ll either have too much space under your staple (if you look in the hole and see staple? You’re too close!) or hit the screw… yikes!

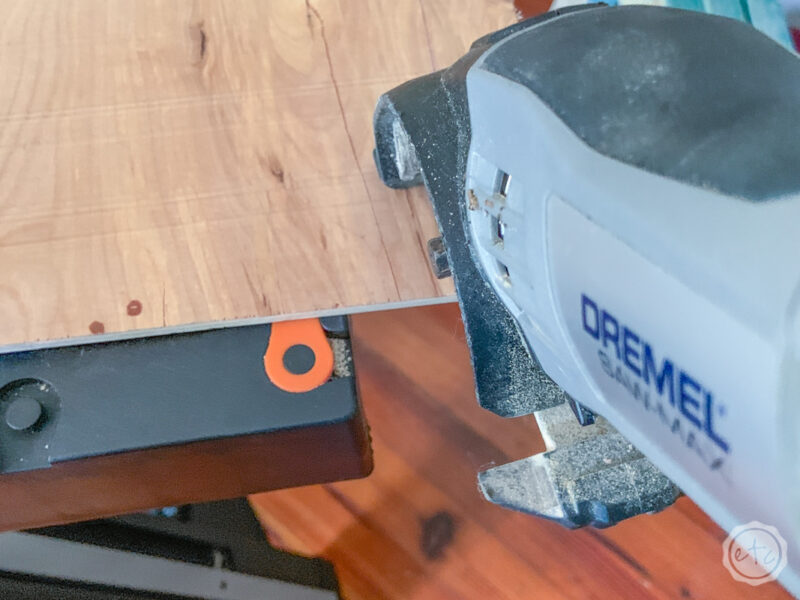
Step 5: Cut Your Boards for a Photo Base
Alright, now it’s time to cut the photo part of our photo frame. I used a spare piece of plywood I had left over from our DIY Dog Feeding Station.
Really just about any flat piece of wood will do as long as it’s thin enough to be recessed within our picture frame.
Simply cut your plywood into a 5 by 6 1/4 square (if you’re doing 4 frames like mine (3 square and a slightly smaller one to use those end pieces) you’ll want to cut 3 boards that are 5 by 6 1/4 and one board that’s 5 by 5 3/4).
I simply clamped by little piece of plywood to my worx table and used my Dremel saw max to cut these babies out.
Easy peezy lemon squeezy.
Then I clamped all four of them together and used my kreg jig drill bit to drill two holes spaced out along the top of the board. Just make sure your clamps are really tight because ply wood likes to splinter and you’ll have a mess if it’s not tight enough.
No I don’t know experience *cough cough* I’m just guessing.

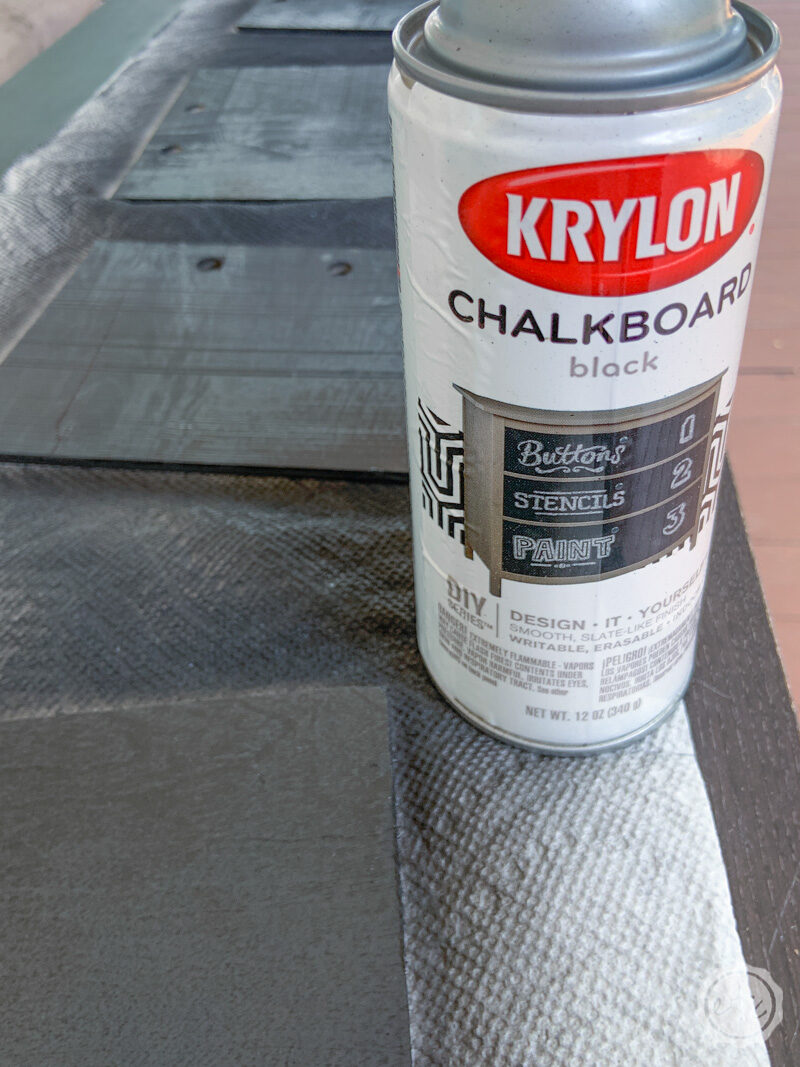
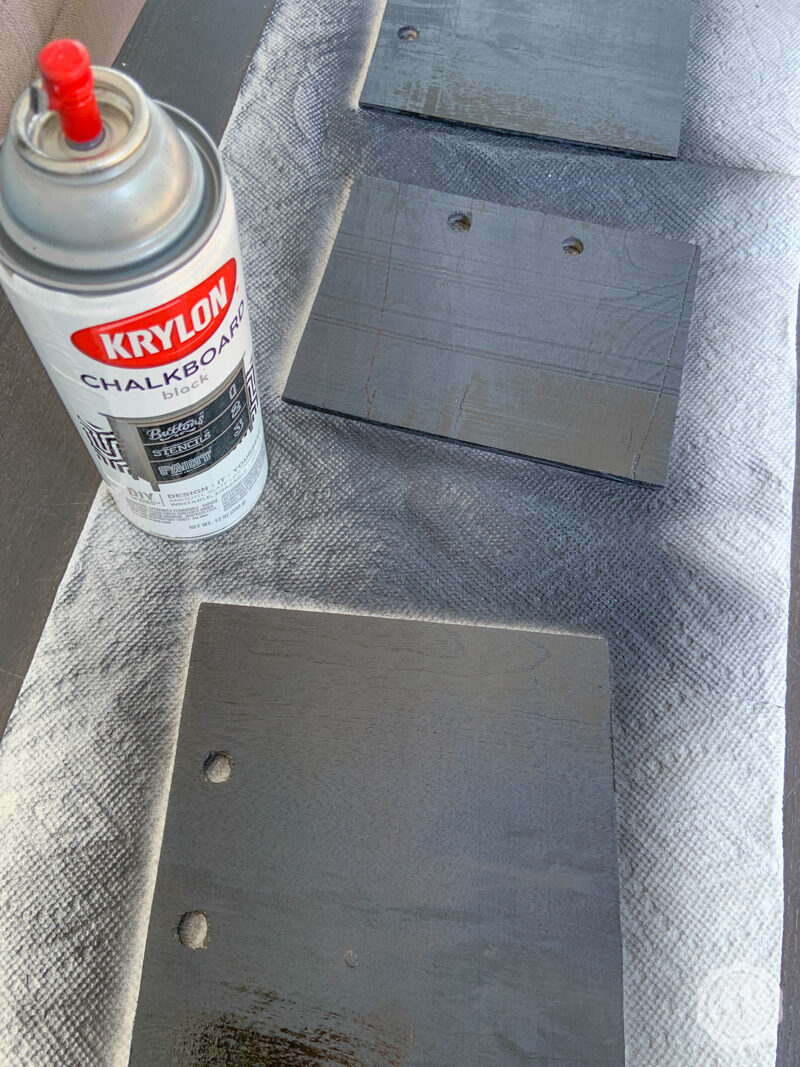
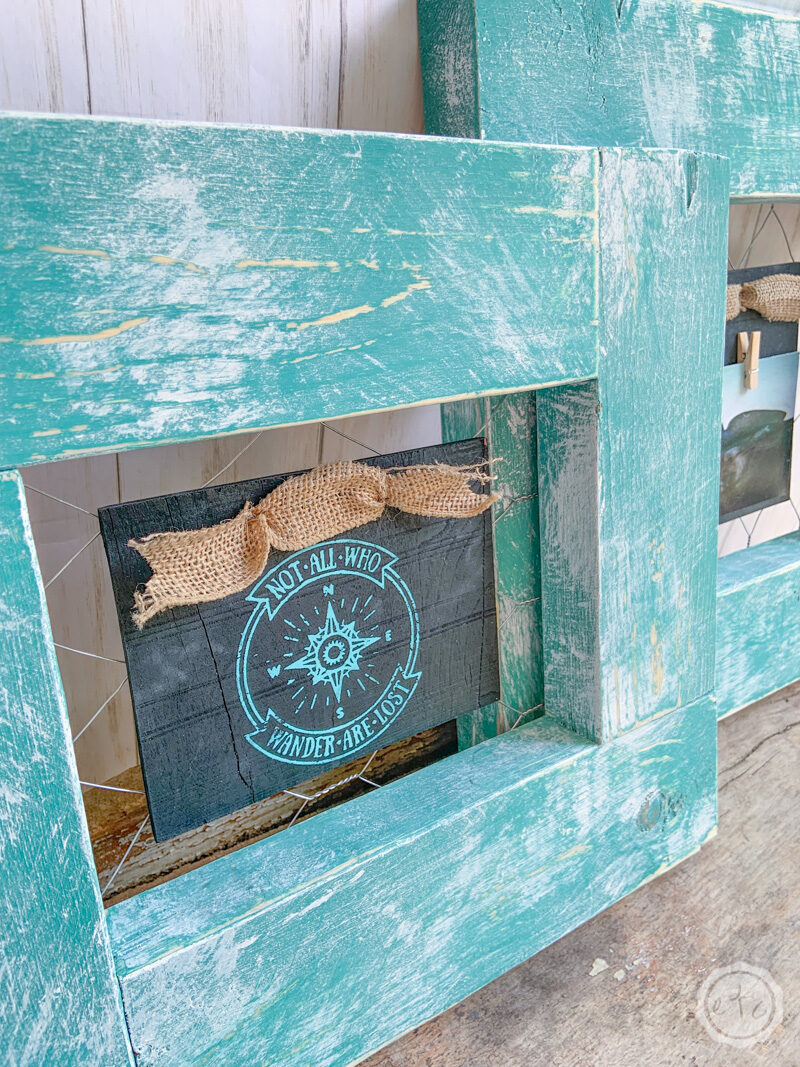
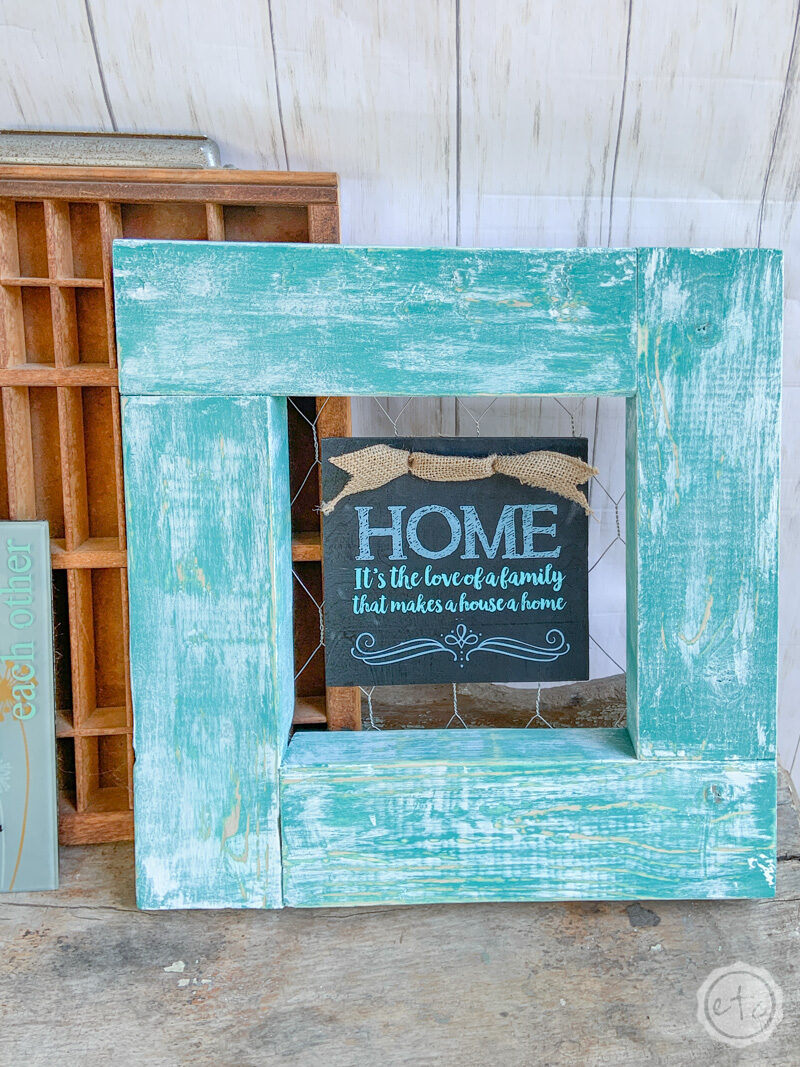
Step 6: Paint your Chalkboards
Once your little boards are all cut out it’s time to paint them! I decided the only thing better than a custom picture frame is one that doubles as a chalkboard… so I covered these babies in chalkboard paint.
Score!
Chalkboard paint is easy enough to use if you follow the directions… so do 2-3 light coats and let them dry in between. Beautiful darling, beautiful!
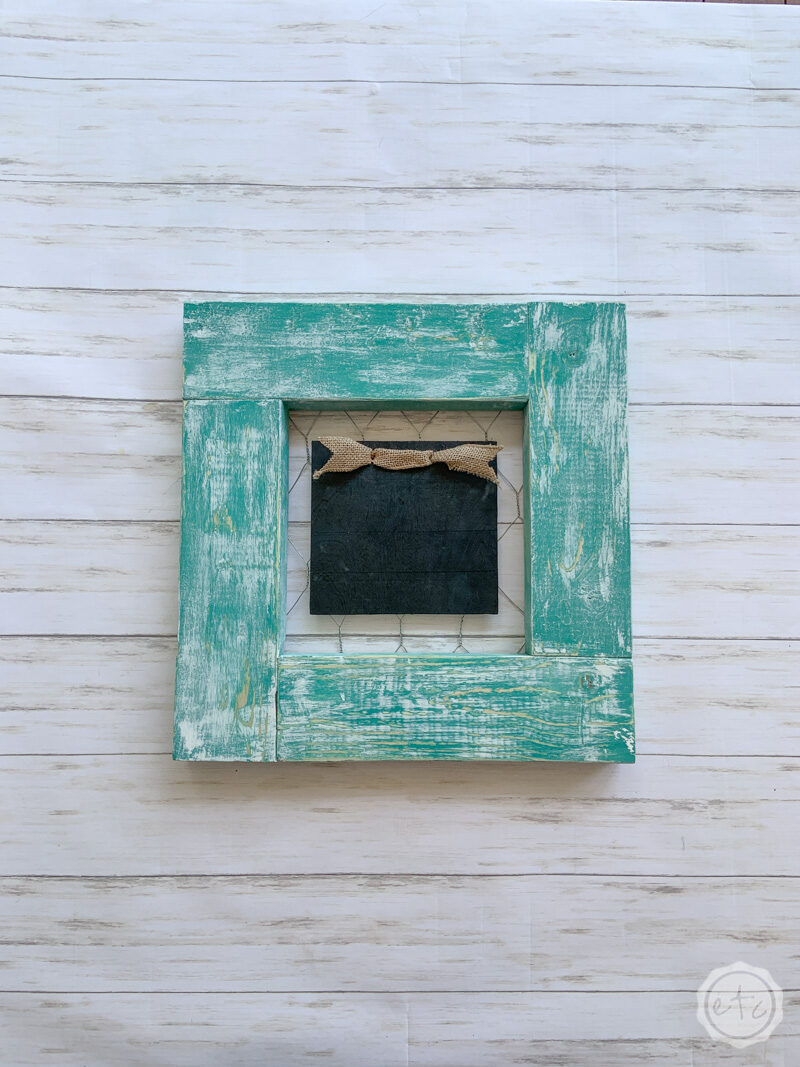
Step 7: Attach your Chalkboards to your Frame
Ready for a bit of fun?
Go ahead and add your chalkboard to the frame! I simply threaded a burlap ribbon through the holes in the top of my chalkboard and around the chicken wire in the back.
This actually held my chalkboard pretty darn tight but just in case I used a few realllllly short staples to hold the chicken wire to the chalkboard from the back. Just make sure to place your stables through the ribbon so that they won’t show if the ends are a little too long.
Volia!
If you’re in love with your little wooden picture frame just like this you can add a bit of chalk art and call it a day… but if not it’s time for the last step!
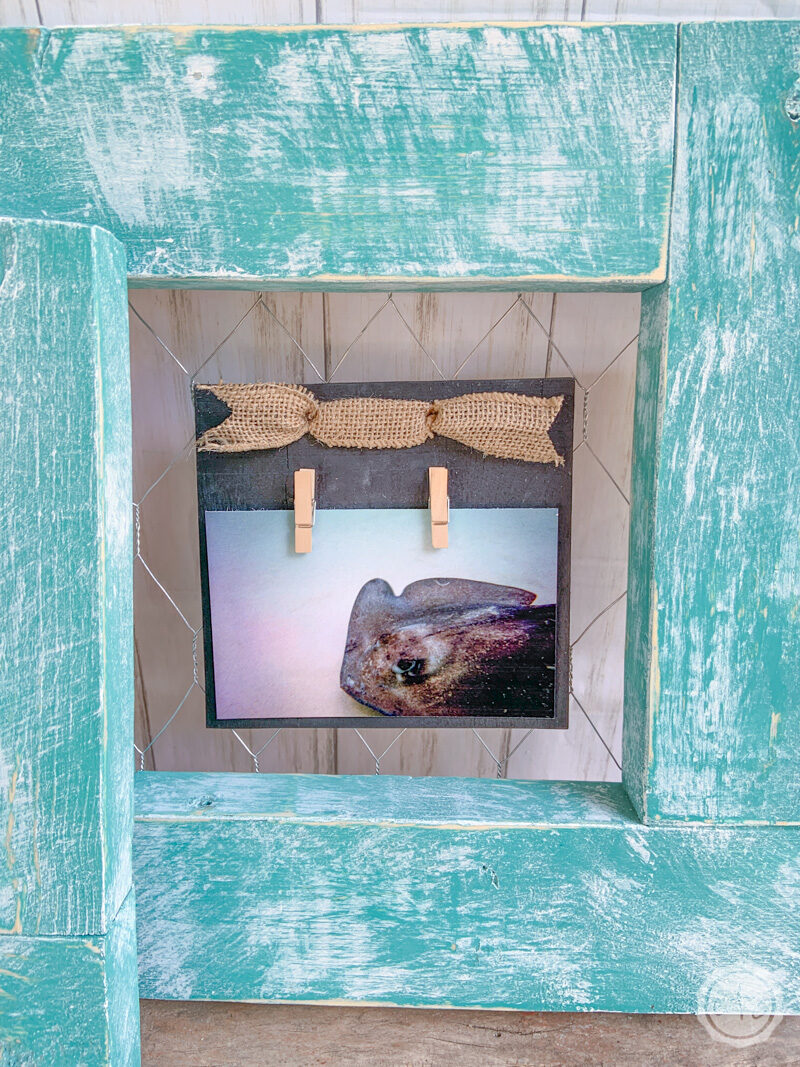
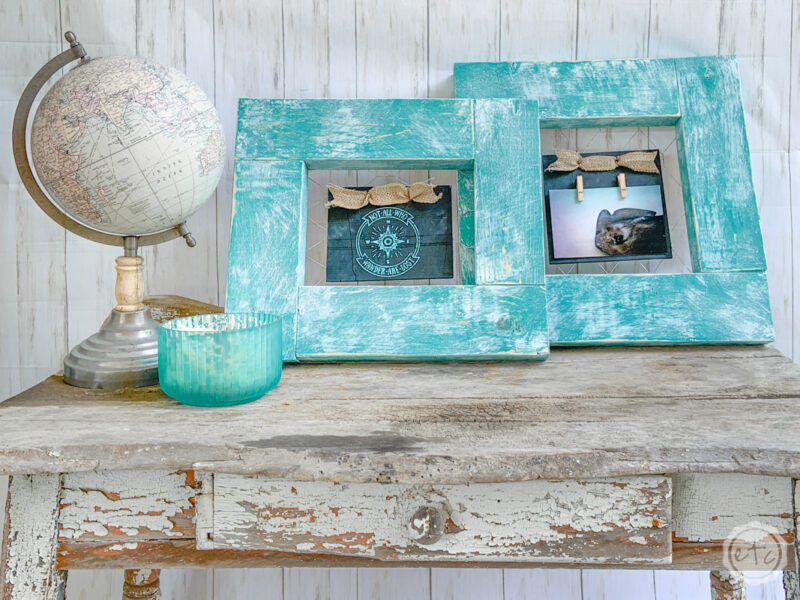
Step 8: Add Clothespins!
This is the easiest step… simply place your clothespins onto a photo (so that you get the spacing perfect) and then put your hot glue on the back of the clothespins.
Press the clothespins down firmly to your chalkboard (before the hot glue dries!) and you’re good to go. One b.e.a.u.t.i.ful custom picture frame to hang on your wall.
Enjoy!
Looking for a few more 2×4 projects?
I’ve got you covered! Here are a few of my favorite bloggers and their amazing 2×4 projects that you can make for your own home. Enjoy!
Don’t Forget to Pin!