


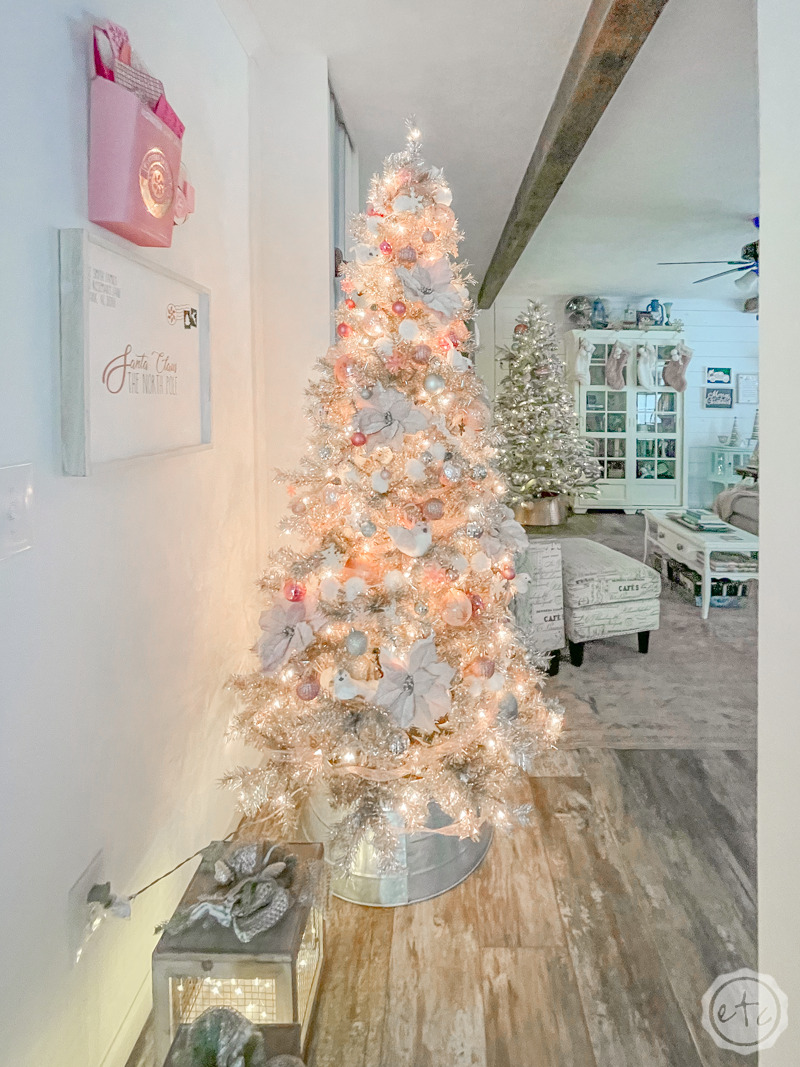
The best part about the weeks leading up to the holidays (for me) is getting in the holiday spirit… and that means decorating! A few fun Christmas signs, a beautiful blush and seafoam Christmas tree and even the cutest Letters to Santa Mailbox!
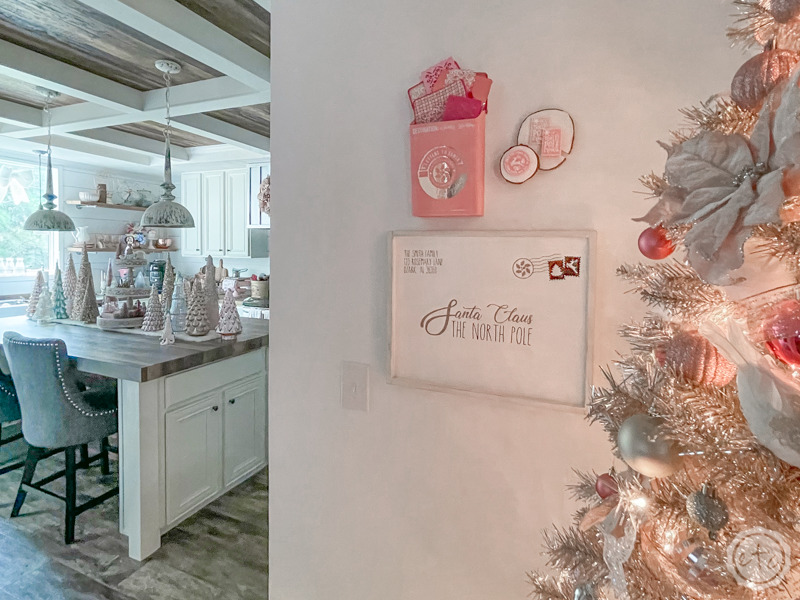
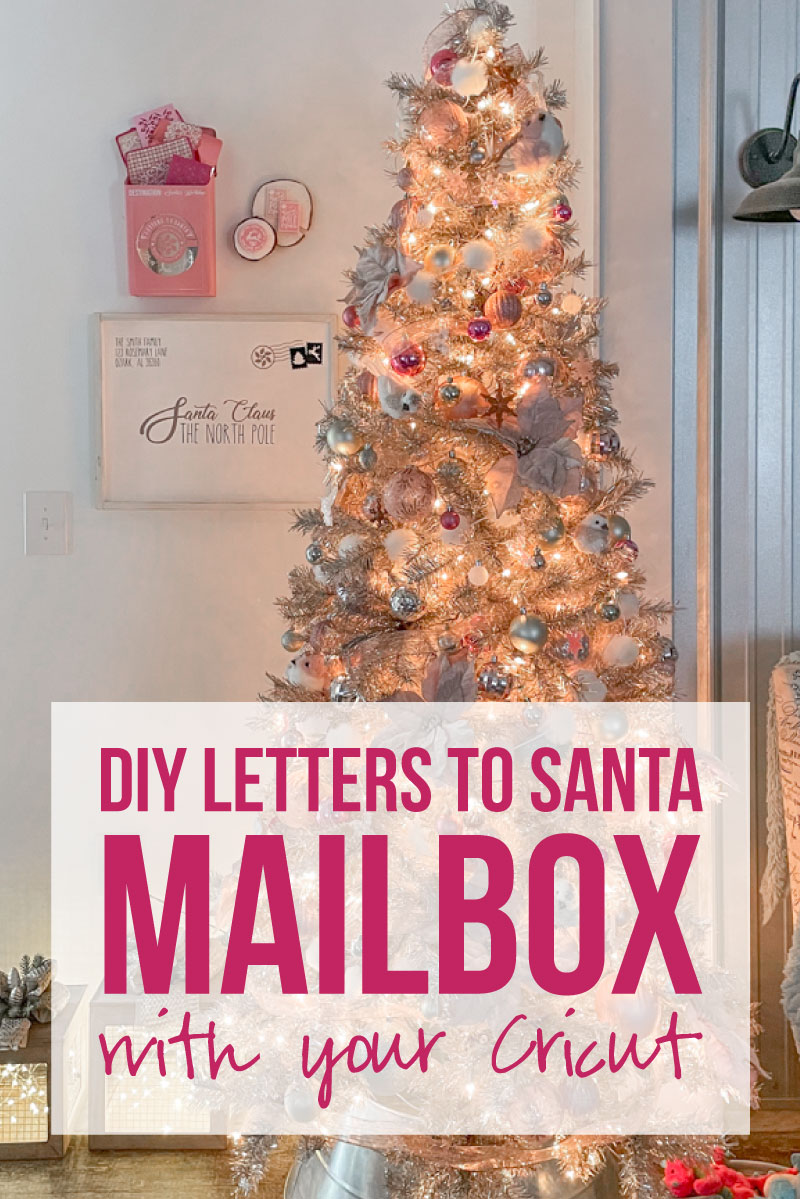
A few year’s ago I made this little “Dear Santa” sign with my Cricut and to this day it remains my all time favorite Christmas sign. It’s simple yet effective… and like most of my projects, I love that I made it myself. There’s just something extra special about that handmade touch. So this year I decided to take it a step further and create an entire little wall grouping to go with this special “Dear Santa” letter starting with a “Letters to Santa” Mailbox!
I’ve seen several of these adorable little mailboxes for sale but of course, none of them were pink… which makes no sense to me but to each their own. I even thought about buying this all white version (it’s so cute!) but I figured the white mailbox on my white wall just wouldn’t cut it. And if I was going to spray paint a mailbox I’d rather make my own decals so that they can be rose gold.
Priorities people.
Plus my spray painted mailbox was under $20 and the pre-made one was $37 so… that made my decision easier.
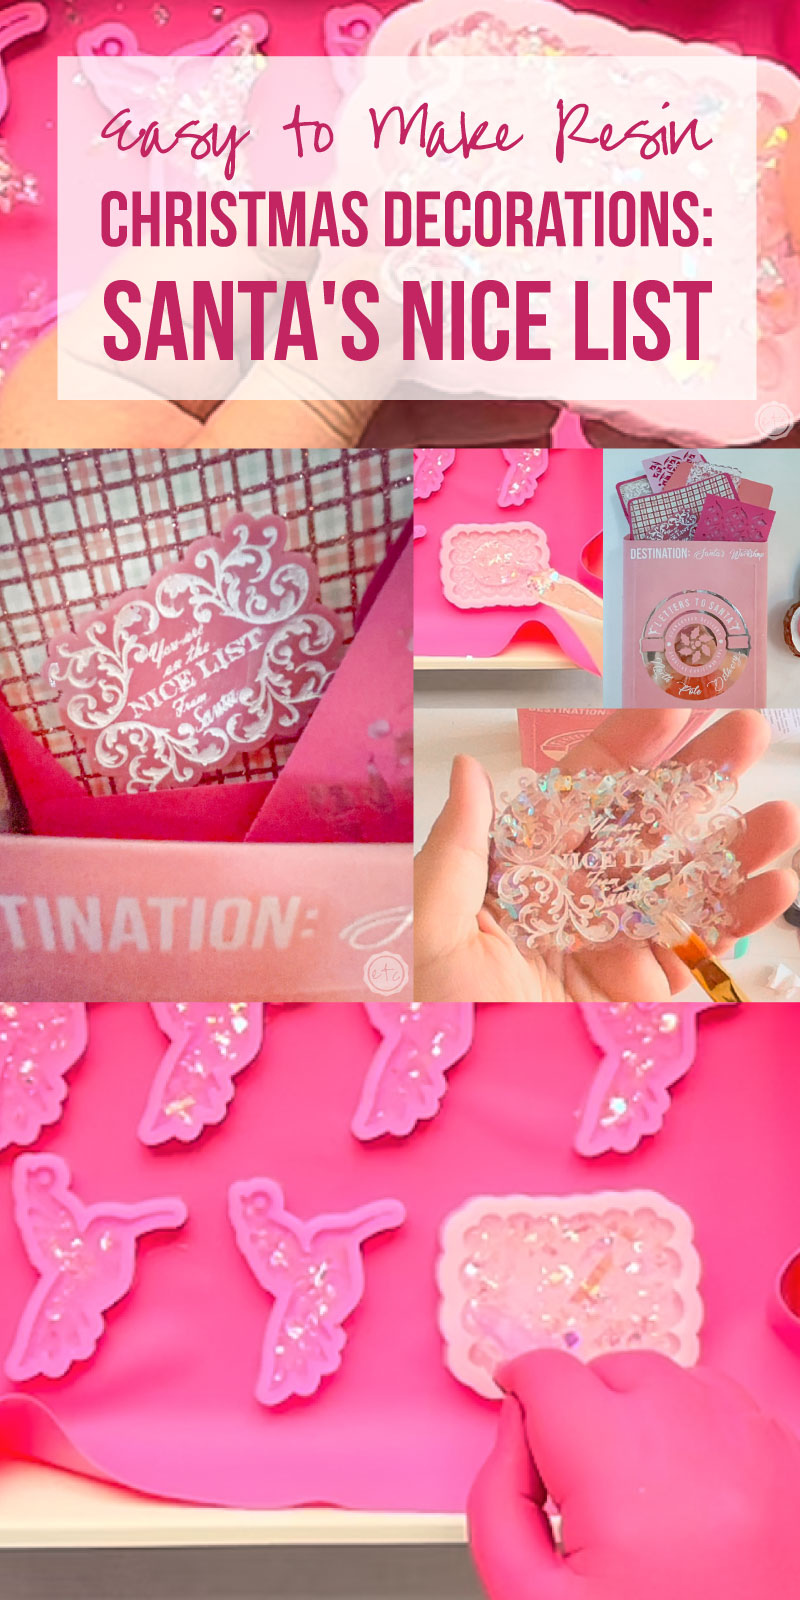
Long story short: today we’re making a cute Letters to Santa Mailbox! I whipped up a few festive holiday envelopes with my Cricut (follow the tutorial here) and even a few fun “You’re on the Nice List, Love Santa” resin cards for those envelopes (follow the tutorial here) so that my little mailbox could be stuffed with fun.
Ready to jump right in?
Supplies:
- Cricut Maker
- Fine Point Blade
- Standard Grip Mat
- Permanent Vinyl (White)
- Rose Gold Adhesive Foil
- Transfer Tape
- Weeding Tool
- Brayer
- XL Scraper
- Cricut Access
- FREE SVG (Download below!)
- Iron Mailbox
- Pink Spray Paint
- Glue Dots
- DIY Cricut Christmas Envelopes
- Santa’s Nice List Resin Piece

Step 1: Prep your Mailbox
When this little mailbox came it was white and shiny… so I hit it with a few coats of pretty pastel pink spray paint. I tried to pick a color that would match the pastel pink of these resin postage stamps since the two signs would be going next to each other.
Unfortunately my specific can was a little funny and sprayed out all kinds of rough and bumpy paint. I’ve used this paint plenty of times so I know that this can must have been defective… so I just decided to roll with it instead of head back to the store. I waited for the surface to dry and then sanded it smooth… sanding it distressed the mailbox in a few places but that’s ok.
It goes with my vintage theme!
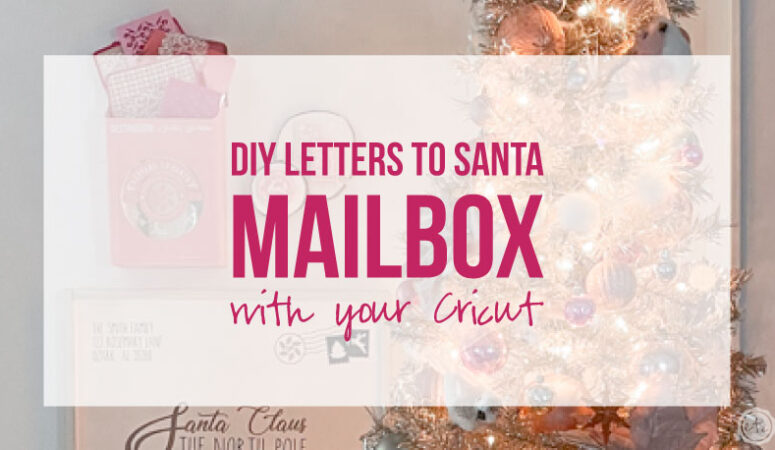
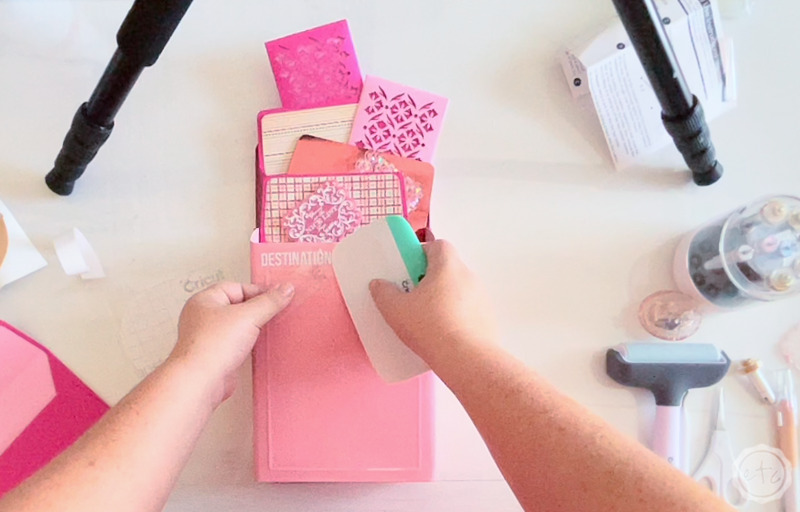
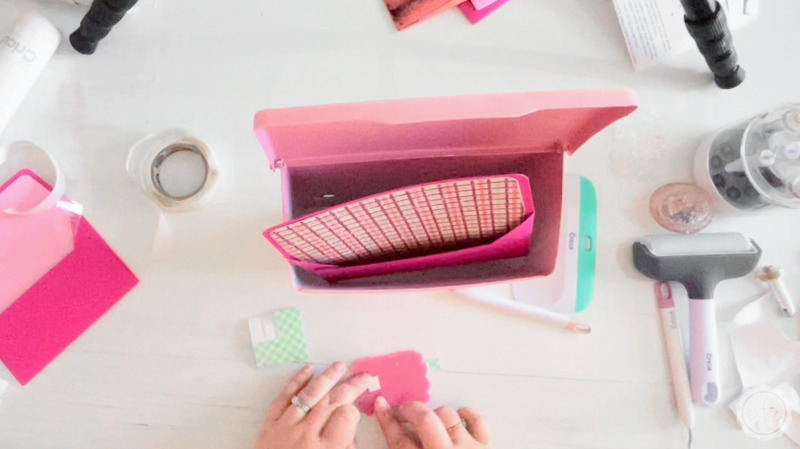
Once the mailbox was painted I headed inside to arrange my envelopes in the opening… I wanted to make sure all of the colors would work well together before I moved on. They did!
So at this point we’re good to go… we have a painted mailbox and a whole host of envelopes and resin nice list cards to play with. Let’s start on the actual mailbox.
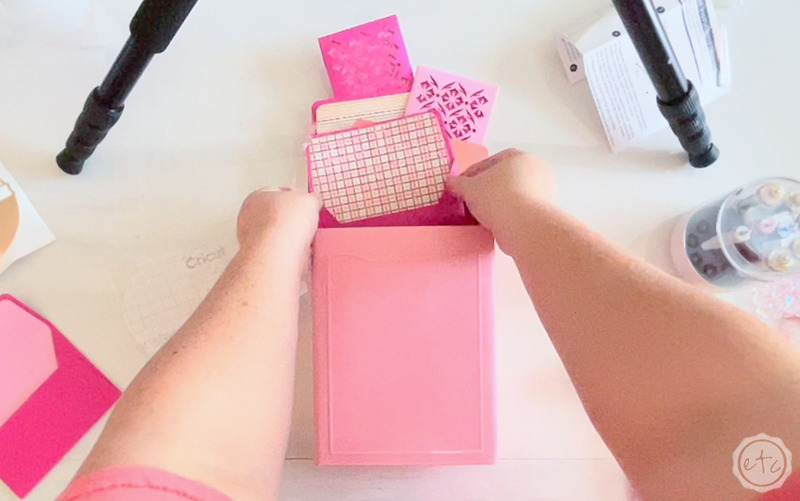
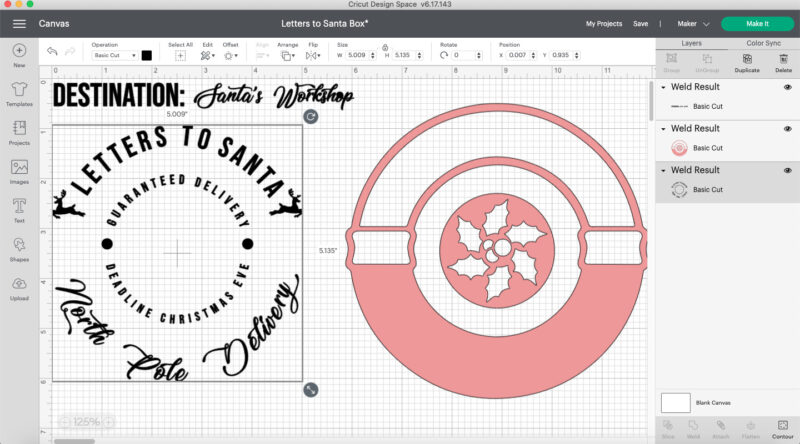
Step 2: Cut your Vinyl Decals
Ready to move to Cricut Design Space? Go ahead and download your SVG’s and upload them to Cricut Design Space. If you’re not sure how to do that don’t worry… I have a tutorial that walks you through the entire process.
Once you have your design files in Cricut Design Space go ahead and weld each piece. I like to weld my design files by color (in this case white vinyl and rose gold adhesive foil) and then by area. So in this case I’ll weld “Destination: Santa’s Workshop” into one solid piece, the white medallion of words into one solid piece and the background medallion into one solid piece. This way they’ll cut in the right configuration and hold their spacing.
Perfect!
Now that everything is welded go ahead and resize your images. I made the medallion 5 inches wide and the “Destination: Santa’s Workshop” 6 inches wide for this specific mailbox but if you’re working with a different mailbox make sure to measure your surface first. Now we’re ready to cut.
I used my Cricut Maker for this project so I simply loaded my vinyl onto a standard grip mat (ok a fabric grip mat… but I just use those because their pink and I like how they look in photos, standard grip is perfect) and hit go! Then all that’s left is to sit back and watch the magic.
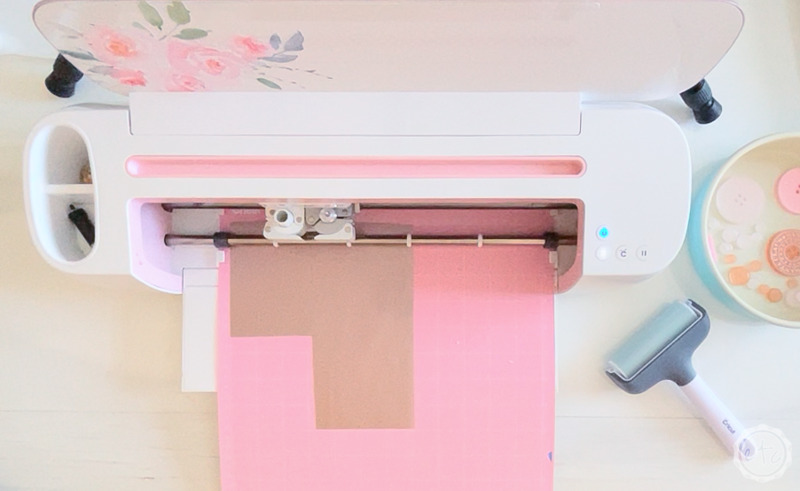
Once all of your cut files are done cutting go ahead and weed your files… carefully some of those letters are very tiny. My favorite trick for weeding such tiny letters is to use my true grip knife to carefully slice the vinyl in between all the words so that I can weed one word at a time and not have to worry about the vinyl re-sticking to itself or lifting another word up, or getting stuck on my fingers and killing the whole design.
I’m a very coordinated individual.
Take a look at the picture below… you can see how I sliced between delivery and Santa. Technically this was when I was adding transfer tape and re-moving the pre-sliced background from when I weeded the design but it’s much easier to see than the white on white version when weeding. If you need an up-close look at this process check out the video and I’ll show you what I’m talking about.
Once you have everything weeded (watch out for those little letters and dots) we’ll move on to transfer tape!

Step 3: Use Transfer Tape to Transfer your Design
Let’s get started with this transfer tape magic… and don’t be confused transfer tape is definitely magic. It works like magic at least.
Start by cutting a piece of transfer tape to cover your letters or design and then carefully smoothing it down over the entire design. Use your brayer or scraper tool to really push the transfer tape down onto the vinyl and then flip it over and smooth it all down again from the under side.
Now carefully take the transfer tape and start to peel it up… the vinyl letters should stick to the transfer tape and leave the carrier sheet behind. I’ll warn you though not all vinyl’s are created equal. The white glossy vinyl I used for this project hated my guts and did not want to stick to the transfer tape. That’s ok, with a little convincing I made it work.
If you’re working with a difficult vinyl to transfer you can grab a strong grip transfer tape (I didn’t have any on hand) or simply pay attention. When a letter didn’t want to come up I used my fingernail or the scraper tool (or even a weeding tool) to pull up a corner of that letter and push it down on the transfer tape… once a bit is transferred the rest of the word is usually quick to follow.
Just make sure to watch those pesky i’s and !’s… and especially the comma’s and period’s!
Once you have the entire design on the transfer tape you can center it on your mailbox and use the scraping tool to smooth it into place. The vinyl letters should have no problem gripping the painted surface of the mailbox so once you’ve smoothed down the transfer tape you can carefully peel it off to reveal the design on the surface.


Go ahead and repeat this process for each piece of your design… and when layering vinyl’s for the medallion just be careful not to press down until you have everything lined up perfectly!
Or place a bit of freezer paper in between the designs, this will keep them from sticking together so you can line up a portion of the design and then remove the freezer paper to smooth the rest of the design into place.
Easy peezy lemon squeezy!

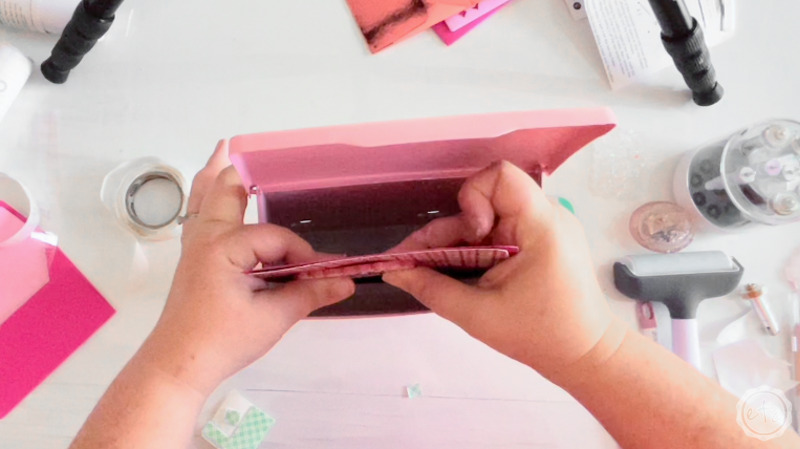
Step 4: Glue your Envelopes into Place
We are so close to done… I can literally smell it!
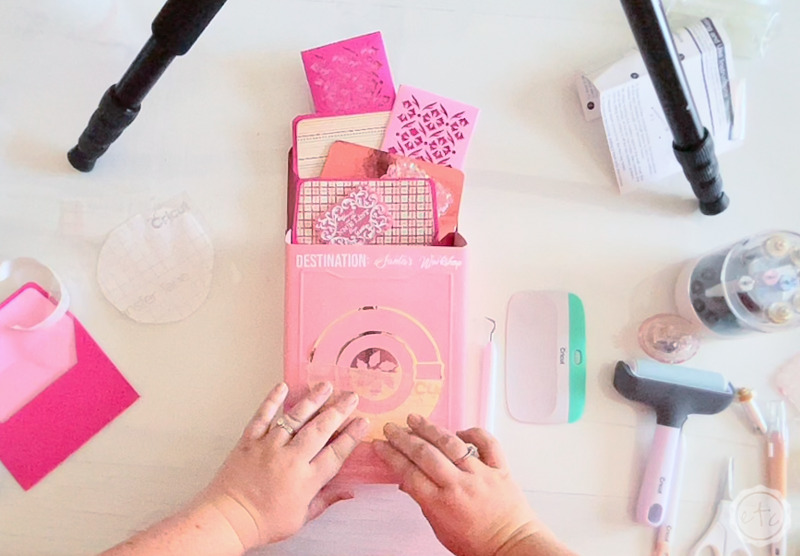
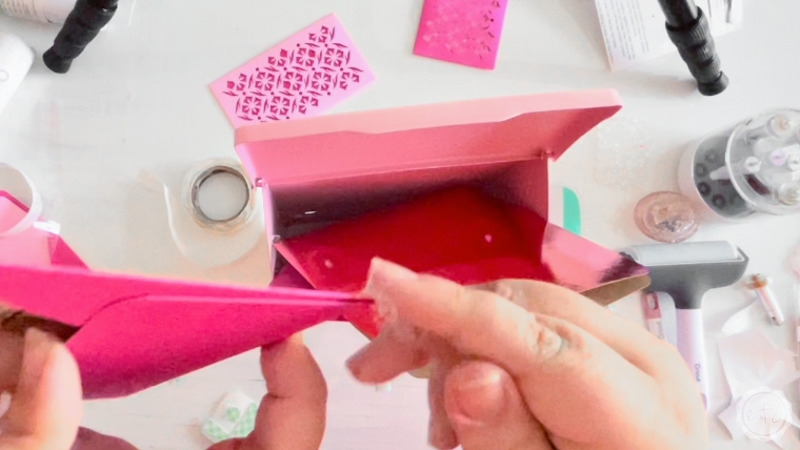
Now that the front of our mailbox is done let’s add those envelopes and resin pieces! In order to get the look of this perfect I used a few glue dots! I added glue dots to the corners of the envelopes and then glued them to the side of the inside of the mailbox.
This way they’ll stick out the top opening of the mailbox at the perfect angle and not fall to the bottom!
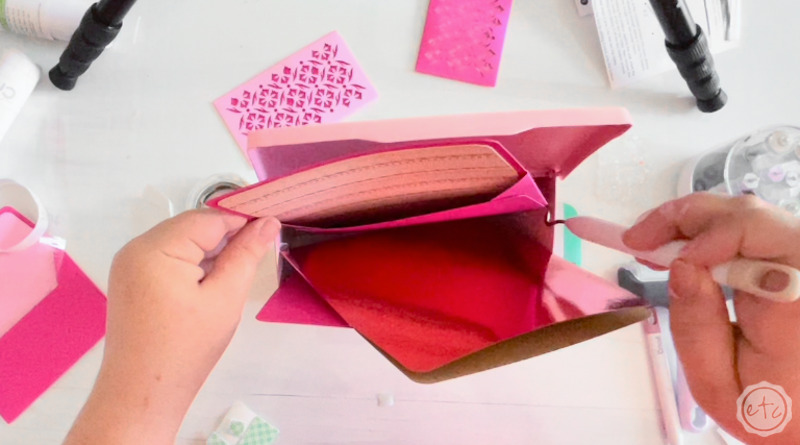
Once I had the perfect stack I used a few more glue dots on the back of the resin nice list cards to glue them into the envelopes… so it looks like Santa is mailing them out!
Last but not least I used a few strategic glue dots to glue a few of the envelopes together… this is not necessary but it does strengthen the entire piece so that it’ll stay put. Once you have it exactly how you want it let’s add it to the wall!

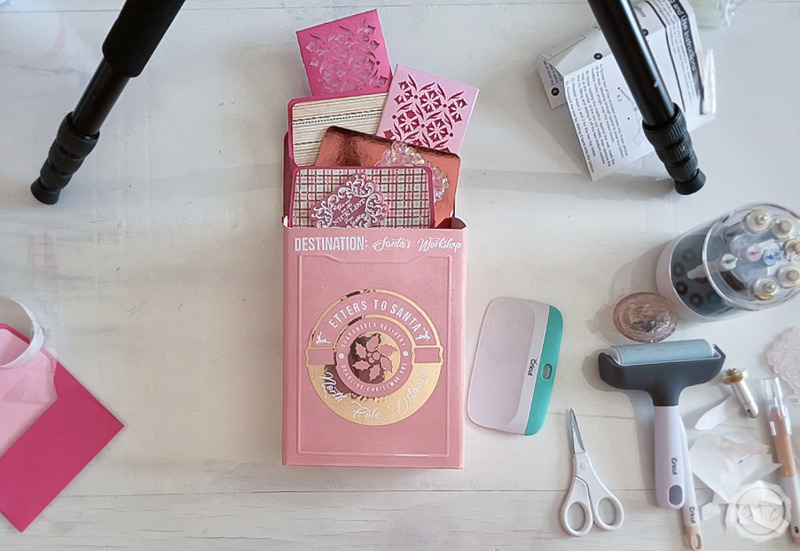
Step 5: Enjoy!
I absolutely love how this little project turned out! It’s so darn cute!
Of course, you could make the mailbox by itself but I love the envelopes and little resin nice list cards… I think it’s the perfect touch. Although if you simply wanted to make the mailbox that’s definitely an option!
You could put it on a table for your kiddos to put their letters to Santa in! How cute would that be?
Ready to check out the final result?


Looking for even more pretty blush and rose gold projects? Here’s a few of my favorite projects from this year’s Blush and Seafoam Christmas or all the projects I made for last year’s Blush & Rose Gold Christmas!
Check out these Blush & Rose Gold Holiday projects (that you can make!)


Leave a Reply