• House Tour
    • Reveals
  • About
    • Smith Life
    • Disclosure and Privacy Policy
      • Terms and Conditions
      • Store Affiliates
  • Contact Me
    • Want a Button?
  • Shop
    • Floral Printable Planners
    • Paint eBooks and Packages
    • Wedding Binders & Extra Printables!
    • Planner Bundles
    • Planner Accessories
    • Home Decor Printables!
  • Cart
    • Bloglovin
    • Facebook
    • Instagram
    • Pinterest
    • Twitter
    • YouTube

Happily Ever After, Etc.

Creating Our Own Fairytale

  • Happily Ever After, Etc.
  • Home
  • Home Decor
    • My Home
    • Paint
    • Before and After
    • Tablescapes
    • Mood Boards
    • Furniture
  • DIY & Crafts
    • New to Cricut – Start Here
    • Cricut Projects
    • Resin
    • Scrapbooking
  • Organization & Planning
    • Cricut
    • Organization
    • Planner
  • Holidays
    • Christmas
    • Halloween
    • Thanksgiving
    • Easter
  • Wedding
    • Cricut Wedding Projects
    • Free Wedding Binder
    • Bride Bag- The Ultimate Wedding Planner

How to Turn a Cheap Wreath into a DIY Flocked Wreath

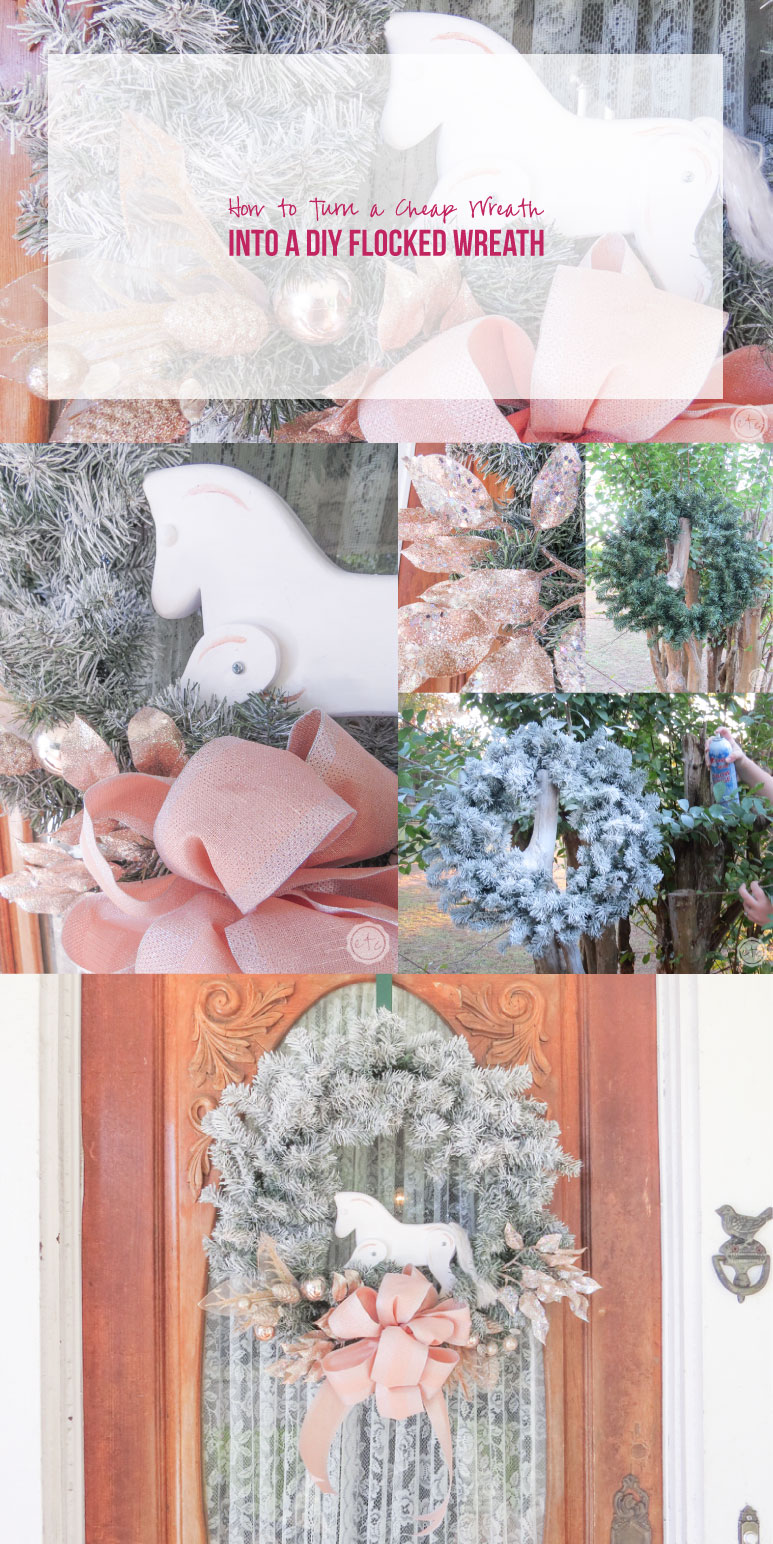
If you are obsessed with all of the beautiful flocked wreaths (and trees!) out there then this is the tutorial for you! I always look longingly at the beautiful flocked wreaths as I walk down the aisles at the store but I can’t stand the price tags.

So I purchased a cheap ($6 budget wreath!) from the Michaels clearance bin and figured we’d try a little DIY flocking of our own. Luckily, it turned out to be much easier than I thought it would be!

Of course, the best part of this little wreath tutorial is that it’s one of a bajillion wreath tutorials! I’ve teamed up with 50 plus bloggers to bring you a oodles of DIY Ideas and Recipes to make your holiday season merrier. There are 12 different posts in the series and we have spread them out over a four week period with three posts per week. Now is the time to subscribe!

Welcome to Day 1 of the Fourth Annual 12 Days of Christmas Series!

DIY Christmas Ideas and Recipes you can use this year! DIY Christmas Decor and Games Ideas #12daysofChristmas

GO HERE for the complete list of Dates and Topics plus a collection of most popular holiday ideas including ornaments, games, recipes and more from all 50 plus talented bloggers!

It’s Day 1 and we are sharing DIY Wreath Ideas! Let’s get started!


Supplies:

Wreath
Spray Snow
Floral Wire
Wire Cutters
Wreath Decor!
Rose Gold Wreath Picks

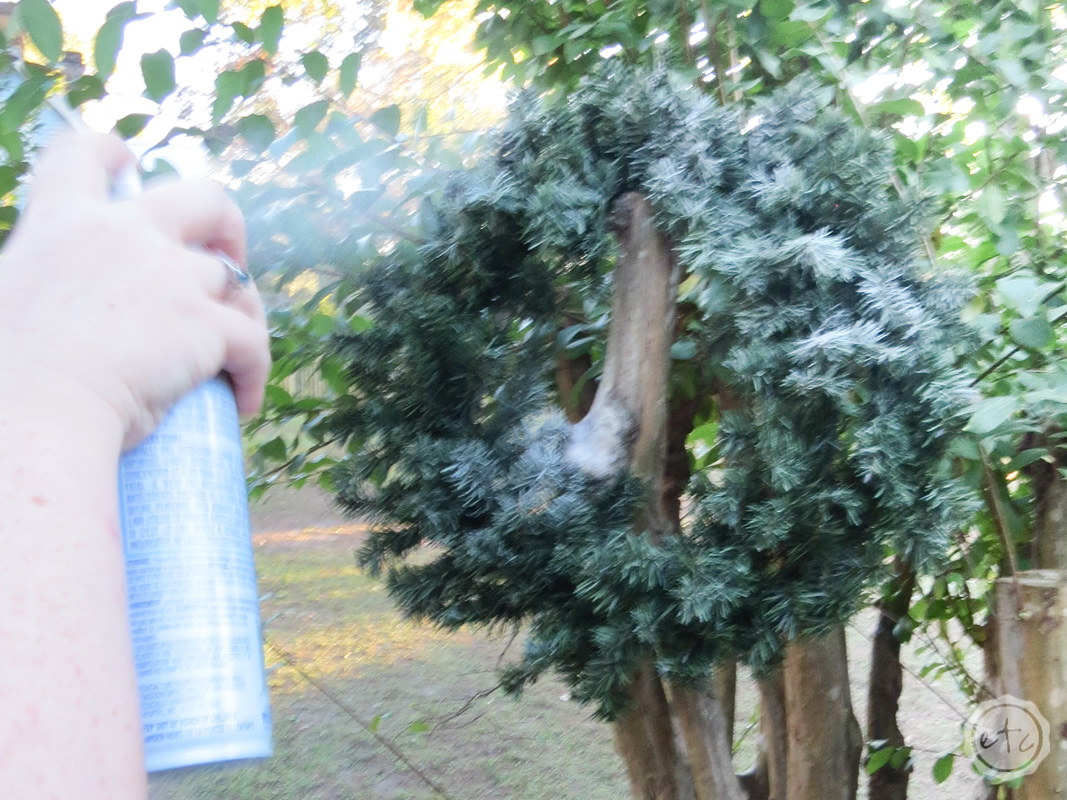
Step One: Spray Snow!

Luckily making our DIY Flocked Wreath is as easy as spray painting a table! This little can of spray snow was so easy to use. I was a little worried it would turn my wreath into a wet, lumpy mess of yuck but it actually turned out wonderful!

Hold your can about a foot away and spray in small circles. Make sure to keep moving so that you don’t hit the same section over and over and over. Remember that light layers is much better than a heavy layer all at the same time.

You don’t want the branches to become too wet before they dry.

Make sure to hit the top and bottom branches with your spray snow and even hit the back and inside of the wreath with your snow.

You want to make sure the coverage is complete!

Then leave your wreath to dry for a couple of hours. At this point I carefully carried my wreath inside and hung it on a wreath hook to dry. It didn’t cause any problems in the house but the air inside was much warmer than the cold air outside so the wreath dried much faster.

Step Two: Repeat!

You can see that the wreath looks beautiful and white at this point… just like I’d hoped! Once the wreath dried it lost a little bit of it’s whiteness (is that a thing?!)… like some of the snow had fallen off.

Not a problem! Once the wreath had dried I took it back outside and put another light layer on the wreath. The second coat was perfect and now my wreath looks snowy and white just like I was hoping for.

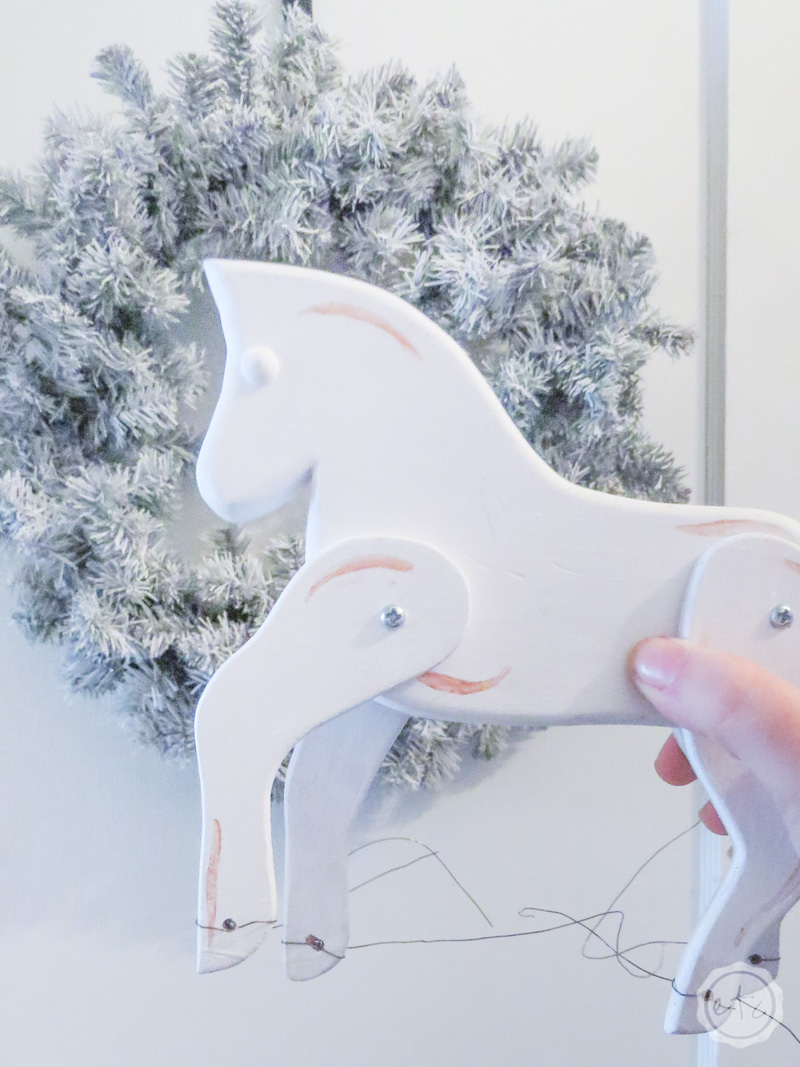
Step Three: Prep Your Decorations!

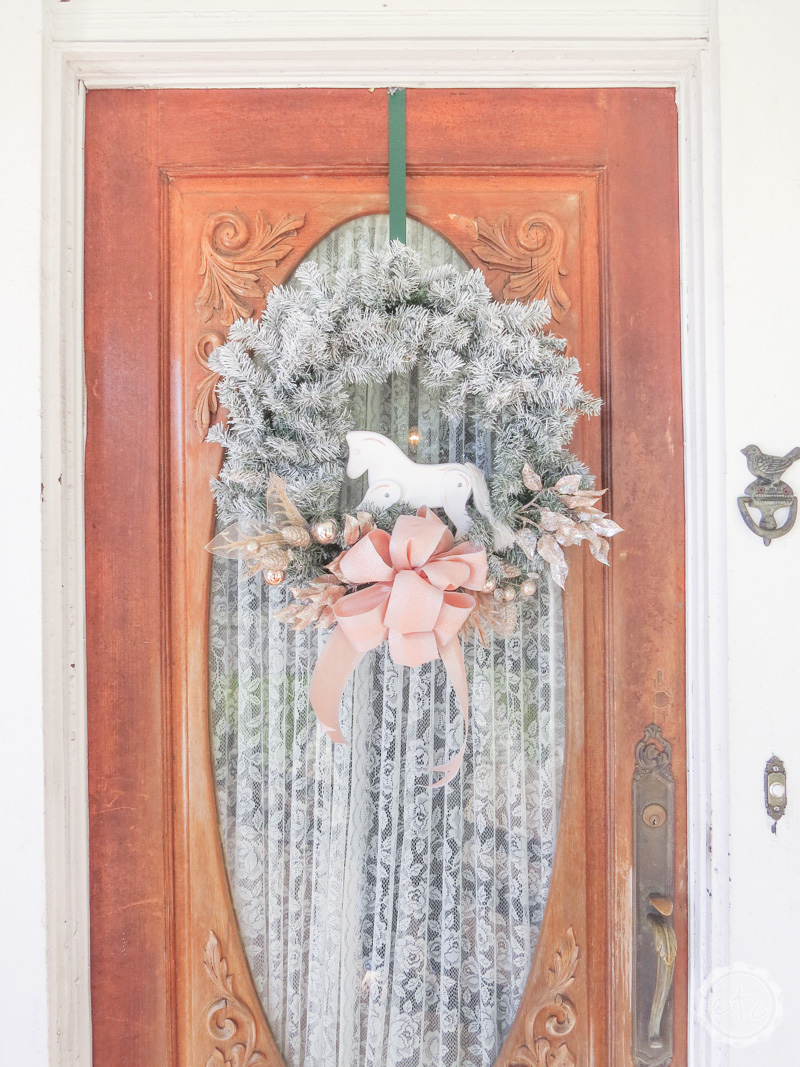
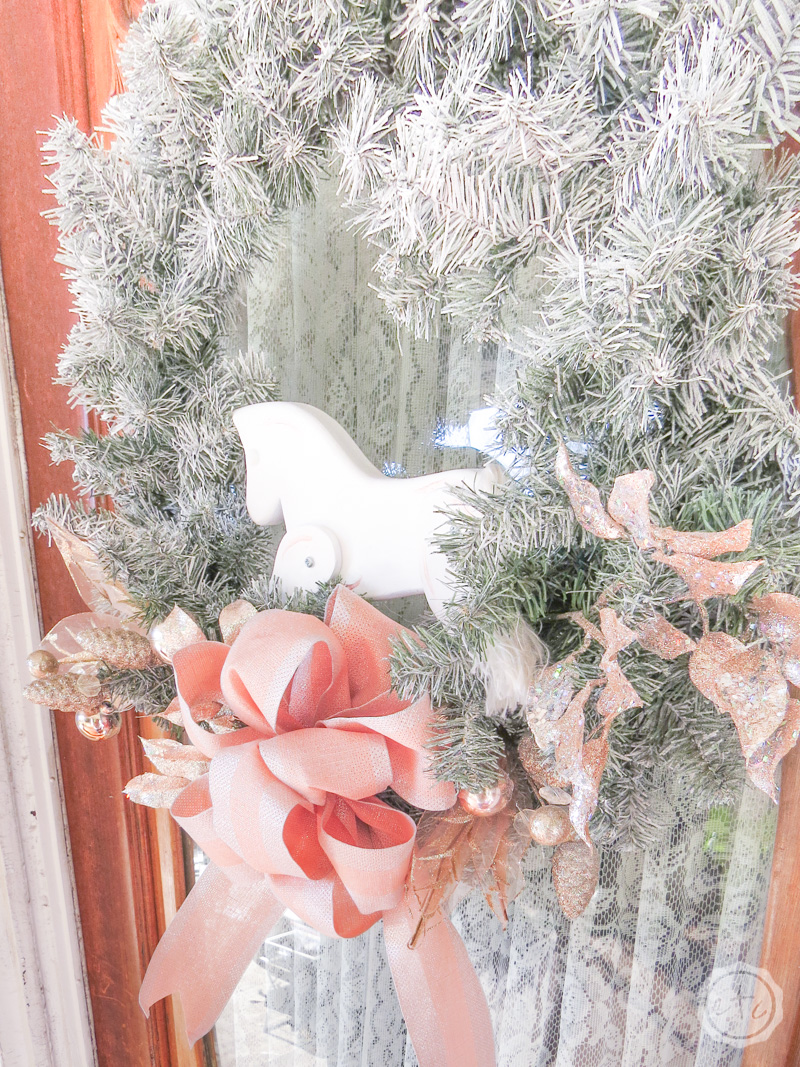
If you’re working with specific wreath supplies (like the pretty leaves and berries I use on either side of the horse) you’ll just have to use a bit of floral wire to attach each piece. This little horse however needed a little help before it was attached!

Since the horses hooves will be hidden by the wreaths tiny branches I decided to drill a hole through each hoof to thread my floral wire through. Now each hoof can be easily attached to the wreath!

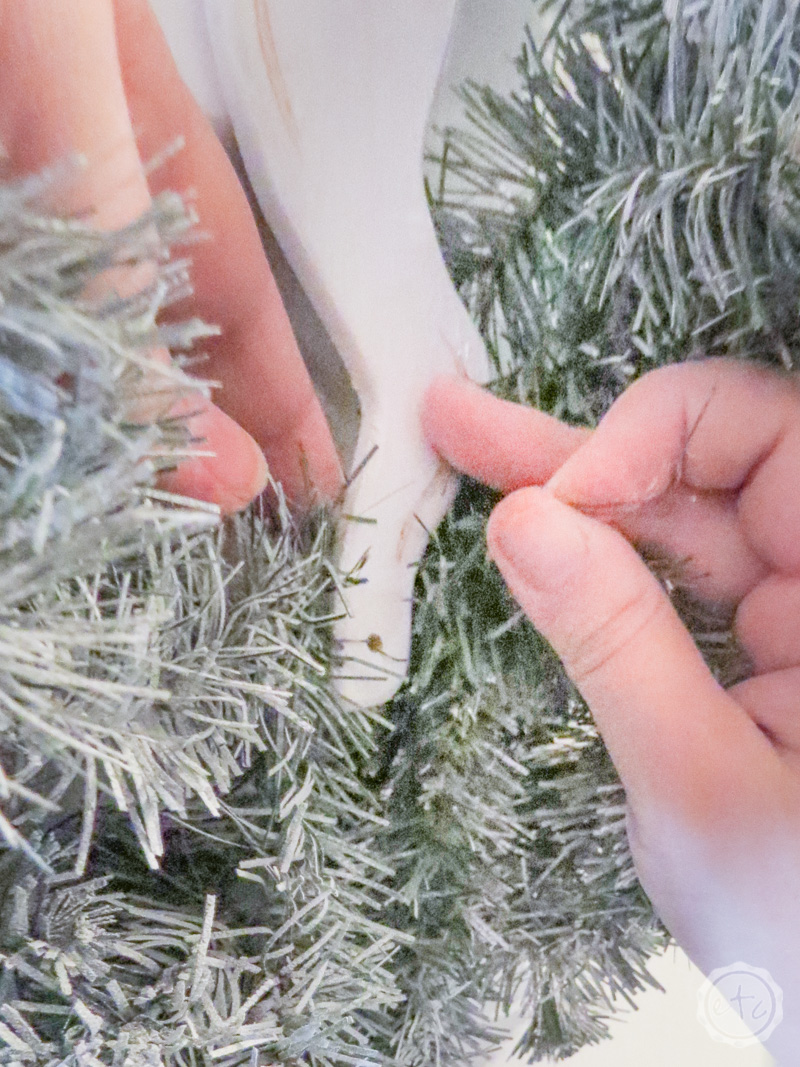
Once the wires are attached I placed the horse on the wreath to make sure it was in the right position before starting to wrap the wires around the wreath. Once your decorations are prepared and the main pieces are placed you can move on to adding the greenery (rose goldery?) and bow.

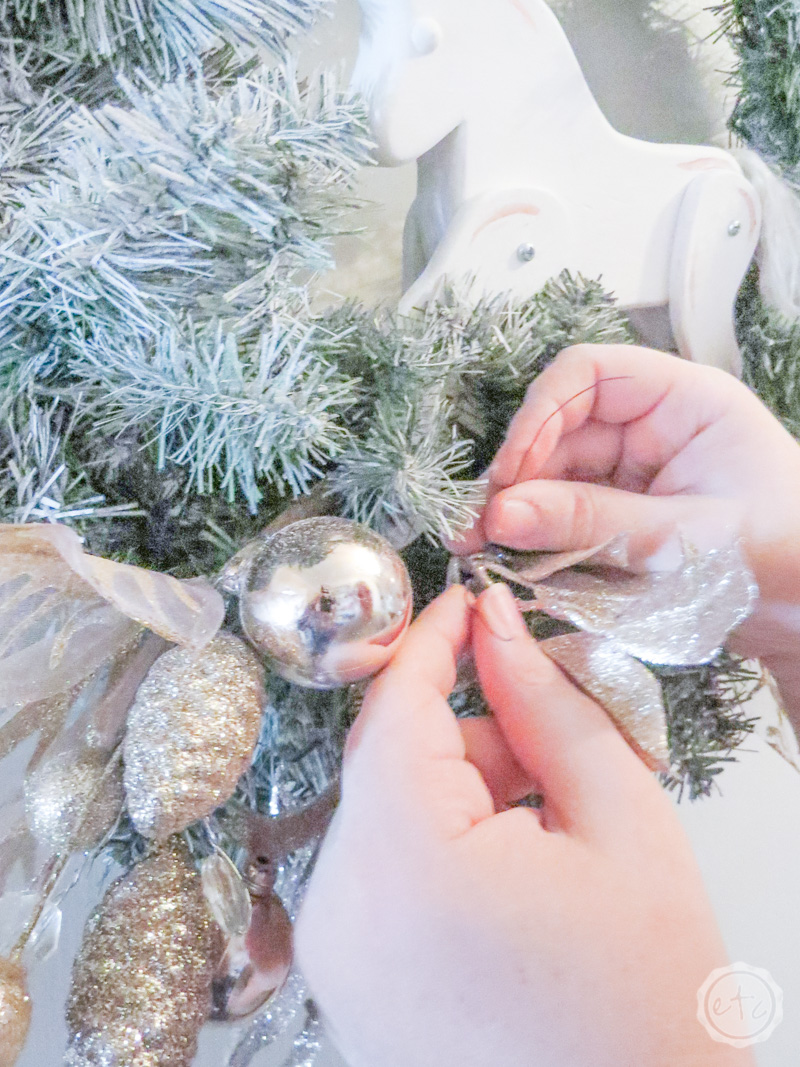
Step Four: Attach Your Greenery and Bow!

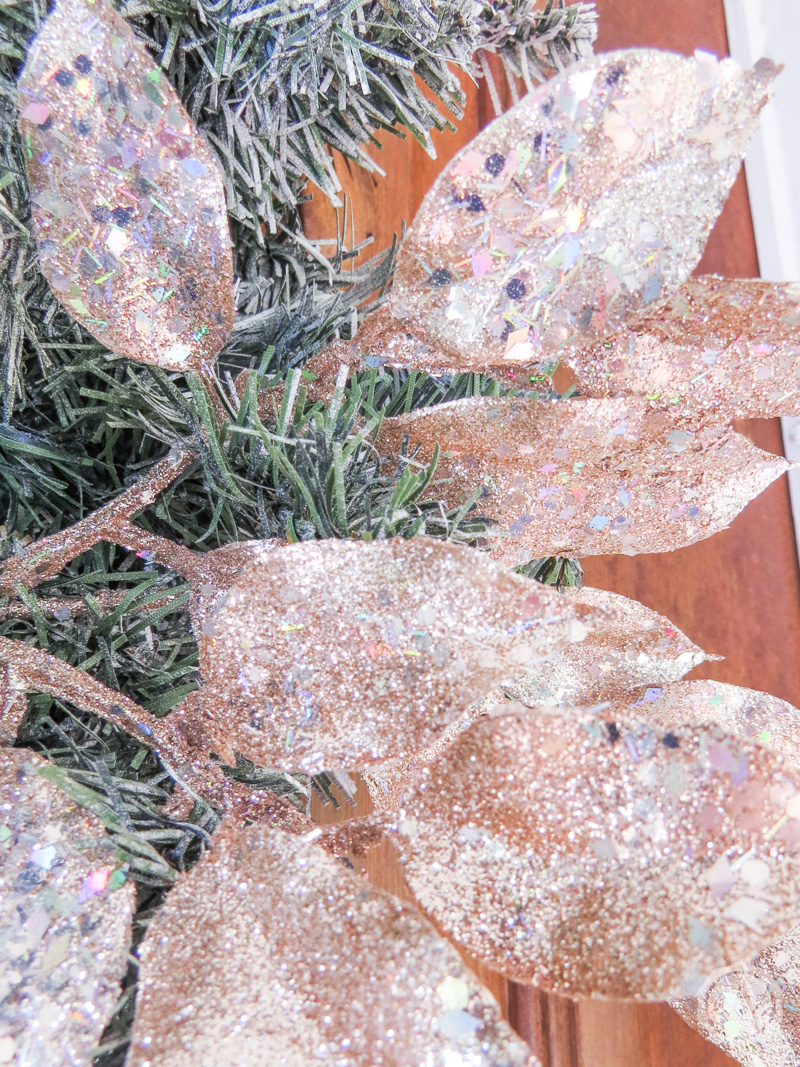
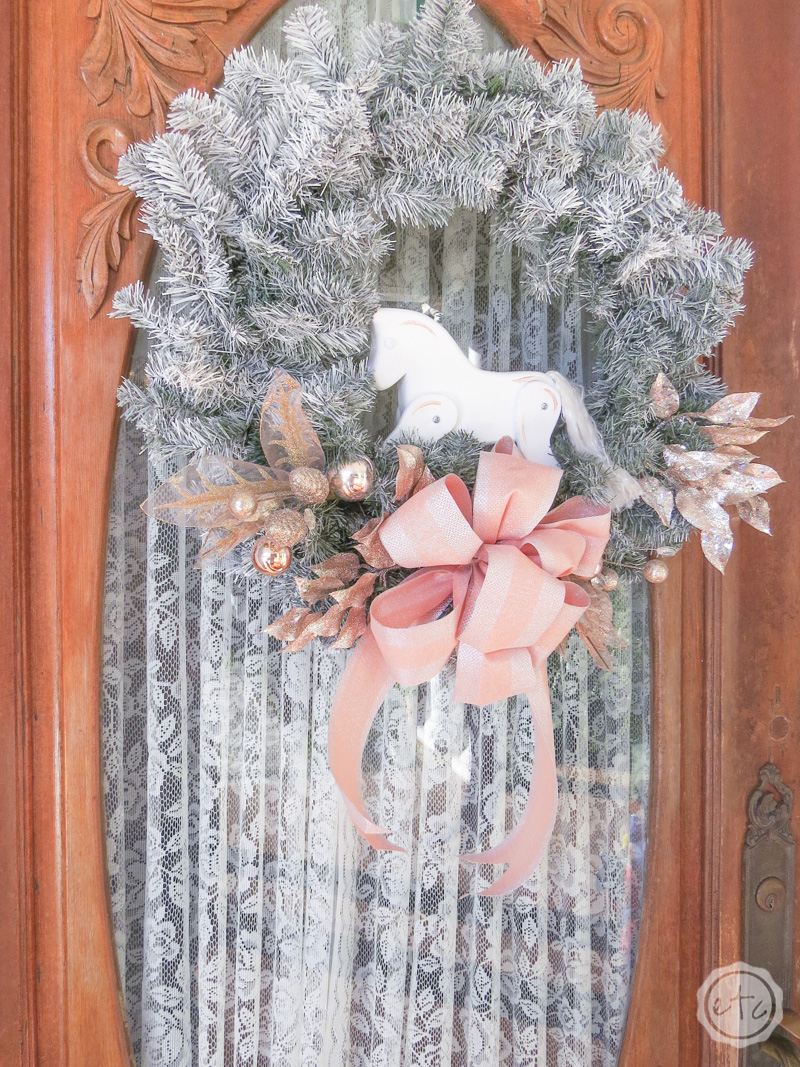
Now it’s time to finish the wreath! I added a bit of rose gold leaves and bobbles on either side of the horse… one leaf pick and one pick with bobbles and webbed leaves on either side.

Simply attach your greenery (rose goldery?) at several points for each pick… then top it all off with a big bow!

Now you’re finished! I went with a rose gold Scandanavian theme for this wreath but you may decide on a completely different vibe for your flocked wreath. Either way it’s time to enjoy. Hang your pretty flocked wreath on the front door and step back!

Looking for more Christmas?! Here are the rest of my fun holiday projects from this year!

An InLinkz Link-up


Scroll down for many more DIY Wreath Ideas for your holiday season!


Looking for more rose gold holiday goodness? These posts are for you!

You are invited to the Inlinkz link party!

Click here to enter


You made it through the entire post? That means you're one of my new favorite people! I'd love to be friends and see what else you would like to read about! Leave me a comment and then sign up for your very own FREE paint planner.... so that you can keep track of every single paint color with ease!
Welcome back! I'd love to be friends and see what else you would like to read about! Leave me a comment and then sign up for your very own FREE paint planner.... so that you can keep track of every single paint color with ease!

Show me some LOVE y'all:

  • Facebook
  • Pinterest
  • Twitter
  • Email

Related

«
»

Christmas, DIY & Crafts, Holidays 30

Comments

  1. Jenny says

    November 19, 2018 at 5:27 am

    This wreath is beautiful and elegant. I just love the pink and the horse. My daughter loves horses and was so excited when I showed her this. #12daysofchristmas

    Reply
  2. Gail M Griffin says

    November 19, 2018 at 6:32 am

    So pretty and beautifully done!

    Reply
  3. Leanna says

    November 19, 2018 at 12:37 pm

    I love your wreath with the little horse Hubs just bought me a scroll saw so I can maybe try and replicate it. So nice.

    Reply
  4. Emily says

    November 24, 2018 at 2:21 pm

    I’m so excited to see this, I have a few wreaths from years past I was thinking I could update by flocking but I’ve never tried it so I wasn’t really sure how to do it. #12DaysofChristmas2018

    Reply
  5. Super Mom - No Cape! says

    December 14, 2018 at 11:55 pm

    I love your DIY flocked wreath! I especially love the addition of the toy horse.

    Reply

Trackbacks

  1. Rustic Luminaries | says:
    November 4, 2019 at 7:44 pm

    […] How to Turn a Cheap Wreath into a DIY Flocked Wreath via Happily Ever After […]

    Reply
  2. 50 Fun Holiday Ideas That Will Make You Smile - Simple Nature Decor says:
    November 7, 2019 at 6:02 pm

    […] How to Turn a Cheap Wreath into a DIY Flocked Wreath via Happily Ever After […]

    Reply
  3. 12 Days of Holiday Ideas Kickoff ~ Simply Inspired Meals says:
    November 8, 2019 at 1:02 am

    […] How to Turn a Cheap Wreath into a DIY Flocked Wreath via Happily Ever After […]

    Reply
  4. 5th Annual Holiday Ideas Blog Hop - lovemycottage says:
    November 8, 2019 at 2:00 am

    […] How to Turn a Cheap Wreath into a DIY Flocked Wreath via Happily Ever After […]

    Reply
  5. 50 DIY Holiday Ideas for You - Creative Ramblings says:
    November 8, 2019 at 2:01 am

    […] How to Turn a Cheap Wreath into a DIY Flocked Wreath via Happily Ever After […]

    Reply
  6. 50+ Christmas Crafts and Ideas * sparkle living blog says:
    November 8, 2019 at 2:01 am

    […] How to Turn a Cheap Wreath into a DIY Flocked Wreath via Happily Ever After […]

    Reply
  7. 50 Ideas to Jump Start Your Holidays - DIY Adulation says:
    November 8, 2019 at 2:01 am

    […] How to Turn a Cheap Wreath into a DIY Flocked Wreath via Happily Ever After […]

    Reply
  8. 50+ Top DIY Christmas Decorations - Cookies Coffee and Crafts says:
    November 8, 2019 at 2:02 am

    […] How to Turn a Cheap Wreath into a DIY Flocked Wreath via Happily Ever After […]

    Reply
  9. Creative Ways to Prepare for Christmas - Radiant Pearl Living says:
    November 8, 2019 at 2:02 am

    […] How to Turn a Cheap Wreath into a DIY Flocked Wreath via Happily Ever After […]

    Reply
  10. 50 Plus Holiday Ideas Blog Hop Kickoff - My Humble Home and Garden says:
    November 8, 2019 at 2:03 am

    […] How to Turn a Cheap Wreath into a DIY Flocked Wreath via Happily Ever After […]

    Reply
  11. 50+ DIY Christmas Ideas - Weekend Craft says:
    November 8, 2019 at 3:02 am

    […] How to Turn a Cheap Wreath into a DIY Flocked Wreath via Happily Ever After […]

    Reply
  12. Holiday Ideas Blog Hop - 4 Weeks of Gift, Recipe & Decor Ideas. Plus Giveaway! - momhomeguide.com says:
    November 8, 2019 at 3:10 am

    […] How to Turn a Cheap Wreath into a DIY Flocked Wreath via Happily Ever After […]

    Reply
  13. Let the Annual 12 Days of Christmas Blog Hop Begin! | The Aspiring Home says:
    November 8, 2019 at 5:04 am

    […] How to Turn a Cheap Wreath into a DIY Flocked Wreath via Happily Ever After […]

    Reply
  14. 50 Best DIY Holiday Ideas - Happily Ever After, Etc. says:
    November 8, 2019 at 8:31 am

    […] How to Turn a Cheap Wreath into a DIY Flocked Wreath via Happily Ever After […]

    Reply
  15. 50 + Best DIY Holiday Ideas! - My Family Thyme says:
    November 8, 2019 at 9:41 pm

    […] How to Turn a Cheap Wreath into a DIY Flocked Wreath via Happily Ever After […]

    Reply
  16. 2019 Holiday Ideas Blog Hop Kickoff - This Autoimmune Life says:
    November 10, 2019 at 8:45 pm

    […] How to Turn a Cheap Wreath into a DIY Flocked Wreath via Happily Ever After […]

    Reply
  17. 50+ DIY Holiday Crafts and Recipes | 12 Days of Christmas Blog Hop and Giveaway! - For the Love of Food says:
    November 15, 2019 at 1:59 am

    […] How to Turn a Cheap Wreath into a DIY Flocked Wreath via Happily Ever After […]

    Reply
  18. DIY Large Christmas Present Boxes for your Porch - Happily Ever After, Etc. says:
    November 25, 2019 at 12:53 pm

    […] Looking for the tutorial for the wreath on my front door? You can find it here. The gnomes are from a certain store that I visit way to often (TjMaxx) but you can find similar […]

    Reply
  19. 50+ DIY Christmas Ideas for the Holidays | Domestic Deadline says:
    November 27, 2019 at 11:42 am

    […] How to Turn a Cheap Wreath into a DIY Flocked Wreath via Happily Ever After […]

    Reply
  20. 2019 Holiday Ideas Blog Hop Kick-off - Hello Central Avenue says:
    November 27, 2019 at 1:17 pm

    […] How to Turn a Cheap Wreath into a DIY Flocked Wreath via Happily Ever After […]

    Reply
  21. 50 Plus Christmas Ideas All Through The House - Intelligent Domestications says:
    December 11, 2019 at 7:17 am

    […] How to Turn a Cheap Wreath into a DIY Flocked Wreath via Happily Ever After […]

    Reply
  22. 50+ Recipes and DIY Holiday Ideas | Domestically Creative says:
    December 18, 2019 at 5:01 am

    […] How to Turn a Cheap Wreath into a DIY Flocked Wreath via Happily Ever After […]

    Reply
  23. The Very Best Holiday Ideas • The Fresh Cooky says:
    January 28, 2020 at 6:35 pm

    […] How to Turn a Cheap Wreath into a DIY Flocked Wreath via Happily Ever After […]

    Reply
  24. DIY Sparkly Rustic Luminaries | says:
    April 7, 2020 at 12:38 pm

    […] How to Turn a Cheap Wreath into a DIY Flocked Wreath via Happily Ever After […]

    Reply
  25. 40+ DIY Christmas Ideas • Family Around the Table says:
    June 3, 2020 at 8:36 pm

    […] How to Turn a Cheap Wreath into a DIY Flocked Wreath via Happily Ever After […]

    Reply

Leave a Reply Cancel reply

Your email address will not be published. Required fields are marked *

sidebar betsy I'm Betsy, Home Decor Enthusiast, Yorkie Mama, Crafter, Blogger, Picky Eater, Chief Mess Maker, Antique Hoarder and Graphic Designer. You can generally find me working on (attacking with a paintbrush) the 3 bed, 2 bath home we are currently renting! Our home might not be perfect but it is ours & if you hang out long enough you'll see that what we lack in know-how we make up for in passion!
Shop My Craft Room

Shop My Home

Featured Articles

15 Fabulous Ideas to Organize your Laundry Room
25 FREE Printables For Your Home!
What to do with EXTRA Paint with Happily Ever After Etc
10 Ways to Make Your Bed EXTRA Comfy with Happily Ever After Etc.
Ready to Pick your Perfect Paint Color? We'll help you with our 6 Day FREE E-Course

Hey y’all,

Profile

I'm Betsy, Home Decor Enthusiast, Yorkie Mama, Picky Eater, Chief Mess Maker, & Graphic Designer...

A Little Note!

Many of the links on Happily Ever After, Etc. are affiliate links. If you purchase a product after clicking an affiliate link, I receive a small percentage of the sale for referring you, at zero cost to you! How awesome is that? Purchasing through affiliate links is an easy, painless way to help out your favorite bloggers. Thank you so much for your continued love and support! Read the full disclosure here!

Instagram

Load More... Follow on Instagram

Copyright © 2023 · Darling theme by Restored 316

Copyright © 2023 · Darling Theme on Genesis Framework · WordPress · Log in · Privacy Policy