


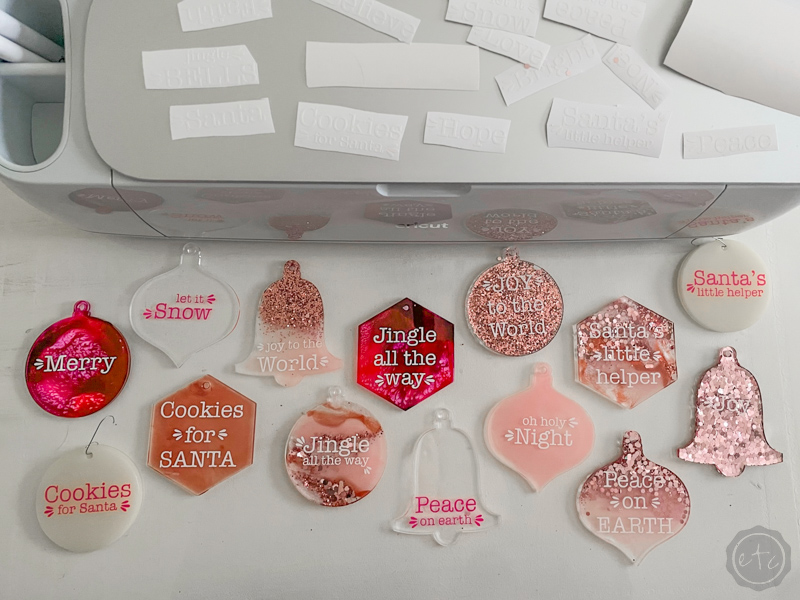
I am slightly OBSESSED with these little ornaments… they’re technically acrylic ornament blanks that I picked up online. All that means is they’re clear acrylic ornament shapes… today I’m going to show you how to add fun resin background to them so that we can add adorable vinyl sayings to the front.
They look soooo cute as the focal point on my resin Christmas Tree (my rose gold tree which has acquired so many resin ornaments over the years that I’m biting the bullet and calling it the resin tree). They would look cute on any tree though.
PLUS, I made an entire set with 2 ornaments of each background but you could make an entire set of all marble background ornaments. Or go nuts and make 20 glitter ornaments… whatever floats your boat.
First we’ll go over our supplies and mix our resin then I’ll walk you through each of the 5 backgrounds and how to make them. We pour a solid translucent colored background, a solid glitter ornament, a glitter ombre, a marble look and an alcohol ink ornament. I hope you like all of them!
Let’s get started!
Supplies:
- Total Boat Maker’s Epoxy Resin
- Acrylic Ornament Blanks
- T-Rex Alcohol Ink
- Black Diamond Mica Powders
- Pink Acrylic Paint
- Respirator/Mask (resin graded filters)
- Gloves
- Wagner HT400 Heat Gun
- Freezer Paper
- Silicone Mat
- Baking Pan
- Heart Shaped Silicone Mixing Cup
- Small Mixing Cups
- Silicone Measuring Cup/Larger Mixing Cups
- Reusable Silicone Stir Sticks
- Toothpicks
- Paper Towels
Just getting started with resin? Download my free resin supply list and make your first project today!
Step 1: Gather your Supplies
This first step is pretty easy… go ahead and gather alllll of your supplies. Resin, safety gear, baking tray and silicone mat if you need to move your pieces after they’re poured (I put mine in a spare bathroom to cure). Then grab your colorants! I use 3 mica powders, 2 glitters and an acrylic craft paint for all of my backgrounds… except the alcohol ink version which uses white, pink, red and purple alcohol inks.
Decide which ones you’re going to rock and then gather your arsenal. The last thing you want is to mix your resin and then race against the clock to find all of your supplies!
Step 2: Mix your Resin
Okay… now that we have all of our supplies let’s get started with the fun stuff! Mixing resin! Go ahead and put on your gloves and respirator so you’re safe. Then mix about 50ml of resin for 10 ornaments. This might be a bit too much but it’s hard to tell when you’re working with flat surfaces and you’d rather have a bit too much then run out.
I usually just grab a little silicone mold to pour excess resin into if I have too much. Win, win!
50ml means you’ll need equal parts of a and b… that’s 25ml of A and 25ml of B. Add both to your mixing cup and then mix those together slowly and thoroughly for 3 minutes, pop any bubbles that have risen to the top (with your heat gun) and we’re good to go!

Bonus Tip: If you’ve never mixed resin before it’s not nearly as intimidating as you’d think! I’ll walk you through all the steps here in my How to Mix Resin for Beginners Tutorial.
Step 3: Color your Resin
Clear resin is awesome but we need a variety of fun colors to make all these backgrounds! I decided to make a few colors that would coordinate with each other and then leave a bit of clear resin for our alcohol ink ornaments… and so we have extra clear if we run out of a certain color.
For this I used small medicine cups. They’re easy to use and disposable which is nice when working with such small amounts. I added colorant to each cup (the top row are the three mica powders on the left (copper, rose and white diamond), the bottom row is a fine rose gold glitter, a chunky rose gold glitter and a blush acrylic paint.
I added each colorant to the cup and then added about 30ml of clear resin to each cup. Then carefully mix the colorant and resin together until they’re solid. You don’t want any streaks or bits of resin that aren’t colored. Since we’re going for more translucent colors I didn’t add much mica powder… but you can keep adding more until you’re happy with the color.
After everything is mixed up make sure to hit each cup with the heat gun to pop any bubbles that have risen to the top.
Once you have all 6 colors ready to rock we’ll move on to the next step.
Step 4: Prep your Ornament Blanks
Now that our resin is ready (and starting to cure!) let’s get this show on the road! Our ornament blanks come with a clear plastic sheeting on both sides… I removed one side of the backing and placed each ornament on top of a medicine cup. This raises it off the silicone mat so any excess resin will drip down and fall off the ornament… instead of gluing the ornament to the mat.
Then we’re ready to pour!
Since I was doing quite a few ornaments I decided ahead of time which ornament was going to be which background (I wanted different shapes for each background) but that is completely up to you! Get organized and let’s get going.
I’ve listed out the steps for each of the backgrounds below so you can follow along with all of them or one of them. Happy pouring!
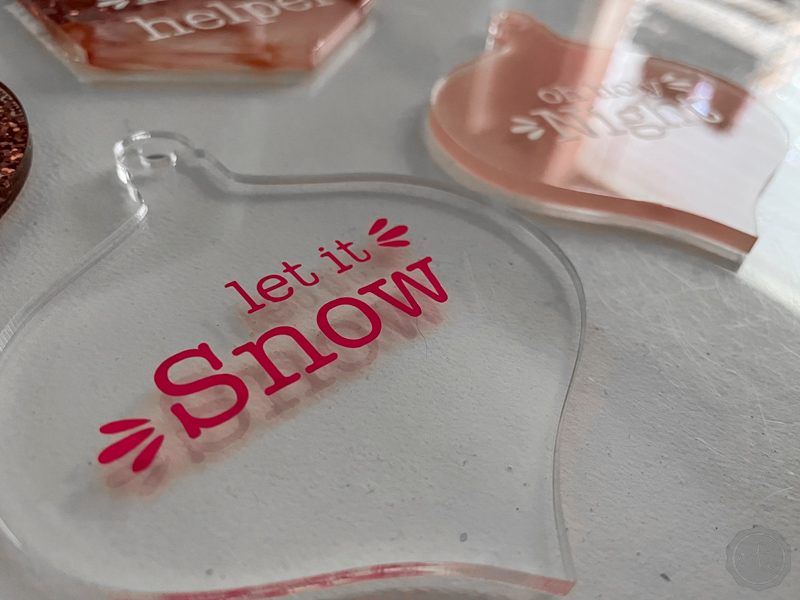
Translucent Color Background
Let’s start with the basics… a translucent pink ornament. For these you’re going to pick one of your resins with the mica powder. Go ahead and pour a bit in the center of the ornanment and then use your stir stick to spread the resin to the very edge.
Make sure you have solid coverage and that you don’t miss any spots!
If you need more resin you can always add more but if you add toooooo much it will pour off the sides so start with a smidege and add more as needed.
Once you’ve covered the entire surface make sure to run your heat gun over the entire surface to pop any bubbles and then set it aside to cure.
Perfect, darling!
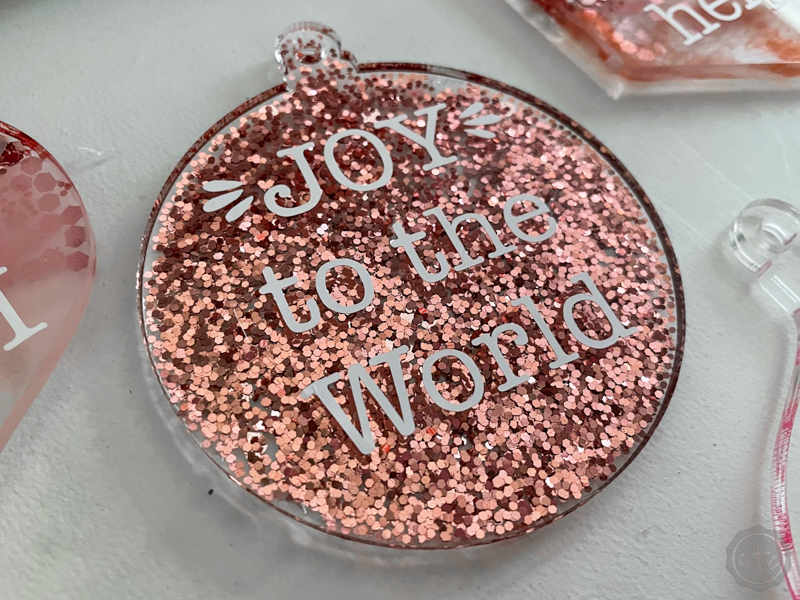
Solid Glitter Background
Ready for the glitter bomb you never knew you needed? These little ornaments are soooo cute!
Start by pouring your glitter resin onto your ornament and then use your stir stick to spread it to the very edges. This works great with the fine glitter… you can see exactly where it is and make sure you have full coverage.
Really spread it out and add a bit more resin if you need to… but you don’t want to add too much at the beginning and have it falling off the edge!
Once you’ve spread the resin out across the entire ornament go ahead and use your heat gun to pop any bubbles. At this point you can set your piece aside to cure OR you can add more glitter. I find that if you want a really solid glitter background adding the glitter into the resin and pouring doesn’t get full coverage.
I went ahead and added a bit more of the chunky glitter so that it was more of a solid layer… just pour it on top and then tap off the excess. We’ll clean up the fallen glitter tomorrow after it’s cured!
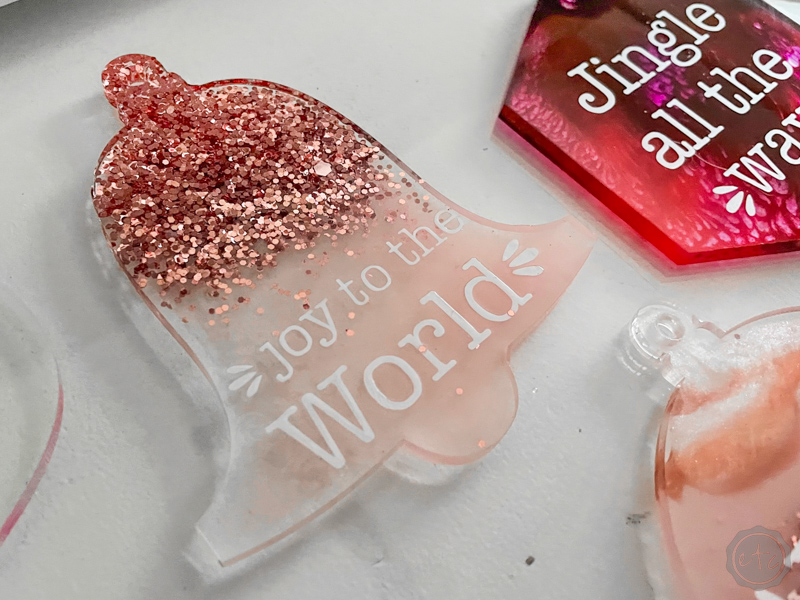
Glitter Gradient Background
Ready to combine the first two backgrounds?
For a gradient or an ombre ornament we’ll start by pouring a bit of solid resin on the bottom and glitter on the top (or vice versa). Then use your stir stick to spread each resin out to the edges… making sure they meet in the middle!
Use your heat gun to pop any bubbles and then use your stir stick to blend the line a little. I also like to add a bit more glitter to the merged area… like the glitter is falling from the glitter area into the solid area. But that is completely up to you!
Once you’re happy with how it looks you can set these aside to cure!
Marble Background
Ready for my favorites??
These little marble background ornaments are soooo pretty… I wan an entire set of them!
They’re super easy to make too. Start with a few stripes of color across each ornament: you’ll want to use the darker colors like the rose mica powder and the rose gold glitters. Then add larger areas like the blush paint and the white mica powder. Keep adding thin veins of rose gold or shimmer until you’re happy and then pop all the bubbles with the heat gun!
Experiment with different shapes and patterns… they all look a little different!
Once you’re in love with the end design go ahead and set these aside to cure!
Alcohol Ink Background
These surprised me!
I kind of love how they turned out! We’ll take a different approach here and start with a layer of clear resin. Go ahead and pour a bit into the center of your ornament and then spread it out to the edges with your stir stick.
Once it’s covering the entire ornament use your heat gun to pop any bubbles!
Now we’ll add our alcohol inks… start with a few drops of your colors. Then add a drop of white to the center of each color. I did 2-3 layers of this: color, white, color, white, color, white.
Then leave them alone! They’ll continue to mix and change until they’re cured so you’ll have to wait until tomorrow to see the finished effect!
Step 5: Enjoy!
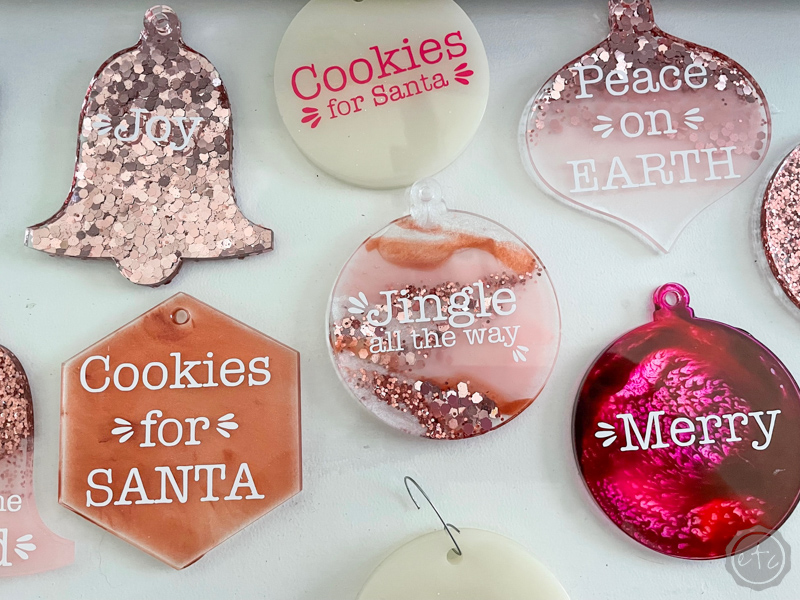
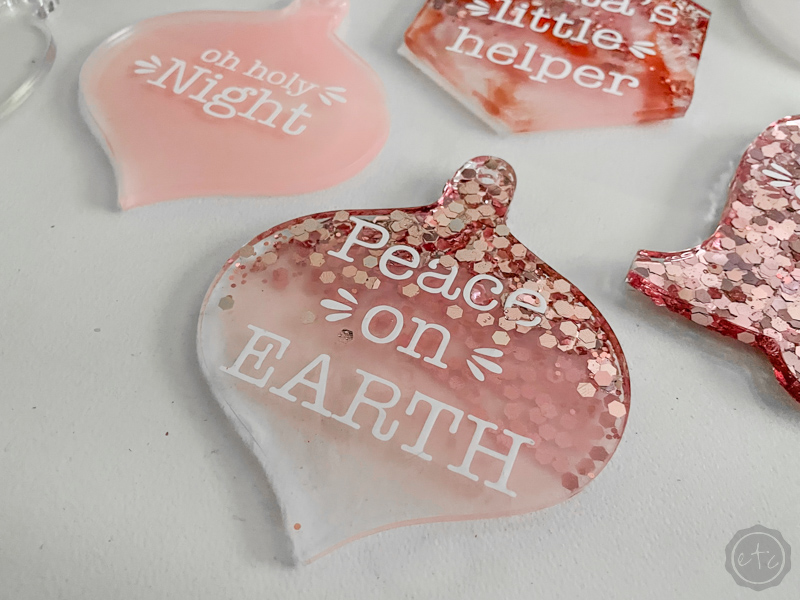
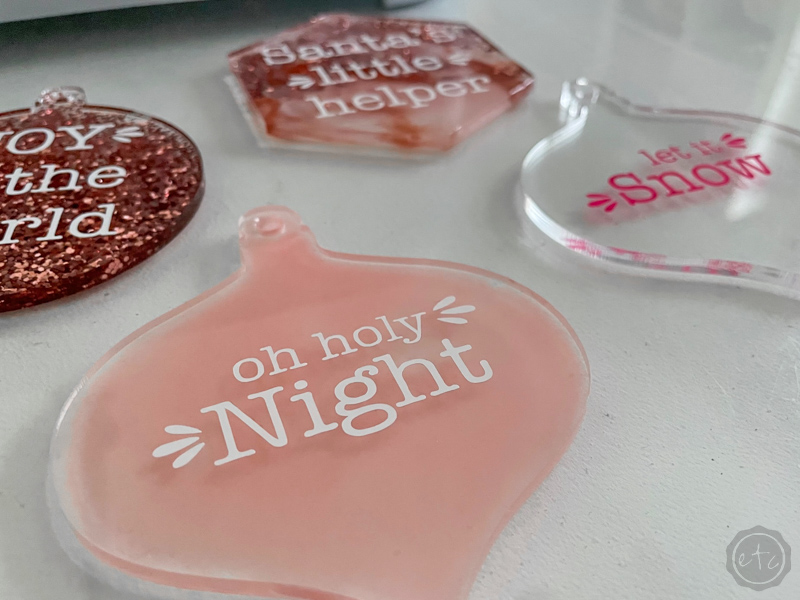
At this point I whipped out my Cricut machine and added a few fun Christmas sayings! I love how sweet they turned out!
They are going to look so. good. on. the. tree.
Let me know which one is your favorite below (you already know my favorite!)


Looking for more resin projects? I’ve got you covered!


These are all beautiful! If you put the sayings on first in reverse and then poured the resin atop them wouldn’t it make them more… sturdy? I don’t know if thats the right word.
It would definitely make the vinyl letters sturdier! Sometimes I like to switch out my letters… so it’s easier not to have them sealed in resin. I also like the way the letters look layered on top of the ornament blanks. So typically I’ll add a clear coat of resin on top of the letters if I want them to be “sturdier”. You can do any version you prefer!