


This is such a quick and easy project… 10 minutes tops and you’ll be ready to show off your brand new DIY resin succulent garden! And the best part? These succulents definitely won’t die… which is perfect for anyone who doesn’t have a green thumb.
Unless it’s green paint… which is a completely different ball game.
Ready to get started?
Supplies:
- Resin Succulents
- Large Pink Pot
- Small Clay Pot
- Crushed Mirror Glass
- Stuffing (Polyfil)
- Pink Craft Paint
Easy Resin Succulent Container Garden

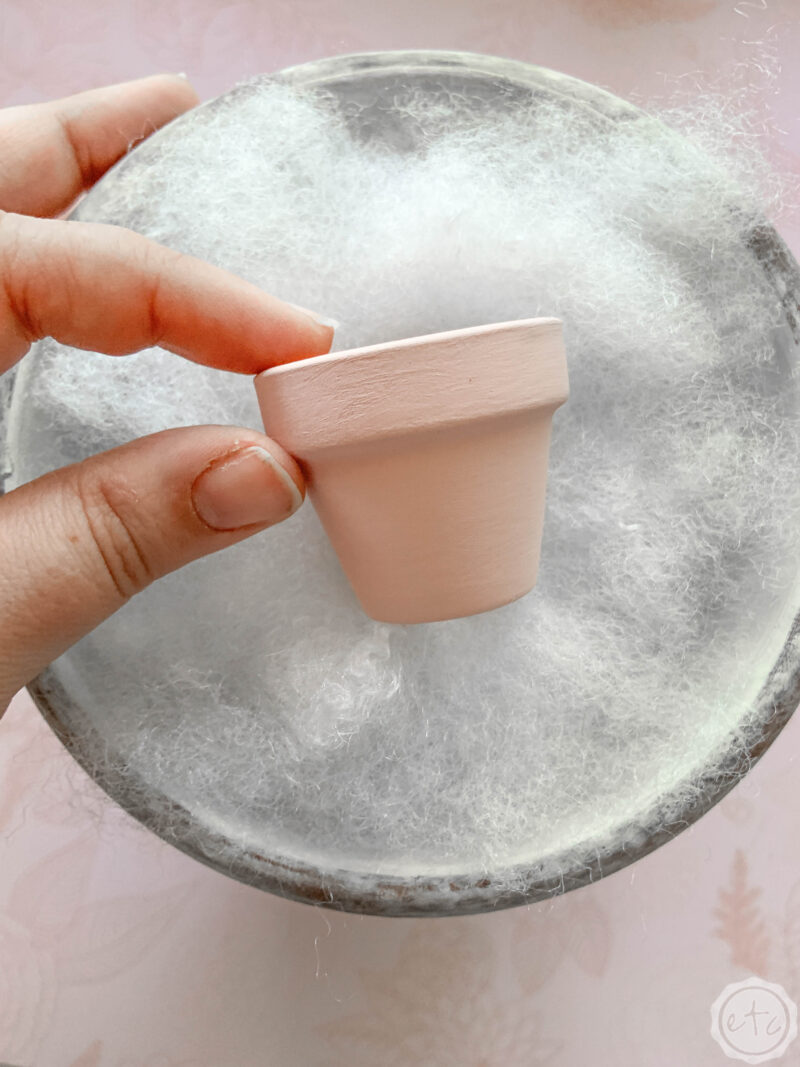
Step 1: Prep Work
Before we can get started arranging our little succulent garden we need to do a little bit of prep work! Start by painting your little clay pot a fun blush pink to match your big pot (don’t forget the inside since parts of it may show!)… then let it dry.
Now it’s time to fill up our pot! Since we don’t want to fill the entire pot with expensive crushed glass I went a different way entirely. I filled the entire pot with stuffing… all the way up to the brim of the pot. When you place anything on the stuffing it will sink down a bit (the way a pillow sinks under your head) so add stuffing until it feels fairly secure inside your pot.
Beautiful darling!

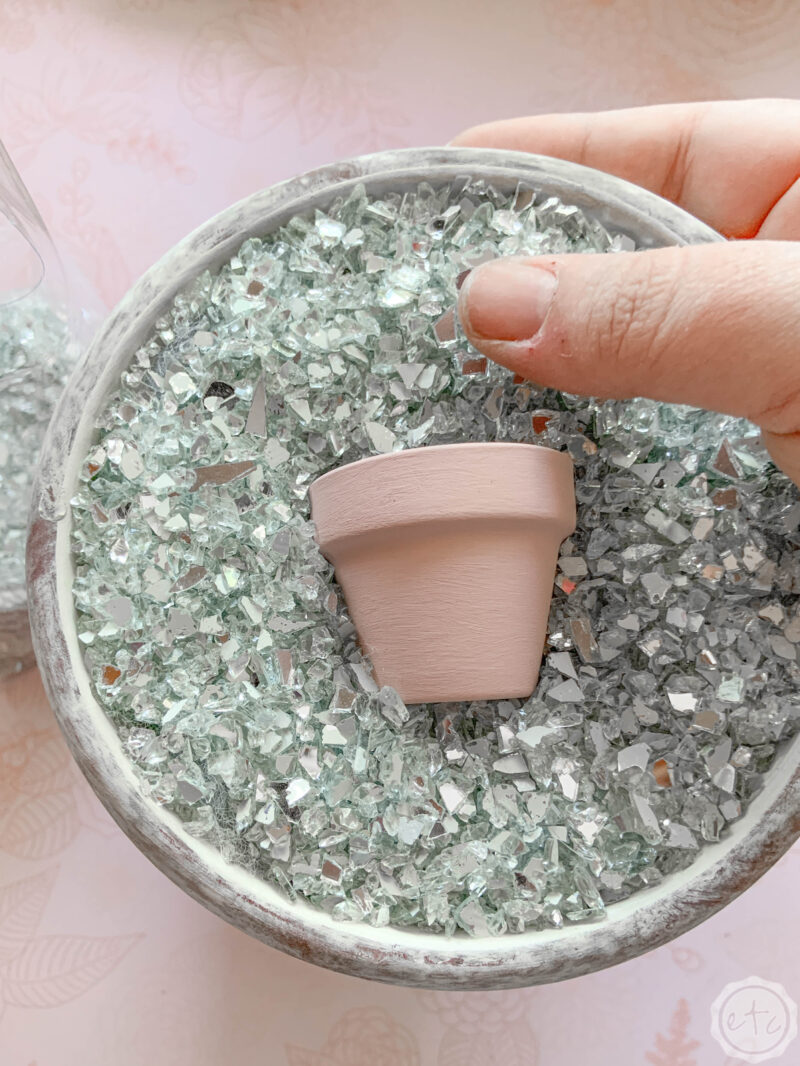
Step 2: Fill your pot
Time for the next step! Go ahead and place your little pink pot inside of your larger pink pot. You don’t want it in the exact middle (your succulents will be the exact center) so make sure to place your pot right under the middle of the pot.
Think of the surface of your pot as being sectioned off into thirds… place your tiny pot in-between the bottom and middle third.
I had to move mine down a little and it wasn’t fun!
Once you have your pot situated start filling the top with crushed glass. You want to put a little crushed glass inside the pot as well… then cover the sides. The crushed glass will weigh down the stuffing a bit (which is good!) so make sure that all the little whispy’s are covered by glass and no stuffing is showing through.

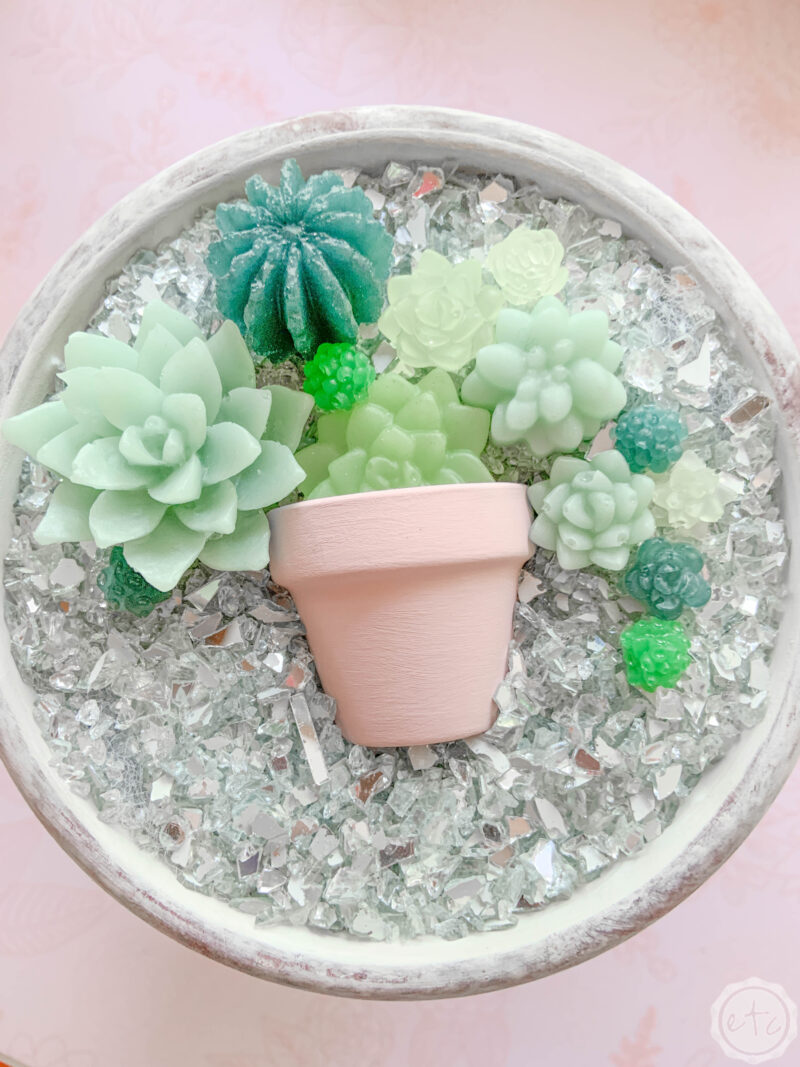
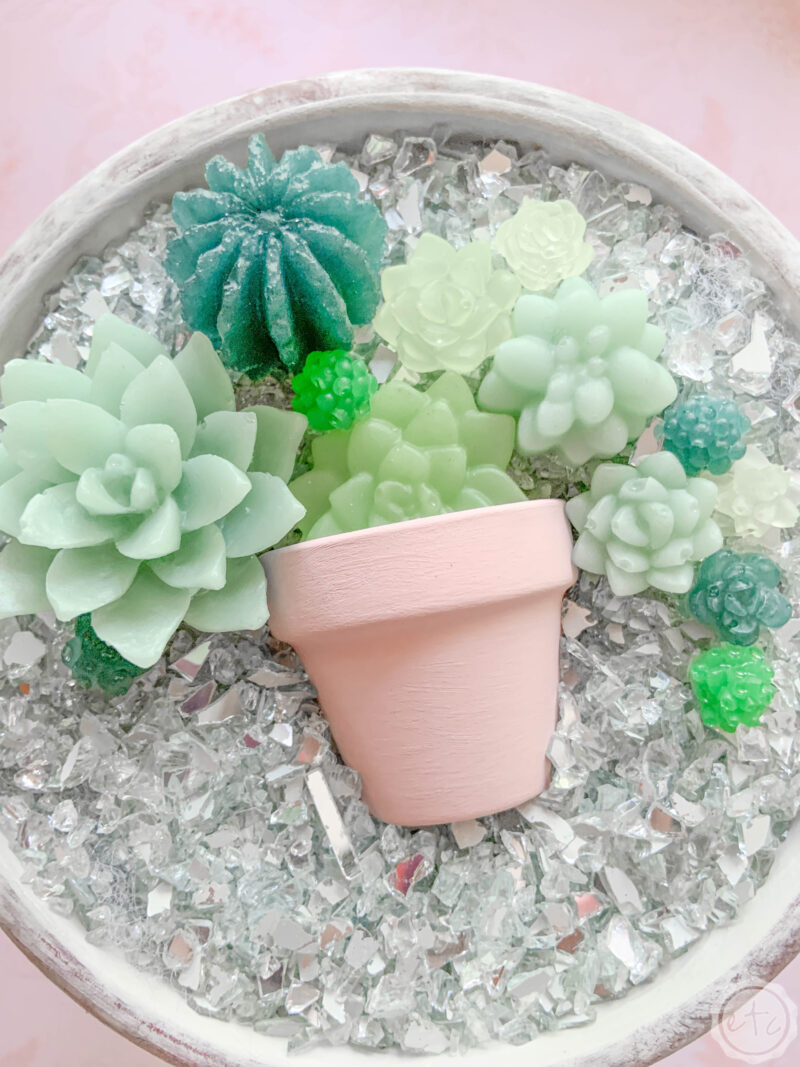
Step 3: Add Succulents
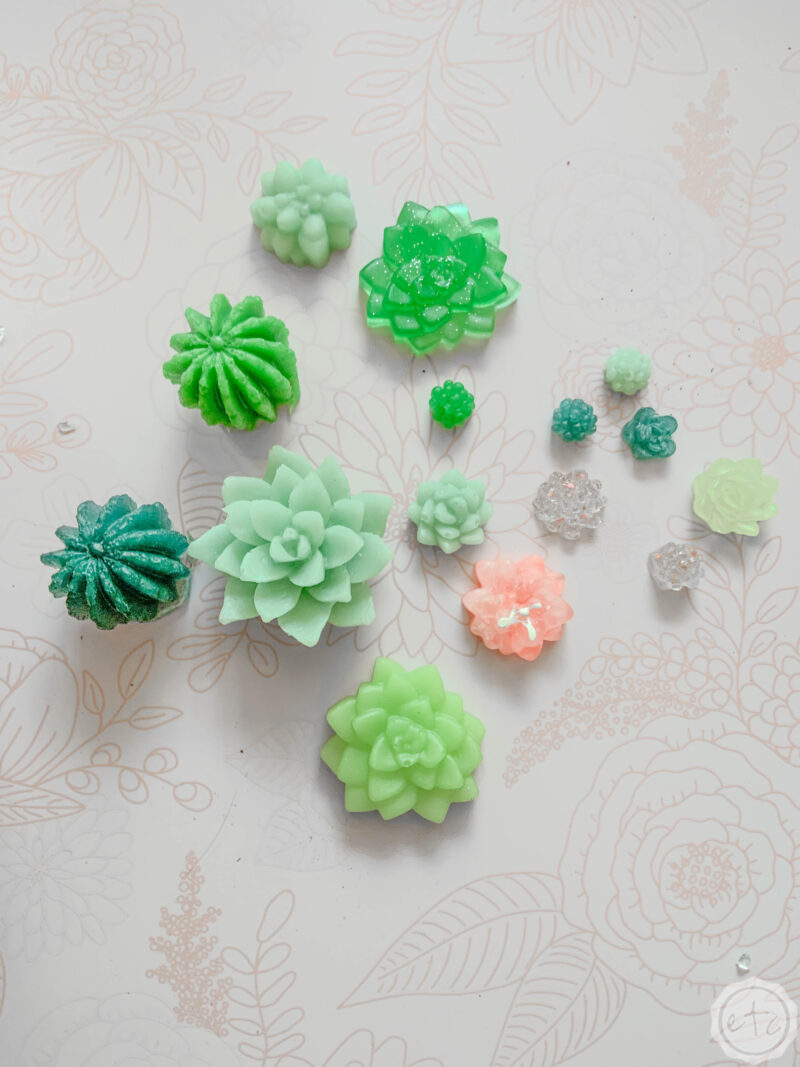
Now is the best part… adding our succulents! I picked a few of my favorites from my stash of resin succulents but if you don’t have a stash you can follow my full tutorial to make a few of your own. It’s a quick and easy resin project (perfect for beginners) so if you haven’t tried resin before don’t let that hold you back!
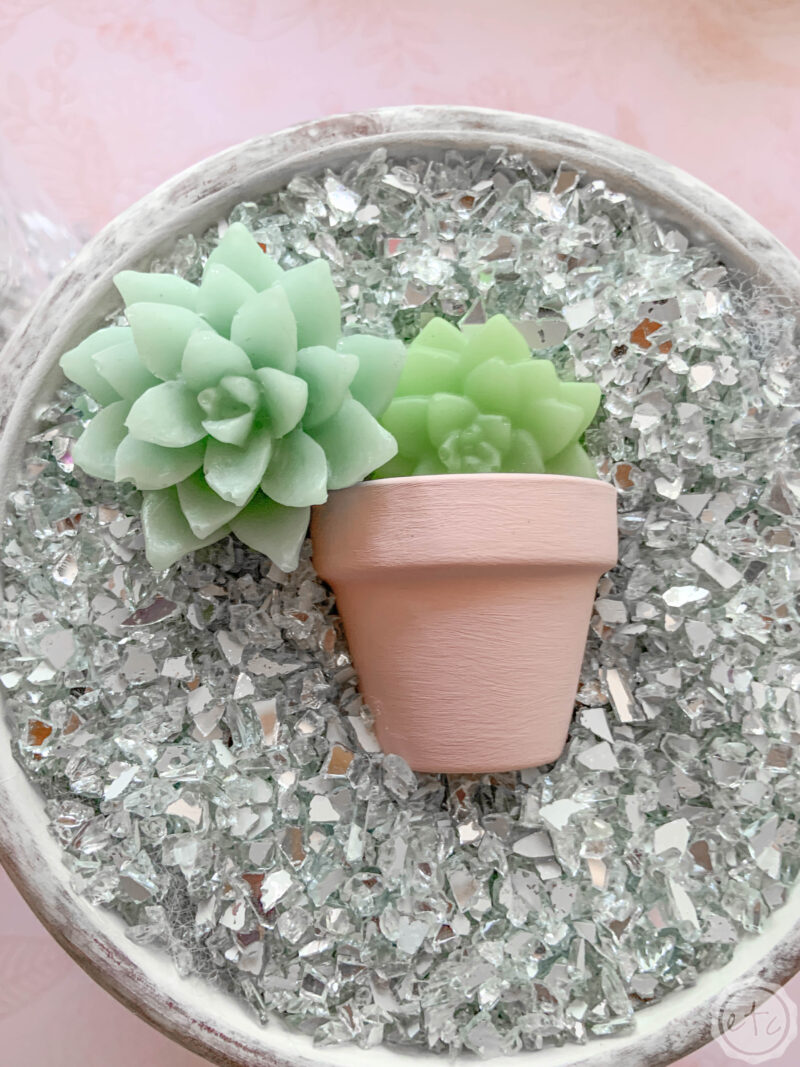
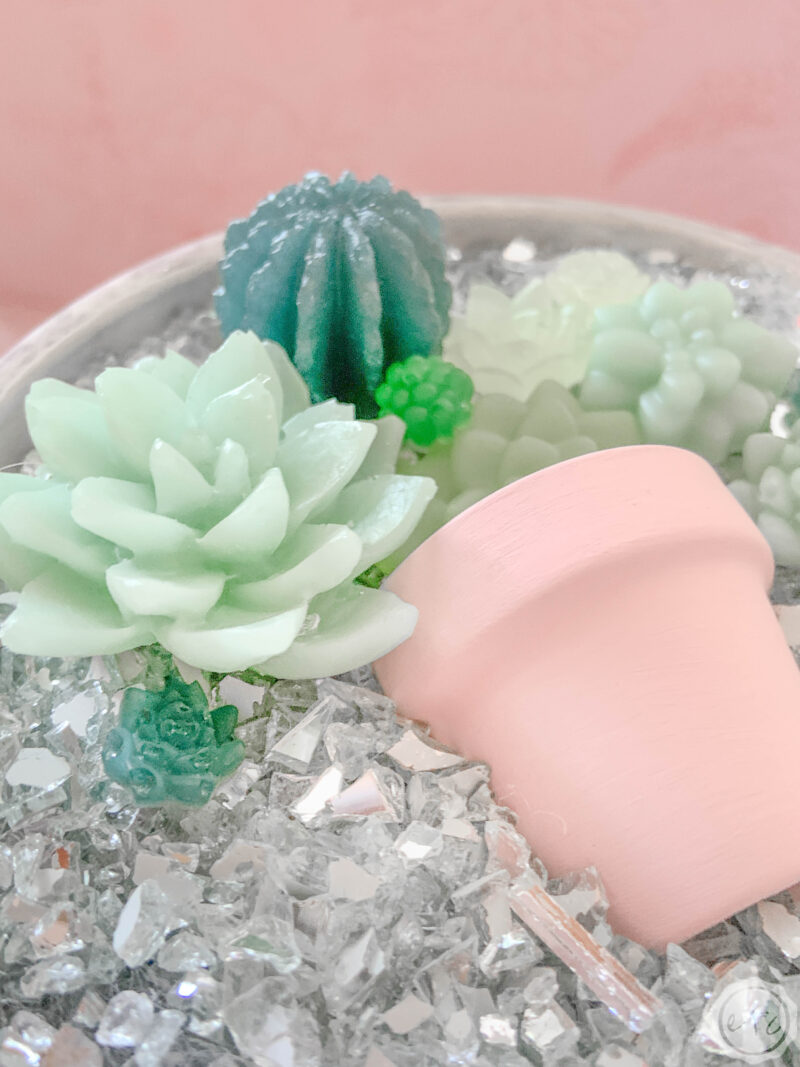
Once you have your succulents ready to go start with your larger pieces. I added a flat succulent into my tiny pot (peeking out from under the rim) and then snuggled my largest succulent up against it.
From here I picked succulents in different shapes and colors to create an arrangement that spills over the side and fills the top. I absolutely love how it turned out!

Bonus Tip: Right now one good swat from my cat would make a huge mess and completely destroy my little garden. I’m okay with that since I want to be able to add new succulents or change the arrangement from time to time. However if I wanted it to be a bit more stable I could use hot glue (or resin!) to secure the entire garden to the pot. That would be absolutely permanent though so be sure before you move forward!

I absolutely love how this little garden turned out! The colors are exactly what I envisioned… and the succulents are just darling! I’m going to set this little guy on the window seal of my craft room with a few of my real succulent arrangements… should be fun!


Looking for more resin projects? I’ve got you covered!


[…] last week’s little resin succulent garden I’m back with another fun resin project! And while our little succulent garden might have […]