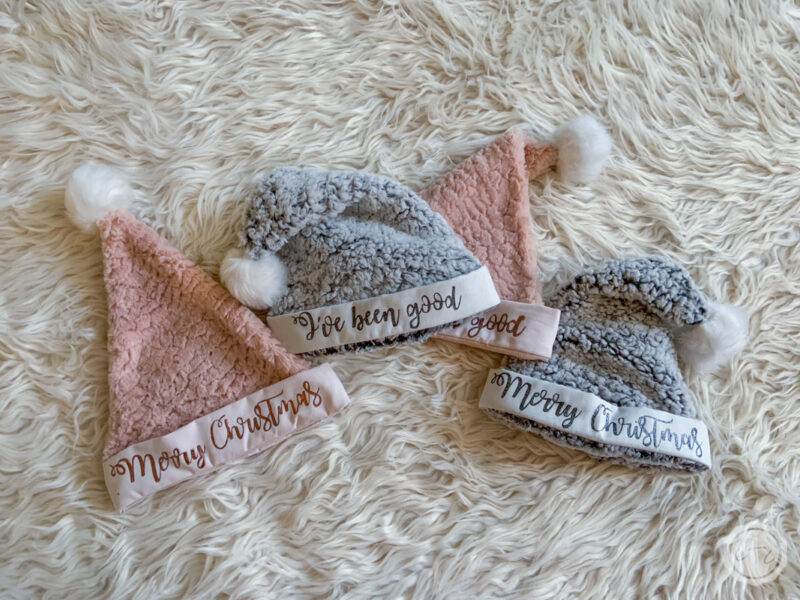
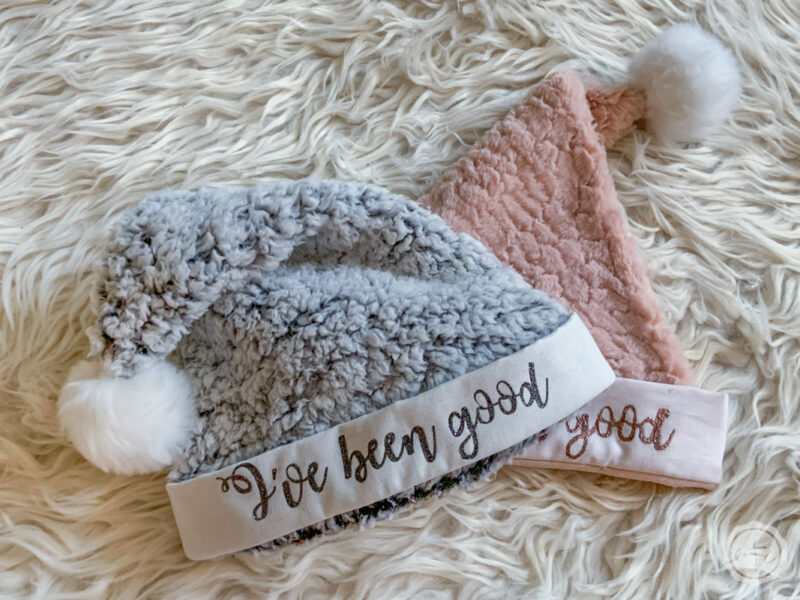
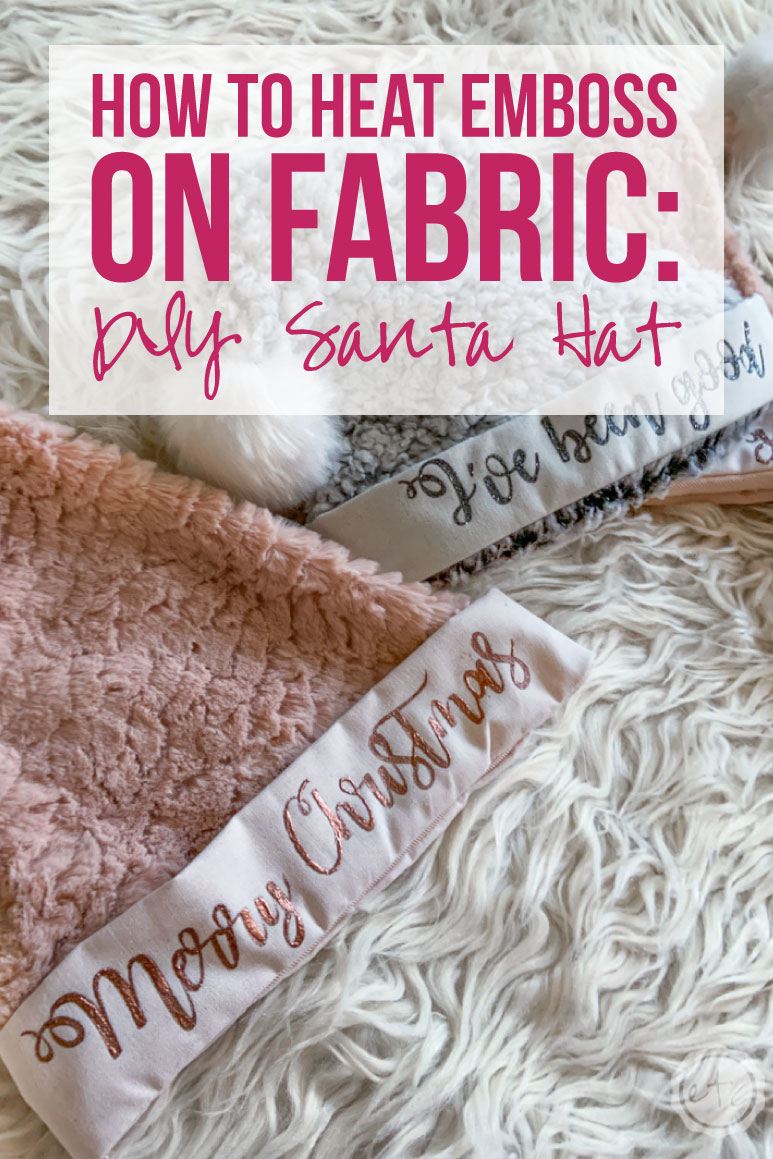
If you haven’t noticed by now I am completely smitten with all things flocked, blush and rose gold… it’s definitely an untraditional Christmas around here! Luckily I’m not the only one on the blush Christmas train (there’s a few of us) and we all wanted pretty Santa Hats!
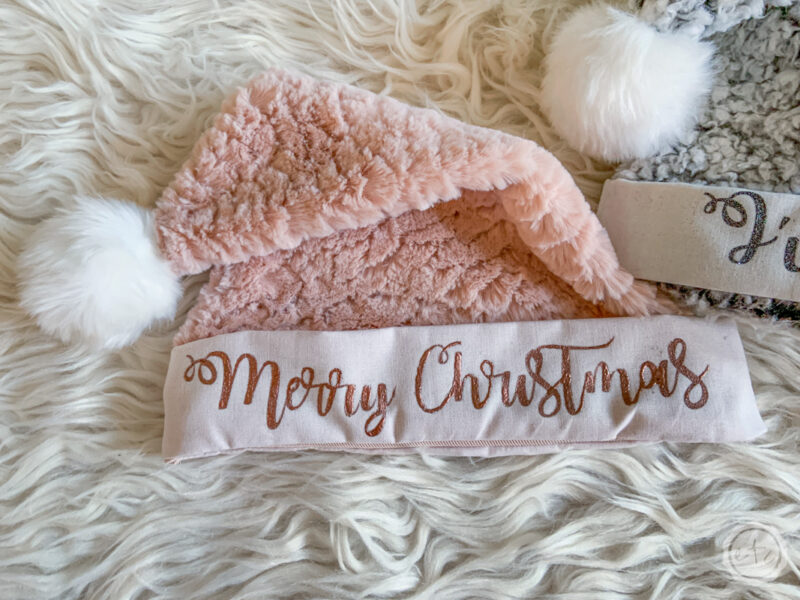
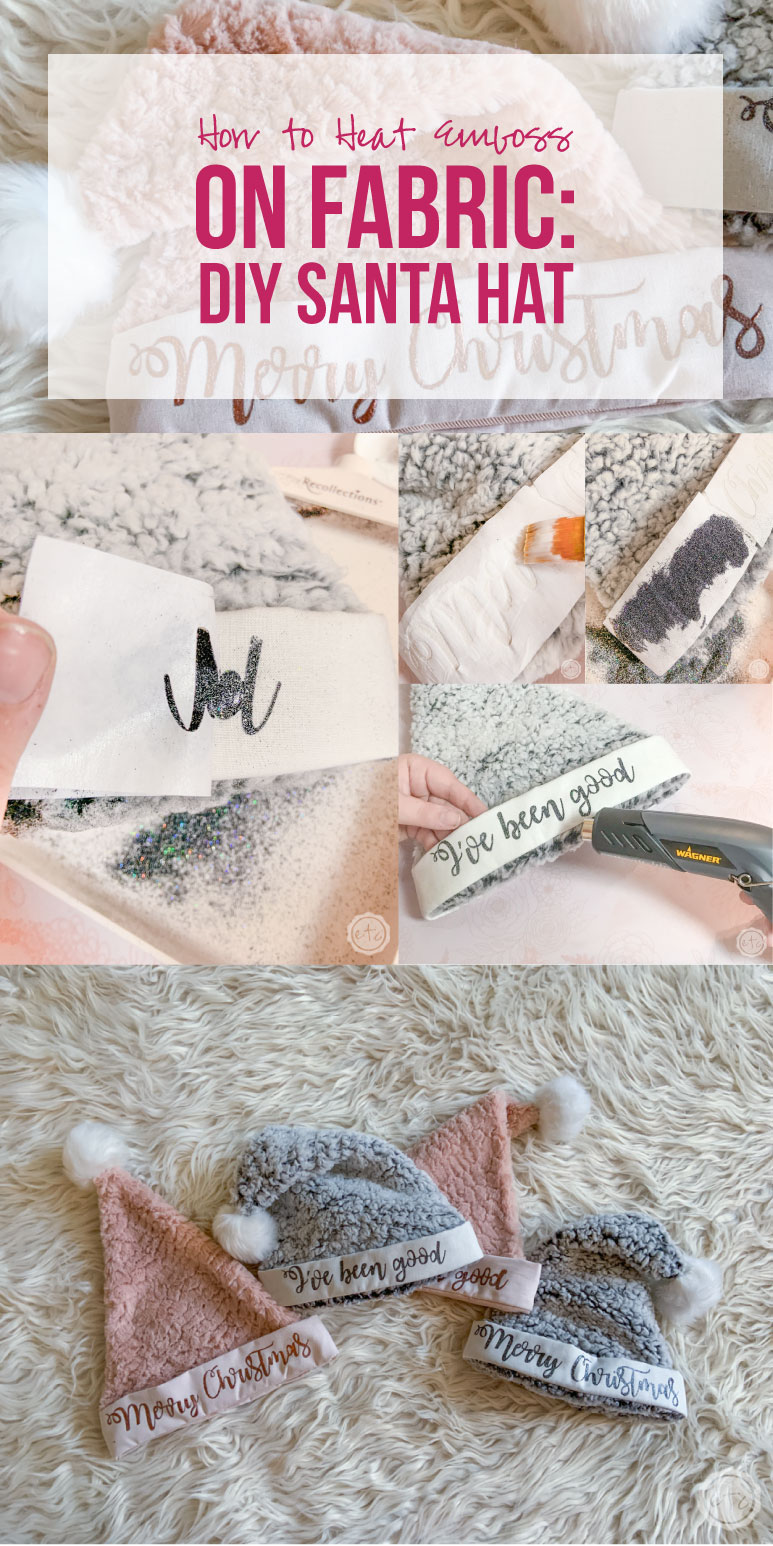
So I decided to whip up a few blush colored Santa Hats and then take things a step further by adding “Merry Christmas” across the cuff with a bit of beautiful copper colored heat embossing powder and my trusty heat gun!
Ready to get started?
Supplies:
- DIY Cotton Band Santa Hat (Cotton works best but these polyester ones would work)
- Embossing Powder (Copper, Charcoal)
- Wagner HT400 Heat Gun
- 2 Paint Brushes
- Mod Podge
- Glitter Tray
- Cricut Maker
- Cricut SVG Files (FREE at the bottom of this post)
- Light Grip Mat (that’s the blue one)
- Fine Point Cutting Blade
- Weeding Tool
- Freezer Paper
- Cricut Mini Easy Press (an Iron will work as well)

Tip: Cotton is the best fabric to use when adding heat embossing powder to a project (cotton t-shirts??? I spy a project!) but since finding a santa hat with a cotton band was harder than I thought I decided to diy my own with a plain cotton band, fluffy fabric for the hat and a fun pom pom. These polyester santa hats would be a close second if you don’t want to sew your own! Don’t worry
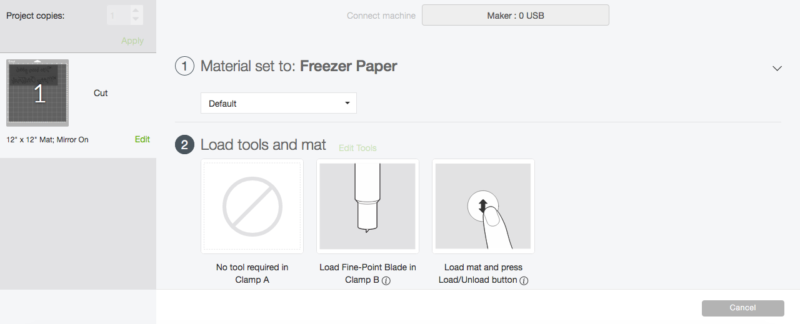
Step 1: Cut Your Freezer Paper
Let’s get started! Once you have your santa hat ready to go (either sewn together or fresh from your mail box) we’ll need to cut out our stencil. When it comes to fabric stencil vinyl doesn’t quite stick so I pulled out my old trusty freezer paper.
My mom has used freezer paper as a stencil as she quilted my entire life… so this is not a new trick. Of course, she used it to cut out hearts and simple shapes with a pair of scissors so running it through my cricut for words is kind of freezer paper level 2.0 but it’s the same concept!
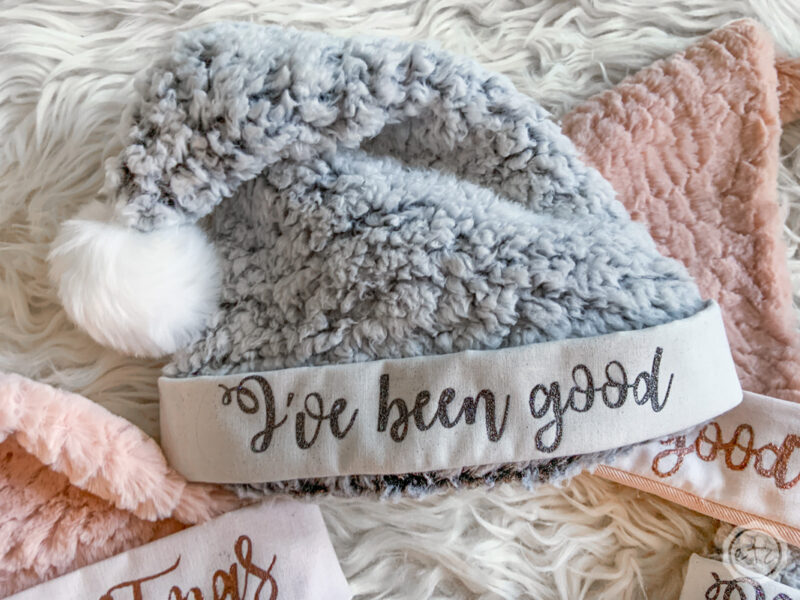
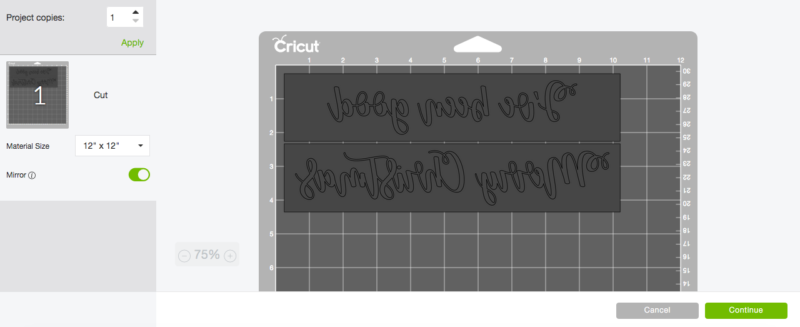
Go ahead and download your SVG’s from the bottom of this post and then upload them to cricut design space. I’ve included two different sayings “Merry Christmas” and “I’ve Been Good” so if you want to make both just hit go!
Go ahead and load your freezer paper onto a light grip mat, make sure the shiny plastic side is face up and the dull side is down. The shiny side is way to slippery to stick to the mat and will give you alllll kinds of problems if you try to do it shiny side down. Don’t ask how I know.
It was a mess.
When the first “customize page” comes up make sure to toggle the little button on the left that says “mirror” so that your words will come out legible. If you’re using a Maker you can simply set your material to “freezer paper”, load your standard cutting blade and hit go. If you’re rocking the explore air 2 you want about 135 for pressure under your custom settings.

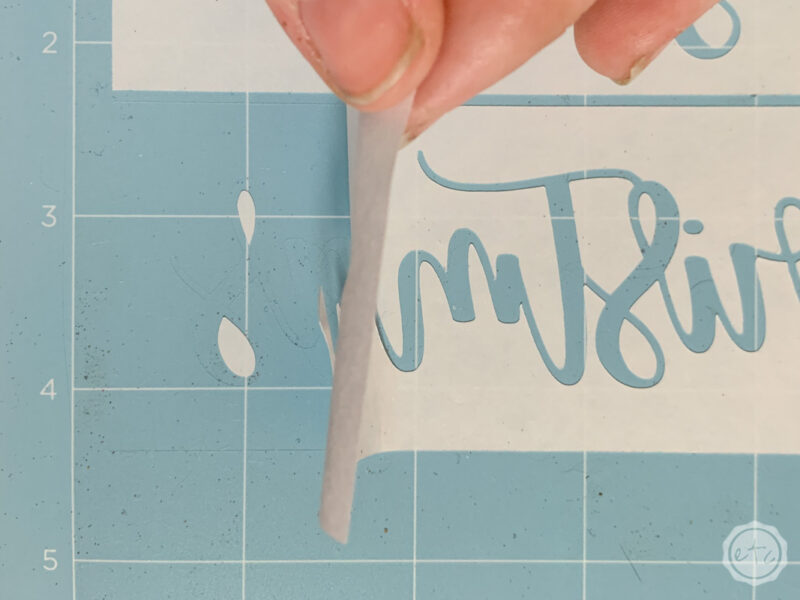
Step 2: Weed Your Freezer Paper
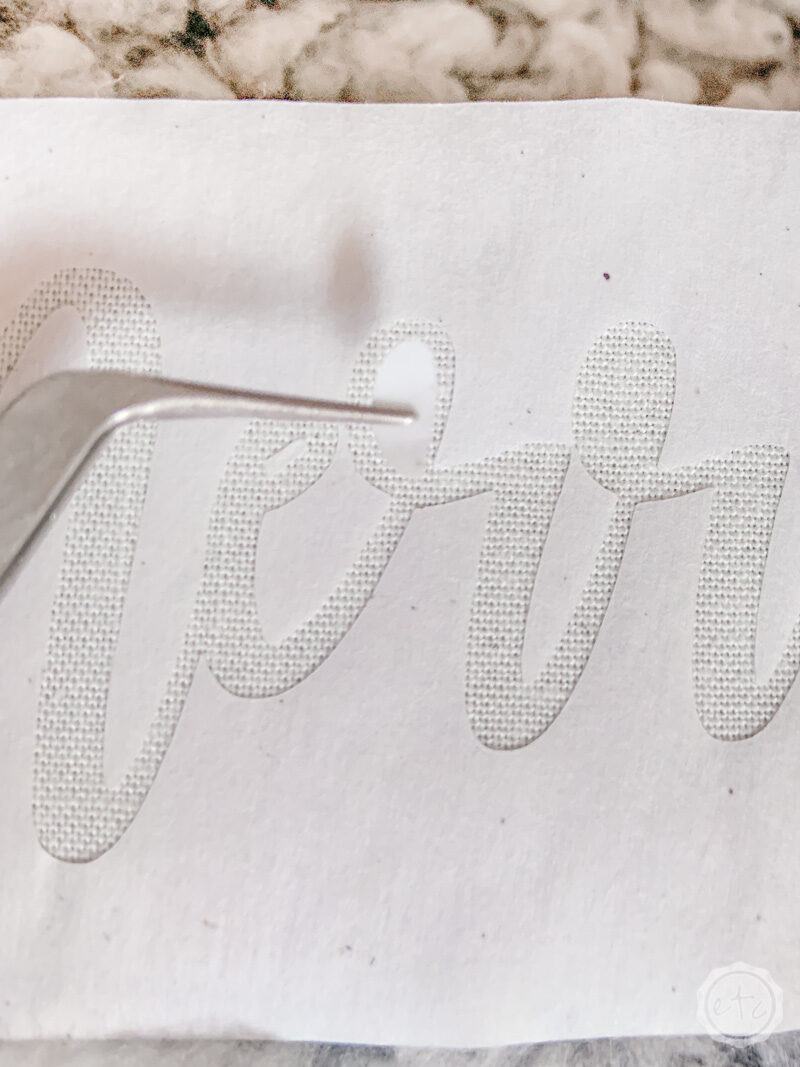
Ready for the next step? Now that our freezer paper is cut out we need to get it ready for stenciling. Start by taking your weeding tool and removing the words… make sure to leave all the little center’s and middles of the letters.
The inside of the e? Make sure it stays on the cutting mat!
Just take out the actual word… you’ll want it to look like the picture up above when it’s done!
Now’s the tricky part… removing the stencil from the cutting mat. Normally I would just grab a bit of transfer tape and call it a day but this freezer paper is too delicate for the transfer tape.
So instead we’re going to remove it by hand.
Yup.
It’s not too bad. Simply start at one side and start pulling up the stencil. Watch all the little bits and pieces as you go so that you don’t tear the insides of the letters.
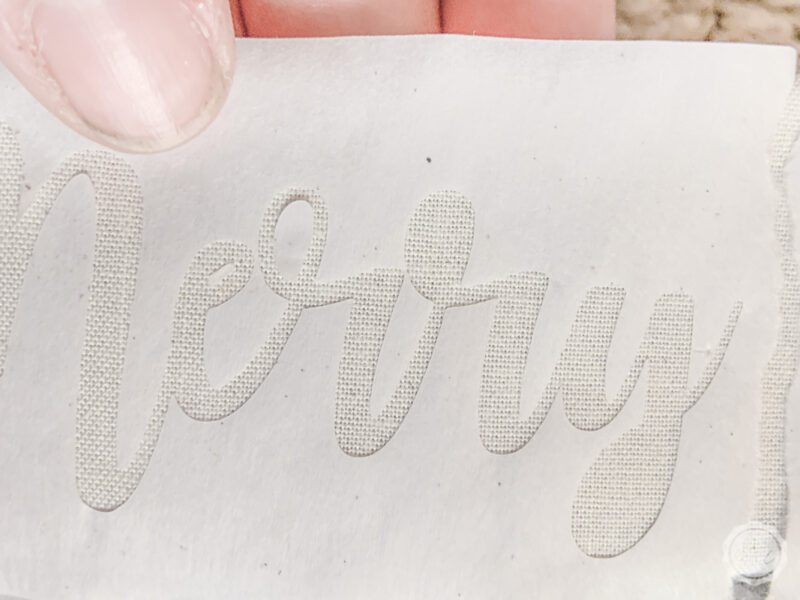
See the picture below? The little bit of freezer paper inside the swoop of the r? It is attached by a very thin line of freezer paper so I had to be very careful not to rip that line in half. When in doubt I simply worked my weeding tool under the delicate pieces and lifted then with the weeding tool instead of with my fingers.

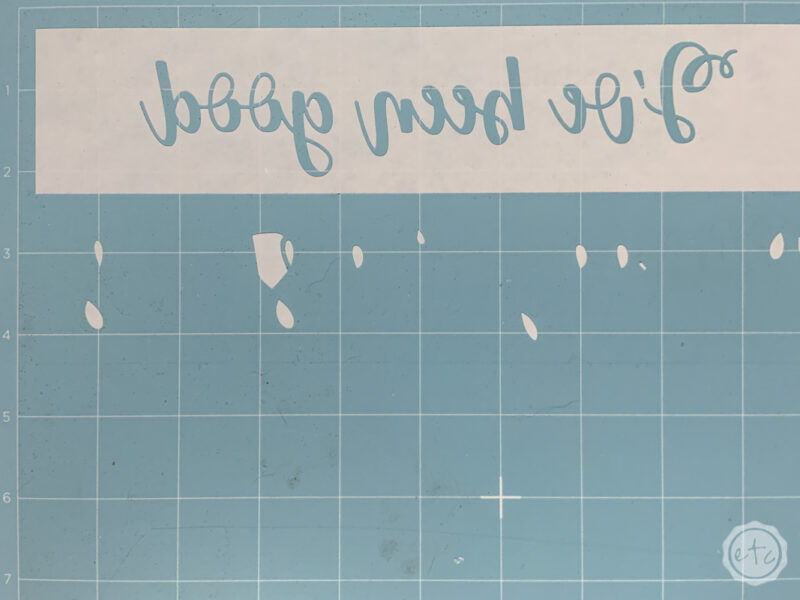
When you’ve taken off the entire stencil you’ll be left with alllllll the inside pieces. That’s ok. Go ahead and leave them for now… we’ll add them directly to our hat’s cuff in a minute.
Ready to iron?
Step 3: Iron your Freezer Paper On
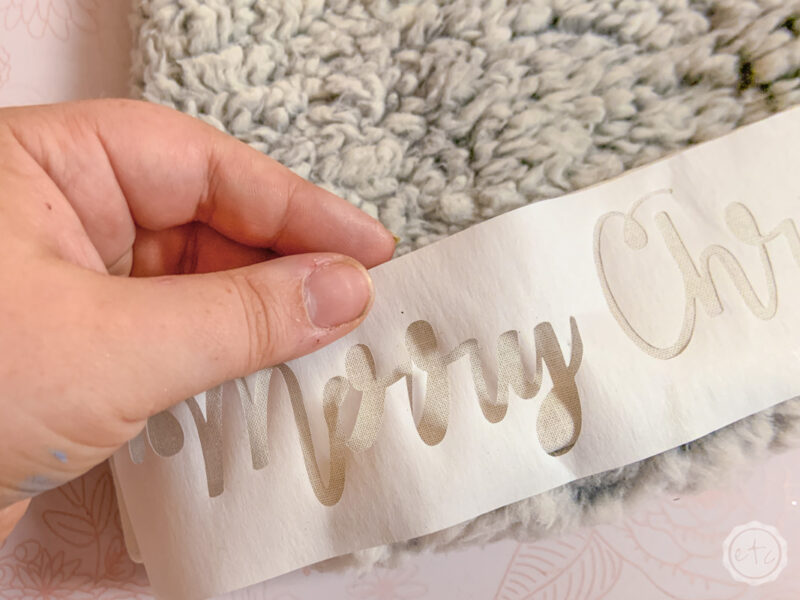
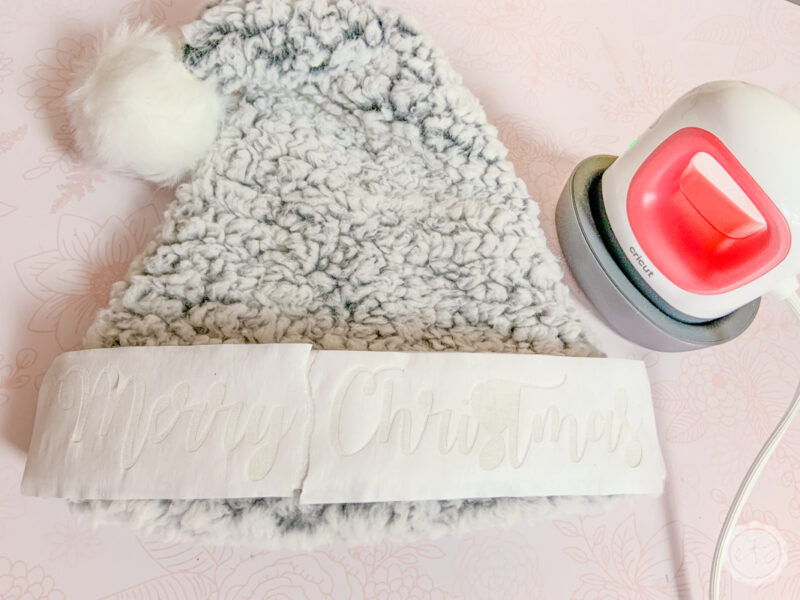
Now that we’ve got our freezer paper ready to rock let’s go ahead and put it on our Santa Hat! Start by lining up the entire stencil (mine is about 10 inches long) on the cuff of your hat. I used the nice straight top of the rectangle to line up my stencil and keep it straight.
Make sure that all of your letters fit on the cuff and no looks are hanging off the top or bottom of the cuff. Then all you need to do is iron your freezer paper onto the cuff!
Freezer paper (shiny side down) will iron onto your fabric and then peel off leaving behind no residue so it’s perfect for fabric stencils. If you iron it on slightly askew the freezer paper can simply be peeled up and then re-ironed in the correct position.
I used my cricut mini easy press since it’s just the right size to fit in the palm of my hand. I placed my fingers under the cuff of the hat, set my mini easy press to medium heat and then started in the middle of the stencil. I slowly ironed the stencil all the way to the right side of the word and then came back and ironed the left side.

Just take a look! It’s beautiful so far.
You’ll notice that I did rip the freezer paper in between “Merry” and “Christmas” that’s because my stencil didn’t want to lay quite flat all the way across the words. It was a quick fix but you may not need to do that… just see how your freezer paper is laying as you go along.
Now we can add all the little loops and insides of the letters. I used a pair of tweezers to carefully position each little piece from my cutting mat on the cuff of the santa hat and then hit it for a couple of seconds with my easy press. This was definitely a little tedious but on a scale of about 1-10 (with 10 being bad) it wasn’t too bad, about a 3.
Except for the insides of the e. They were an 11. Darn e’s.

Make sure all the little pieces are ironed down really good so that when you add the mod podge in a minute there isn’t any way the mod podge will seep under the freezer paper.
We want the freezer paper to be firmly bonded to the cuff of the santa hat!
Take a look at the finished stencil… absolutely beautiful!

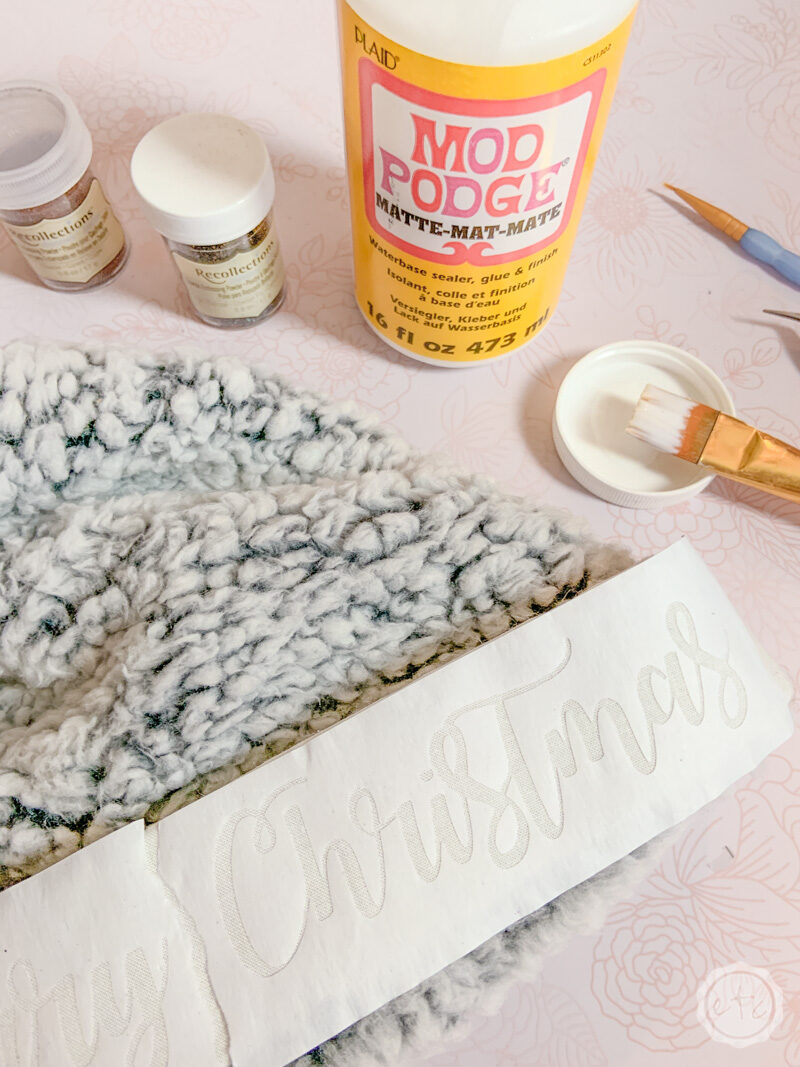
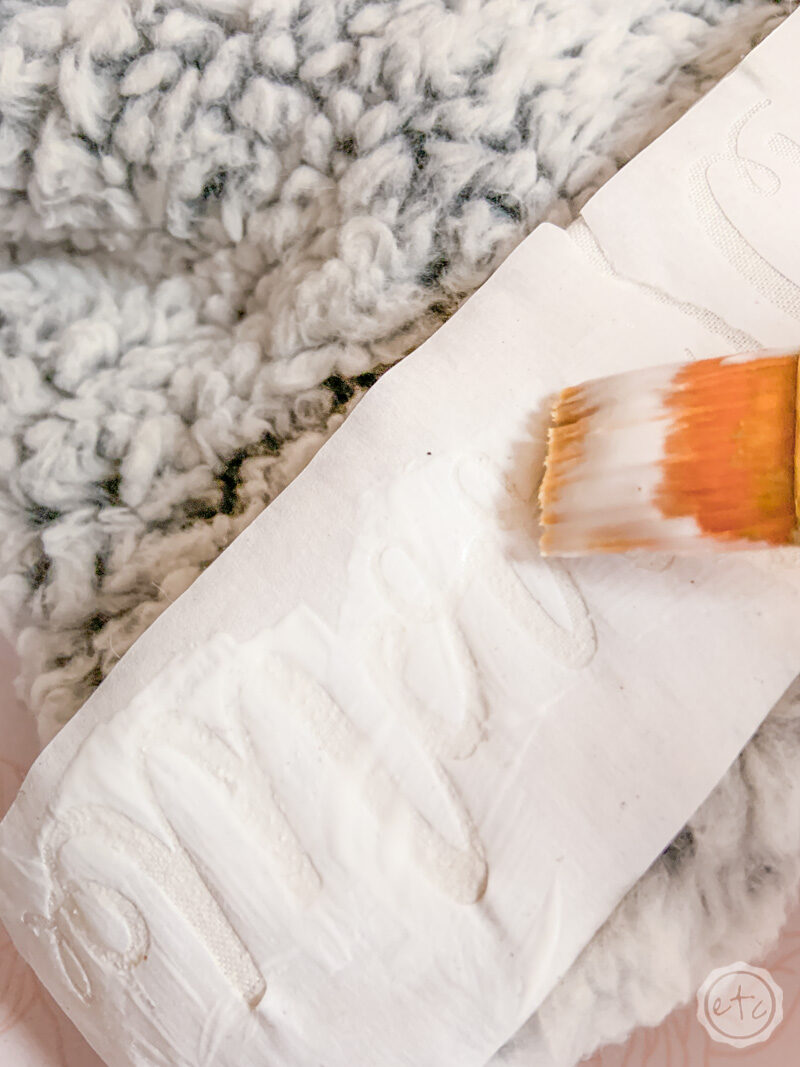
Step 4: Add your Mod Podge!
Alright y’all here’s the fun part! Painting on the mod podge!
This is really as easy as it sounds, start by adding mod podge across the first word. Make sure it’s in all the little nooks and crannies and that it’s not seeping under the freezer paper.
Put it on liberally so that all the letters are thoroughly covered. Then go back and smooth out the mod podge so that it’s even all the way across. You want it to be as smooth and even as possible so that you don’t have any weird bumps or lumps in the finished words.
I went ahead and did my words one at a time so that the mod podge didn’t have time to dry. So fill in the entire “Merry” word and then move on to the next step.
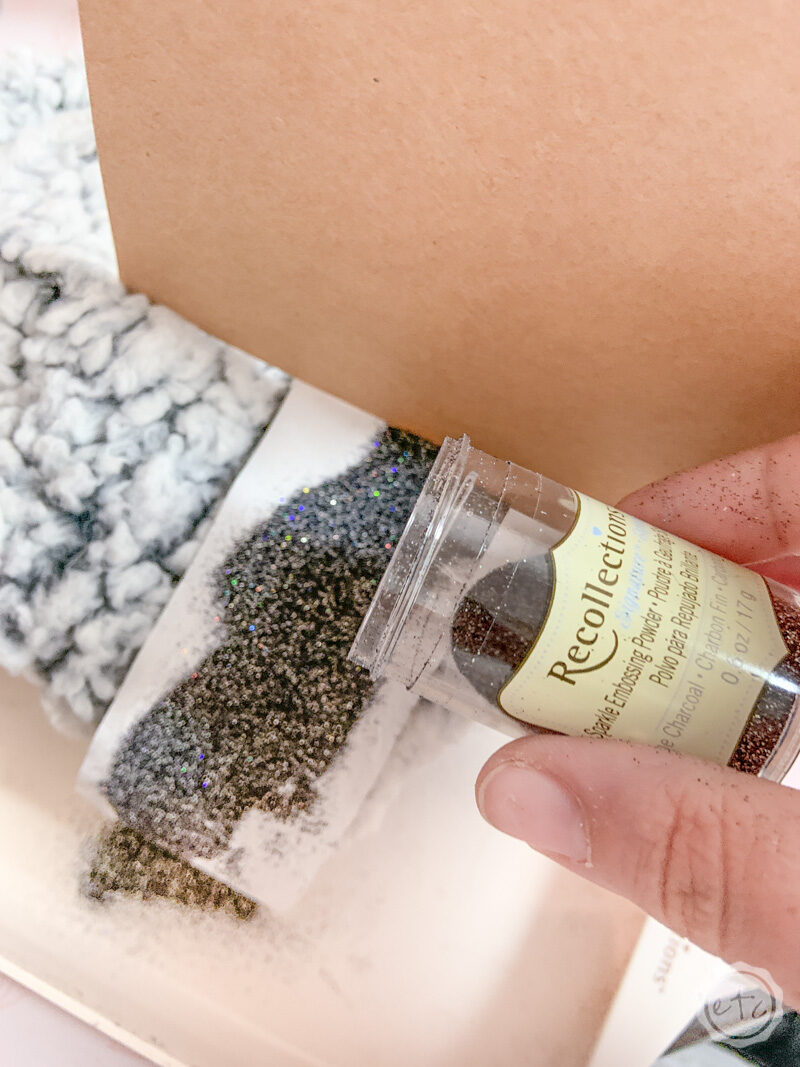
Step 5: Add Embossing Powder
Now’s the fun part! Embossing powder!
Grab your glitter tray and place your santa hat on top. Then sprinkle your embossing powder liberally on top of the mod podge. Be careful not to get it on the fuzzy part of the hat since any embossing powder that sticks to the fuzzy fabric will want to stay for life. It’s impossible to keep it completely off the fuzzy fabric but do your best!
I also added a little piece of cardstock in between the words when I was shaking my embossing powder in place so that the next word didn’t get a bunch of embossing powder before it was mod podged.
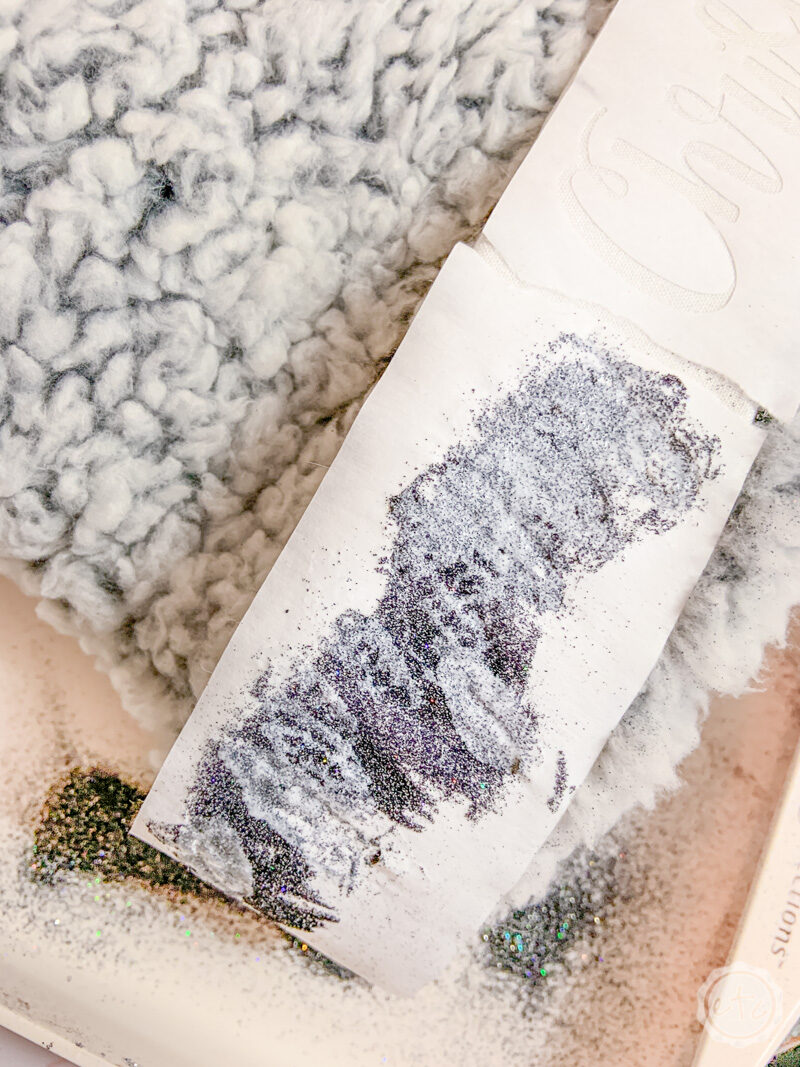
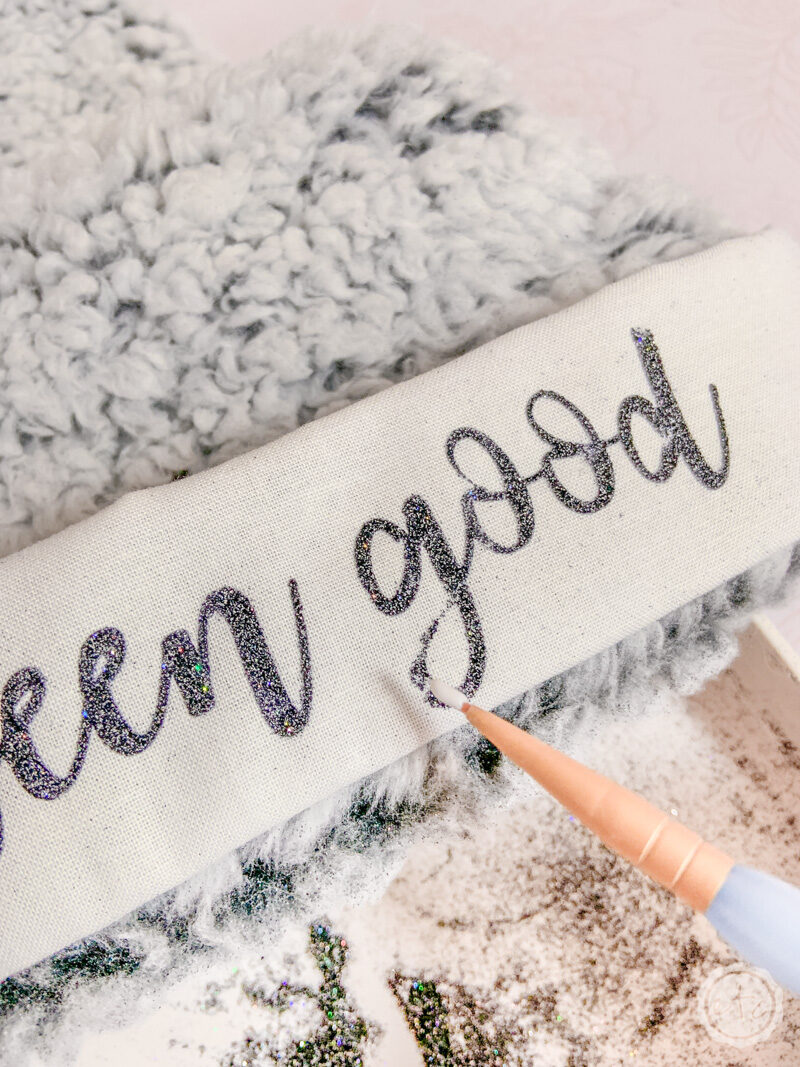
Once you’ve added the embossing poser use your fingers to firmly press down across the entire word so that as much of the embossing powder as possible sticks to the mod podge. (This post is definitely winning for the most times I’ve ever used the word mod podge, FYI).
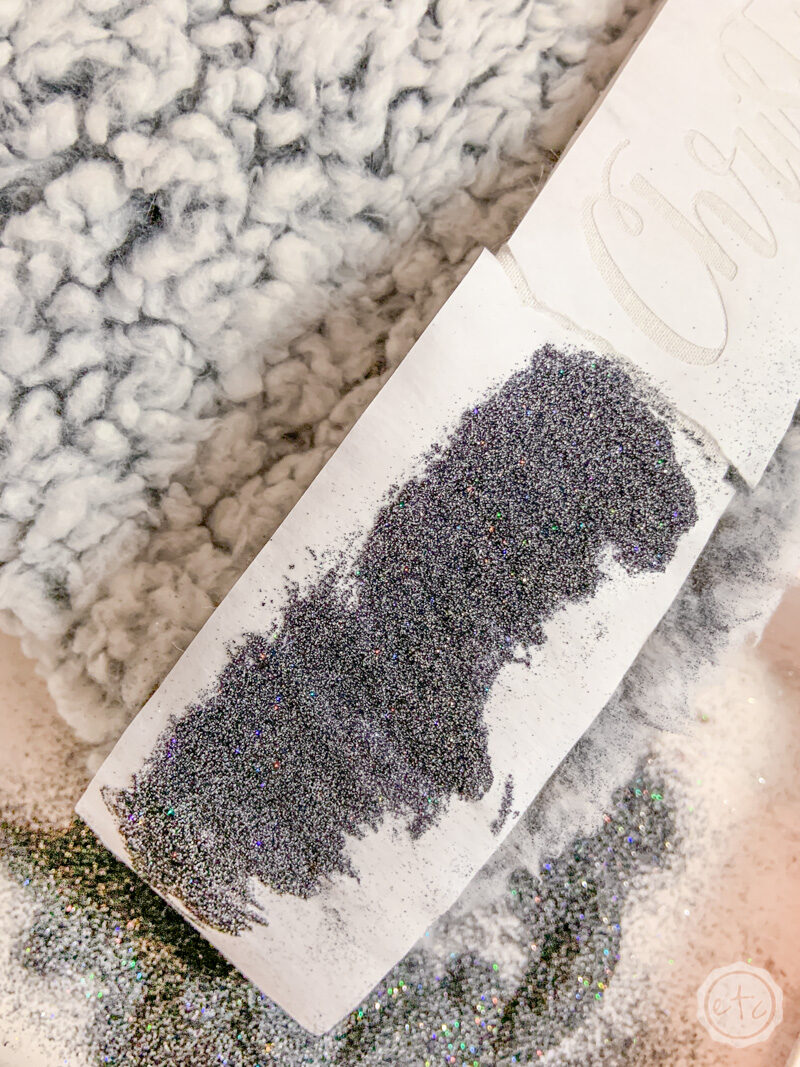
Then shake your hat off into your glitter tray. Make sure to get as much of the loose embossing powder as possible into the tray.
Now go back with your mod podge and add a bit of glue (mod podge) to any part of your word that doesn’t look covered in embossing powder. This second layer of mod podge/embossing powder is the difference between a slightly embossed word and a WOW that’s a really crisp and awesome embossed word. (Trust me… I made a few of these).
Add more embossing powder to the second layer of mod podge, press it down with your fingers and then knock off the excess. You want the finished product to look like the photo below… solid embossing powder across all the letters.
Now go back and finish the second word. Make sure to go through all the steps: mod podge, embossing powder, press firmly, remove excess embossing poswer X2.
Beautiful Darling!

Step 6: Remove your Freezer Paper
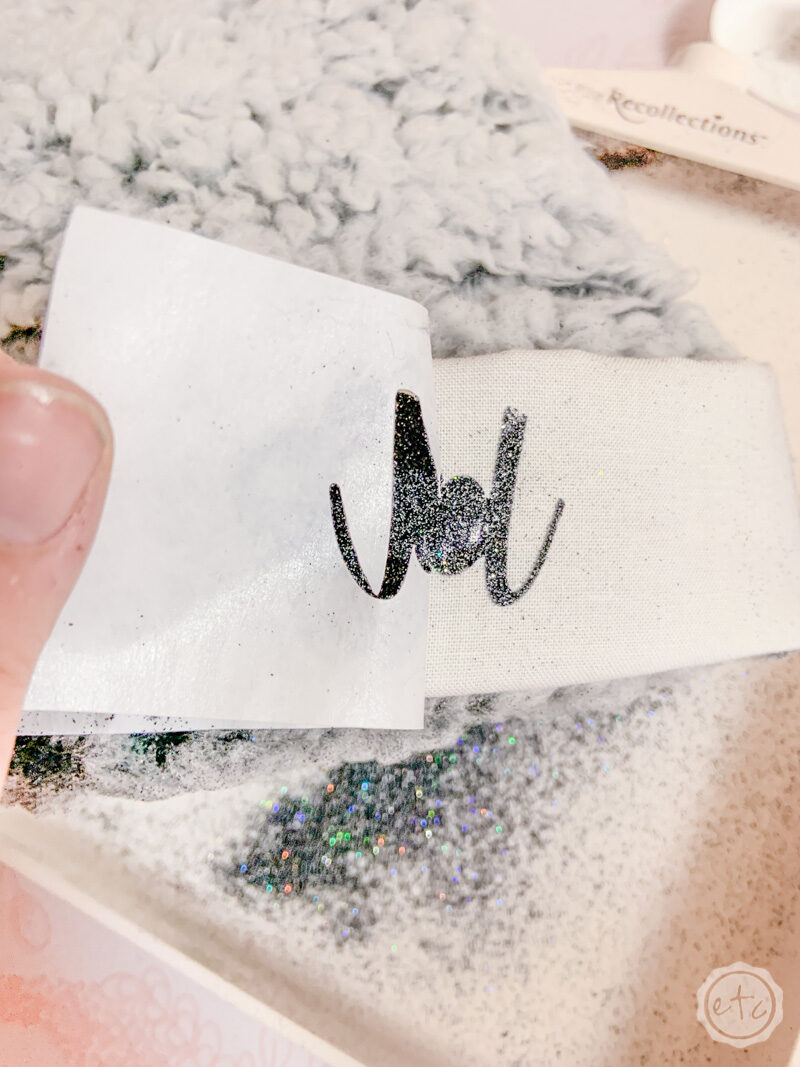
Now for the fun part… remove that freezer paper! Start at one side and gently pull alllllll the freezer paper off that you can. Mine came off pretty cleanly but it was really glued in certain spots. In those spots I simply grabbed as close to the stuck spot with my tweezers as possible and pulled.
Worked like a charm!
Take a look at those crisp edges!
Of course, you’ll notice that all of the little pieces we had to manually stick down one at a time now need to be removed… one at a time.
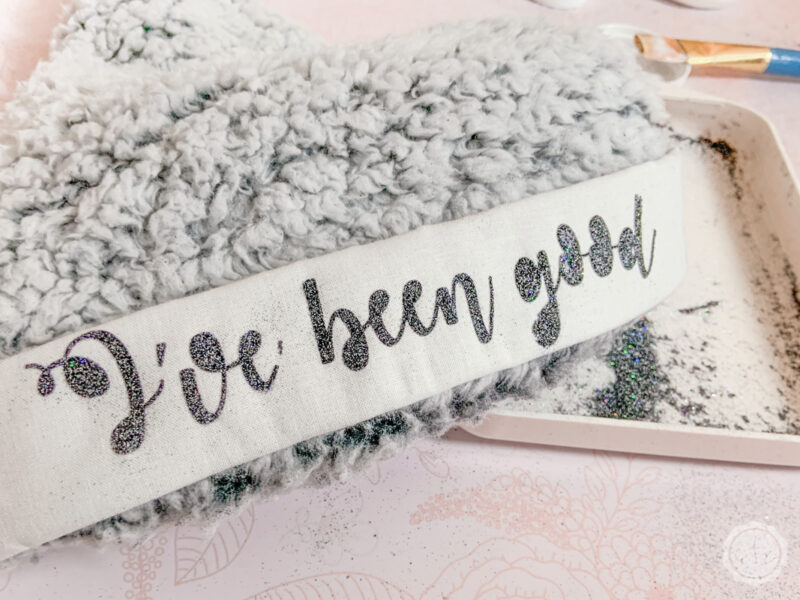
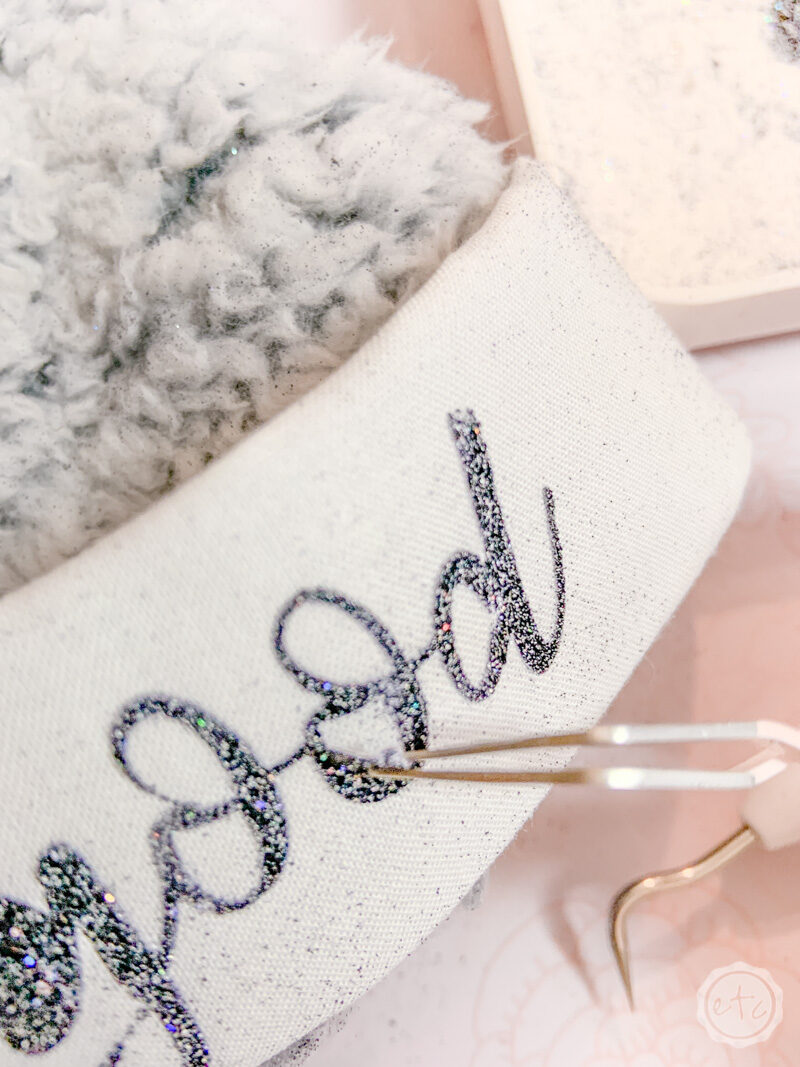
Take your tweezers and weeding tool and carefully take each little piece of freezer paper out of the middle. I found that my weeding tool with it’s sharp point was great for getting under the edge and lifting up the freezer paper. In most cases the freezer paper came up easily with the weeding tool and maybe my fingers.
In a few (really mod podged spots) I needed my tweezers… but they were able to grip the little pieces of freezer paper easily so I could pull them off with a bit more force.
Once all of the little inside pieces are out take a look at your letters. Most of mine look amazing but a few spots (like the bottom of the g) looked a little spotty.
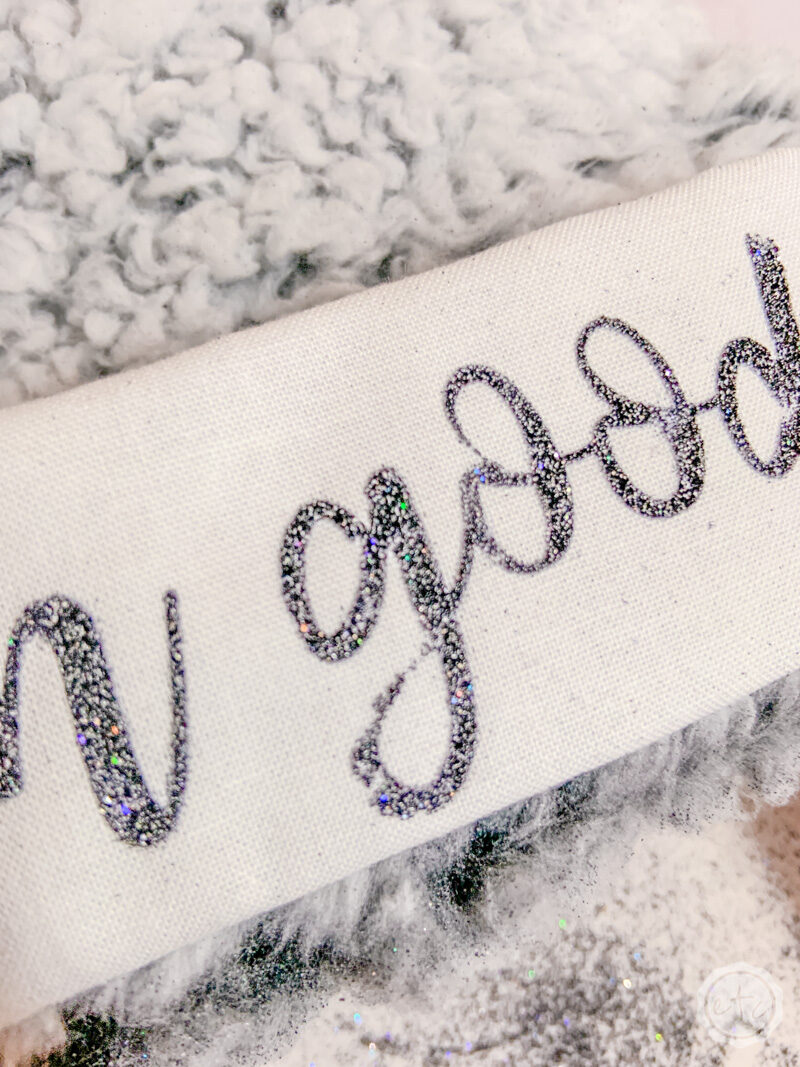
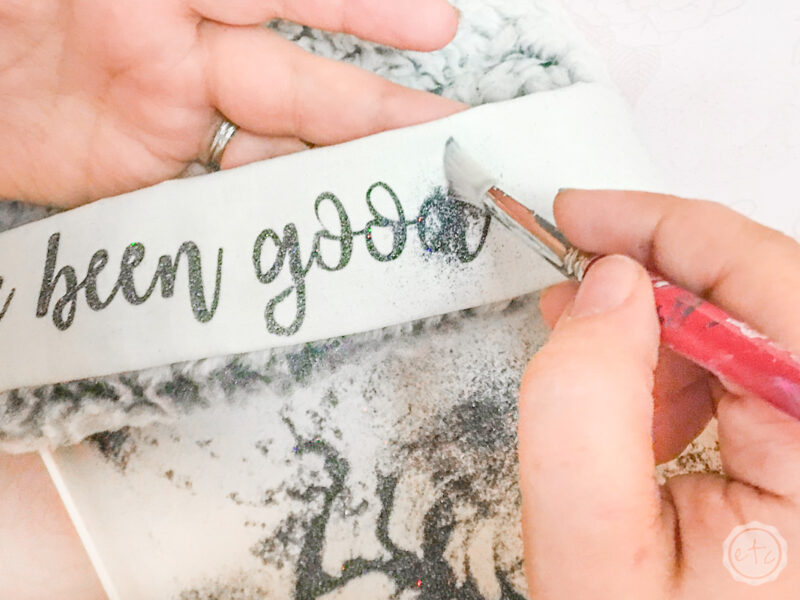
Don’t worry it’s a simple fix. Simply take a tiny little paint brush and add a bit of mod podge to the spotty places… painting in smooth lines with your brush and the mod podge. Then cover that area with embossing powder, press firmly and then shake off the excess.
Once your entire word is perfect use a large DRY brush to go in and make sure alllllll of the excess embossing powder is swept off the cotton cuff, off the fluffy hat fabric and into the glitter tray.
I am so in love with this project already it’s ridiculous.

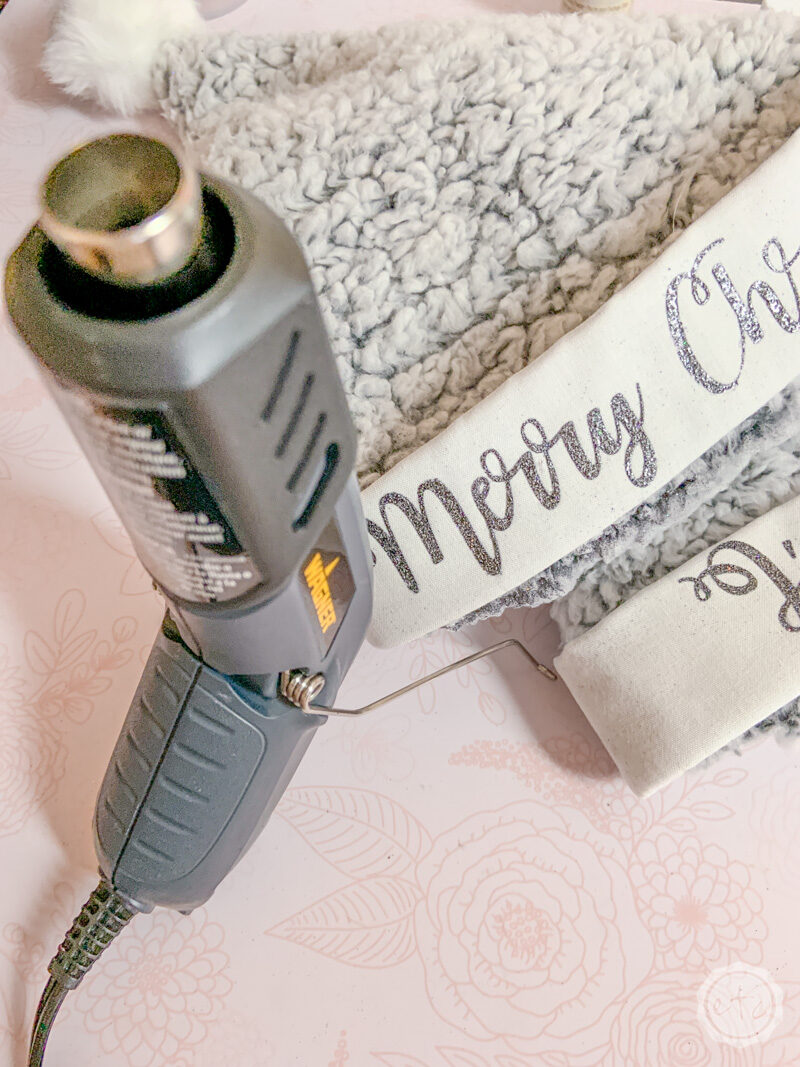
Step 7: Use your Heat Gun to Heat the Embossing Powder
This is the BEST step! It’s time to heat up that embossing powder… while craft stores sell special embossing guns I just grabbed my little Wagner HT400 heat gun. It can heat at 450 and 680 while most embossing guns only have one setting so it’s a bit more versatile than the average embossing gun and I love that I don’t need a special tool.
Special heat torch for flow art? Nope I just use my heat gun. Special embossing gun for embossing powder? Nope I just use my heat gun. Special toaster oven for shrink plastic? Nope I just use my heat gun!
On top of that embossing guns typically need a little time to heat up once you turn them on whereas my heat gun is ready to go from the second you flip the switch.
I may or may not be obsessed… you decide.
Either way setting the embossing powder is pretty simple… just set your heat gun to 680 (click the button to the right) and start to heat up your embossing powder. Work in small circles and keep moving so that you don’t have the heat in one spot for too long.
You don’t want to burn your fabric!
After about 10-20 seconds you’ll start to see your embossing powder heat up. It will turn liquid and shiny (which is the absolute best part) keep the heat on it until it’s completely liquid and laying flat and smooth.
If the embossing powder bubbles at any spot just use your weeding tool to pop the bubble and it should smooth out into the rest of the embossing.
Once you’re done with the entire phrase set your heat gun down and wait a couple seconds for the embossing powder to cool down. Once it’s cool to the touch you’re ready to rock!

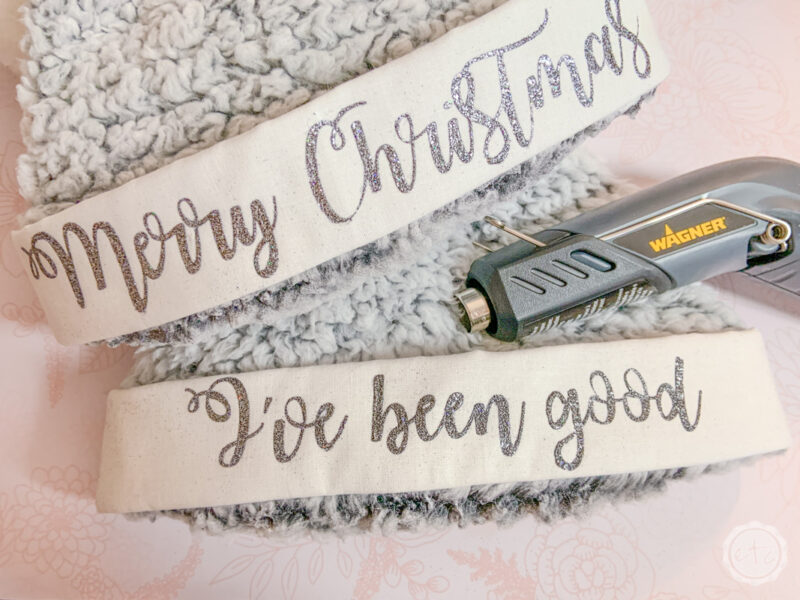
I just love how smooth and shiny the embossing is… and the edges are extra crisp and clear! Just how I like it!
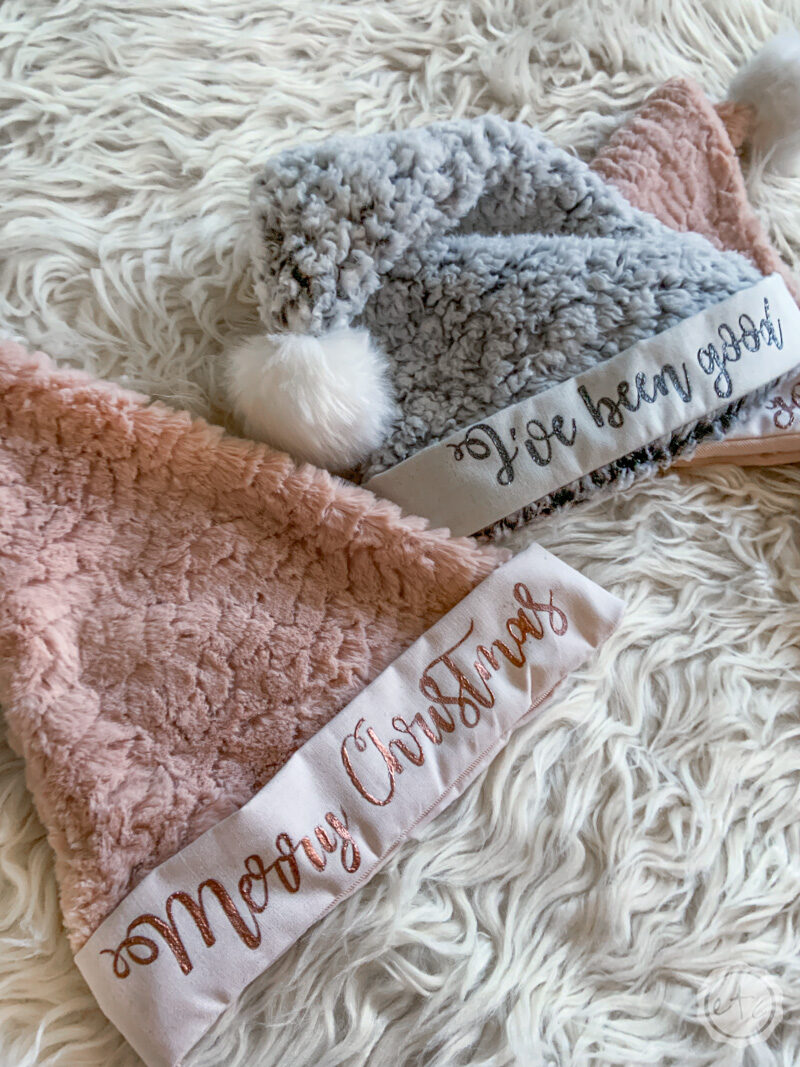
I decided to make 4 santa hats so that no one in my family has to fight over them… so we have 2 gray and 2 blush. I absolutely love how the gray ones turned out but the copper embossing on the blush hats is absolutely to die for. Check it out: