


So I may or may not be obsessed with uv resin at the moment. Y’all know I love my casting resin but the fact that I can make a resin piece in minutes and not have to wait hours to un-mold my piece is like literal gold. So after last weeks adorable resin acorn necklace I decided I needed to make a little resin fall branch necklace so that I can wear the two stacked together.
UV resin necklaces for the win!
This project is very similar to the acorn necklace project but our little branch is deeper so we’ll need to do a few layers.
Ready to get started?
Supplies:
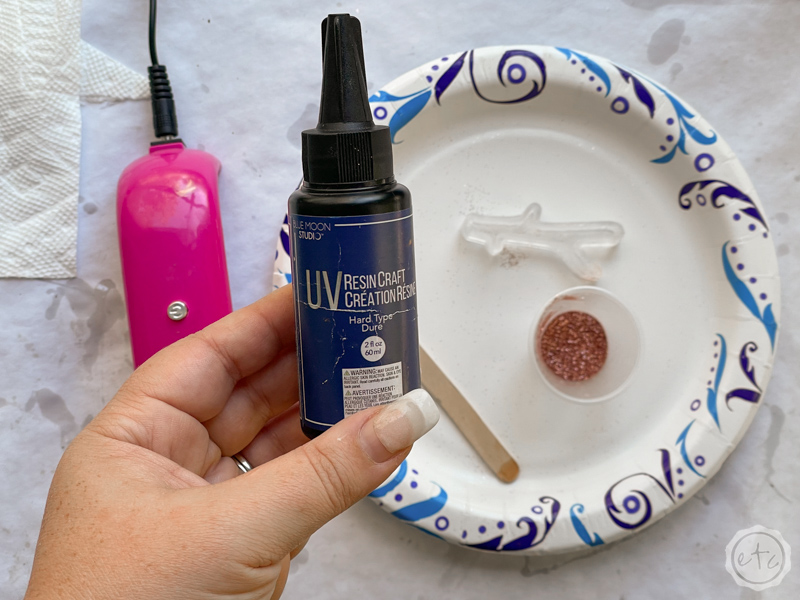
- UV Resin and Light
- Branch Silicone Mold
- Medicine Cups
- Fine Rose Gold Glitter
- Respirator/Mask (resin graded filters)
- Gloves
- Wagner HT400 Heat Gun
- Freezer Paper
- Necklace Supplies: Chain, Jump Rings, Lobster Clasp
- Jewelry Pliers
- Manual Jewelry Drill
Just getting started with resin? Download my free resin supply list and make your first project today!
Step 1: Mix Your Resin
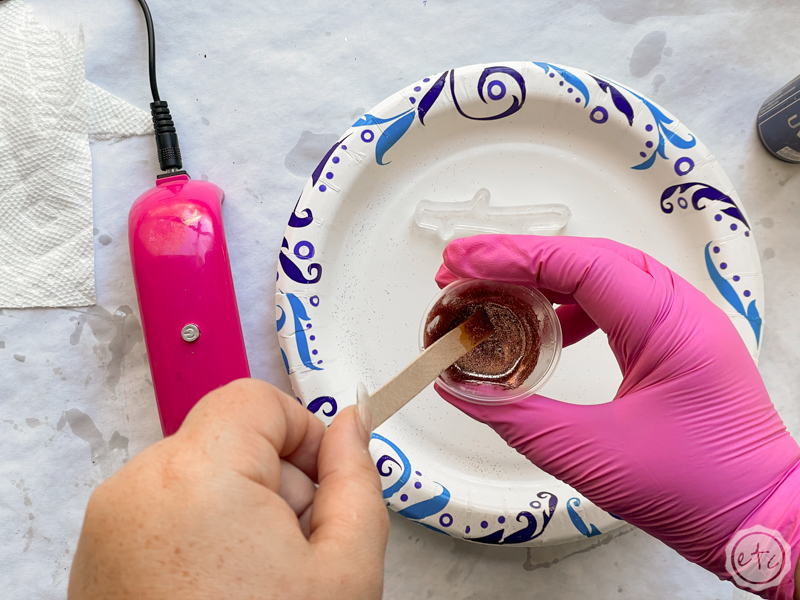
First we’re going to mix our resin! UV resin doesn’t need to be mixed for a certain amount of time… there’s no part a or part b. BUT if we want to color our resin we’ll need to mix in our colorant.
So if you’re looking for clear resin you can add it straight from the bottle to your piece. (I do a clear version of this little branch in the video above if you’d like to see the process sans mixing).
Since I want to make a rose gold glitter branch I’m going to squeeze some resin (about 10 ml) into a medicine cup and then add my glitter.
Make sure you’re wearing your protective gear here (a respirator and gloves)… UV resin is still resin!
Once your resin is mixed up and looks consistent we’ll move on.

Step 2: Pour Your Resin
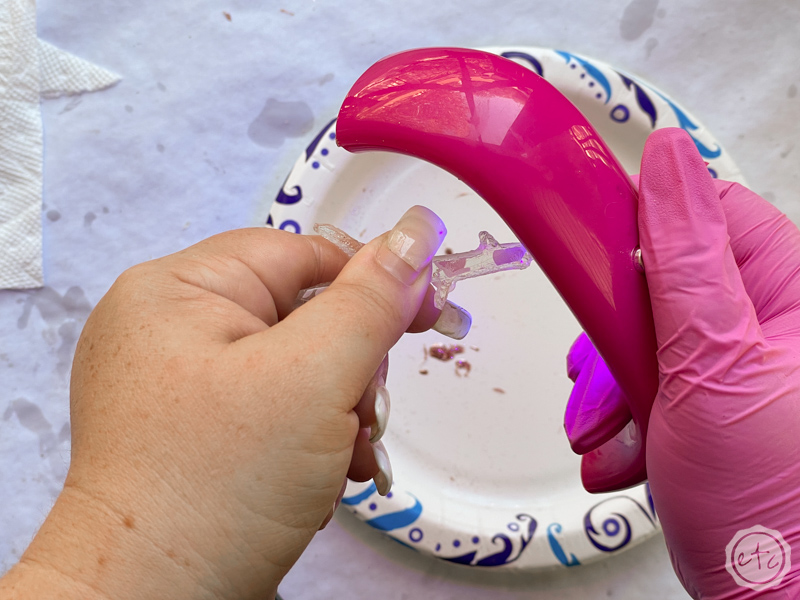
Now we’re ready to roll. Go ahead and pour your resin into your mold.
This little branch is tiny but it’s still deep for UV Resin. The clear sides allow the UV light to reach all the exterior sides to cure them but if we pour the entire branch in one shot our UV light will not be able to cure the middle.
Instead we’ll pour our little branch in layers.
Start by filling the little branch about a third of the way full (use your popsicle stick if you need help guiding it into the little fingers of the branch). Then we’ll cure the first layer.
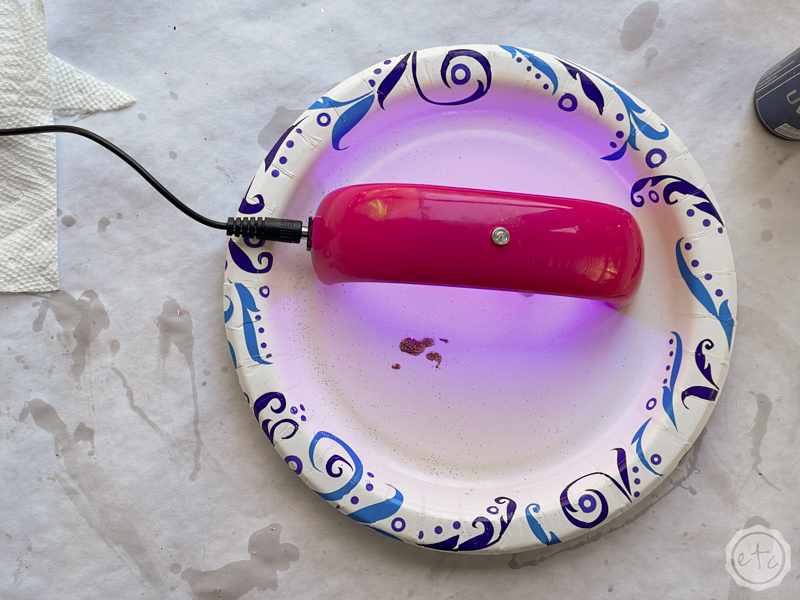
Step 3: Cure Your Resin
Alright… let’s cure that baby! Go ahead and place your UV light over your branch and hit the go button. My light goes for about 30 seconds but if your light doesn’t have a timer you’ll want to cure your piece for 10-30 seconds depending on the piece.
Just remember that your UV light will cure ALL UV resin… so move your little measuring cup of resin out of the way so we don’t cure our second and third layer of resin before we can even use them!
Once your 30 seconds is up repeat step 2 and 3 until your branch is all the way full.
Then you can pop your branch out of the mold (un-mold it if you will) and you’re good to go!

Step 4: Enjoy!
We’re all set! Now that your branches are cured you can use a jewelry drill (I have this manual one since I don’t use it that often… cost effective for the win!) to add jump rings and turn your little resin branch into a cute fall branch necklace.
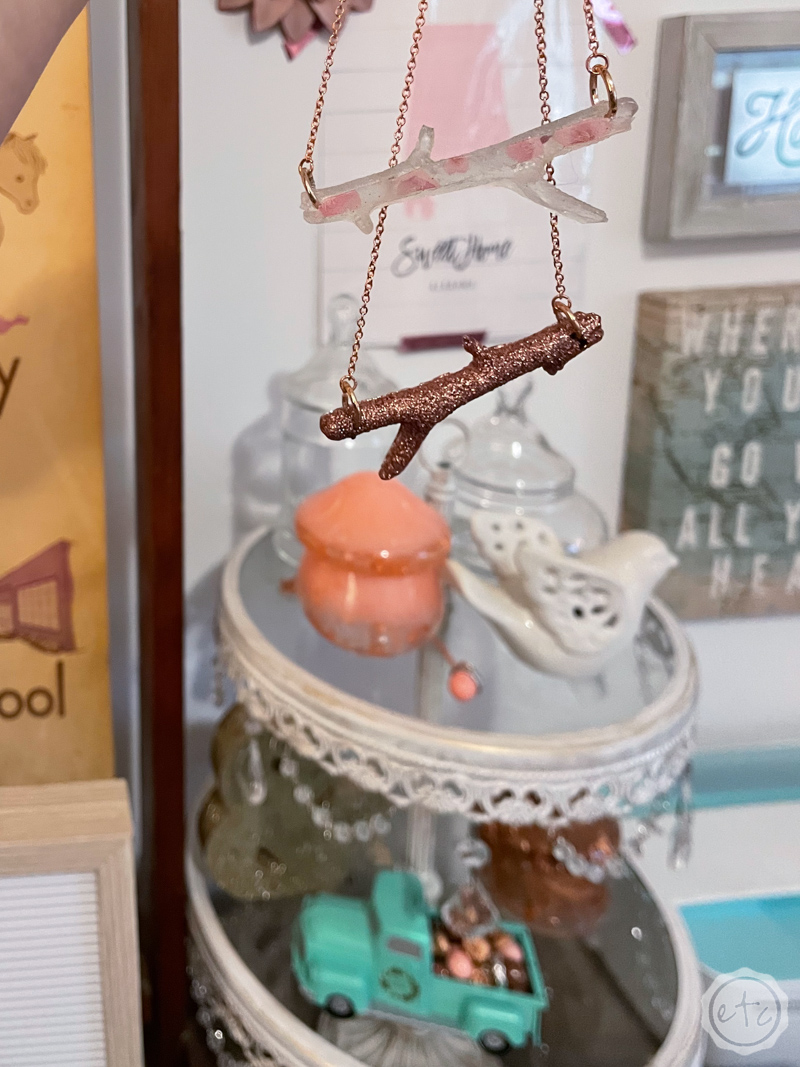
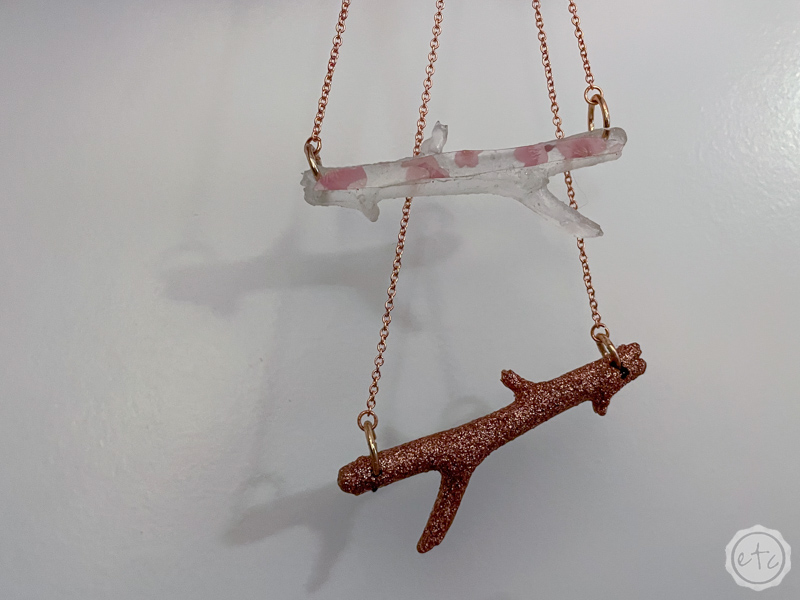
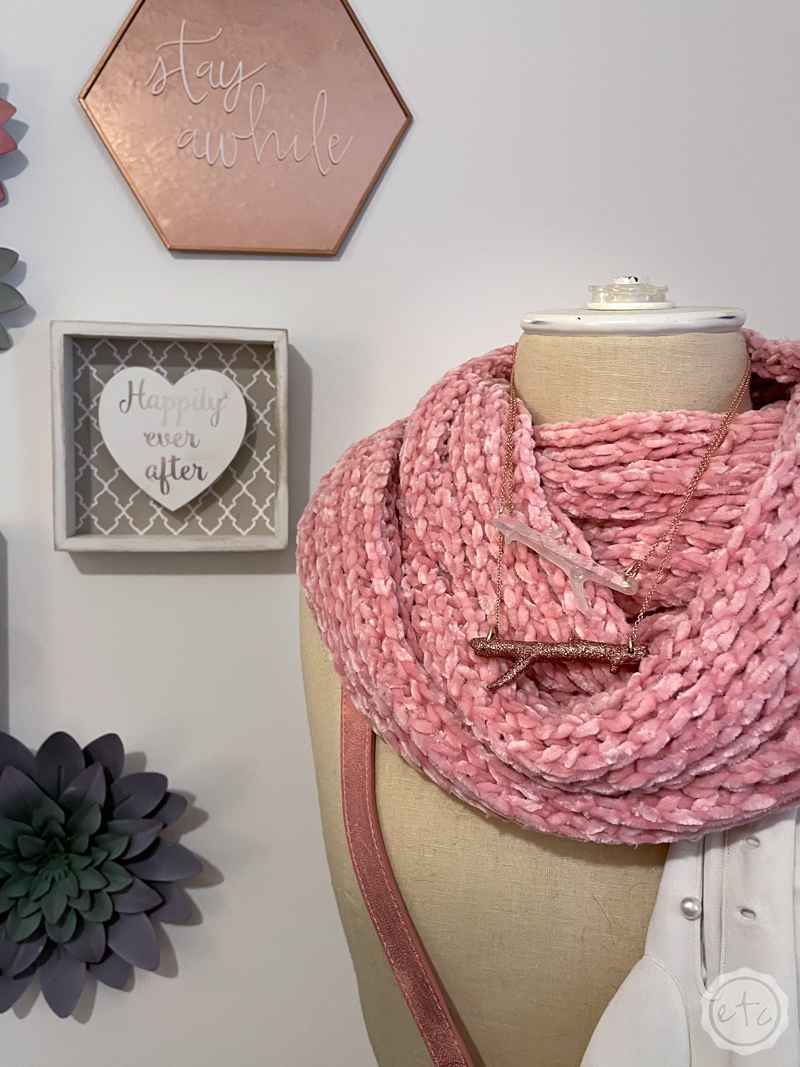
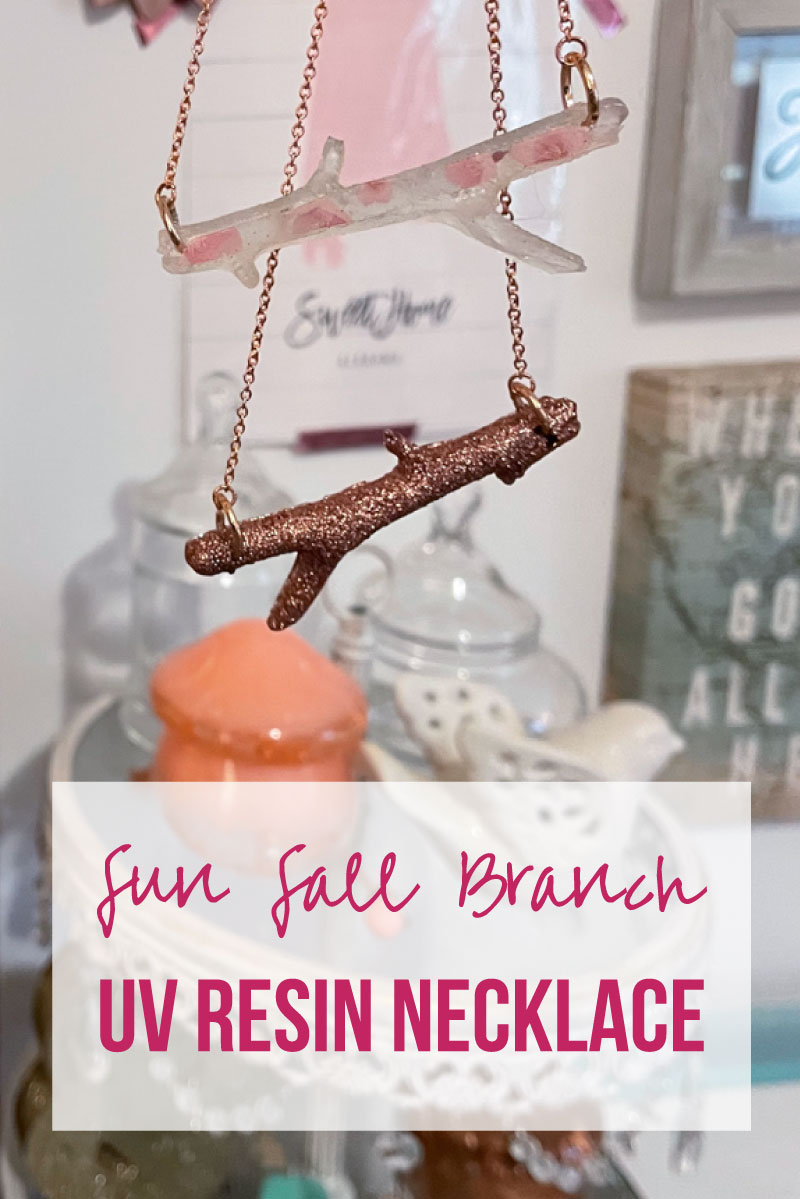
I love love love how these little branches turned out… I made two and the rose gold glitter version looks perfect stacked with my tiny acorn.
The other one is clear with a cherry blossom pattern so while it’s cute up close it’s harder to see at a distance.
I think the rose gold glitter one is my favorite but don’t tell cherry… you’ll hurt her feelings.
Let’s take a closer look!

Looking for more resin projects? I’ve got you covered!


Leave a Reply