


It’s time for another fun Wedding project that you can make with your Cricut! Today we’re going to take an antique window and up-cycle it into a pretty Seating Chart for your reception… this is a fun project that is super simple.
The only skills involved are cutting vinyl and weeding!
Perfect for beginner Cricut crafters!
Want to see how I updated this little window with a resin backdrop? Pouring resin on the back of each window pane really transformed this piece from pretty to downright jaw-dropping! It’s an easy resin makeover and I’ll walk you through all the steps. Check out the Antique Window Resin Makeover here.
Supplies:
- Cricut Maker
- Fine-Point Cutting Blade
- Standard Cutting Mat (that’s the green one! Although I used a fabric mat since it was on hand!)
- Rose Gold Adhesive Foil
- Transfer Tape
- Antique Window 6 Pane Window
- Weeding Tool
- XL Scraper Tool
- Cricut SVG’s (FREE at the bottom of this post)
Ready to take the leap but not sure which machine is right for you? Check out my Explore Air 2 and Maker comparison before pulling the trigger. I go over the pro’s and con’s of each machine and even have an easy to read check list of each machine’s features so you can decided which cutting machine is perfect for you.
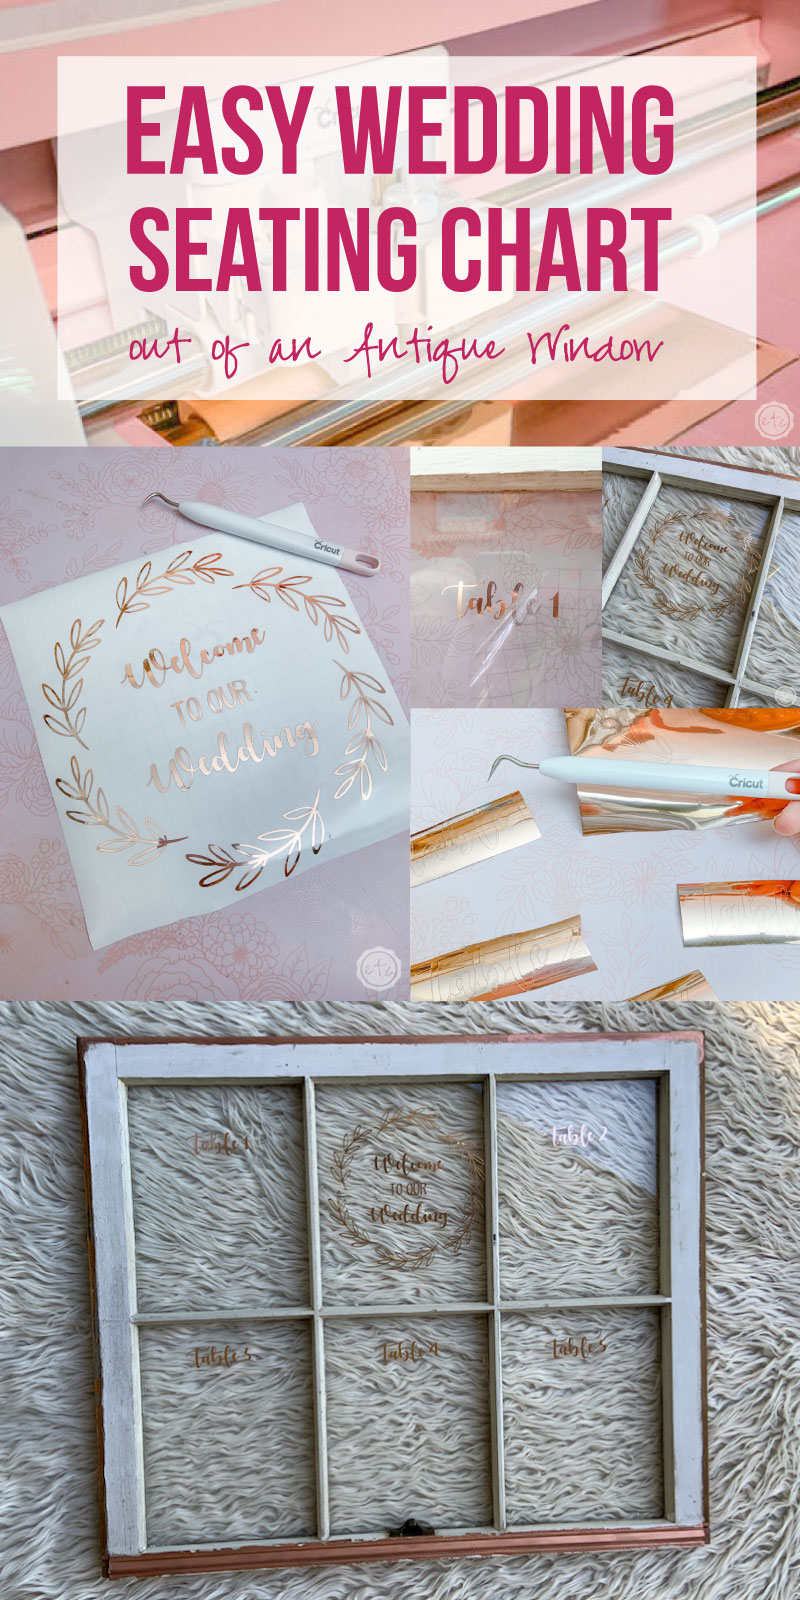
Step 1: Cut your SVG’s
Ready to get started? Once you’ve downloaded your SVG’s and uploaded them to Cricut Design Space (you can follow this tutorial if you’re not sure how) it’s time to cut your vinyl… or should I say adhesive foil?
This adhesive foil is soooo pretty and looks perfect as a rose gold touch for any wedding. Of course, I’m a sucker for anything rose gold so my vote may not count… either way you can always use a different color vinyl or adhesive foil to match your wedding colors!
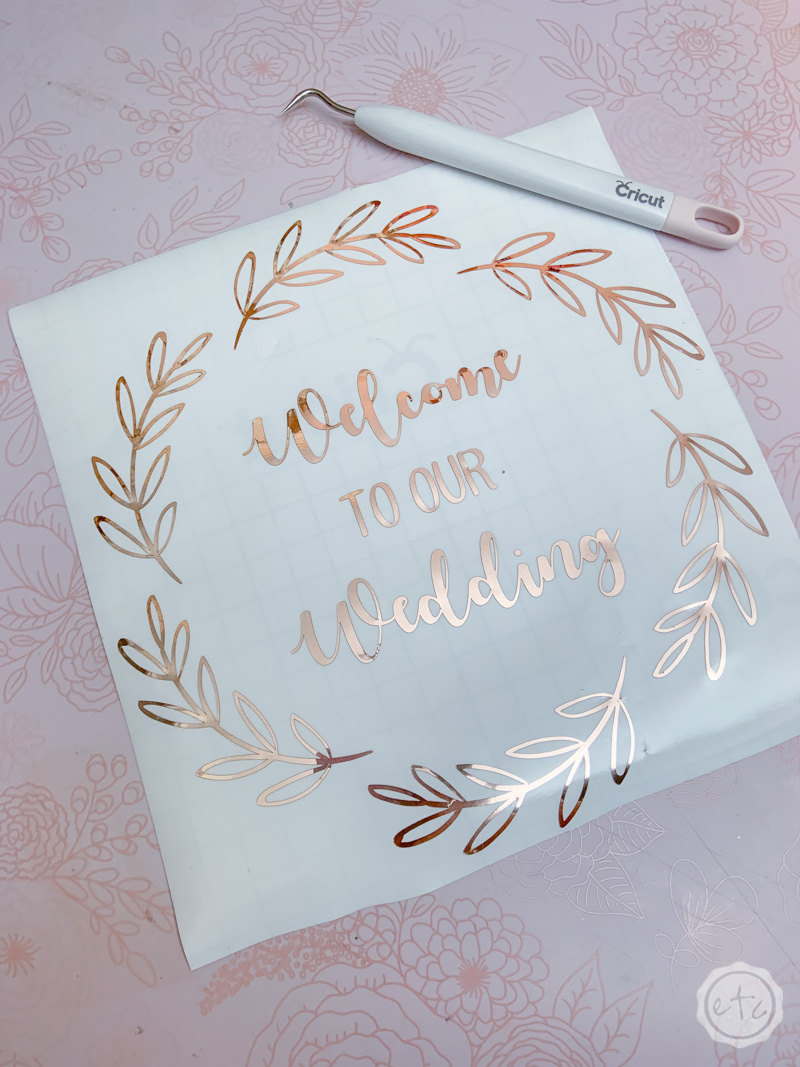
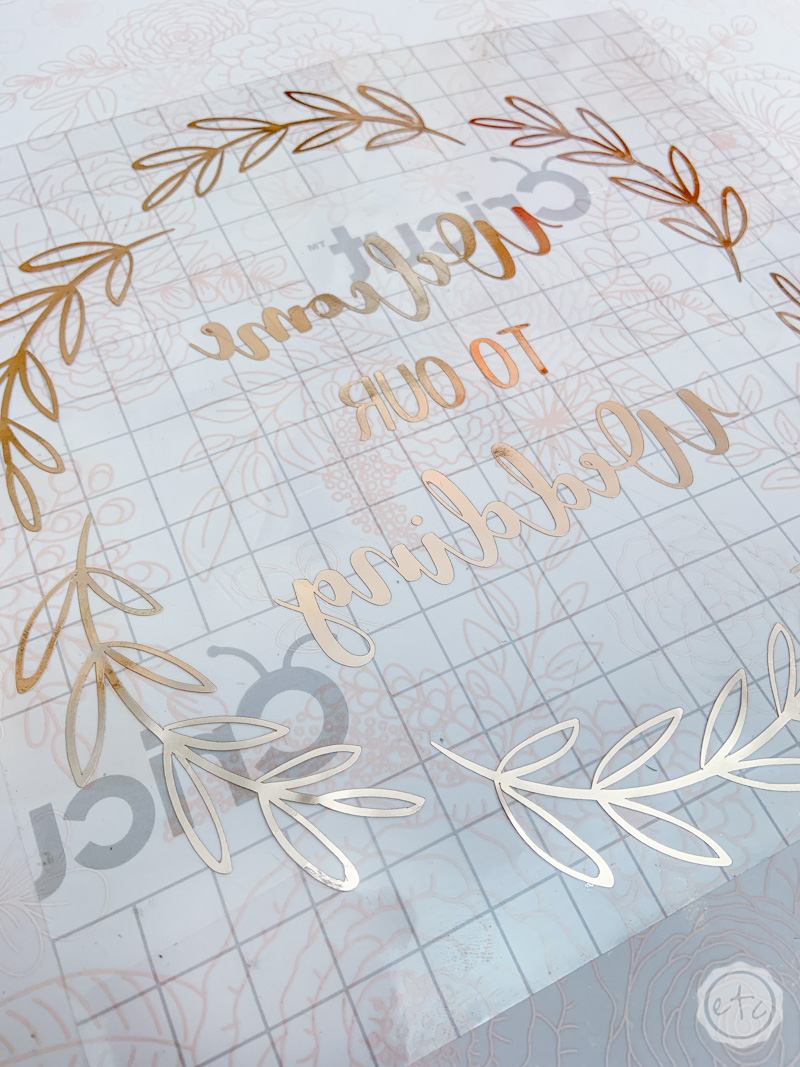
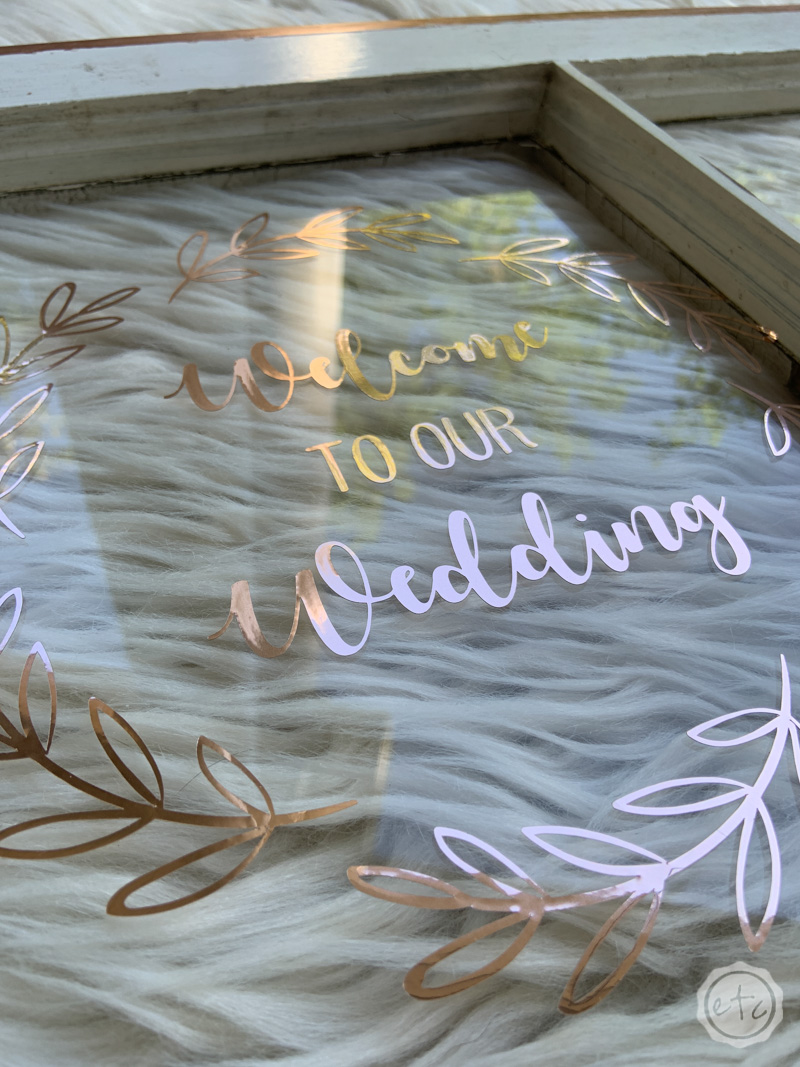
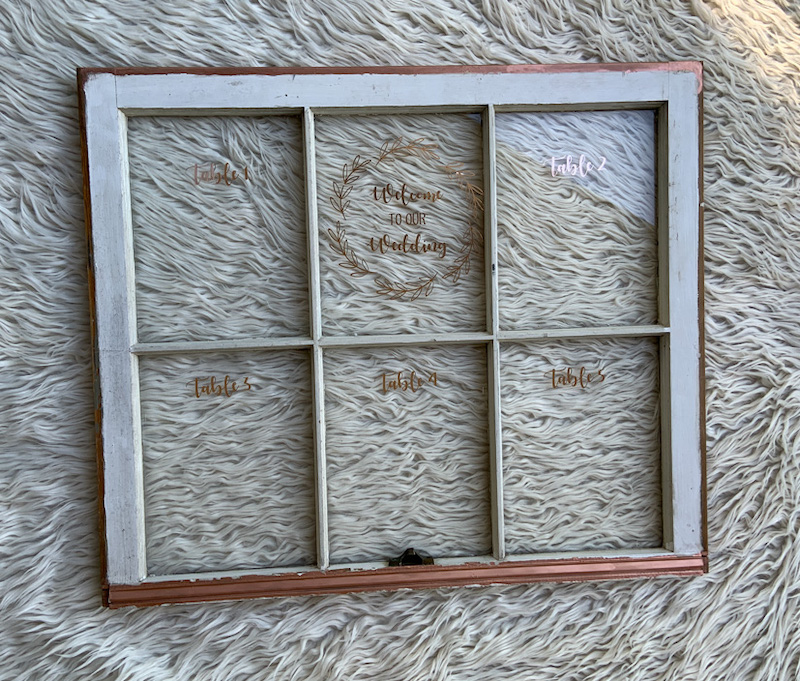
Once your SVG is uploaded into Cricut Design space you’ll want to make sure each of your sections is welded together. You’ll have 6 sections… one for each window pane. The large circular wreath and the words inside are one section and then the table numbers are the other five… easy peezy!
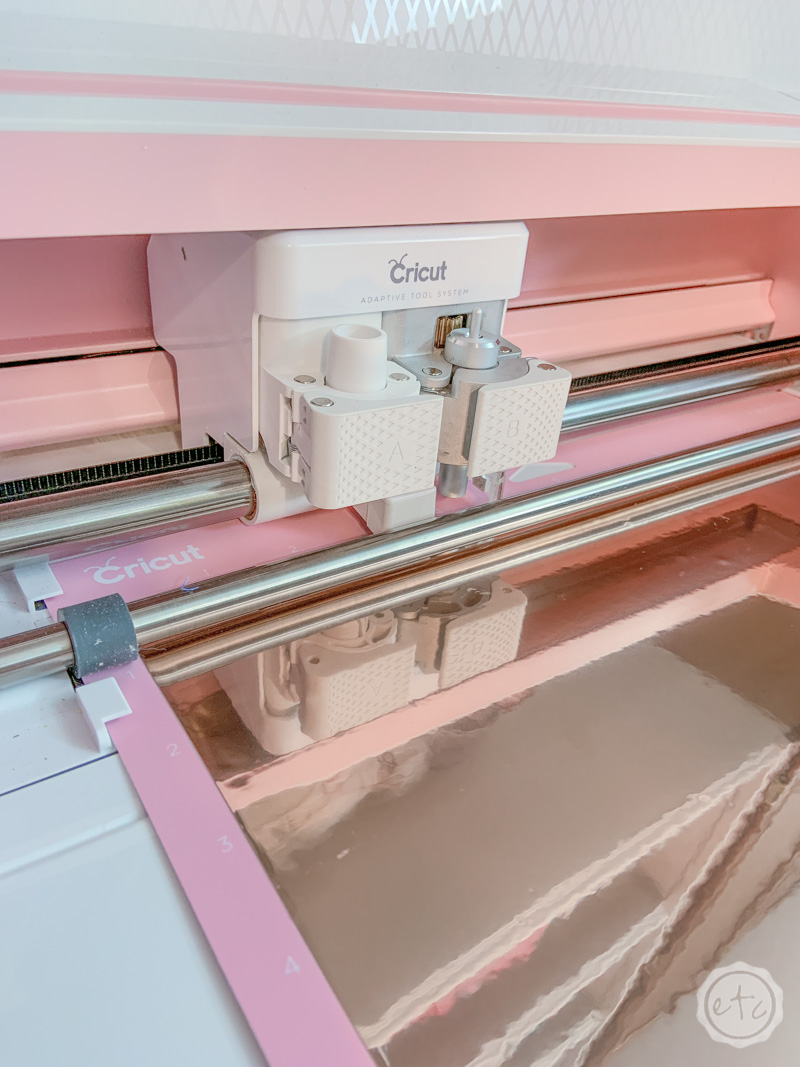
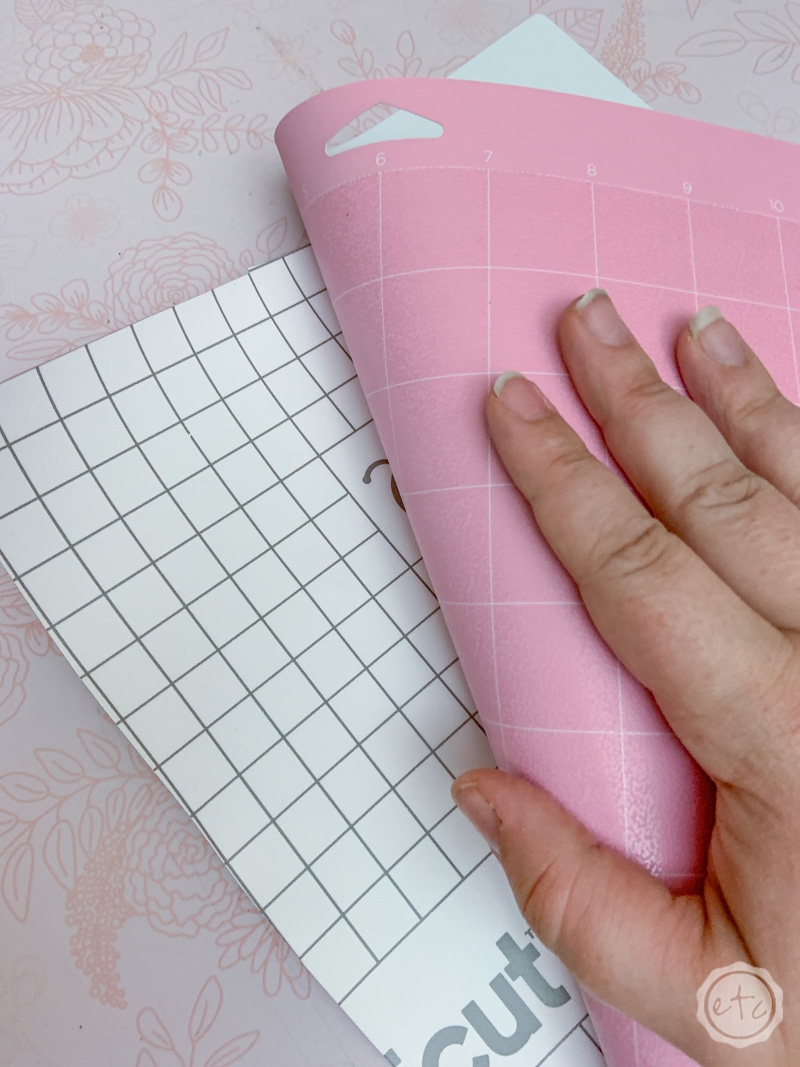
Now that everything is welded together properly you can hit “make it”, load your foil onto a cutting mat, pop in your fine point blade and hit go!
Even though this is a large window our six sections are pretty small (excluding the large wreath!) so the cutting for this project is pretty fast. You’ll be done in a jiffy!
Then you can remove the foil from the cutting mat (make sure to curl the mat away from the foil so that the foil doesn’t curl!) and you’re ready for the next step.
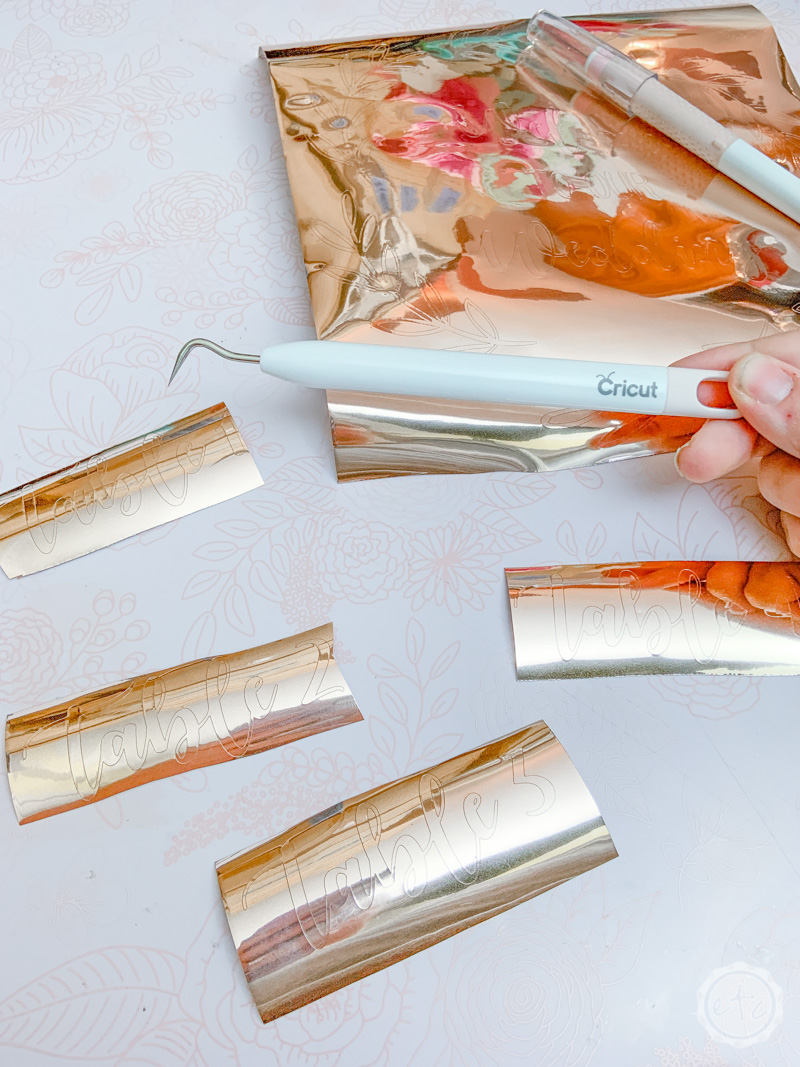
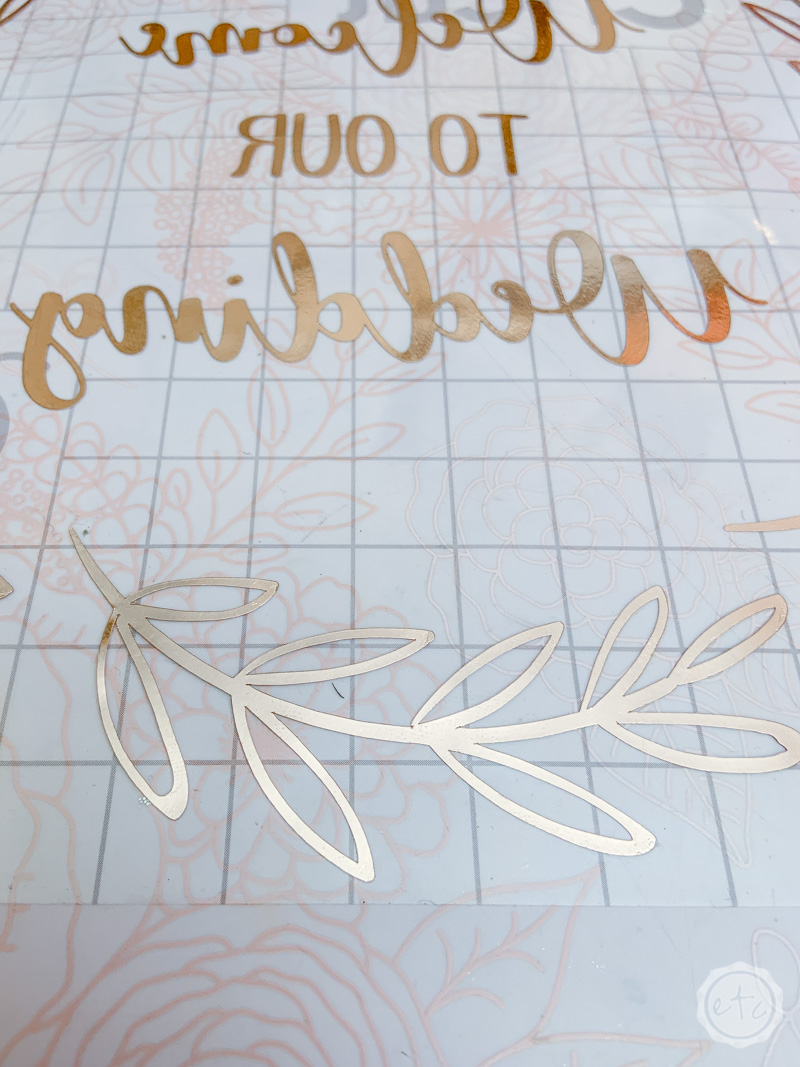
Step 2: Weed your Vinyl
Onto the fun part… weeding all those little tiny pieces. The table numbers themselves are pretty easy to weed (and the weeding tool makes quick work of it!) but let’s be honest.
That wreath is a little tedious to weed.
Not difficult… just tedious. Luckily it’s not too big of a piece (even though it’s the largest piece on the project) so it goes pretty quickly.
And it’s definitely worth it!
In case you’re new to cricut and completely lost weeding is what we call removing all the little negative bits and bobs between the letters… the inside of the o, the space inside the e. Any foil that you don’t need. You’ll use your sharp little weeding tool to lift these extra foil pieces right out.
Volia!
Beautiful darling… and just like that we’re onto the next step!

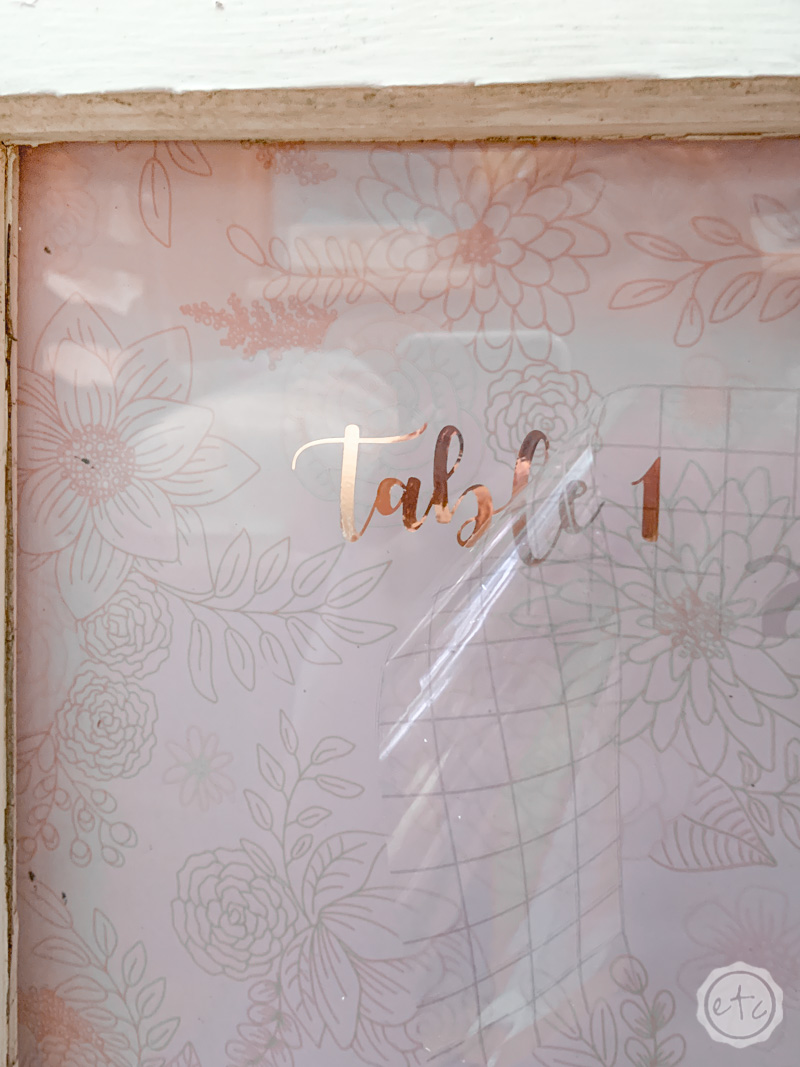
Step 3: Transfer your Design
Go ahead and cut a piece of transfer tape that will go over the entire wreath design… and then use a smoothing tool to firmly attach the transfer tape over your foiled design.
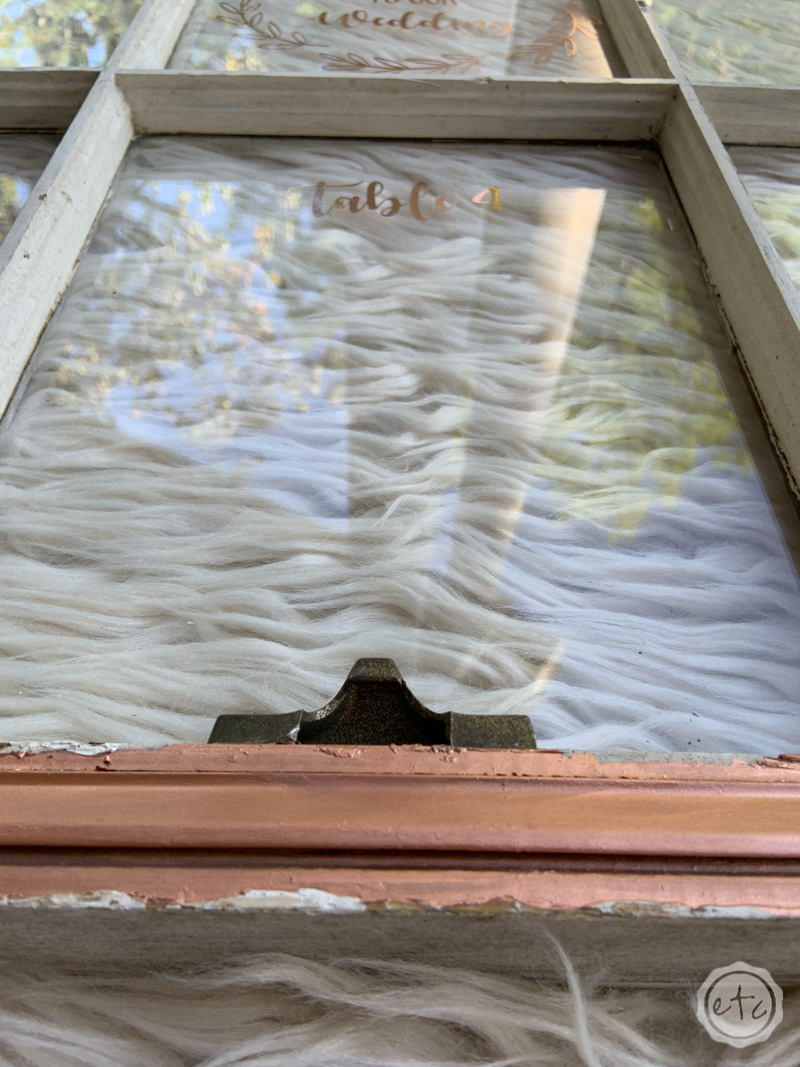
Then peel up the transfer tape (and the design!) leaving the white backing behind. Now you can carefully place your design in the top center window pane (using the grid on the transfer tape to make sure it’s straight) and smooth the design into place.
Since this little design is larger than a single word make sure to push it down in the middle first and then carefully smooth the design out towards the edges. That way you won’t have any bubbles in your design and the foil will lay smoothly.
Once you have everything smoothed down and into place you can use your smoothing tool to press the entire design down firmly. You want a good bond between the foil and the glass of you window so that it won’t peel off in the future.
Once you’re done you can go ahead and peel up the transfer tape leaving the foil behind! Isn’t it lovely?
Now you’ll repeat the process for the other 5 window panes and the table numbers that go in those panes.
Little tip of the trade… you don’t have to cut new transfer tape each time but can use the same transfer tape a few times before you need to get rid of it. Since our large design is so much bigger than our table numbers I simply cut the transfer tape from the large design into strips and used that for the table numbers.
Saving a few bucks baby!
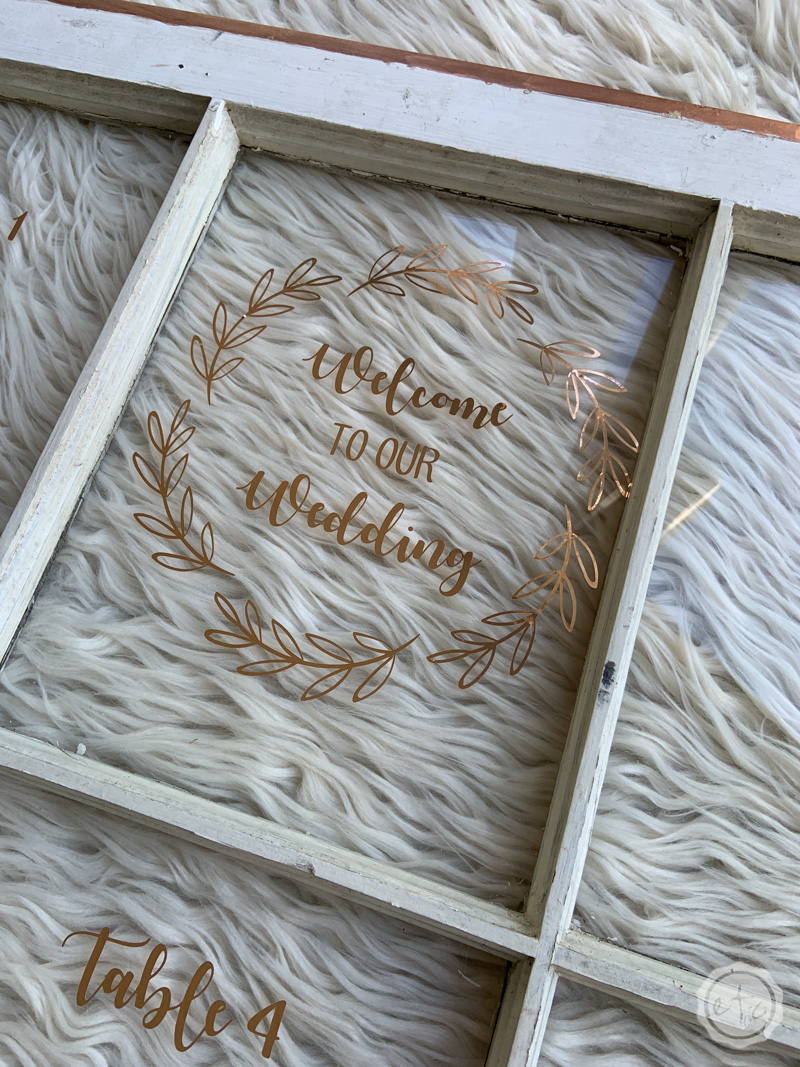
Now you’re done! I absolutely LOVE how this turned out!
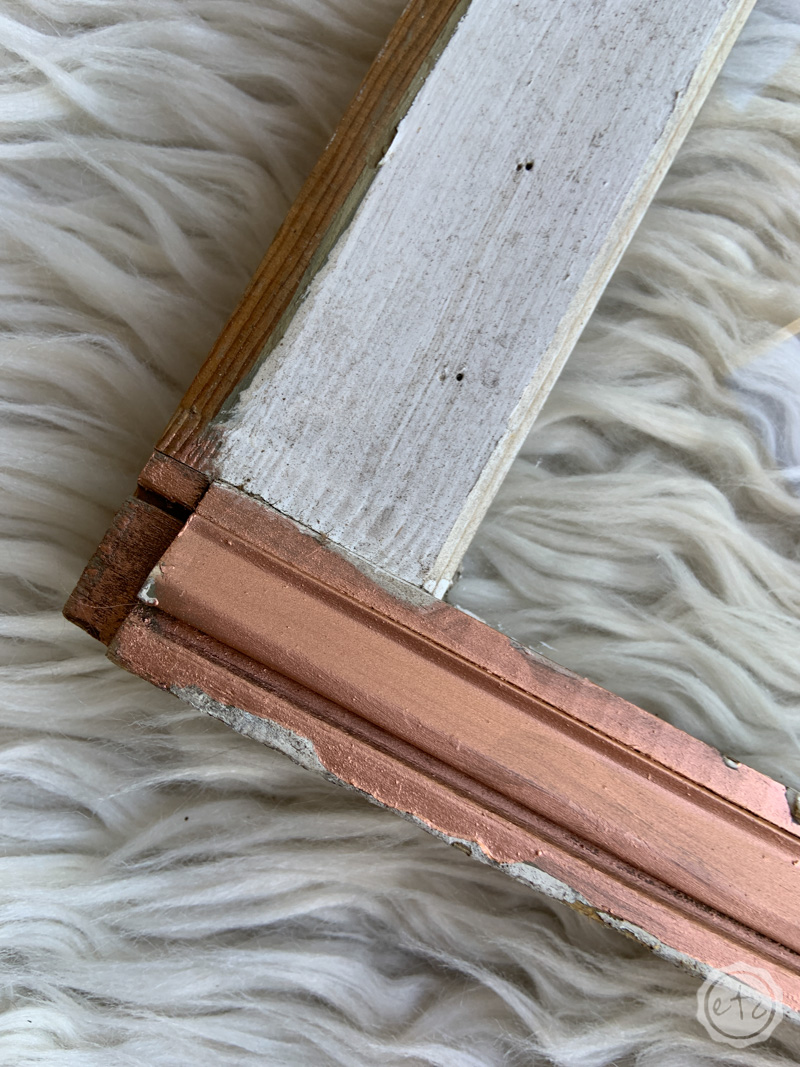
And the old patina of the window looks so good with the shiny metallic of the adhesive foil…. I love the contrast! I wanted a little more though so I grabbed a little bit of my copper oil based testers paint and painted over a few edges of the frame… it gives it just a bit more pop!
Although if you really want pop you should check out this tutorial on adding a pretty blush and rose gold resin backdrop to these window panes!
At this point you have a few options: you can keep cutting out names for each of the guests at your tables and transfer them to the window. Or you can print little cards with your guests names and attach those to each pane (I’ve seen the cards attached with double sided tape on the back or even modge podge) OR you can go for broke and hand write all of your guests names on the window pane with a permanent marker (or a dry erase marker! Then you can move those suckers around!).
Either way you have plenty of options.


Looking for more wedding projects you can make with your Cricut? Check these out!


Leave a Reply