
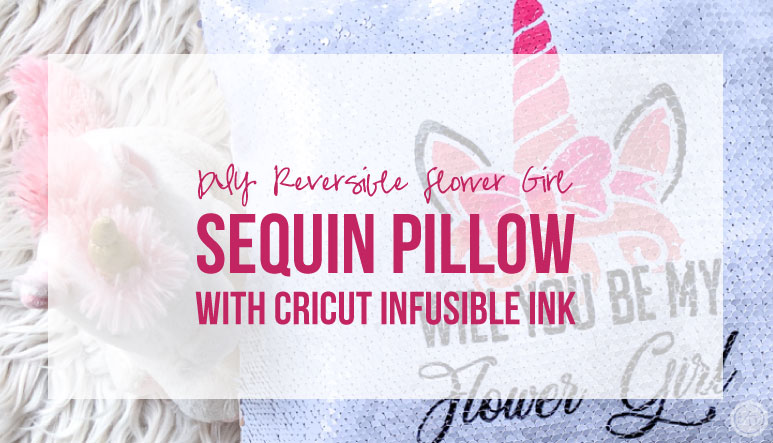


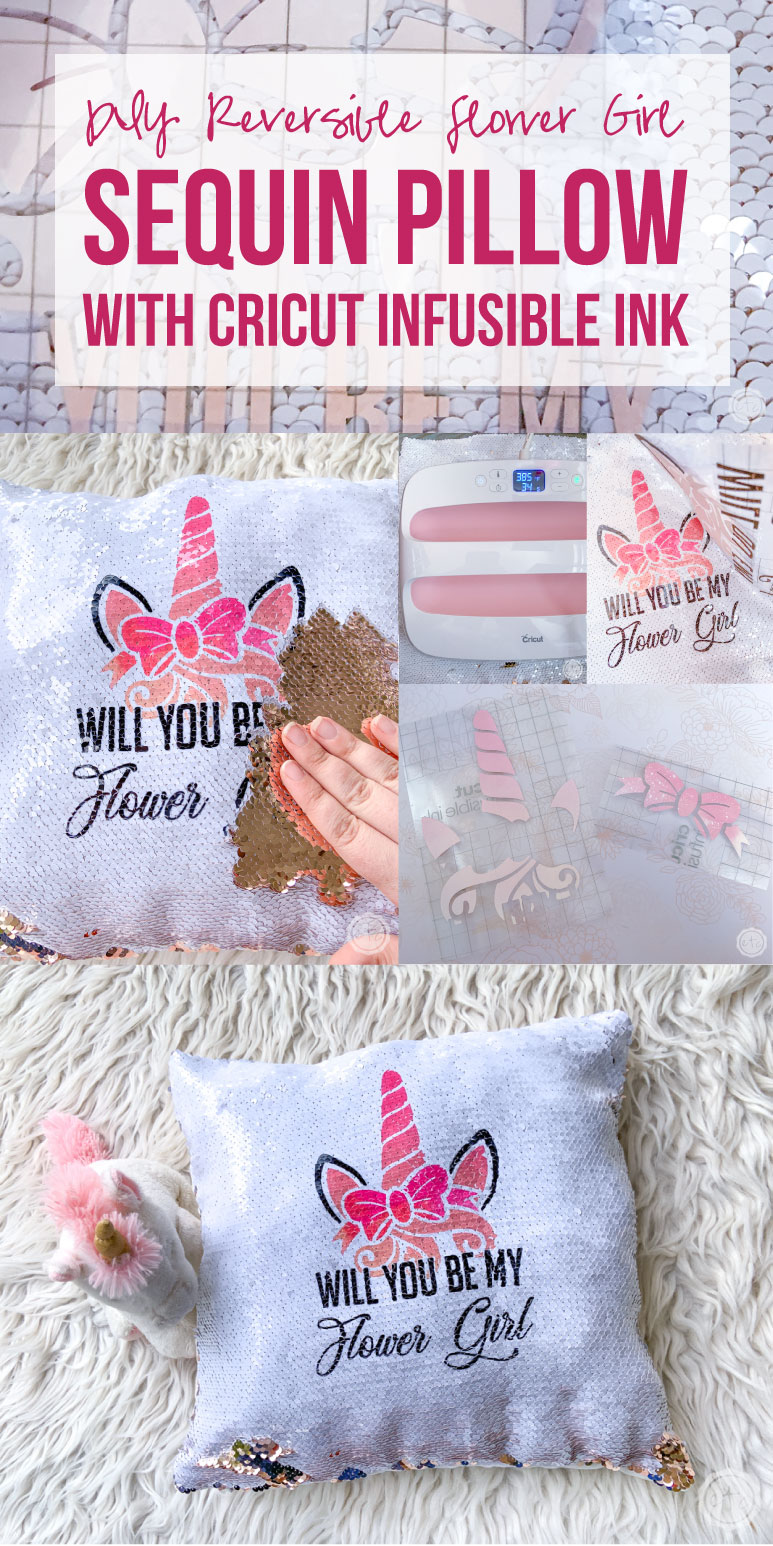
Ready for a quick and easy wedding craft today? I am absolutely in love with all of the bridesmaid boxes (the cute ones where you ask your besties to be your bridesmaids?) but what about the littlest bridesmaids… the flower girl?
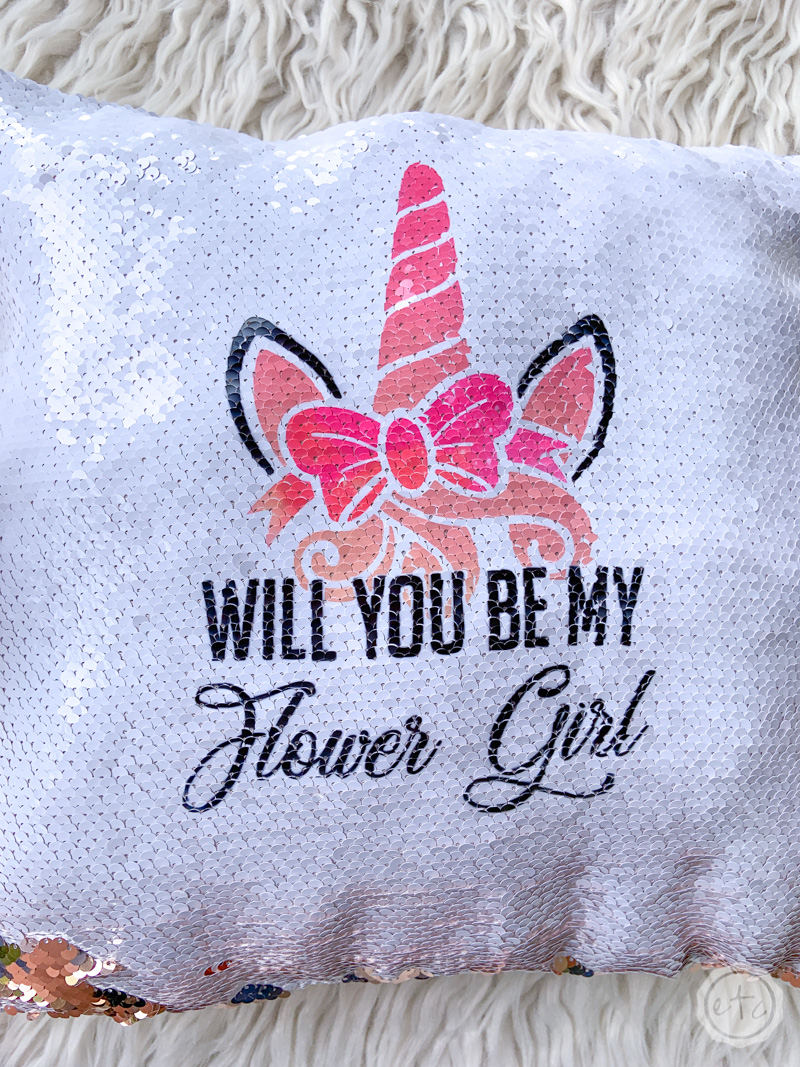
If you haven’t seen flower girl proposal gifts then you are missing out… there are some adorable options! Of course, my first thought was “I could make this!” So I thought I’d make a cute little “Will you be my Flower Girl” pillow for our smallest member of the bridal party.
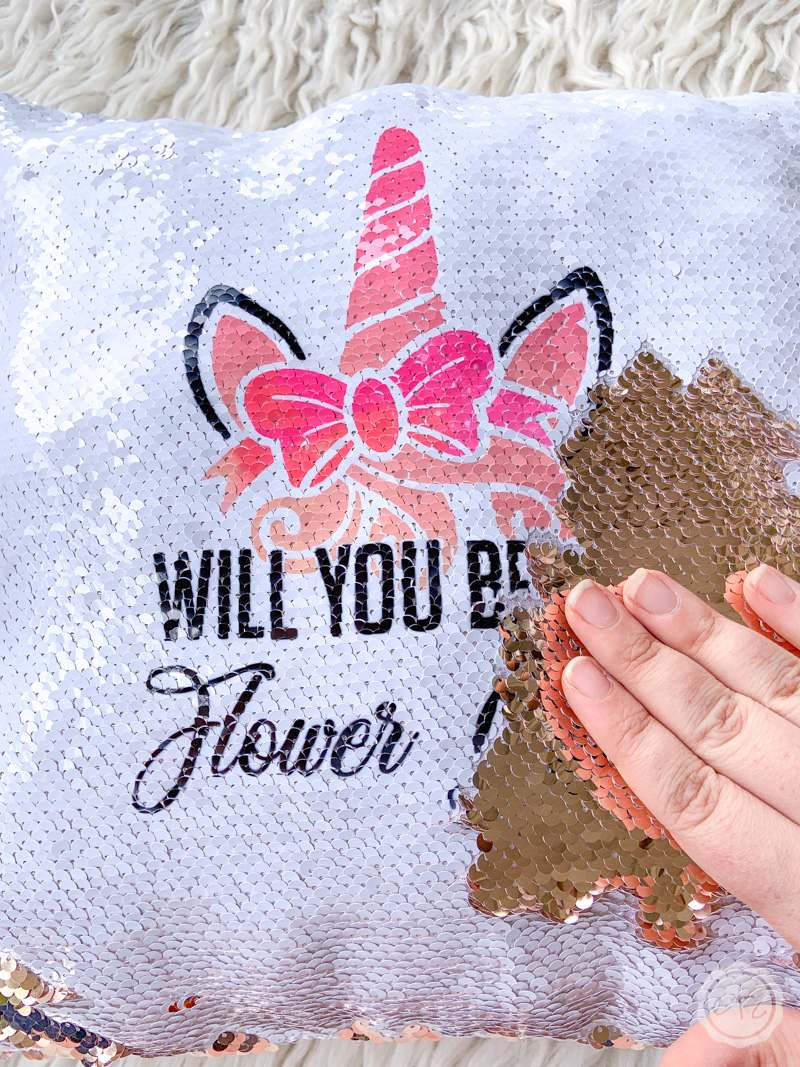
This little pillow is even more magical since it is a reversible sequin pillow… which all little girls know are magic.
The trick here is using a sublimation sequin pillow as our crafting blank and Cricut Infusible Ink to make this entire project quick and easy. No fancy sublimation printers or worrying about what sublimation means (it’s kind of a scary word right?!). Cricut infusible ink will work with Cricut specific blanks and sublimation blanks which means we’re good to go… next stop awesome DIY sequin pillows!
This entire project is so much fun and it will only take about 20 minutes, let’s get started.
Supplies:
- Cricut Maker (You could also use an Explore Air 2 or the Cricut Joy)
- SVG Cut Files (free at the bottom of this post!)
- Fine-Point Cutting Blade
- Standard Cutting Mat (that’s the green one!)
- Cricut Easy Press 12 x 10
- Cricut Easy Press Mat
- Cricut Infusible Ink: Pink Lemonade Transfer Sheet & Black Transfer Sheet
- Heat Resistant Tape
- Sequin Pillow Sublimation Blank
- Stuffing or Pillow Form
Getting Married? Congratulations! Organize your entire wedding the stress free way with my FREE 67 page printable Wedding Binder.
Ready to take the leap but not sure which machine is right for you? Check out my Explore Air 2 and Maker comparison before pulling the trigger. I go over the pro’s and con’s of each machine and even have an easy to read check list of each machine’s features so you can decided which cutting machine is perfect for you.
Step 1: Cut Infusible Ink
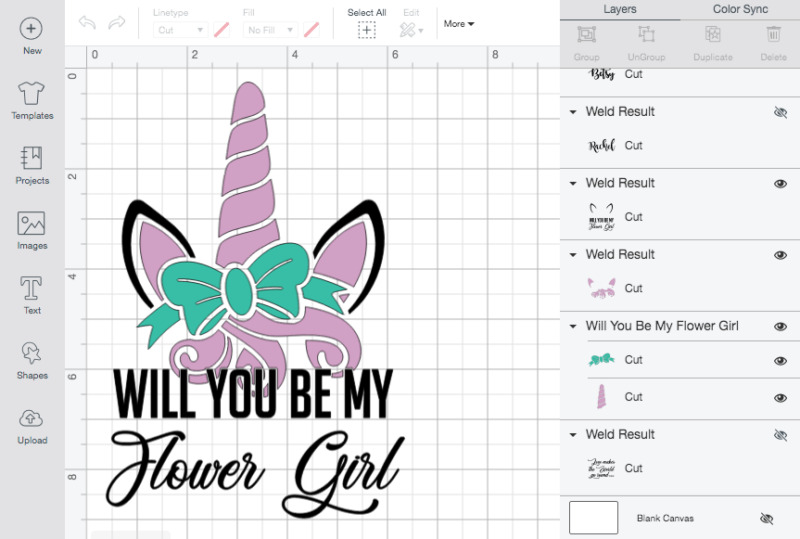
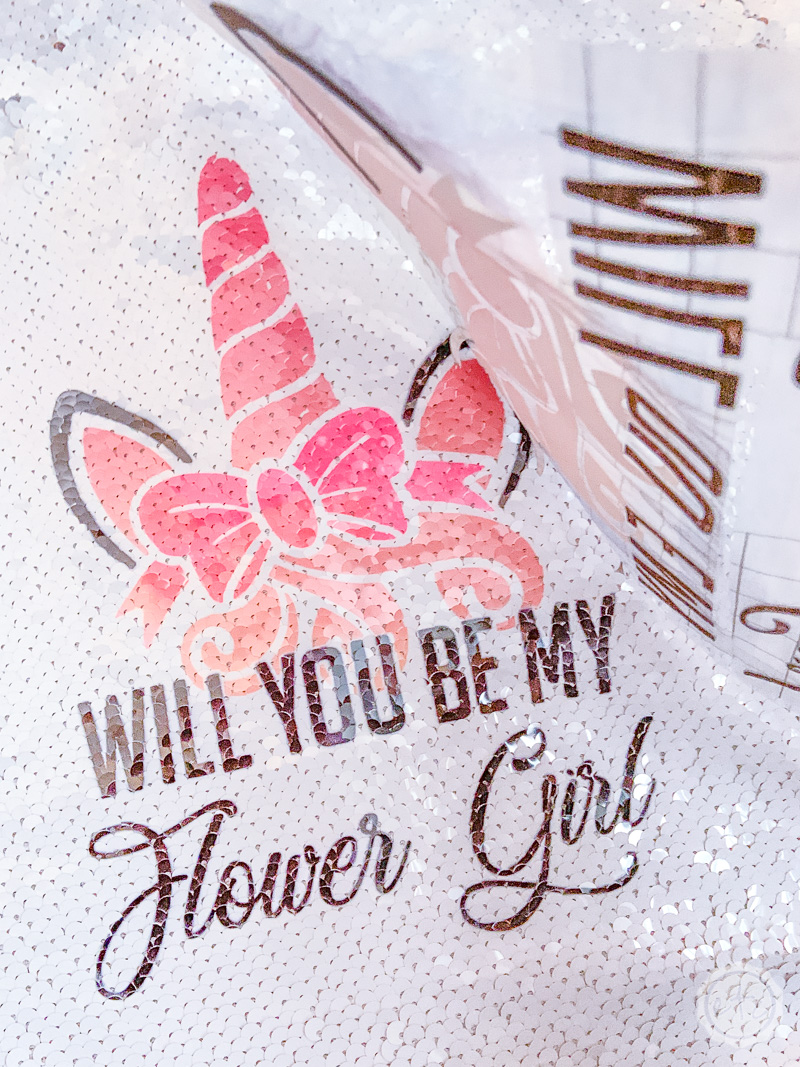
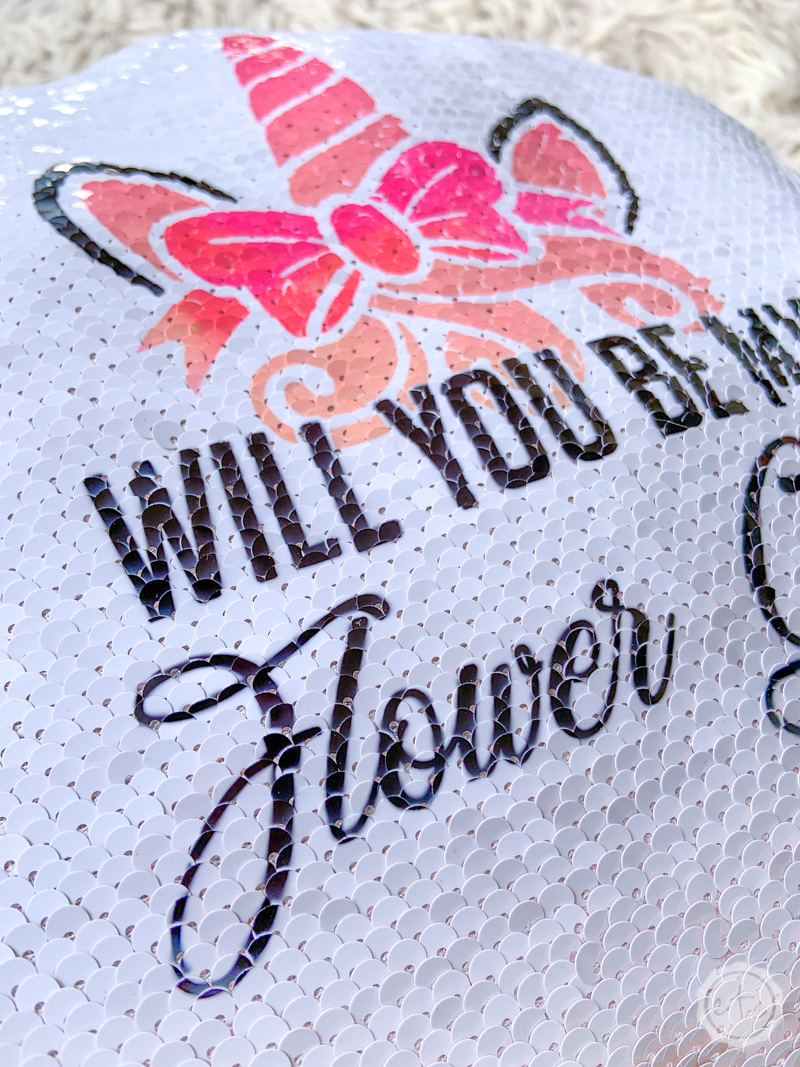
Alright y’all ready to get started? Infusible Ink comes 2 ways: in transfer sheets like these or in pens. For this project I picked the Pink Lemonade Infusible Ink transfer sheet set… it has 2 coordinating patterns and we’ll use one for the unicorns bow and one for the horn/ears/hair. The words and the tops of the ears we’ll do with a black infusible ink sheet so that they’ll be easy to read!
If you’ve never used Infusible Ink here’s a few things you need to know. Inside the box everything will be in a black bag, that’s because Infusible Ink is easily damaged by long term sun exposure (like storing these in a window). It’s fine once it’s fused to your pillow but you want to keep the sheets in the black bag before you use then so they don’t get faded by the sun.
The black bag also helps protect them from moisture… these are INK sheets so if you get any water on them they will smear. Just make sure to put any extras back in the bag and use clean (dry!) hands to handle the sheets and you’ll be fine.
The other thing you may notice is that the actual sheets are pretty dull compared to the color on the box. That’s ok. Once you’ve applied heat the color will pop!
Yet another reason you don’t want to store these babies in a window where the sun can get to them!
Ready to rock?
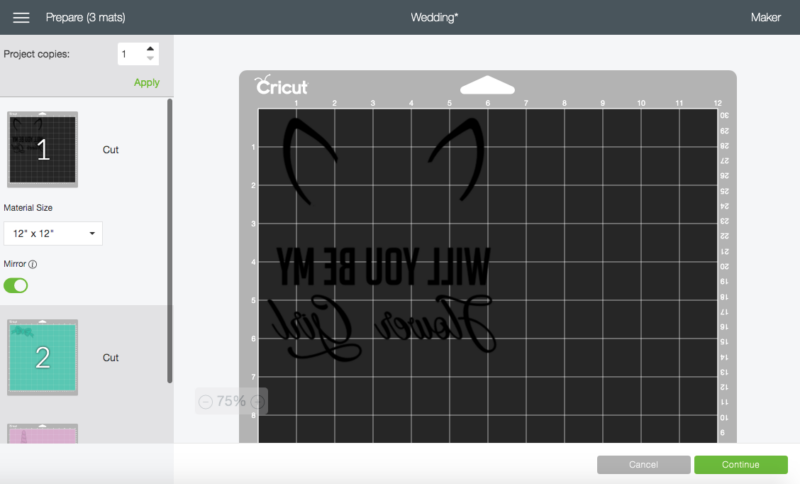
Go ahead and place your infusible ink sheet on your cutting mat and cut the SVG file with your Cricut Maker.
Design Space will remind you to load the ink sheet ink side up and to mirror your images before you cut (so that they’re legible on your pillow).
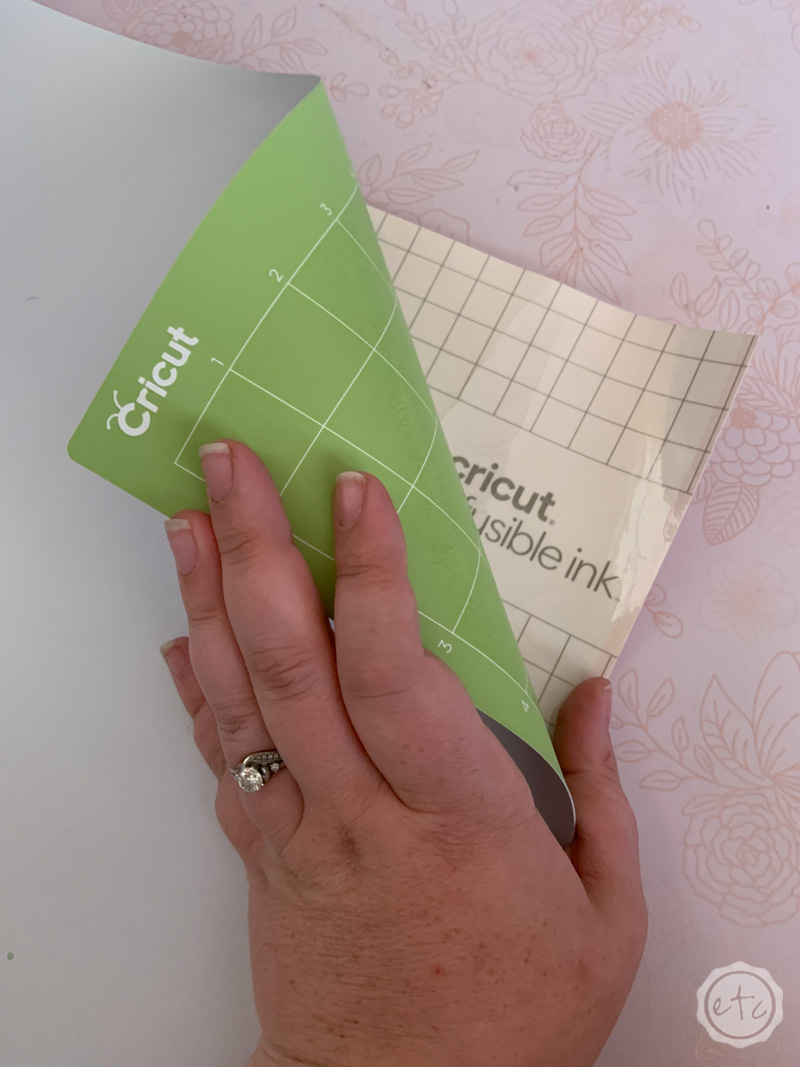
Once the cut is finished go ahead and take the infusible ink sheet off the cutting mat. You don’t want to curl your infusible ink sheet so instead place it face down on a clean surface and curl the mat away from the infusible ink sheet to remove it.
Easy peezy!
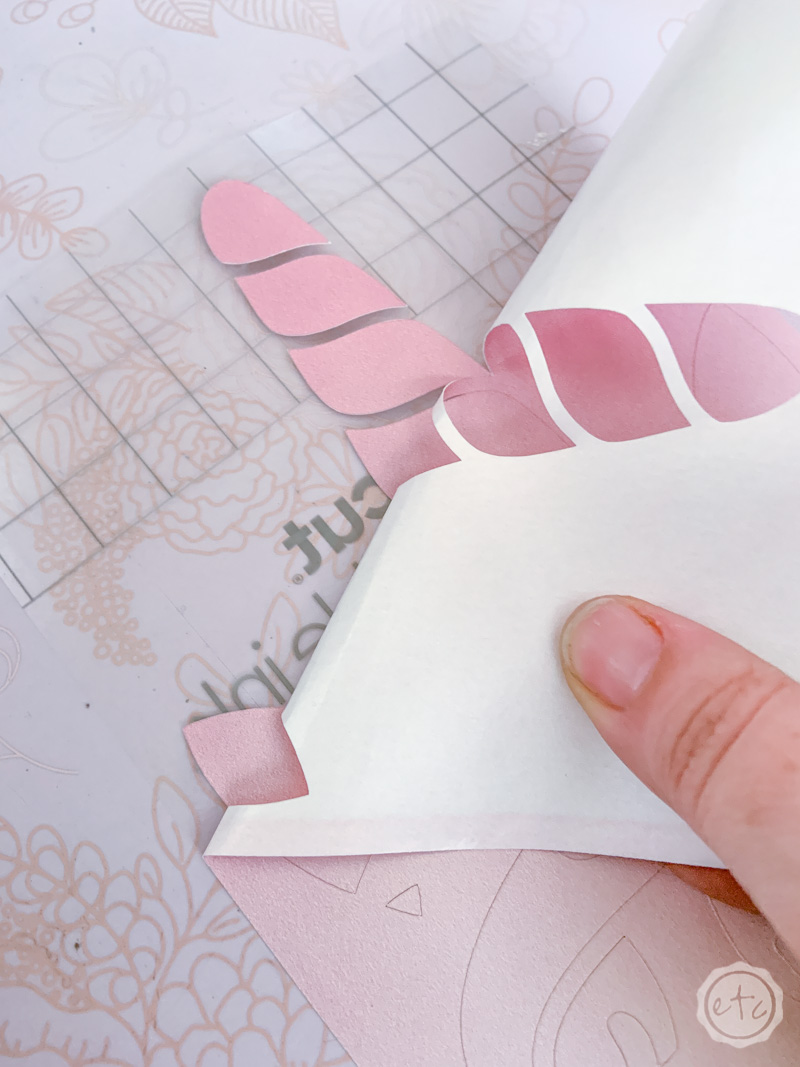
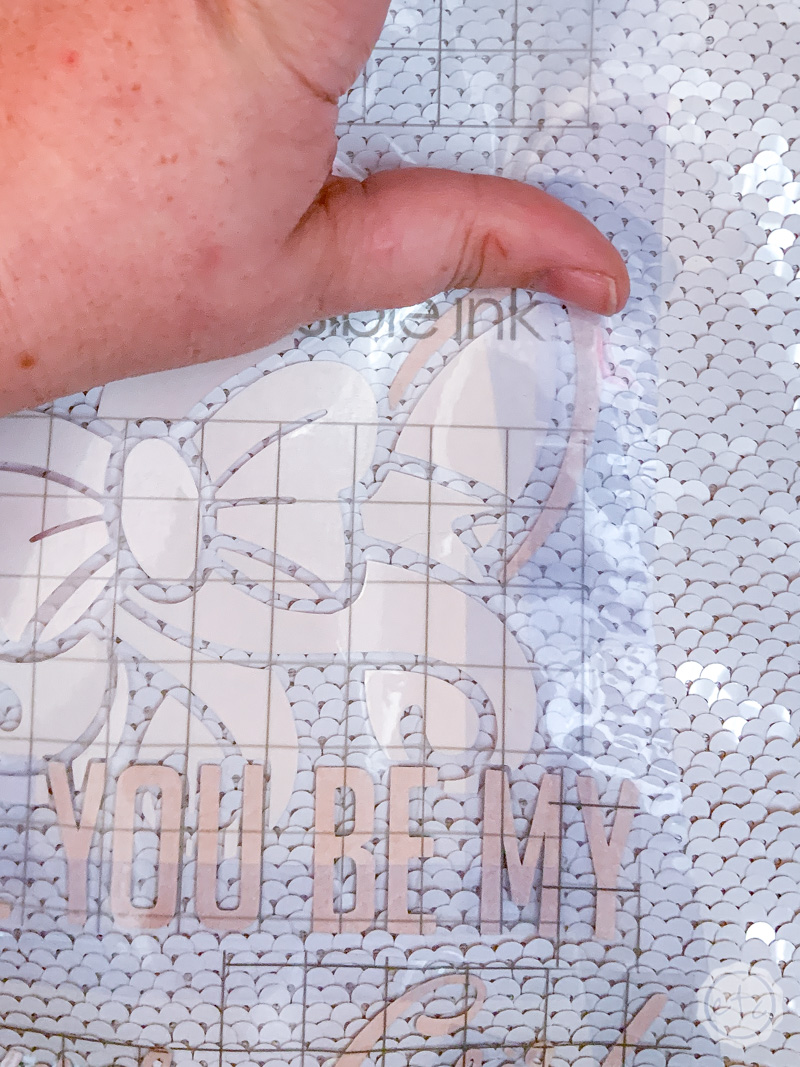
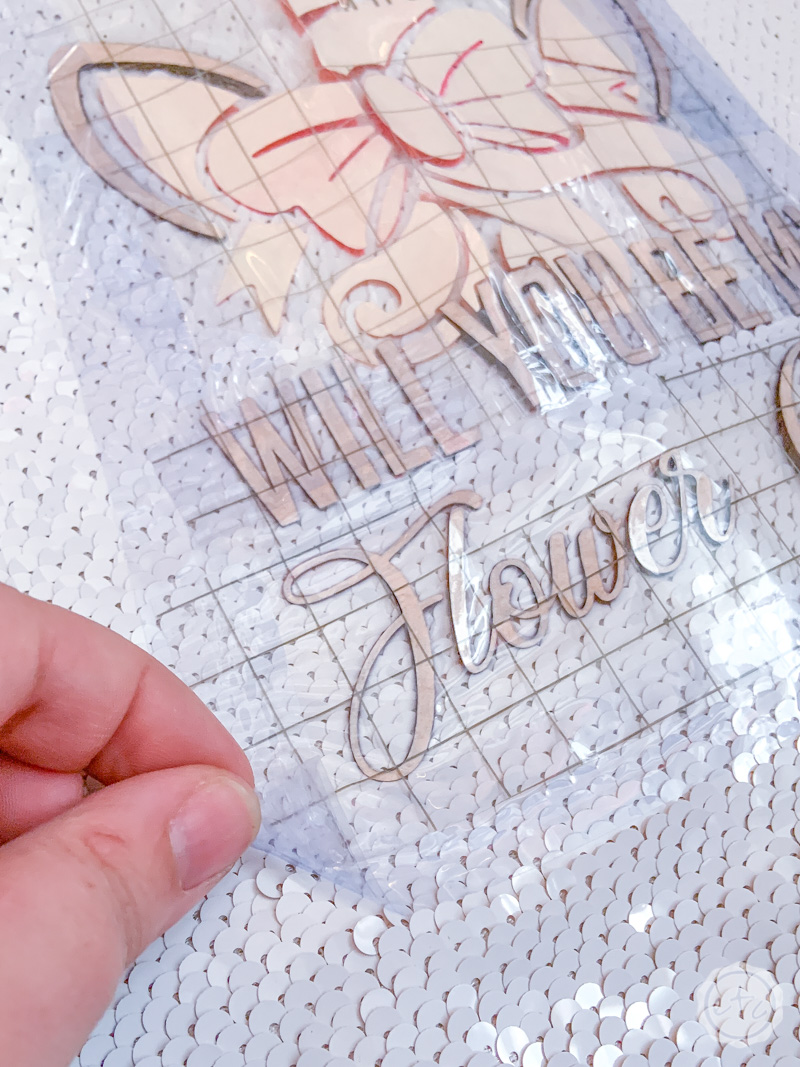
Now we need to weed the design… but we don’t want to use a weeding tool. They’re too sharp and pointy for the infusible ink material… they’ll definitely rip it.
Instead use your fingers… the infusible ink material is pretty thick and peels up easily (even from inside the letters) so you shouldn’t have any problems.

Step 2: Layer All Infusible Ink on ONE Carrier Sheet
Alright y’all ready for the fun part? In order to make this little pillow we need to take all 3 layers of our infusible ink and put them all onto the same carrier sheet.
It sound intimidating but it’s pretty easy. Basically you can layer different colors of infusible ink onto one design… but you can only heat your surface once. So allllll your different layers of ink have to be on one clear carrier sheet in order to be bonded to your surface.
That’s okay we can simply combine the entire design onto one sheet. The infusible ink sheets are pretty thick (kind of like thick card-stock) so it comes off the carrier sheet fairly easily by itself. Just make sure not to use transfer tape on this bad boy as it would mess up the ink.
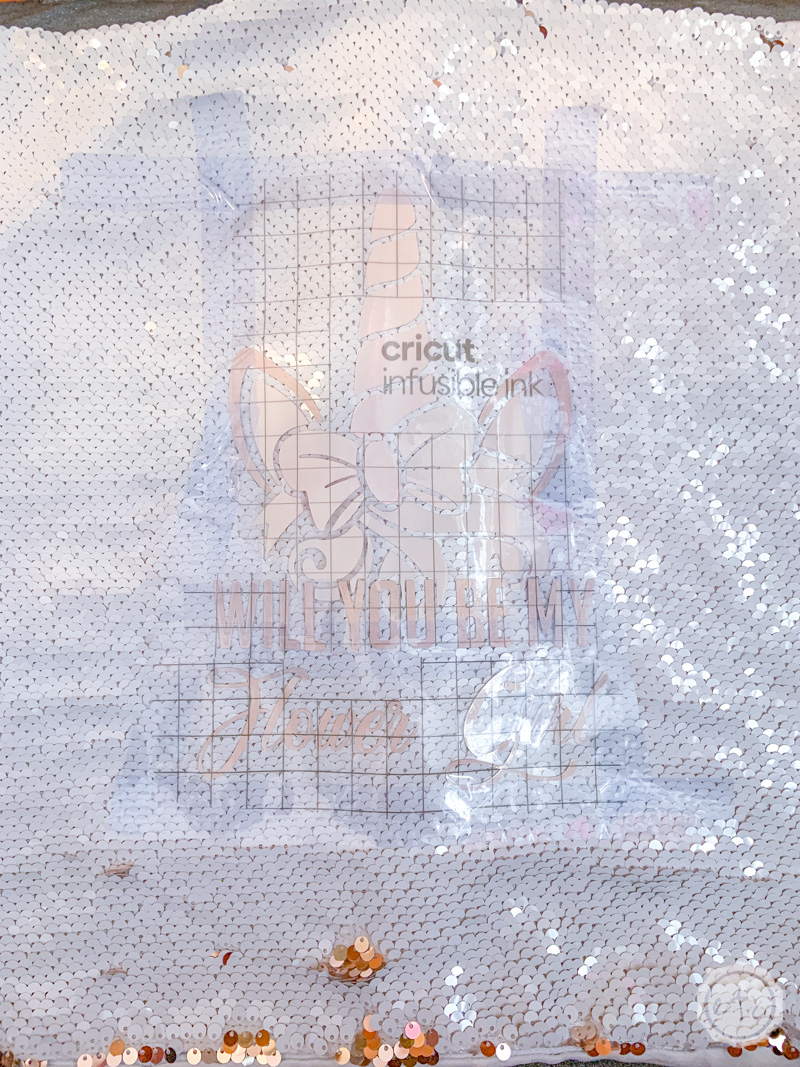
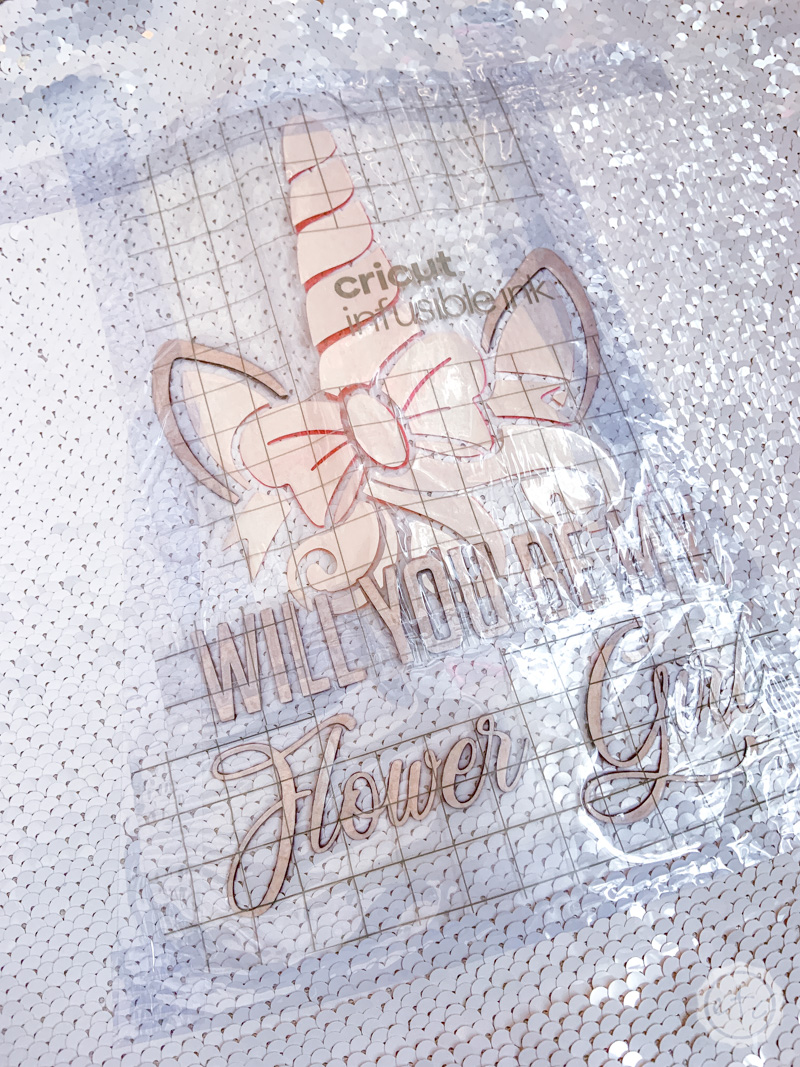
I started by adding the bow pieces onto the carrier sheet for my unicorn… and then the black pieces for the ears and the top block letters. The carrier sheet will be sticky so you can simply press the new pieces in place… although I didn’t find it as sticky as say the carrier sheet for iron-on. So place it down once and try not to move it around a bunch.
Since I ran out of carrier sheet at the bottom I simply cut the bottom of the carrier sheet flush and then used a bit of heat transfer tape to tape the carrier sheet for our script words down below… take a look.
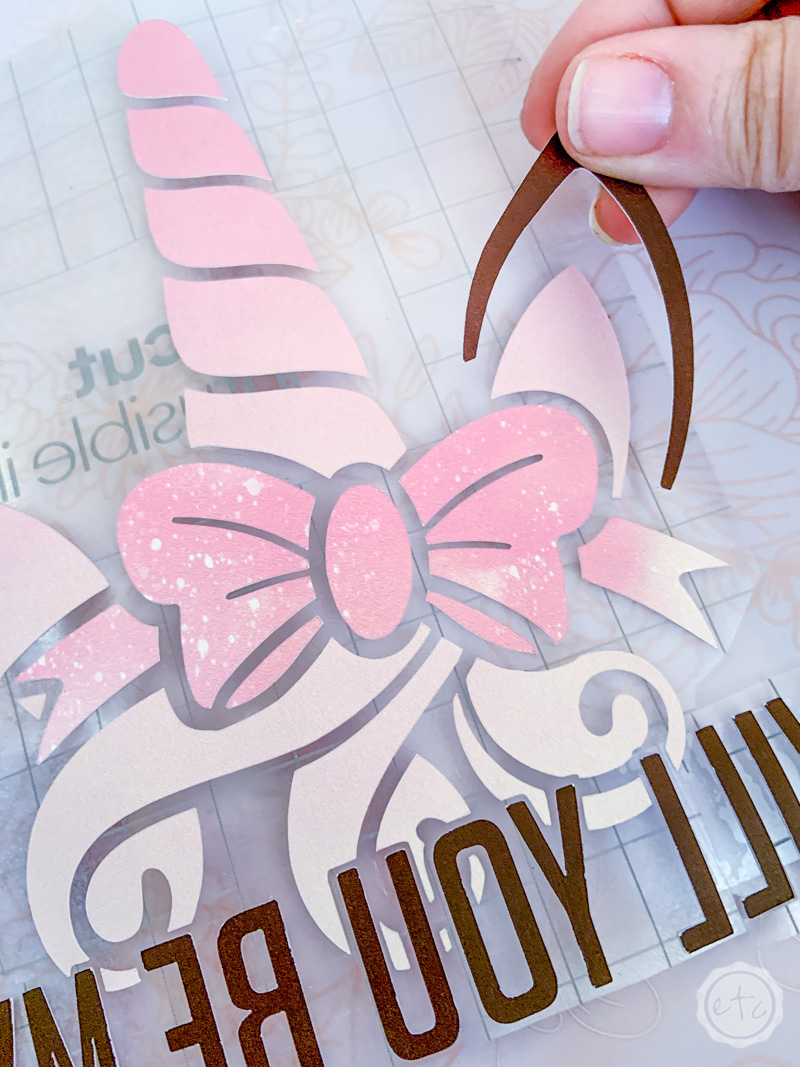
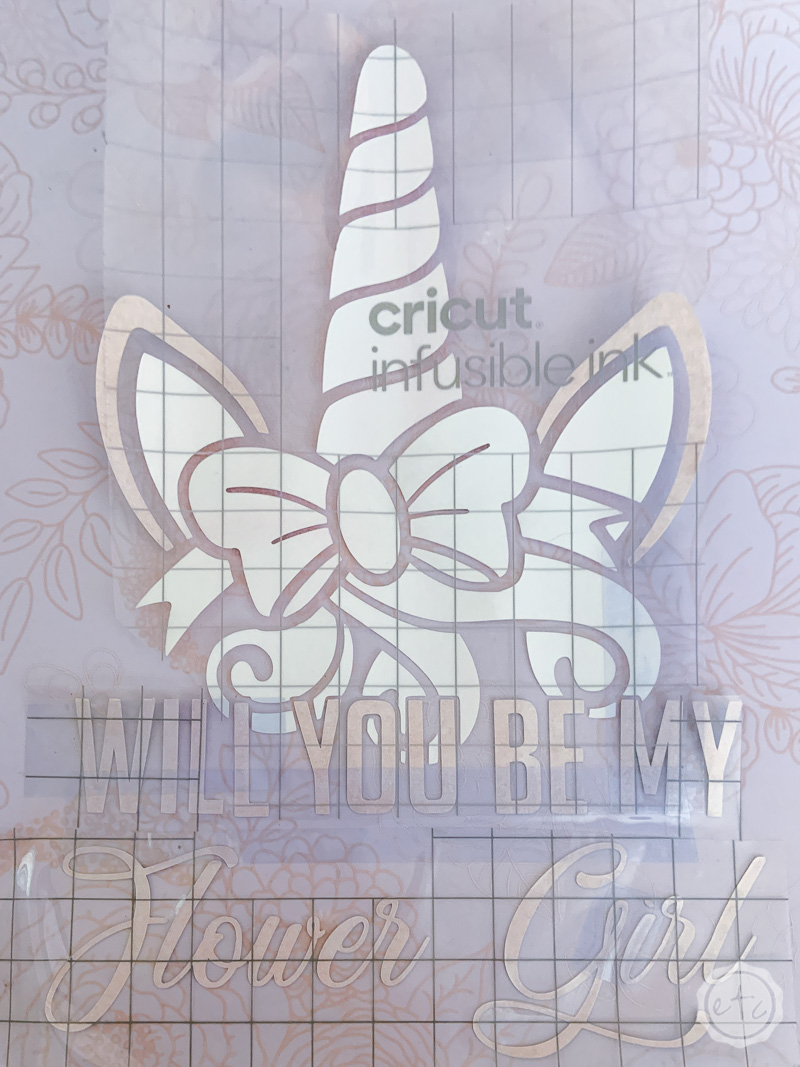
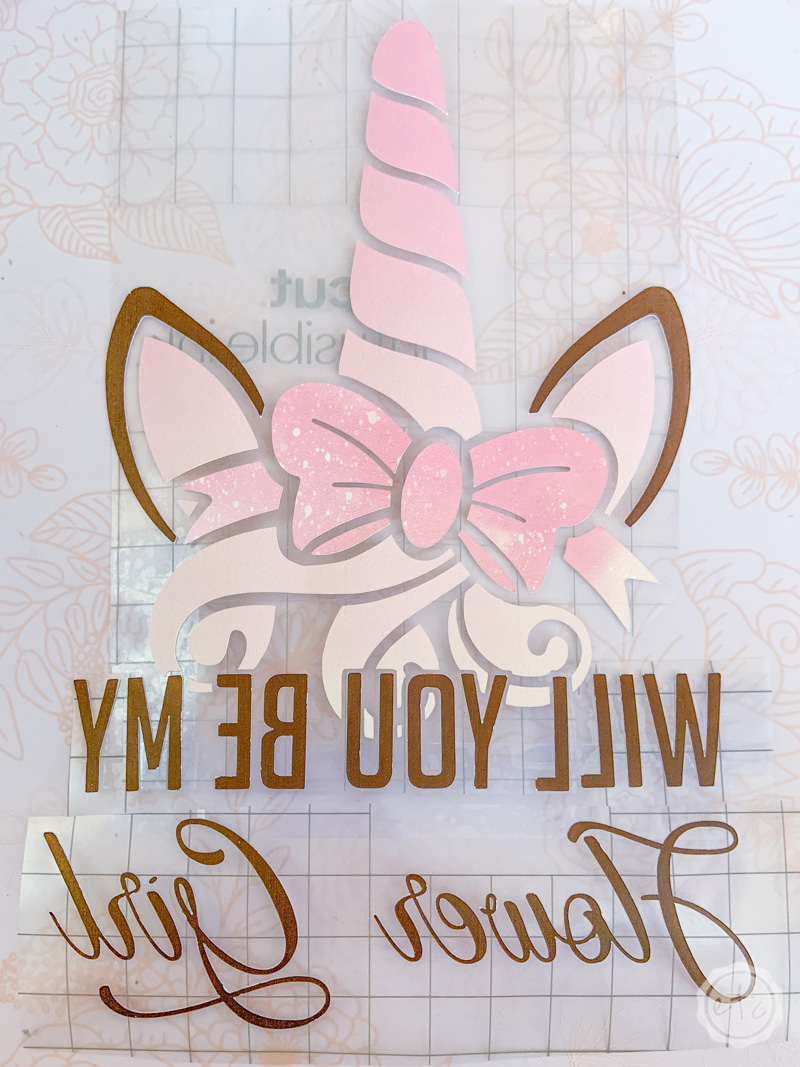
Two different carrier sheets but this way our entire design can be pressed onto the pillow in one go.
Easy peezy!
Now we’re ready for that easy press!
Step 3: Prep the Pillow
Before we can get started we need to get everything ready! Start by taking out your easy press and plugging it in. Set it for 385 degrees and 40 seconds… then give it a minute to heat up.
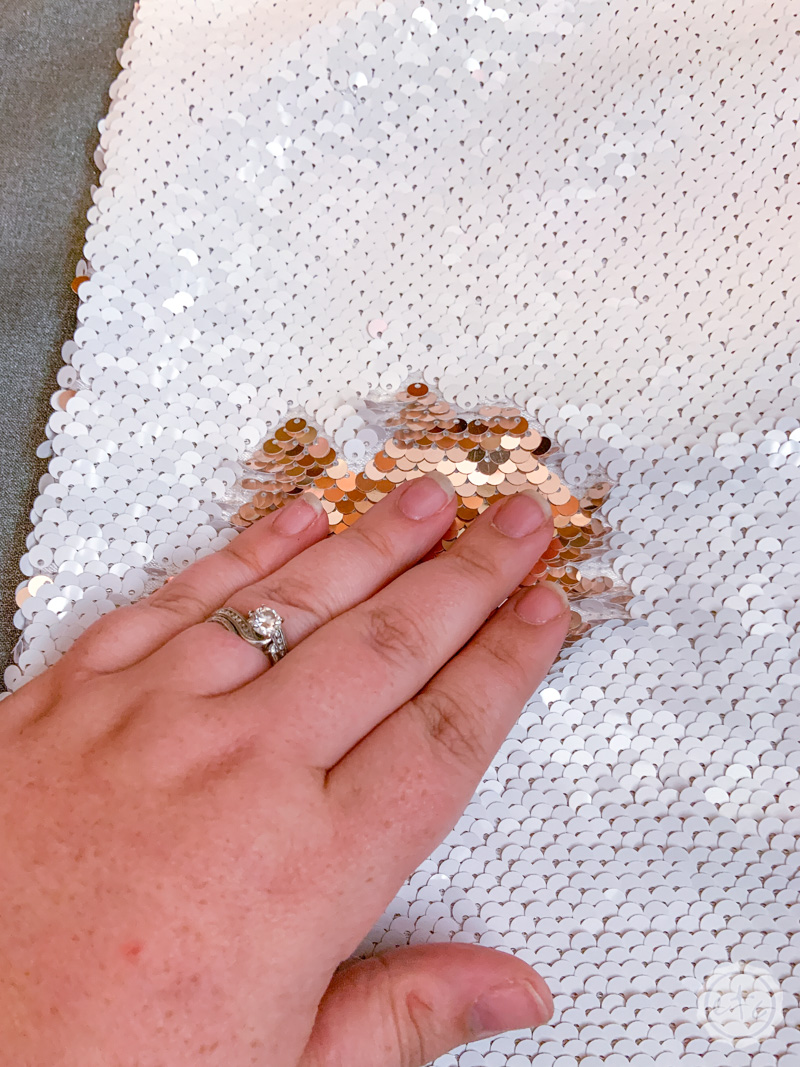
Now lay out your easy press mat with your sublimation pillow blank on top of it. You want to make sure that allllll the sublimation sequins are facing up and all of the rose gold sequins are down… since the sublimation sequins are where we want to press our design.
Just take your hand and push them all up… bonus points to make sure all the sequins are headed in the same direction. This will help your design line up when it’s played with so that your little flower girl can read it!
Once you’ve got your sequins all facing up go ahead and place your design onto the surface of the pillow. The carrier sheet is sticky so it will stay in place a little bit but an important part of using infusible ink is making sure that the ink stays 100% still while it’s being transferred… so use a few pieces of heat resistant tape to tape your design in place.

Step 4: Apply the Design
Now it’s time for the EASY PRESS! This baby should be pretty hot now (385 is pretty darn hot!) so be very careful with it.
Place it down over your design and hit the little go button. Then leave it alone for 40 seconds… it will beep when it’s ready!
Infusible ink can shift when it’s being heated up so you don’t want to move the easy press AT ALL during this time. Place it straight down and lift it straight up.
Once your 40 seconds are up lift the Easy press straight up and volia! You’re done! The transfer sheet will still be really hot so make sure to let it cool before you touch it.
Even before you peel the tape off you can see the transfer of the ink… it looks like a shadow below the carrier sheet! I may be a nerd but I think that’s pretty cool!
Ready for the final reveal?
This little flower girl pillow turned out sooo cute! It’s going to be the perfect way to ask the tiniest member of your family to be part of the bridal party… I can’t wait!


Looking for even more Wedding Projects you can make with you Cricut? Check out the gallery!


[…] this same technique to put infusible ink on anything! I’ve done this same process to make a reversible sequin pillow with infusible ink, you could make a tote bag… I literally have a list of 22 infusible ink crafting blanks that […]