


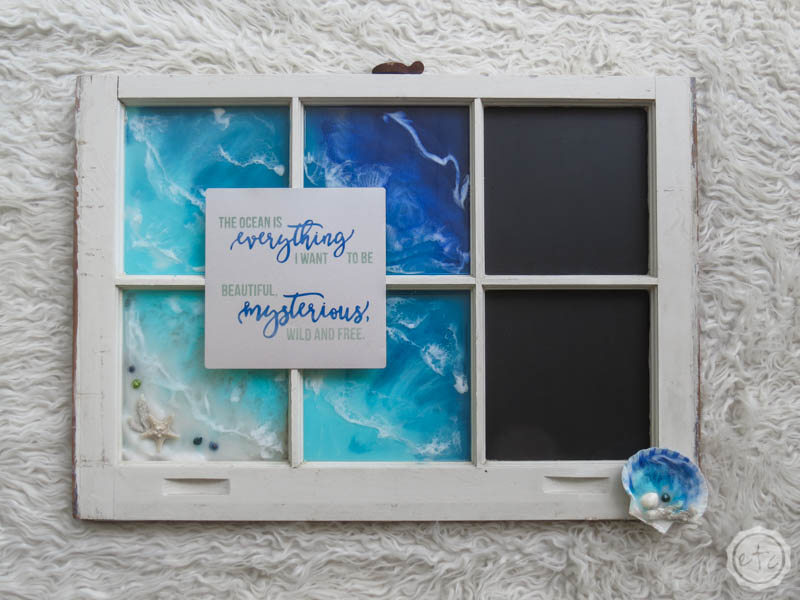
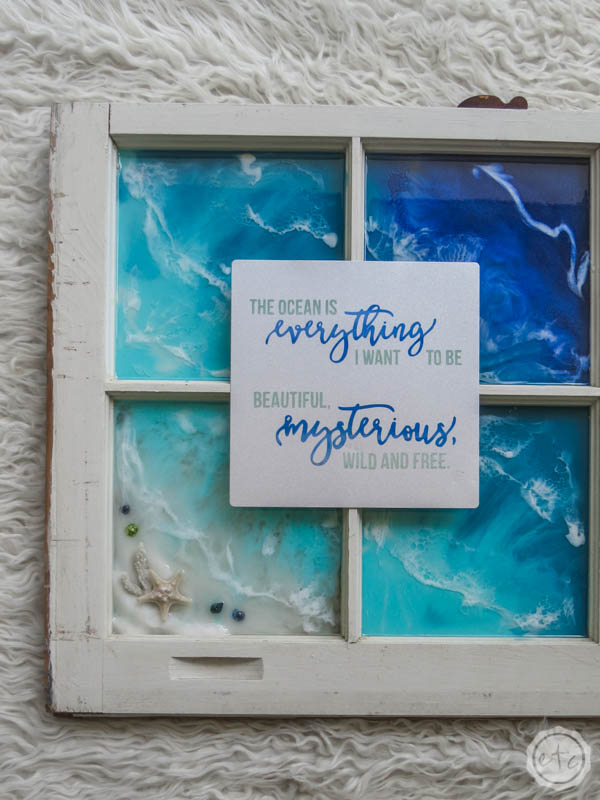
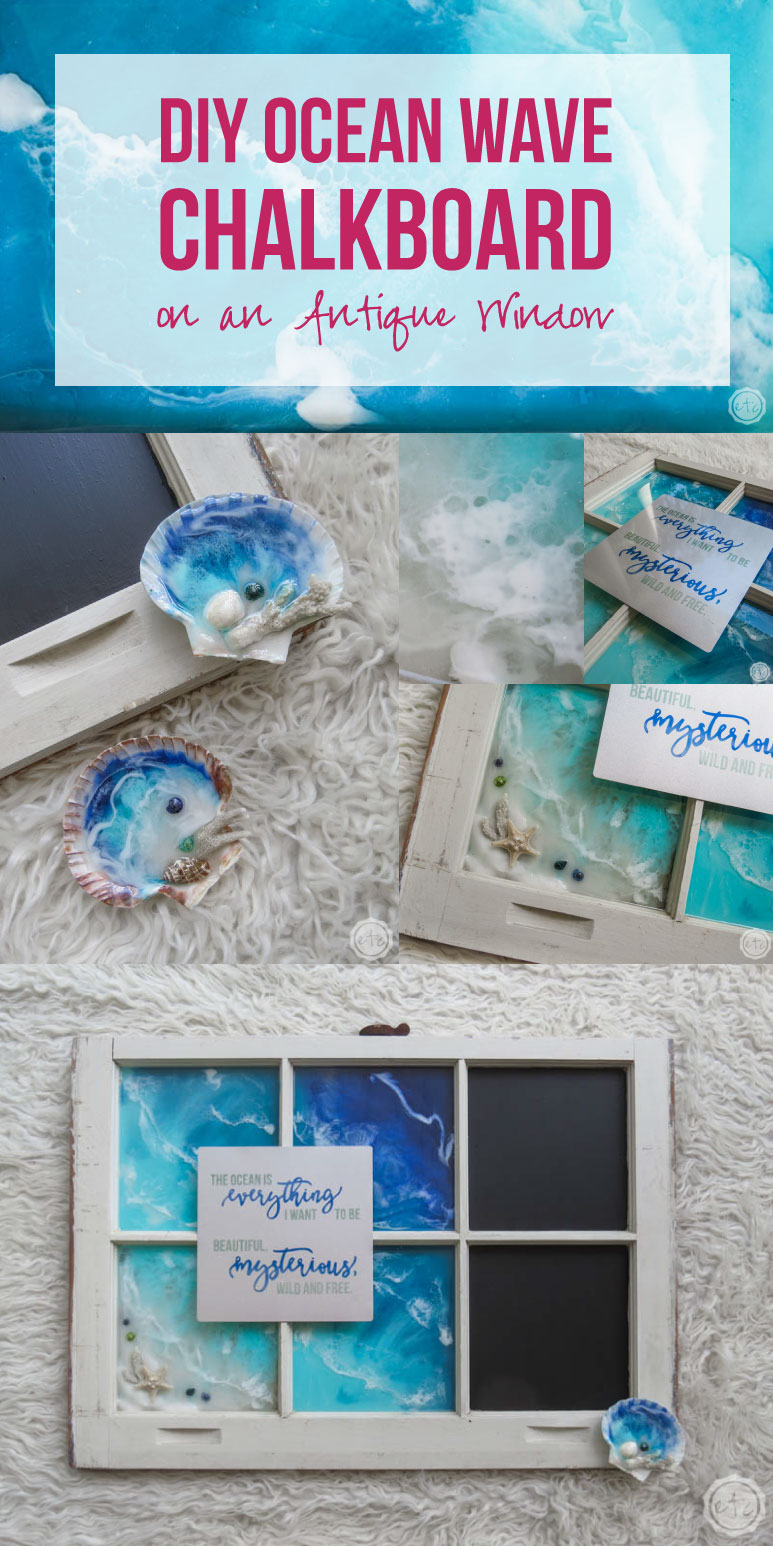
If you love the ocean this little antique window turned chalkboard would be the perfect message board for your home! I can’t wait for the day I have a beach house because this baby is the first thing I’ll hang on the wall!
Of course, the best part is that even though there are several pieces that go into putting this project together it’s actually quite simple to make. Definitely a beginner level project! So grab a paint brush, your bottle of resin and let’s get started!
Supplies:
- Multi-Purpose Primer
- Chalkboard Paint
- Antique Window with Resin Ocean Waves (Follow the tutorial here)
- Aluminum Sign with Infusible Ink Message (Follow the tutorial here)
- Tiny Scallop Sea Shell with Ocean Waves (Follow the tutorial here)
- Amazing Clear Cast Resin
- Respirator/Mask (resin graded filters)
- Gloves
- Wagner HT400 Heat Gun
- Disposable Medicine Cups
- Popsicle Sticks
- Eye Hooks
- 1/4″ White Rope
DIY Resin Wave Chalkboard Tutorial
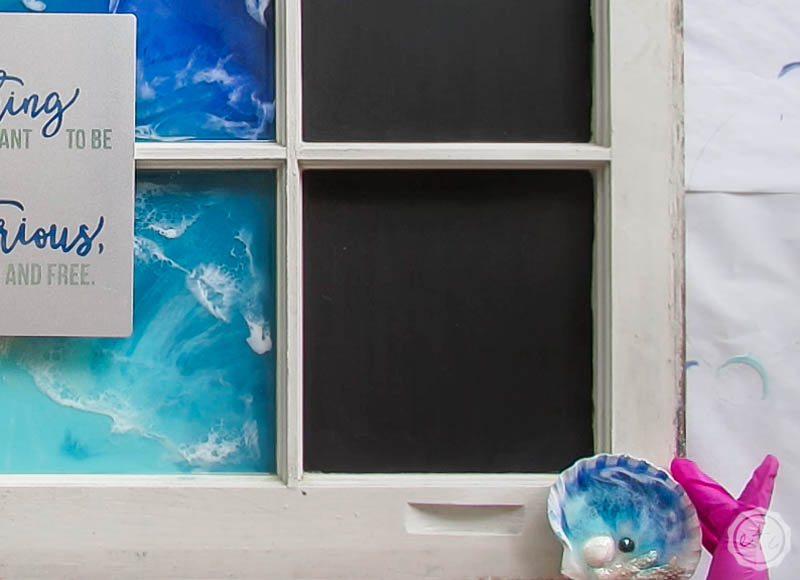
Step 1: Paint your Chalkboard
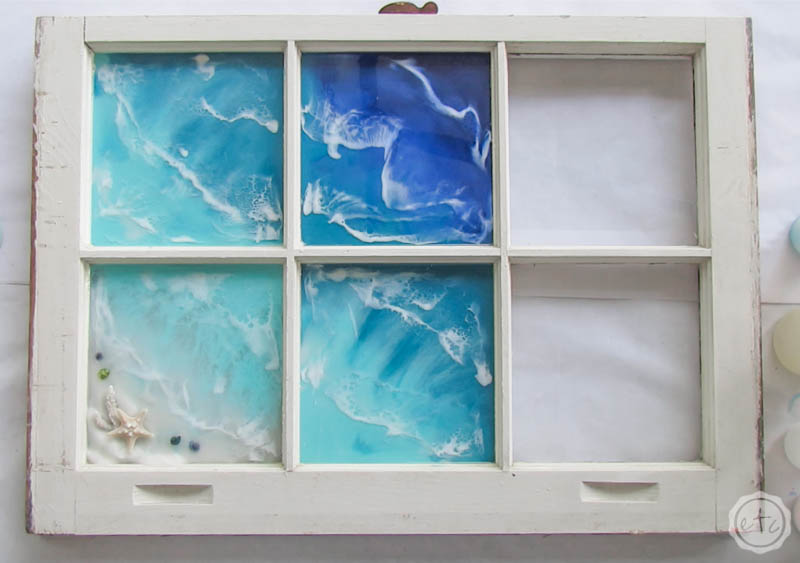
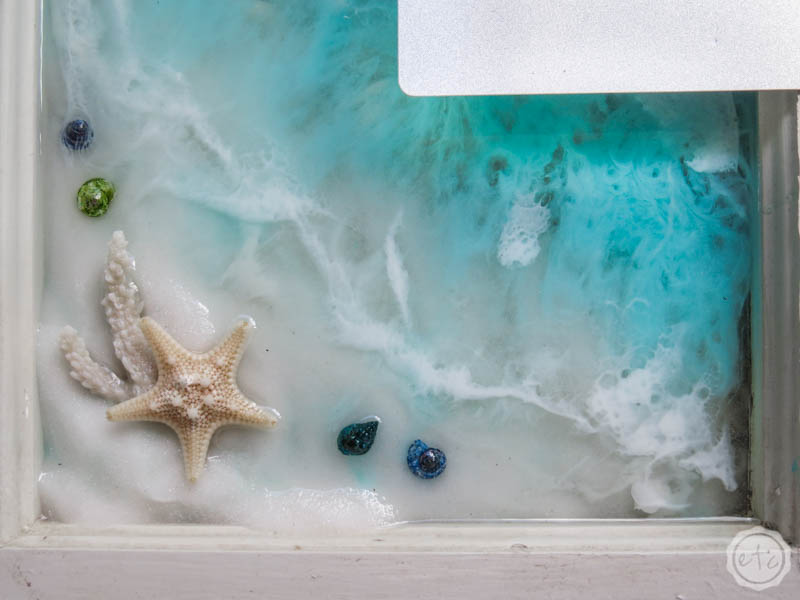
Okay y’all first things first… if you’ve followed my “how to make ocean waves tutorial” then you already have an antique window with a beautiful ocean scene.
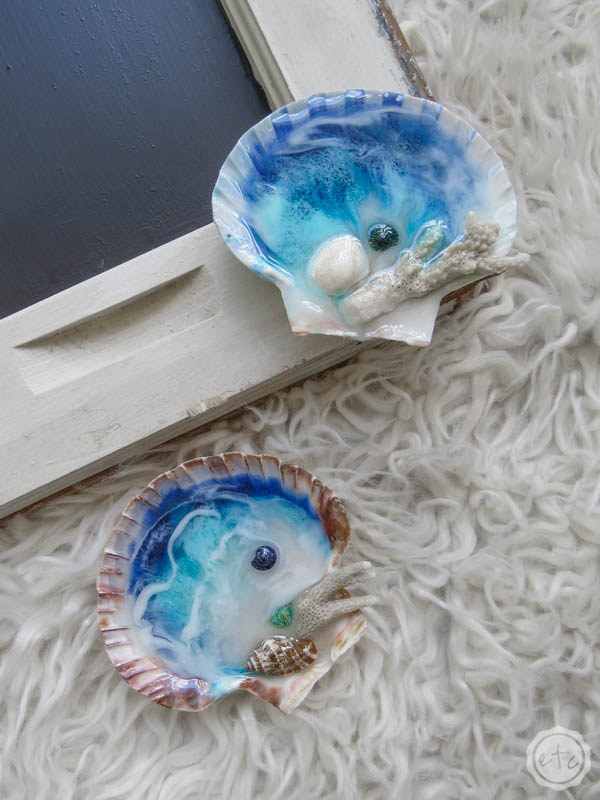
I am kind of in love with that sea shell!
Of course, the most confusing part of that tutorial was “why doesn’t she take the waves through all 6 panes?” and you totally could… it would look amazing. But in order to make this a functional piece (as well as beautiful!) I decided to add a chalkboard.
Chalkboard paint is really easy to use… simply take a brush and add a layer of primer to your glass. Once the primer is dry add a thin coat of chalkboard paint.
Repeat two more layers of thin chalkboard paint until the black is opaque and you can’t see through it. If you need more than 3 layers then just keep going… the important thing to remember with chalkboard paint is that thinner is better.
It doesn’t work with thick glopped on layers!

Step 2: Glue on your Shell & Sign
Now that our chalkboard is finished we can add a few embellishments… our tiny scallop and the aluminum sign!
I thought long and hard about what to use to glue everything together and eventually decided that resin was the answer. It’s clear, it’s strong, and if it drips down onto the window it will blend in with the resin that’s already there.
So this is easy! Simply mix about 20ml of resin in a tiny medicine cup and use it as glue. I started by add a pool of resin where my shell would go and then firmly pressing the shell into it.
Perfect!

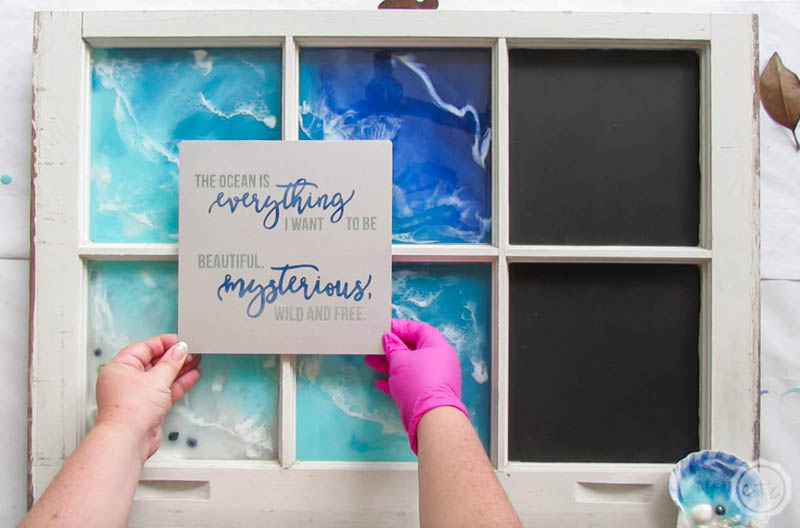
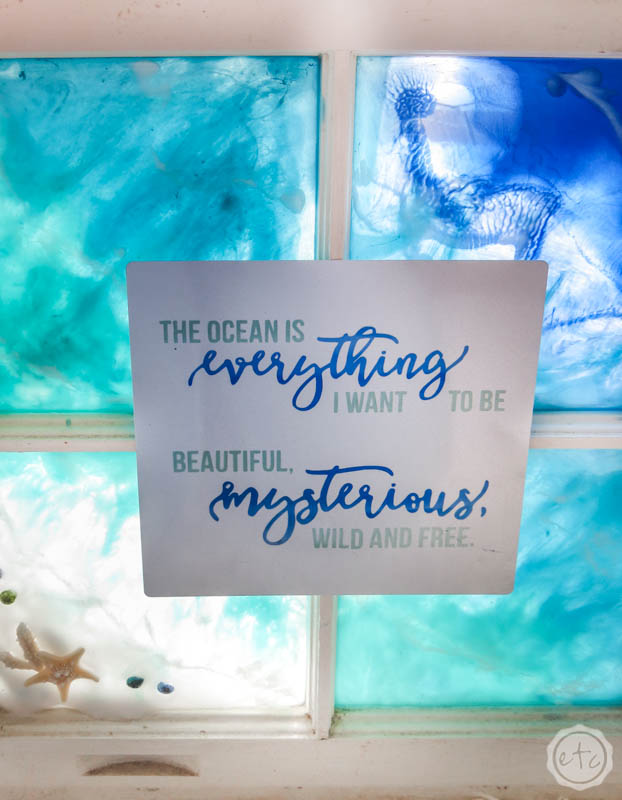
The aluminum sign will be a little harder since you have to add it to the cross beam. Go ahead and add a bit of resin to the cross beam with a Popsicle stick.
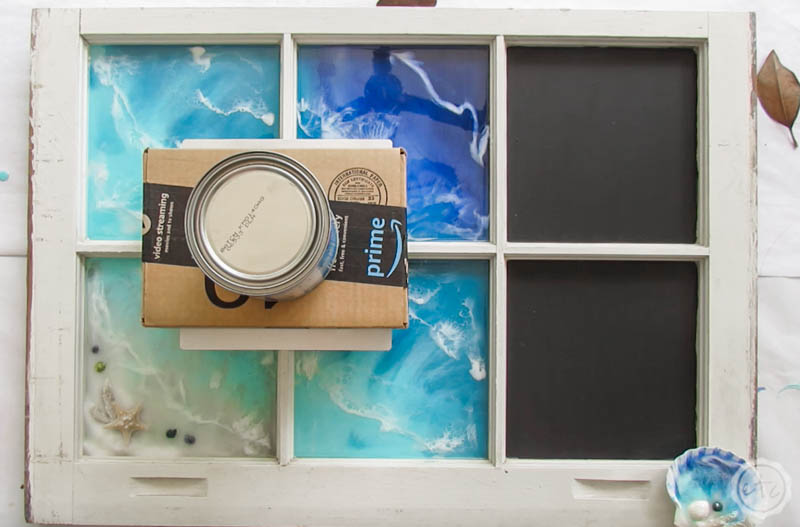
Make sure that the resin completely covers the crossbeam and doesn’t fall off… if you need to keep adding resin until you have enough on the cross beam.
Then carefully place your aluminum sign, making sure it’s straight and centered.
Once you like your placement put something heavy on top of the aluminum sigh to keep it in place while it dries!
Easy peezy!
Now you’re ready to hang this bad boy on the wall.

You know what would be even better than hanging this bad boy on the wall? Hanging it on a window!
Just look at how pretty the light coming through the resin is… it definitely looks like glass!
Plus the pictures really can’t do it justice… it looks so much better in person. Of course, making the individual pieces for this project was the most time consuming piece of the puzzle… putting it all together was pretty quick and easy!
Enjoy!
BONUS: This little shell is part of a larger project! Follow along if you want to make each project:
How to Make Ocean Waves | Ocean Themed Aluminum Sign | Ocean Wave Sea Shell | Ocean Wave Chalkboard Window


Looking for more resin projects? I’ve got you covered!


Leave a Reply