


If you’re looking for a cute (inexpensive!) meaningful gift for someone in your family I have the sweetest present lined up! With all of the customized photo gifts out there (calendars, t-shirts, ornaments, mouse pads!) the possibilities are endless.
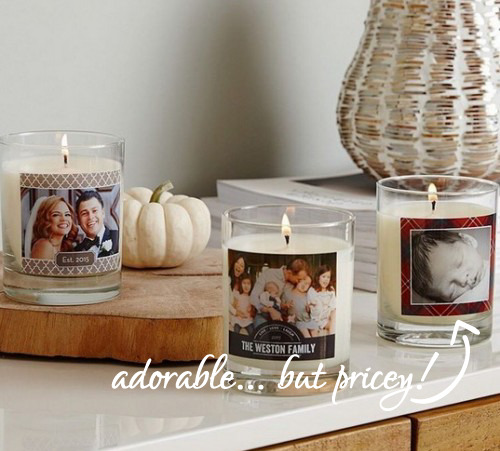
I personally love these little custom photo candles from Shutterfly but at $39.99 (plus shipping) it just wasn’t going to happen. I love Shutterfly but I have a BIG family with lots of people… and these candles aren’t exactly huge (9oz to be exact) so I set out to figure out my own photo candles!
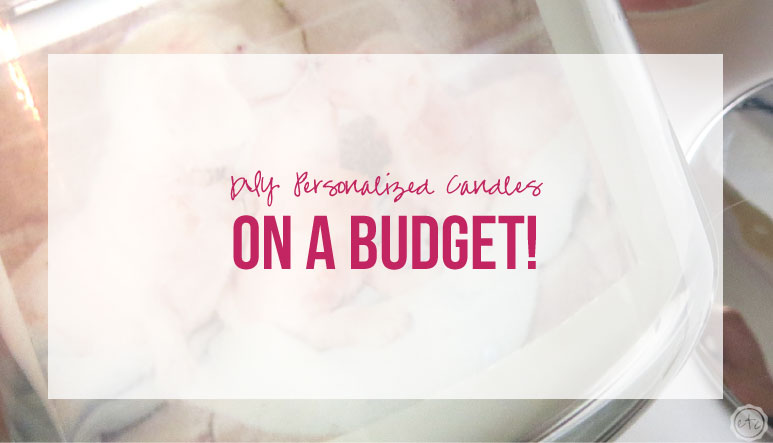
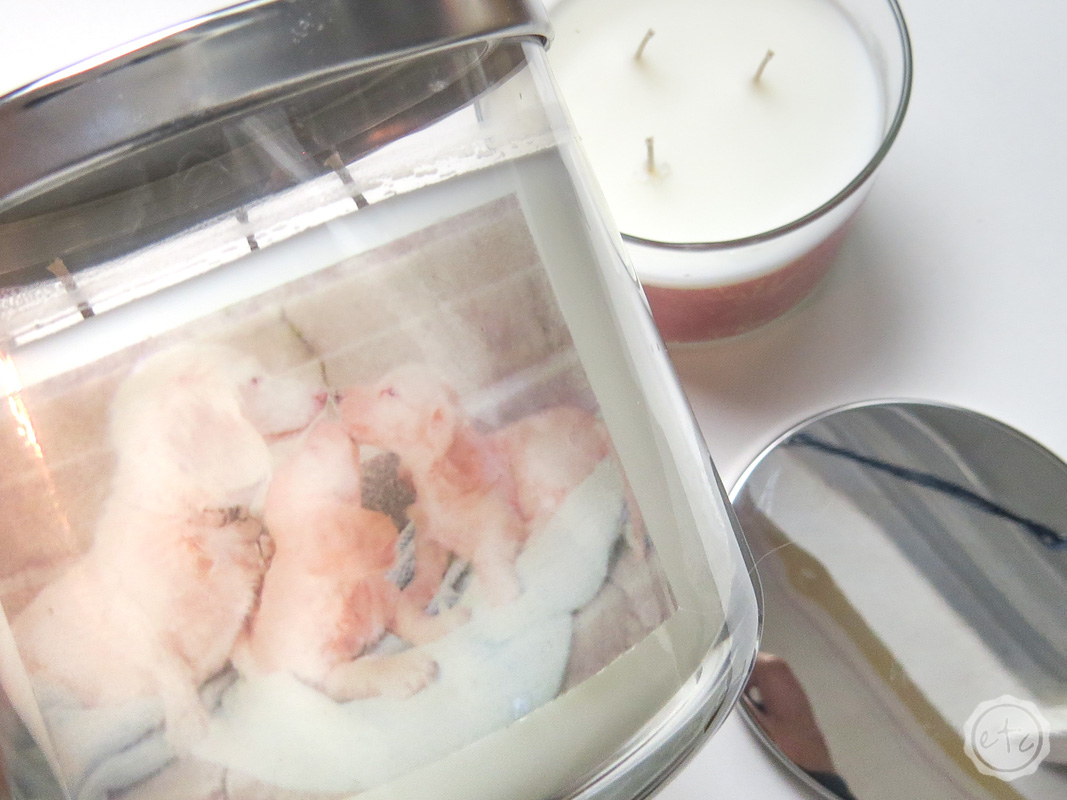
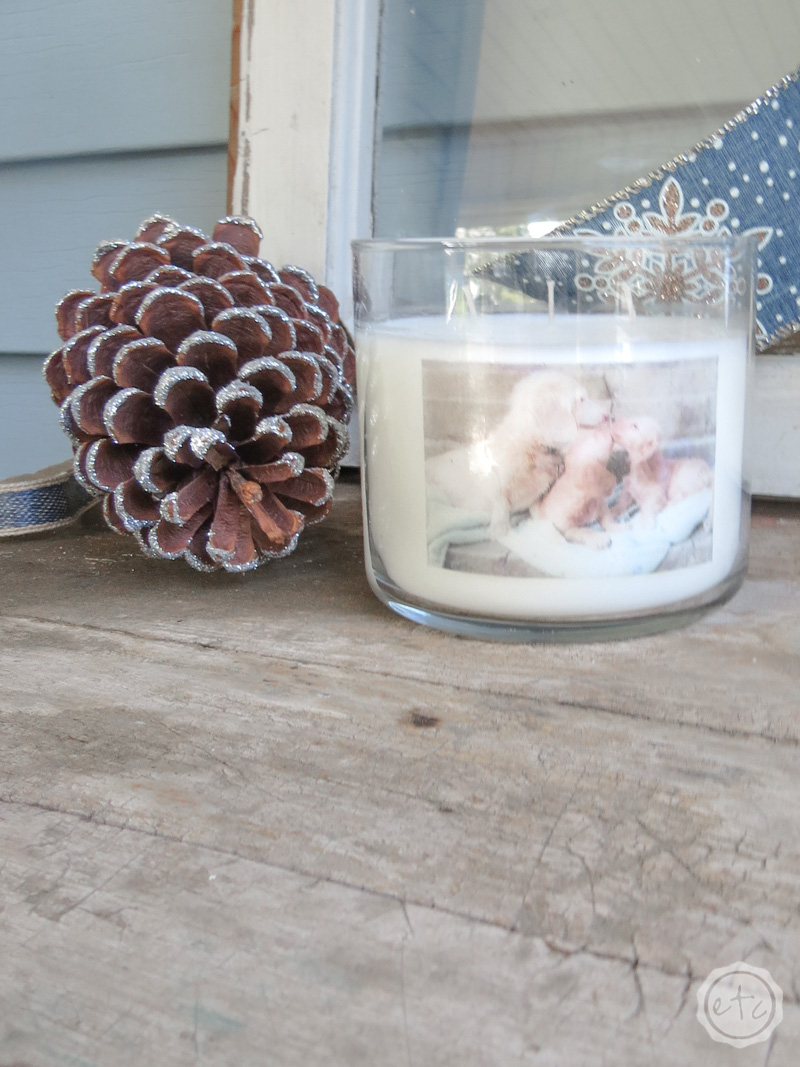
This tutorial will teach you how to make a sweet, photo candle (14oz!) for the price of a candle, packing tape and a printed photo… and if you already have packing tape and a laser printer this is the cheapest (meaningful gift) you’ll ever whip up!
Of course, if photo candles aren’t your thing and you’re still looking for the perfect gift I’ve got you covered. I’ve have teamed up with 50 plus bloggers to bring you a oodles of DIY Ideas and Recipes to make your holiday season merrier. There are 12 different posts in the series and we have spread them out over a four week period with three posts per week. Now is the time to subscribe!
Welcome to Day 2 of the Fourth Annual 12 Days of Christmas Series!

GO HERE for the complete list of Dates and Topics plus a collection of most popular holiday ideas including ornaments, games, recipes and more from all 50 plus talented bloggers!
It’s Day 2 and we are sharing DIY Gift Ideas! Let’s go!
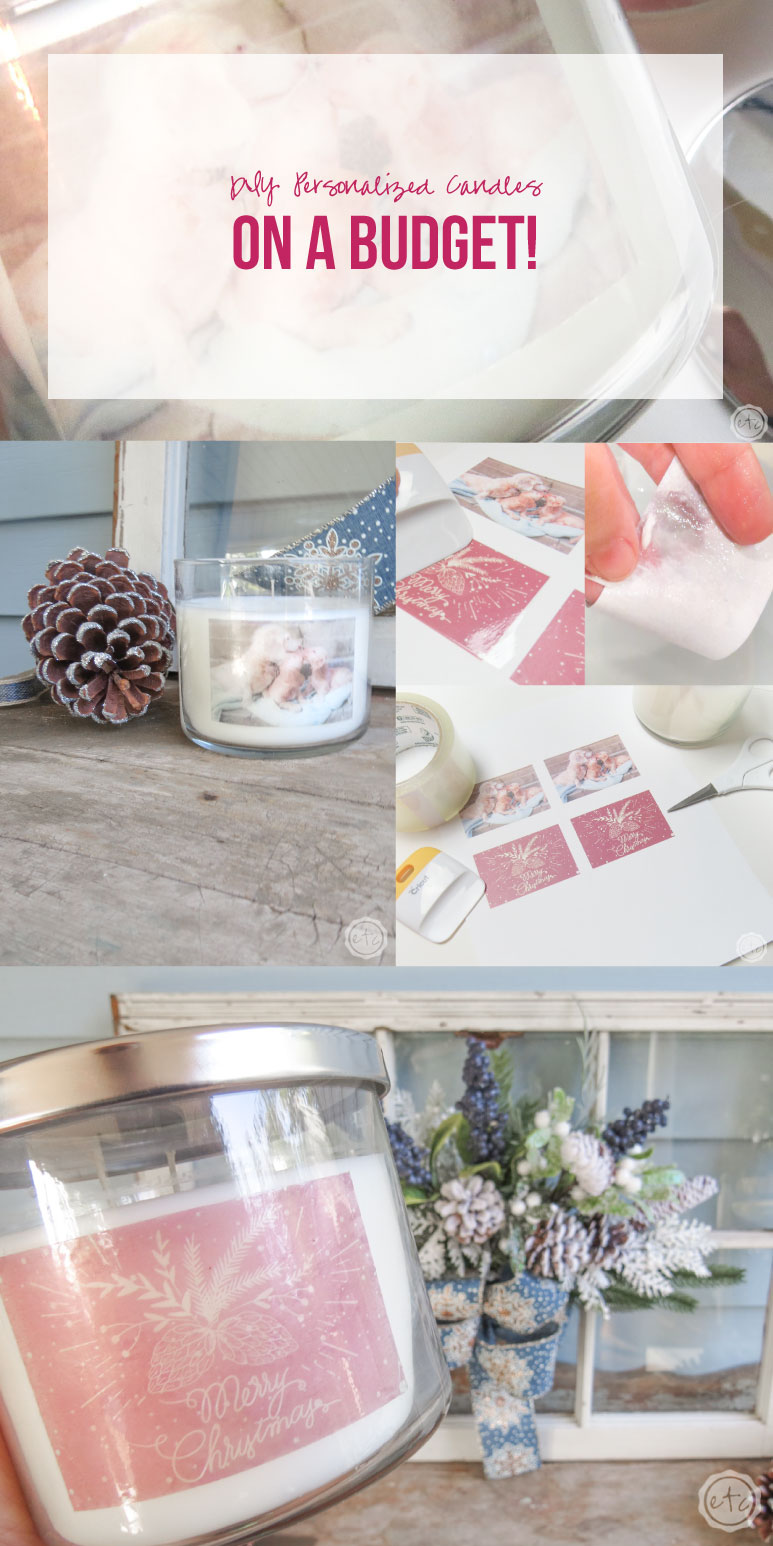
Supplies:
White Candle
Packing Tape
Scissors
Smoothing Tool (or Credit Card)
Bowl of Water
Laser Printed Images on Regular Paper

Step One: Print Your Images
If all goes well this project should only take 15-20 minutes! Start by printing your images as 2×3 inch files on regular printer paper. Make sure you use a laser printer… ink jet will not work! Stores like office depot print on laser printers and color copies work too so when in doubt print your images at home on an inkjet and then make a color copy.
Score!
Now it’s time to grab your candles. I picked up a few of these little white candles from Walmart for four bucks… while you can use any color I find that the tape transfer looks best on white. Feel free to experiment though. Packing tape only costs a few dollars and color copies are usually around 50 cents, so if you are making a few of these you can easily put them together for five bucks each.
I decided to print out a few pictures and a fun Christmas quote! You can transfer anything you can print! If you’re looking to do a few test runs (or you just really like my little Merry Christmas quote) you can download the Merry Christmas images at the download of this post.
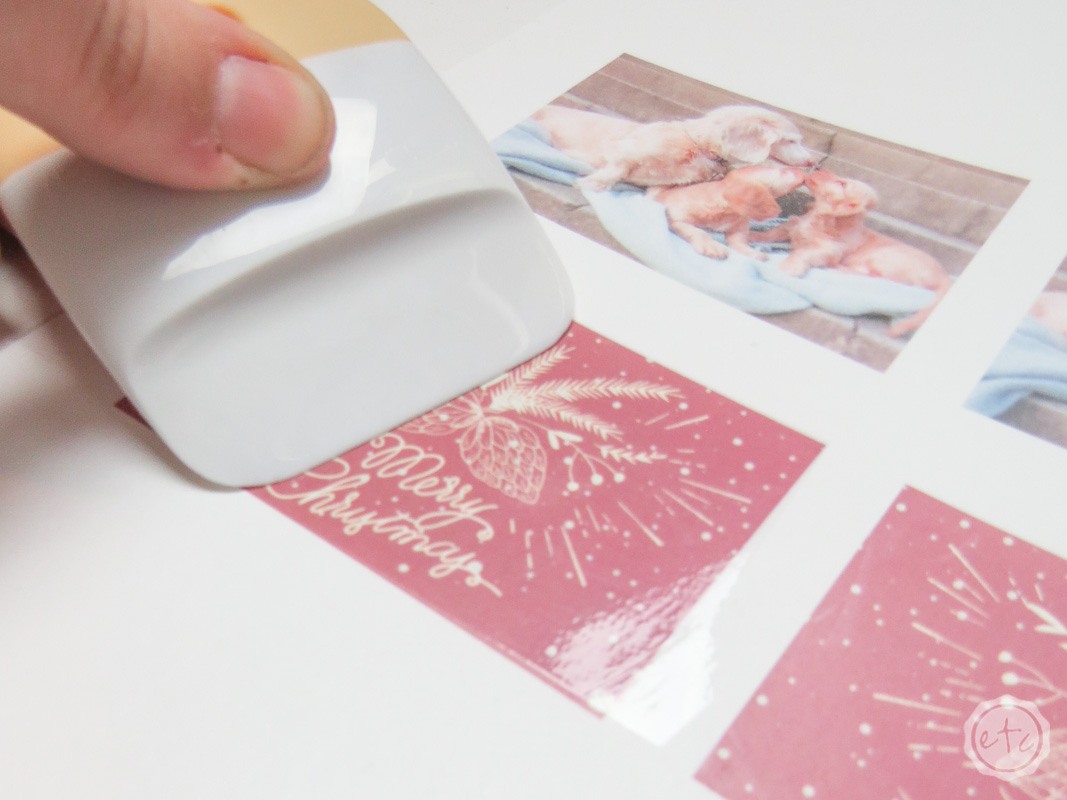
Step Two: Apply Your Packing Tape
Now that you’ve printed your images go ahead and lay your packing tape over each of the images and use your smoothing tool to press the tape down tight. If you don’t have a smoothing tool a credit card works just fine… although I’m always using my smoothing tool for something.
Make sure when you place your tape that it’s straight and completely covers the photo. Smooth it down tight, tight, tight… making several passes if need be. Once your tape is smoothed down tight with no bubbles… then it’s time to cut out your photos.
Step Three: Submerge Your Photo
Alright now is the fun part… plop those little photos into your bowl of water! The images curled up fairly quickly for me but don’t worry they laid back flat once they were out of the water.
Once the images are placed into the water leave them to soak for about 10-15 minutes.
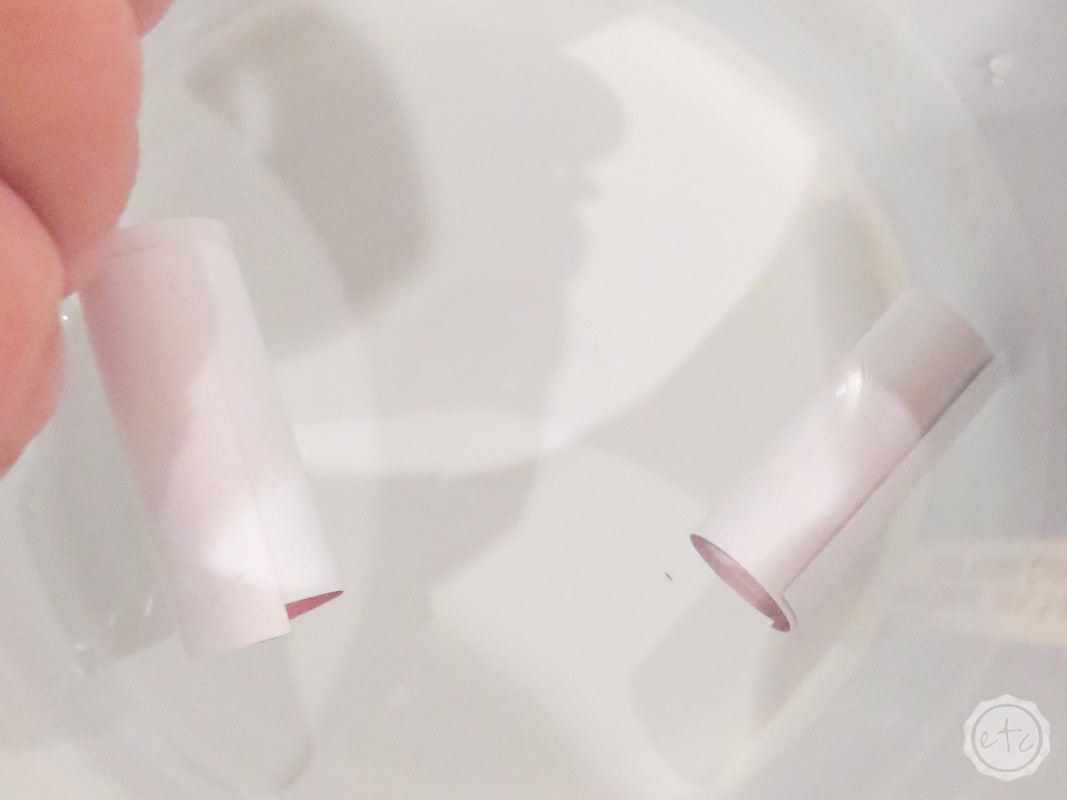
Step Four: Remove the Paper Backing
Once you remove the paper from the water you’ll be able to remove the paper from the tape. Gently rub your fingers over the paper and the paper will come off. It will ball up and slowly leave the clear packing tape with your image printed on the tape!
Feel free to dip your tape back into the water as many times as needed to remove all of the paper. Bonus points if you’re using a white candle because you don’t need to get the back of your tape perfectly clear of the white fibers.
Clear as many of them as you can before moving onto the next step.


Step Five: Lay Your Tape Out to Dry
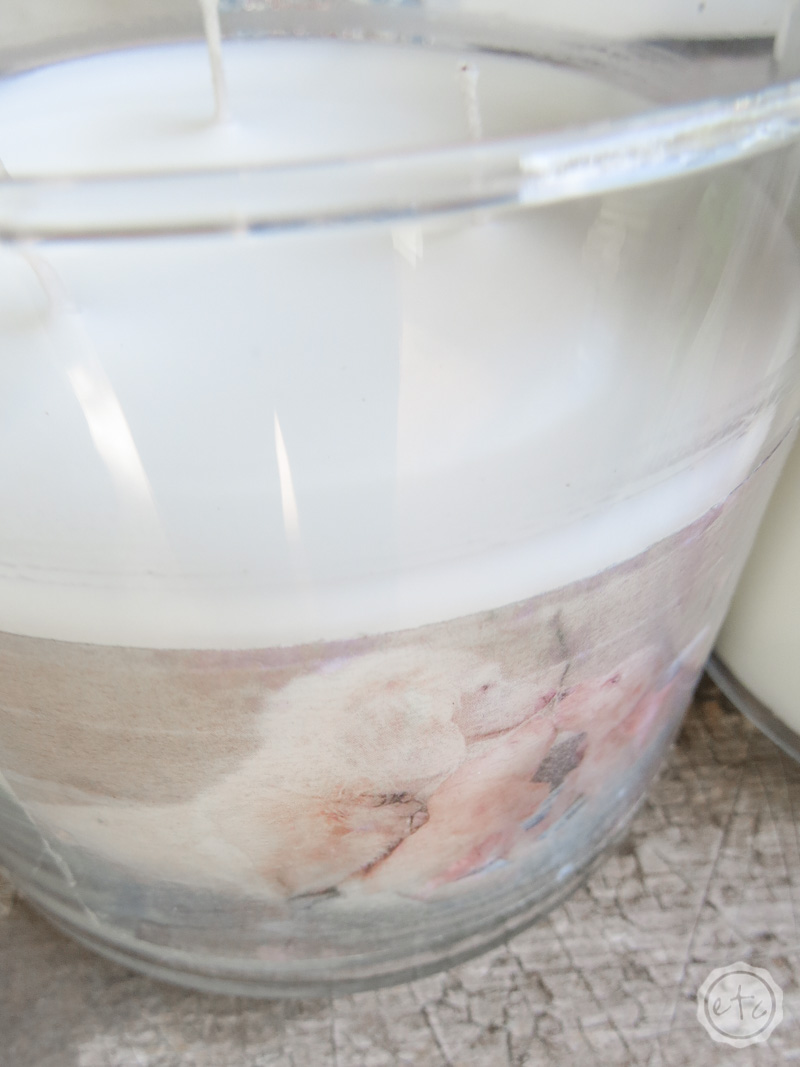
Once you’ve removed the background lay out your pieces of tape (sticky side up!) to dry. When it’s finally dry, the tape will be sticky again, and you can smooth it down onto the glass for your very own personalized photo candle!
After a bit of trial and error I’ve learned that lighter photos seem to retain there sticky better than dark photos however a bit of adhesive on the back of the lighter photo tape seems to work just fine. I simply ran my new photo/tape through my little sticker machine and it was ready to rumble.
Step Six: Apply Your Tape to Your Candle
Now that your tape is dry you can stick it to your candle! Easy peezy lemon squeezy. I try to line up my photo and start to press it firmly from the middle working my way to the outside so that there aren’t any bubbles or wrinkles to creep up on me.
Now you’re done! This was so easy I’m thinking about making one for everyone on my list… I’ll have to stalk facebook for photos but I think it could work!


Love this idea and way of personalizing a candle gift.
Great idea to personalize a candle. Photo gifts are the best.