
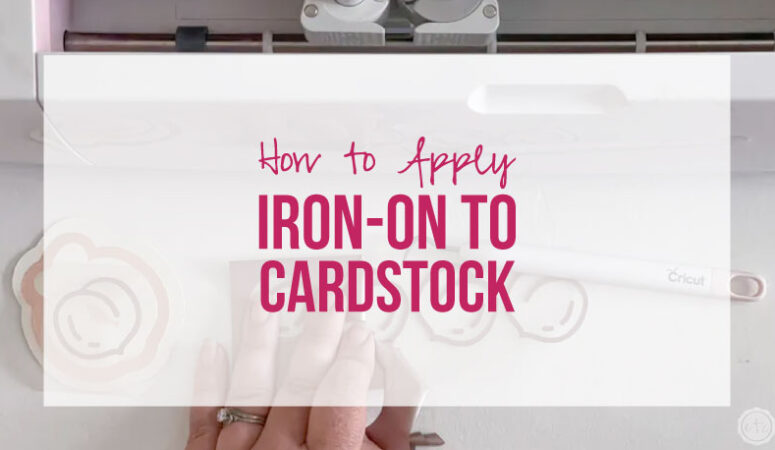


I’m sure you’ve heard of iron-on… maybe you’ve even used it to whip up a cute t-shirt or pillow case somewhere along the way. But have you ever used iron-on on cardstock? That’s right… you can actually add iron-on directly to paper or cardstock with your easy press.
It’s not even the weirdest material you can add iron-on to!
I made a few mermaid tail drink stirrers with cardstock and iron-on last summer for my holographic mermaid tablescape and they were so cute! So when I decided to do a peach themed tablescape I figured I needed a few peach themed drink stirrers to match.
PLUS a cute cake topper… because after all of the shadow boxes I made last month for my cardstock comparison I am a cardstock champion.
Let’s get started!
Supplies:
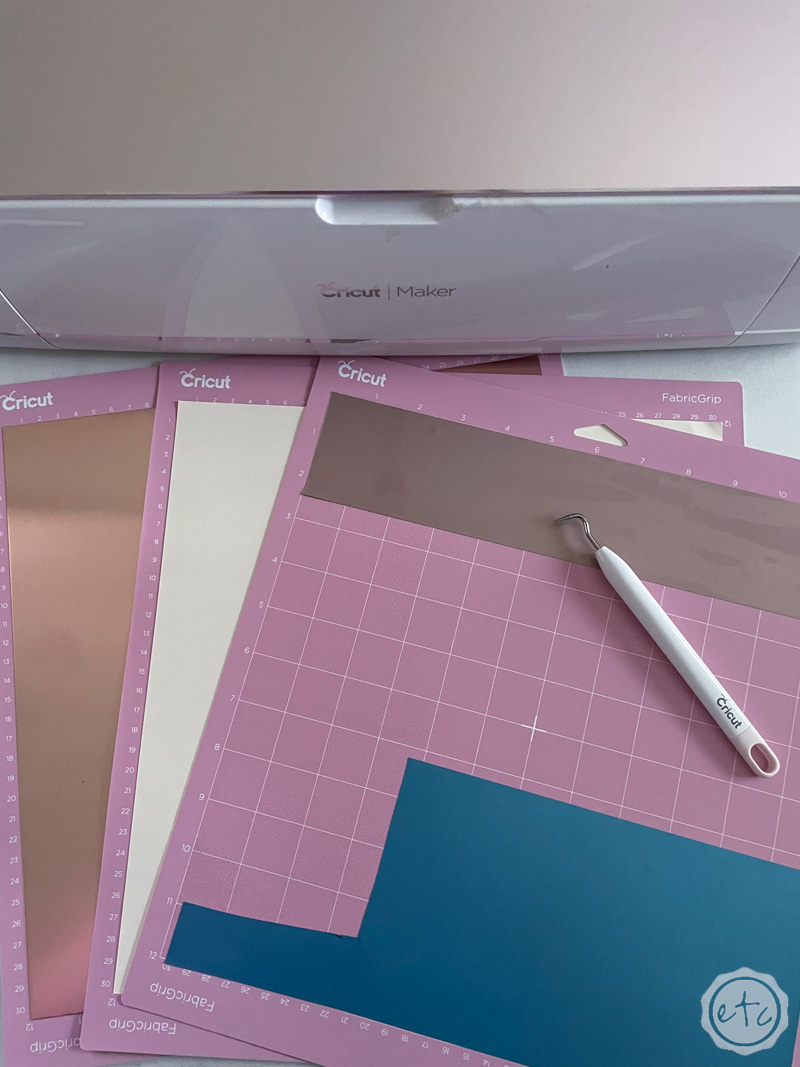
- Cricut Maker
- Standard Cutting Mat (that’s the green one! Even though I used the fabric mat for this project)
- Fine-Point Cutting Blade
- Weeding Tool
- Brayer
- Scraper Tool
- Metallic SportsFlex Sampler
- Rose Gold Poster Board
- Off White Cardstock
- Mini Easy Press
- Cricut Access Library: Peach Please Image
- 1/4″ Foam Tape
- Bamboo Skewers

Step 1: Pick your Design from the Cricut Access Library
While I knew I wanted a peach themed cake topper set to go with my peach plates on my summer table that was as far as my thought process went. So I headed to the Cricut Access Library and typed “Peaches” into the image search bar!
Remember that while there is an entire design library at your finger tips there is also an image library that has lots of adorable images up for grabs if you have a Cricut Access Subscription.
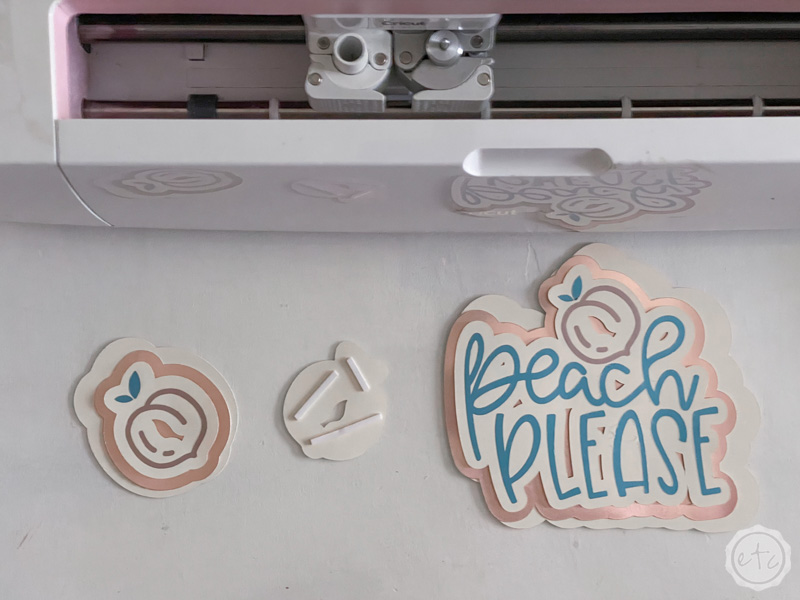
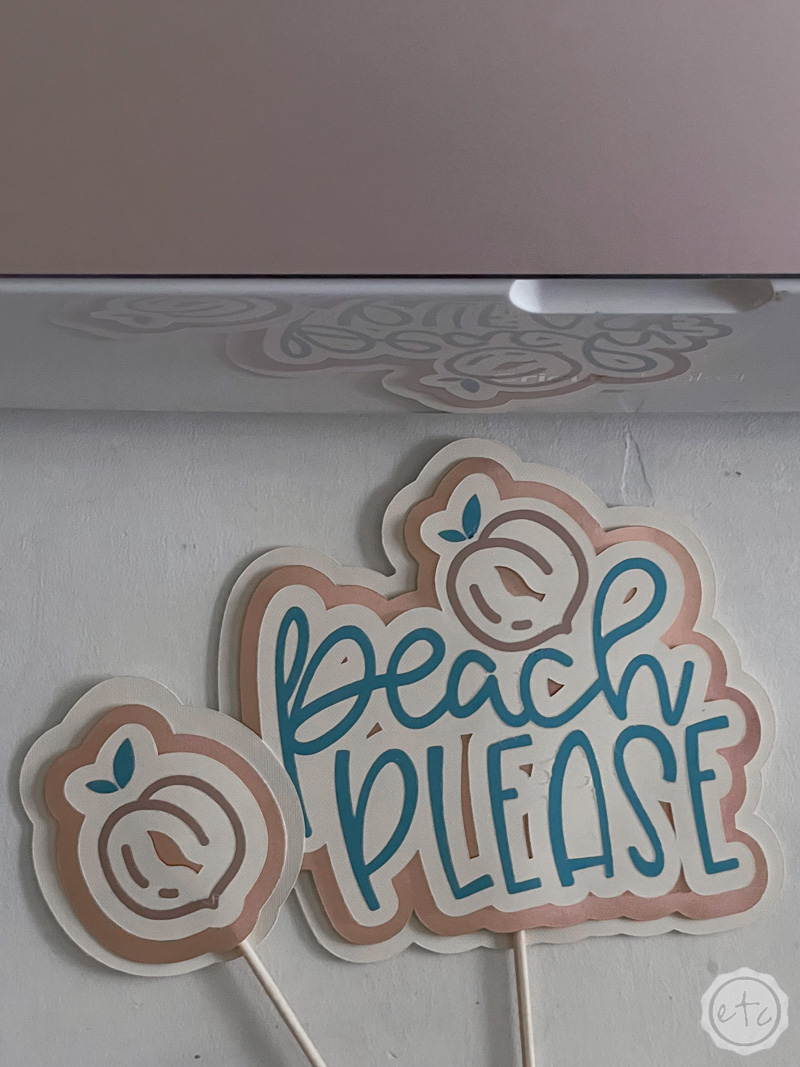
I found this adorable “Peach Please” design and clicked add to canvas… then I used the offset tool to create 3 additional layers to create my cake topper design. This was the easiest way to create multiple layers for my little peach design… similar to the layers in the cardstock shadow boxes I made last month.
Simple! Easy! That’s all I really wanted!
I also watched matching drink stirrers so I sliced the peach out the design and added 3 offsets for a smaller version of the cake topper. Perfect!

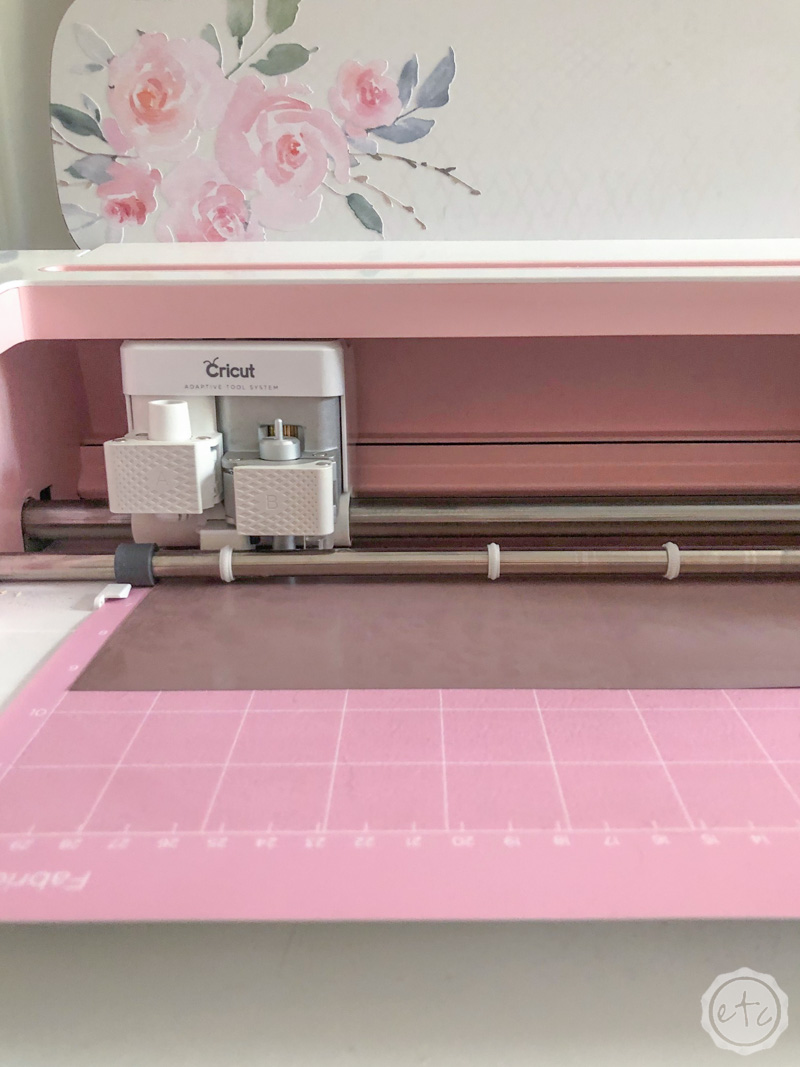
Step 2: Cut your Materials
Now that we have our cut files ready to go let’s prep our materials and cut our designs! We’ll need 2 different colors of cardstock (I picked off white and a rose gold poster board) and two colors of iron-on (I picked the rose gold and blue sheets from our metallic sampler).
Go ahead and load all of your materials onto your cutting mats making sure that the iron-on is face down so that you can cut into the back of the material. I used fabric grip mats for everything but you can use a standard grip mat for the iron-on if that’s easier. You will want a light grip mat for the cardstock though… standard grip will be too strong for your delicate paper.
Make sure to mirror your iron-on designs and then click cut! All that’s left is to watch your Cricut work… enjoy the magic!
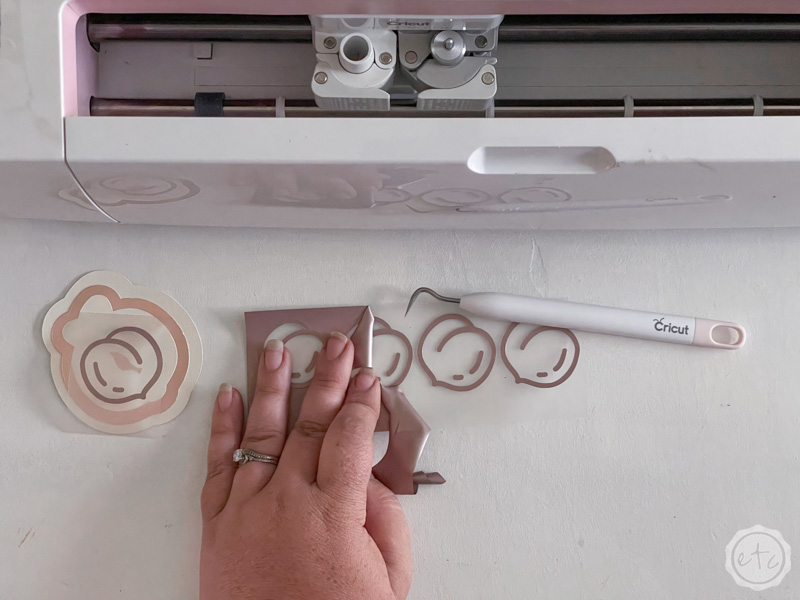
Step 3: Weed your Pieces
Our cardstock pieces will pop right off the cutting mat but the iron-on pieces will need a smidge more help. Go ahead and remove everything from the cutting mat and then grab your sharpest weeding tool.
It’s time to weed these babies!
Use your weeding tool to remove all the negative space from both sheets of iron-on… then cut the peaches apart so you have each design on it’s own carrier sheet.
In the case of your large design (for the cake topper) you’ll have a blue design (saying Peach Please) and the actual peach that goes with it. You can trim the peach design down and place it on the carrier sheet for the blue Peach Please layer… so that we can iron both colors on our cardstock at the same time.
The more heat on our cardstock the more it will wan to curl so by combining the layers we’re minimizing the heat. Win, win!


Step 4: Apply the Iron-on to your Cardstock
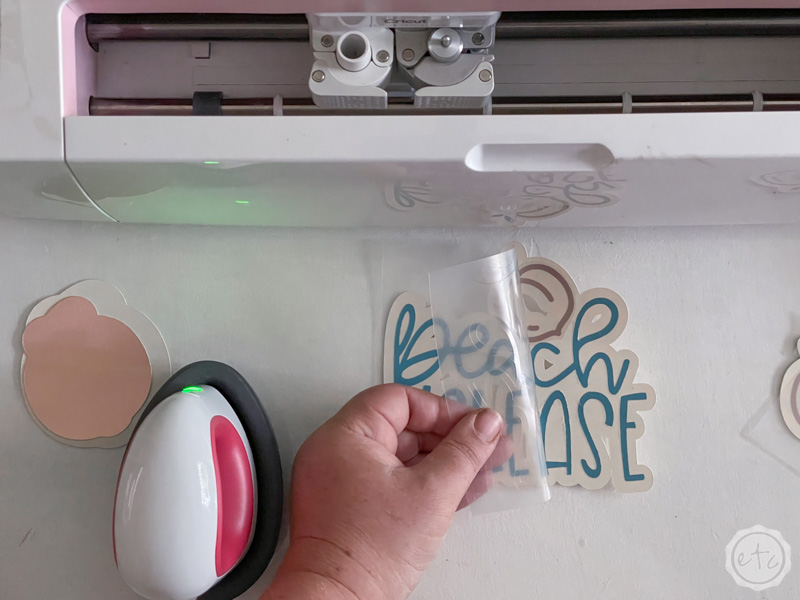
Once everything is lined up and ready to go we can start heating these babies up! Turn on your mini easy press to level 3 and let it warm up.
Then make sure your iron-on is lined up perfectly over the next cardstock layer… once everything is good to go place your easy press down in the middle of the design and smoothly pull it to the edge. Iron the entire design from the middle out while applying even pressure.
You only need to go over the surface once or twice since we don’t need a lot of heat to apply iron-on to cardstock. Once you’re finished with the easy press go ahead and move your easy press mat… then place your cardstock/iron-on layer directly on your desk (or another hard surface) and use your scraper tool to firmly smooth across the surface. I find that this really bonds the two layers and helps them to melt into each other.
Once the carrier sheet has cooled down you can remove it from the cardstock leaving the iron-on behind.
Volia!


Step 5: Add Double Sided Foam Tape
Ready for the fun part? Adding shadows and dimension!
We want these babies to pop!
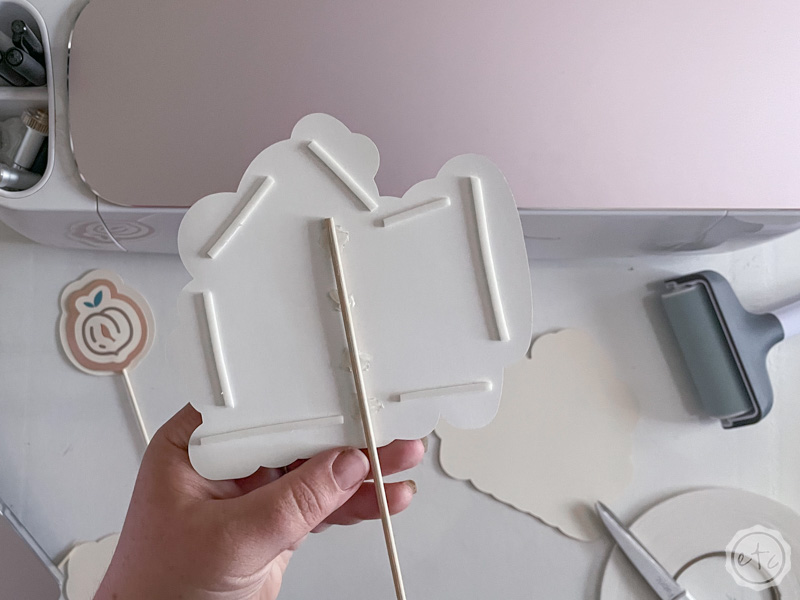
As you can see above simply laying the layers on top of each other works just fine. They’re so cute! BUT if you add a bit of double sided foam tape in between each layer you get shadows, you get dimension, you get contrast.
Each design has 3 layers so the tape will go between layers 1 and 2 as well as 2 and 3. We’ll add a bamboo skewer to the bottom layer as well… this will serve as either the drink stirrer or skewer to put in our cake!
I used a few glue dots to secure the bamboo skewer in place… they’re really strong!

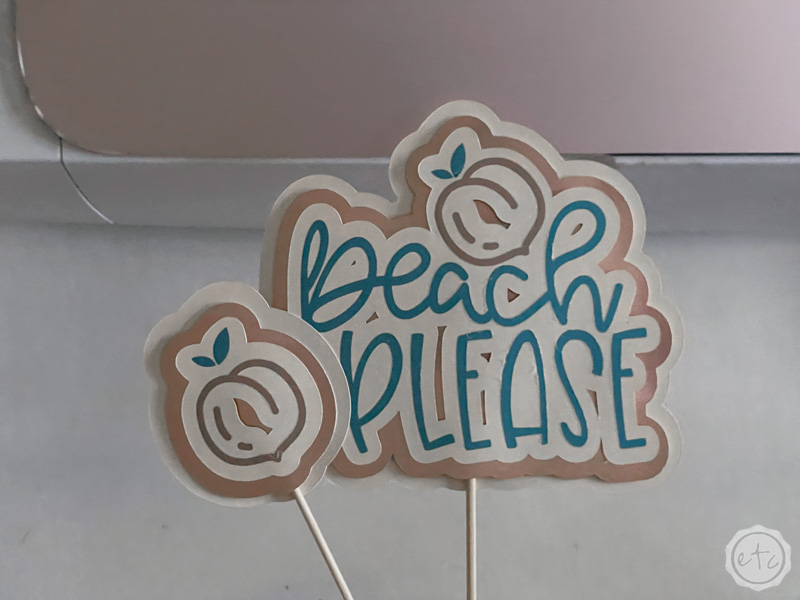
Step 6: Enjoy!
Once all the layers are sandwhiched together you’re good to go! You can use these in so many different ways but I’m off to set my dining room table with adorable peach themed plates so I can use these babies in a fun tablescape.
I can’t wait!
In the meantime you may want to check out the next post in this series where I apply SportsFlex Iron-On to metal!
Or head back to the beginning and check out the full comparison where I apply SportsFlex Iron-On to 5 different materials for a side by side comparison.


Leave a Reply