


If you have been using a Cricut for a while there’s a good chance you’re over the moon with Cricut’s new offset design tool. If you’re not over the moon about it… you will be soon! The offset tool is a way to add a shadow or bubble around any existing shape, text or SVG.
And while they’re not new to the design world it has always been difficult to add them a Cricut design. You had to use third party software (like Illustrator) and have a bit of knowledge about how that software works… plus Illustrator is not exactly free!
So today I’m going to show you how to use the offset tool in Cricut and give you a few examples of exactly what you can do with it.
Ready to get started?
How to use Offset in Cricut Design Space
What Can I do with the Offset Tool?
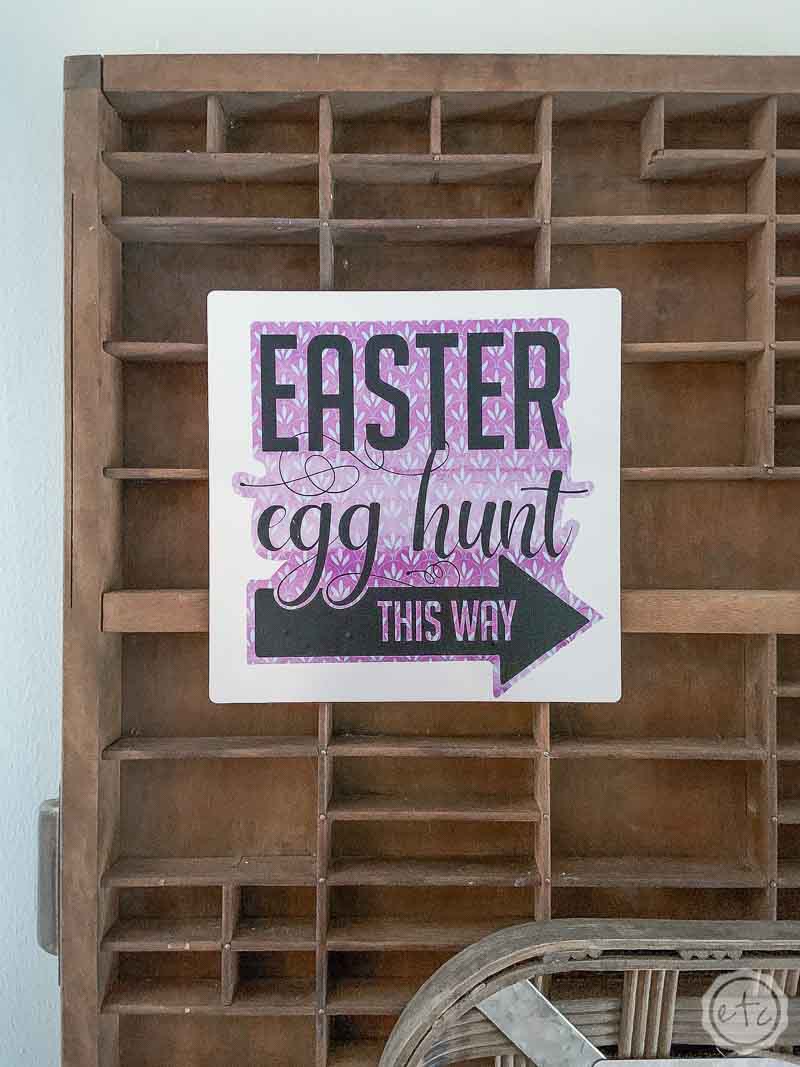
First let’s make sure you understand exactly what an offset path is. Basically the offset path tool makes a larger layer of your design. This is great for backgrounds, like the infusible ink background I used for this vinyl SVG.
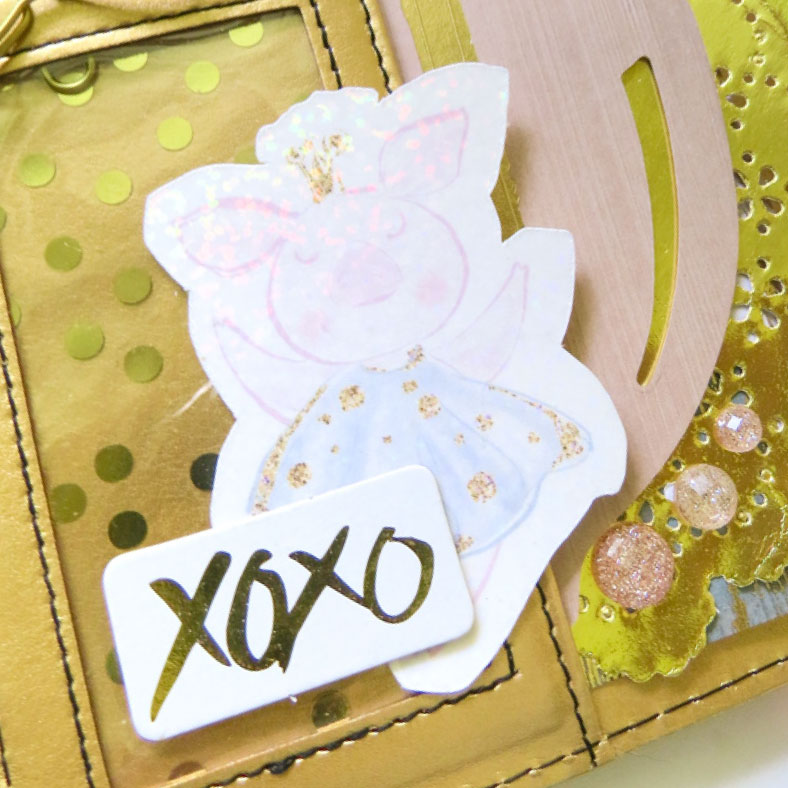
It’s also perfect for “bubble cutting” or adding a background to your stickers or die cuts. I originally had to manually make each die cut’s background for these little planner stickers… but now you can add offset backgrounds to these die cuts in a couple of seconds.
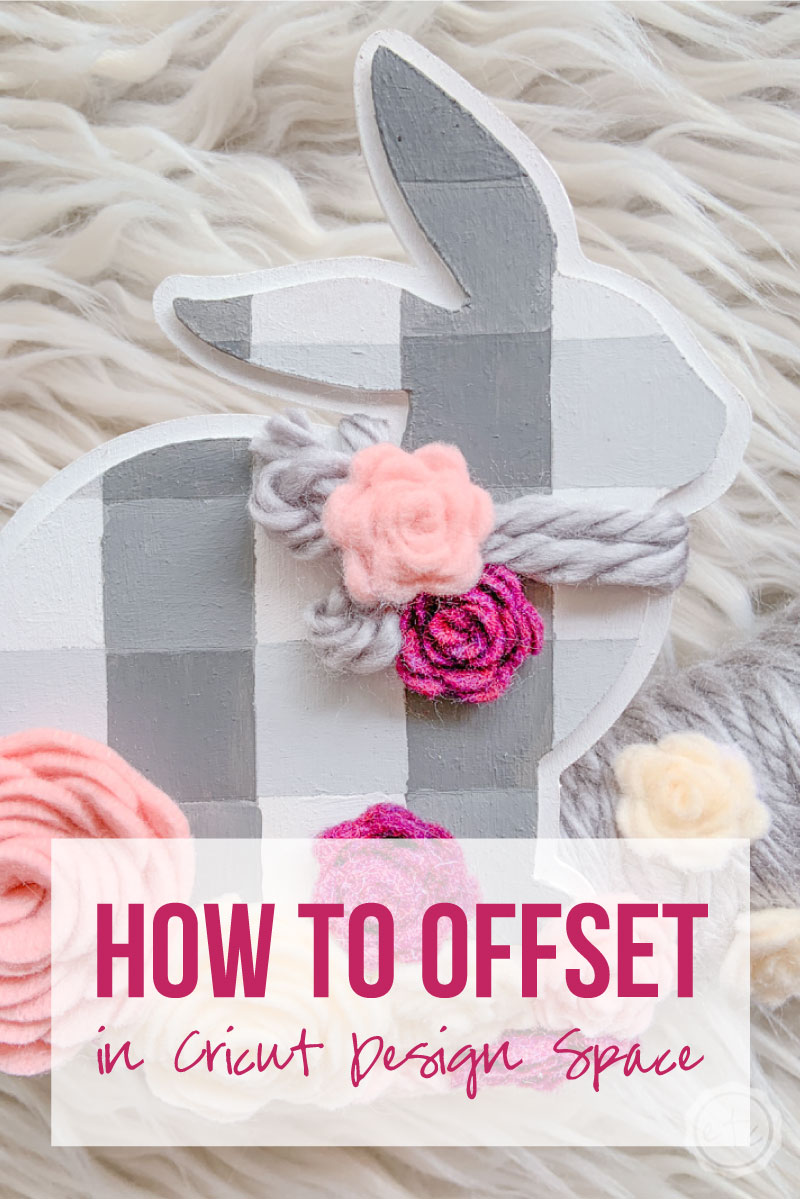
You can make simple offset paths for shapes like this little buffalo check bunny. I cut the original bunny out of basswood and then cut a second larger (offset path) bunny also out of basswood. Then I could put both layers together to make one strong bunny combo for my little felt flower bunny wreath!


One last example before we get into the actual tutorial: t-shirts! When you’re making a t-shirt a white offset path behind the SVG can really make your design pop! I added an offset path background to the “Winterfell” text as well as the castle design for this little Game of Thrones based T-shirt.

Offset is only one of many confusing terms in the Cricut vocabulary! Weeding, contour, vinyl… if you need the full run down on all the Cricut terminology I’ve got your back. Check out this post for a full explanation of all the words in the Cricut glossary. I’ll have you up to speed and crafting in no time!
How to Use Offset in Cricut Design Space
Before we jump into the actual tutorial let’s cover the basics. In order to use the new offset feature you’ll need to use the most recent version of your computer’s hardware. That would be Window 10 (64-bit only) or higher, or macOS 10.15 or higher.
And remember… offset is only compatible with Design Space on a Desktop, you won’t be able to create offset paths on mobile or ipad.
Let’s get started!
Step 1: Select your Image
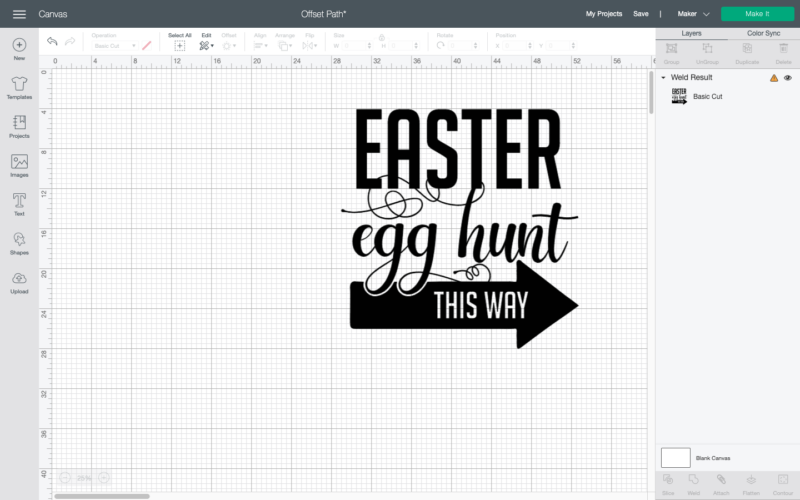
Begin by uploading an SVG, writing a bit of text or inserting an image onto your Design Space Canvas. When using the offset feature you can select a single layer, multiple layers, or multiple objects… which is pretty cool! For this project I’m going to grab one of the Designs from my FREE Easter Svg Collection.
Go ahead and add your svg to the canvas and weld all the layers together. Now we have one Easter Egg Hung cut file that we can add an offset path to.


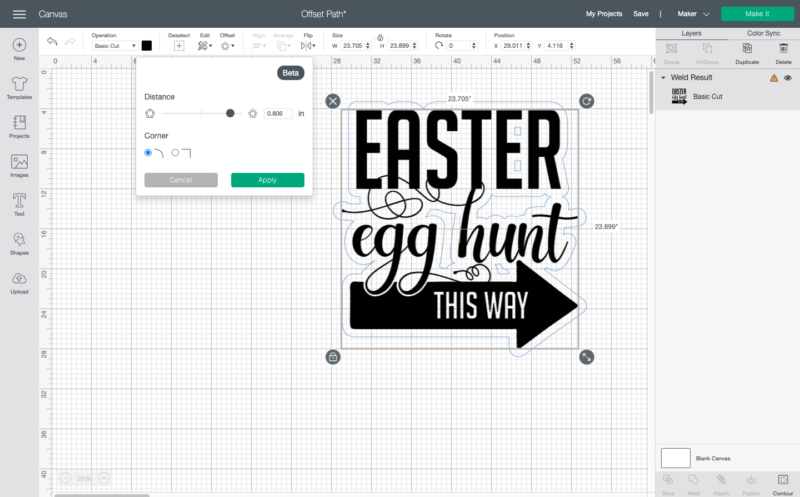
Step 2: Select Offset Path
Now select the layer (in the layers panel) that your art work is in, then head up to the top toolbar. You’ll find the offset tool to the right of “edit” and “deselect”. Go ahead and click it… this will bring up a drop down menu.
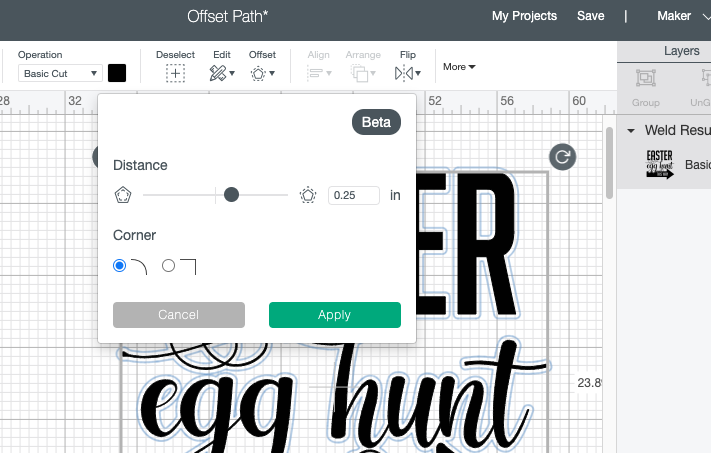
The dropdown menu will have a few options.
Distance: This controls how far the offset path will be created from the outer edge of your current image. 1 inch is the furthest away you can get… or the largest offset path you can create.
Corner: You can create rounded corners or sharp corners. Nine times out of ten a rounded corner looks best but you can always play around with the options to decide which one you like.
Weld Items: I don’t have this option but I’ve seen it on a friends Design Space. It lets you decide if you want to make one offset path image or several. In this case we want one singular layer behind our text.
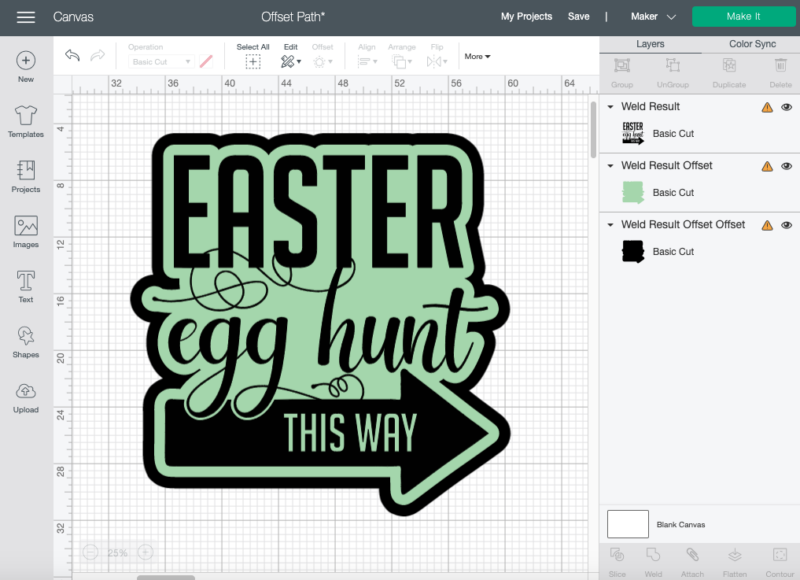
Now that we know the options let’s adjust them! For this project we want to bump up the distance until the area underneath the R (of easter) and the t (in hunt) are connected. Then select rounded corner and hit apply!

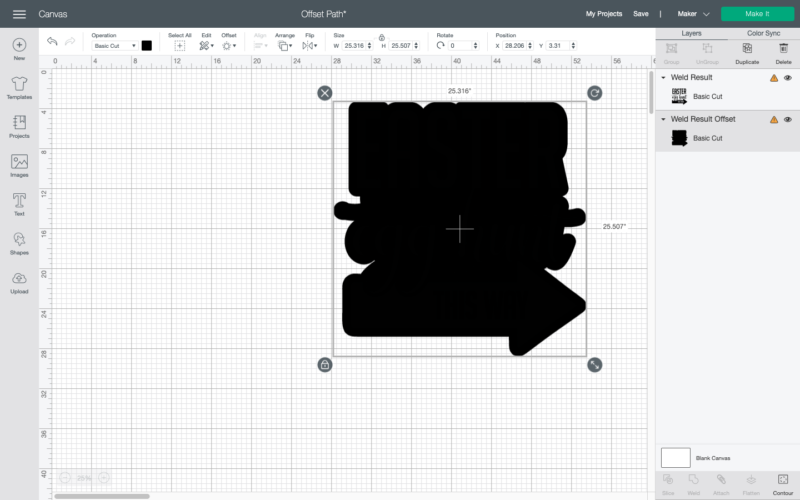
Step 3: Contour your Image
If you’re doing a simple image you may not need this step… but for this particular image we want one continuous layer. Which means all the little odd negative spaces in between our letters need to go.
The easiest way to do this is to select the image in your layers panel, then hit contour at the bottom right of the layers panel.
This will bring up a separate display box where you can pick individual layers to turn on and off or turn off all the little layers at once.
That’s what we want to do!
Go ahead and select Hide All Contours at the bottom of the box, then hit the x to leave this screen and go back to your Design Space Canvas.
Now you should have one large design without any strange spaces in the middle.

Step 4: Change the Color of your Offset
Ready for the last step? In this case we want to cut our image out of one material (vinyl) and our offset path out of a different material (infusible ink) so we’ll change the color of our offset path so that Cricut knows these two layers need to go on different cutting mats.
If we were cutting both out of the same material (say the image and offset of the basswood bunny for the buffalo check bunny wreath!) you could leave both pieces black and simply hit make it.
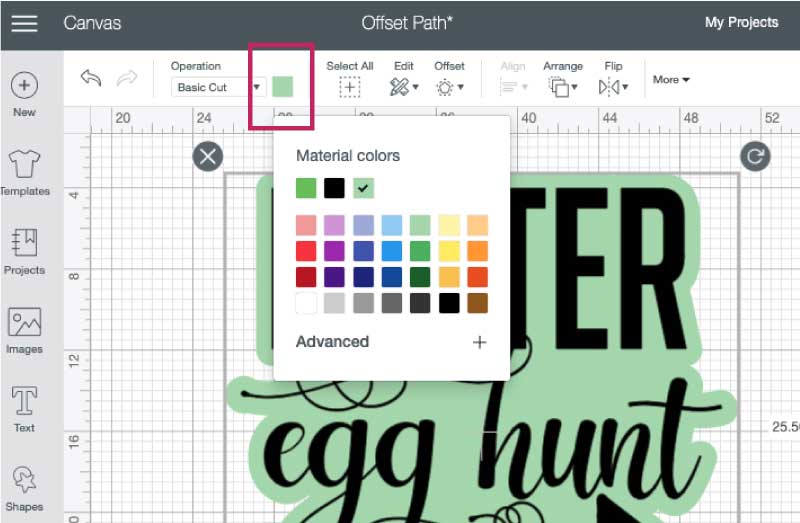
To change the color you’ll want to select the offset layer in the layers panel. Then go back to the top toolbar and select the little box of color next to the operations dropdown. Then select whatever color you like (I picked green) and the color should automatically change.

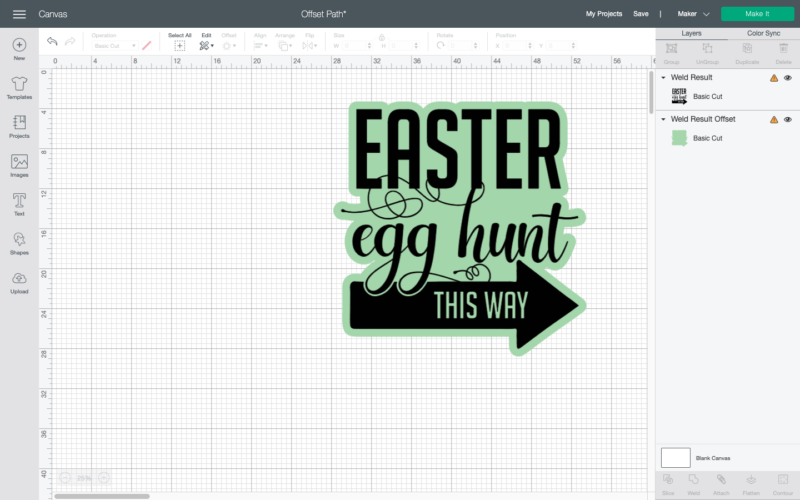
At this point we’re all set. We can cut both our offset layer and our original svg!
Score!
If we click make it Design Space will sort our images onto two different cutting mats, now we can cut both pieces out of different materials.


Optional Step 5: Flatten your Images
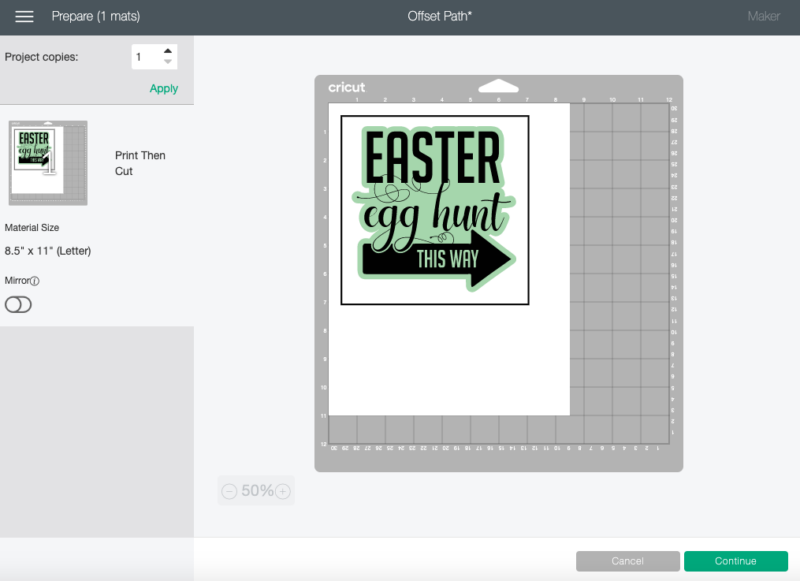
On the other hand if I wanted to create a print and cut sticker or die cut then multiple mats would not be helpful to me. For a print and cut sticker I need my image and my offset to be one image that will all print together on the same page.
Luckily this is easy… simply select your image and the offset path from the layers panel and then select flatten.
This will flatten everything into one image that you can use to make a sticker or die cut. Click make it and you’ll find your new image set up with a boundary box ready to be printed.
Optional Step 6: Add an Outline
So the thing about offset paths? You can just keep making them! If you want a black outline around the offset path you just created simply select the offset path layer and make a new offset path.
You can then flatten all 3 layers to make one image… or keep going. 12 offset paths might be a lot but who’s to judge? You might be making an everlasting gobstopper of an image!
Or cutting multiple layers of basswood for a topographical map!
You never know just what you’ll be making.

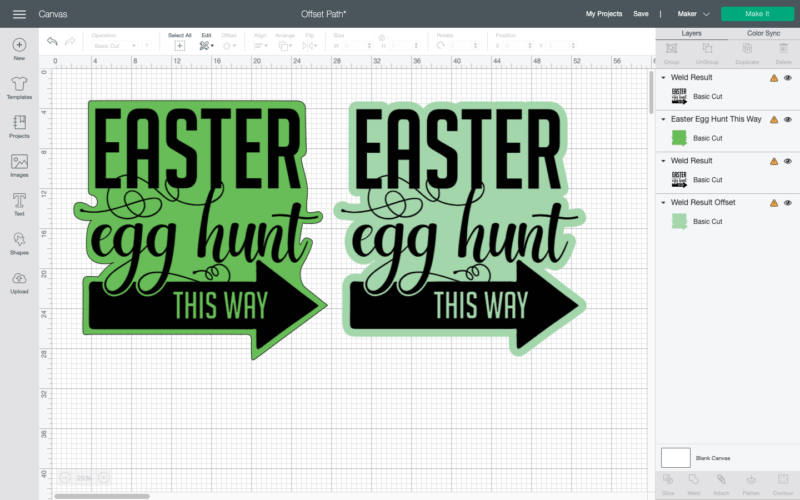
Offset Path Comparison: Illustrator vs Design Space
Just a quick comparison… in the image below the offset path on the left is one I created in adobe Illustrator before the offset path option was released. The offset path on the right is the one we just created together in this post.
You can see that both offset paths are very similar. In fact the Design Space path is a bit more detailed! Mine took 5-10 minutes to manually make whereas the offset path in Design Space was under a minute from start to finish.
This is definitely a game changing tool!
Ready to take the leap but not sure which machine is right for you? Check out my Explore Air 2 and Maker comparison before pulling the trigger. I go over the pro’s and con’s of each machine and even have an easy to read check list of each machine’s features so you can decided which cutting machine is perfect for you.


Leave a Reply