

This is NOT a sponsored post but there are affiliate links here for your convenience!

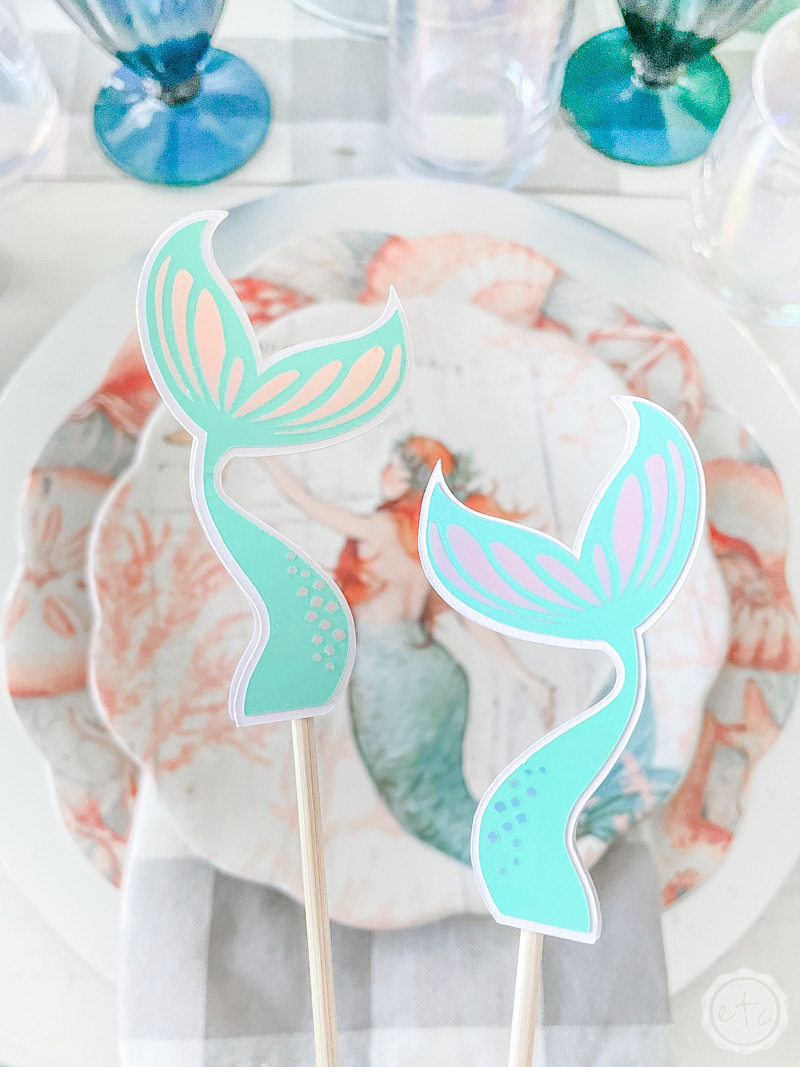
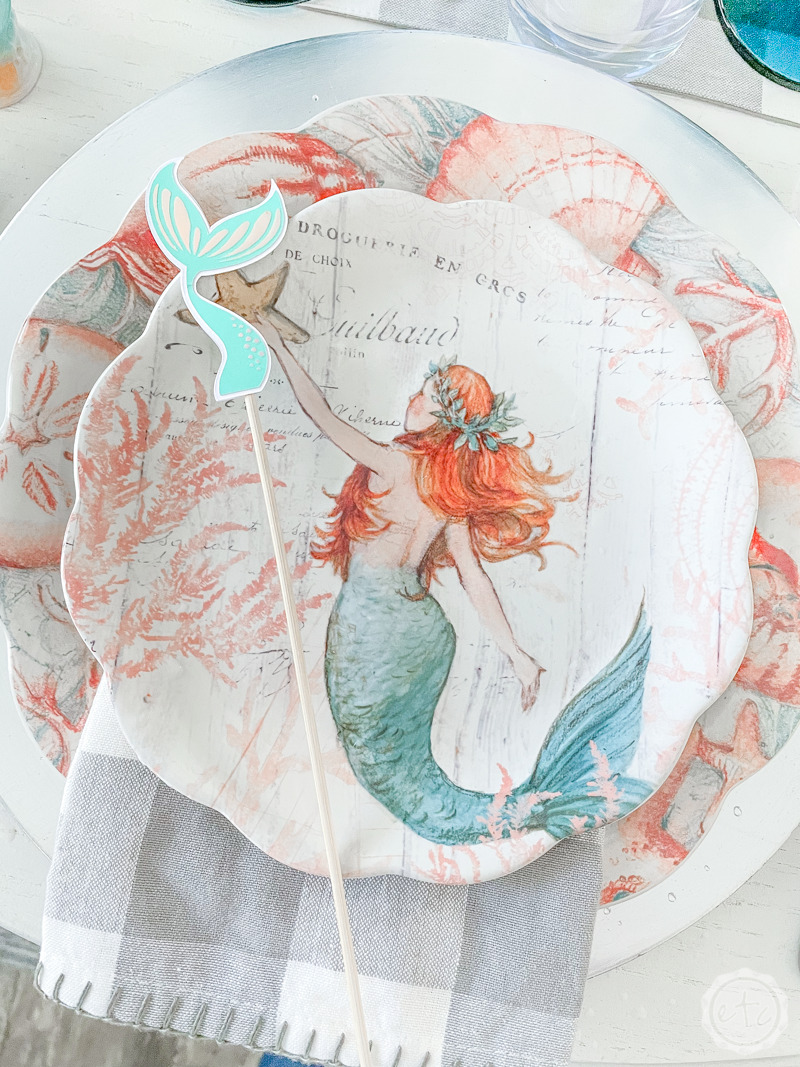
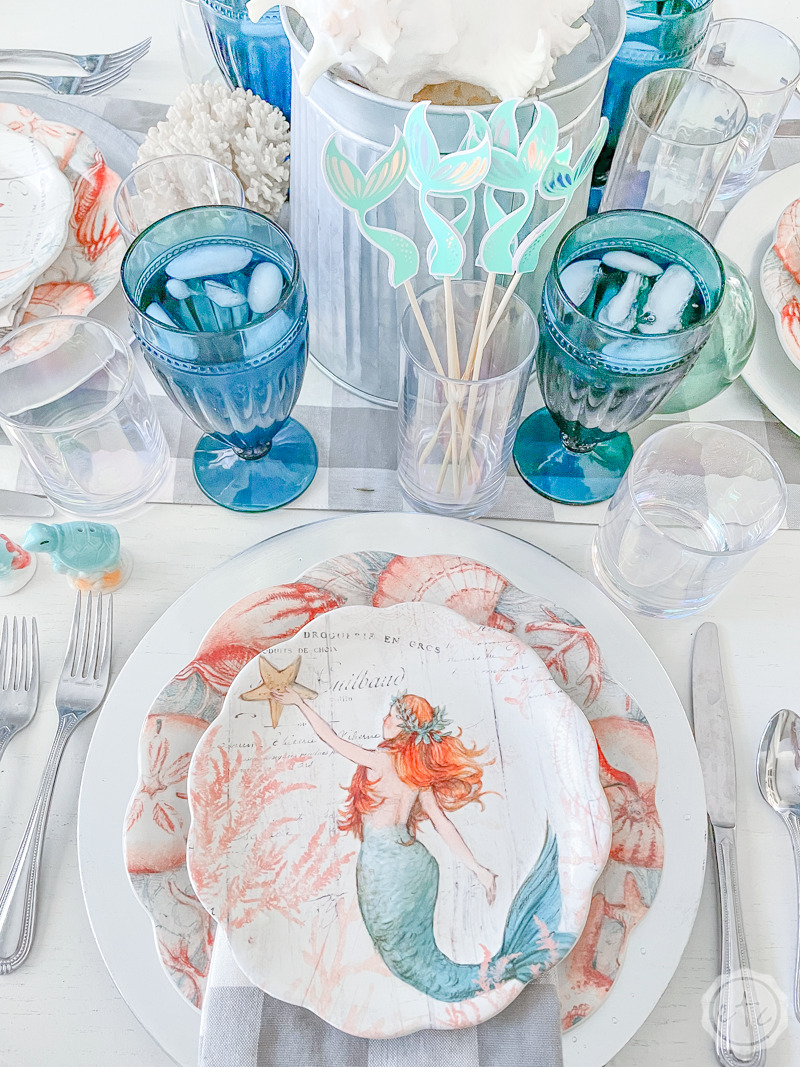
Last week I was working on this beachy mermaid inspired table… I found these amazing plates with mermaids and I knew they would be fantastic in a tablescape. I knew that this little tablescape would look amazing in my newly made over dining room! But while I loved the plates I didn’t want to buy the entire collection or go on a shopping spree for new decorative pieces. So instead I put together my plates and figured I’d live with a few flowers as a centerpiece.
Then (as I was going to bed) it hit me… I was scrolling through Instagram and saw a set of adorable flamingo drink stirrer’s made with a Cricut! So instead of leaving well enough alone I rolled out of bed to whip up a few fabulous drink stirrers of my own! I wanted mine to work with the teal and orange color scheme of my plates so I grabbed my new pack of smart sticker cardstock and got to work.
Starting with searching the Cricut Access Library for a mermaid tail cut file that would match my salad plates!!
Let’s go!
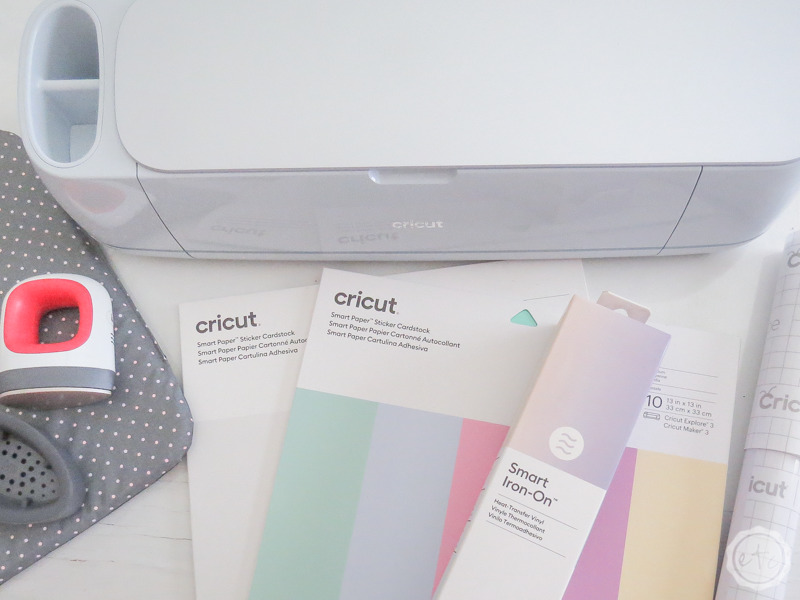
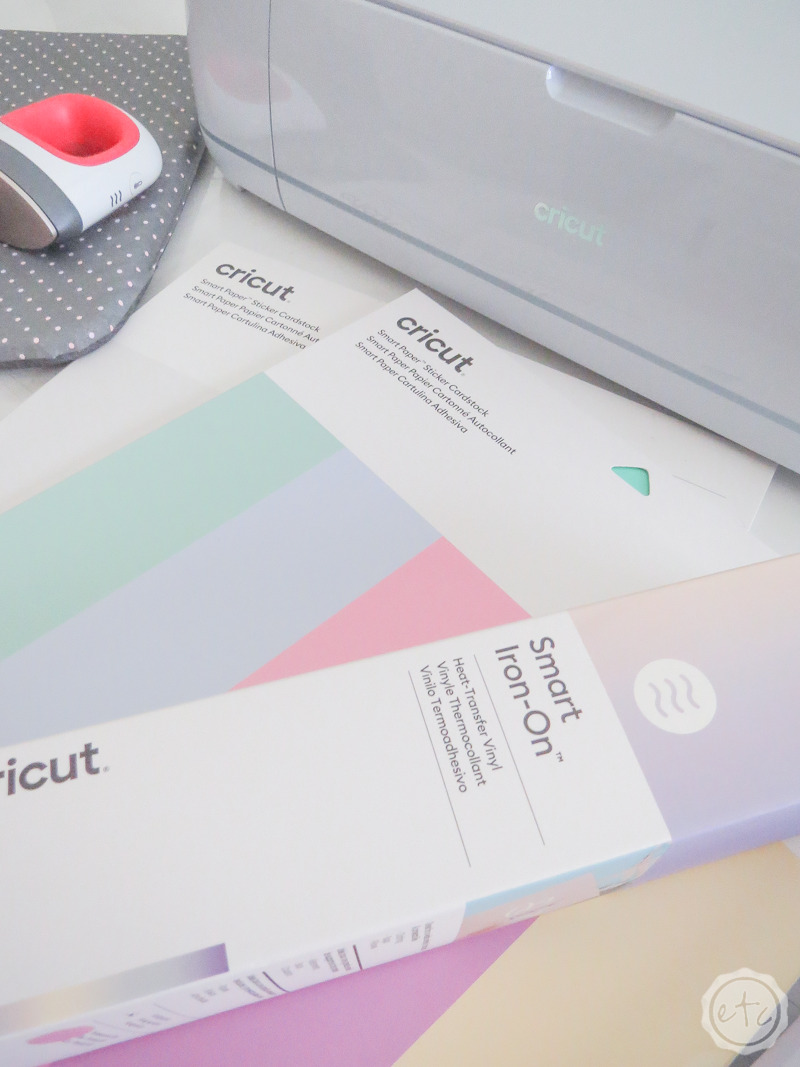
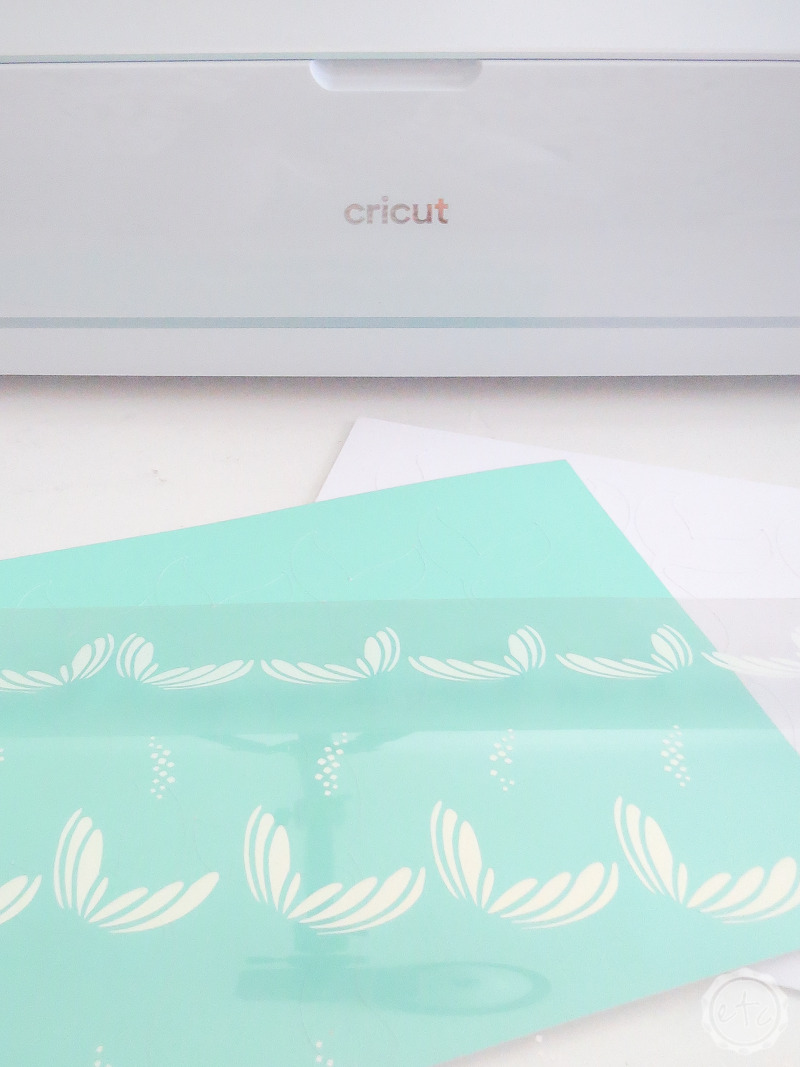
For this project I used my Cricut Maker 3 so that I could utilize these fun new smart materials… and if you’re unsure what smart materials are they’re special Cricut materials that work without a mat.
Fancy!
I’m using smart sticker cardstock and smart iron-on for this project… which is my new favorite thing. Smart materials make things so quick and easy. This entire project took about an hour: from finding a cut file, to cutting the pieces, assembling them and setting them on the table.
PLUS I had to video everything and take all these pictures!
You can check out my Cricut Maker 3 unboxing post here for all the details on the newest machine.
Of course, the Cricut Explore Air 3 and Cricut Joy work with smart materials as well… so keep that in mind if you’re buying your first Cricut!
Supplies:
- Cricut Maker 3
- Cricut Access
- Smart Sticker Cardstock in White
- Smart Sticker Cardstock in Pastel
- Blue Holographic Iron-On
- Mini Easy Press
- Easy Press Mat
- Weeding Tool
- Vinyl Roll Holder
- Wooden Skewers or Paper Straws
Step 1: Prep your Design Files
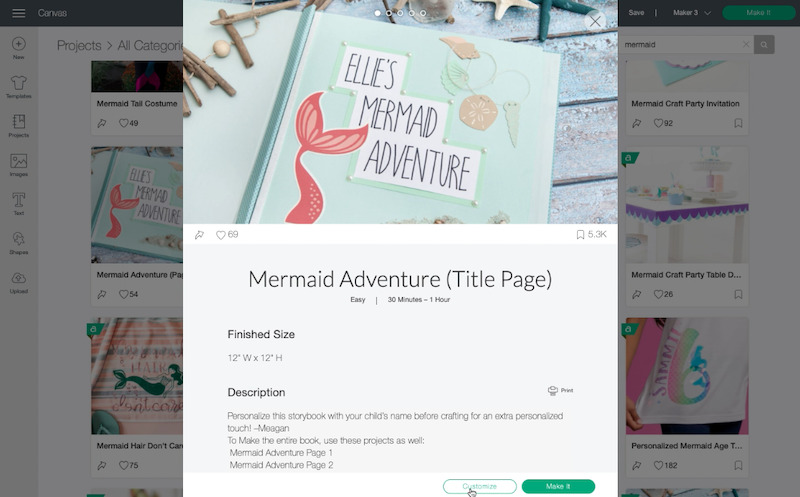
Ready to jump in? I started by searching my Cricut Access library and found a few mermaid tails… but I liked this little option from the “Mermaid Adventure Title Page”. I didn’t need all of the cut files (although if you want to make a few varieties there was a cute shell that would make an adorable drink stirrer as well) so I just copied the mermaid tail and created a new project.
Paste the mermaid tail onto your new canvas and you’re good to go!
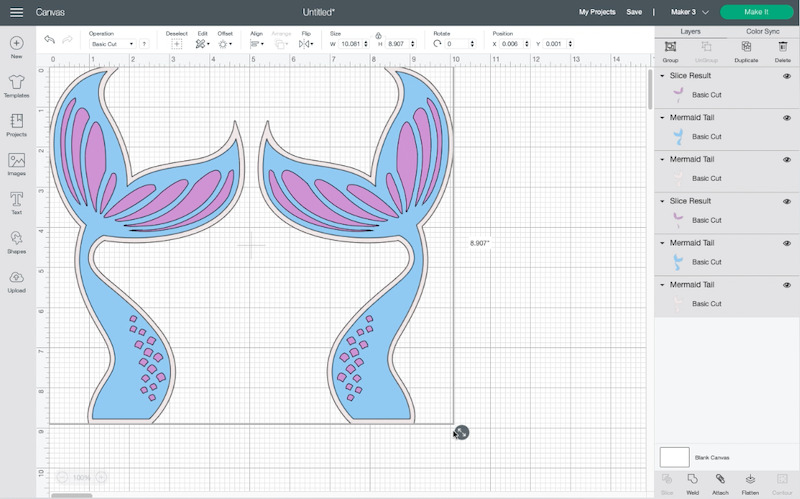
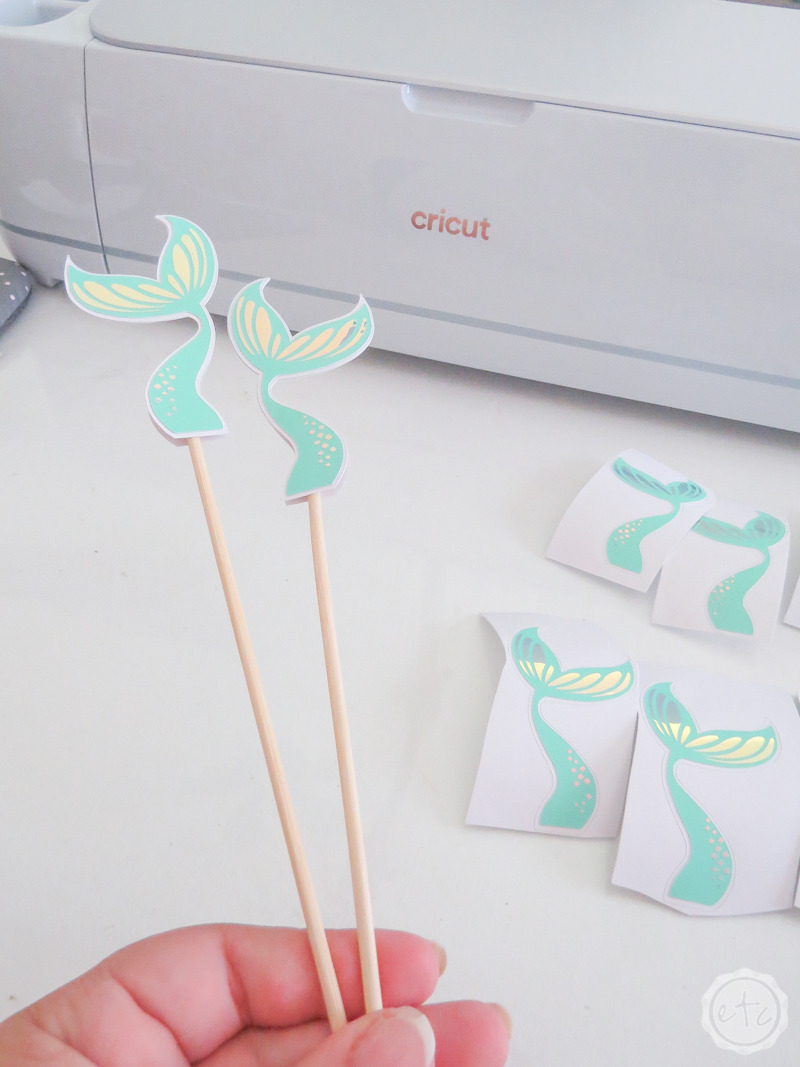
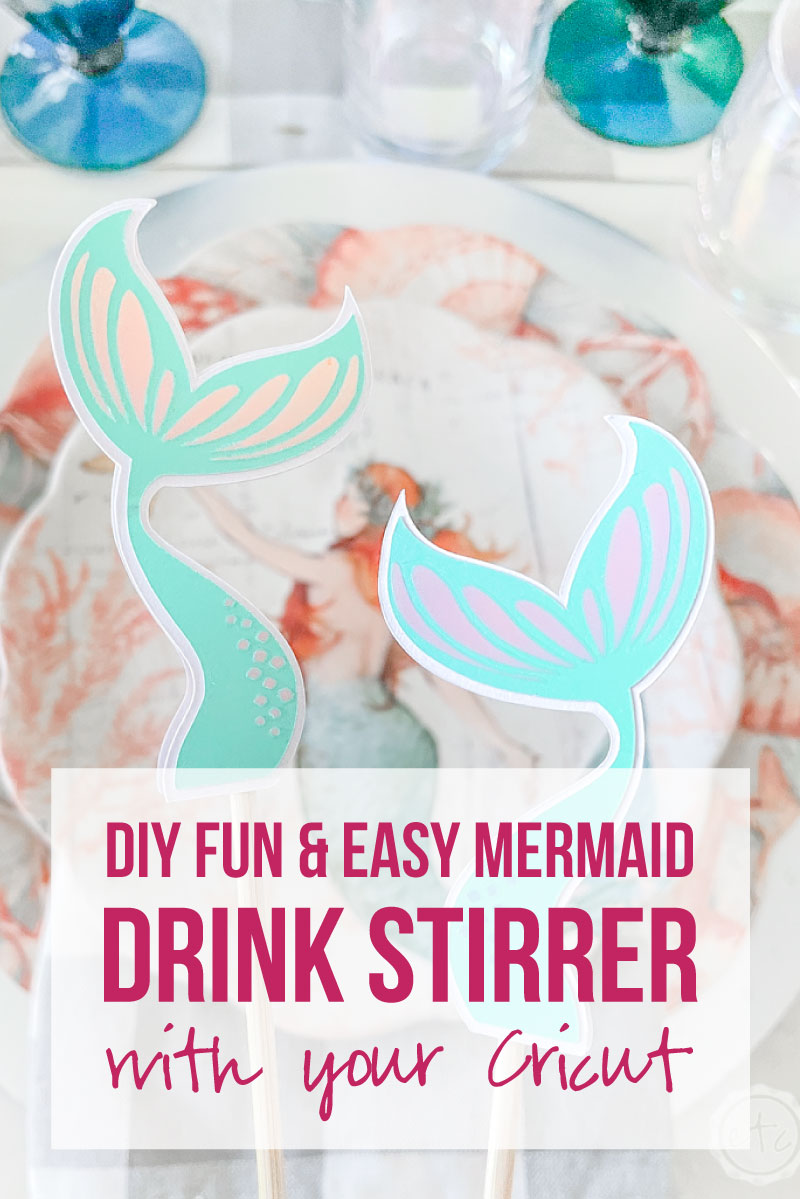
At this point you can leave the cut file exactly as found or you can change it up a bit. I decided that I wanted to use holographic iron-on for all the little detail pieces (the scales and parts of the fin) so I copied the top two layers and pasted them… then used the slice tool.
Then I deleted everything but the back base layer, the middle layer (that’s the same as the base layer but a little smaller), and the top scales. If this is too confusing I screen recorded the entire thing so just check out the how to video up above.
From here I copied all three layers, pasted them to make a copy and then used the flip button to flip them over. We need two copies for our drink stirrer after all… one for the front and one for the back! Now select allllllll the layers and re-size these babies.
After all 9 inch drink stirrers would be the whole darn glass!! Typically you want to make your drink stirrer between 2 and 3 inches and since these are tall and skinny I went with 3 inches tall. At 2 inches the details were just a tad bit small… 3 inches tall gave us a good width and enough details to make these babies pop.
Now we’re good to go… go ahead and click make it in the upper right corner.

Bonus Tip: Confused about all the lingo? You might want to check out my Cricut ABC’s post where I go over all the fun Cricut terminology that you’ll come across while making your projects. Or go back to basics and check out my complete guide to Cricut Design Space… you’ll be ready for your next project in no time!
Perfect!
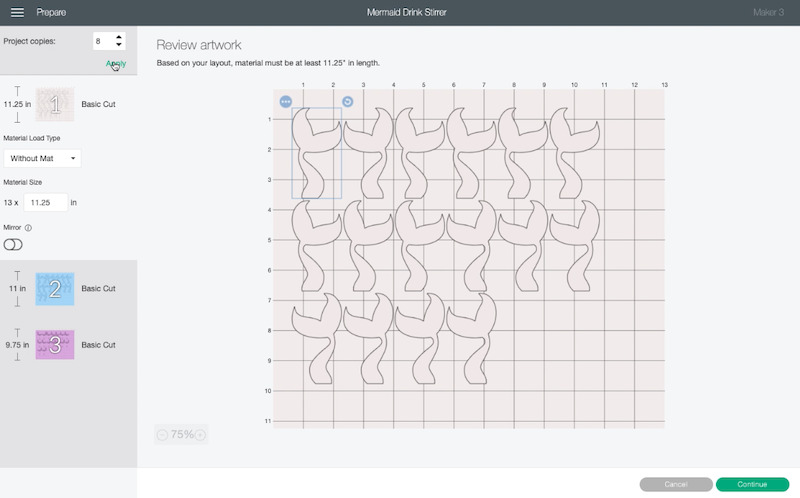
Once you click make it Cricut Design Space will ask you if you’re using a mat or not… we’re using all smart materials so we’ll pick the option on the left for no mat. Then we’re at the review artwork screen!
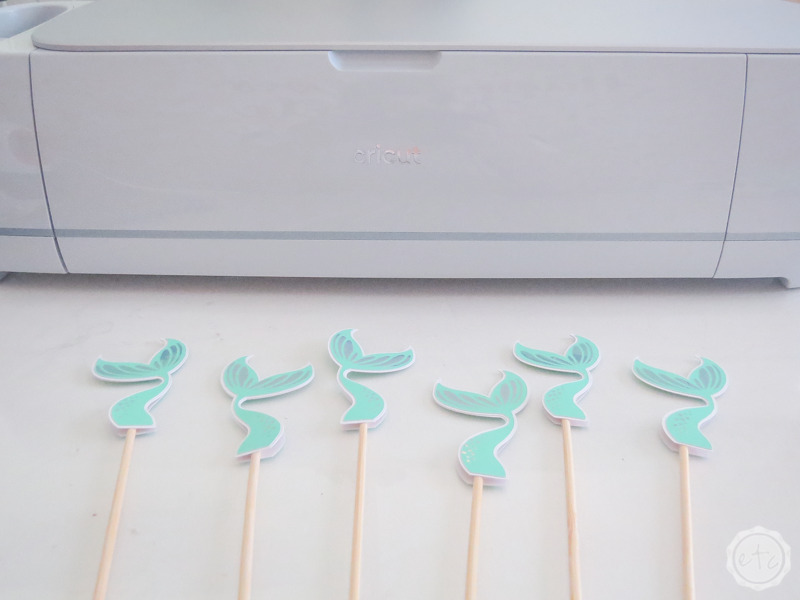
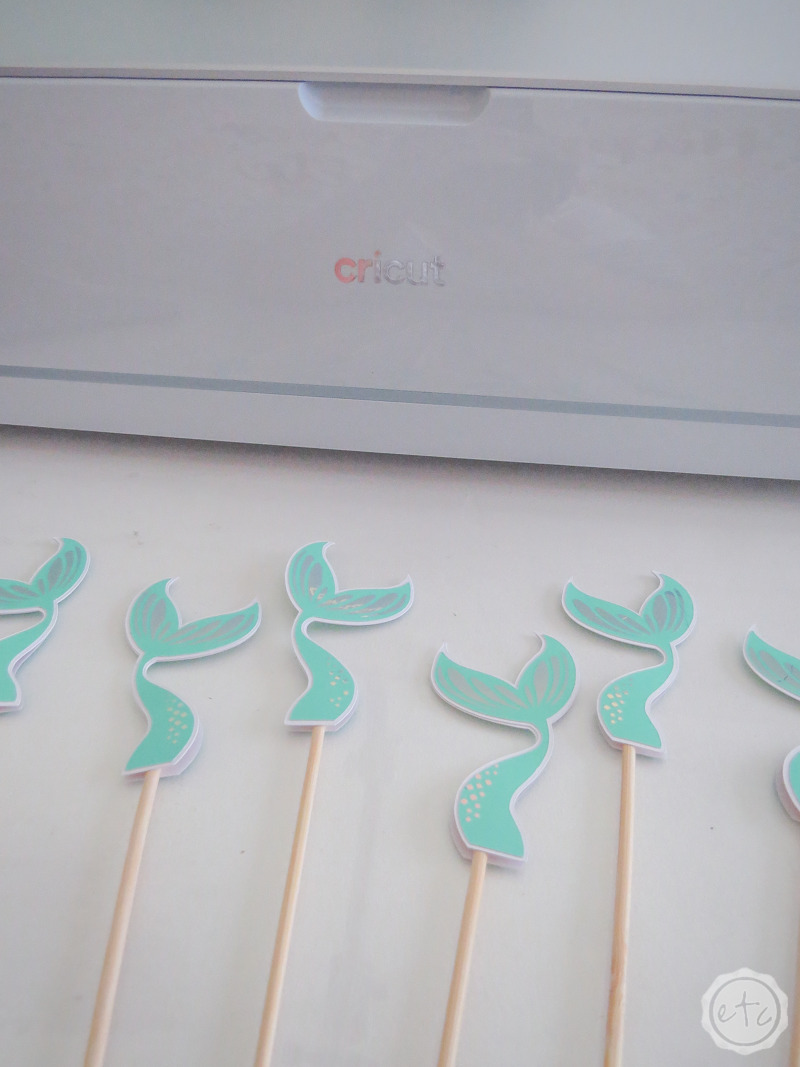
I need to make more than one of these (only having one drink stirrer for the table wouldn’t go over well!) so I simply upped the number of project copies at the top left and then hit apply. I knew I needed 4 but I wanted a few extra… so I played around with the settings seeing how the copies populated on the pretend cutting mat and decided to go with 6 copies.
Now head down to the third layer (in my case that’s the purple layer). It’s also the layer with allllll the top layer holographic iron-on details. And as we know when you’re working with iron-on you need to load the material shiny side down and make sure the design is mirrored. If you forget the cut settings will remind you but for now make sure to click that mirror button. Then click continue!
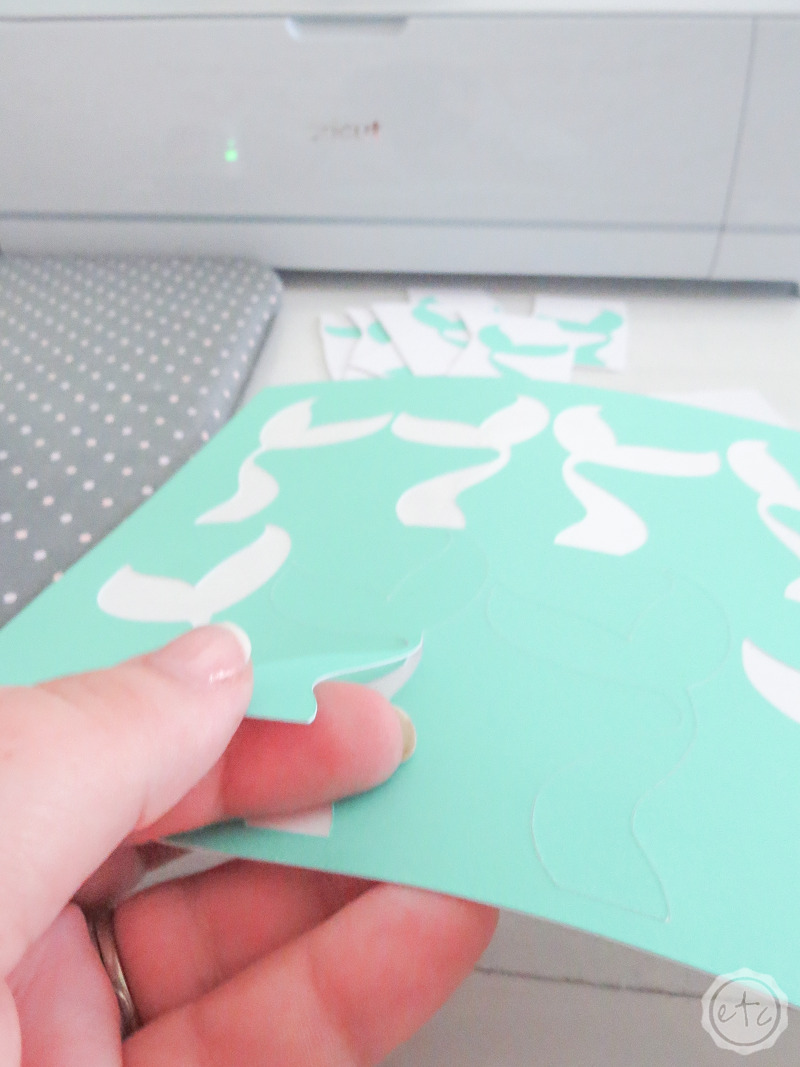
Step 2: Cut & Weed your Designs
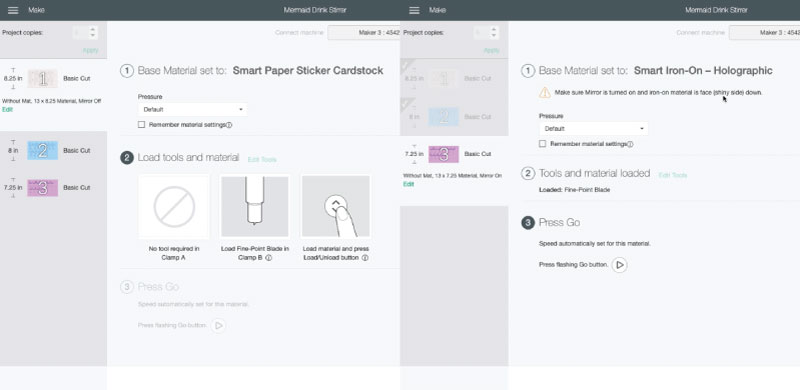
Now all that’s left is cutting all 3 layers! Design space will ask you (one layer at a time) which material you’re working with and which pressure you’d like to use (more, default or less). I find that smart sticker cardstock and iron-on both work fine with default pressure… and of course the fine point blade (which Cricut will tell you to use if you’re not sure).
Just make sure you have a sharp blade (you can sharpen it on a ball of aluminum foil if it’s a little dull) for cutting cardstock… otherwise it can tear.
Make sure to cut the back layer out of your white sticker cardstock, the middle layer out of the aqua blue smart sticker cardstock and the top layer out of that holographic iron-on… or if you change the colors just make sure you’re cutting the right layer out of the right material.
Perfect!
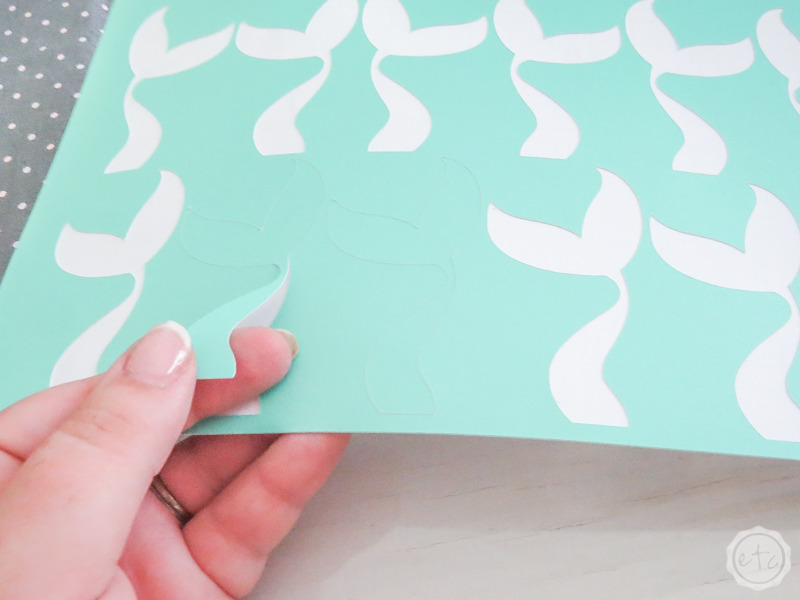
Ready to weed these babies?
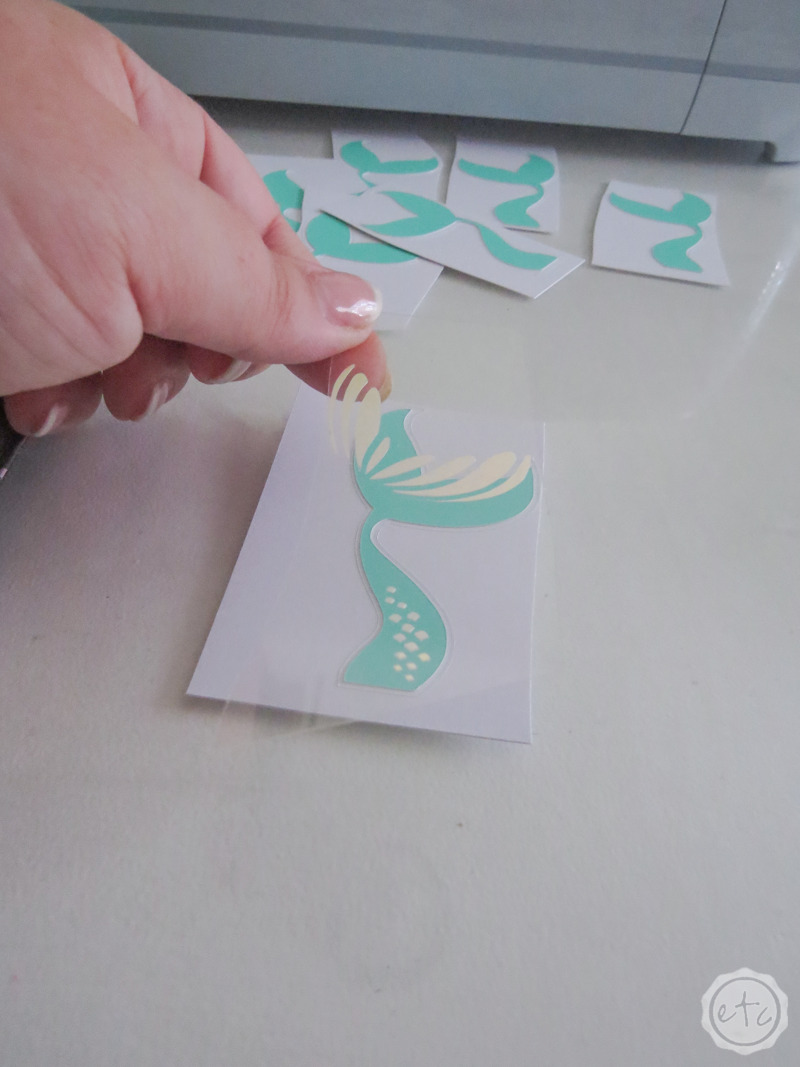
Honestly the sticker cardstock paper is as easy as removing a sticker but the iron-on needs a second more effort. Use a weeding tool to remove the background leaving the design and a clear carrier sheet.
The excess iron-on should come off fairly easily but those little scales will be realllllly little so just watch that you don’t throw the baby out with the bathwater!
Then we’ll move on to the next phase: assembly!
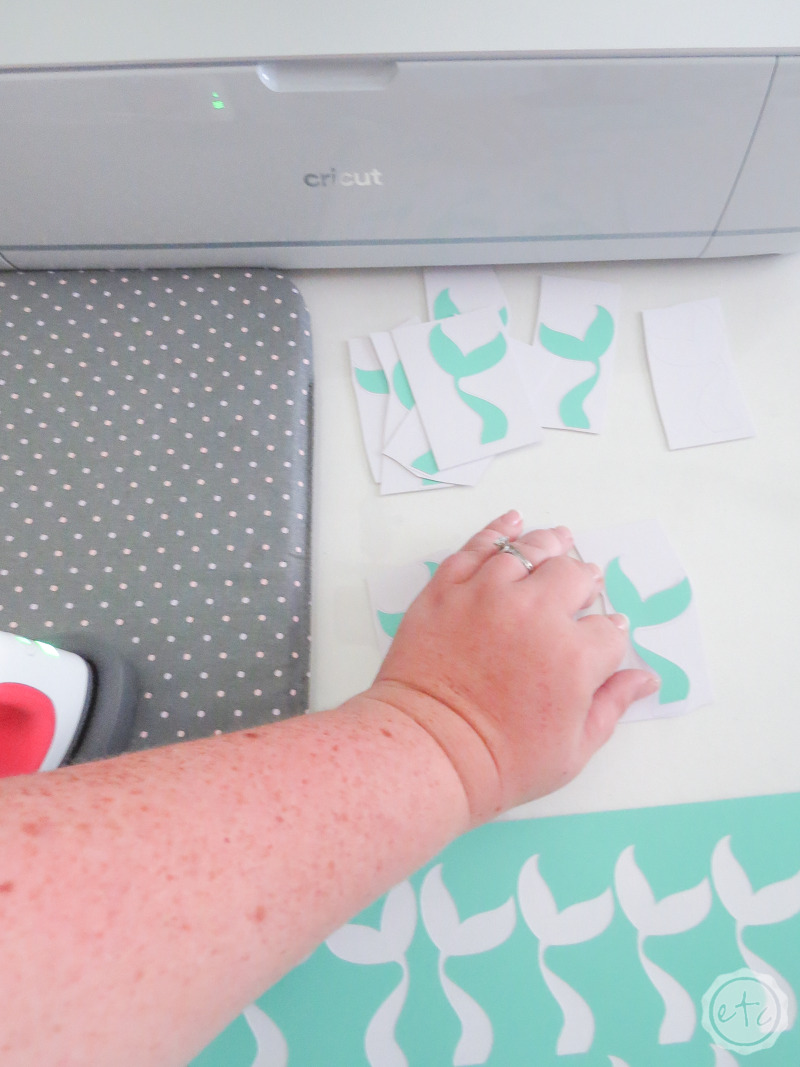
Step 3: Assemble the Base
This part was soooo fun!
I’ve worked with Cricut’s cardstock before but never their sticker cardstock… and it really is just like a sticker! I was able to lift each piece directly out of the sheet… no muss, no fuss, just like butter!
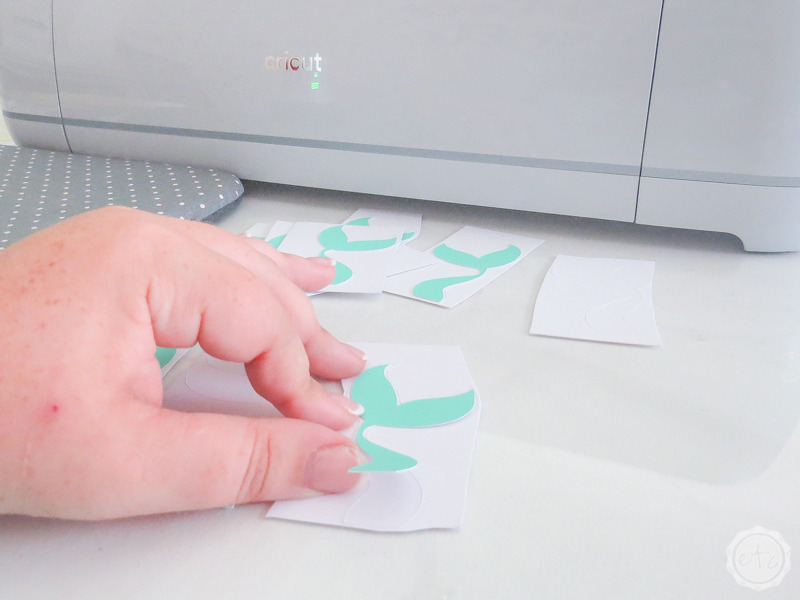
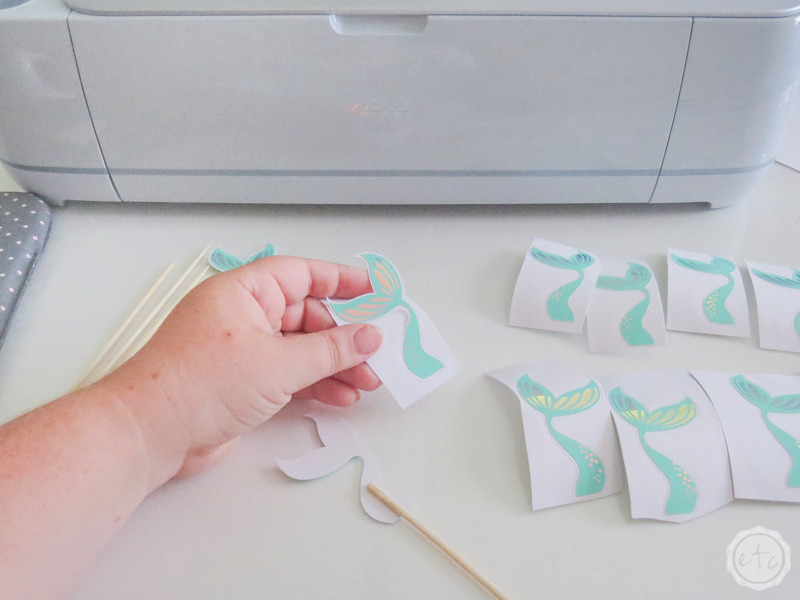
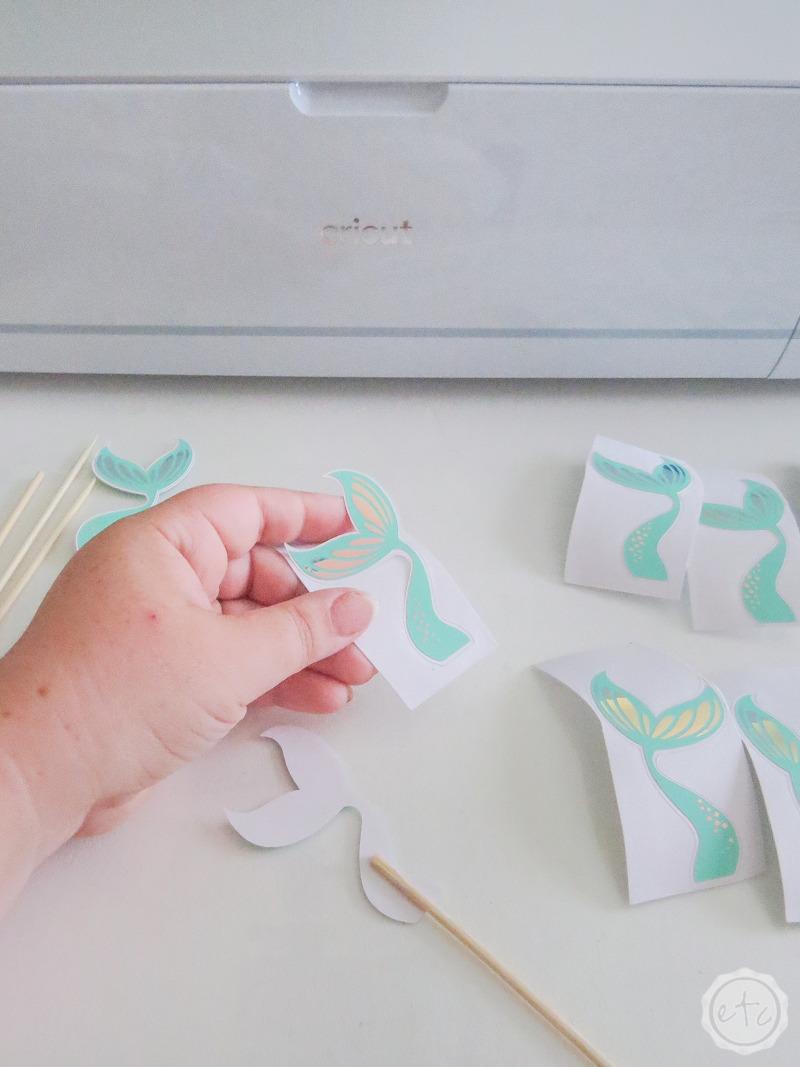
I started by taking all the aqua tails off their backing sheet and placing them onto the white mermaid tails.
Perfect!
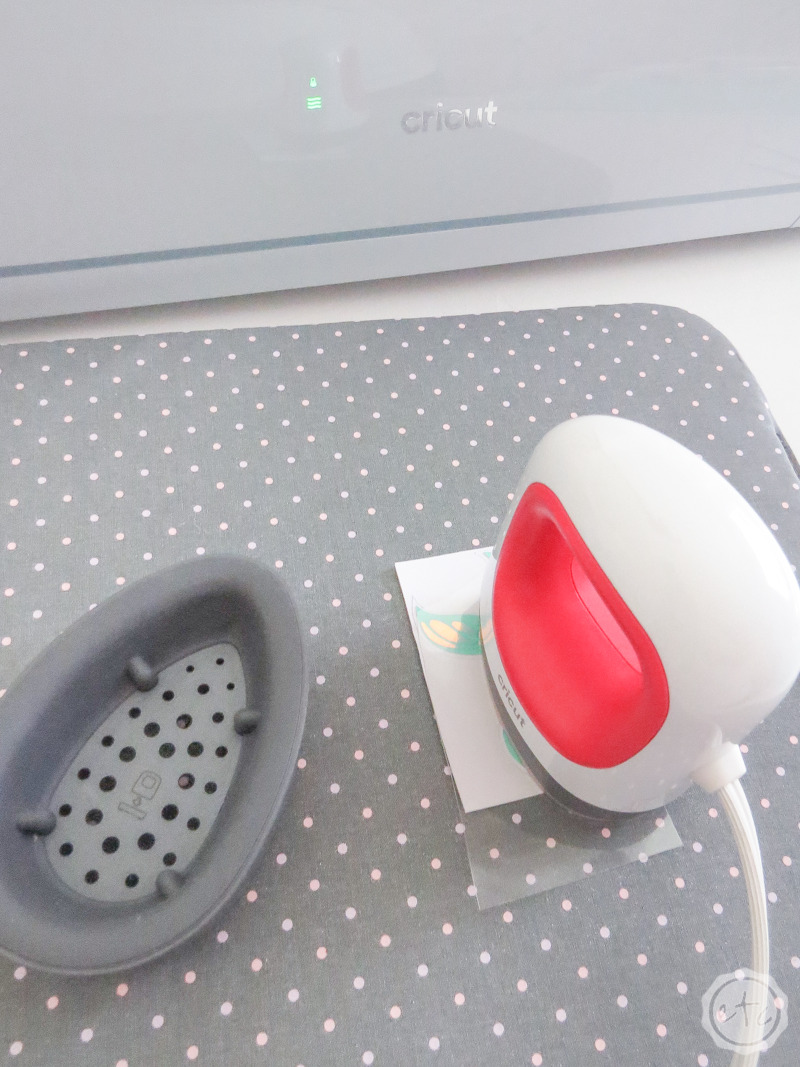
Then I used my scissors to cut apart all of the white/aqua mermaid tails and the iron-on scales… so I have a base to put my scales on. Then I hit the button on my easy press mini three times to turn that baby alllll the way up and let it start to warm up.
Step 4: Add your Iron-On Scales
This might be the best part of the project but it’s also the longest. Of course, you could skip this part entirely if you’re looking to save time. The mermaid tails are pretty darn cute on their own!
But in my opinion the holographic iron-on just gives it that something extra!
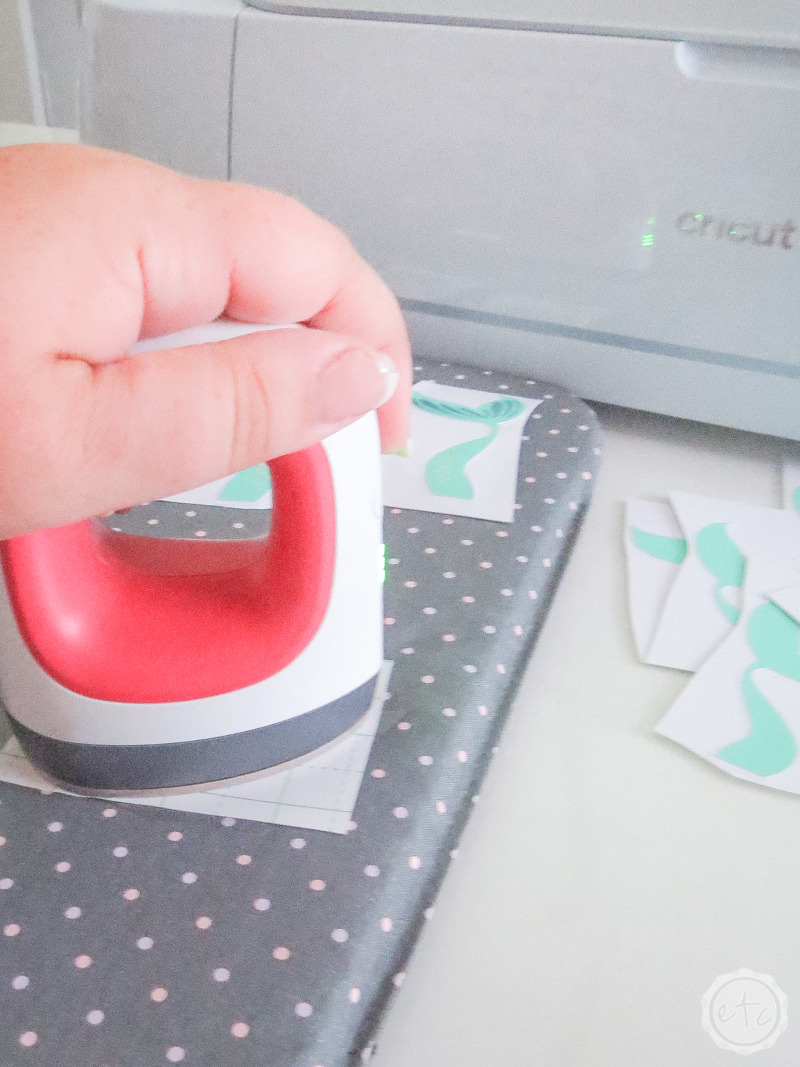
Start by lining your holographic iron-on up with it’s mermaid tail base (the white/teal sticker paper we assembled earlier) then place the entire thing on your easy press heating mat. Go ahead and press the front of your iron-on with your mini easy press for 10 seconds, then turn it over and press the entire tail stack (white sticker cardstock, aqua sticker cardstock and holographic iron-on) for 10 seconds.
Then place the stack on a hard surface (aka my desk) and use the top of your weeding tool to firmly press down on all the little scales. I find that when I skip this step the iron-on doesn’t want to stick… and using the metal weeding tool definitely works the best. I’ve tried a regular scraping tool and my finger nail and something about the metal weeding tool on the hard surface of the desk just sets the iron-on in place.
Then carefully peel off the carrier sheet to reveal the entire tail!
So cute!

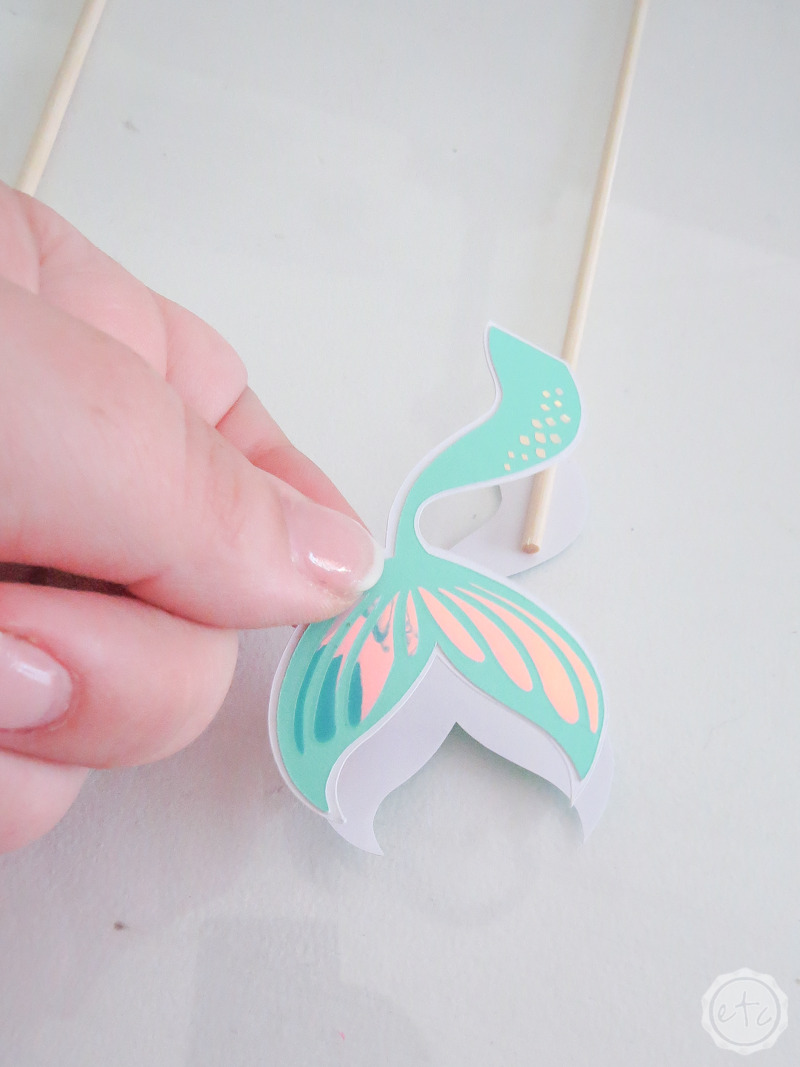
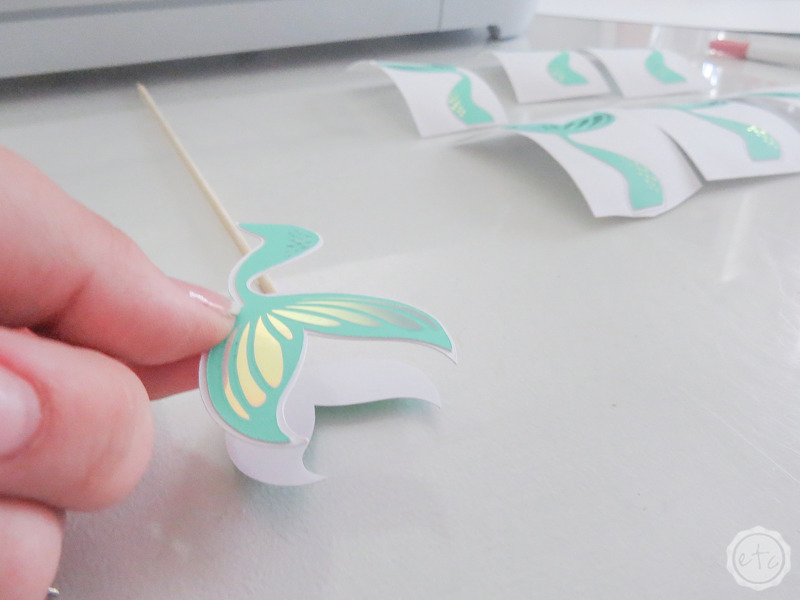
Step 5: Sandwich your Skewer!
We’re sooooo close to done y’all! Now that our iron-on is in place let’s make these wooden skewer’s into drink stirrer’s!
Although if you want to use a different item for your drink stirrer you can… I just had a lot of these skewer’s on hand from making this rose gold Christmas tree garland.
This part is fairly straight forward… peel one side of your mermaid tail off it’s backing sheet and lay it down sticky side up. Then place your skewer on it… now peel another mermaid tail off it’s backing and line up the fin’s. Once the fin’s are aligned go ahead and stick both mermaid tails together with the skewer in between.
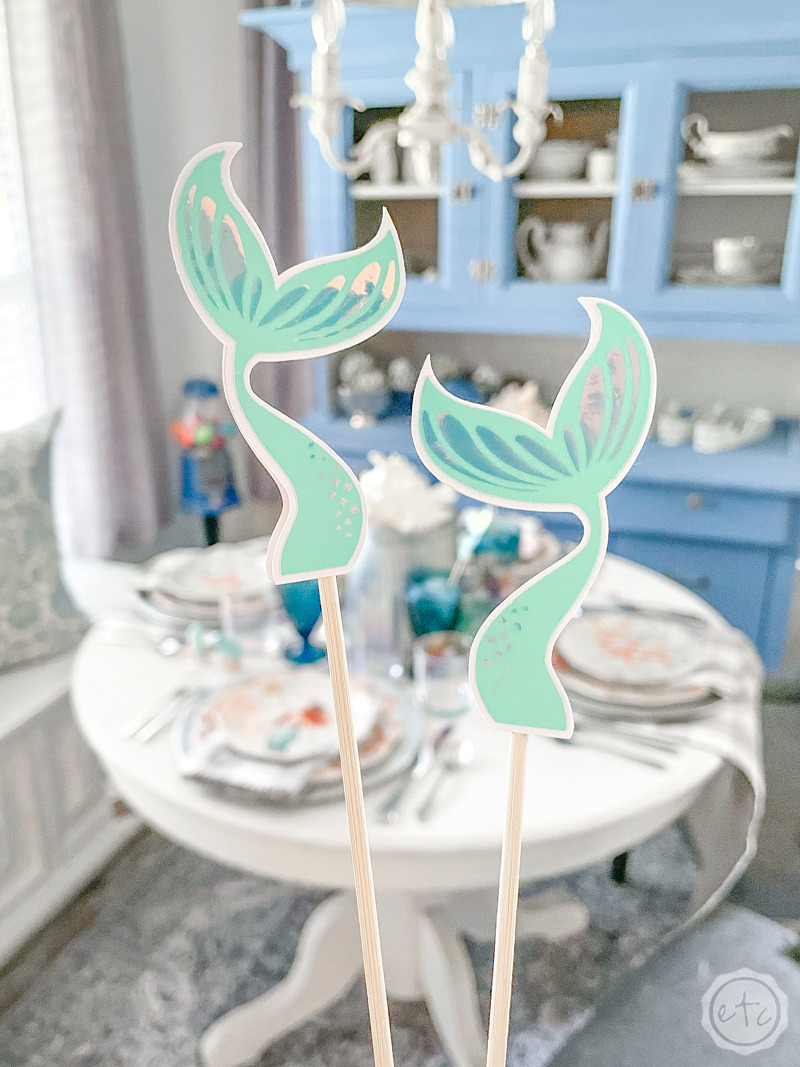
Volia! Instant mermaid tail drink stirrer!
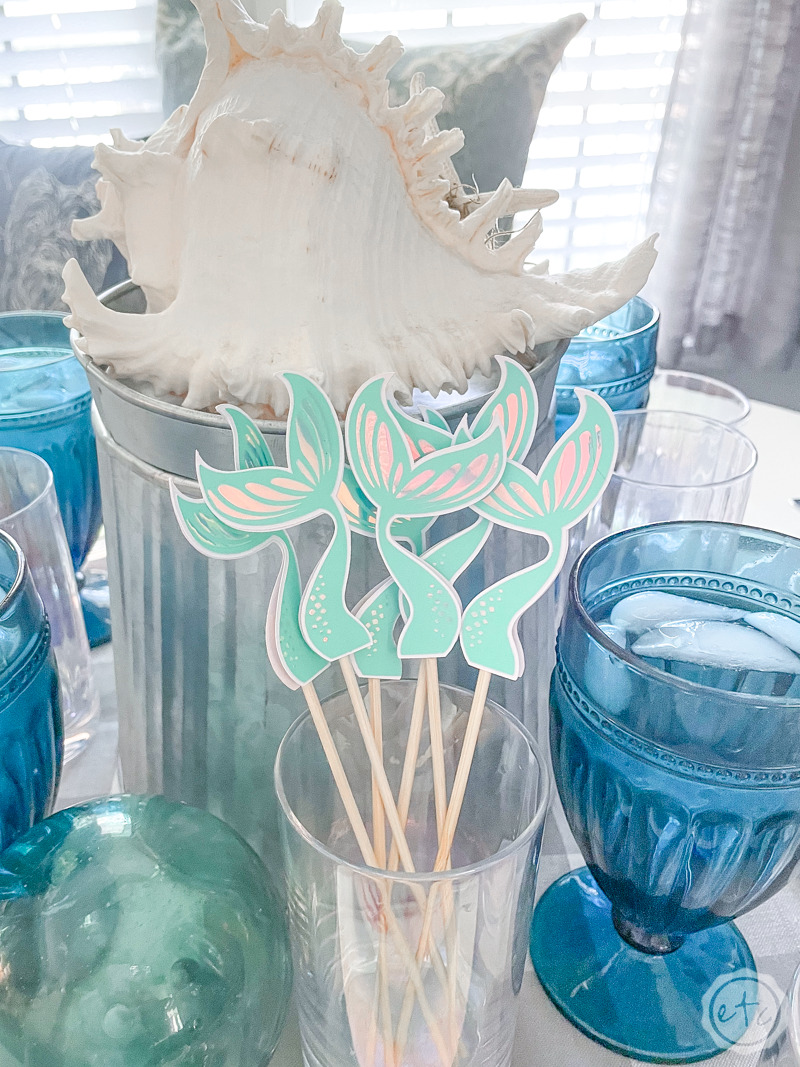
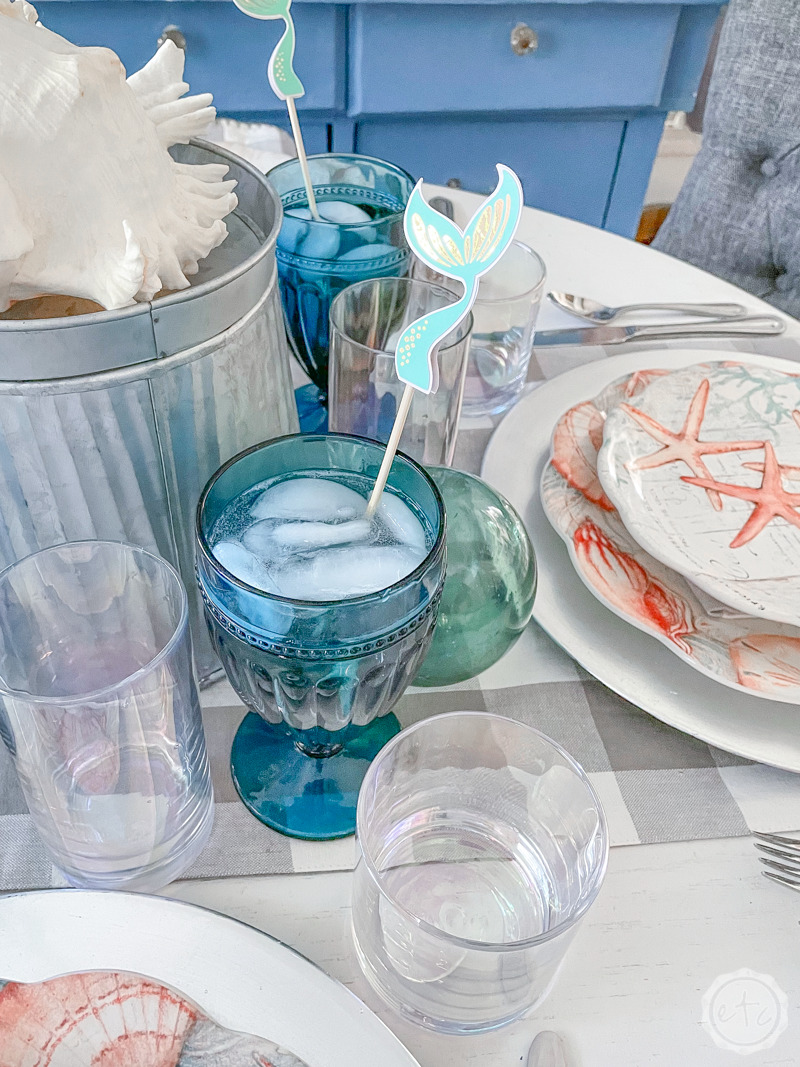
Step 6: Add to your Table and Enjoy!
How cute are these!!
I absolutely love how they turned out! My favorite part might be that I didn’t have to design anything… I simply had an idea and made it in less than an hour.
College student me (I have a graphic design degree) staying up all hours of the night in the design lab executing packaging design projects would have killed for a Cricut.
At this point you can grab your drink stirrer’s and head to the dining room to add these to your fabulous whimsical beachy mermaid tablescape… they’re totally ready. But I loved these so much I want them to last a few rounds so I decided to add a little uv resin on either side of the skewer to hold the mermaid tail straight.
I simply put a few drops of uv resin between the mermaid tail sides and used a spare skewer to make sure it was touching the mermaid tail and the skewer… then I hit it with the uv light. (This is all in the video if you’re confused).
While they were very sturdy before I added the uv resin it definitely took the sturdiness up a notch. And since the uv resin was cured instantly (and no where near the bottom of the stick) I am confident using it here won’t be a problem.
Ready to see the pretty finished pictures?
P.S. I fell in love with fun drink stirrers for my tablescapes during this project… so I may have repeated the process a few times. Check out the fun 4th of July Pinwheel drink stirrers I made for my July table here.


Leave a Reply