


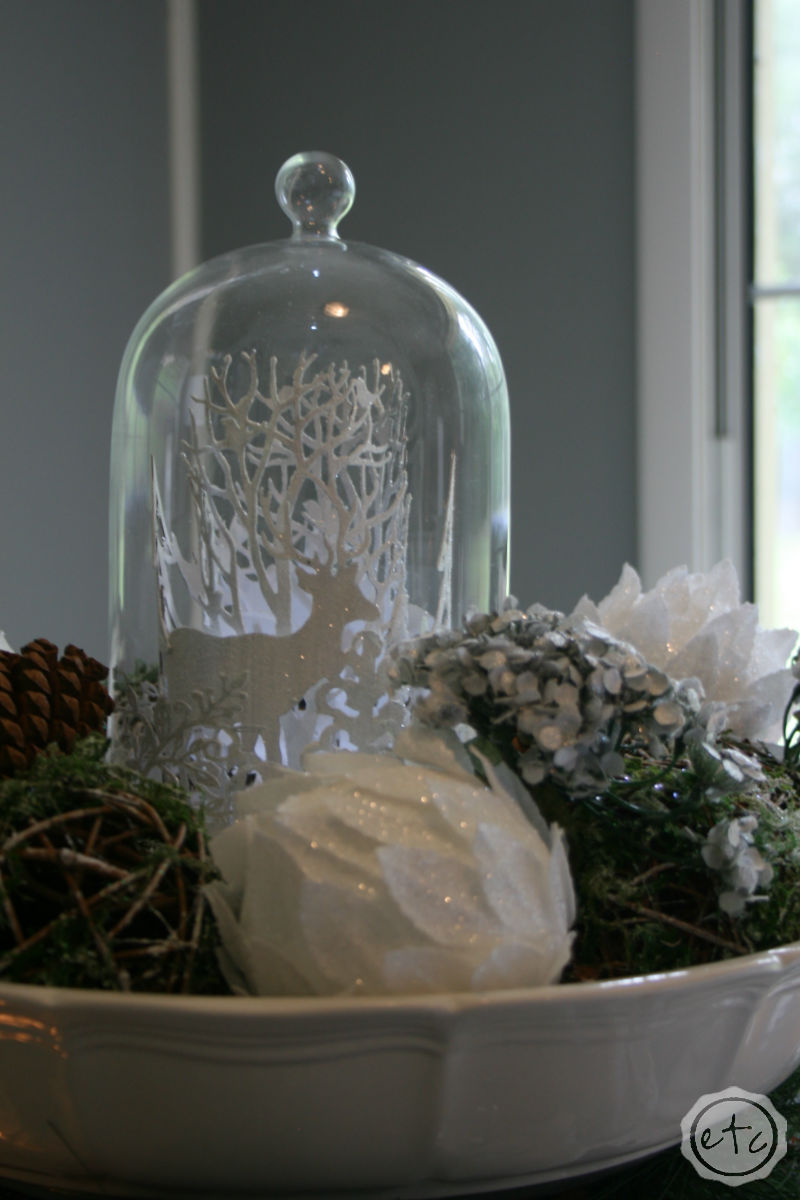
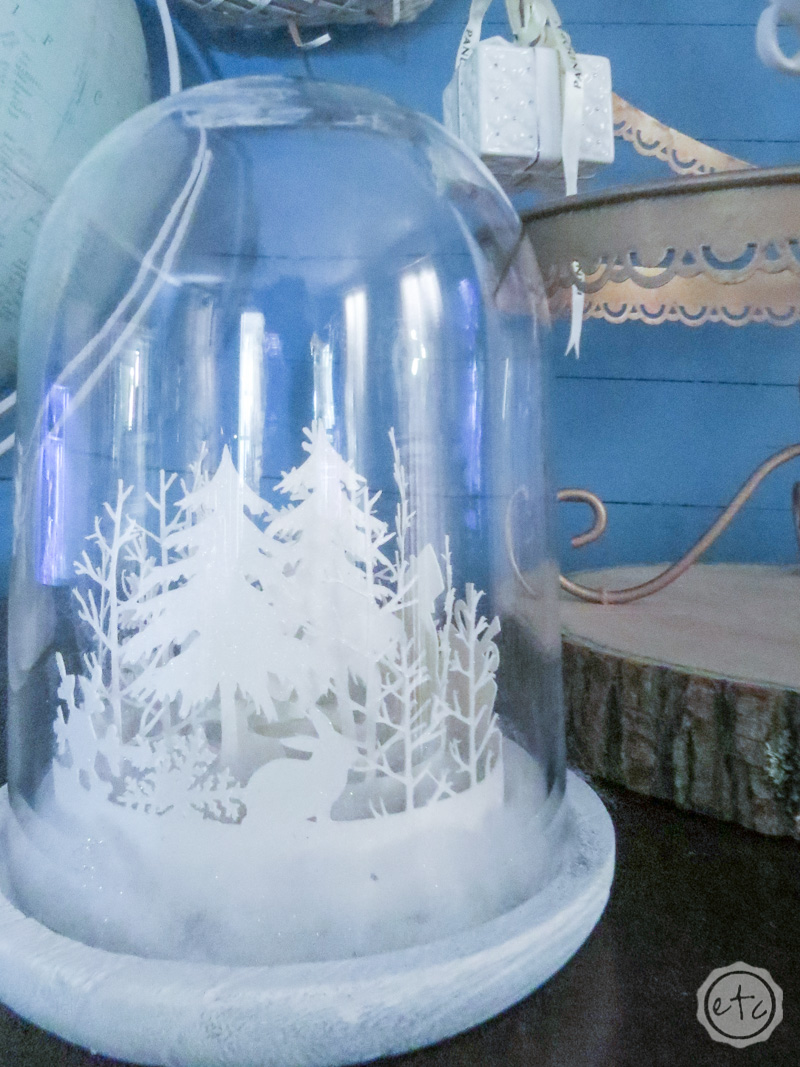
Several years ago I bought this little cloche and used it to add a centerpiece to our kitchen table. I absolutely love the delicate branches and little animals winding around and around inside of this little glass cloche and I’ve always wondered if this was something I could re-create.
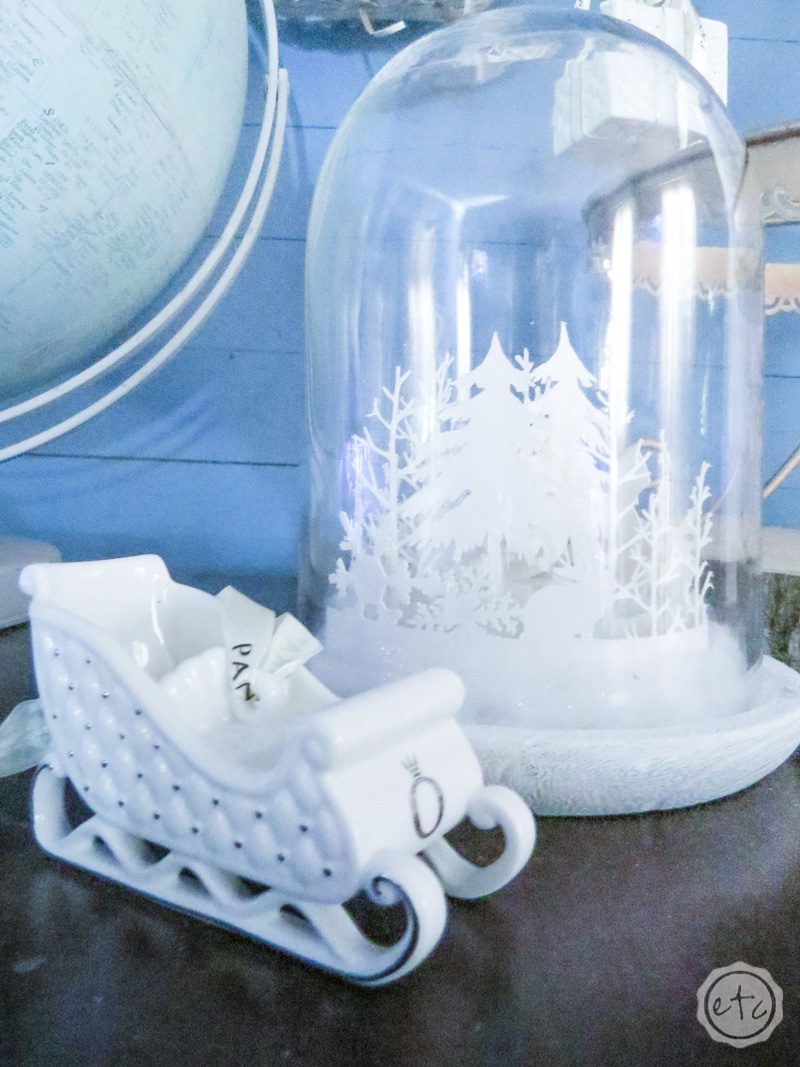
I absolutely adore all the animals that are in this little guy but I wanted to make a Holiday version with a snowman and presents… maybe even Santa’s sleigh! So I started with a holiday cut file and then added the little animals and then added a version with generic snowflakes…
So we can make allllll the options!
SO, I set about to make my very own little winter wonderland cloche… and this time we’re rocking it DIY style! Here’s what you’ll need.
Supplies:
- Cricut Explore Air 2
- Deep Point Cutting Blade
- Fabric Cutting Mat (that’s the pink one!)
- Cricut Cut File
- Glitter Cardstock
- Weeding Tool
- Glass Cloche
- Paper Clips
- Pliers
- Glue Dots!
- Faux Snow
- Glitter
Need help picking your perfect machine? I’ve got you covered!


Step 1: Cut Out Your Winter Wonderland!
I feel like the first step in all of these projects is to cut out your cricut file… but it’s kind of an important first step. In this case I designed the files in illustrator and then imported them into Cricut Design Space… there wasn’t exactly a “cut file to replicate the glass cloche you bought several years ago” in Cricut Access.
It would have saved me a bit of time though!
Luckily layering trees and deer to get the effect I was looking for was fairly easy and in no time at all (several episodes of the Big Bang Theory) I had my files ready to rock. You don’t even have to design the files… just grab the cut files here and you’re ready to go!
Then it’s as easy as hitting the “make it” button and watching your Cricut cut out the glitter cardstock.
Make sure to use a fabric cutting mat (the normal one wasn’t quick strong enough for my thick cardstock) and a deep cut blade. Set the dial to “Fabric” and our settings are complete! To recap it’s a fabric cutting mat, deep cut blade, set to fabric and thick cardstock.
Easy peezy lemon squeezy!
Here’s a tip: at the end of the project your cardstock will need to stand tall without the tips of the little trees falling over so make sure to use thick cardstock. Another tip? If you have a bit of thinner cardstock and you want to see if it will work don’t put your thin cardstock on a fresh cutting mat. The cutting mat will be way too sticky and will decimate your thin cardstock… you won’t be able to get any useable pieces off the mat and you’ll run out of episodes of the big bang theory to watch cleaning your brand new mat of tiny pieces of thin white glitter cardstock.
Trust me.

Step 2: Coil your Cardstock
Now that you have all your cardstock cut out the next step is to coil the pieces. Since we’re going to wind them around each other in layers to create the circular winter wonderland at the middle of our cloche it’s easiest just to wrap your cardstock around a bottle (or a rolling pin).
Be careful of the little branches!
For the best results wrap your cardstock cut-outs around something like a rolling pin that is long and solid… then place a piece of solid paper or cardstock over the whole thing and tie it off with a rubber band. That way the paper will help to spread out the pressure of the rubber band and curve all of the pieces evenly… even the tops of the branches.
I left my rolling pin over night but you could probably get away with an hour or two. Experiment with it and see!

Step 3: Make a Stand
Okay this part is a little strange and you MIGHT be able to get by with just glue dots. I wanted to keep my little cardstock forest neat and tidy in as close to circular coils as possible and the easiest way I could think to do that was with a little stand.
Basically I wanted a little wire stand to thread the cardstock through! I used a paperclip and pliers to create it.
I started by straightening my paperclip into a straight wire. If you have wire just go ahead and use that but my jewelry wire wasn’t thick enough to use and paper clips are free!


Once it’s straight you can use your pliers to start and make your stand. I simply kinked the paperclip every quarter of an inch (we’re totally eyeballing it here y’all, don’t worry about getting out your ruler!) until the entire paperclip was used!
I did two of these bad boys so that I had 11 little spaces all the way across (it would be 12 but my paperclip broke right before the 12th spot!). If you’re feeling adventurous I would make four of these paperclips and place them in an x formation… that would make the coiling even easier. Of course, I thought I could do it with two so I moved on!
I found the easiest way to attach my stand was with little strips of tape through the slots… then I ran one piece of tape next to the stand to secure all the little bits of tape. Just in case… I’m a little OCD like that.


All in all this step looks way more complicated than it is… and if you’re really coordinated you may be able to skip it all together. I can see using the glue dots to secure your cardstock without the stand at all however the stand really helped to line up the spiral.
It looked a bit lopsided even with the stand I made… a stand in an x would really center the entire piece nicely!
Don’t worry about how it looks… we’ll cover it all with faux snow in a minute.

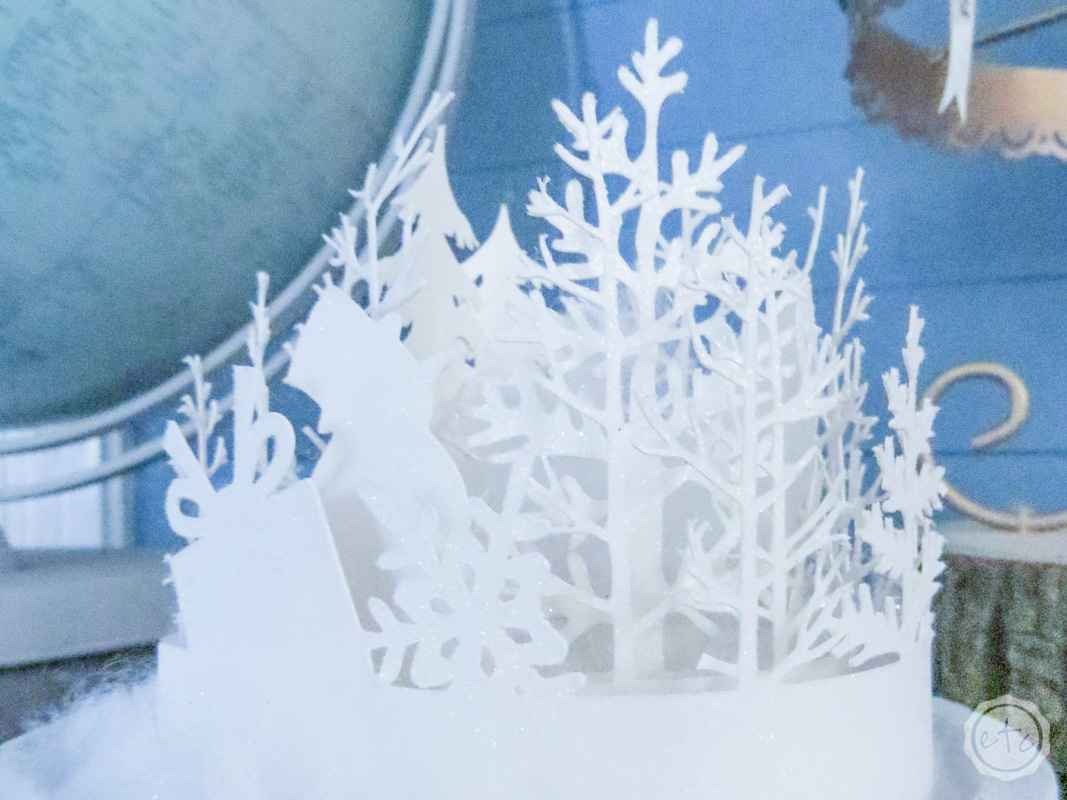
Step 4: Arrange your Winter Wonderland
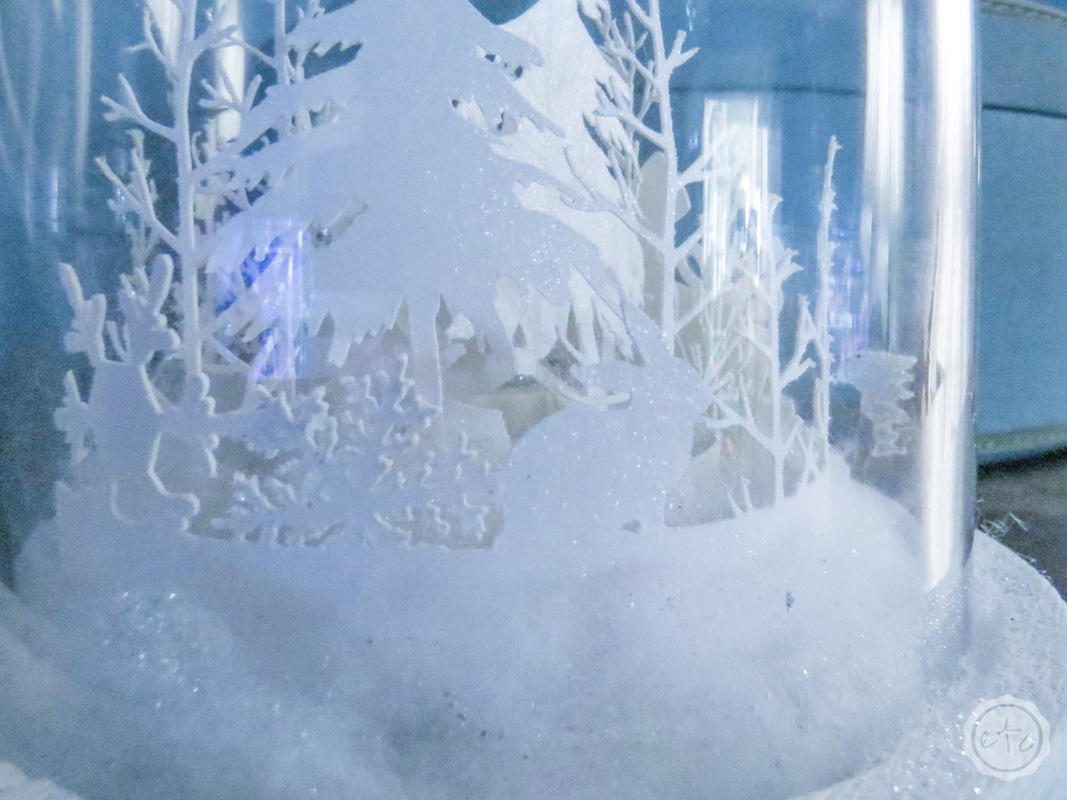
Now’s the fun part! The Cricut cut file has all 3 sets of cut files in a row from tallest to shortest so you can tell exactly what order to arrange your cardstock pieces. For this particular cloche I used the middle set with the sleigh, snowman and the present as well as the smallest section up top with the little bunny rabbit.
Take your cardstock pieces and start by placing the tallest one in the middle! I used extra strength glue dots to secure the coils as I went around… it made this whole project super easy.
The basic idea is to keep placing glue dots and securing the cardstock… around and around and around until you reached the end of the cardstock.


If any of the sides are buckling in one way (or the other) a glue dot will hold the walls in place… likewise a glue got at the end will hold the end piece in place.

Step 4: Add Snow!
Now is the fun part… adding a bit of snow to our winter wonderland! A bit of faux snow does the trick… just make sure to pull it apart like cotton candy so that it’s super whispy.
Luckily the glue dots have the added benefit of holding the snow in place. A pair of tweezers makes it easy to put the snow down in between all of the little coils… and the snow helps the coils keep their shape so that they are more circular and less broken ovals.


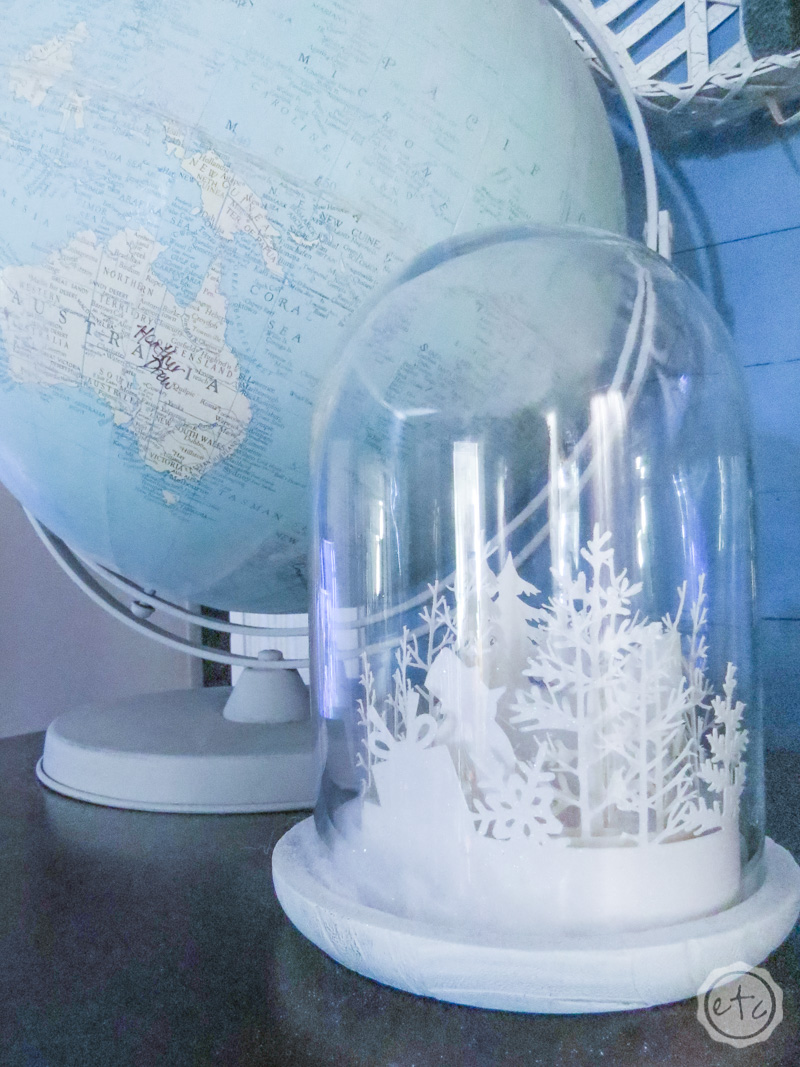
Once you’ve added snow in between all of the coils you’re pretty much done!
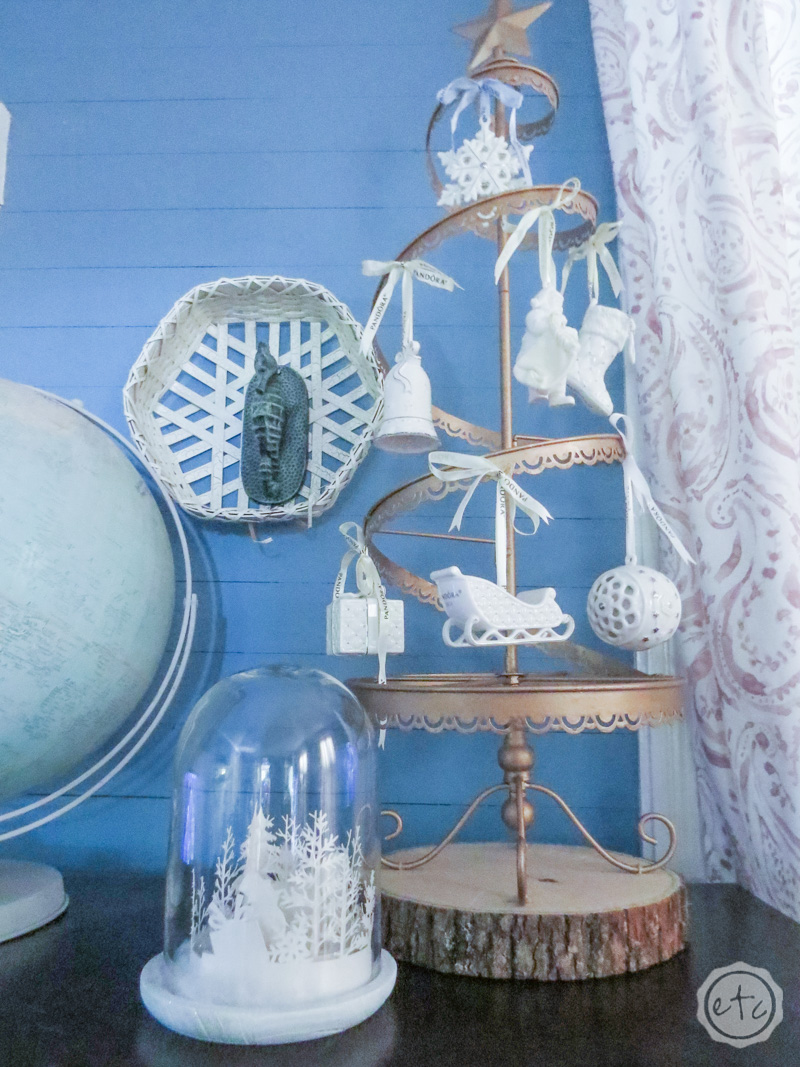
I placed a little battery operated candle in the middle so that the little cloche can light up at night… then I sprinkled a bit of glitter on top of the snow so that it would shine in the light.
Glitter is always the answer.
All in all I think this little glitter holiday cloche turned out wonderfully… a pretty close replica of the original too! I wasn’t sure exactly how many card stock cutouts I would need so I have enough pieces to make two more of these babies.
I love it!


The best part of this little Cricut tutorial? It’s one of many! I’m participating in this months Craft and Create Cricut Challenge so if this little Christmas Cloche isn’t your cup of tea we still have plenty of fun projects for you to look through!
Have a look around and see if you love any of these fun Cricut projects!
Watch Me Whip Oven Mitt Gift Idea / Make Christmas T-shirts with Cricut / Rae Dunn Inspired Christmas Signs / Mini Reverse Canvas Ornaments / How to Use Cricut Maker and Chalk Couture to Make Christmas Ornaments / Painted Chipboard Christmas Wreath / Days Until Santa / Glitter Cardstock Gift Card Holder / Believe in the Magic Gift Bags /Easy-to-Make Christmas Tree Art /DIY Winter Wonderland Cloche (with FREE Cricut Cut Files)

I hope you enjoyed our Cricut post for the month! We’ll be back next month with more fun Cricut tutorials.
In the meantime if you loved this project don’t forget to pin for later!

Looking for more rose gold holiday goodness? These posts are for you!


[…] Christmas Cloche […]