• House Tour
    • Reveals
  • About
    • Smith Life
    • Disclosure and Privacy Policy
      • Terms and Conditions
      • Store Affiliates
  • Contact Me
    • Want a Button?
  • Shop
    • Floral Printable Planners
    • Paint eBooks and Packages
    • Wedding Binders & Extra Printables!
    • Planner Bundles
    • Planner Accessories
    • Home Decor Printables!
    • Cart
    • Bloglovin
    • Facebook
    • Instagram
    • Pinterest
    • Twitter
    • YouTube

Happily Ever After, Etc.

Creating Our Own Fairytale

  • Happily Ever After, Etc.
  • Home
  • Home Decor
    • My Home
    • Paint
    • Before and After
    • Tablescapes
    • Mood Boards
    • Furniture
  • DIY & Crafts
    • New to Cricut – Start Here
    • Cricut Projects
    • Resin
    • Scrapbooking
  • Organization & Planning
    • Cricut
    • Organization
    • Planner
  • Wedding
    • Cricut Wedding Projects
    • Free Wedding Binder
    • Bride Bag- The Ultimate Wedding Planner

How to Customize Store Bought Christmas Stockings on a Budget

Hey y'all,

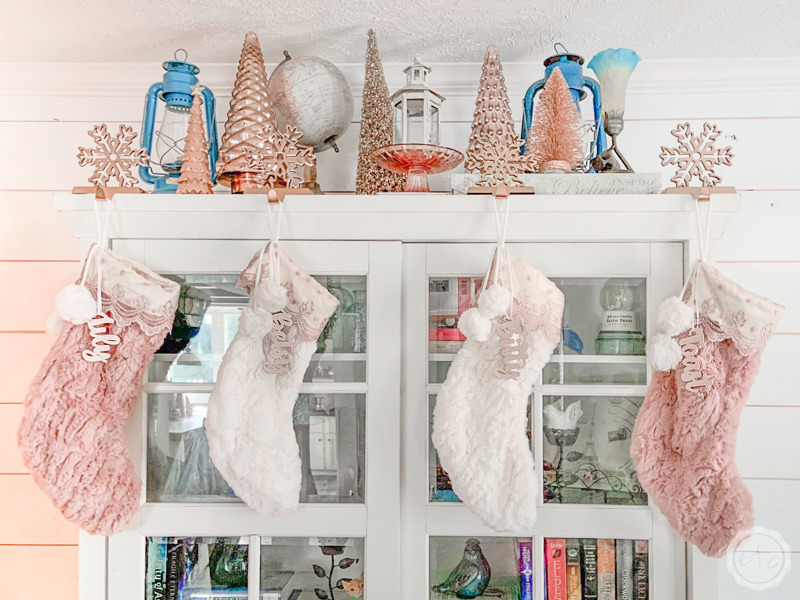
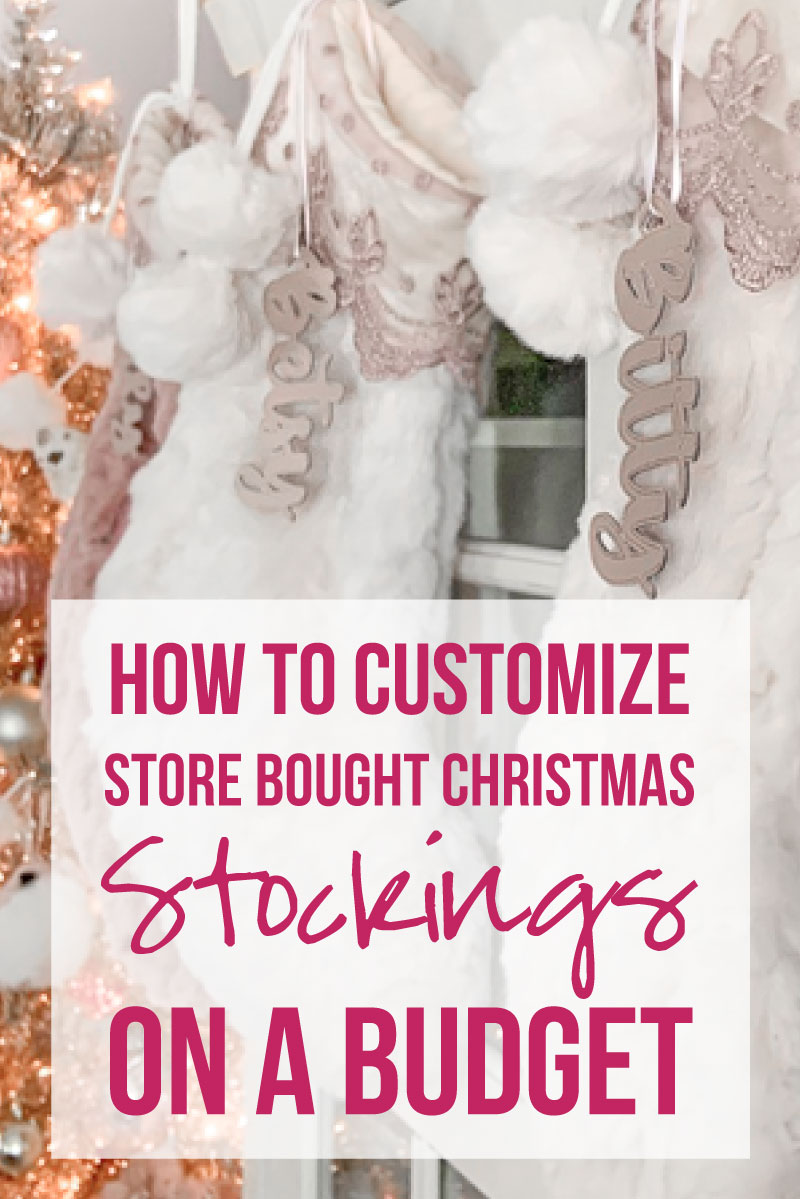
After years of searching for the perfect Christmas stockings for my mantle I finally found them last year… or at least the closest thing I’ve found. A set of stockings with beautiful lace, sequin tops and gray polka dotted bottoms.

Of course, the main difference I was looking for was a blush faux fur bottom instead of the gray polka dotted fabric. Unfortunately the etsy shop (Stitched by Sisters UK) wasn’t able to find faux fur to make these babies exactly what I wanted. So I resigned myself to the task of sewing these stockings from scratch.

I figured faux fur would be easy to find so I set out to locate a bit of blush lace with a large drop scale pattern… and everything I found was a bit pricey. Just take a look at this lace that’s $30 for 20 centimeters. So I started to think outside the box and found a children’s dress with a similar lace overlay.

I bought the biggest dress they had (girls size 6) for $18.80 and then the gates of heaven opened and this year’s Target collection included ready made, beautiful blush faux fur stockings for $15 each! Which means instead of sewing these babies from scratch we’ll be able to add a simple lace overlay to our Store Bought Stockings for custom stockings that only cost about 19.75 each.

Score!

Let’s get started on this quick and easy transformation!

Supplies

  • Stockings
  • Lace or Children’s Dress
  • Fabric Scissors
  • Fabric Pins
  • Needle and Thread

How to Add Lace to Store Bought Stockings

Step 1: Cut Your Lace

Alright y’all, if you’ve bought ready to use lace you can skip this step completely… but if you’ve bought a little dress to use as lace you’ll need to separate the lace from the dress.

We don’t want to sew an entire dress onto our stockings!

Luckily this is a fairly easy (if tedious) step. Simply take a pair of fabric scissors and carefully cut up the seam of the dress until you are directly under the second tier of lace. We’ll use the entire bottom tier of lace for our stockings so the easiest solution is to carefully cut all the way around the skirt following the scallops in the second tier of lace.

This will take a few minutes but it is a little girls dress… so not too many minutes! Once you’re finished cutting all the way around you can set the dress aside… we are finished with it.

At this point you can use the remaining dress as a dress or keep it for fabric in a future project!

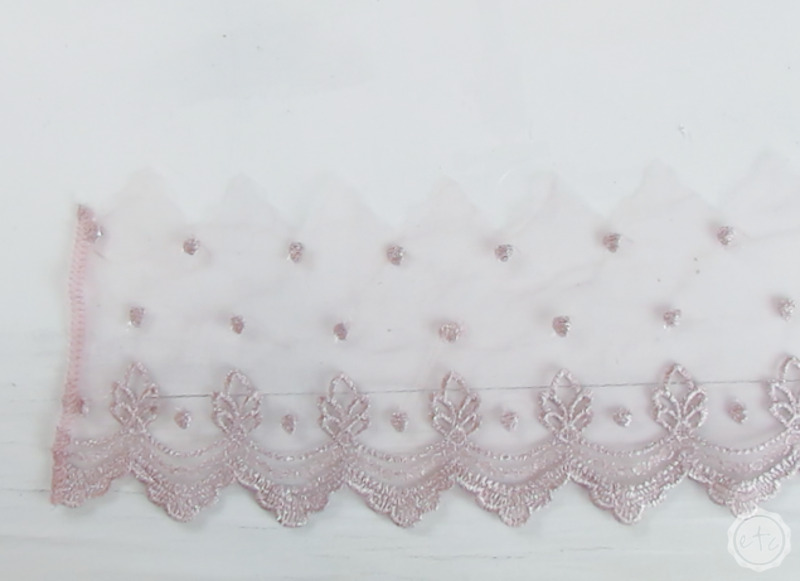
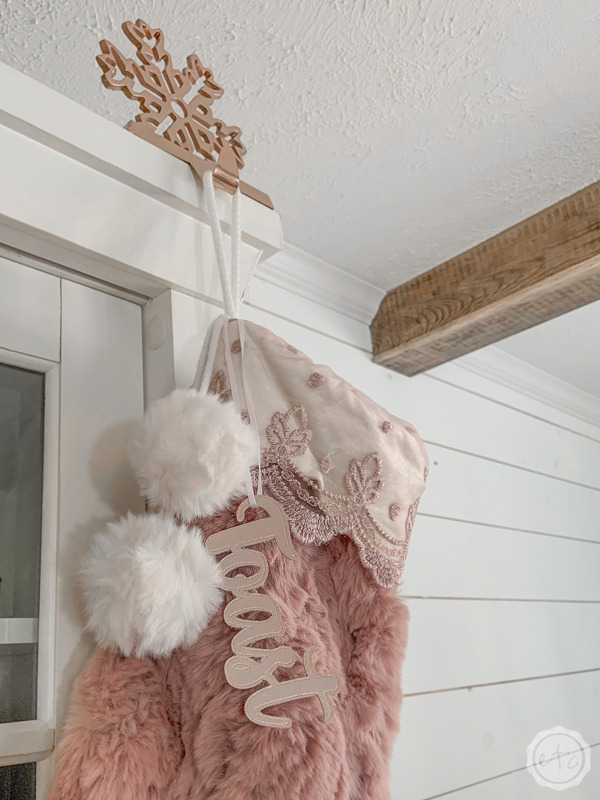
Once you have your lace cut it should look roughly like this… a beautiful lace with a scalloped edge and a field of polka dots on a sheer illusion netting.

Topped with a few beautiful peeks… from where we cut off the top tier of lace! We won’t need a jagged edge for our little project so once the entire piece of lace was cut free of our dress I simply cut the top edge of our lace straight across.

Easy peezy lemon squeezy!

Step 2: Pin the Lace to Your Stocking

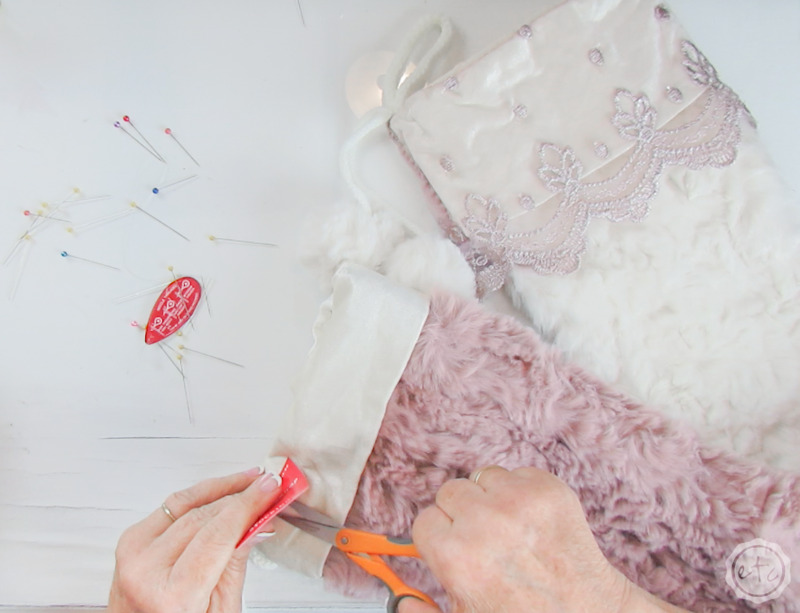
Now that our lace is loose (and not attached to a dress!) it’s time to attach it to our stocking. With the bottom tier of lace I was able to add cuff’s to all four of my stockings (yay!) so start by folding your lace over until you have four equal sections.

Make sure that the length you’re left with will go around your stocking with enough lace for a small seam at the back of the stocking. The easiest way to do this is to smoothly wrap the lace around your stocking.

Once you’re confident that you have enough lace go ahead and cut the length for your first stocking. Keep in mind that we want to be careful but if we mess up some of our lace we can cut the second tier of lace off our little dress… so we won’t be completely up a creek without a paddle!

Once I cut the first length of lace for our first stocking I repeated the process with our other 3 stockings and had just enough lace with all 4. Perfect!

Step 3: Pin the Lace to your Stocking

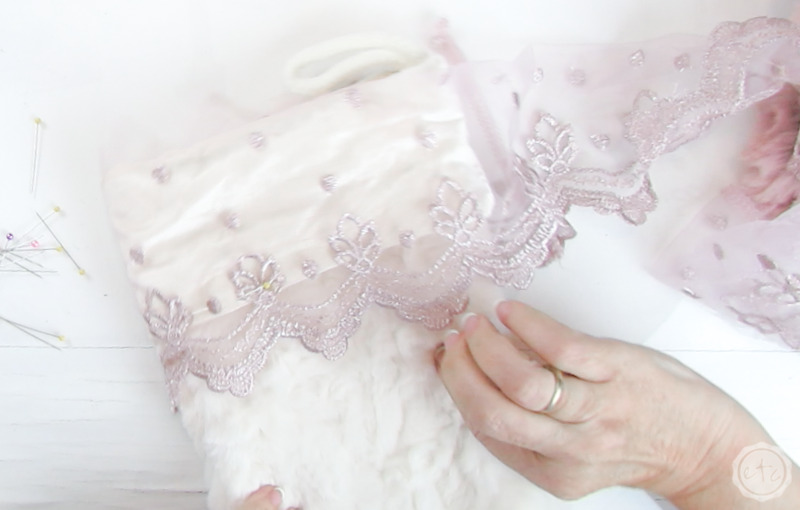
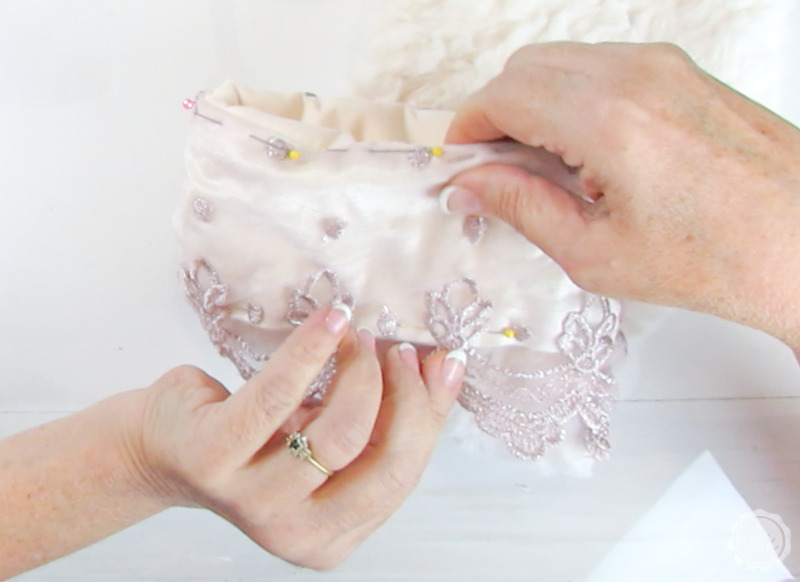
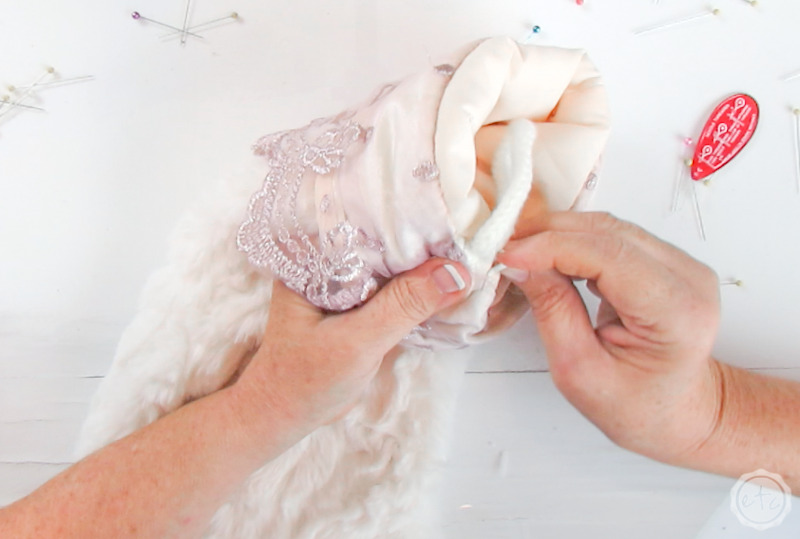
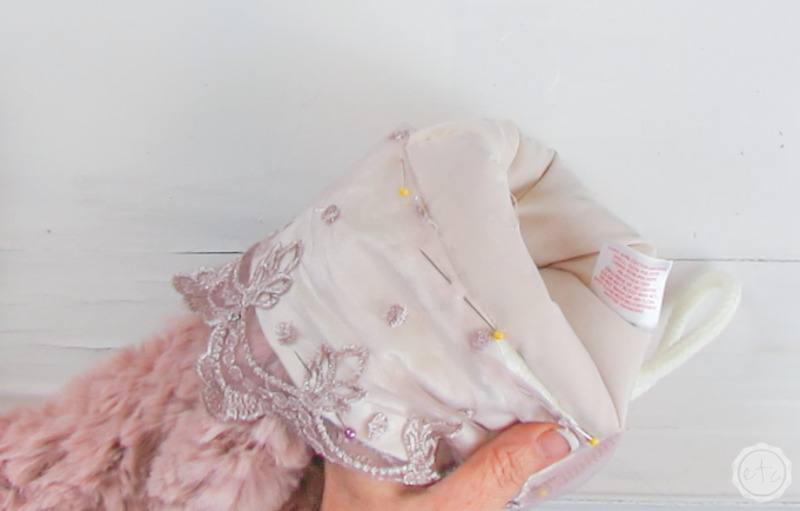
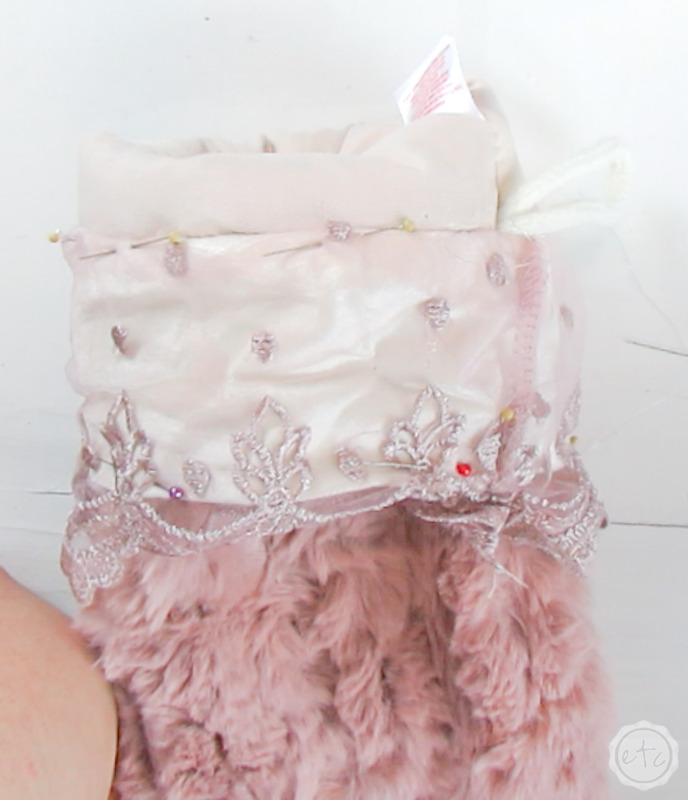
Ready to pin everything in place? Start by folding over your lace so that you have a smooth edge (you don’t need to fold it far, about a centimeter of a seam along the top will do) and then start to pin the lace to the top of your stocking.

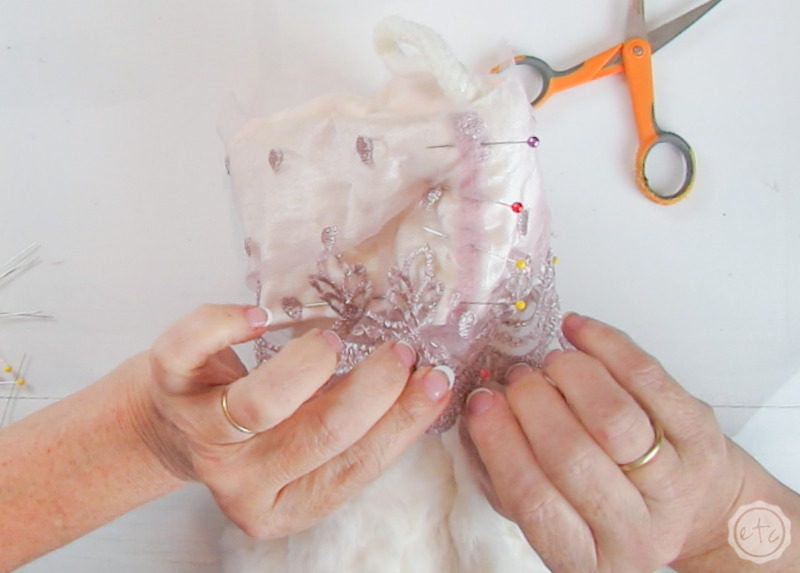
You want the top seam on your stocking to line up with the top seam of your stocking (so that your stitches can go into the stocking seam that already exists). Go ahead and pin the top all the way across, then pin the bottom of the cuff to keep things straight, and finally pin the seam so that you can sew the two pieces together.

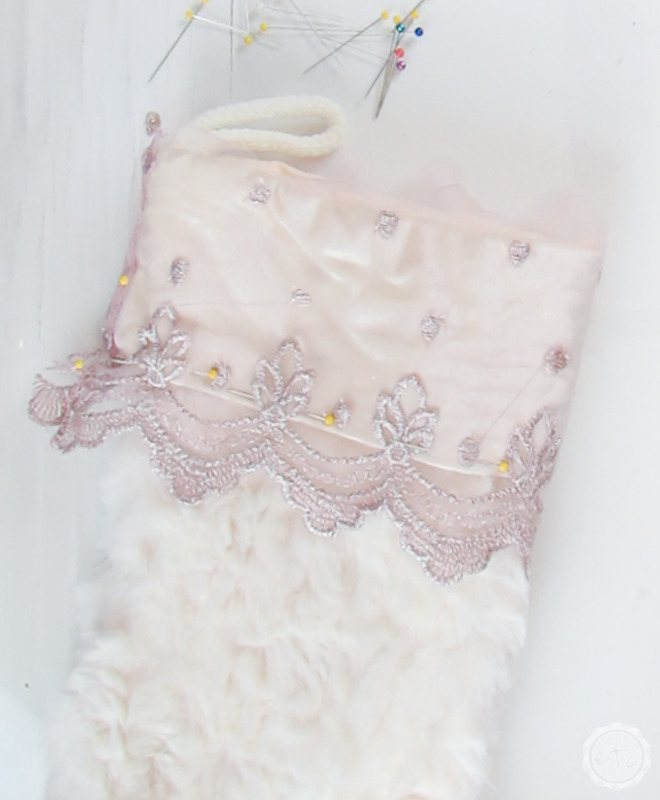
Pinning the bottom of the cuff will help you to be able to fold over a slight seam at the end of the lace and create an actual seam down the side of the stocking.

Looking good!

Step 4: Sew the Lace in Place!

Ready for the fun part? Let’s start sewing!!

This is a simple project and we are not going to start complicating it now… a need and thread is all you need to get started. Simply work your way around the stocking on the top edge. Make sure you take tiny stitches directly into the top seam of the stocking… this will secure the lace without leaving any trace that you added something extra to the stocking.

It will be like the lace was always suppose to be there!

If you’re having a hard time sewing into the seam or “stitching into the ditch” as my Mom calls it you can roll the stocking a bit so that the seam is flat and work along the flat surface.

Whatever floats your boat!

Just make sure that once you go all the way around the top of the stocking you also sew the seam of the lace. For this seam you don’t have to attach the lace to the stocking, simply sew straight down the pins and secure the seam with tiny stitches.

Perfect!

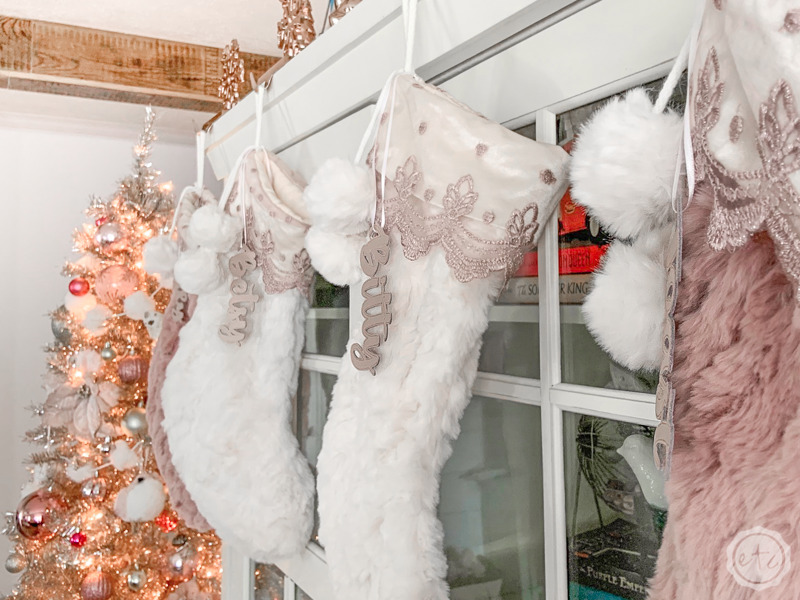
Now repeat that process as many times as you need (in this case I wanted four stockings so I had to sew lace cuffs four times!) and you’re good to go. Let’s hang these babies!

Looking for more rose gold holiday goodness? These posts are for you!

You are invited to the Inlinkz link party!

Click here to enter
You made it through the entire post? That means you're one of my new favorite people! I'd love to be friends and see what else you would like to read about! Leave me a comment and then sign up for your very own FREE paint planner.... so that you can keep track of every single paint color with ease!
Welcome back! I'd love to be friends and see what else you would like to read about! Leave me a comment and then sign up for your very own FREE paint planner.... so that you can keep track of every single paint color with ease!

Show me some LOVE y'all:

  • Facebook
  • Pinterest
  • Twitter
  • Email

Related

«
»

Holidays, Home Decor 0

Leave a Reply Cancel reply

Your email address will not be published. Required fields are marked *

sidebar betsy I'm Betsy, Home Decor Enthusiast, Yorkie Mama, Crafter, Blogger, Picky Eater, Chief Mess Maker, Antique Hoarder and Graphic Designer. You can generally find me working on (attacking with a paintbrush) the 3 bed, 2 bath home we are currently renting! Our home might not be perfect but it is ours & if you hang out long enough you'll see that what we lack in know-how we make up for in passion!
Shop My Craft Room

Shop My Home

Featured Articles

15 Fabulous Ideas to Organize your Laundry Room
25 FREE Printables For Your Home!
What to do with EXTRA Paint with Happily Ever After Etc
10 Ways to Make Your Bed EXTRA Comfy with Happily Ever After Etc.
Ready to Pick your Perfect Paint Color? We'll help you with our 6 Day FREE E-Course

Hey y’all,

Profile

I'm Betsy, Home Decor Enthusiast, Yorkie Mama, Picky Eater, Chief Mess Maker, & Graphic Designer...

A Little Note!

Many of the links on Happily Ever After, Etc. are affiliate links. If you purchase a product after clicking an affiliate link, I receive a small percentage of the sale for referring you, at zero cost to you! How awesome is that? Purchasing through affiliate links is an easy, painless way to help out your favorite bloggers. Thank you so much for your continued love and support! Read the full disclosure here!

Instagram

The number one question people ask when they watch The number one question people ask when they watch my new home tour on YouTube? Why is there so much clutter... um excuse me I like stuff! The second question? How did you frost the doors? Don’t worry... I wrote out the whole process, check out the step by step tutorial on the blog!
With Christmas fast approaching I’m having secon With Christmas fast approaching I’m having second thoughts... about taking down my holiday decorations! I absolutely love all the blush and rose gold this year and think I might have to add more pink to my every day decor. Until then maybe it will just stay Christmas at the Smith house! Tutorials for both the “Merry Christmas” resin sign and the “Dear Santa” Cricut sign are in my profile! #pinkchristmas #pinkchristmastree #pinkchristmasdecor
Well y’all Christmas is coming up quick... which Well y’all Christmas is coming up quick... which means I need to get a move on with all that wrapping! I got a jump start this morning after whipping up a few little resin light bulbs! Check out the full tutorial over on the blog if you’d like to wrap your presents with a few resin goodies this year... and tell me in the comments below. Are you finished wrapping or (like me) are you still getting started? #pinkchristmas #pinkchristmasdecor #resinchristmas #giftwrappingideas
Ready for another fun and easy resin project? Thes Ready for another fun and easy resin project? These little Christmas trees are the perfect beginner level project so if you’ve never done resin before don’t let it intimidate you!! Grab your heat gun and jump in... I’ll walk you through it! Check out the full blog post for these little guys on the blog (link in profile!)
If you haven’t joined Michelle at @weekendcraft If you haven’t joined Michelle at @weekendcraft SVG membership then WHAT ARE YOU WAITING FOR?! I am obsessed with all the cute svg’s and y’all she is doing a live craft night every month to walk you through making one of her designs... and the first craft night is tomorrow! She’ll be making this “Merry everything and Happy always” SVG and it’s so cute! You don’t want to miss it! See you there! 

(Also who noticed the sneak peek at my new kitchen?!)

#cricutsvgfiles #christmassvg #cricutsled
Well y’all I’m getting this close to unpacked Well y’all I’m getting this close to unpacked in my new house!! And since I’m a blogger Christmas is going up! So here’s the question... do you want a 1 month house update or do you want to wait for the Christmas tour? #lulamaefarmhouse #rosegoldchristmastree #newhouse
Well it’s still a work in progress but I finally Well it’s still a work in progress but I finally have a house!! They have to put it together and do all the detailing before I get keys... but we’re in the end game now! Check out my stories for a sneak peek at the moving process... full YouTube video coming soon!
#ad how amazing did these little fall coasters tur #ad how amazing did these little fall coasters turn out?! Plus I absolutely love the matching tray! The best part? This is such a quick and easy resin project... a silicone mold, a little resin and your trusty heat gun and I promise you can make this baby!! Link in profile for the tutorial!! #fallresin #resinforbeginners #cheetahprint
Okay... is it bad if you just want to make coaster Okay... is it bad if you just want to make coasters in the same mold with the same technique but different colors?? They turn out soo differently! Just a sneak peek of my fall coasters and the blush ones I made last year!
Happy #nationaldogday to the fur babies that are ( Happy #nationaldogday to the fur babies that are (literally) behind (beside... or underneath!) all Of my projects! These sweet little cuddle muffins make everything better 😊🐶😘
GIVEAWAY CLOSED Our winner is @kamikvega Check you GIVEAWAY CLOSED
Our winner is @kamikvega Check your inbox girl, this little machine is headed your way! Thanks to everyone who participated... I can’t wait to see where we go from here!

🥳📦🥳 GIVEAWAY🥳📦🥳
If you have loved all of the Cricut projects I make here is your chance to win a Cricut Joy of your very own! If you’re ready for a little craftiness (maybe a little time to relax) then this giveaway is for you! I’m teaming up with a few of my cavities crafty bloggers so that one of you can win your very own mini crafting machine. Good Luck!!!!

TO ENTER GIVEAWAY:
1.) Follow
@creativeramblings 
@weekendcraft 
@craftylumberjacks 
@this.is.tisa 
@justcallmehomegirl 
@happilyeverafteretc
@lovebird_heartworks 
2.) Like this post
3.) Tag a friend in the comments.
.
.
.
Hurry! Giveaway ends Saturday 8/29/20 at 11:59PM PST. Winner will be notified via Direct Message. Share or tag a friend who'd love to win a Cricut. .
.
.
This contest is in no way affiliated with or sponsored by Instagram or Cricut. To enter you must have a U.S shipping address.
A little peek into the fun summery Tablescape I pu A little peek into the fun summery Tablescape I put together for a little garden party! Want to check out the full table? Wondering where to find all the pieces... click the link in my profile for all the details!
#ad Did you know you can put infusible ink onto al #ad Did you know you can put infusible ink onto aluminum? It's sooooo simple... honestly it's one of the easiest projects I've ever done. Even if you've never used your Cricut before you. can. do. this. I'll show you how every step of the way! Follow along with the full tutorial video over on YouTube! The best part? These little aluminum signs look amazing as part of a larger project! Check out how I added mine to a larger resin wave project on the last slide! @officialcricut #cricutcreated https://lnk2.io/wvMllZf
Okay so It’s no secret that I’ve been obsessed Okay so It’s no secret that I’ve been obsessed with resin for a while now but this week I’ve been playing around with resin waves! Including this tiny resin sea shell! Check out the link in my profile for the full tutorial!
After a lot of struggle, loss and frustration I am After a lot of struggle, loss and frustration I am finally dotting the i’s and crossing the t’s on my next chapter. Yesterday I went and signed the million and one papers to close on my new house! I cannot wait to share the moving (and decorating) process with all of you... next step: keys! #firsttimehomebuyer #newhouse
Load More... Follow on Instagram

Copyright © 2021 · Darling theme by Restored 316

Copyright © 2021 · Darling Theme on Genesis Framework · WordPress · Log in · Privacy Policy

loading Cancel
Post was not sent - check your email addresses!
Email check failed, please try again
Sorry, your blog cannot share posts by email.