• House Tour
    • Reveals
  • About
    • Smith Life
    • Disclosure and Privacy Policy
      • Terms and Conditions
      • Store Affiliates
  • Contact Me
    • Want a Button?
  • Shop
    • Floral Printable Planners
    • Paint eBooks and Packages
    • Wedding Binders & Extra Printables!
    • Planner Bundles
    • Planner Accessories
    • Home Decor Printables!
  • Cart
    • Bloglovin
    • Facebook
    • Instagram
    • Pinterest
    • Twitter
    • YouTube

Happily Ever After, Etc.

Creating Our Own Fairytale

  • Happily Ever After, Etc.
  • Home
  • Home Decor
    • My Home
    • Paint
    • Before and After
    • Tablescapes
    • Mood Boards
    • Furniture
  • DIY & Crafts
    • New to Cricut – Start Here
    • Cricut
    • Resin
    • Scrapbooking
  • Organization & Planning
    • Organization
    • Planner
  • Holidays
    • Christmas
    • Halloween
    • Thanksgiving
    • Easter
  • Wedding
    • Cricut Wedding Projects
    • Free Wedding Binder
    • Bride Bag- The Ultimate Wedding Planner

DIY Unicorn T-Shirt with Heat Transfer Vinyl

Hey y'all,

It’s time for another fun Cricut Post! I am having so much fun learning new tricks and tricks for all of my projects… there are so many things this little Cricut can do that I’m just learning. Of course, being part of the Cricut Craft & Create Challenge every month gives me the opportunity to actually pull the Cricut out each month and try new projects.

This month I’m tackling an entirely new project… a fancy new DIY T-Shirt with Heat Transfer Vinyl. Of course, the first time you tackle a new project it takes fifty billion times longer than the second time so I’m here to share all of my tips and tricks so that you can make fun new T-Shirts the easy way (not the million step way).

Plus, if you follow the rainbow all the way to the end there’s a pot of gold… which is code for if you read this post all the way to the end there’s a giveaway!

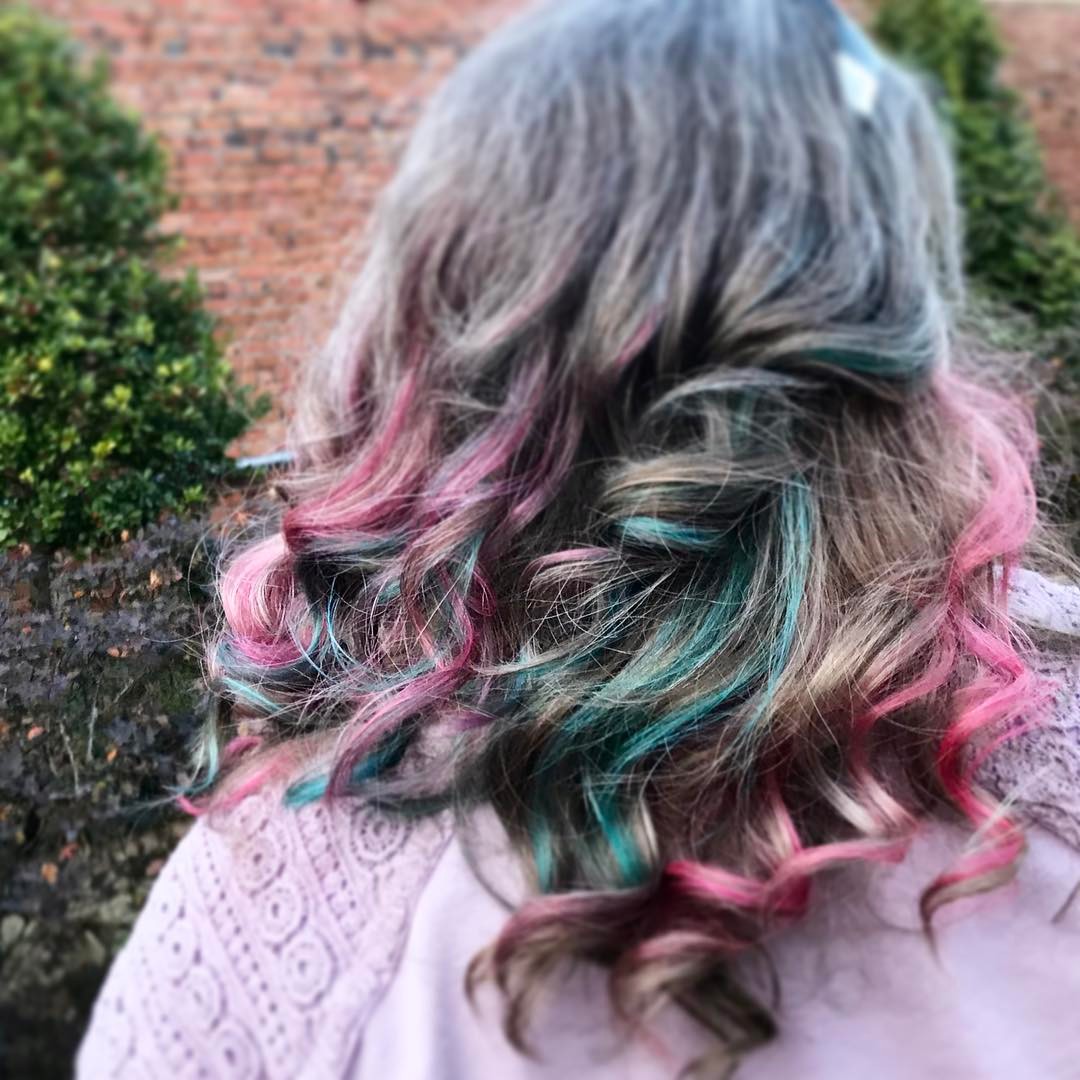
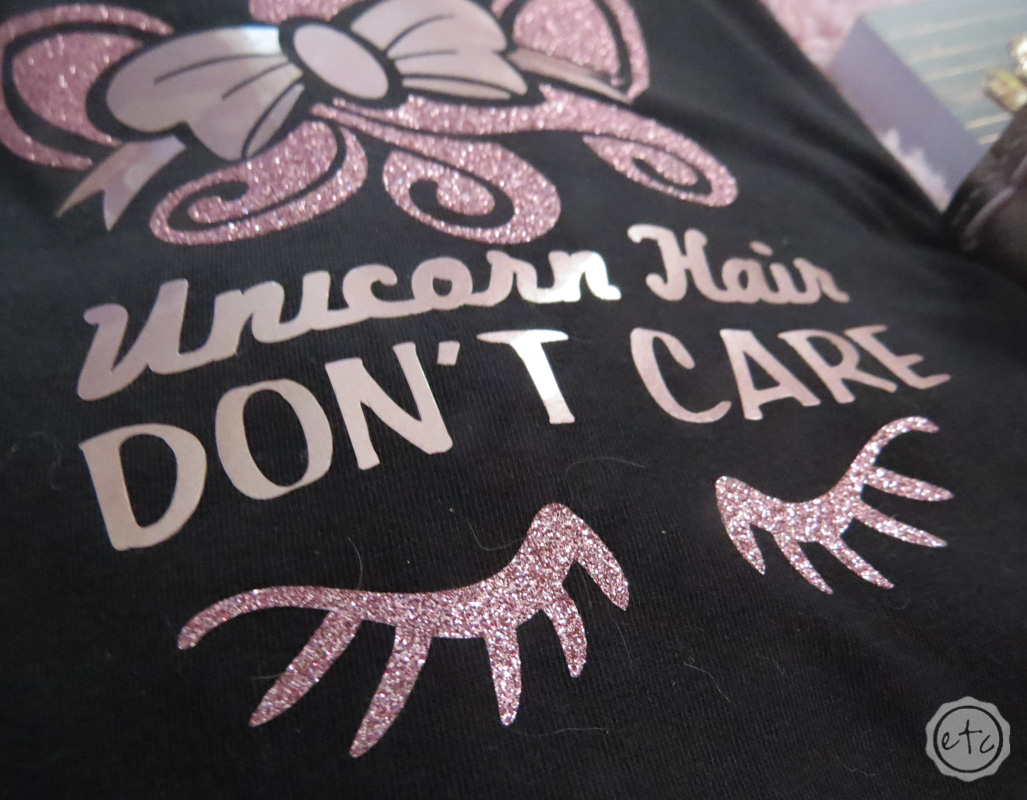
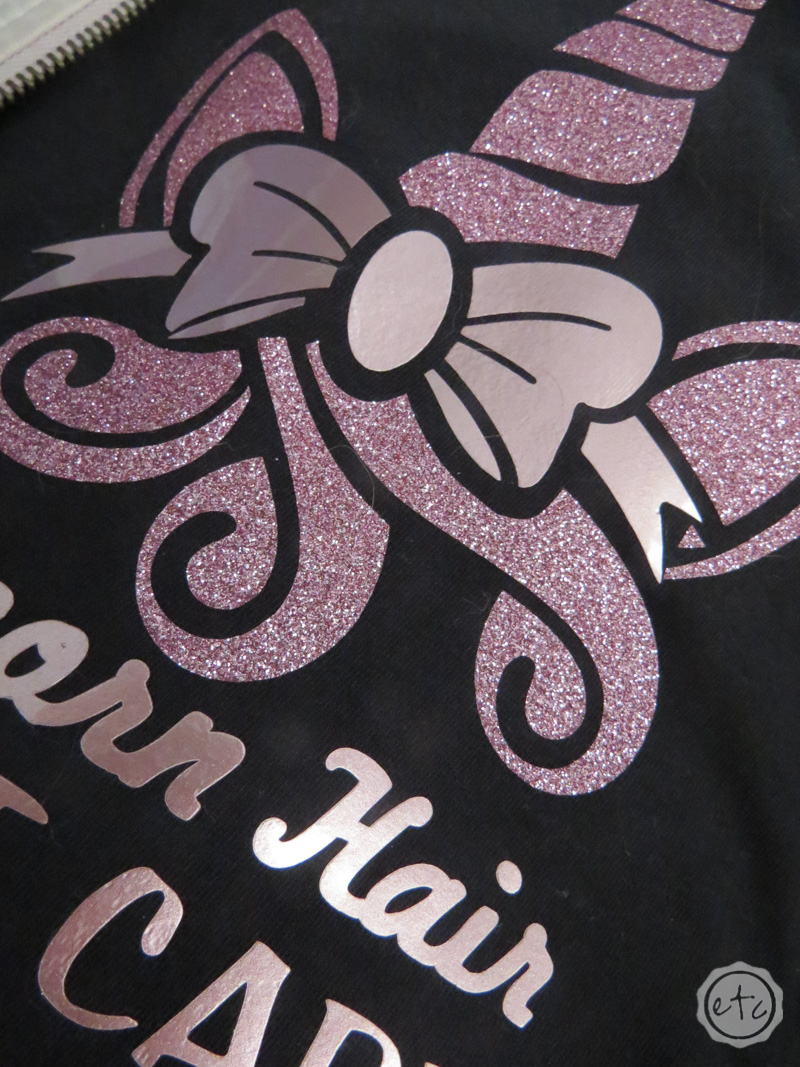
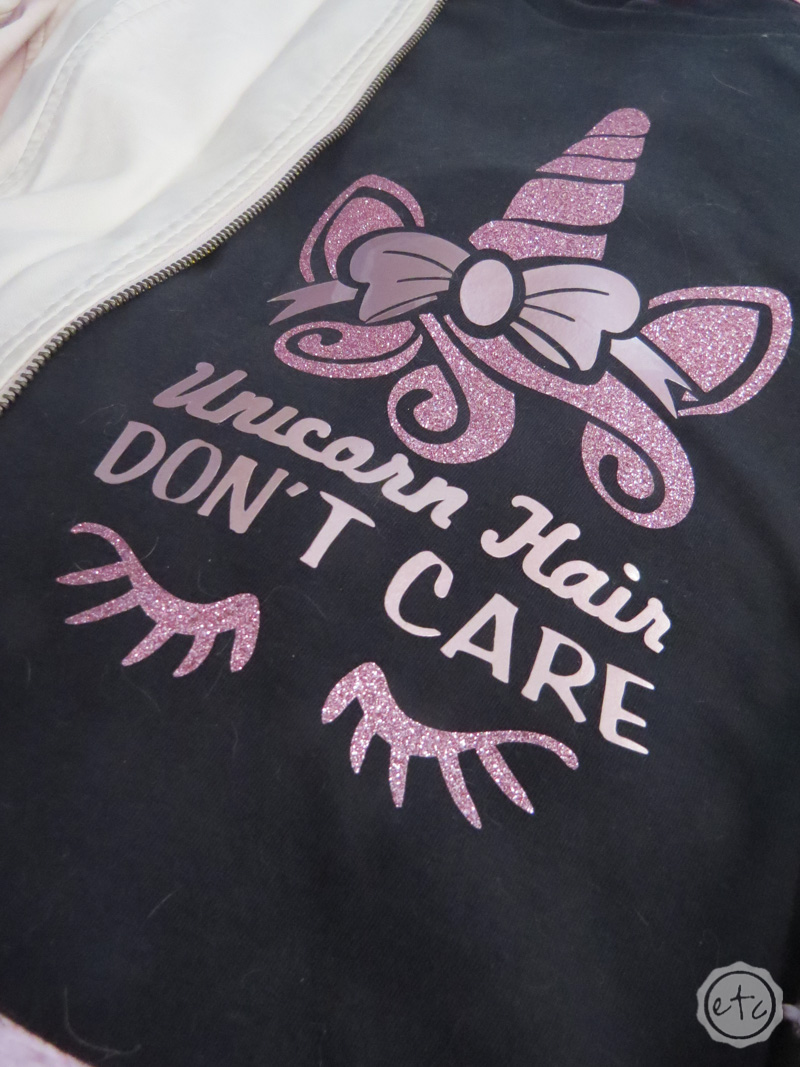
I decided to take my fun new multi-colored unicorn hair as my inspiration and make a fun Unicorn t-shirt… Unicorn Hair Don’t Care y’all! Mom asked if I had made up that saying and of course… I didn’t. But I told her I did so if you’re chatting with her don’t let her in on the secret *wink wink*

Supplies:

  • Cricut Explore Air 2
  • Fine-Point Cutting Blade
  • Standard Cutting Mat (that’s the green one!
  • Cricut Easy Press 12 x 10
  • Cricut Easy Press Mat
  • Unicorn Cut File
  • Glitter Iron On
  • Metallic Iron On
  • T-Shirt
  • Unicorn SVG

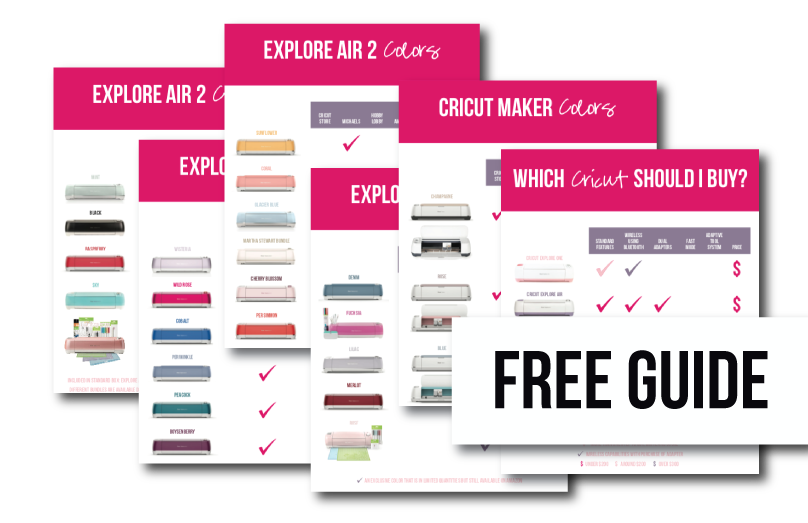
Need help picking your perfect machine? I’ve got you covered!


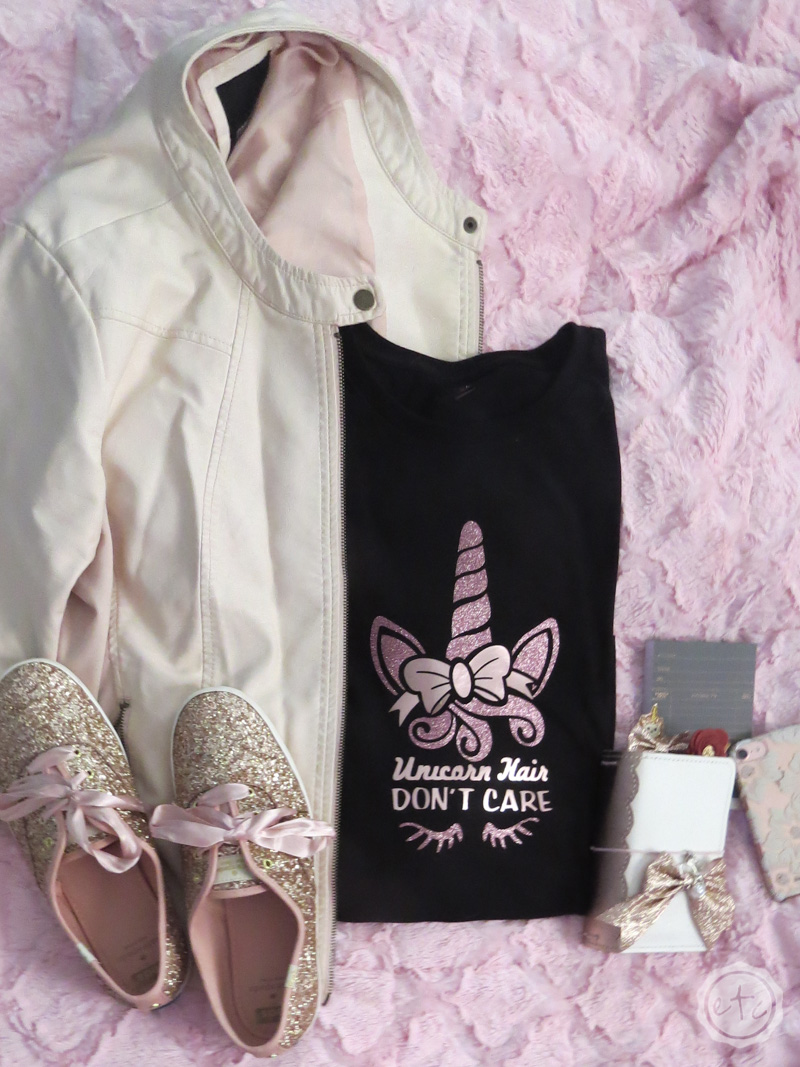
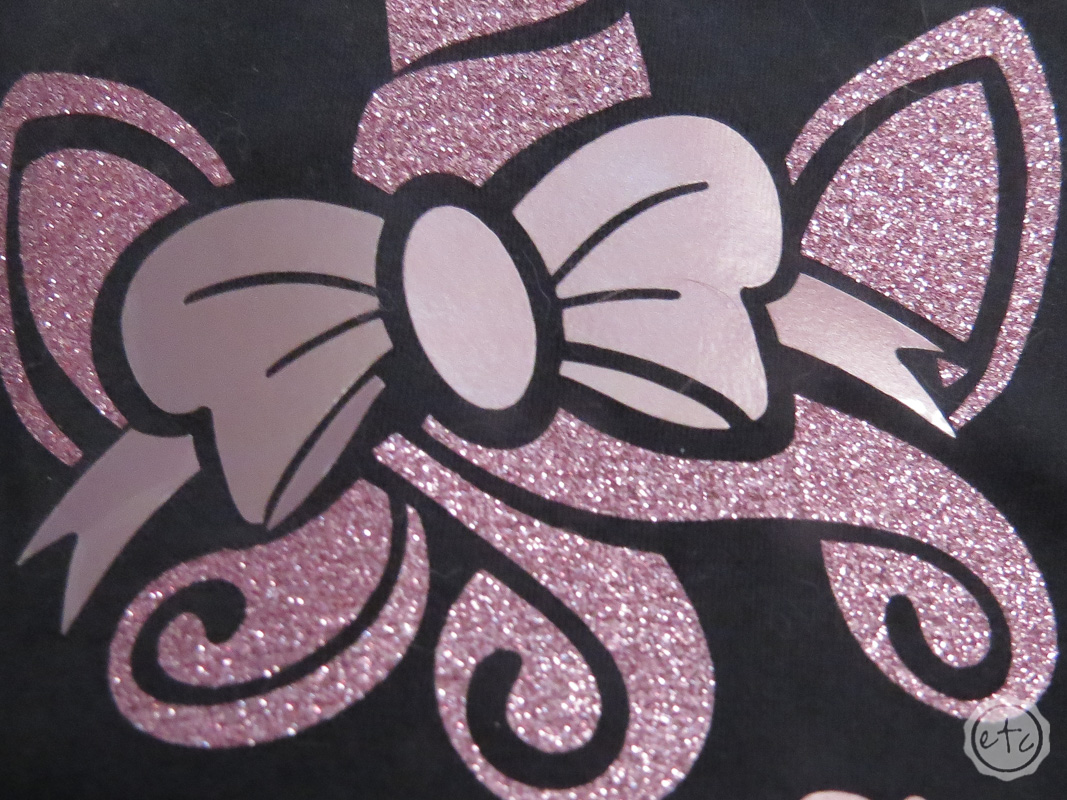
Didn’t it turn out cute?! I am in love… literally I wore this bad boy the day after I made it. The t-shirt is so soft and I love the way the glitter looks. I’m one of those people that is easily distracted by anything shiny so I kept admiring it all. day. long.

On to the good stuff… instructions!
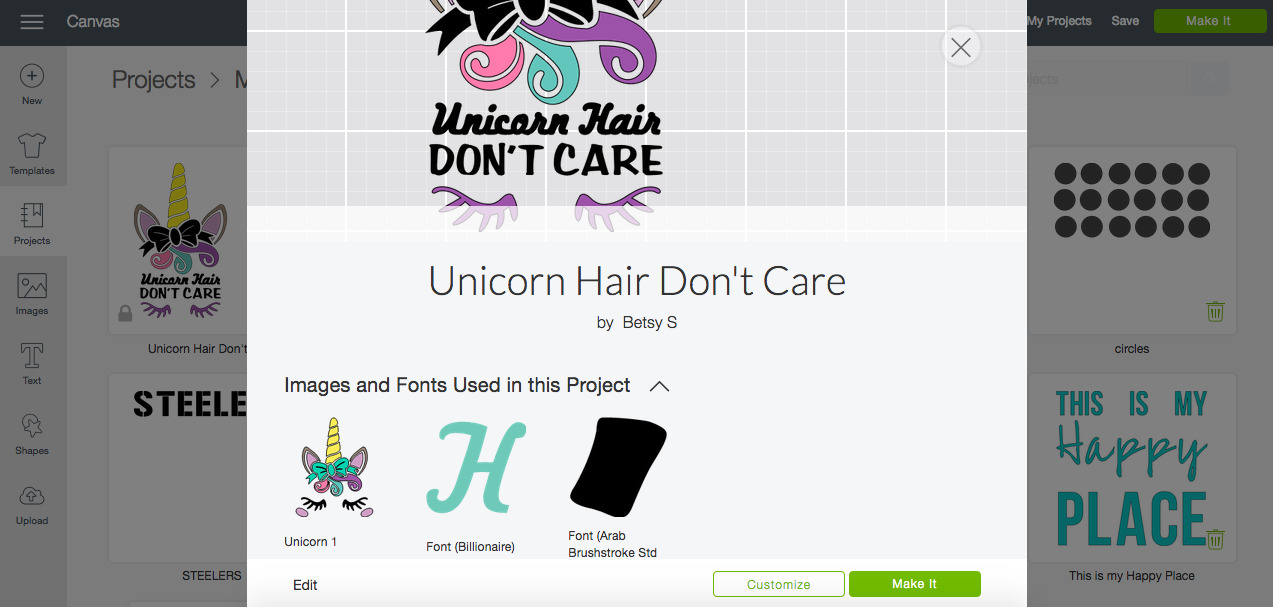
Step One:

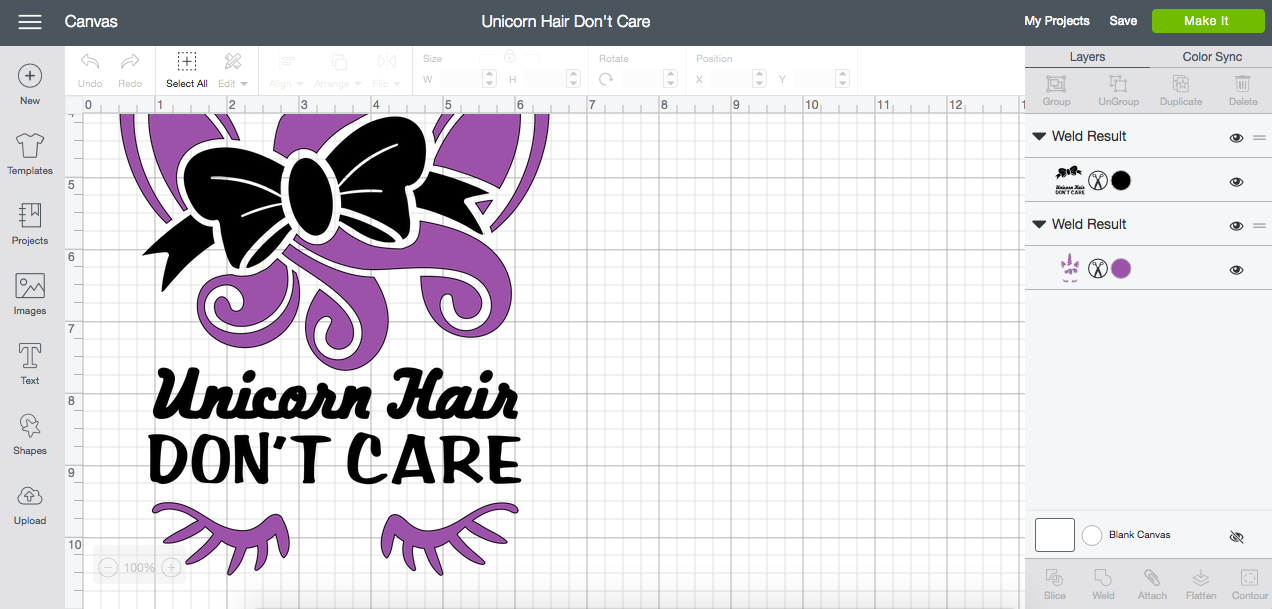
Finalize your design in Cricut Design space… I thought about actually designing my own unicorn for a couple of minutes and then decided that for two dollars I could get a really cute unicorn that someone else did all the hard work on. Complete time saver.

I downloaded this sweet little unicorn from Etsy and it was super easy to upload the svg file into the program. Then it was a simple act of adding my fonts and cutting the vinyl out on my Cricut.

Since I used two different types of vinyl for this shirt I simply welded the different sections of the shirt together on Cricut Design Space. This basically makes them different layers so that I can easily turn on one layer or the other when it’s time to cut. Just click the little eye symbol next to the layer to make the layer you want to cut visible.

I even made the two layers different colors so I could easily tell them apart but you don’t have to do that… since we’re just cutting (not printing) the color is really not relevant.

Everyone following along so far? Once you are ready to go click “Make It” in the top right corner… then when the prepare screen comes up MAKE SURE YOU CLICK MIRROR. HTV has a clear layer over the top so you must mirror your design in order for it to be the right way on your shirt. Make sure the clear film layer is pressed to the sticky side of your cutting mat and you are good to go! Cut the glitter vinyl… then cut the metallic vinyl! Easy peezy.

TIP: Part of what took so long to figure out was that the “iron on” setting on my Cricut was not enough for my glitter and metallic heat transfer vinyl. I accidentally messed up an entire section of vinyl with the wrong setting before I figured that out. I had to set it to the “bonded fabric” setting in order to cut through the glitter and the metallic vinyl sheets. Go figure.

Step 2: Pre-Heat your Shirt

Yes… it’s as easy as it sounds. Since we’re working with HTV go ahead and use your iron to preheat the area of your shirt where the design is going to go. Once you’ve ironed it enough to warm up the fabric you’re good to go!

Step 3: Transfer the Design

Once your vinyl is cut out it’s time to place your design on your t-shirt… I used transfer tape for the metallic vinyl which made it easy super easy. The glitter vinyl is easy peezy since it has the clear layer already keeping it together… kind of like built in transfer tape.

Since we’re using two different vinyls go ahead and place the first sheet… then use the iron to attach it to the shirt before placing the second piece of vinyl. It’s kind of like a two step dance here… one step forward two steps back! Worth it though… definitely worth it!

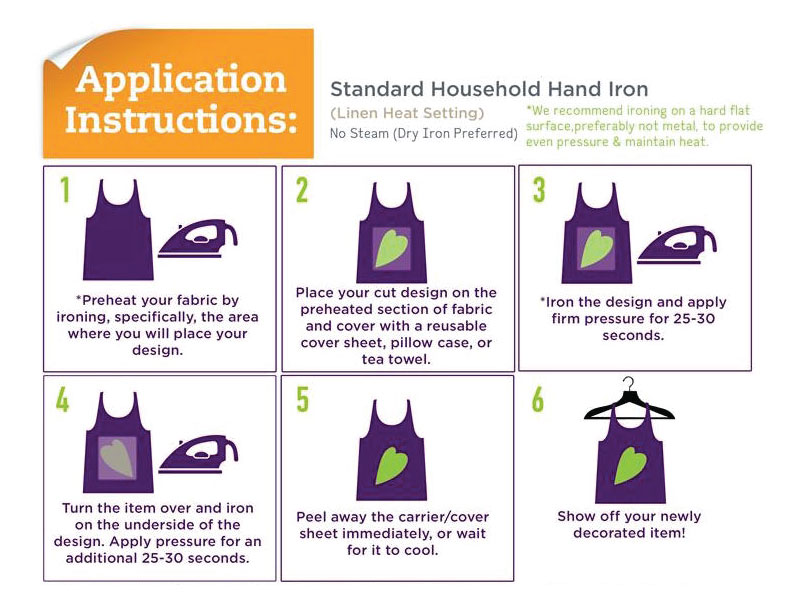
Step 3: Time to Iron!

Now it’s time to actually iron your design onto your shirt! If you have a handy dandy heat press then you’re in luck… just use that baby for 15 seconds and you should be good to go. If you’re using an iron it’s still pretty simple.

Use your Place a pillow case (or other lightweight fabric) over your project and iron the design. Make sure to place the iron down firmly for 20-30 seconds at a time… don’t move the iron while it’s down. You’re not ironing a pair of slacks here… if you start moving the iron all around your design may shift and your unicorns horn may or may not become slightly wonky.

I may or may not know this from experience *wink wink*

Go ahead and flip your shirt over and repeat the process from the back! Make sure the vinyl is fully bonded and you’re ready to take the clear film off! Ta-da!

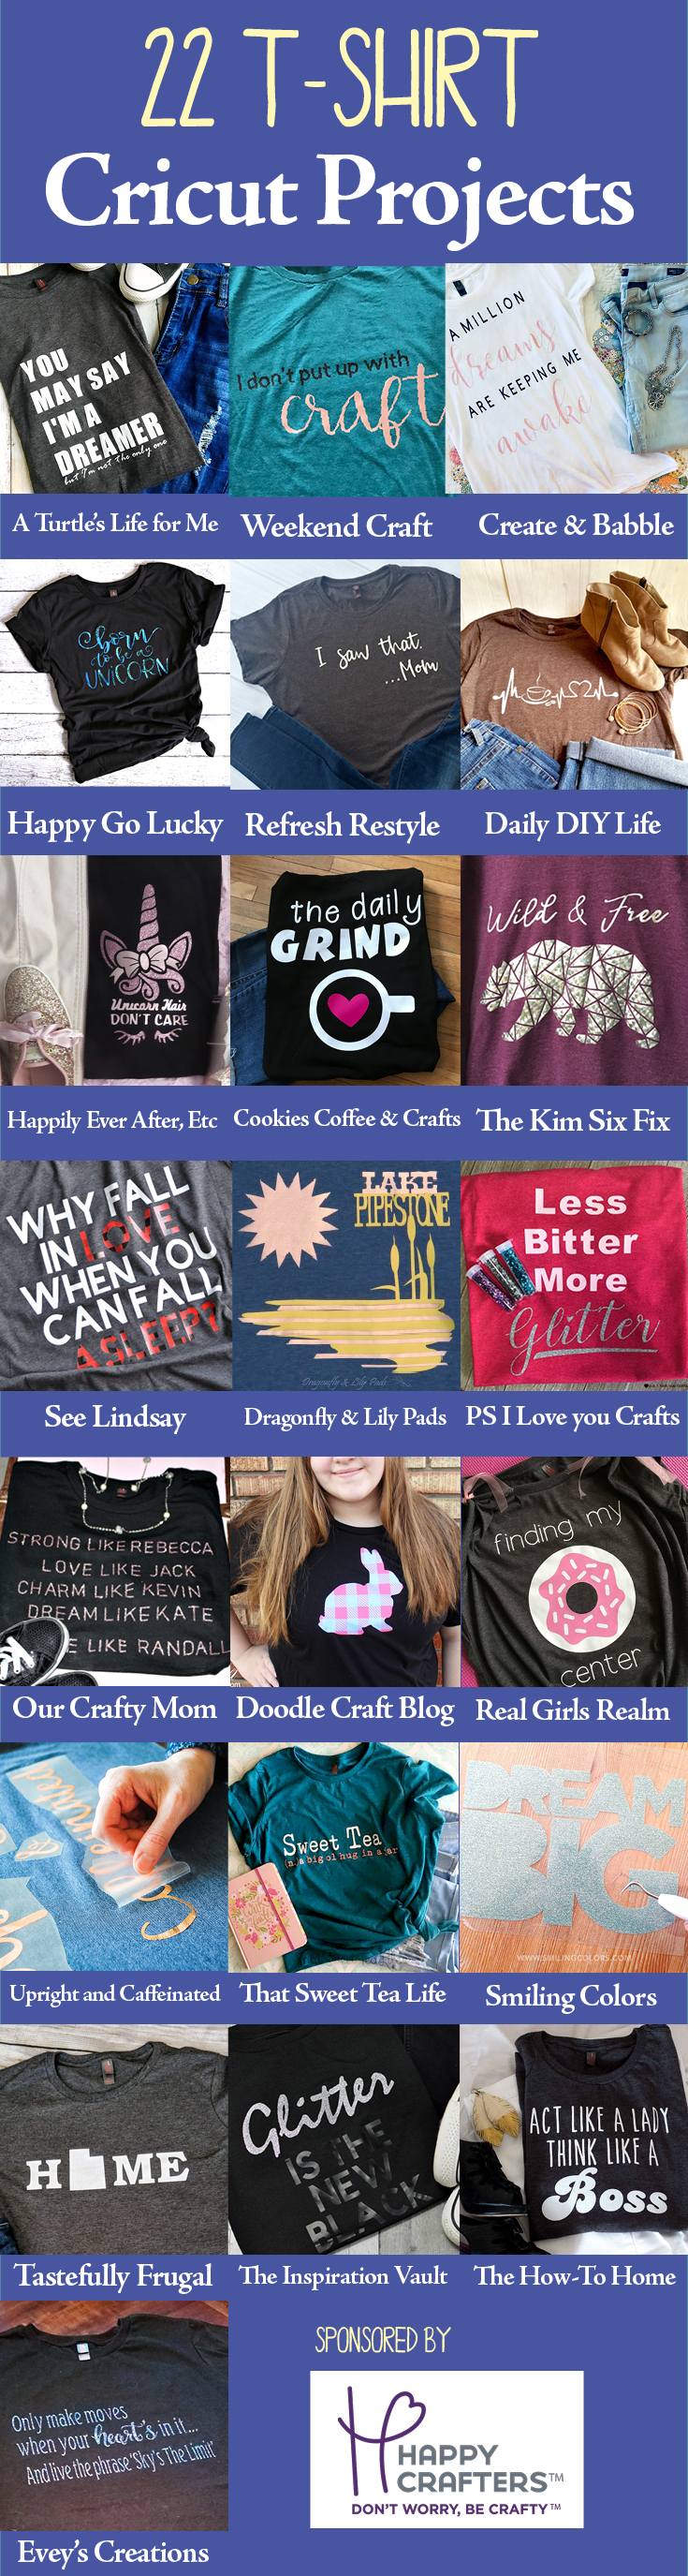
Liked this project? Want more awesome shirt ideas!? Click below to see all the DIY T-Shirt ideas your little heart can handle!

Although I’m still partial to mine *wink wink*

A Turtle’s Life for Me • Weekend Craft • Create and Babble • Happy Go Lucky • Refresh Restyle • Daily DIY Life • Happily Ever After, etc • Cookies, Coffee and Crafts • The Kim Six Fix • See Lindsay • Dragonfly & Lily Pads • PS I Love you Crafts • Our Crafty Mom • Doodle Craft Blog • Real Girls Realm • Upright and Caffeinated •  That Sweet Tea Life • Smiling Colors • Tastefully Frugal • The Inspiration Vault • The How-To Home • Evey’s Creations


You made it through the entire post? That means you're one of my new favorite people! I'd love to be friends and see what else you would like to read about! Leave me a comment and then sign up for your very own FREE paint planner.... so that you can keep track of every single paint color with ease!
Welcome back! I'd love to be friends and see what else you would like to read about! Leave me a comment and then sign up for your very own FREE paint planner.... so that you can keep track of every single paint color with ease!

Get Your FREE PDF Guide!

Don't forget to snag your free PDF Guide to buying your first Cricut!

Success! Now check your email to confirm your subscription.

There was an error submitting your subscription. Please try again.

Powered by Kit

Show me some LOVE y'all:

  • Click to share on Facebook (Opens in new window) Facebook
  • Click to share on Pinterest (Opens in new window) Pinterest
  • Click to share on X (Opens in new window) X
  • Click to email a link to a friend (Opens in new window) Email

Related

«
»

Cricut, DIY & Crafts 14

Comments

  1. Jenny says

    March 11, 2018 at 6:53 am

    This shirt is super cute! Your rainbow hair is awesome, I love it. So funny what you told your mom. lol! The glitter vinyl looks so good on a shirt, I’ve used it for my daughter, but not myself (yet!) Pinning!

    Reply
  2. Heather Northington says

    March 11, 2018 at 7:00 am

    What a fun T-shirt! Love the glitter vinyl, it’s perfect for a unicorn shirt. Your hair is gorgeous, the colors are awesome!

    Reply
  3. Allison | Upright and Caffeinated says

    March 12, 2018 at 8:23 am

    Oh my goodness- Betsy, I LOVE your hair!!! and that t-shirt is PERFECTION!

    Reply
  4. Mary Hunnicutt says

    March 12, 2018 at 3:24 pm

    I love your hair and that tee is perfect! I have found the same thing out about the glitter HTV…It’s thicker than the regular iron-on.

    Reply
  5. Marie Dabbs says

    March 16, 2018 at 11:38 am

    Ha, best saying ever! Hair is one of those easy, non-permanent things we can have fun with, so I say go crazy. This t-shirt design is absolutely adorable and suits your cute hair perfectly!

    Reply
  6. Veebeecouture says

    March 16, 2018 at 12:12 pm

    Thanks! I would love to help!!

    Reply
  7. Brigettd says

    March 17, 2018 at 5:15 pm

    I would love this file, but I have a Silhouette. This is awesome!

    Reply
    • Happily Ever After, Etc. says

      March 17, 2018 at 5:16 pm

      I believe the file is able to be purchased for the silhouette as well! Yay!

      Reply
  8. Michelle from Weekend Craft says

    March 18, 2018 at 7:48 am

    This couldn’t fit your hairstyle more!!! Love it.

    Reply

Trackbacks

  1. DIY Dry Erase Calendar from an Antique Window - Happily Ever After, Etc. says:
    July 27, 2018 at 5:01 am

    […] onto the glass the entire process was smooth as butter and the vinyl went down like a dream. Unlike the heat transfer vinyl I worked with a few months ago… it was beautiful but it definitely won that […]

    Reply
  2. What is a Cricut... & What Can I do with it? - Happily Ever After, Etc. says:
    March 5, 2019 at 3:31 pm

    […] T-shirts […]

    Reply
  3. How to use the Cricut Fine-Point Blade (Plus Cricut Access Project!) - Happily Ever After, Etc. says:
    March 9, 2019 at 5:06 pm

    […] T-Shirts […]

    Reply
  4. 25 Crafting Blanks You Can Get on Amazon Prime - Happily Ever After, Etc. says:
    April 7, 2019 at 6:24 pm

    […] like this cute little “unicorn hair, don’t care” t-shirt I whipped up after dyeing my hair last […]

    Reply
  5. The Ultimate Guide to the Cricut Easy Press - Happily Ever After, Etc. says:
    April 1, 2020 at 3:10 pm

    […] Let’s tackle this question first. Yes you can use an iron. I’ve done it a few times and it does work (just check out this unicorn shirt if you want to see an iron in action). […]

    Reply

Leave a Reply Cancel reply

Your email address will not be published. Required fields are marked *

sidebar betsy I'm Betsy, Home Decor Enthusiast, Yorkie Mama, Crafter, Blogger, Picky Eater, Chief Mess Maker, Antique Hoarder and Graphic Designer. You can generally find me working on (attacking with a paintbrush) the 3 bed, 2 bath home we are currently renting! Our home might not be perfect but it is ours & if you hang out long enough you'll see that what we lack in know-how we make up for in passion!
Shop My Craft Room

Shop My Home

Featured Articles

15 Fabulous Ideas to Organize your Laundry Room
25 FREE Printables For Your Home!
What to do with EXTRA Paint with Happily Ever After Etc
10 Ways to Make Your Bed EXTRA Comfy with Happily Ever After Etc.
Ready to Pick your Perfect Paint Color? We'll help you with our 6 Day FREE E-Course

Hey y’all,

Profile

I'm Betsy, Home Decor Enthusiast, Yorkie Mama, Picky Eater, Chief Mess Maker, & Graphic Designer...

A Little Note!

Many of the links on Happily Ever After, Etc. are affiliate links. If you purchase a product after clicking an affiliate link, I receive a small percentage of the sale for referring you, at zero cost to you! How awesome is that? Purchasing through affiliate links is an easy, painless way to help out your favorite bloggers. Thank you so much for your continued love and support! Read the full disclosure here!

Instagram

Follow on Instagram

Copyright © 2025 · Darling theme by Restored 316

Copyright © 2025 · Darling Theme on Genesis Framework · WordPress · Log in · Privacy Policy