


I’ve made quite a few Christmas projects around the letters to Santa theme over the years… this adorable “Dear Santa” sign I made with my Cricut, this set of resin postage stamps… even this cute 3-Dimensional Letter’s to Santa Mailbox with little resin “nice lists” to all the good boys and girls. So I WAS NOT planning to make anything letter related this year. No letters, no nice lists, no mailboxes… but when I found this tiny 3D wooden mailbox at the Target Dollar Spot I figured… why not.
I love that it’s 3-dimensional with a little slot for letters… I didn’t feel the need to stuff it full of pretty (festive) envelopes and resin nice lists. Of course, it was red when I picked it up at Target but a bit of paint, a bit of Cricut vinyl and a pretty resin postage stamp and this baby was ready to add to the collection!
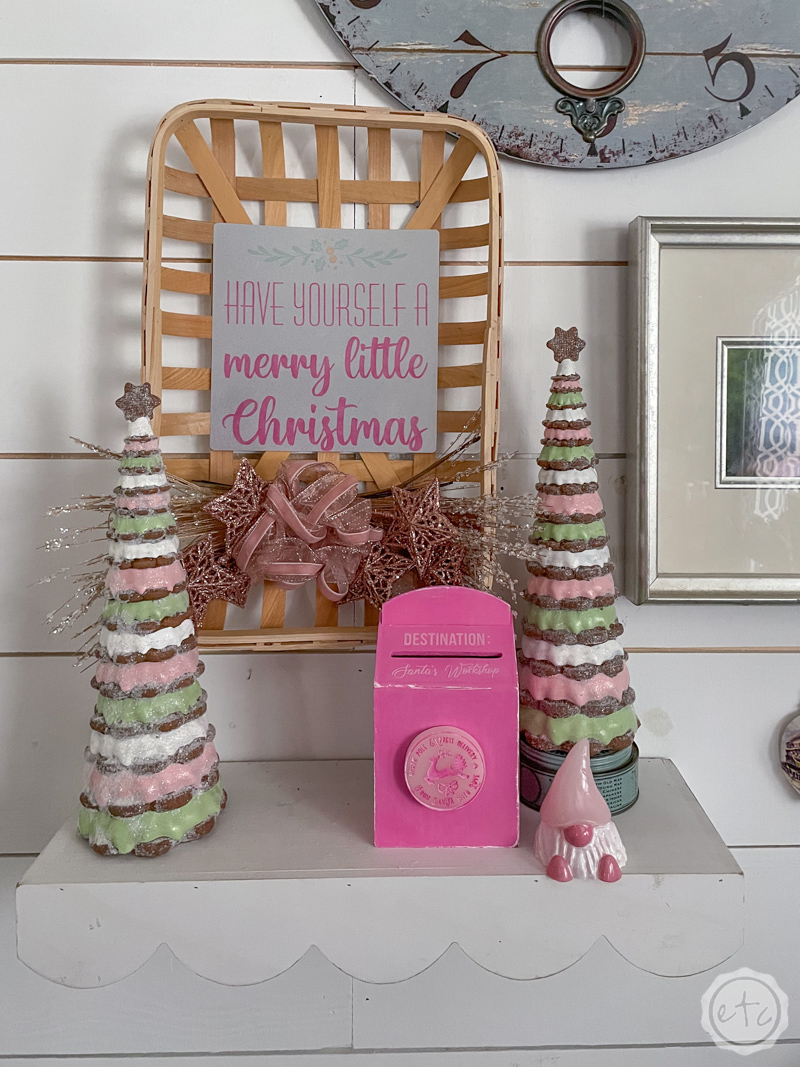
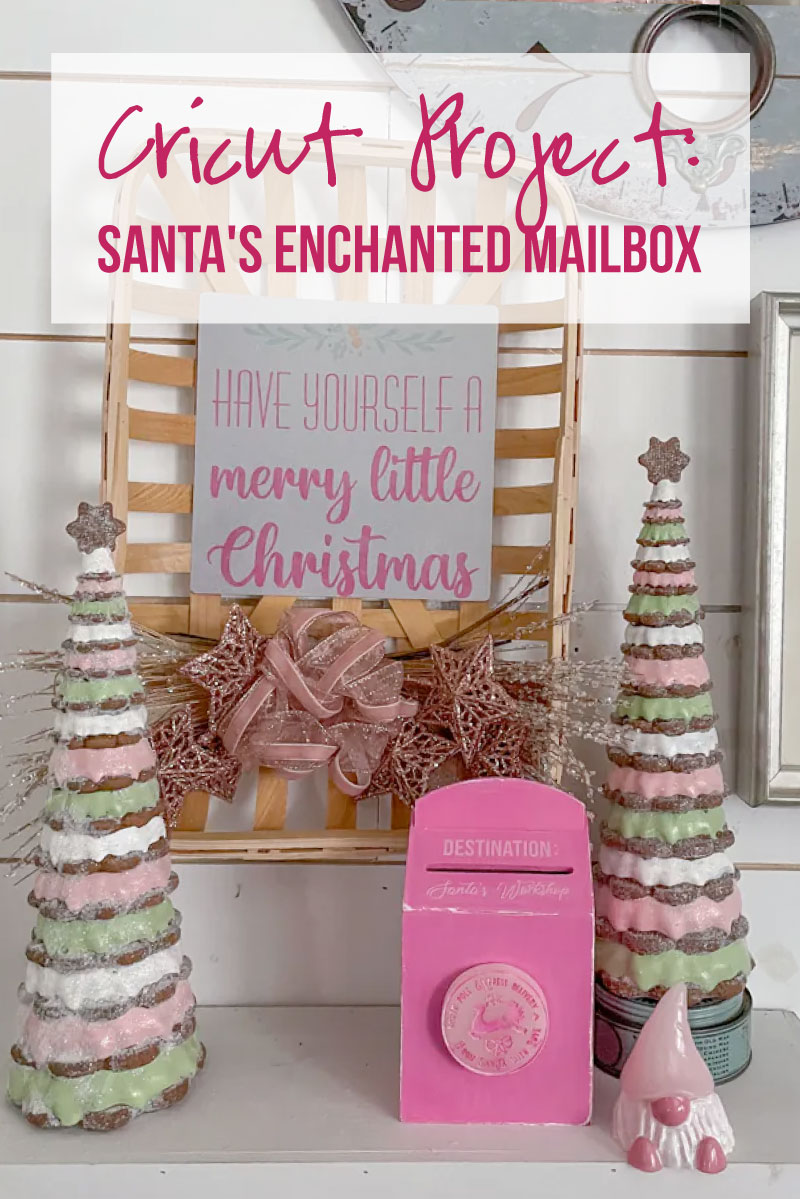
It’s so cute on my scalloped shelf in front of my little metal “Have Yourself a Merry Little Christmas” Sign!
Ready to get started?
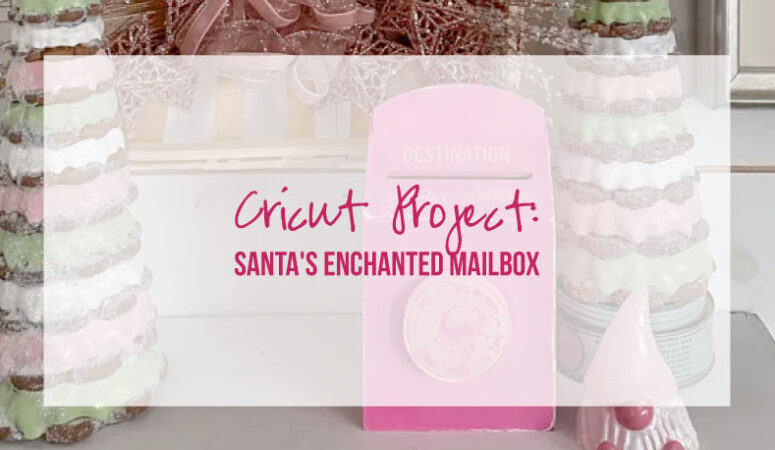
Supplies:
- Cricut Maker 3
- Fine-Point Cutting Blade
- Cricut Cutting Mat (I like to use the fabric grip mat but the standard grip mat works fine for either material)
- Pink Shimmer Vinyl
- Transfer Tape
- Brayer
- XL Scraping Tool
- Weeding Tool
Just getting started with resin? Download my free resin supply list and make your first project today!
Step 1: Cut your SVG’s
Okay y’all let’s do this thing! First things first.. go ahead and paint your little mailbox. I painted mine pink to match the rest of this years blush and seafoam Christmas decorations but you could easily go with a more traditional color.
Once your mailbox is painted (and distressed!) it’s time for our SVG! Go ahead and download the FREE SVG from the bottom of this post and upload it to Cricut Design Space. (If you’re not sure how to upload an SVG to Cricut Design Space you can follow my tutorial here).
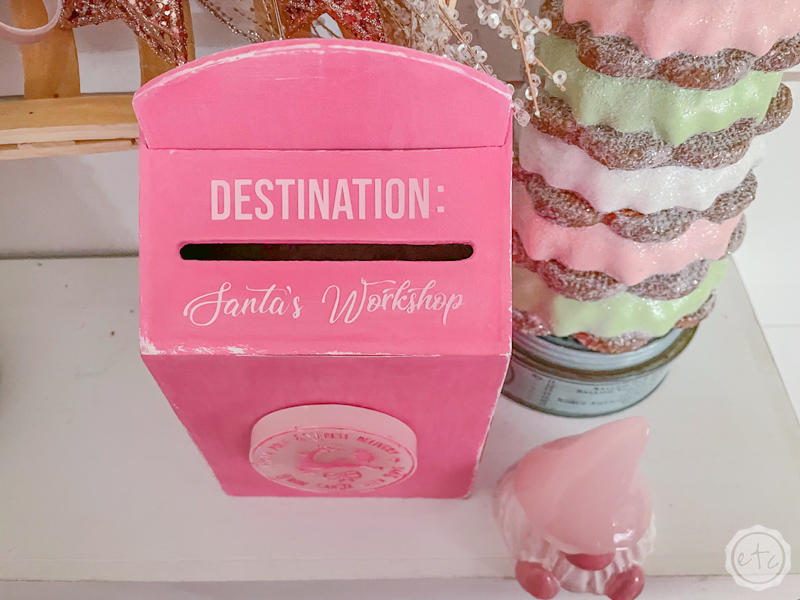
Now go ahead and re-size the writing from the original file (the mailbox I used last year was much larger!) to fit onto this tiny mailbox. I actually sized everything so that “Destination” would fit above the mail slot and “Santa’s Workshop” would fit below… rather than leave all 3 words on the same line.
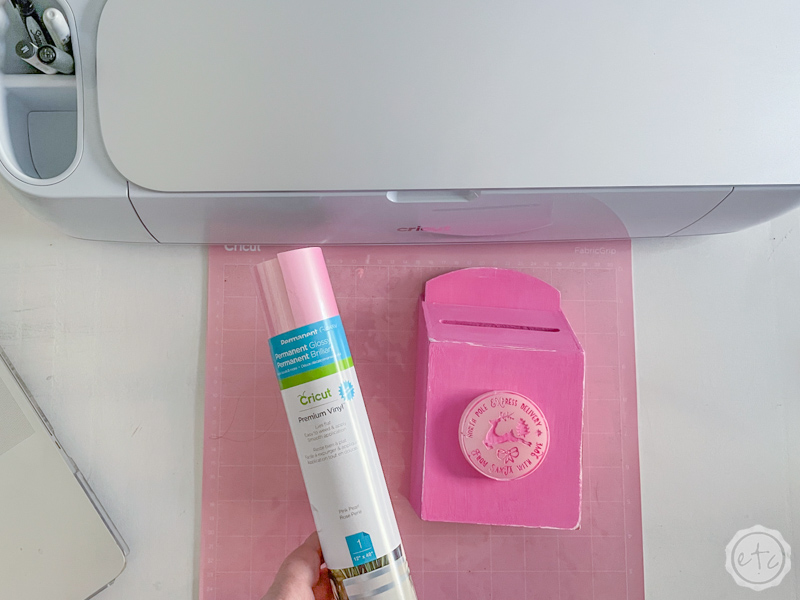
Then I cut all 3 words out of a shimmer pink vinyl and weeded them so they’re ready to go!

NOTE: The SVG includes a large Christmas medallion I added to last year’s mailbox. This year I added a resin postage stamp instead and only used the “Destination: Santa’s Mailbox” text from the SVG. If you don’t want to pour a resin postage stamp you can cut out the medallion for the front of your mailbox instead… just make sure to re-size it first!


Step 2: Transfer your Design
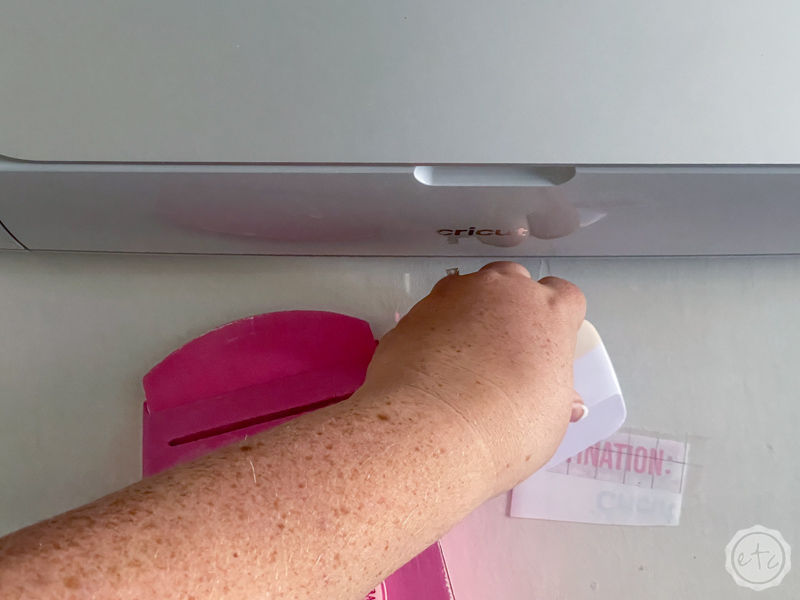
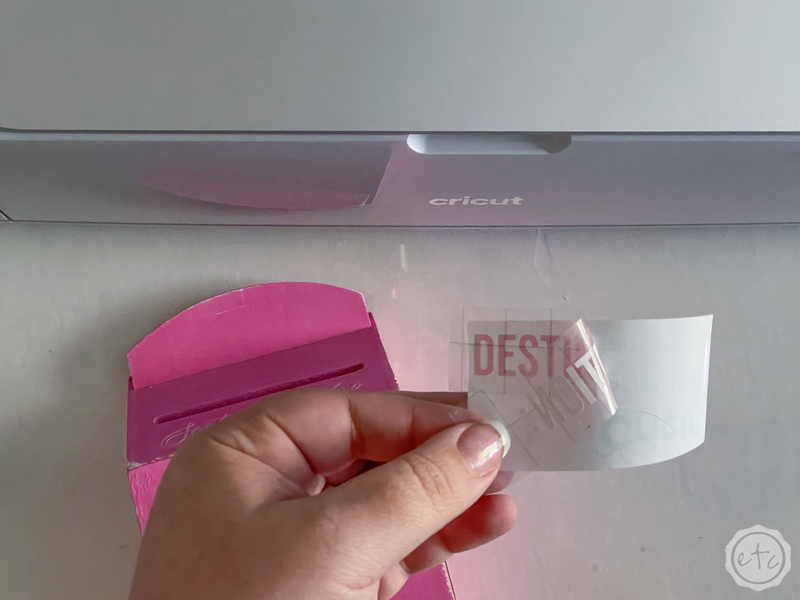
Once everything is weeded and ready to go we’re halfway there! At this point it’s a simple matter of using a bit of transfer tape to pick up the vinyl and place it on your mailbox.
You’ll want to double check that all the tiny letters and curly cue’s are on the transfer tape as you peel it up (no letter left behind!). If part of a t or the loop of an s is coming then simply lay the transfer tape back down and scrape over that portion again… it should come up fairly easily once it’s all bonded together.
Then line it up carefully on your mailbox… make sure that everything is centered and then scrape it so that it sticks!
Volia!
Remove your transfer tape and you’re good to go! I used the same sheet of transfer tape for both lines of text and it was perfectly sticky.
Easy peezy lemon squeezy!


Step 3: Add your Resin Postage Stamp
At this point we’re basically done! If you’re working with a vinyl SVG then you can add that to the front of your mailbox but if you’re loving the resin postage stamp let’s add that baby instead.
The silicone mold for this project has a circular and a rectangular postage stamp that you can pick from… either would look great but I loved the circular option. So I made one in a lighter pink to contrast the darker pink mailbox and then added a bit of the dark pink and white to highlight the words.
You want to read them after all!
Then I used a bit of hot glue to glue this baby in place.
Epic!
Step 4: Enjoy
This little enchanted mailbox turned out soooo cute! I love that it has a removable backing so your kiddos can actually add letters inside for Santa… or it could be the perfect hiding spot. If everyone else just thinks it’s adorable decor they won’t look for your chocolate stash inside.
Just saying.
Either way I love how it turned out and it’s just what my little shelf needed!


Leave a Reply