
This post contains affiliate links to products I 100% love and use in this tutorial.

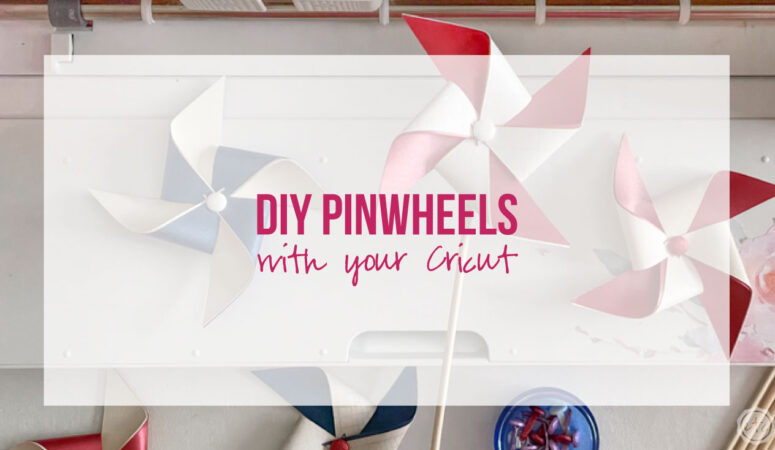
Today we’re tackling a fun project… 4th of July Pinwheels! Technically you can use different colored cardstock to make these pinwheels for any occasion: birthday parties, summer barbecues, parades… whatever floats your boat. BUT I’m working on the cutest 4th of July themed tablescape and I need adorable drink stirrers for my lemonade.
Yes, I need them.
It’s important.
And I thought pinwheels would be a super cute addition to the table!
So while you can make pinwheels for any occasion I’m making these little babies as adorable drink stirrers for my 4th of July party. I even made super cute 4th of July napkins for each of the place settings!
Let’s get started.
Supplies:
- Cricut Maker 3
- Fine-Point Cutting Blade
- Cricut Fabric Grip Mat (that’s the one I use… it’s pink and holds everything)
- SVG Cut Files: Pinwheel Party Cut Files
- Brayer
- Cardstock (Cream, Blue, Red… any other patterns or colors you’d like)
- Brads
- Skewers or Straws
- DIY Pinwheel Kit
- Cricut Access

Step 1: Grab a Cut File
Pinwheels are so much fun to make… but there’s no reason to re-invent the wheel. There are dozens of already made, super adorable cut files in the Cricut Access library for making your very own pinwheels.
If you’re looking for a cut file that works with a pinwheel mechanism (and actually turns) or one that works with a small brad (like the one I ended up using) there are different patterns. There’s even some with really cute scalloped edges!
I ended up picking this “Pinwheel Party” file for it’s traditional style (we are working on a 4th of July design after all!). Since I’m using brads for my pinwheel and don’t need them to actually spin this file works perfectly.
I added it to a canvas and we’re ready to rock!
This pattern has 5 different colors geared up so we can turn a few of those off or cut 5 colors ourselves… let’s start with the traditional red, white and blue.


Step 2: Cut your Cardstock!
Let’s get ready to party! I went with a few basics: red, white and blue cardstock. I also grabbed a few fun cardstocks from my collection… blue lined paper, a cream distressed look. I wanted a very traditional look with a bit of an antiqued look.
If I wanted to buy new papers for this project I would have looked for papers with stars and stripes… a true 4th of July themed cardstock. BUT I couldn’t find any at my local craft store and I was way to impatient to wait for 2 day shipping.
When I’m working on a tablescape I often want to whip up pieces to go with it right now.
So I went with basic colors that I had in my paper stash… I loaded them onto light grip mats and hit go. This is a pretty simple design so it cuts super quick!
Score!


BONUS TIP: When you’re removing cardstock from a cutting mat it’s important to avoid the dreaded cardstock curl… otherwise your straight, smooth cardstock may end up a little wonky. So once your piece is cut don’t be hasty… instead of peeling the cardstock off your cutting mat the same way you would a piece of vinyl be a bit more careful.
Turn the entire cutting mat upside down and slowly peel the cutting mat away from your cardstock. Make sure the cardstock stays flat to your work surface and only the cutting mat curls… it will bounce back to normal easy peezy whereas the cardstock will stay curled.


Step 3: Assemble your Pinwheels
We’re cooking with gas now!
Once all of your pieces are cut we’re ready to put these little guys together. Since your cardstocks are double sided you can easily make an all red, an all blue or an all white pinwheel… but I wanted a bit of contrast.
So I layered a colored piece of paper and a white (or patterned) piece of paper back to back. Then I carefully started to put my brad through each of the four corners… keep adding corners and curl the edges toward the middle of the pinwheel. Your brad will keep the corners together and once you’ve added all 4 corners the brad will easily go through the middle of the pinwheel to secure all 4 corners.
If you’re using a pinwheel mechanism instead of a brad it’s the same process only your pinwheel will be mobile at the end… the brad will secure our pieces and keep them from moving.


Step 4: Enjoy!
Once your Pinwheels are good to go go (all braded up and looking like pinwheels) we’re ready to add the finishing touches. In this case I grabbed a few bamboo skewers since I love how they work as drink stirrers and they match the antiqued look of the plates and pinwheels. I used these same bamboo skewers for the mermaid tail drink stirrers I made last summer… they were a huge hit with my holographic mermaid tablescape.
You could grab a few cute straws if you’re looking for a different look.
Then I simply hot glued the two pieces together. The pinwheel mechanism kit comes with a handle that works perfectly… no hot glue needed.
Either way our pinwheels are done and we can pop these babies in our lemonade! I loved how they looked so much I made a few extra to put in the bouquet I picked from my garden… I thought they would be cute in a centerpiece.
THEY WERE.
Check it out!


Leave a Reply