
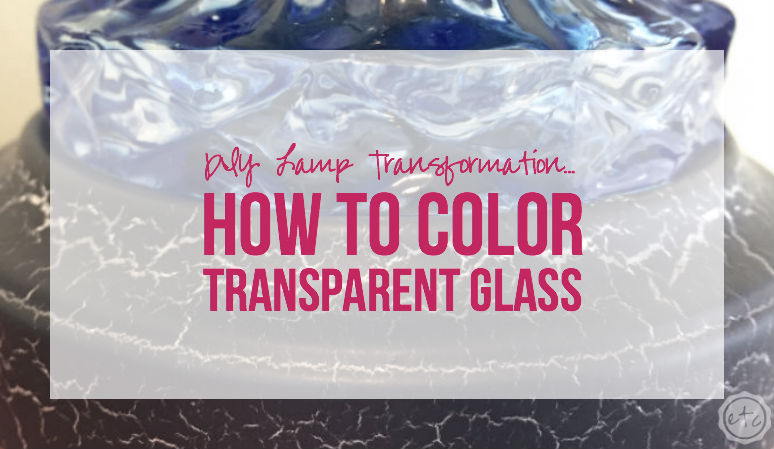


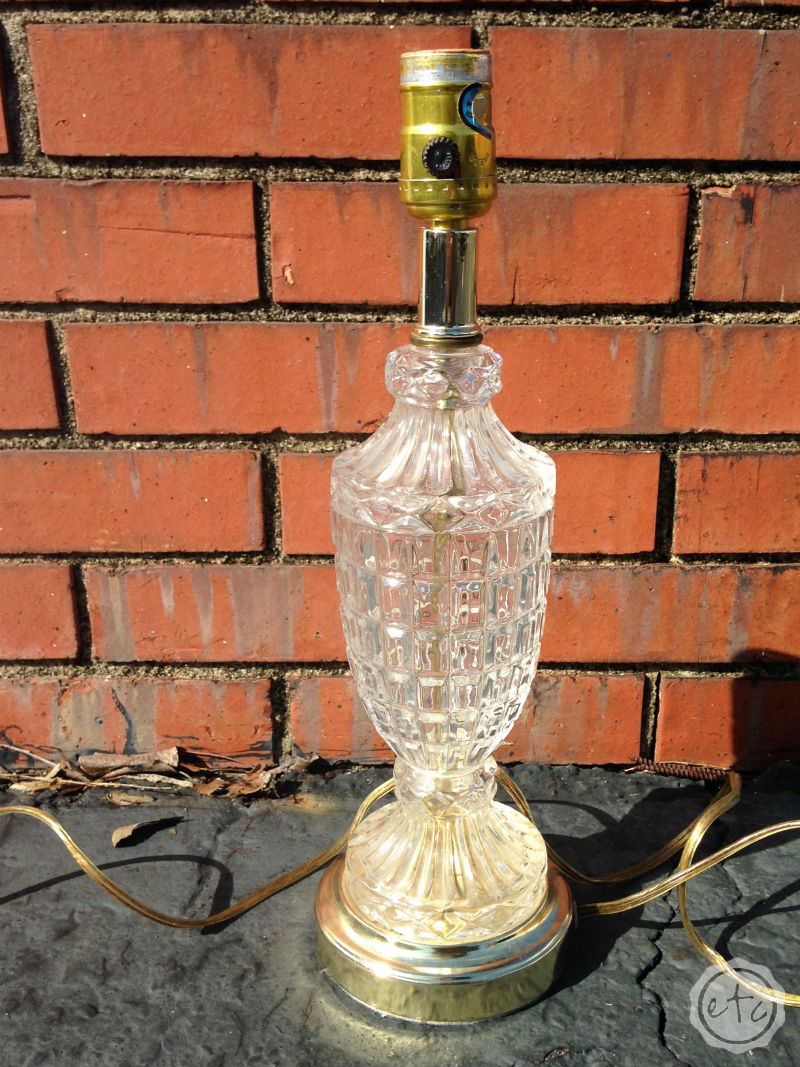
If you’re looking for a beautiful new lamp but you’re on a budget the chances are good that you have one of these old cut glass lamps lying around. (If you don’t Goodwill definitely does!).
So when I started looking for a lamp for my guest room make-over (without spending a bunch of money) I knew exactly where to look. My Mama’s house…
Isn’t that where you go to get all the good old stuff that should have been taken out behind the barn and shot already? She’s had a few of these old cut glass lamps stashed in her closet for years (really as long as I’ve been alive).
Honestly I don’t know how many of these babies I’ve seen over the years… I think everyone has one in a back closet somewhere. Mom has two or three!
It’s really not a bad little lamp… it just needed a little facelift to fit into my sage, grey and navy color scheme! So I grabbed a little transparent glass dye, a little spray paint and got started.
Check it out!
Supplies:
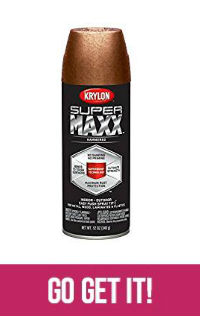
White Spray Paint and Gray Spray Paint (flat)
Thrift Store/ Mom’s Old Lamp 🙂
Cardboard
Lamp Shade
Looking for a bunch of posts on DIY & Crafts? I’ve got you covered!
Click here to see all of my how to DIY & Craft posts in one place!
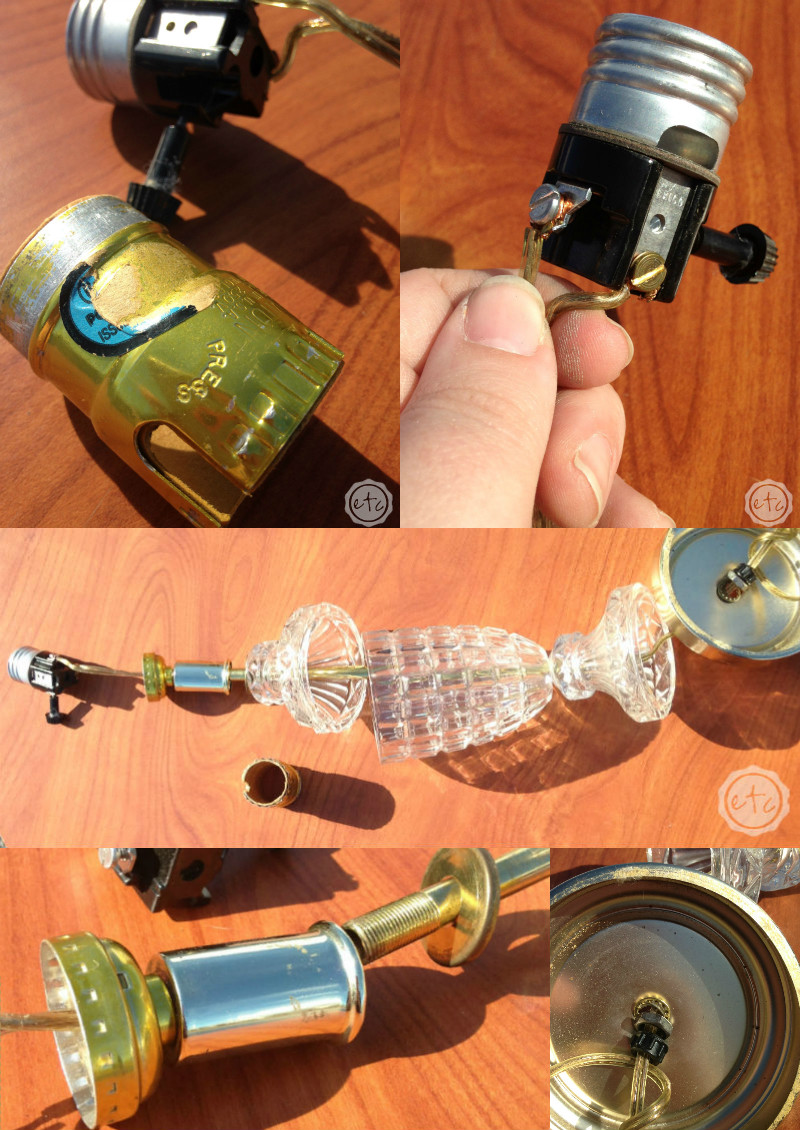
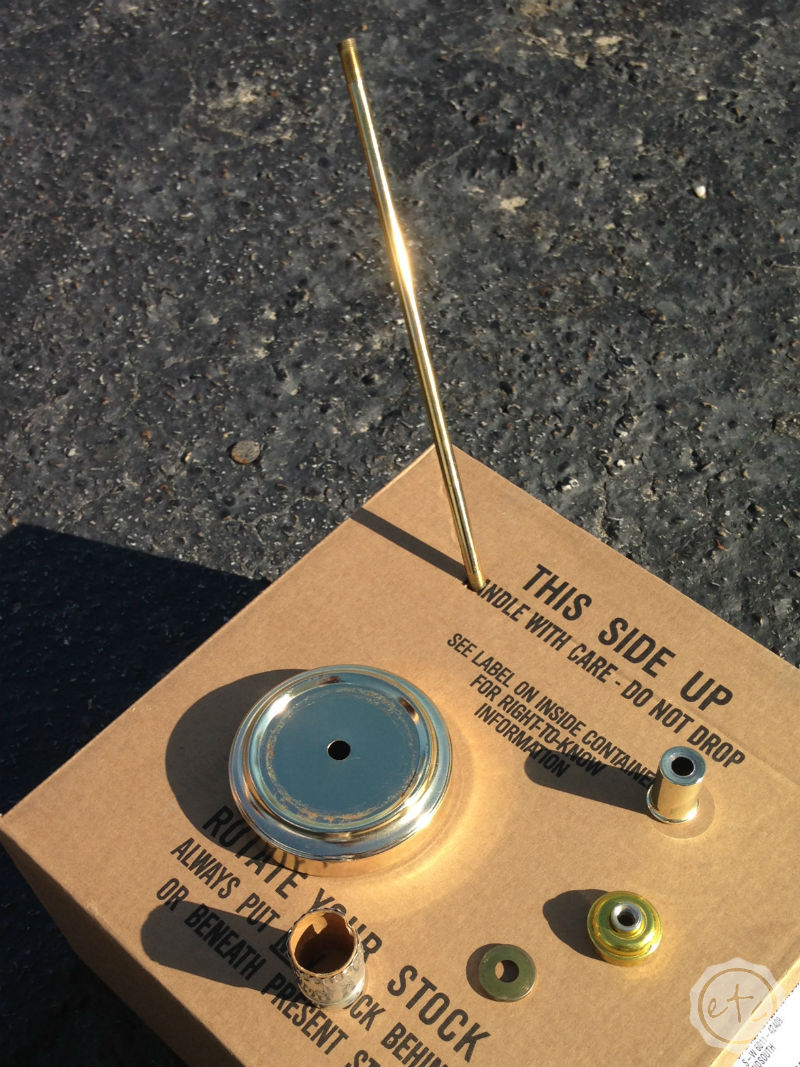
Step 1: Take Your Lamp Apart
I wasn’t sure how this transformation was gong to go but I knew I wanted to keep the glass portion of the lamp transparent… so spray painting the entire thing and calling it a day wasn’t going to work!
I started by completely taking this baby apart… trust me it was a learning experience! Normally these are the types of projects I casually bat my eyelashes at the hubby for… but he was busy with a job interview so I tackled this one myself! (Pray for us… he really wants this job!)
In order to take this little guy apart I started by turning it over and loosening the bolts in the bottom of the lamp. This gave me enough slack to pull the top wires free from the little gold compartment they were in. It took a minute but I finally read the little “press” sign on the side and figured out I could squeeze the top portion like a spray paint top and pull it off.
You learn something new every day!
From there I simply unscrewed the two little screws and took off the wires… then I pulled the wire out of the bottom of the lamp and volia! All of the pieces were loose!
Of course don’t forget the most important part… take plenty of pictures so you know how to put the darn thing back together! I don’t know about y’all but I’m not a lamp technician so I would be absolutely lost without a photo to put this baby back into working order.
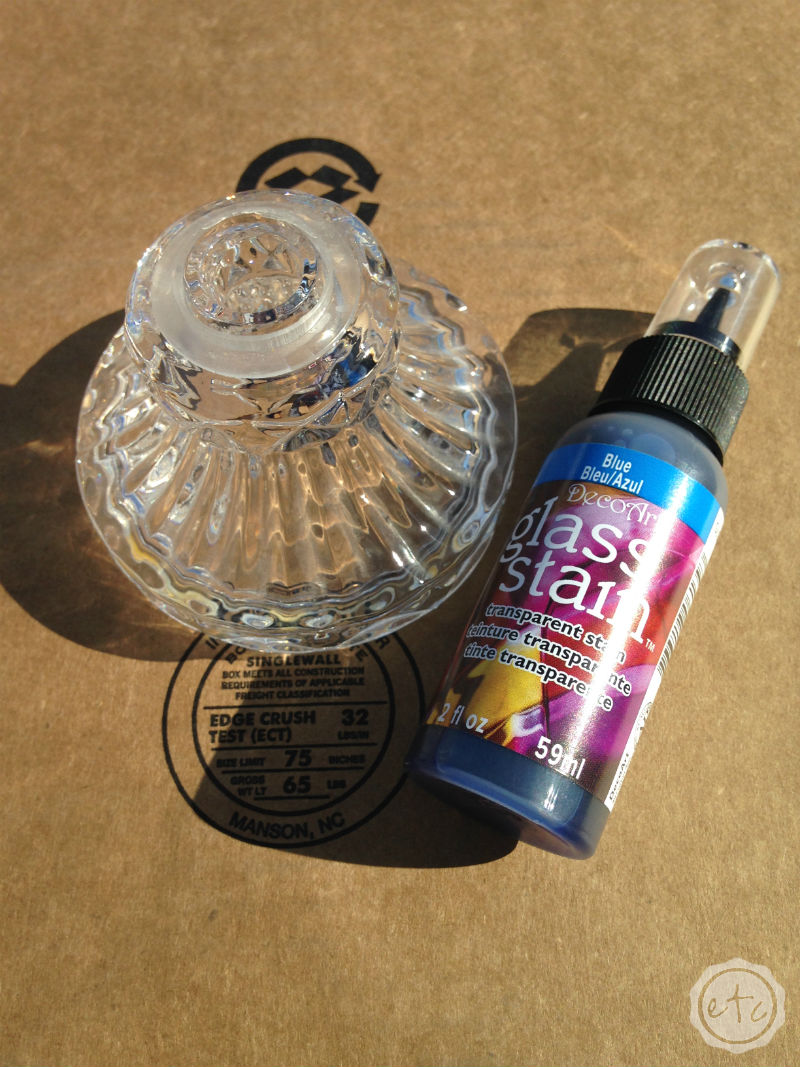
Step 2: Paint Your Glass
Here’s the easy part… paint your glass! I used DecoArt Glass Stain in the blue color to paint the glass portion of the lamp.
I simply placed all three glass portions on a bit of cardboard (trust me… this is about to get messy!). From there squeeze paint onto your glass… that’s it! I started from the top and let the paint fall down the sides… gravity baby!
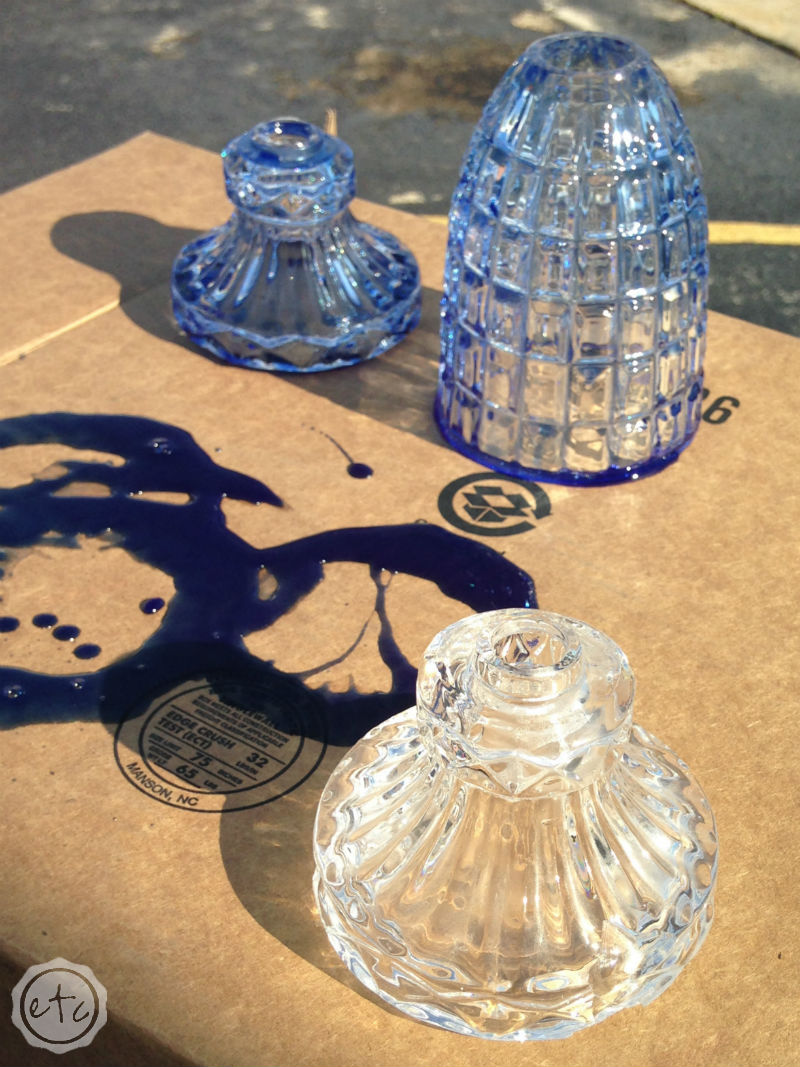

Just make sure to thoroughly cover each bit of glass… and if any bubbles form pop them right away! This stuff dries doesn’t cure for 24 hours but it dries super fast so if you leave a bubble for 30 minutes it will be a bubble forever. (Learned that the hard way!)
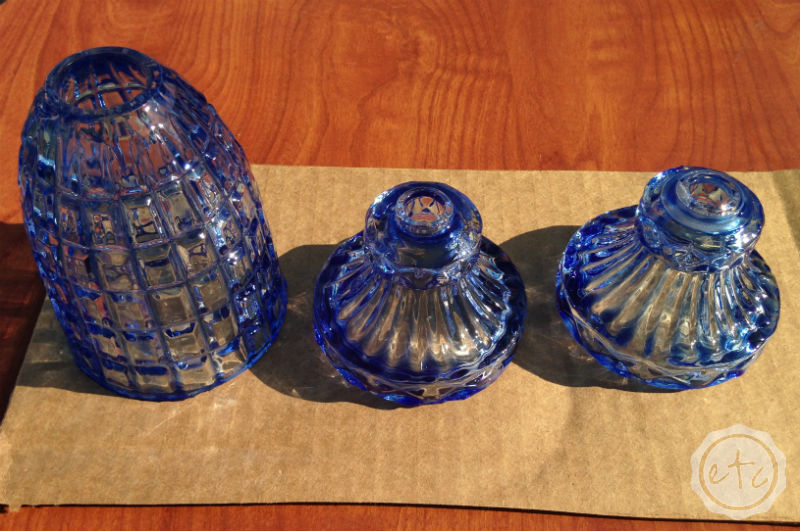
Once you’ve finished one piece move it to a clean section of cardboard so that it’s not sitting in a pool of paint. Other wise the paint will dry and form a seal securing your glass to the cardboard… no bueno. I went ahead and moved my little glass pieces about once an hour for the first 3 hours. The first and second times they were glued to the cardboard and needed a little pop to come loose. The third time there was only a little bitty teeny tiny pop and the fourth time they were dry enough to pick up with no pop at all.
If the whole written guide isn’t working for you I made a quick little video for you… if you thought it was that easy? It really is that easy!
Don’t you love it when that happens?!
Step 3: Spray All of the GOLD
Once your glass is drying I moved on to the the fun part… spray painting the little golden sections! I really wanted the base of the lamp to have an antique finish so that it fit in with the rest of the room. So I started with a coat of white spray paint to cover all of the gold.
I simply laid all of the pieces out on a cardboard box and sprayed a light layer of paint.
Bonus Tip: To spray the middle rod without it getting paint everywhere I simply made a small hole in the cardboard! It held up perfectly!
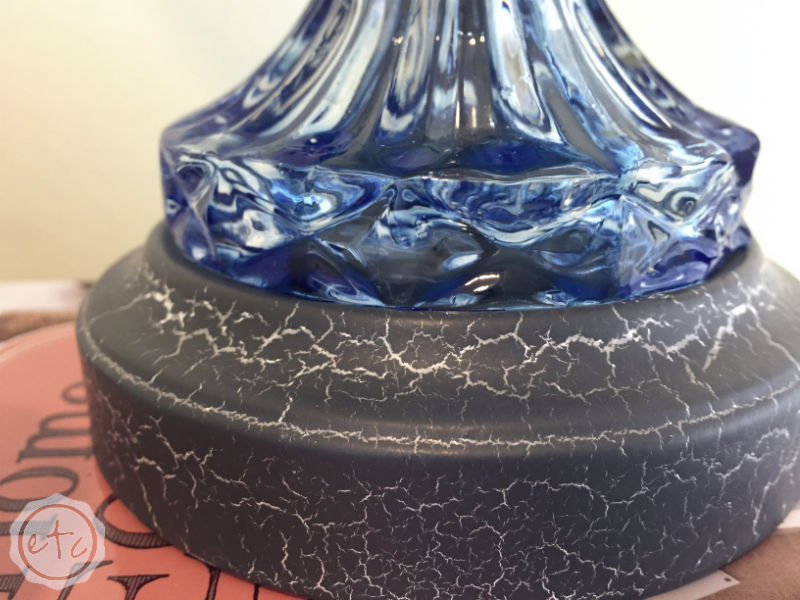
Once the white dried I sprayed a light layer of hammered spray paint… this is definitely the ugly stage but it’s so worth it! At this point the entire thing looked like brown and white polka dots. Yuck. Of course, the next step makes it all worth it.
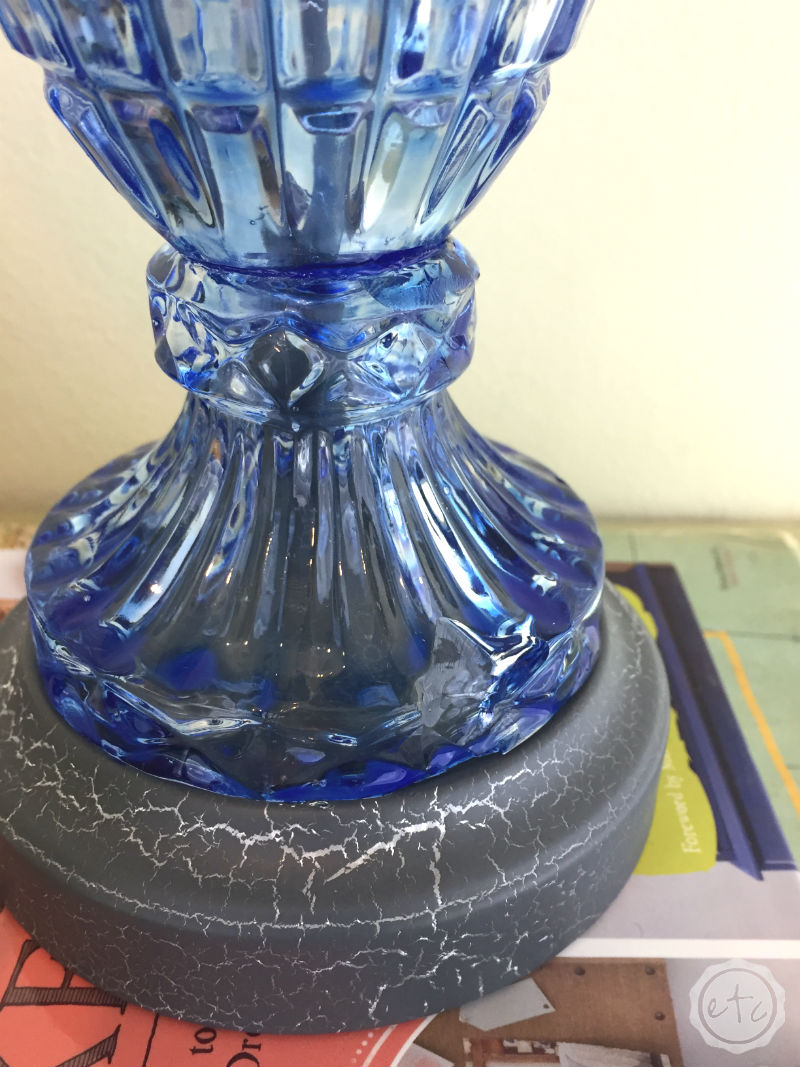
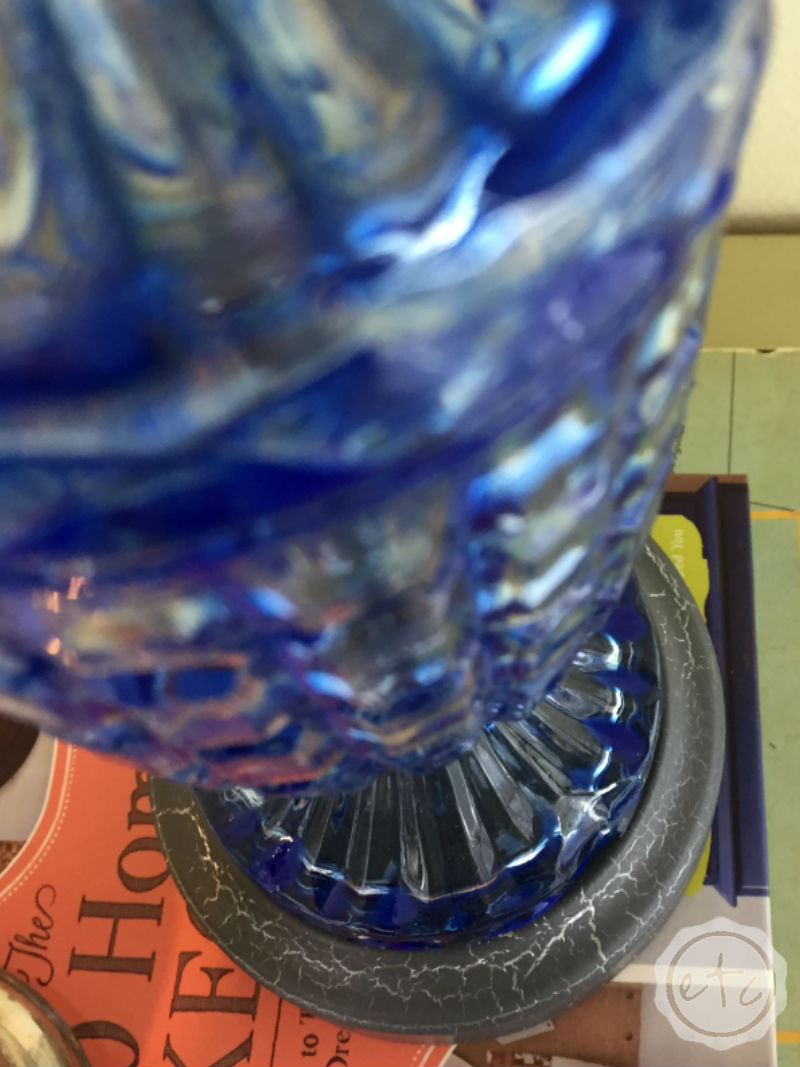
The third coat was simple flat grey spray paint but this is where the magic happens. A light coat of gray over the hammered effect leads the paint to crackle.
It’s glorious!
A gorgeous antiqued crackle effect, swoon!
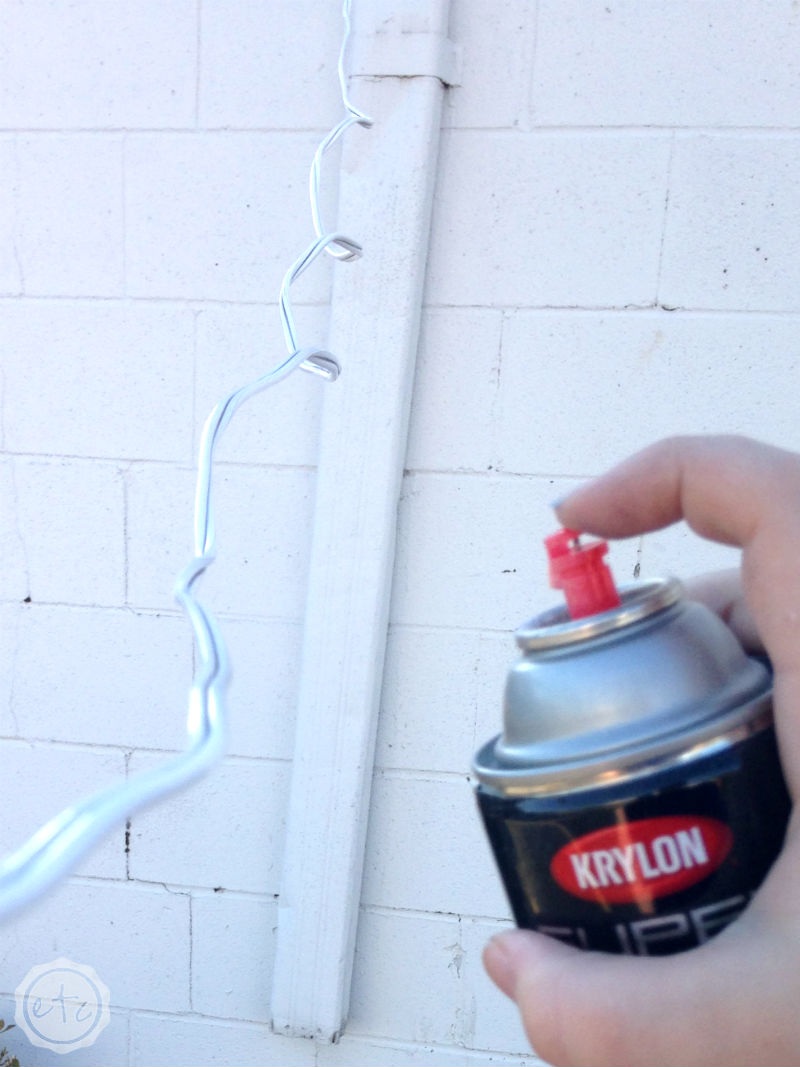
The only thing left to do was spray the electrical cord. I used a magnetic clip to hang the cord from a nearby drain pipe… then I sprayed a few feet at a time. Just spray 2-3 feet while rotating the cord then push the clip up a few feet on the drain pipe! Once the entire cord is painted let it dry. Easy peasy!

Ready for the big reveal?
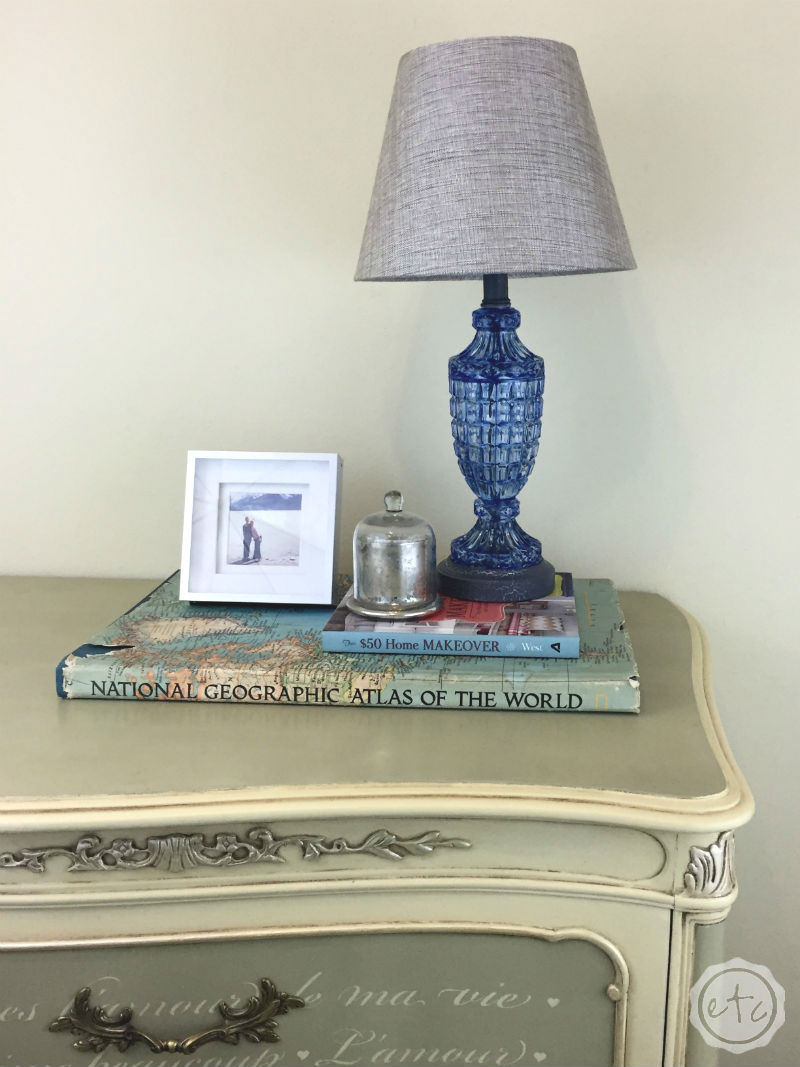

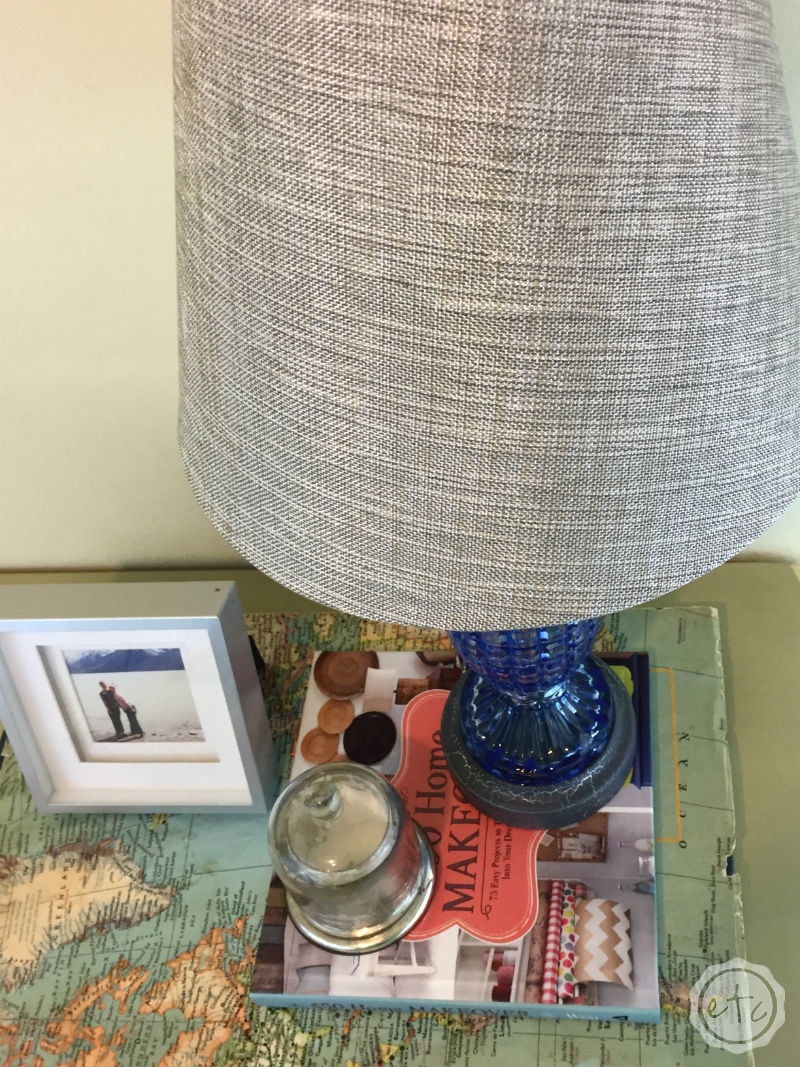
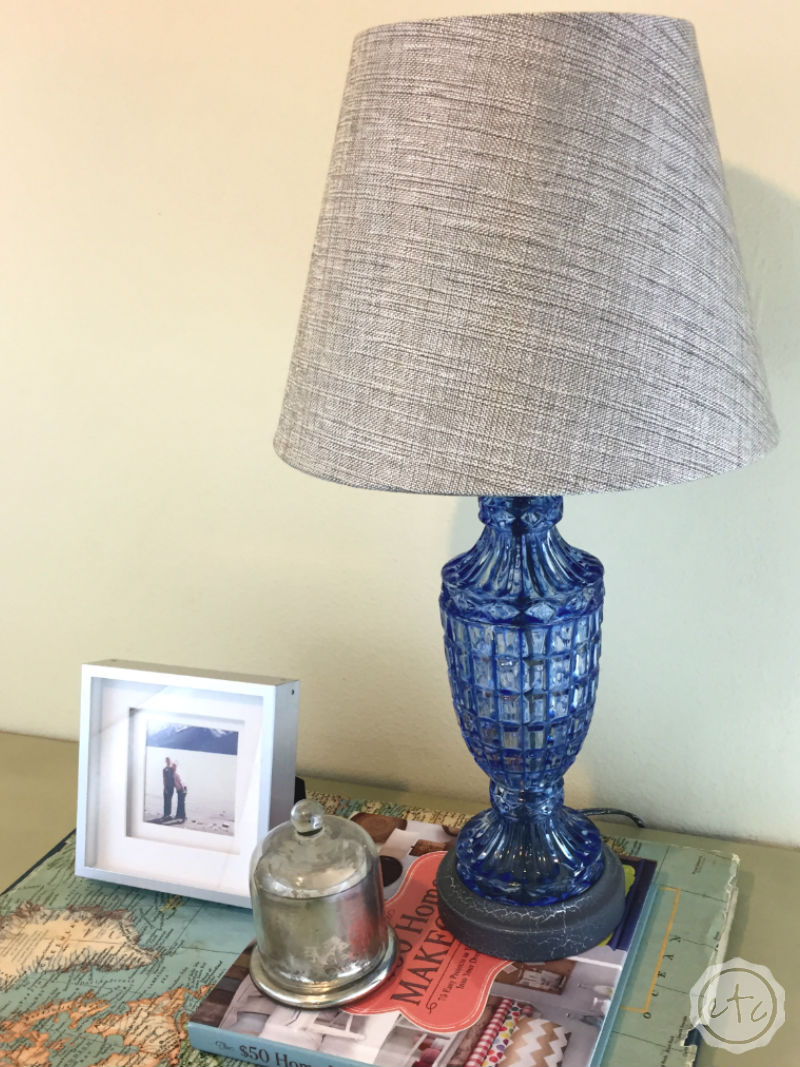
This might be redundant but I love it! From the stained glass to the crackled finish this little lamp is the perfect combination of color with an antique finish!
I think I might just swoon again!
If you loved this transformation don’t forget to pin!

P.S. 15 Gorgeous Table Lamps, How to Accessorize your Nightstand, and DIY Pet Bowl Stand (with Storage!) Using an Antique Box


Holy transformation, Batman!! It looks FANTASTIC! I always bypass those cut glass lamps at thrift stores, but hmmm….I might need to play around with that glass stain. Happy #DIYMySpring!
You are so sweet! I’ve seen this lamp a million times before and bypassed it at least a million more… but this time it was lamp or bust! I’m just glad it worked out! Thanks for stopping by hon!
Hi Betsy.
It’s Julie from Love My Simple Home popping over from the blog hop. I love how your lamp turned out. Great way to update an old lamp, thank you for sharing the tutorial. I can’t wait to see your guest room reveal.
Hi Julie! Thanks so much for stopping by, the blog hop was so much fun this time! I can’t wait to have the entire room put together!
I love this DIY so much. I ordered the glass stain online and started one but I could not get the paint to crackle so I ended up doing it just grey. I have another lamp I really want to turn out like yours. Is there something I am missing? I have the white, flat gray and hammered. Is there a certain brand you used?? Maybe I need to let certain coats dry? IDK what I am doing wrong haha.
Thank you for this tutorial!!
Gabby, I love that you’re trying this with your own lamp! As far as the crackle goes you definitely need to let all three coats dry. So do a coat of white… Let it dry. A coat of hammered and let it dry. Then a coat of grey. If that doesn’t work let me know and I’ll look up the brands I used specifically! Good luck!
I have that exact same lamp and can’t get over what an amazing transformation you gave it! It is stunning in blue! Great job.
I think everyone in the world has this lamp… that was half of the fun! Haha! Thanks so much for stopping by, I can’t wait to see what you do with your lamp!
I was actually looking for a tutorial on painting glass a couple months ago. So glad to have run into you!! Thank you for the tutorial! 😉
The best part is how easy it was… I thought there would be a catch but it worked like a charm! I can’t wait to see what you paint! Good luck and thank you for stopping by!
Ah, the ubiquitous cut crystal/gold lamp…you’re right…we all have them (though some of us might not admit it!) I had never considered painting the glass before! What a phenomenal idea. Now…I just need to go search my attic for the one that I KNOW is stashed in there.
Thanks for sharing this Betsy!
Happy Tuesday!
Many Hugs, Lynn
That looks amazing! Now I want to try it.
I know what you mean by asking your hubby for help on these things. I usually do that also, but took on the adventure of putting an IKEA end table together all by myself recently. It was exciting!
Tell me about it… I had a blast doing it all on my own even though I do like the hubbys help! Thanks for stopping by, You’re such a sweetheart!
This is beautiful. Saw it on HomeTalk and left a reply. Roll Tide!! We prayed that your husband will get the job that the Lord has for him. Blessings.
You’re such a sweetheart! Thanks so much for stopping by and praying for us, the road is hard but we’ll make it to the other side.
Super awesome transformation! I love lamp makeovers 🙂 I am on the lookout for inspiration as I really need to add some lighting to my poor house
I totally agree… Lamps are great for just about every room! Good luck on your search! Thanks for stopping by!
Hi Betsy…I love your lamp makeover! Looks so much better than the original. Of course, blue is my favorite color so I really love your color choices 🙂 Now I’ll have to go find something to try this on…
Thanks Wanda! You’re such a sweetheart! The new look is definitely a step up… I have a second lamp that’s much larger so I’m thinking of doing that one too! Thanks for stopping by!
Fabulous project! It is completely transformed-
Love the blue color – Thanks for the thoughtful tutorial- would love to try something like this
Cheers!
You’re such a sweetheart! I love the blue as well 😉 Thanks for stopping by!
Awesome transformation. I am going to try it this weekend.
I just have 2 quick questions:
1. How much glass stain did you need for one lamp?
2. Where did you find that shade? It looks great with the lamp.
THANKS!!
Thanks for stopping by Dan! I used exactly one bottle of glass stain… the type I used is in the supply list! Happy shopping!
love this idea…
Thanks Rebecca, you’re so sweet!! This was definitely one of my favorite projects!
Me again! I tried it again and for the life of me, I cannot get this paint to crackle. Could you list me exact brands and color shades?
Thank you!
Gabby
Gabby,
It was all krylon spray paint, gloss white, hammered bronze and then flat grey. I’m sorry it’s not working for you! I’ll try to do a more detailed tutorial if I have time this week.
I will have to grab those brands specifically next time I am out. I am honestly surprised it wasn’t working for me.
Thank you!
Gabby
Amazing Steps!
My lamp is almost, but not quite, like yours. I, however, decided to leave the glass clear and paint all the gold with mirror glass paint. Turned out great. Now next time I see one of these lamps I will definitely buy it just to paint the glass. The accent color in my living room is turquoise, so that’s the color the glass will be, and the metal will probably still be mirror glass. Wish I could leave a picture, love this idea, thanks for the detailed instructions.
This is a good one.. very economical 🙂
Absolutely beautiful! All of you crafts and designs are 🙂 Great blog, what a treat!
Do you think this would work on glass that’s not transparent?. I have an old lamp that’s glass and it’s a milky kinda of color.
Holly, I think it would definitely work but the color will probably reflect some of that milky color underneath! I would just experiment to make sure you like the finished color. Good luck! Send me pictures if you try it… I’d love to see!
I’m coming into this conversation kind of late. I have 2 lamps to do. I did the first one, but it did not drip down evenly and some paint that didn’t seem to drip all the way down and are quite visible. Any suggestions?
Thank you
Hello, can I get the same effect by painting the inside of the glass and leaving the outside untouched?
Hi Starla! Thanks for stopping by! I’ve never tried the inside of the glass but I am thinking it would work in the same way. So, yes!
I loved your remake of your lamp. So very pretty and beautiful!! Thank you for sharing this. I am 67 years old and I am trying to redo some end tables and maybe some lamps too. Wish me luck! Thank you again for your glass lamp transformation.
I would have never thought you could paint glass like this. Great suggestion! Do you think it will look the same or better on semi transparent glass?
I’m so glad you like it! I would imagine that semi transparent glass would be very similar, depending on how transparent it is. If it’s fairly cloudy to begin with the finished glass may not be as clear. Good luck!
I was so excited to find this post while looking for how to paint my mom’s lamp that is EXACTLY like the one you used for the makeover!
However, I cannot find a glass stain anywhere, online or in stores. The link to amazon goes to a different product then you used, but even it says “currently unavailable.”
Any suggestions??
Sorry hon! Sometimes the links go out of stock (especially right now with all the stores being low on supply) Here’s a different glass stain that has most colors in stock… should work for what you want! Good luck with your mom’s lamp!
Question: where’s the video? You mention it, but I don’t see a link anywhere.
Hi Lynn, There isn’t a link the video is embedded in the post directly above where I say “If the whole written guide isn’t working for you I made a quick little video for you… if you thought it was that easy? It really is that easy!” Just click play and enjoy!