


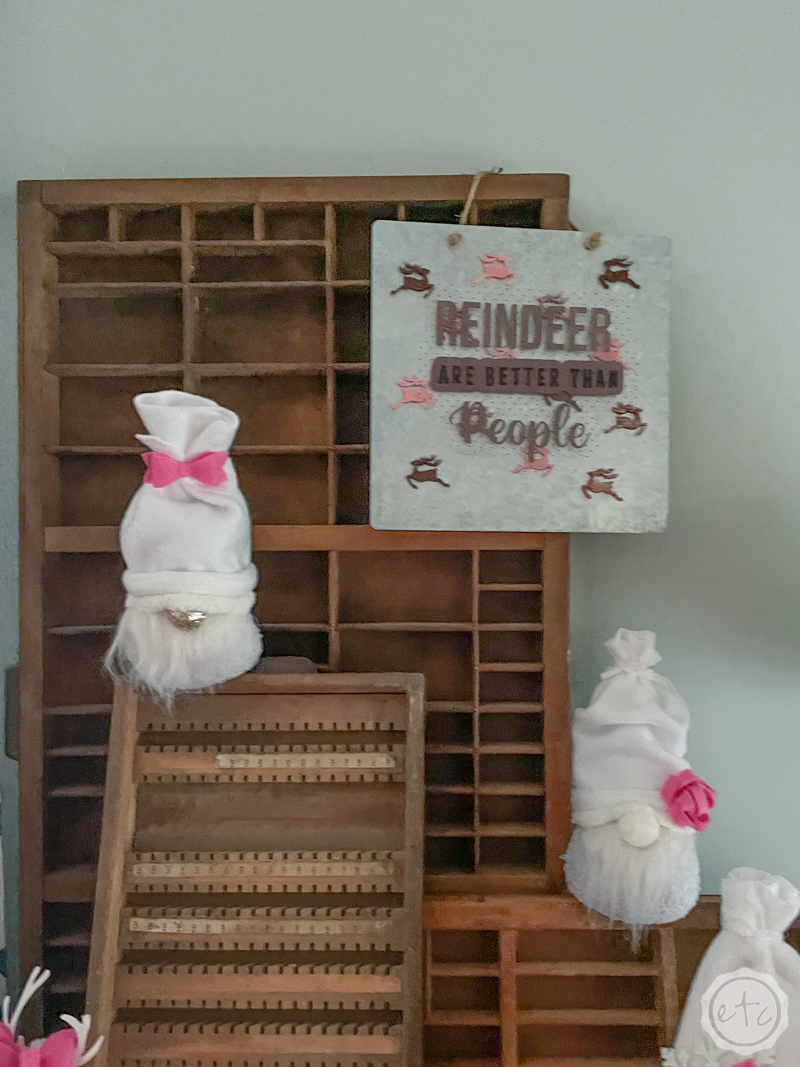
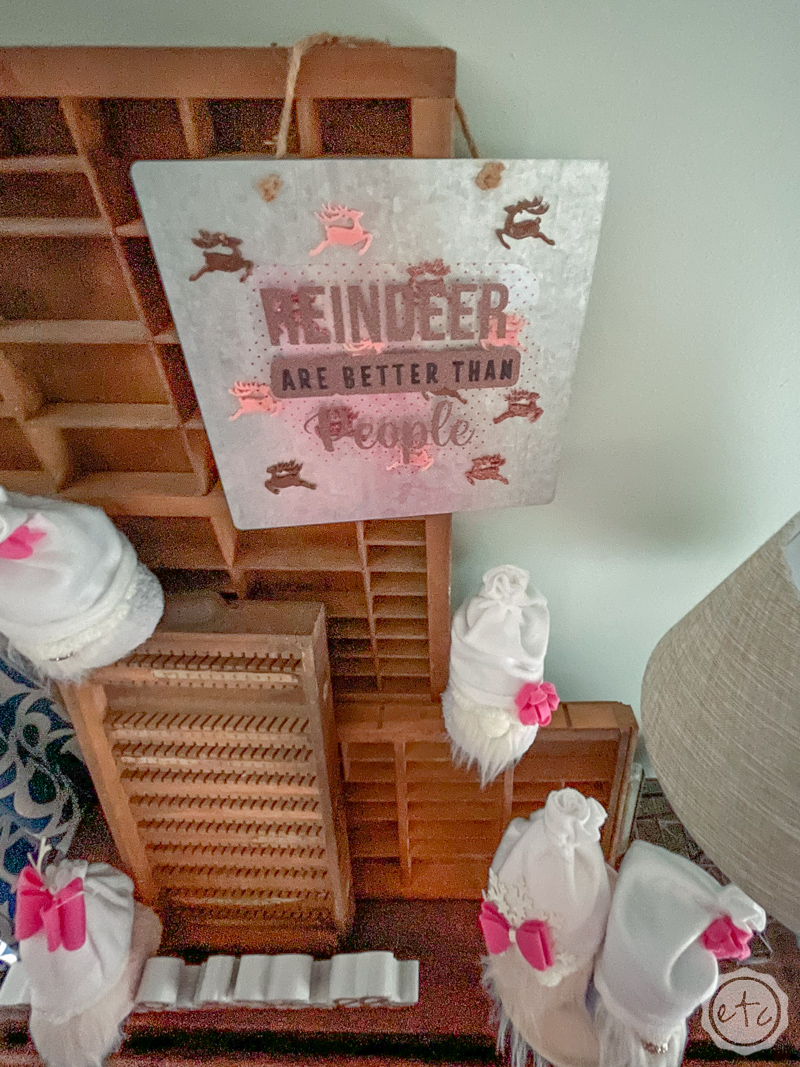
Ready for another fun metal sign? I love these little metal sign blanks for fun layered signs over the type trays in my entry way: I have a few for Easter and even Christmas but today we’re going one step further and adding a bit of vinyl to the UV resin reindeer background I made last week!
It’s going to be soooo cute!
If you want to check out the full UV Resin reindeer tutorial click here. In the meantime we’re going to assume you too have a bunch of adorable baby reindeer and get right into the Cricut part of this project!
A fun and easy “Reindeer are better than people SVG!”.
Supplies:
- Cricut Maker 3
- Fine-Point Cutting Blade
- Cricut Cutting Mat (I like to use the fabric grip mat but the standard grip mat works fine for either material)
- Glitter Vinyl
- Love Notes Acetate
- Black Cricut Pen
- Transfer Tape
- Brayer
- XL Scraping Tool
- Weeding Tool
- Metal Sign Blank
Just getting started with resin? Download my free resin supply list and make your first project today!

Step 1: Prep your Sign
You can do this project without the adorable 3-dimensional resin reindeer but of course, I don’t recommend it. The resin reindeer are kind of awesome.
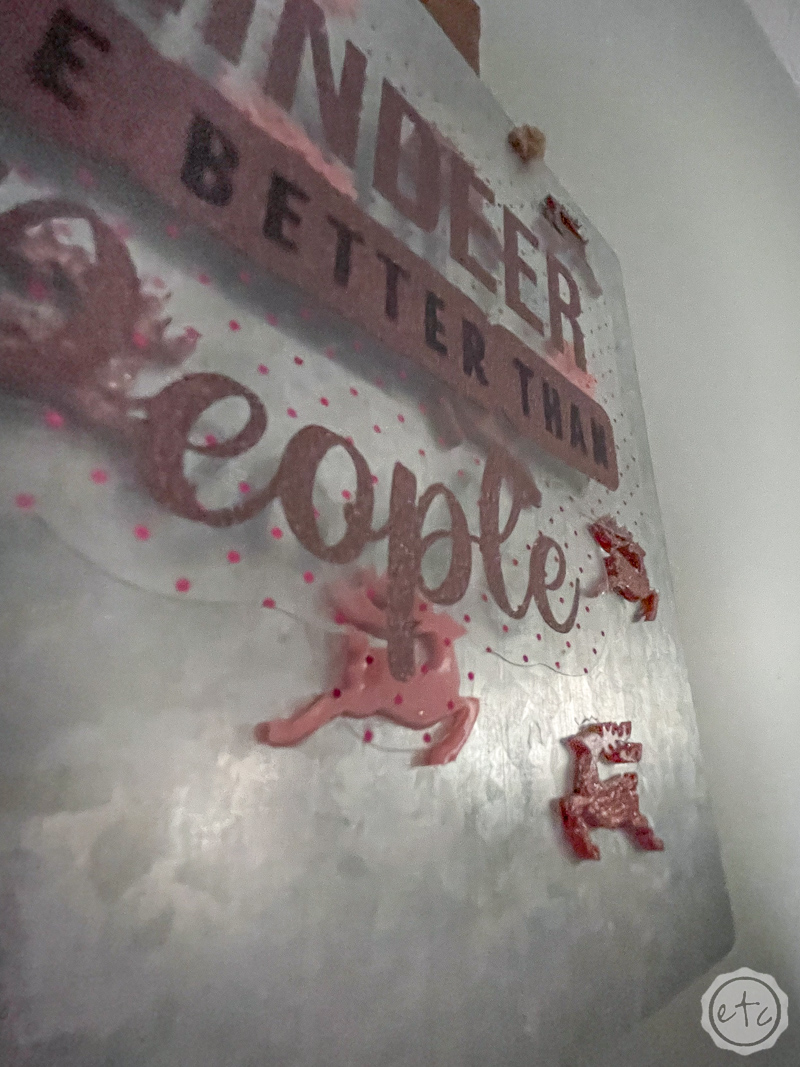
I started by laying mine out on my metal sign blank until I had a repeating pattern I liked… then I used a bit of UV resin (the same type I used to make the reindeer) to glue each reindeer in place. I simply put a bit on the back of a reindeer, spread it out with my popsicle stick, put it in place and then hit it with my UV light. Volia!
Instant 3D textural background!
Because this background is 3D we can’t put vinyl right over the reindeer… instead we’re going to cut an acetate layer for our words to sit on. Let’s do it!

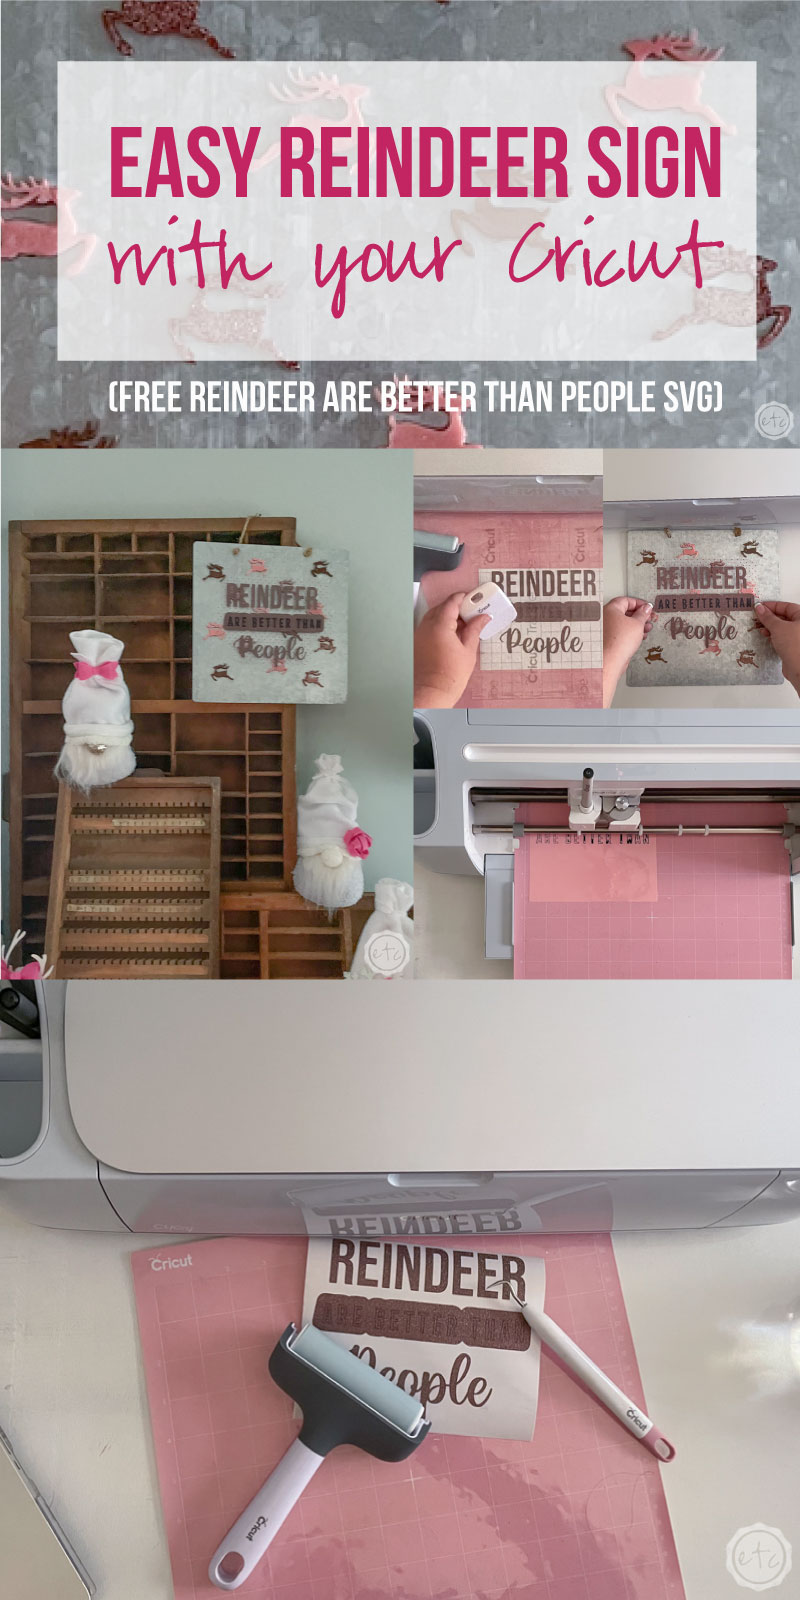
Step 2: Cut your SVG
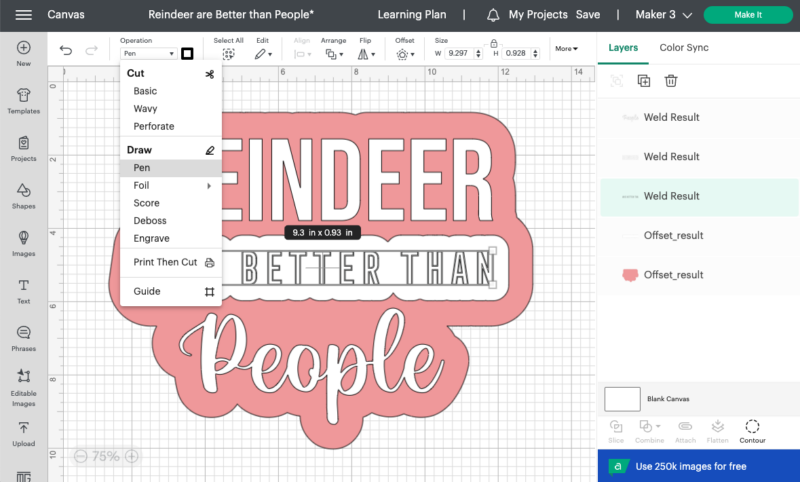
Ready for the fun part? Go ahead and download your FRE SVG from the bottom of this post and upload it into Cricut Design Space. (If you’ve never uploaded an SVG to Design Space before you can follow this tutorial).
You’ll see that you have a few layers… the pink layer we will cut out of acetate. The white layer we will cut out of vinyl and the black words “are better than” will be drawn by a pen. You’ll need to grab this specific layer and re-classify it as a “pen” layer at the top.
Then attach it to the rest of the white layers (the words and the bubble behind it) so that Cricut knows you want to draw those words on that vinyl layer.
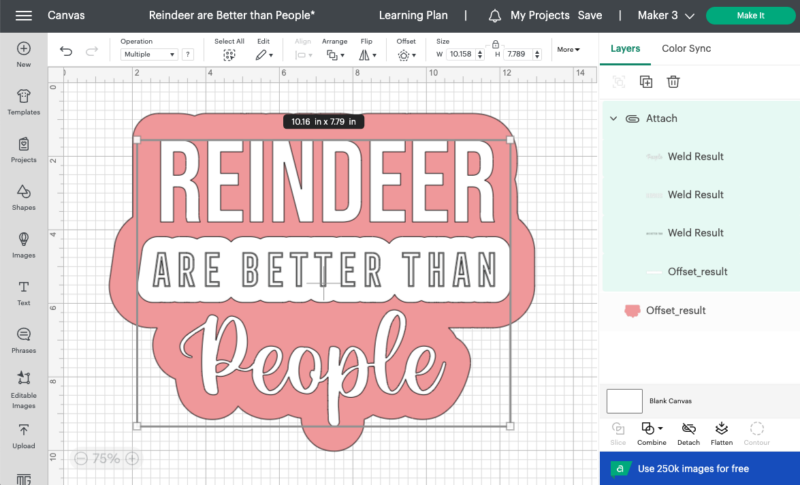
Once you’ve sorted that out you can click make it and cut out your pieces!
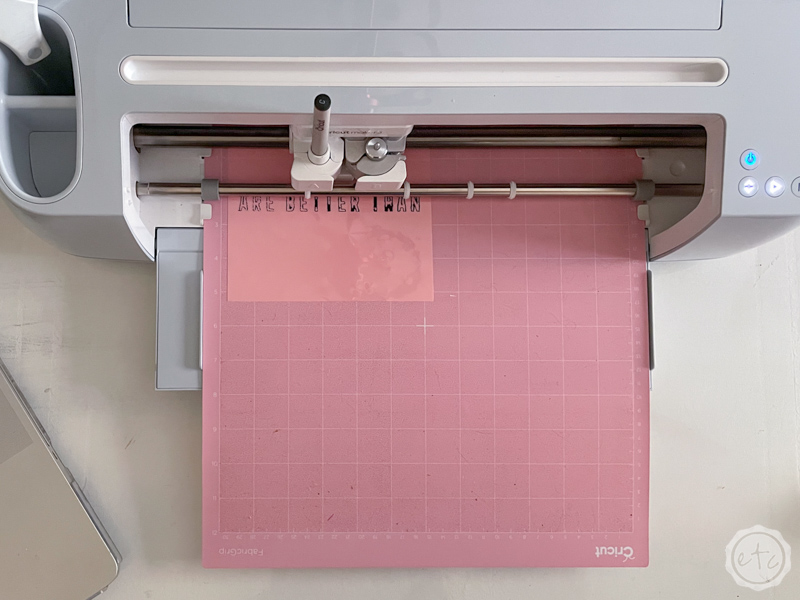
Cricut Design Space will instruct you to cut out the acetate layer first and then the vinyl… making sure to place a pen in clamp a and the fine point cutting blade in clamp b.
If anything from this step confuses you I walk you through the entire process in the video up above!

Just a quick tip… I originally picked this pink vinyl for my letters but quickly remembered that you can’t write on glossy vinyl with a pen. The ink will just wipe off.
Score!
Instead I switched to a rougher glitter vinyl that the pen would stick too and had waaaay better success. Glitter vinyl for the win!
Sometimes you have to change mid project to something that works better! On the other hand the font I used for this project was not writable (meaning it was only the outline of the font that was written with the pen) which was fine on the light pink vinyl.
The darker glitter vinyl however needed a bit more help so once the cricut was done I went ahead and filled in the letters with a sharpie so they stood out more.
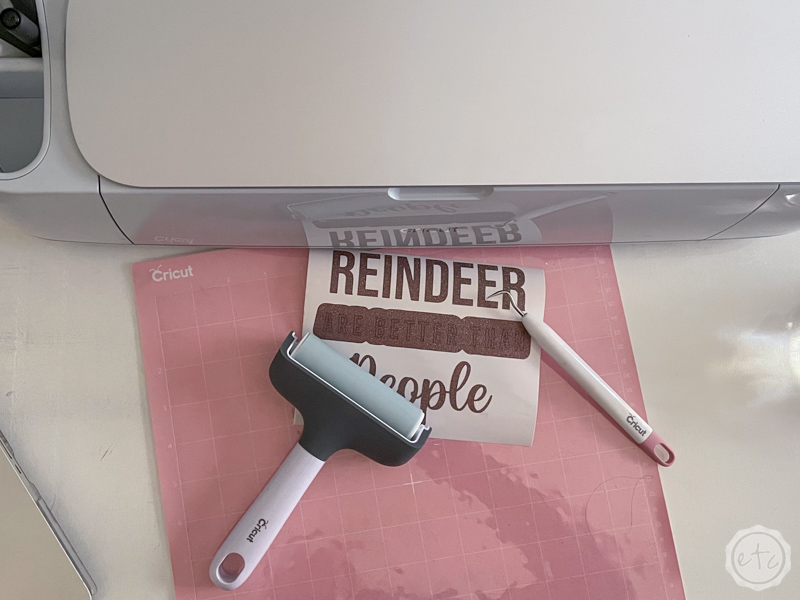
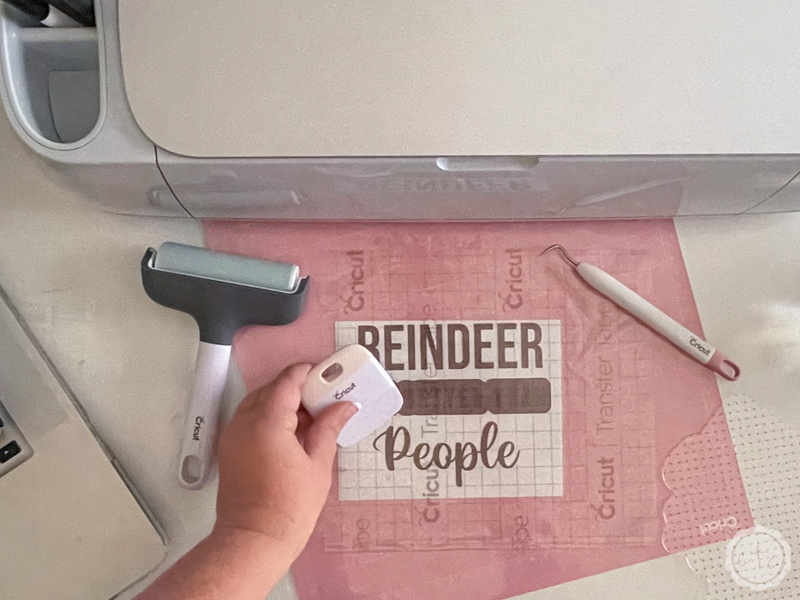
Step 3: Weed & Transfer your Design
See that pretty, pretty, glitter vinyl? Much better!
Once everything is cut you can grab your weeding tool and remove any excess vinyl. We don’t need it! Take it away so that only our letters are left. Then it’s time to transfer our vinyl onto our acetate.
You can use transfer tape for this although I’ve found that glitter vinyl can be stubborn with normal transfer tape. It doesn’t like to… transfer.
If I have it on hand I find that strong transfer tape works great… but since everything that can go wrong went wrong with this project I was out of strong grip transfer tape. I switched instead to a low grip duct tape… it’s not pretty put it works!
Go ahead and transfer that design onto the acetate background and then we’ll add our acetate/vinyl sandwich to our sign!


Step 4: Add your Acetate to your Sign
We are so close to done! At this point you have a few options… glue the acetate down directly to the sign with hot glue or glue dots.
OR use a bit of foam tape to bump that acetate up another layer! I wanted to really play up the 3D aspect of the UV reindeer so I added a bit of foam tape to the back of my acetate and then firmly pressed it into place.
Now my whole sign is extra 3-dimensional!
Score!


Step 5: Enjoy!
Your sign is done! I hung it from one of my type trays along with my sweet little no-sew Christmas gnomes and fell in love. It’s sooooo cute!
I love that these metal signs are easy to switch out for the seasons and are great decor while still letting the type trays shine.
Here’s a few close-up’s!


Leave a Reply