
This post was sponsored by Wagner but all plans, excitement and products are 100% endorsed by me… I truly love this project!

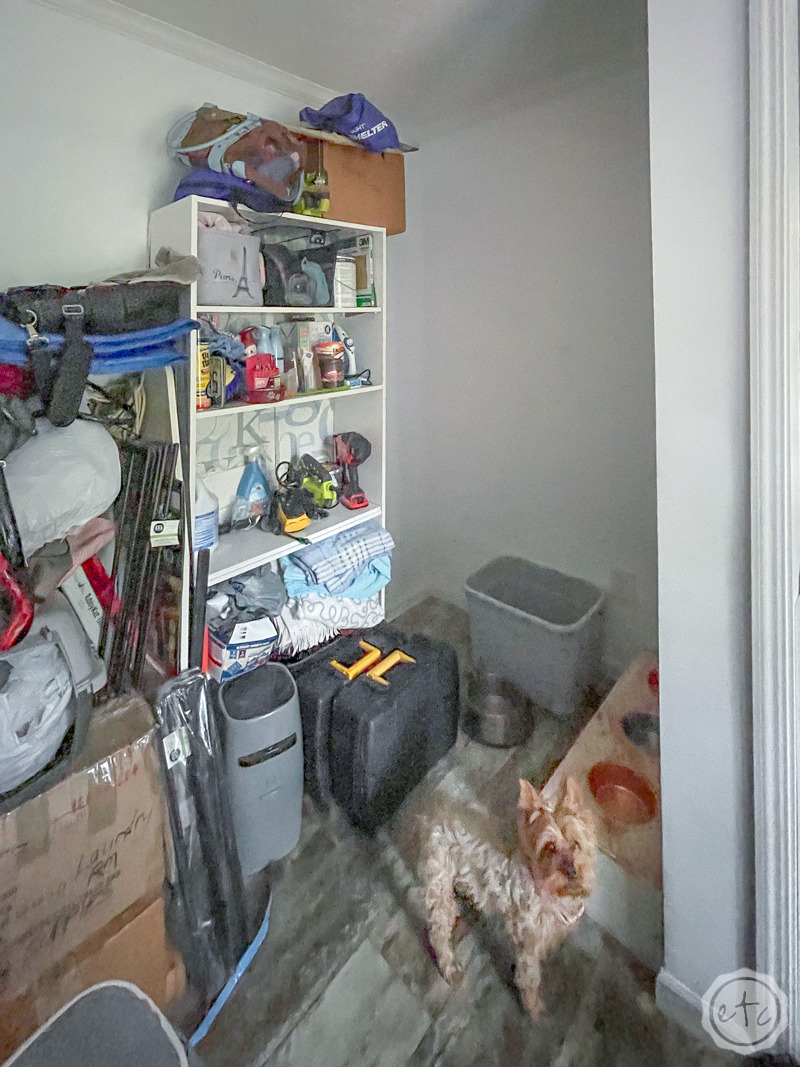
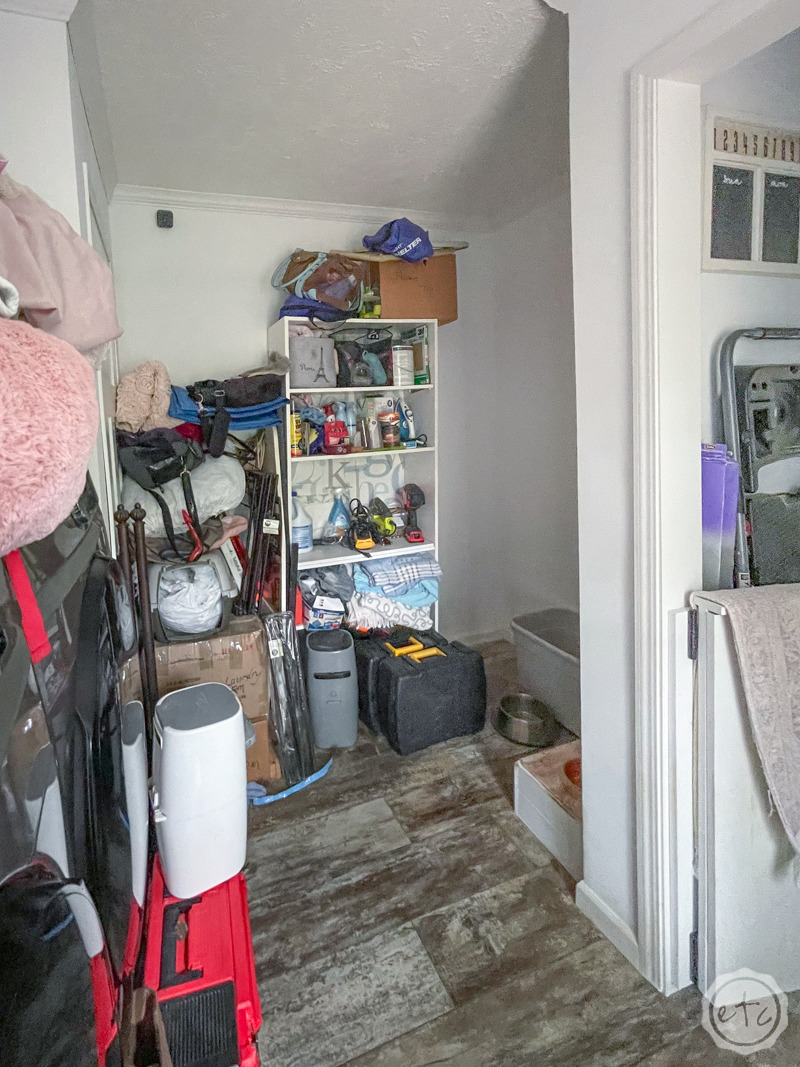
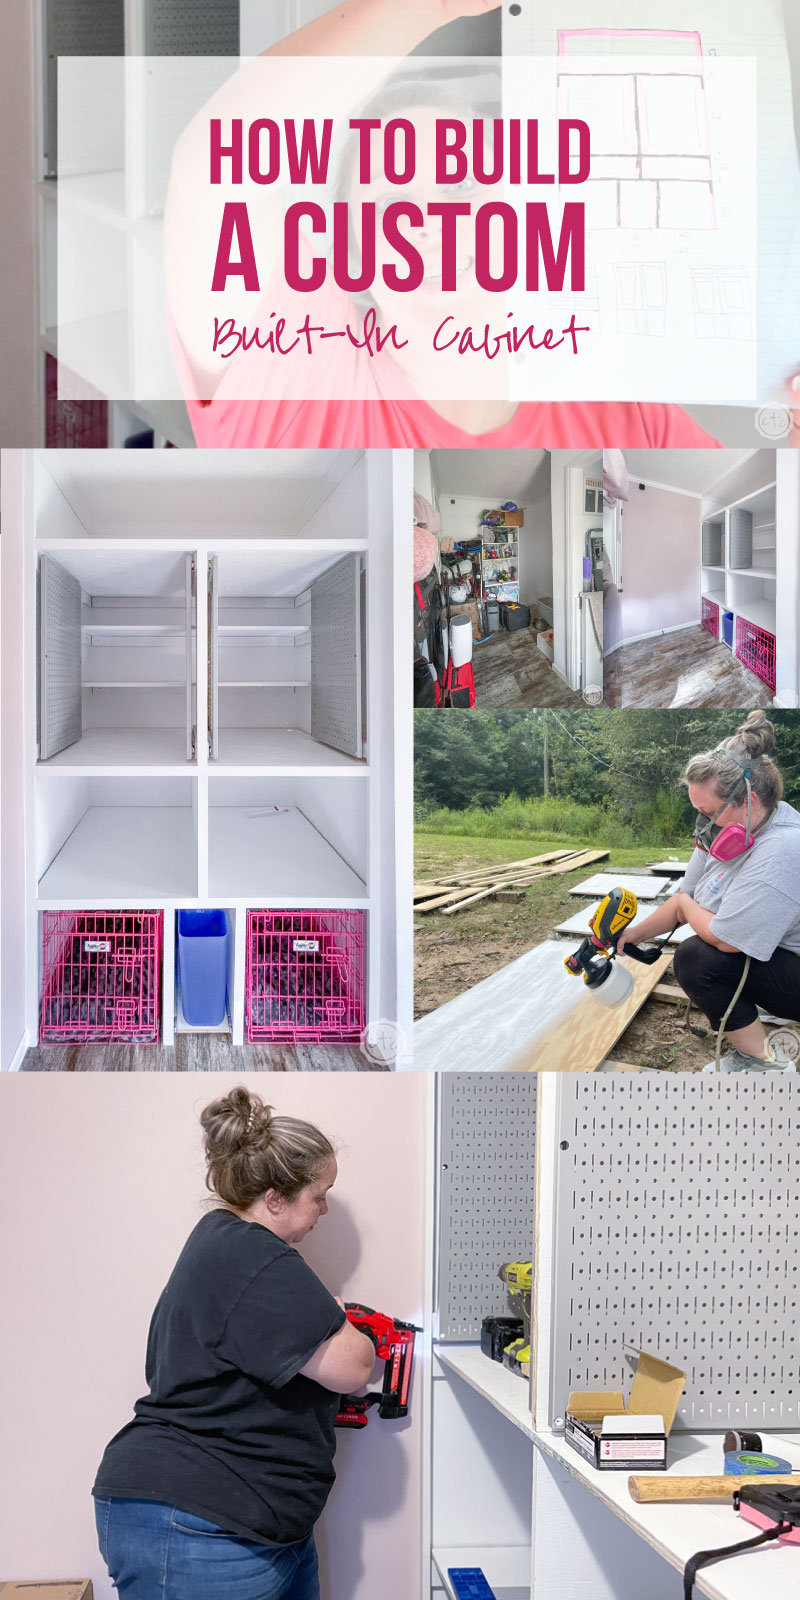
Y’all… I BUILT A CABINET! When I moved into my new house I knew that the large space in my laundry room (that was originally designated for a large deep freezer) was the perfect space for a built-in cabinet. I needed a space to house my tools, hold my dog’s kennels and give me a little extra storage for all of those fun *ahem* spare bits and bobs that end up in the laundry room.
Of course, instead of building the cabinet first thing I had other things to focus on… un-packing, Christmas, outdoor projects like staining my deck and building a pallet pathway to the front door. So while I was busy getting the other spaces in order the laundry room became *ahem* a bit of a catch all space.
It’s time to tackle that.
Ready for the before? This little space is going to go under quite the transformation!
We’re going to plan a cabinet that will give us that perfectly built-in cabinet look… I want it to look like it was meant to go there. I want it to store all. the. things. I want it to look fabulous. I want to build it myself!
Which is the main problem (while I’ve been building bigger and better things all the time… hello look at this adorable farmhouse dog gate!) I’ve never built a piece this big… especially not something that I planned myself. I mean… I have a lot of stuff to put in this cabinet so I need it to be sturdy!
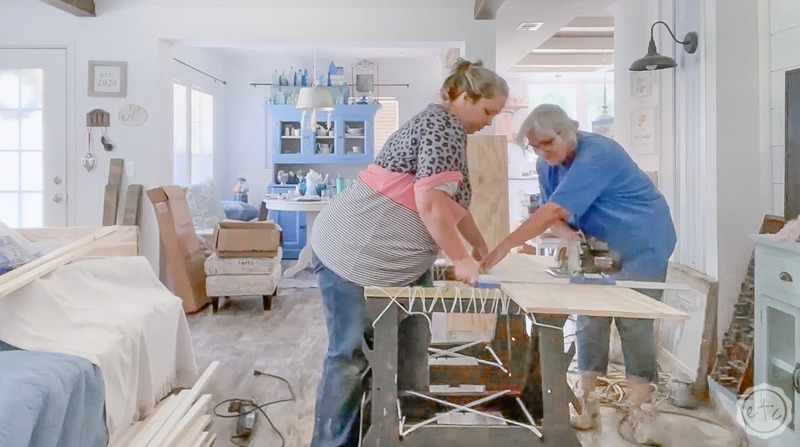
It took a hot minute (ok… many, many, many, many days) but after hours and hours of work, phone calls to dad to ask advice about the plans, days with Mom cutting wood and putting the pieces together and chats with the bestie to talk through the entire process we’re finally done.
In this post we’ll plan, paint and build the cabinet… in order to store all my tools I’m installing 4 metal pegboards on drawer slides so we’ll tackle a How to Organize a Metal Pegboard post next and to top it all off we’ll break my new Wagner Flexio 3500 sprayer back out of the box to finish a How to Build Cabinet Door tutorial.
Supplies:
- 3 4′ x 8′ 3/4″ Plywood Sheets
- 7 1×3’s
- 7 1×2’s
- 1 2×4
- 1 1×4
- Wagner Flexio 3500 Paint Sprayer
- Kilz primer
- Water-based Enamel
- Pocket Hole Jig
- 1 1/4″ Pocket Hole Screws
- Impact Driver
- Power Drill
- Drill & Driver Bits
- 3″ Carpentry Screws
- Circular Saw
- Rip Cut Saw Guide
- Optional: Table Saw
- Stud Finder
- Brad Gun
- Multi Tool
- Caulk Gun
- Caulk Tool
- Caulk
- Spackle
- Edge Banding
- Mini Easy Press

Step 1: Plan your Cabinet
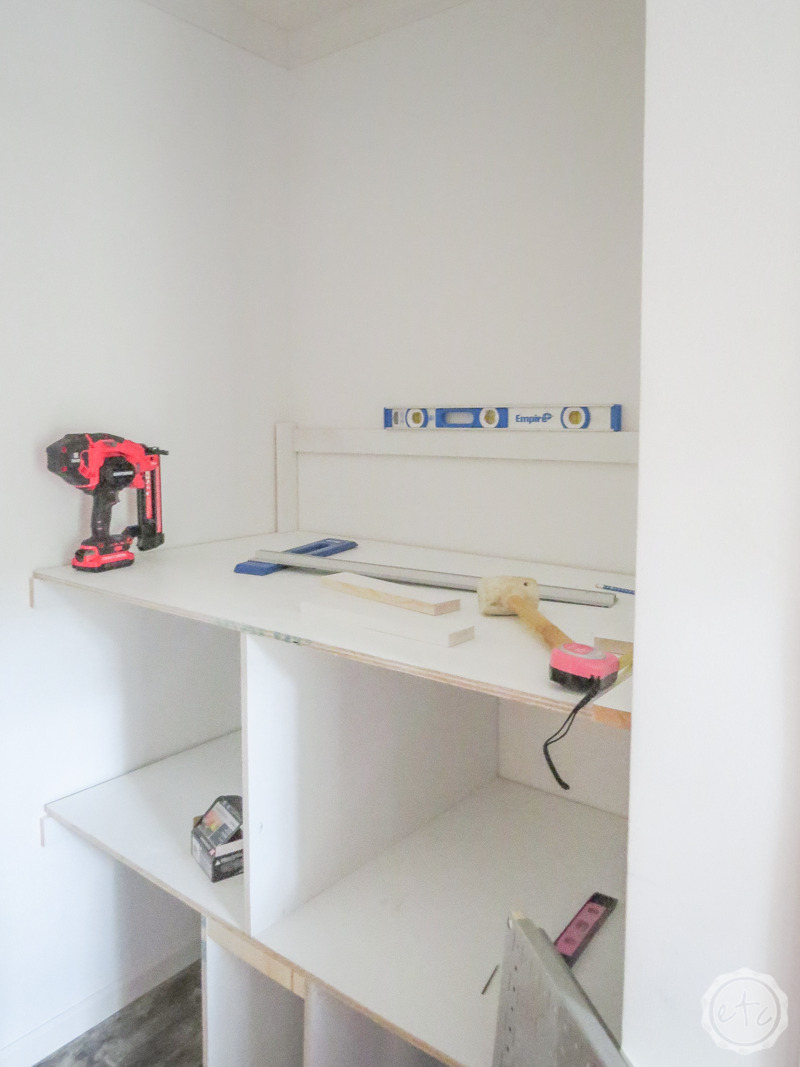
Ready to plan your cabinet? Since we’re working with a predetermined area that’s 53 inches wide by 34 inches long we know the cabinet will need to fit inside that space… your space might be different dimensions but you can always work off these measurements to make a custom piece to fit your area.
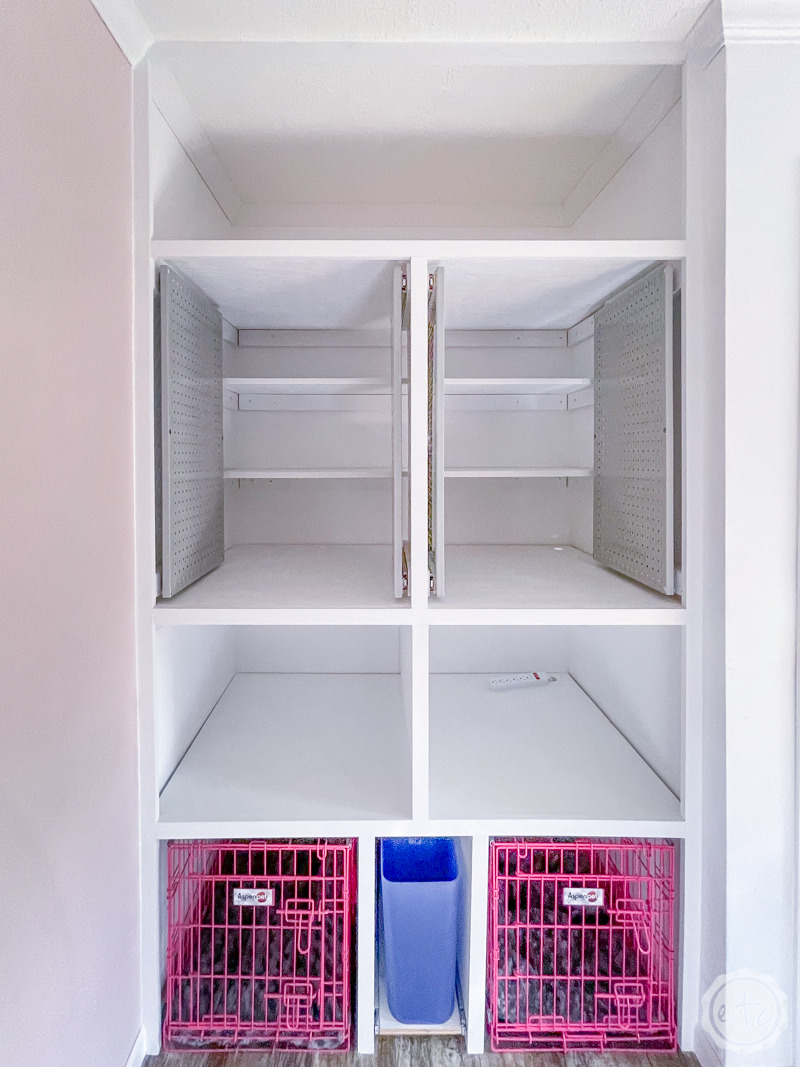
To start with think about how you’ll use the space, then start to sketch out rough plans for how many shelves and cubbies you’ll have. I wanted to make sure that certain items would fit in certain areas… so I started with those and made the rest of my measurements around those pieces. To start with I knew I had 2 dog kennels that I wanted to live on the bottom layer… these kennels are 18″ wide by 20″ tall so the bottom cubbies needed to fit those dimensions. I wanted a space directly above that to house my Wagner spray guns… I have two and I like to keep them in their boxes so that they stay as pretty as possible. Especially since the second one is the brand new Flexio 3500 I used for the first time in this post! Last but not least I have 4 metal pegboards that are 16″ by 32″… so with those dimensions in mind I knew I needed a 22″ tall shelf on the bottom, a 20″ shelf above that, a 34″ shelf above that… and that left 16 inches of space for the top shelf.
Now all that’s left was deciding on vertical supports!
We’ll add cleats to the wall but vertical supports will help carry the structural load of your cabinet… especially when you have heavy items like paint sprayers or pegboards that may be placed in the middle of a shelf. 53 inches with no middle support is just asking for trouble.
Instead draw out your plans and decide on your horizontal shelves and vertical supports. Then measure your space. Measure measure measure… then write in the measurements on your plans. I like to start by writing in the measurements of the openings I know (like the 22 inch opening on the bottom), then draw in your trim pieces (these will cover the edges of your plywood)… each trim piece will be 1.5″ wide. Now we can do a little math to determine what’s left of our space… so for the bottom section we have 2 20″ wide openings and 4 trim pieces. That’s 46 inches total… and 53 – 46 gives us 7″ leftover. Which is a very small cubby or a spectacularly long drawer.
Whichever way you want to look at it!
Keep in mind you’ll need to take into account the space needed for items to fit through the openings. I like to leave an inch on either side for ample space… so an 18 inch wide kennel needed a 20″ wide opening. An 18″ kennel in an 18″ opening is a recipe for disaster!
Now that we have our plans drawn out we can make our cut list… which is a fancy way of saying alllll the pieces of board we’ll need to cut to build this cabinet. I literally started to draw out all the shapes: 3 53″ x 30″ pieces for the large shelves, 3 1″ x 3″ x 53″ pieces for the back cleats, 6 1″ x 3″ x 30″ pieces for the side cleats etc.
Then you can play a little tetras and fit your cut pieces onto the large plywood sheets. For this project I needed 3 4×8 sheets of 3/4″ plywood… since you can only get one 53″ x 30″ piece out of each sheet we’ll need one per shelf. But don’t worry we’ll have plenty of space on those big plywood pieces to cut allll the other pieces of our puzzle. In fact if you’re confident in your cutting abilities (or you have a table saw) you can cut your cleats out of the larger plywood sheets as well… or you can take the easy way out and buy separate 1×3’s to use as cleats.
Which is what I did!
Cut List:
- 3 53″ x 30″ Shelves
- 2 53″ x 12″ Shelves
- 5 1″ x 3″ 53″ Cleats
- 6 1″ x 3″ x 30″ Cleats
- 4 1″ x 3″ x 12″ Cleats
- 4 2″ x 4″ x 16″ Supports
- 4 1″ x 4″ x 16″ Supports
- 8 1″ x 2″ x 15 3/4″ Supports
- 2 22″ x 30″ Vertical Supports
- 1 20″ x 30″ Vertical Support
- 1 34″ x 16″ Vertical Support
- 1 7″ x 28″ Optional Drawer Bottom
- Trim Pieces (to fit)


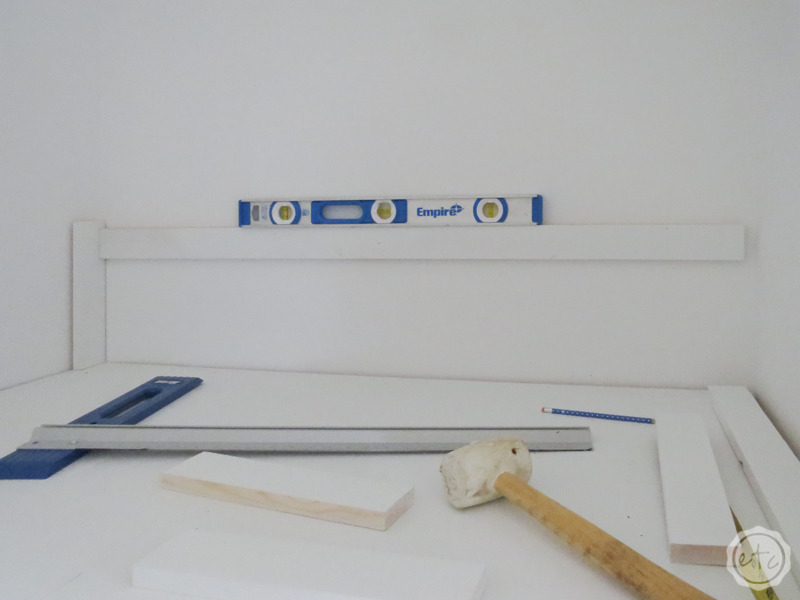
Step 2: Cut your Shelves and Cleats
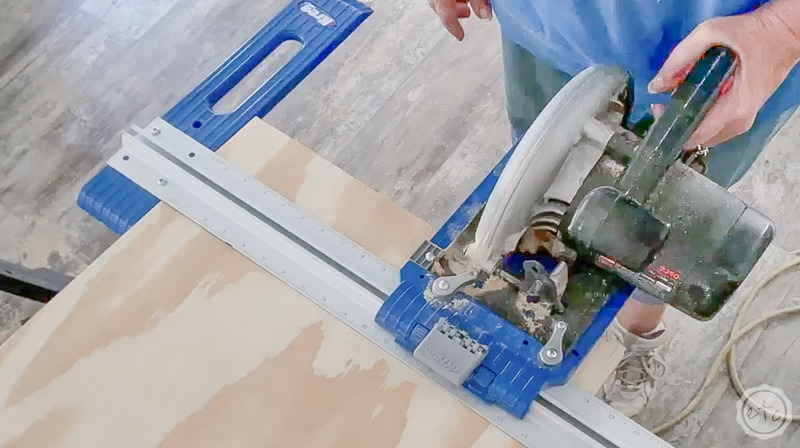
Ready to cut these bad boys? Now that we have our plans… and we’ve hit up the hardware store for wood it’s time to get this show on the road.
Just remember measure twice, cut once!
We have a bunch of cuts to make so we’re going to start at the top of the cut list and work our way down… you’ll want to use a table saw or circular saw with a rip cut guide to cut the larger boards down to size. Either way be safe and careful… and ask for help if you need it!
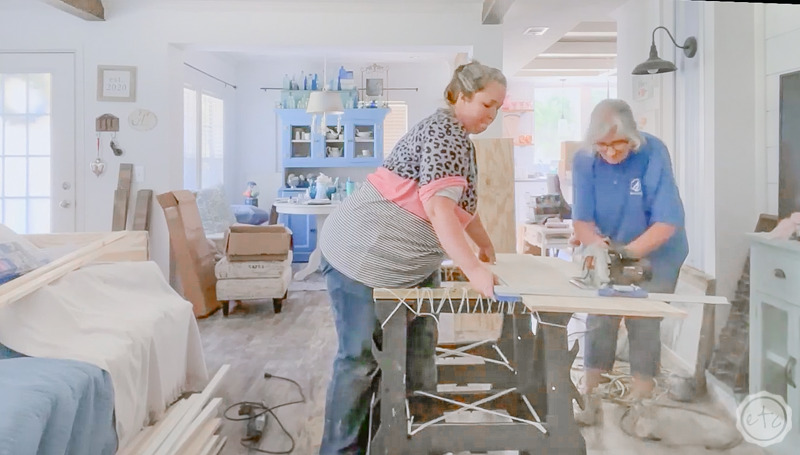
Mom came over to help me cut the larger boards (and I finally ordered hearing protection!) and we worked our way through the cut list. Each time we cut a large piece we carried it into the laundry room to make sure it fit properly… just a little precaution!
This took a few minutes (especially since our circular saw kept trying to die! I had to buy a new one of those too). but once we finished with the large cuts it was on to the smaller ones. For these you could easily keep using your circular saw but we pulled out the miter saw and chopped all the cleats and trim down to size.
Easy Peezy Lemon Squeezy.

Bonus Tip: If you don’t have a table saw or a rip cut guide you can use a straight board and clamps to create a guide for your circular saw. Works just fine!
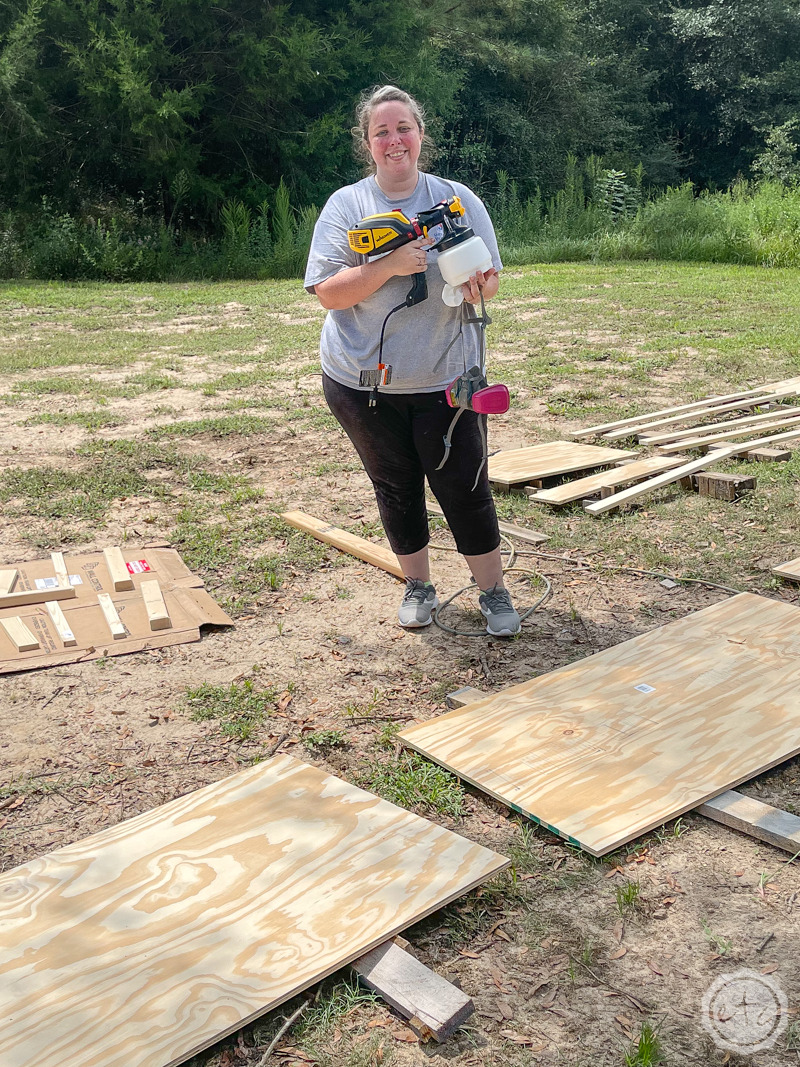
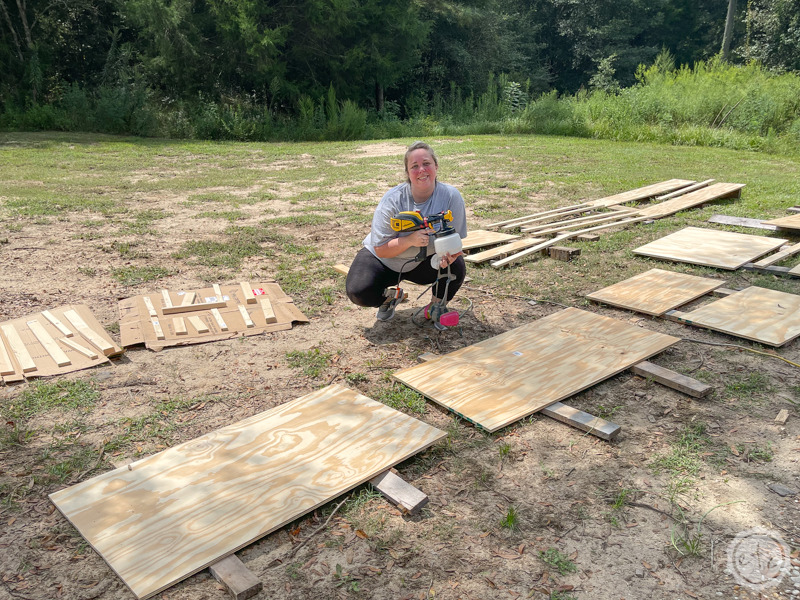
Step 3: Use your Flexio 3500 to Spray all the Boards
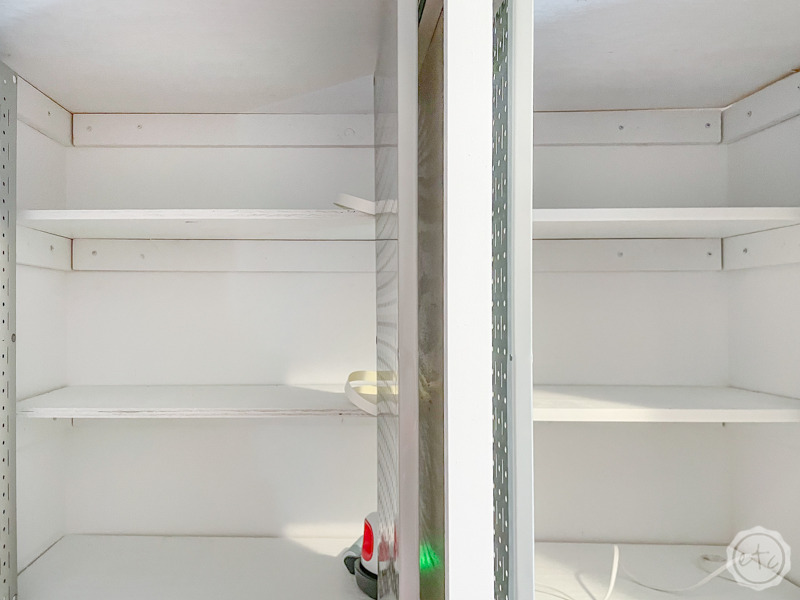
Ready for the best part? Spraying our boards! Since I have a small laundry room and a champagne colored washer and dryer I went with white paint for the cabinet. I wanted it to look open and not crowd the room… plus white always looks clean and fresh in a laundry room.
These cabinets are going to get a lot of wear and tear (my dogs will literally live in them) so I decided to do a layer of primer topped with a layer of water-based cabinet enamel. These paints will go on smooth and nearly in-destructible if applied properly… and since we’re spraying both layers they’ll be super even. Which is kind of the definition of applied properly.
Either way I couldn’t wait to break my new Wagner Flexio 3500 out of the box… I’ve never met a Wagner sprayer I didn’t like and this one is definitely at the top of my list. It’s super light weight and sprayed continuously without any trouble.
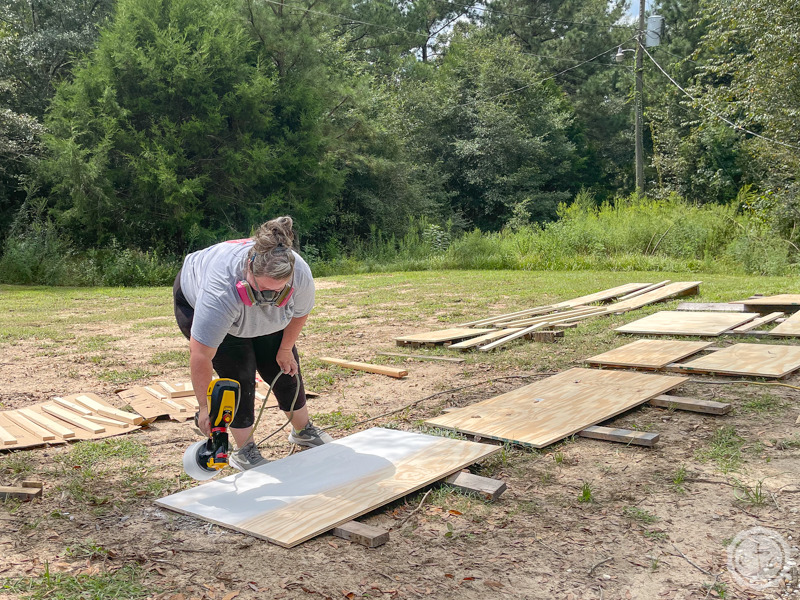
I even had to run inside for a puppy emergency (it was nothing but they were barking like someone’s leg got cut off!) and by the time I got back outside I was convinced the sprayer would have clogged. I mentally prepared myself to clean out the nozzle but it was good to go. It really seals itself in between sprays… plus it’s super fast.
The turbo speed was almost too much with dirt flying everywhere! I have super sandy soil so this is always a problem for me… I think I’ll grab a large spray tent before I start on the doors.
Once all the boards are painted (front, back, sides, primer and topcoat) you’re good to go! Let them dry (and cure!) and then we’re on to the next step.

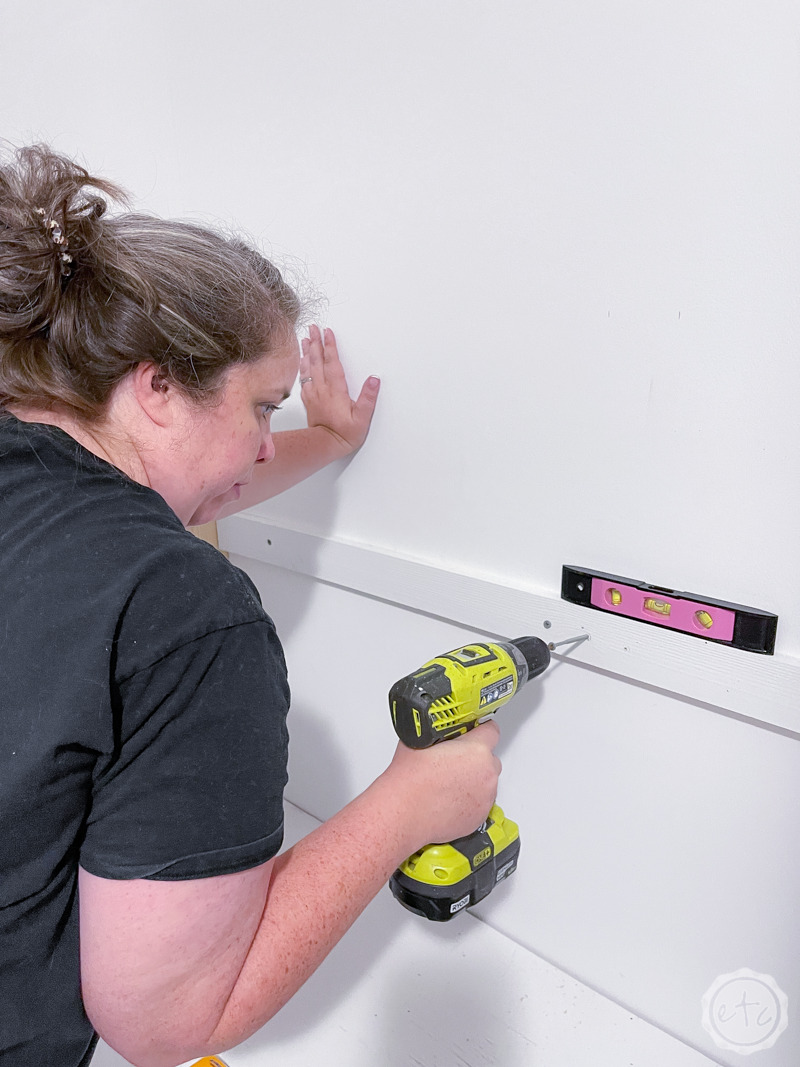
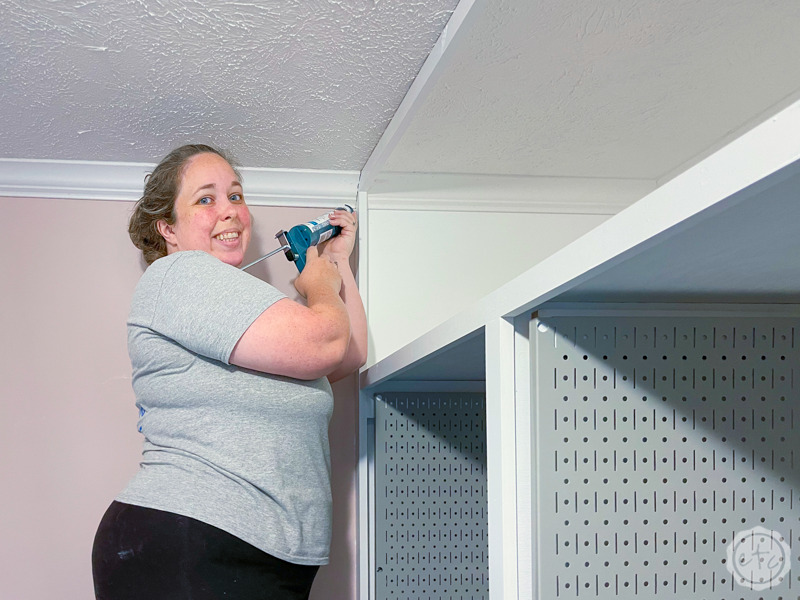
Step 4: Install the Cleats into Studs in your Space
While we’ll have a few vertical support pieces these cleats are the main supports of our shelf… so we need to be extra sure they’re going into studs. That’s the only way they’ll be able to hold the weight of our shelf (and the items on the shelf).
Use a stud finder to mark the studs and then measure the distance from the floor to the first cleat. Once you’ve marked the top of the first cleat I like to place the middle cleat on the wall and hold it in place with a brad directly through the board, into the wall in the middle of the cleat. This will hold the cleat on the wall and give you an extra set of hands while you work.
Now you can set a level on top of the cleat and pivot it to find true level across the wall. Next I like to take my power drill and drill pilot holes into the studs… then sink your 3″ carpentry skills directly into the studs all the way across the board.
Once you have the back cleat installed on the wall you can line up the side cleats with the top of the back cleat and level them as well. You can add a brad to the side cleat if you need an extra hand… then once you’ve leveled the side cleat place a longer level across the side cleat and back cleat to make sure they’re level across the top.
Basically we want to make sure everything is level, everything is square… every. single. step. of. the. way. That way we know our cabinet will be super sturdy when we’re finished!
Once we know the side cleat is level across the board we can drill a few pilot holes and sink carpentry screws into the studs on each side.
Perfect!
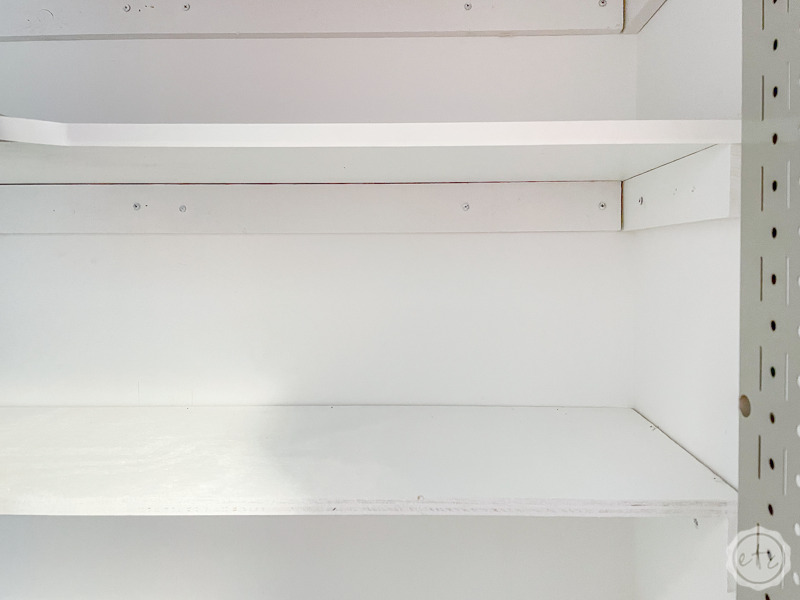
Now we have an entire row of cleats for the first shelf. Perfect! At this point we can add the first large shelf to the top of the cleats.


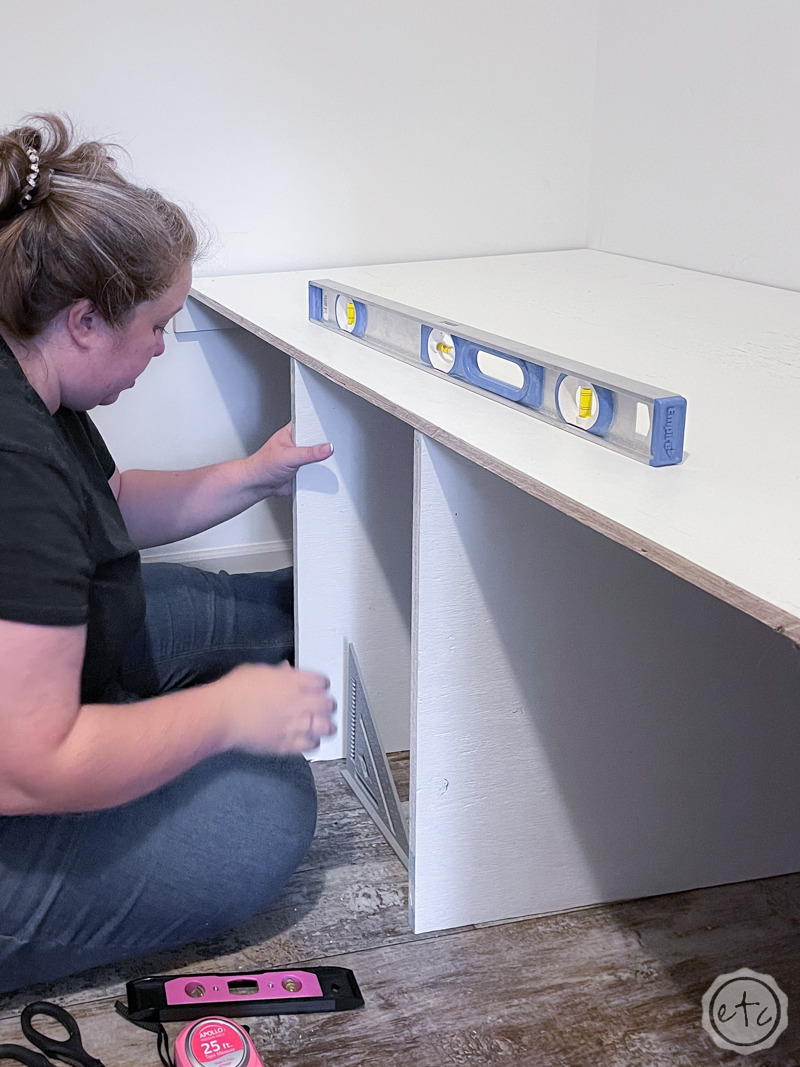
Step 5: Add the Vertical Supports
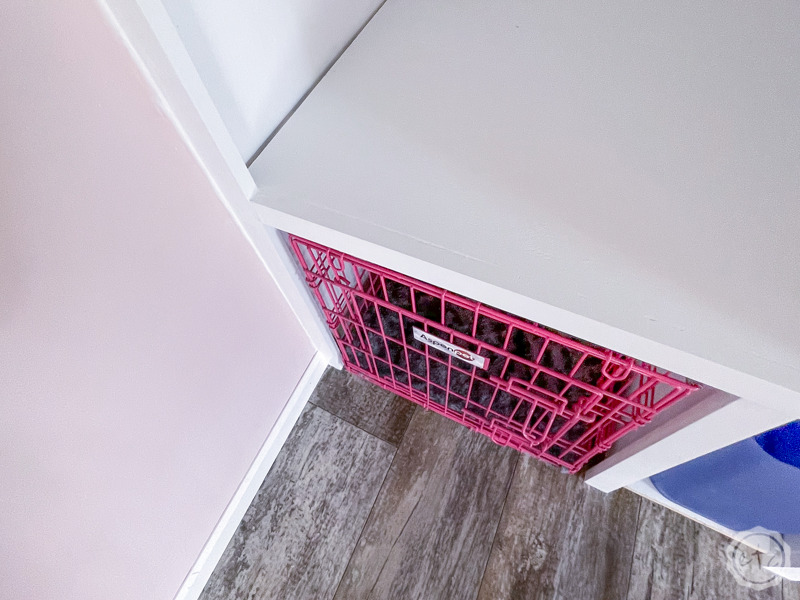
Ready to add the vertical supports for our first shelf? Since these shelves are 53″ wide and 30″ deep they are. big. shelves. Which means they need a little support in the middle… that can come in the form of a front & middle cleat or a vertical support.
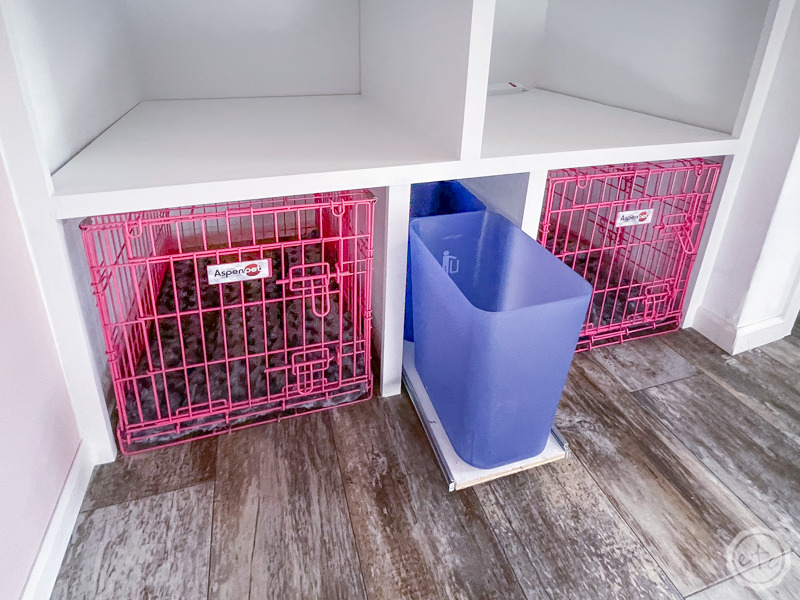
In my case I want 2 cubbies on the floor (one for each of my dogs kennel’s)… and with that doesn’t leave much space for a third cubby. With 2 20″ openings and 4 1.5″ trim pieces I have a 7 inch opening left for my third cubby. So I decided to add 2 vertical supports on either side of the dogs kennels and instead of a cubby I added a drawer.
The drawer itself is extra so let’s focus on the vertical supports first.
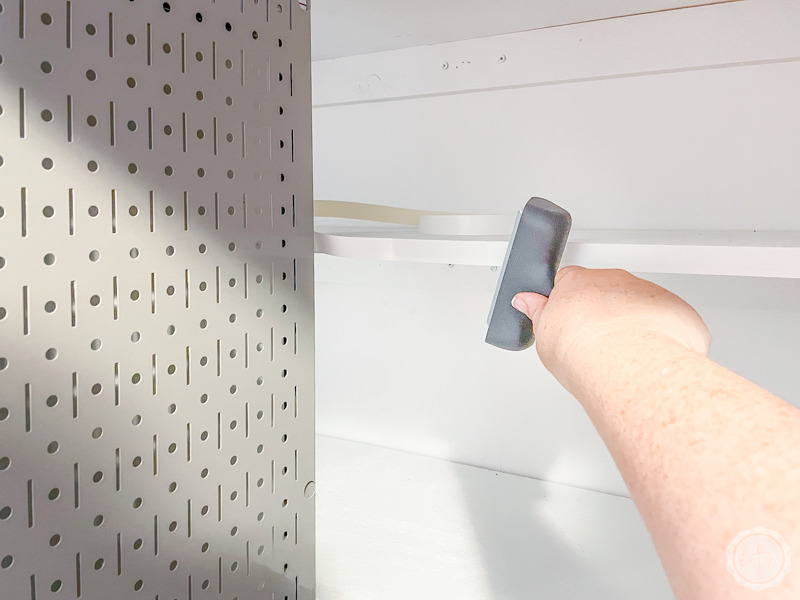
I went ahead and drilled pocket holes on the top my vertical supports… I also cut out a notch from the back of the vertical support so that it fits snuggly under the back cleat (the one we already secured to the wall). Once the pocket holes were drilled I measured the dog kennel openings (including the space for the eventual trim) and marked the inserted my vertical support at 23 inches from the wall (not the molding… we’re going to cut out the molding for the trim piece so we measured from the actual the wall).
Once the vertical support was in place I used a square to make sure the support was… square. Both to the shelf above it and the floor below it. Then I used a long t-square (actually the guide from my rip cut) as a guide to mark where the vertical support is from the top of the shelf. Then I sank several 1 3/8″ brads all the way down the guide… through the top of the shelf and into the vertical support. Once I had secured the piece with brads I wiggled into the cubby’s and added pocket screws into the pre-drilled holes.
Beautiful darling!
*Bonus Tip: I didn’t want to screw a pocket hole into my floor and since this is our bottom layer we’re going to rely on gravity to hold the very bottom of the vertical supports in place. For alllllll of our other layers we’ll drill pocket holes into the top and bottom of each vertical support and then drill the vertical supports into the shelf above and the shelf below.


Repeat Steps 4 & 5 for Each Shelf
Alright y’all… you have the basic formula! From here on out we’re going to add a few more shelves using the same techniques as the first one. For my cabinet I’m adding 3 large shelves (53 by 30) and 2 shelves that are a little less wide (53 by 12).
This is a completely optional step that will allow me to add a few metal pegboards (on drawer slides) in front of those shorter shelves.
Keep in mind that depending on how large you want your shelves to be will determine how wide your openings to be as well as how many vertical supports you’ll have. I ended up with two vertical supports under the first shelf and one center vertical support under the second and third shelf.
Once all of your shelves are in place we’ll move on to the optional pegboards!

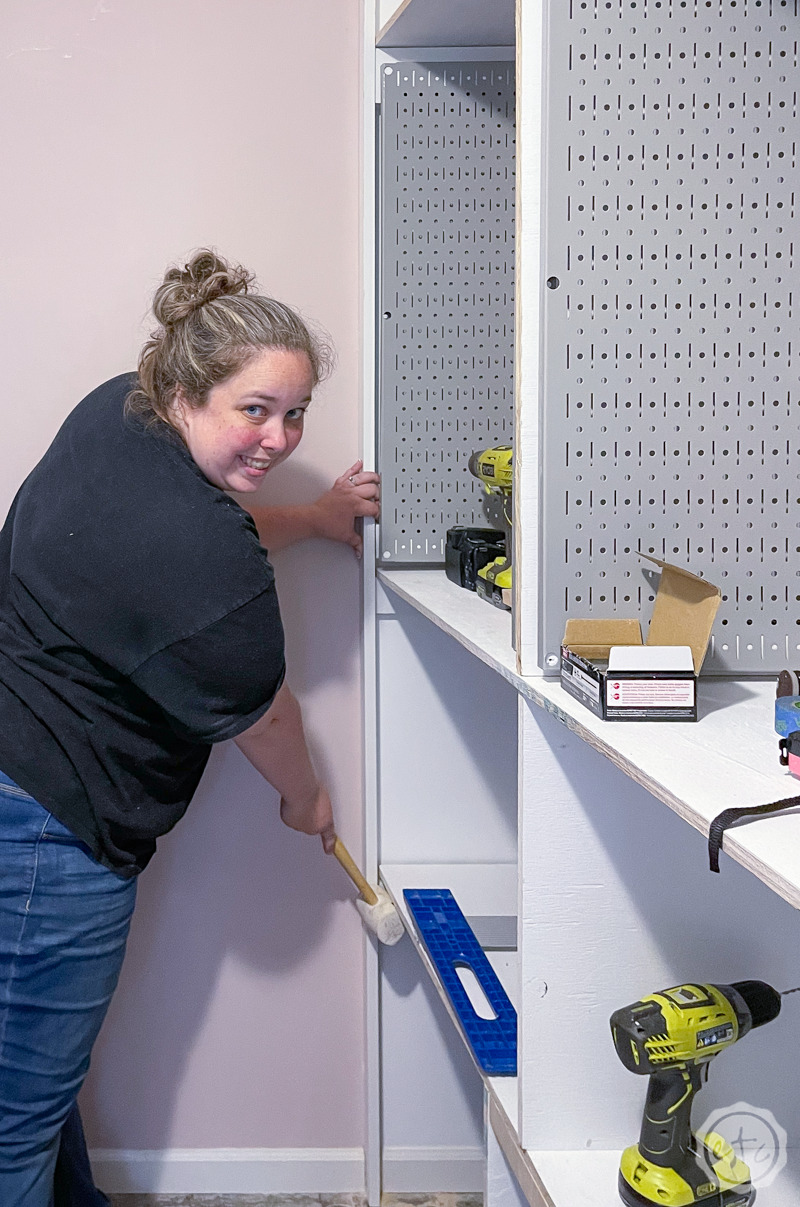
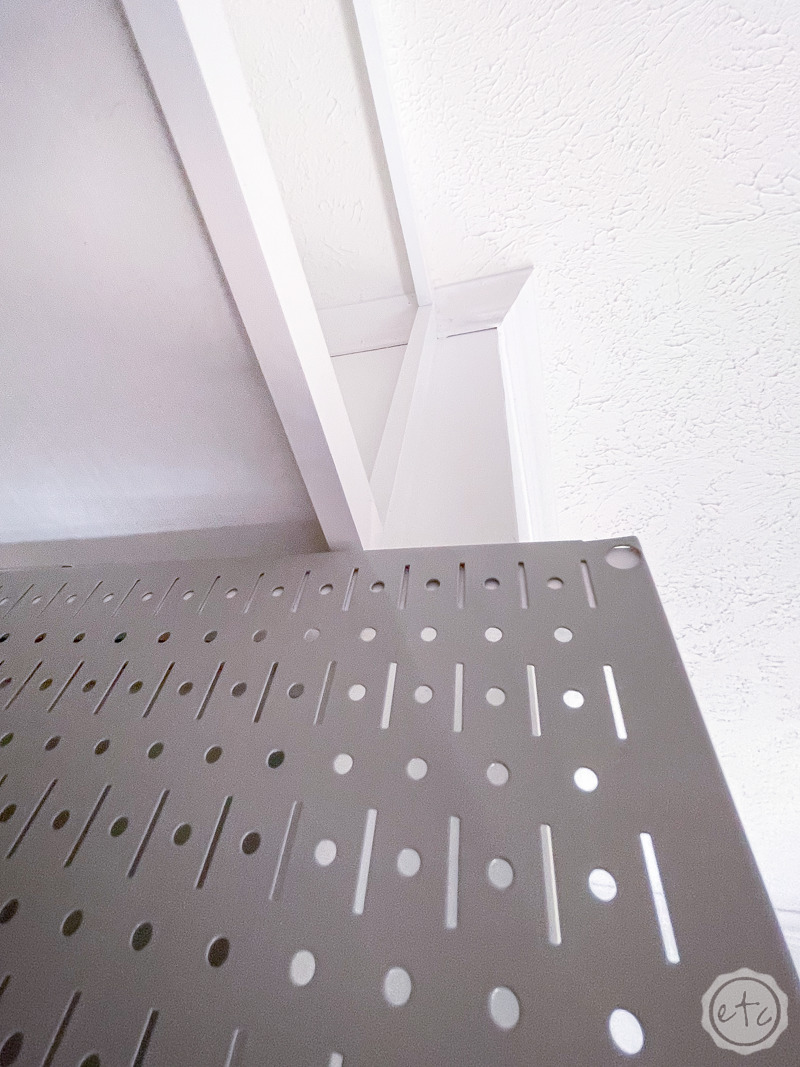
Step 6: Add Pegboards on Drawer Slides
Speaking of those optional pegboards… let’s talk about those for a minute. Since I’m storing quite a few tools in this space I needed a functional way to do that. So instead of shelves I decided to install 4 16×32 metal pegboards… and since my shelves are 30 inches wide a 16 inch pegboard left me 14 inches of space behind the pegboards.
Which is why I chose to install 2 long 12 inch wide shelves behind the pegboard section of the cabinet. We want to be able to utilize every inch of this cabinet after all… storage storage storage!
As far as the actual pegboards go I went a little crazy… and instead of installing them flush to the wall (and flush to the inside vertical support) I decided to install them on drawer slides. This way they’ll slide out and be accessible as well as provide enough space to access anything sitting on the shelves behind them.
To install these babies I cut a few 1×2’s to the proper size (15 3/4″ so that they’ll side right inside the 16″ wide pegboards) then I use my multi tool to notch out a small section on either side of the 1×2 (so that they’ll slide under the sides of the 16″ pegboards). These 1×2 supports will give you a sturdy base to install your drawer slides to the pegboard.
Once the 1×2’s are in place on the top and bottom of each pegboard (you can add one to the center as well for additional support if you like) you can add your drawer slides.
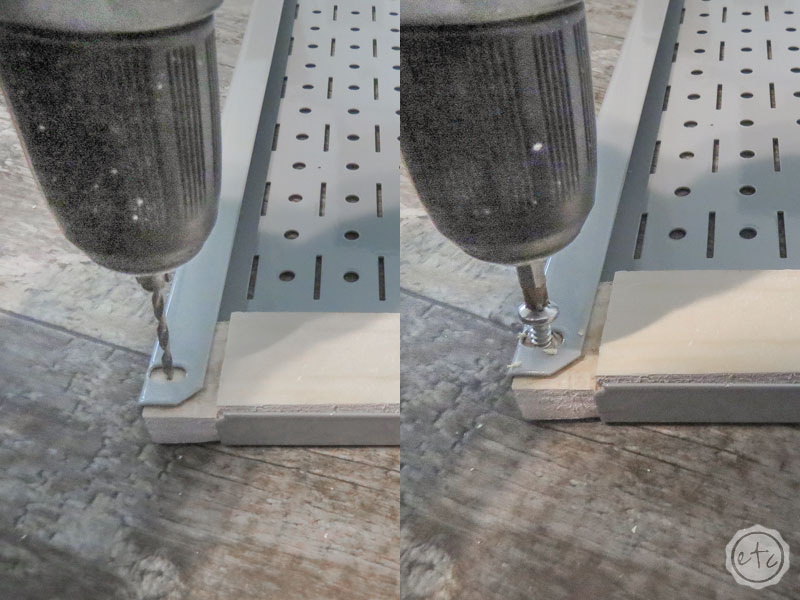
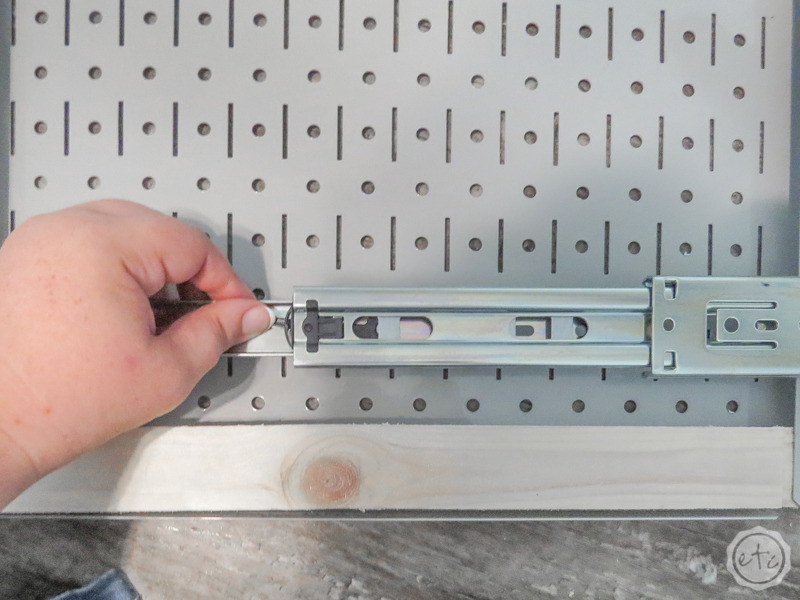
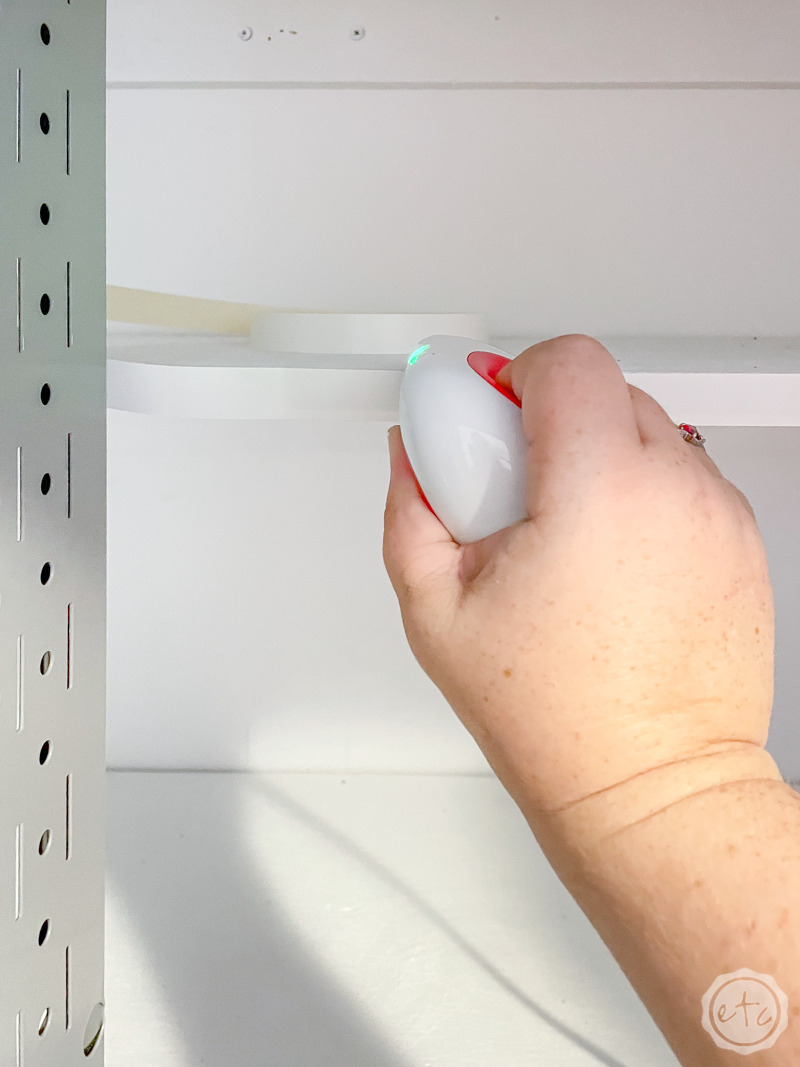
I used 14″ drawer slides so that there was room on either end for the pegboard hardware… if you’ve never installed drawer slides before don’t worry. It’s soooo easy… this was my first time and after a brief moment of panic it was a breeze. Start by laying the drawer slide on the 1×2 where you want to mount it… then extend it until you see a little black plastic lever.
Press the lever and the two parts will come apart so that you can mount one to the pegboard and one to the wall.
Double triple check that the drawer slide is level to the edge of the pegboard (you don’t want it to hang crooked or you’ll have problems with how it functions). Now go ahead and pre-drill 3 spots for the screws that came with your drawer slide… then screw it in place. Once you’ve added your drawer slides to all four sections it’s time to install these babies in the cabinet.


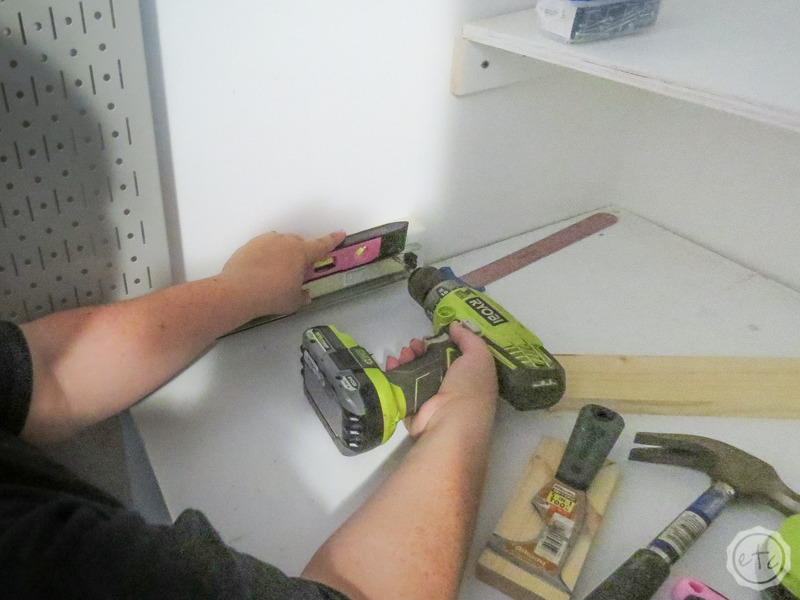
Ready for the cabinet? Now here’s the thing… I’m going to be installing a bit of face trim to the front of this cabinet so if I mount the drawer slides directly to the wall the drawer slides won’t slide. They’ll just hit the face trim and stay inside the cabinet… which defeats the purpose of the slides.
So to fix that I’ve cut down 4 2×4’s and 4 1×4’s. We’re going to install a 2×4 for the top and bottom drawer slide on the wall… and a 1×4 for the top and bottom drawer slides on the inside vertical support. Since the vertical support will have one trim piece that splits center those slides won’t have as much to clear… but the drawer slides on the wall will have to clear the entire trim piece on the side of the cabinet.
I found the easiest way to install these wooden pieces was to start at the top. I added a level over the wooden piece and made sure the level was flush to the shelf above before adjusting to level… essentially I’m using my small level as a spacer here. Then I made sure the wooden piece was flush to the front of the cabinet (might as well give myself an extra place to secure the trim to!) before screwing it into the studs.

Once the top supports were installed I added the back of the first drawer slide making sure it was level and flush to the top of our wooden support. Then I slide the pegboard onto the top drawer slide… extended the bottom drawer slide and marked the placement. Then it’s just rinse and repeat… level the bottom stud flush to the front of hte cabinet and screw it into the studs. The extend the bottom drawer slide once Once I had the placement for the bottom drawer slide I was able to screw it into place on the bottom support.
Now you should have a working pegboard that slides in and out of your cabinet!

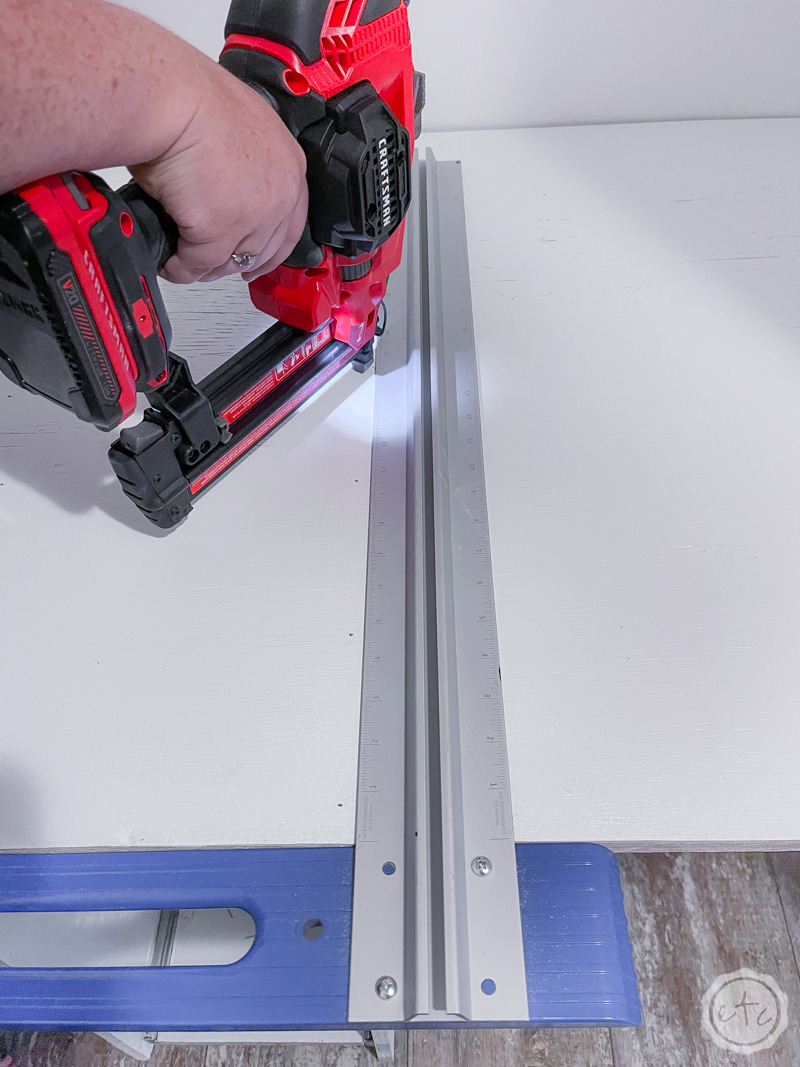
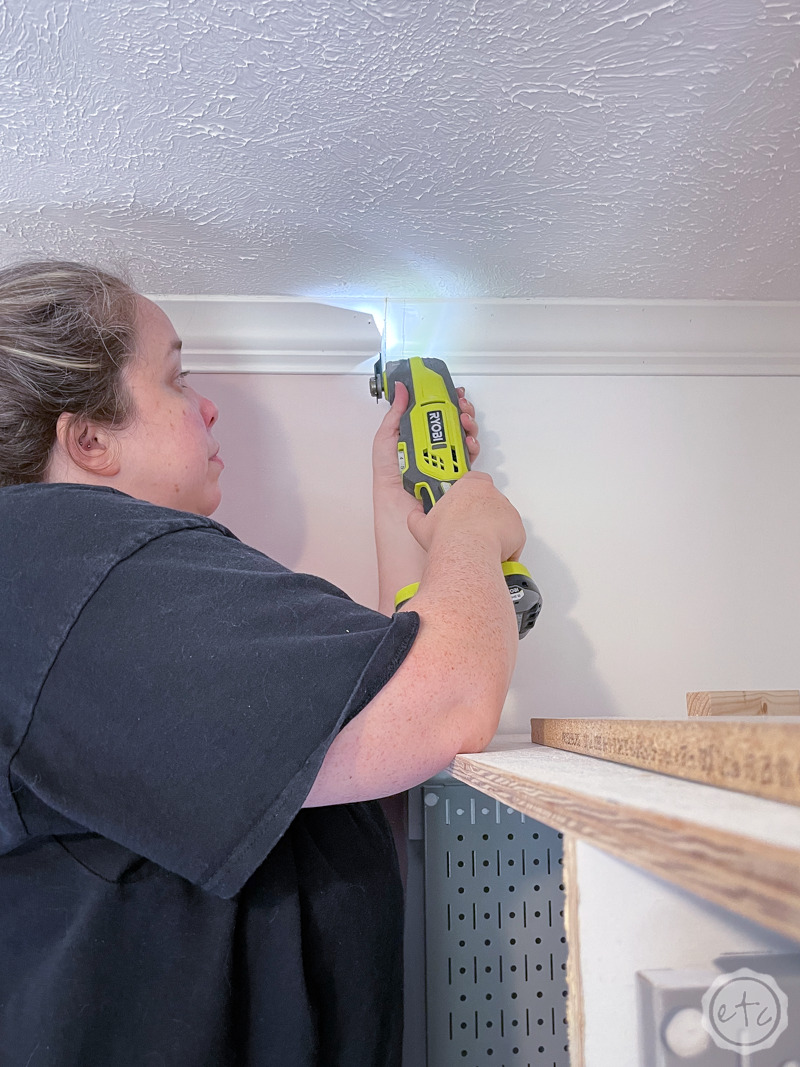
Step 7: Add your Trim Pieces
At this point we have the bones of our cabinet finished! You can see the shape of the piece and how it’s going to look… but we’re not done yet. I want this cabinet to look like was built into this space… like it was always meant to be here.
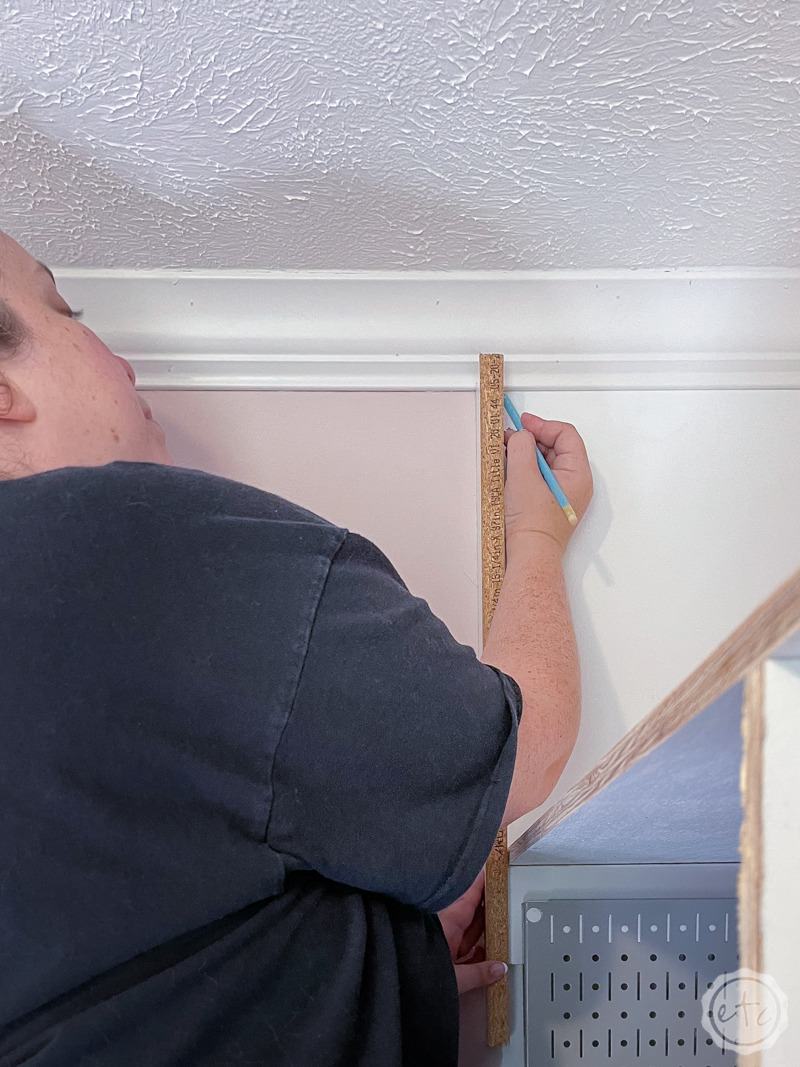
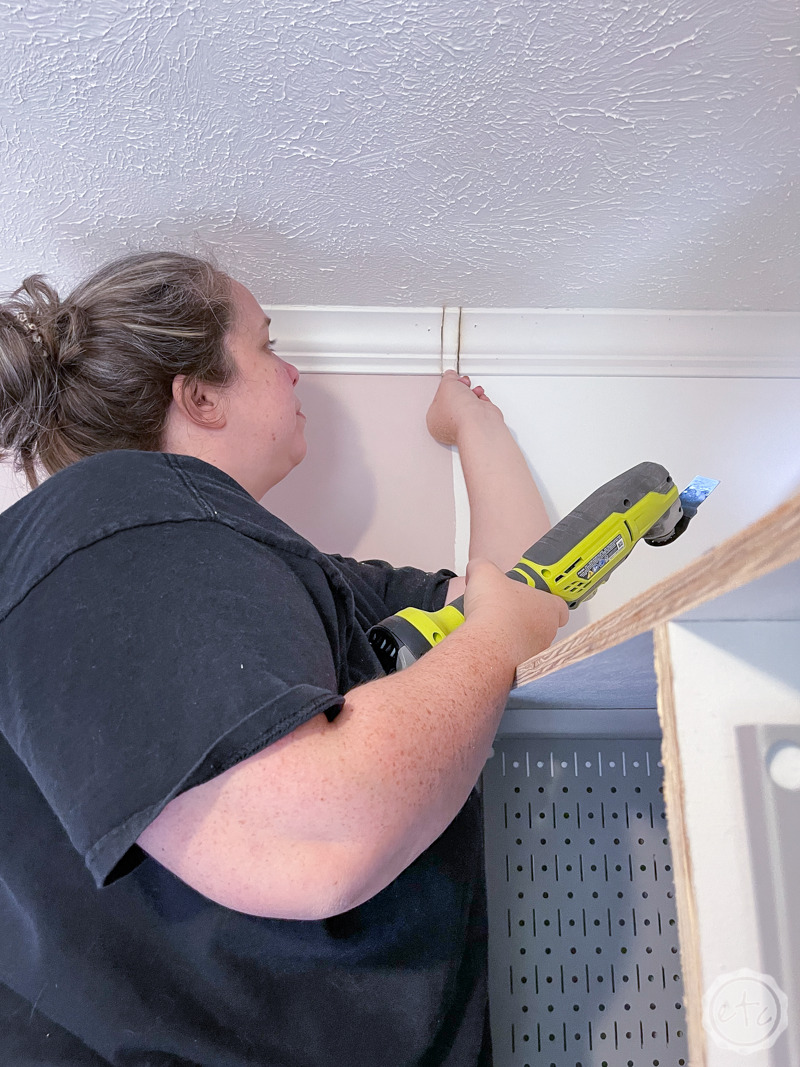
The best way to do that? To finish off all the un-even shelves we’ll add a bit of trim to the front of the cabinets. To start this process we’ll need to remove part of the molding so that the trim can fit flush to the walls.
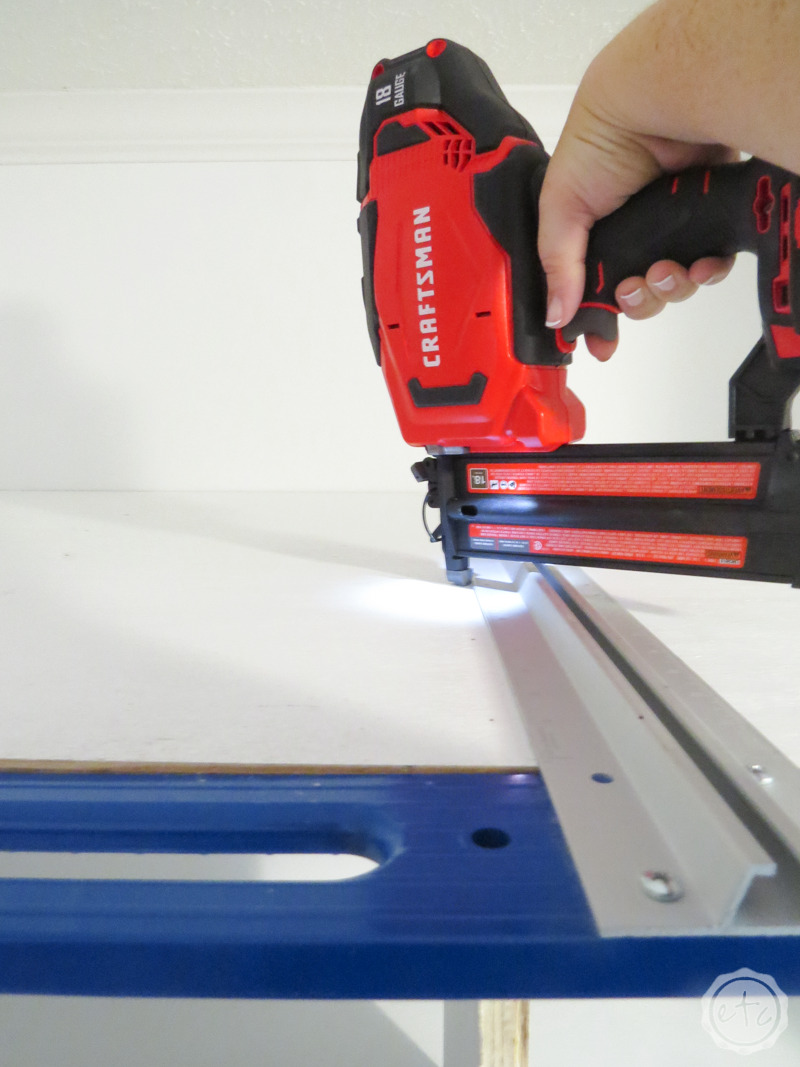
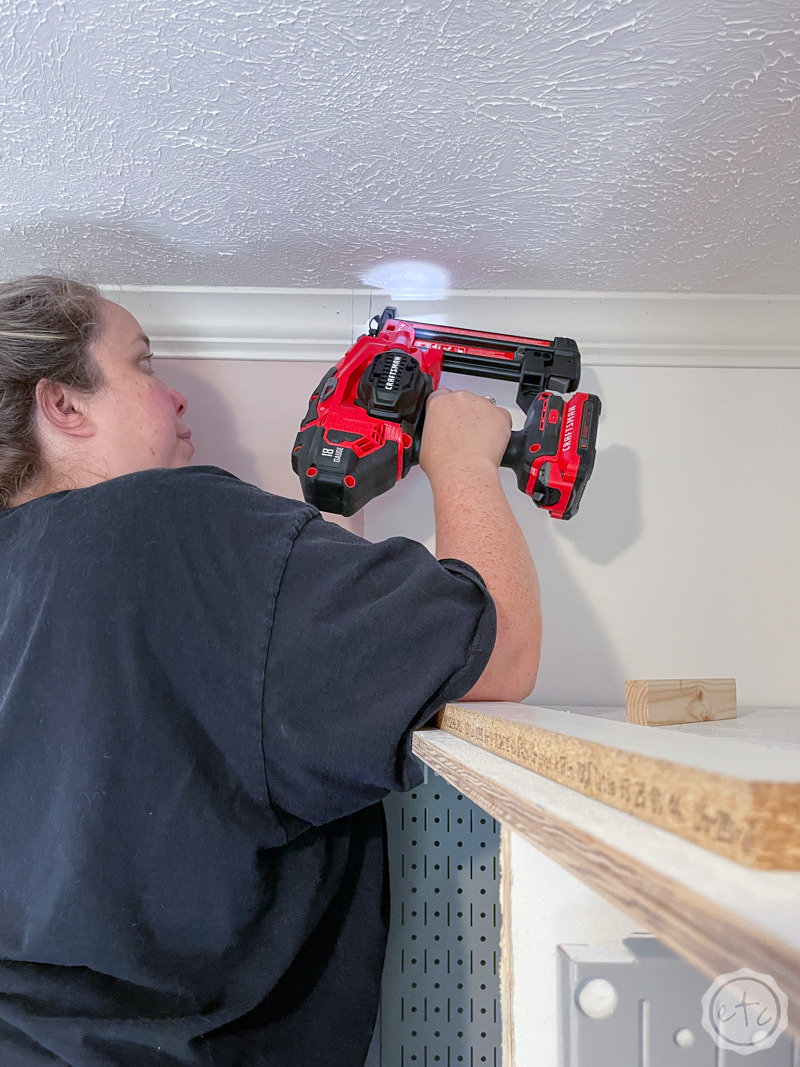
I grabbed my multi-tool and a pencil… then I used a spare piece of trim to mark the lines where the trim needed to fit. Once I had the lines marked on the trim pieces I used my brad gun to add a brad to the trim on either side of the lines. That way the molding will stay on the wall when we remove the slivers for the trim to slide into.
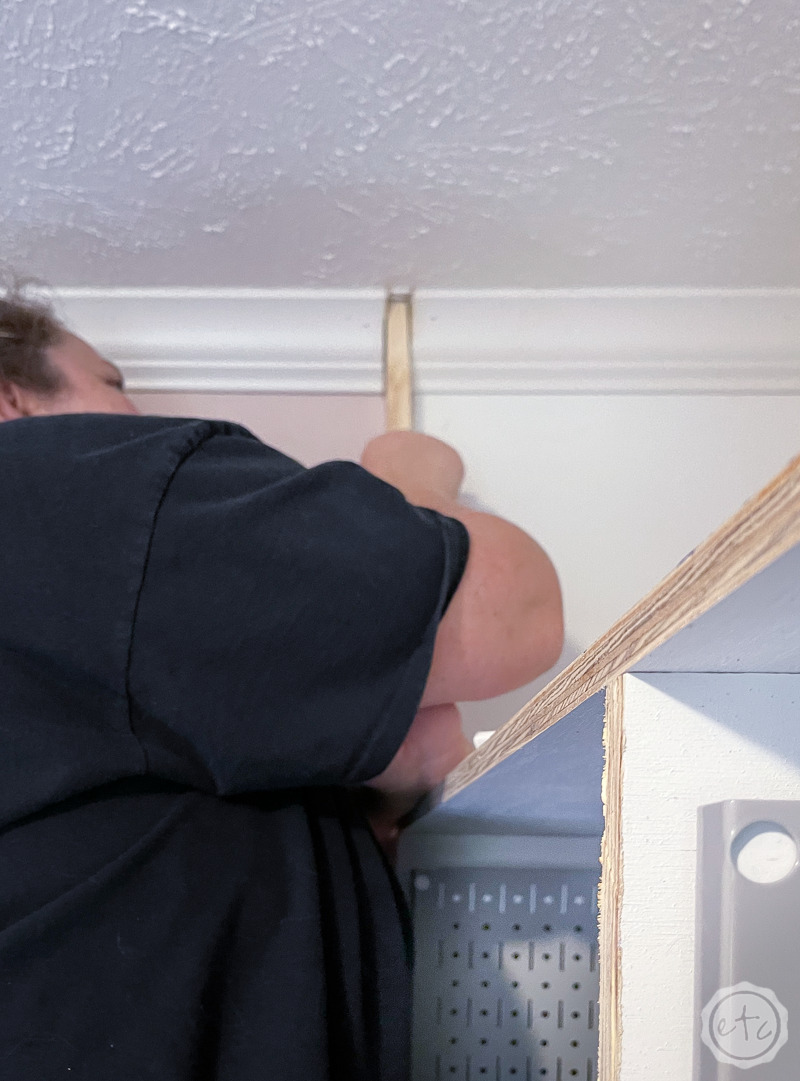
Ready to cut the molding? I grabbed my multi-tool and carefully cut along the lines until I could pull the small trim piece loose.
This was the first time I’d cut trim with my new multi-tool and it made me feel like such a professional! Once we caulk these gaps it’s going to look so. stinkin. good.
Now that the molding is notched let’s cut our trim pieces! I started by individually measuring the left and right sides of the cabinet… inserting the trim pieces and then securing them with a few brads from the brad gun. Make sure to secure the trim on as many cleats as possible as well as the top and bottom of the cabinet… then keep working your way across the cabinet.
After the long side pieces I cut all 3 long horizontal pieces and then the vertical trim pieces to cover the vertical supports. Just a few tips. 1) Not all floors are even and not all walls are the same width apart at every point. So don’t assume that you need 3 53 inch trim pieces to span the front of the shelves… measure each trim piece individually, then cut the trim piece, then install that trim piece. That’s the best way to get a perfect fit 2) When you’re installing the pieces keep all the trim pieces flat across the front. In order to do this I had a few gaps between the trim and the shelf but we’ll fill those in shortly. We want the front to be flat so the front is one continuous piece.
Score!


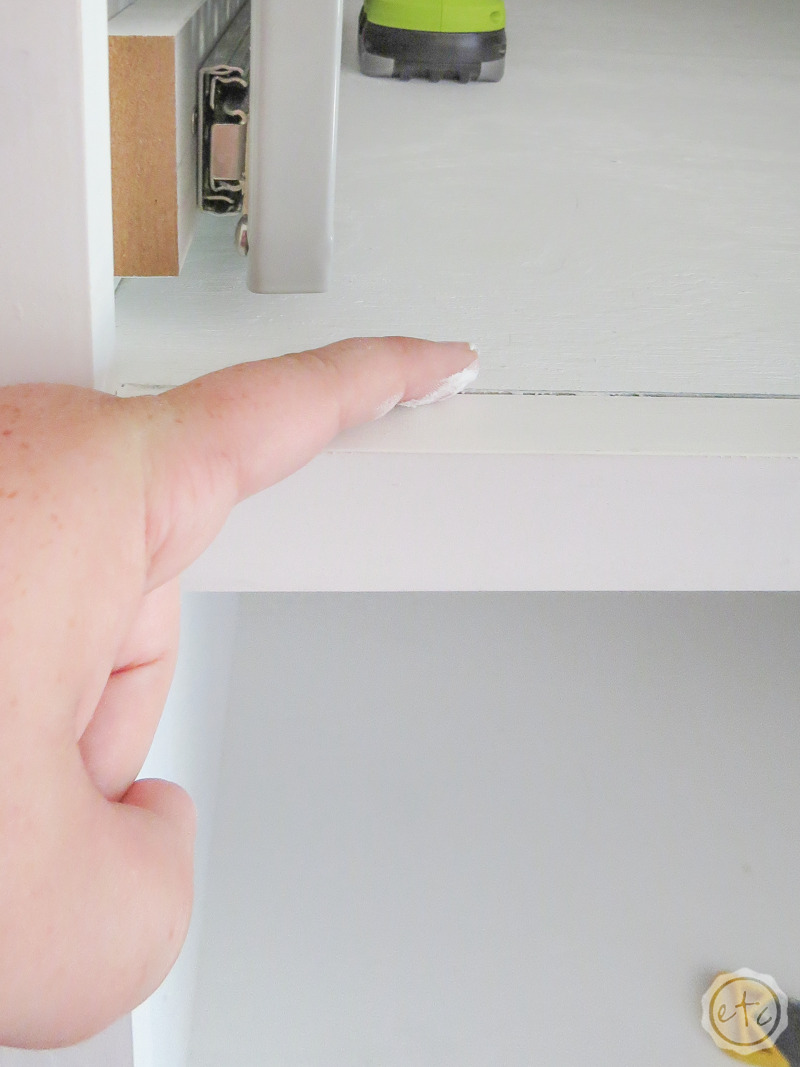
Step 8: Spackle and Fill in any Gaps
Ready for the fun part? A little bit of spackle! We’ll use spackle for the brad nail holes, any small gaps between the trim and the shelf or any cracks in the wood. Fill in those holes, smooth them out and then once they dry you can sand the surface smooth.
As far as the larger gaps… like the ones between the face trim and the shelves we’ll need a bit more than spackle. Instead I grabbed a bit of wood glue and a bunch of saw dust from my shop vac (that I swept up earlier in this project… ideally you want to use saw dust from the same boards in this project). I made a paste and filled in the gaps… then once it dries you can sand it smooth.
The wood glue/sawdust mixture can bridge bigger gaps but it tends to be a little rougher and it doesn’t always fill in a gap seamlessly so once the wood glue/sawdust mixture dries I like to go over it with a layer of spackle to fill in any small gaps and smooth out the surface. Fill it in with spackle and then sand it with fine sandpaper once it’s dry.
Then you’ll have a smooth shelf with no gaps and a straight trim piece across the front!

Step 9: Paint any Touch-up & the Trim Pieces
We are so close to finished! At this point we need to do a little touch-up… mainly over the wood glue/sawdust sections since they’re brown and not white (although you may be painting your cabinet a different color!). While we could easily break out the sprayer and give the entire cabinet another coat of paint the initial layers we did outside held up extremely well.
I was worried they would get scraped and scratched with the installation but this water-based enamel is a beast and spraying it over a layer of primer gave us a great foundation for a flawless finish.
Basically spraying this paint was amazing!
So I was able to break out a roller and only hit the new places (like over the sawdust mixture) and the few brad nail spots we filled with spackle on the trim.
I prefer a mohair roller nap for flawless transitions here… it rolls right into the sprayed paint and doesn’t leave any brush strokes. Which is perfect since we want to keep that sprayed finish in tact.
It’s absolutely perfect!
Step 10: Caulk the Trim
Once the paint has dried it’s time to add a bead of caulk to either side of the trim pieces! I grabbed a white caulk and added a bead from floor to ceiling on the right and left… then I smoothed out the caulk with my little caulk tool (and my finger).
The finishing touch is to add caulk between the molding and the trim so that the entire front piece looks flawless!
Absolutely flawless!

Step 11: Add Edge Banding to the Smaller Shelves
This is a completely optional step but remember those two long skinny shelves behind the pegboard? Since I didn’t add trim pieces to the fronts of these pieces they still have exposed plywood edges. Which isn’t horrible but it isn’t fabulous.
We want fabulous!
So in order to finish those edges off I grabbed a roll of white edge banding and my tiny easy press mini. Once the easy press was heated up (I had already drilled holes through the two bottom shelves so that I could thread an extension cord up and supply power to the top shelves) I cut two edge banding strips… one for each of the 12 inch wide shelves.
Then I carefully lined each strip up and used my easy press to smooth them into place. You’ll want to place your easy press over the edge banding for several seconds… until the glue starts to heat up. Then I grabbed my brayer and carefully smoothed/pushed the edge banding into place so that it’s fully bonded.
Once you’ve worked your way all the way across the shelf you can cut the edge of the banding flush… then it’s done!
Step 12: Enjoy!
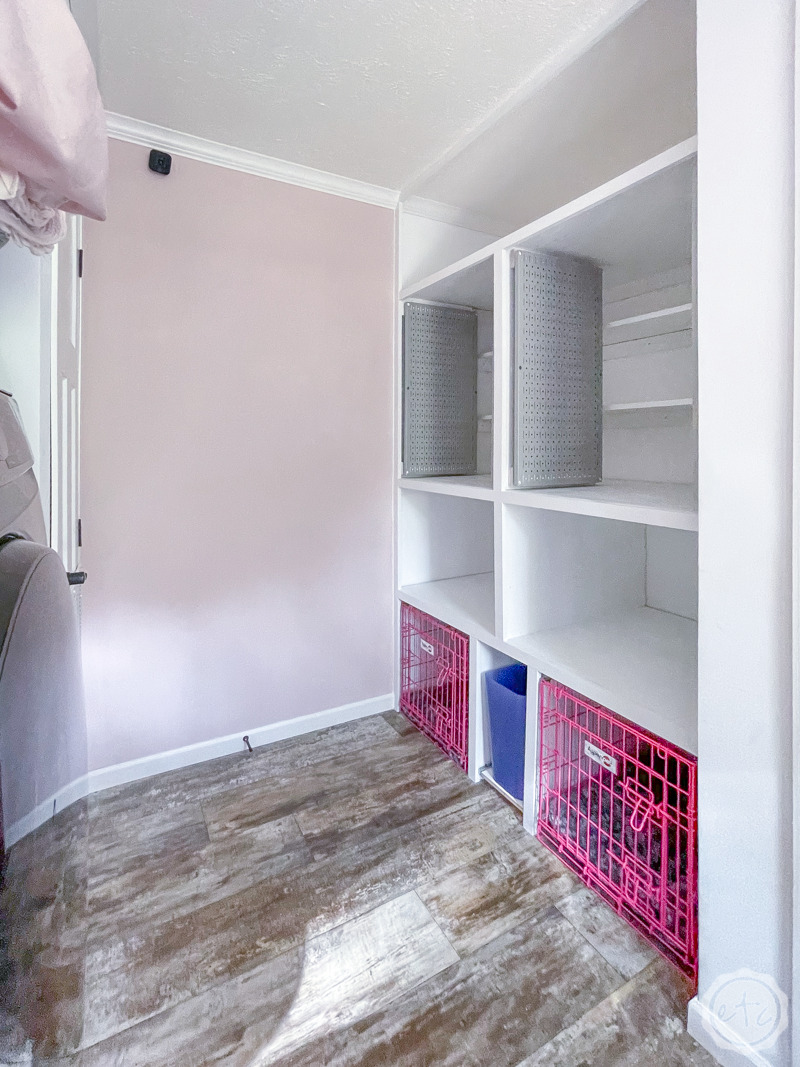
Doesn’t it look fabulous!? I’m so proud of how it turned out… I just want to sit in the laundry room and stare at it! I cannot wait to organize this baby!
I can’t wait to load it up with tools, dog supplies and laundry room essentials.
In the meantime… here’s a close up of the baby soft painted finish of my brand new cabinet.


This is awesome! will you be doing a full house tour update soon?
Thank you!! I’m hoping to do an updated home tour soon… it’s been on my to-do list for a few weeks now!