
This post is sponsored by Wagner but all opinions are 100% mine.

I knew when I moved into my new house that one of the very first projects I needed to cross off my list was a little diy dog gate for the laundry room. After all I need a place to put my fur babies when I’m not at home… and I hate having to crate them but the younger one (I’m looking at you Cinnamon) is not quite trained for unlimited access to the house yet.
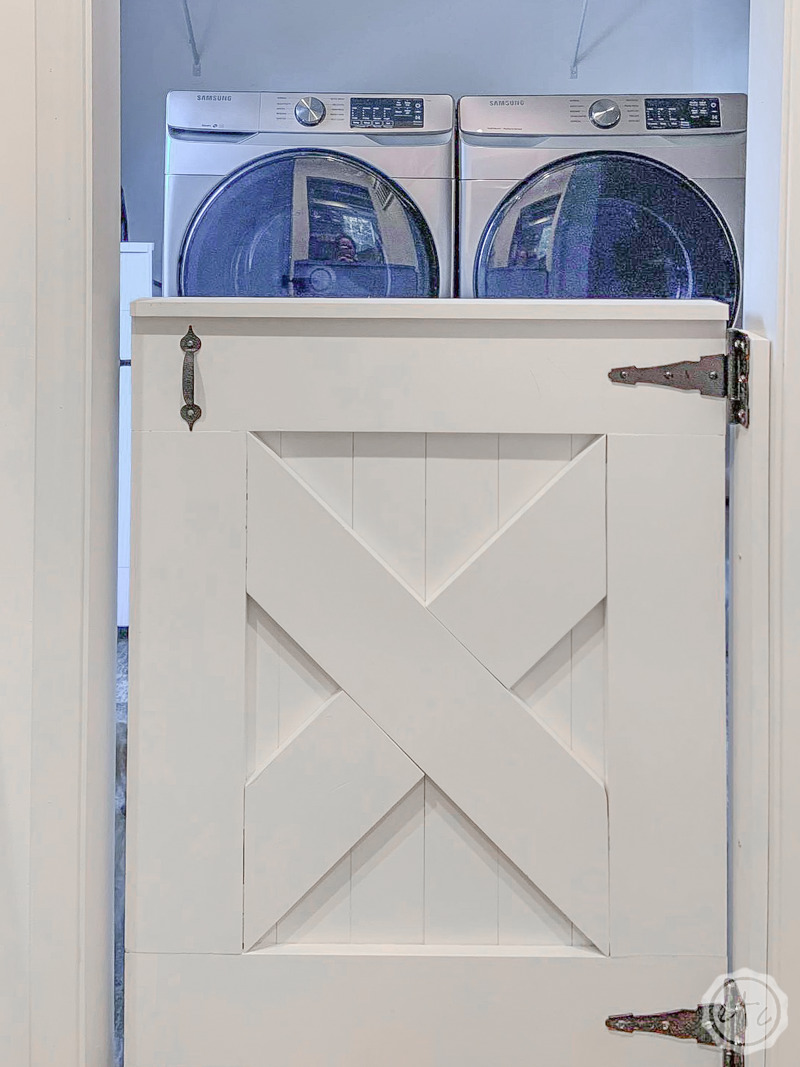
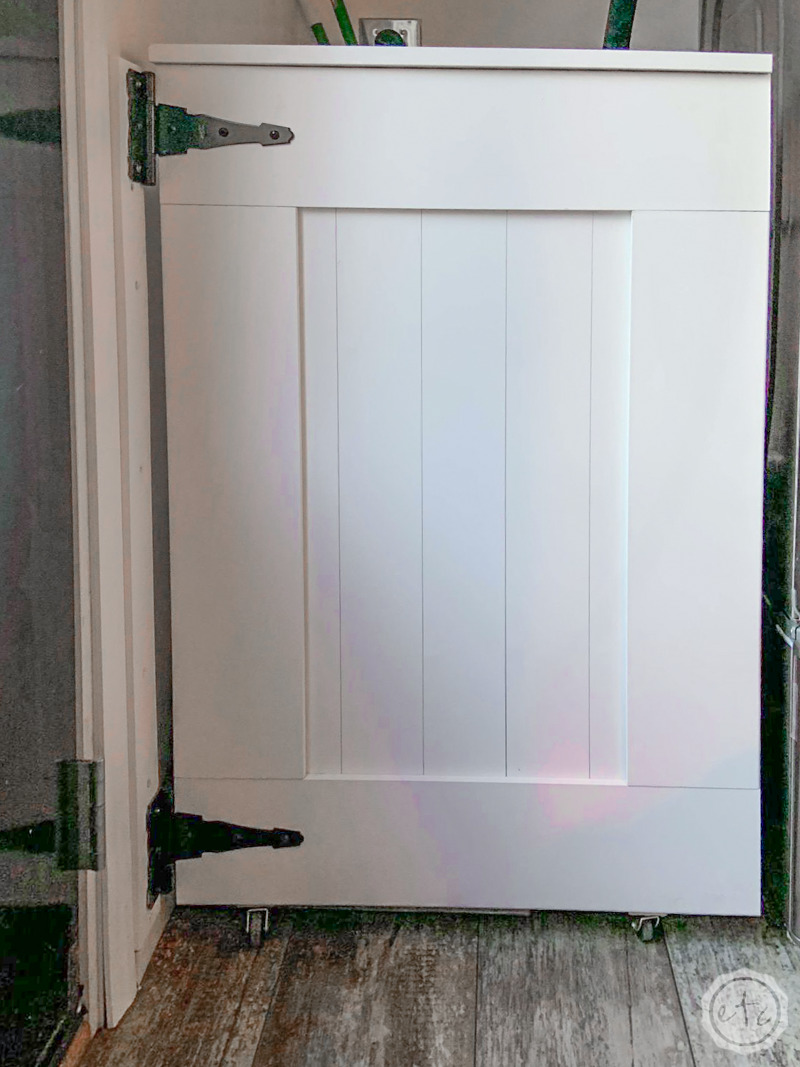
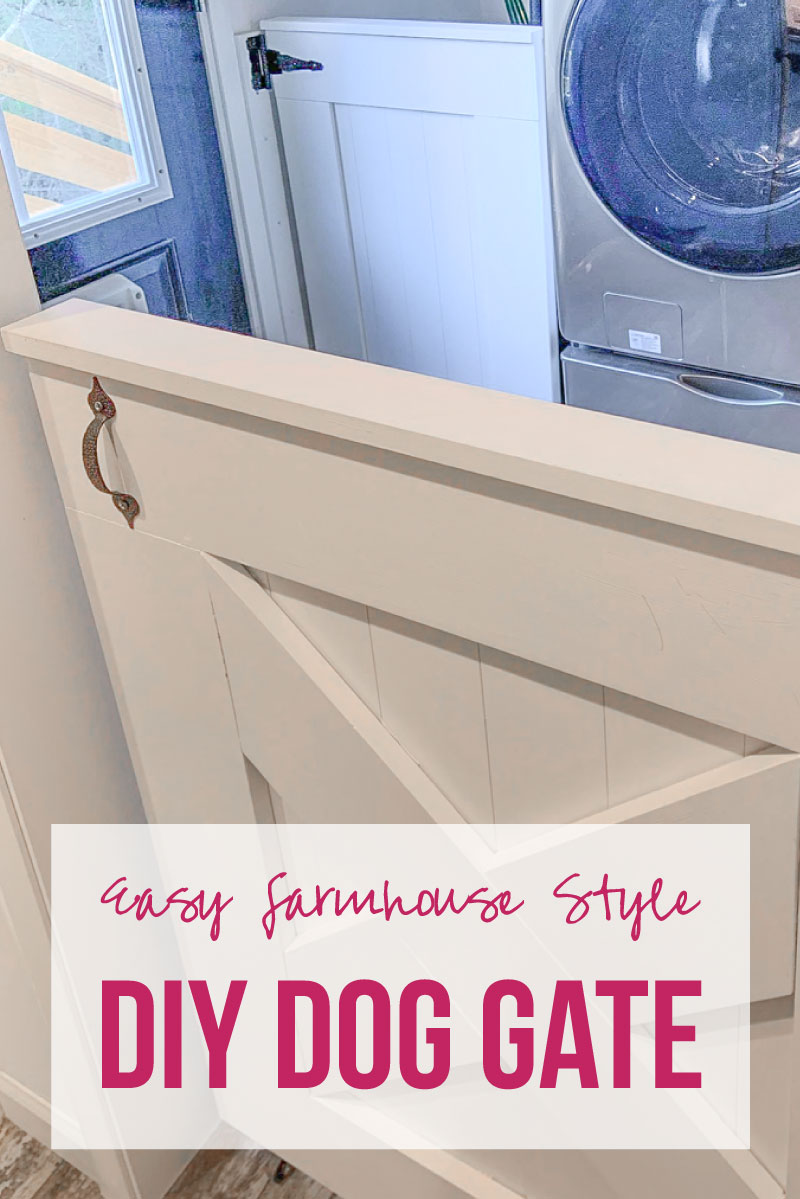
And since I didn’t want to put up a plastic baby gate I started looking at building my own gate… a little farmhouse diy dog gate of my own! And I loved it so much I built a second one to go next to my washer and dryer to corral my dog food and vacuum.
Of course, while I’m using this little gate to keep my fur babies corralled you could totally use it as a diy baby gate instead… I imagine it would keep kiddos in too!
The best part about this little gate? With just a few changes you can make it 100% custom for your space… my large gate is made to fit a 35 1/4 inch opening but my second gate is only 31.75 inches wide (an entire 1×4 smaller!).
You can add slats to the back layer to make the gate wider or you can add height to the back slats (and front middle boards) to make the entire gate taller.
One more note: I picked primed pine boards for this project but you can use whatever style board you like. Primed boards are a bit more expensive but they’re so much easier when you’re painting… especially when you’re using a sprayer.
Since I made two gates (one large with a farmhouse style X on the front and a smaller one without the X) I did a little experiment… I used a brush to paint the first gate and my Wagner Flexio sprayer to paint the second one (with the same paint). Instead of 3 coats the sprayer covered in one coat… and the finish looks flawless. I’m in love!
Let’s get started.
Supplies:
- 2 1x6x8 primed pine boards (true width is 5.5)
- 2 1x4x12 primed pine boards (true width is 3.5)
- 1 1×3 primed pine board (true width is 2.5)
- 1 Box 1 1/4 Pocket Hole Screws
- 1 Box Wooden Pocket Hole Plugs
- 1″ Brad Nails
- Wagner Flexio Paint Sprayer
- White Linen Chalk Paint
- Kreg Jig (I use the K4 but the new K5 looks a-m-a-zing)
- Clamp to hold down Kreg Jig
- Power Drill
- 18 Gauge Brad Nailer
- Miter Saw (or smaller hand saw if a miter saw isn’t available, I used my small hand held circular saw since my miter saw decided to take a vacation)
- Hand Sander
- Putty for Holes
- Worx Portable Work Table
- 2 Heavy Gate Hinges
- 1 Door Handle
- Sliding Gate Latch
- 2 Wheels
- Pencil
Tutorial: DIY Dog or Baby Gate

Step 1: Cut your Wood
Ready to get started? Before we get started building the gate we need to cut all of our wood to size! Now the cross pieces of the x for the front will need to be cut on a miter saw (and we’ll do that later to be 100% sure we get the angle right). BUT we can definitely cut all of our straight pieces first.
Depending on where you’re picking up your wood and materials you may be able to have your boards cut right there in the store. I always do this since it saves me so much time… although the large saws at the store are not always as accurate as I’d like.
Either way we’re going to start with a few straight cuts:
- 2 Horizontal Front Slats: 1×6’s cut to 35″
- 2 Vertical Front Slats: 1×6’s cut to 24 3/16″
- 8 Back Slats: 1×4’s cut to 35″
- 1 Top Cap: 1×3’s cut to 35″

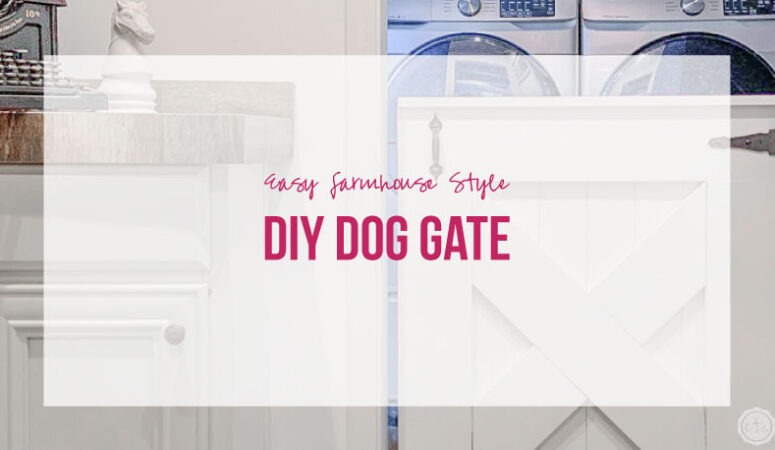
Step 2: Drill Pocket Holes
Okay guys since I’m going to be using this gate all the time and I want it to be extra sturdy (my dogs will probably jump on it) I decided to use pocket holes to join both layers independently before we use the brad nailer to join the two layers.
At the end of the day this gate is essentially two layers: the back layer (that’s 8 slats alllll joined together) and the front layer (that’s essentially the outer square with the farmhouse x through it). So let’s start with the back layer.
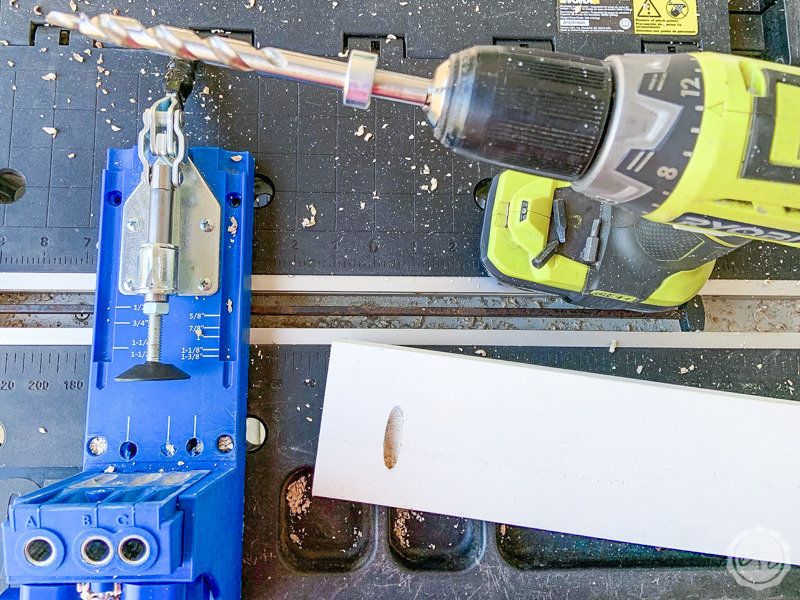
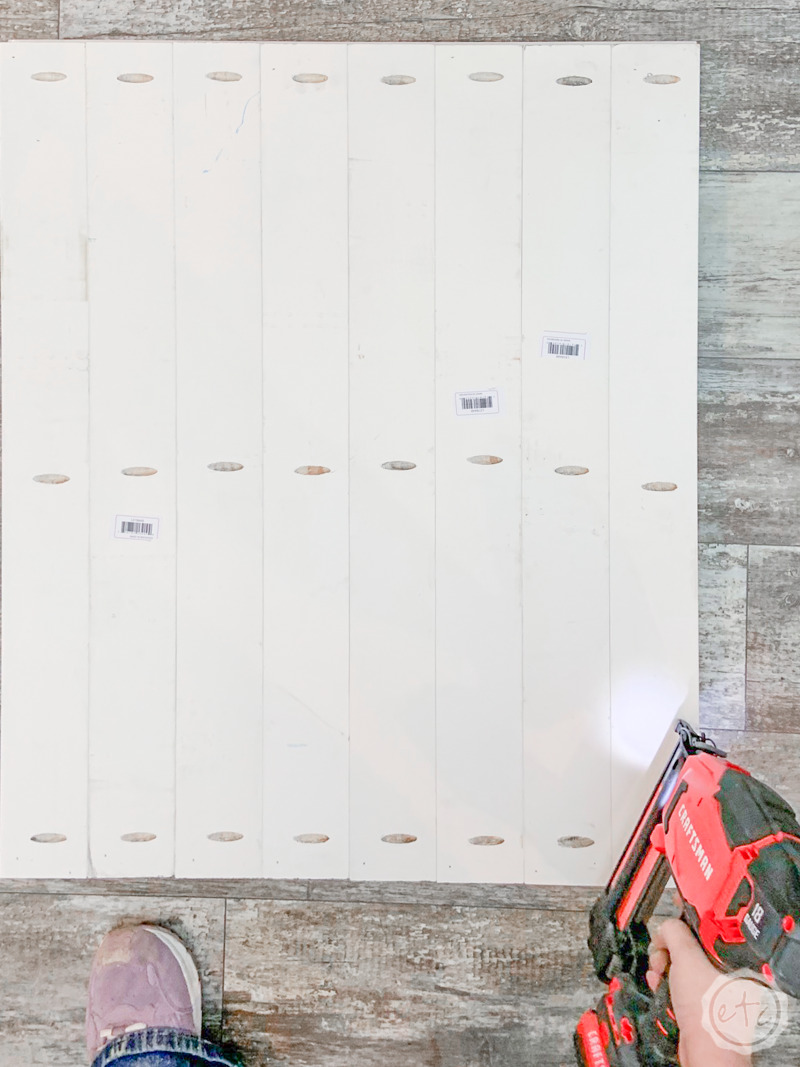
For my larger gate I need to join 8 slats together, for the smaller gate I needed 7 slats. In case, you’re lost what I’m calling “slats” are the 1×4 pieces we had cut to 35 inches long. I drilled 3 pocket holes in every single slat… one on either side and one in the middle.
Perfect!
The front layer is a bit easier: we have two horizontal slats and two vertical slats. Grab your vertical slats and add two pocket holes (I used slots A and B so that they’re perfectly spaced out) to each side. When you’re done the vertical slats will have four pocket holes each and the horizontal slats will be pocket hole free.
Now let’s get started putting alllll these pocket holes to good use!

If you’ve never used a Kreg Jig before, you can follow my How to Drill a Pocket Hole Tutorial here. Just a note that our 1×4 and 1×6 boards are both 3/4 of an inch deep (in the real world) so you’ll want to set your kreg jig for 3/4.

Update: I got a new shop vac for Christmas and it makes pocket holes so much easier… no saw dust! Check it out in my Insta stories!

Step 3: Join your Layers with Pocket Holes
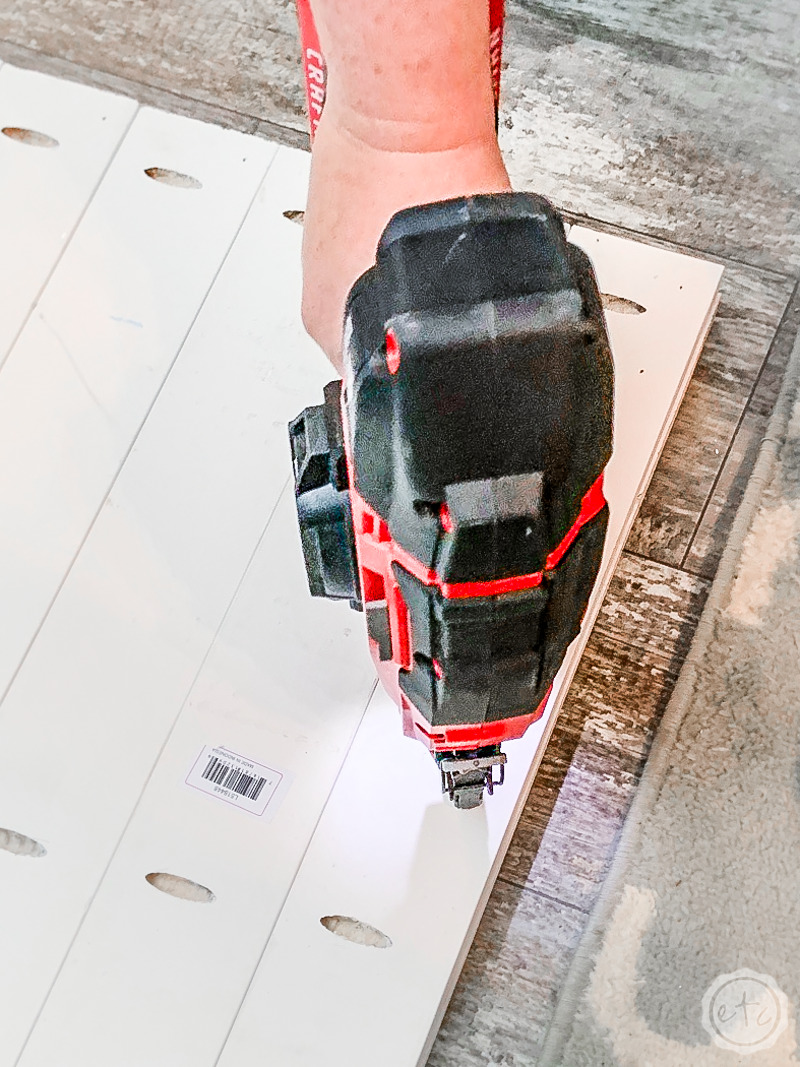
Okay y’all, let’s put these babies together! Now that all of our pocket holes are drilled we can go ahead and join all the pieces together. For 3/4 inch wood we’ll use 1 1/4 inch pocket hole screws… these will hold the pieces together super tight!
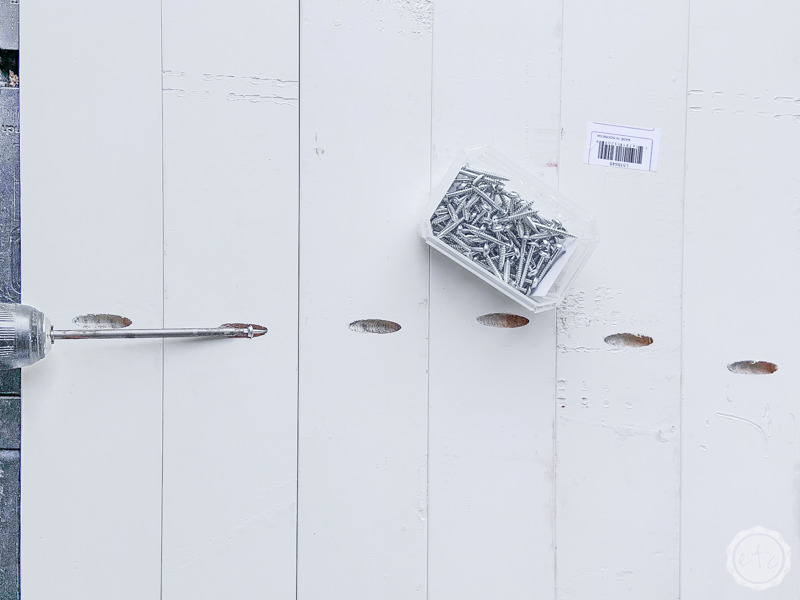
Go ahead and start with the back layer… I like to lay all the pieces out and make sure they’re all lined up. The edges should be flush on either side and all of the pieces should be flat to your work table. Then you can go ahead and join all 8 of the back slat boards together.
Double Check: After you join the first two boards together make sure that the screws aren’t coming through the front of the board. Although 1 1/4 inch screws are the right length for 3/4 inch boards not all boards are uniformly made (which is aggravating). The boards for my larger gate worked perfectly with the 1 1/4 inch screws… but they tried to come through the front of my smaller gate so I had to switch them out for 1 inch screws. The 1 inch screws were not nearly as stable but they were ok once the front and back layers were joined.
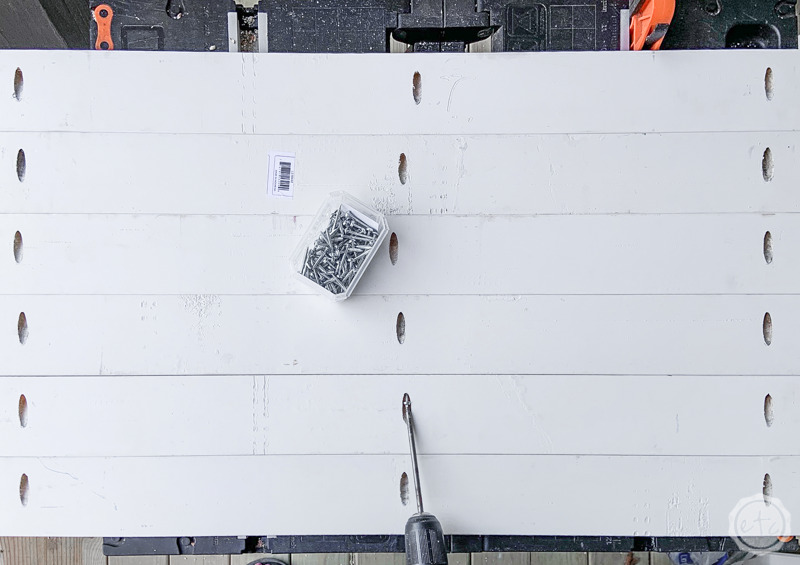


Once the entire back layer is finished move on to the front layer… or in this case we’re only building the outer box of the front layer. We’ll lay this part out the same as the back layer: flush to the outsides and flat to the surface.
Then add screws to each section until all four sides are joined… and make sure that all four corners are square. They should be but double checking is always worth it when you’re building a piece that needs to function properly. And we need this gate to function properly… otherwise the dogs will get out!

Step 4: Measure & Cut the Front X
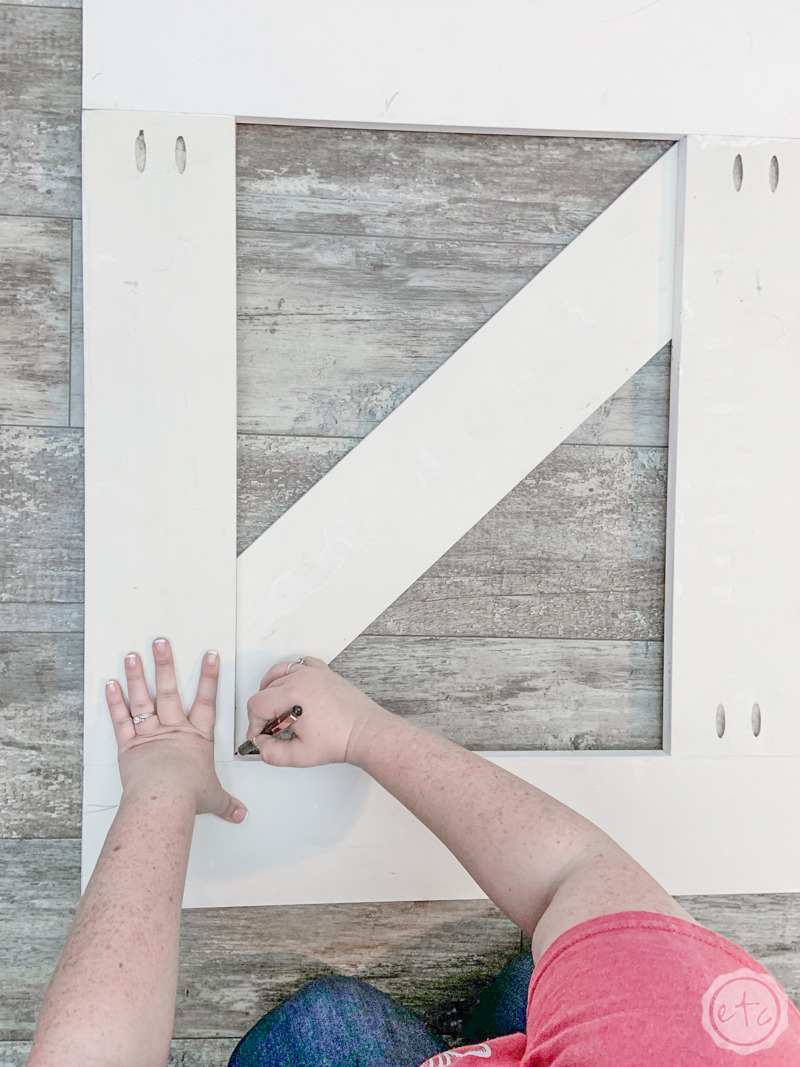
This is definitely the “hardest” part… and I put hardest in quotation marks because if you have a miter saw it’s pretty darn easy! Go ahead and lay one 1x6x8 board across your door and mark both of the ends.
This is the most *ahem* scientific way to find the angle for the cross pieces so I hope it makes sense to everyone!
Once you’ve marked both sides go ahead and take your board outside to your miter saw. Now you can simply change the angle of the blade until it aligns with the marks you just drew on your 1×6. Double check that the angle and the mark line up (the angle for this full cross piece should ideally be about 36 degrees but that angle can change based on the size of your little baby gate so make sure to go off the measurements you’ve personally taken).
Once everything is checked and double checked you can use your miter saw to make the cut… or if you don’t have a miter saw you can use a small handheld saw to make the cut. A hand held saw can be less accurate so if the piece doesn’t fit perfectly you can sand the edge until you achieve that perfect fit.
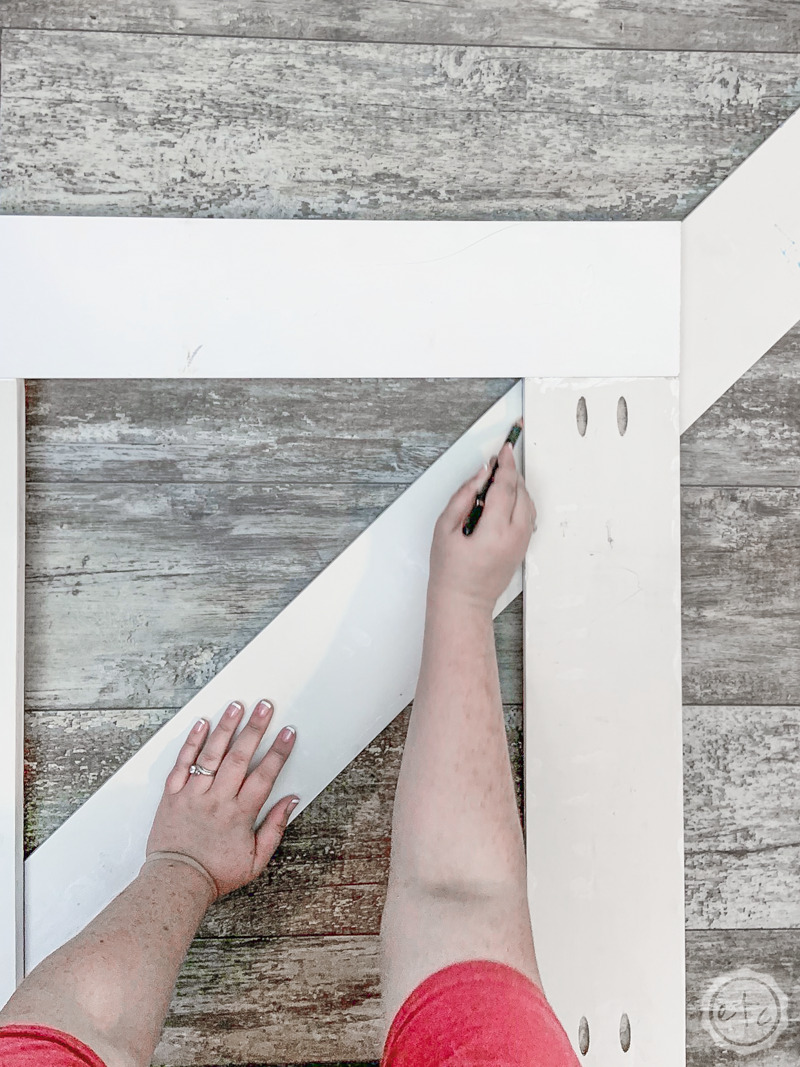
Once the full cross piece is cut you can put it into place and then repeat the process on the other side for the two smaller cross pieces. Since we’ll need two seperate pieces this time (instead of one long cross beam) we’ll have two different angles: the 36 degree angle for the corners (same as the first board) and a smaller 18ish degree angle for the middle (the two parts right up against the cross x).
Now I know what you’re thinking “but the middle parts look straight! I have to cut an angle for those as well?” Yes… they’re not quite straight once you have everything in place so instead of second guessing simply mark both sides and cut along the marks. Then you know they’ll fit together.
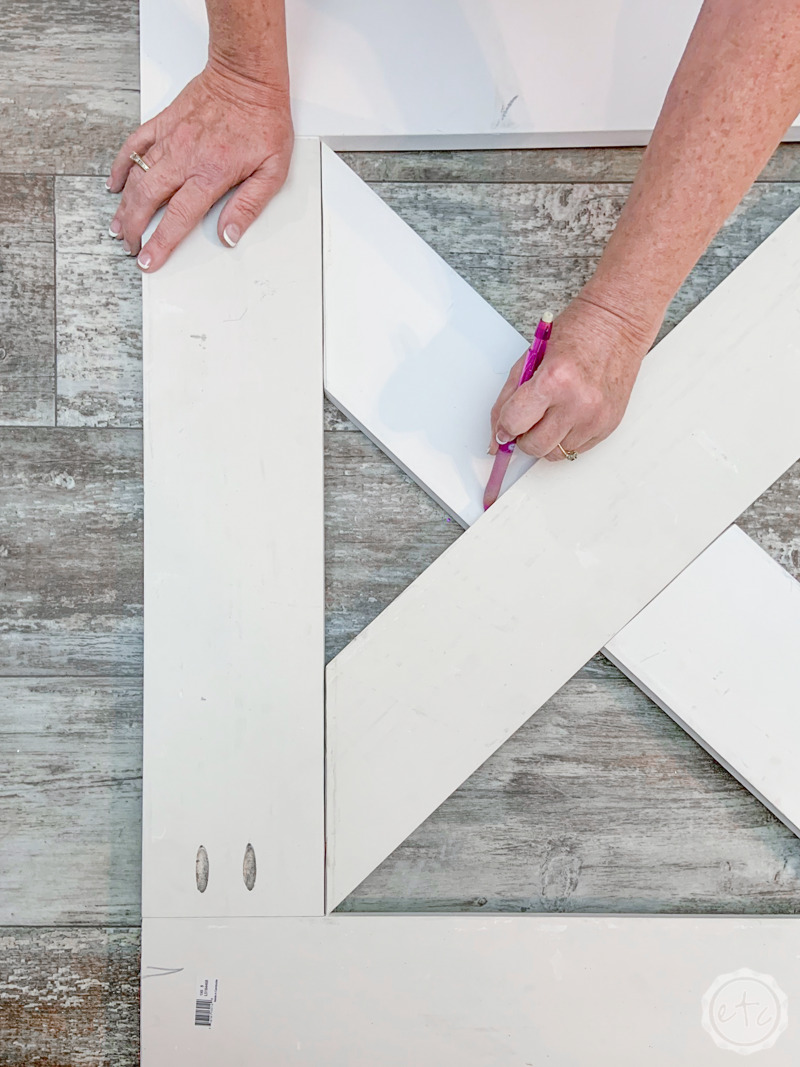
Once everything is cut you can put it together… and while pocket holes would strengthen these pieces as well… mine fit together so snugly I decided they weren’t needed. Instead I moved straight on to my dog gate sandwich (which is what I’m calling putting the back and front layers together).

Step 5: Attach the Front and Back Layers
Okay guys… it’s nail gun time! To put together our little sandwich I broke out my 18 gauge nail gun and a few 1 inch long brad nails. Then I lined both pieces up nice and straight (making sure that they’re both facing front)… then it’s literally boom, boom, boom.
I added nails along the top and bottom of the door, along both sides and all the way across both of the cross beams in the x. Just make sure that you’re going through the back layer and into the front layer or else your brad nails will come through the front of your gate and be visible… which would kind of defeat the point.
We’ll add spackle to cover all of these little nail holes in a minute so if you don’t feel like it’s sturdy enough just keep adding brad nails… but keep in mind that the more holes you make the more holes you’ll have to spackle.
Last but not least you can stand the entire piece up and attach the top rail… this little guy is optional but it really helps tie the whole thing together. I simply used my nail gun to attach it… nails allllll down the length really hold it together!

Step 6: Detail the Back with Wooden Pegs and Spackle
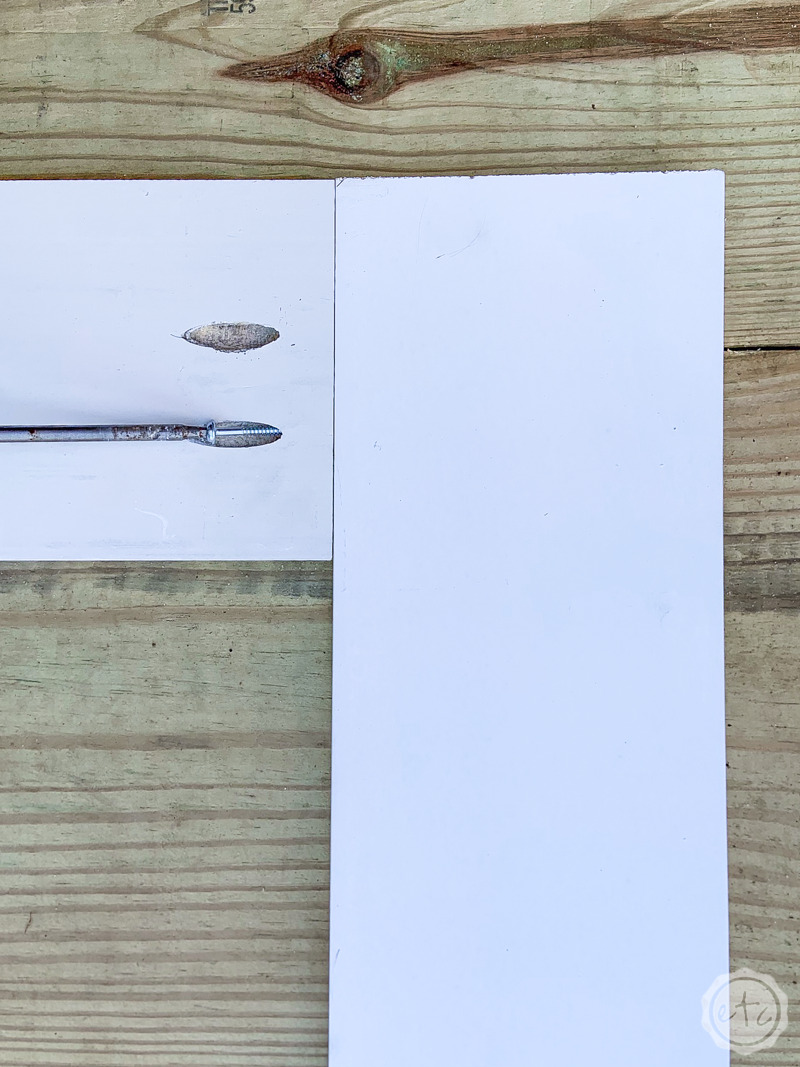
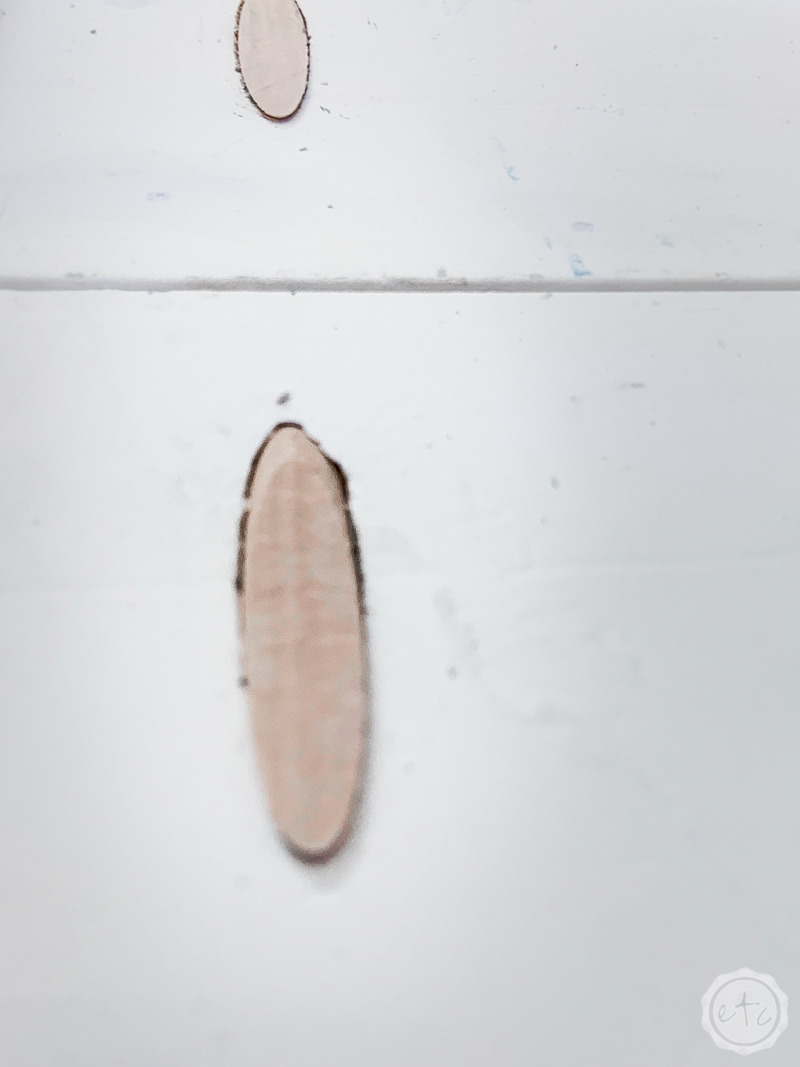
Speaking of spackle… let’s fix this baby up shall we? The best part about pocket holes is that when you’re finished it’s like they were never there. I took little paint-ready wooden pegs and filled each and every pocket hole on both doors.
Most of the pegs went in clean and didn’t come back out but a few needed a little persuasion (I grabbed a rubber mallet for that!) and a few needed a little help (I grabbed some wood glue for that). You’ll notice that once they’re in they are not flush with the board… instead they stick out from the surface.
Which I understand but it’s still a pain in the booty.
See how far this little wooden peg sticks out?

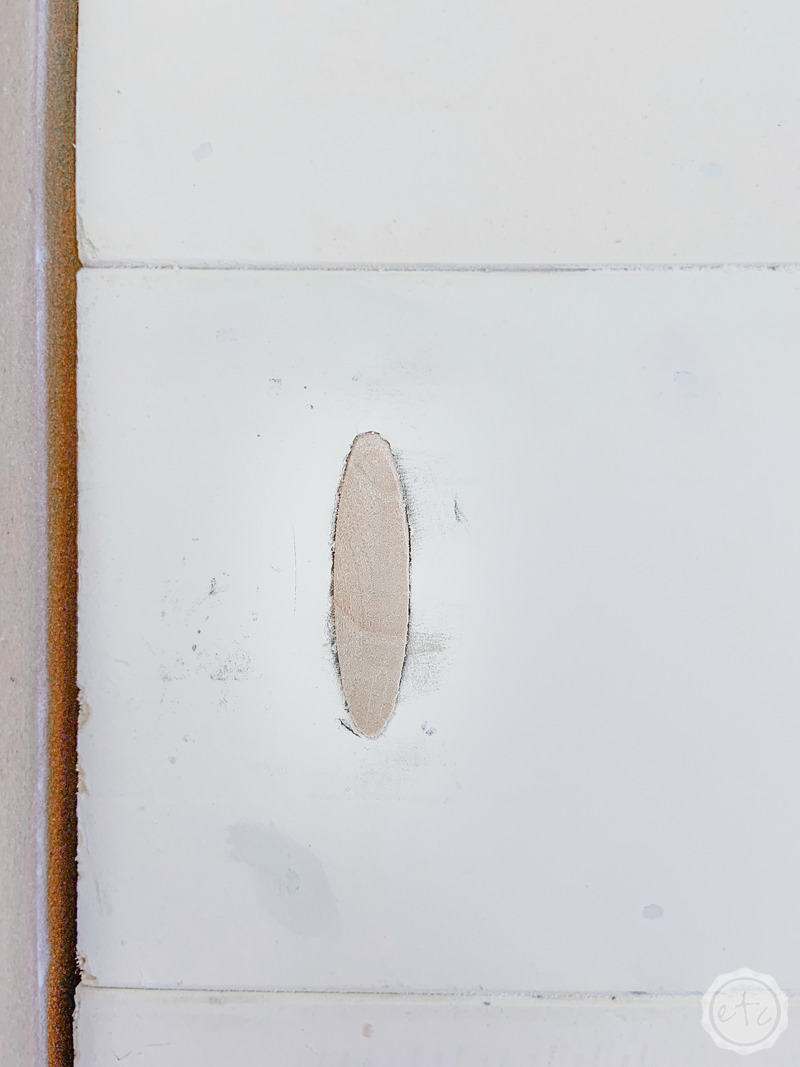
This is where your mouse sander will come in handy… go ahead and hit allllll of those pegs with your handheld electric sander until the entire surface is smooth.
Smooth as a babies bottom y’all.
Then you can use a bit of spackle to fill any gaps that are still showing around the wooden pegs.
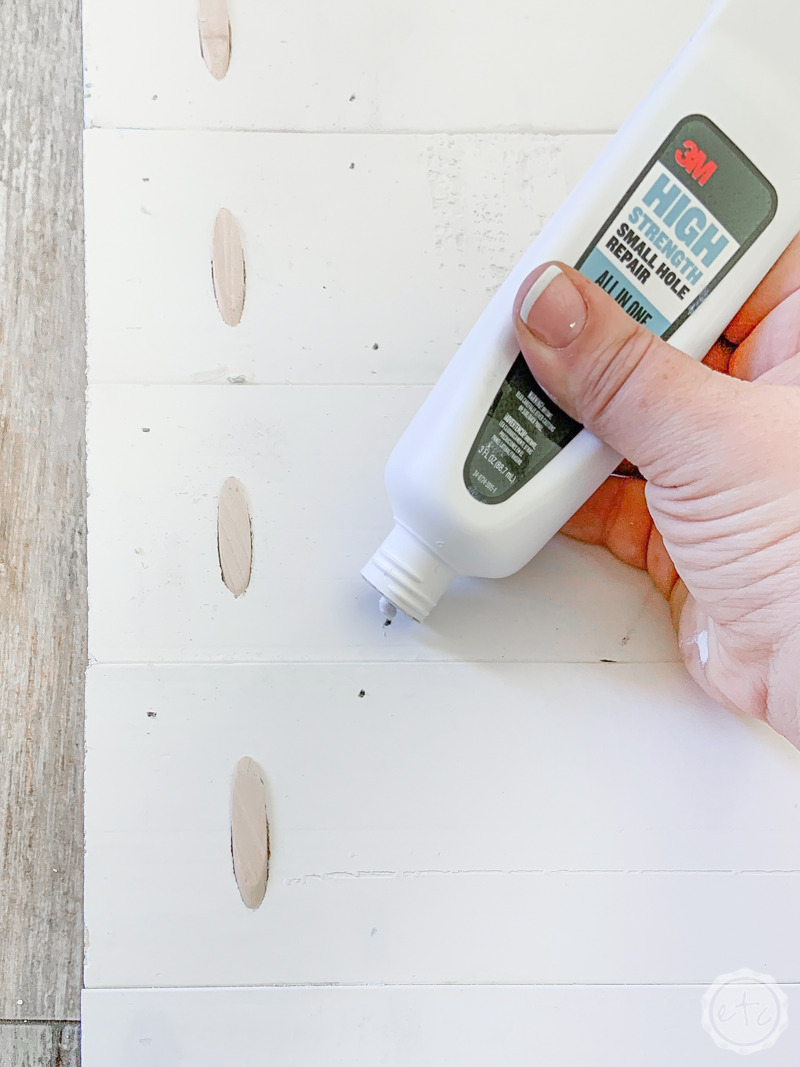
Last but not least we have all. the. nail. holes. And since they’re super tiny (and there are a lot of them) this may take you a minute. Luckily it’s not necessarily difficult.
Simply fill each of the nail holes with spackle and then sand it smooth (or rub your finger over it until it’s smooth… these are little holes so that’s usually good enough). Work your way all the way around the dog gate until every single nail hole is filled… since they’re so tiny they should be dry pretty quickly.
And then we can paint!

Step 7: Paint the Door!
This is where the magic happens!
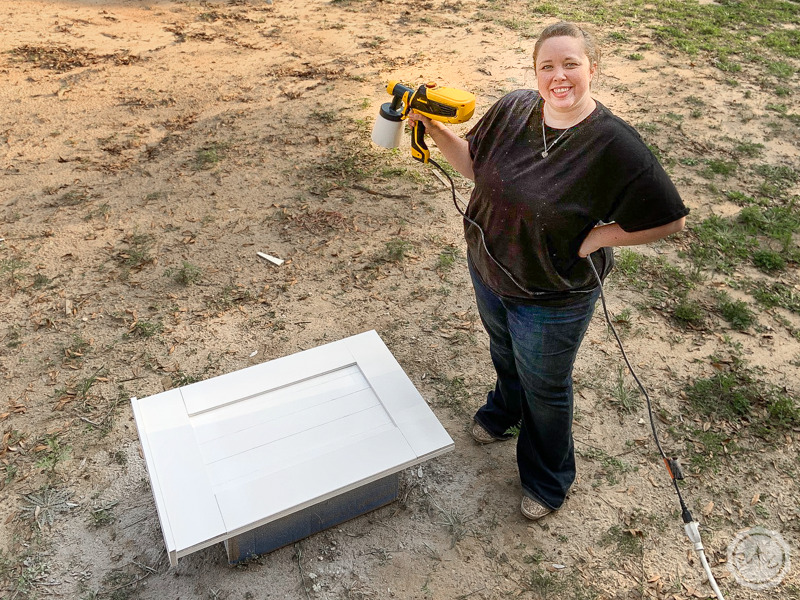
Since we’re using primed wood it doesn’t take too much effort to paint this little door… in fact I grabbed my Wagner Flexio sprayer and was able to put a good covering coat on the back, let it completely dry, flip it over and coat the front, then let that dry… all in 30 minutes.
Which is kind of my favorite.
If you’ve never used a paint sprayer before the Flexio makes it super easy… especially since you don’t have to thin your paint in order to spray it. Simply fill up the cup with your paint (I used linen white chalk paint) and make sure your piece is off the ground (hello old box) and in a place where it’s ok to spray the ground.
If you don’t have a place you can paint (concrete or grass isn’t great…) then a little spray tent is your next best solutions. I love these things for spraying at my Mom’s house (she would kill me if I got paint near her garden).
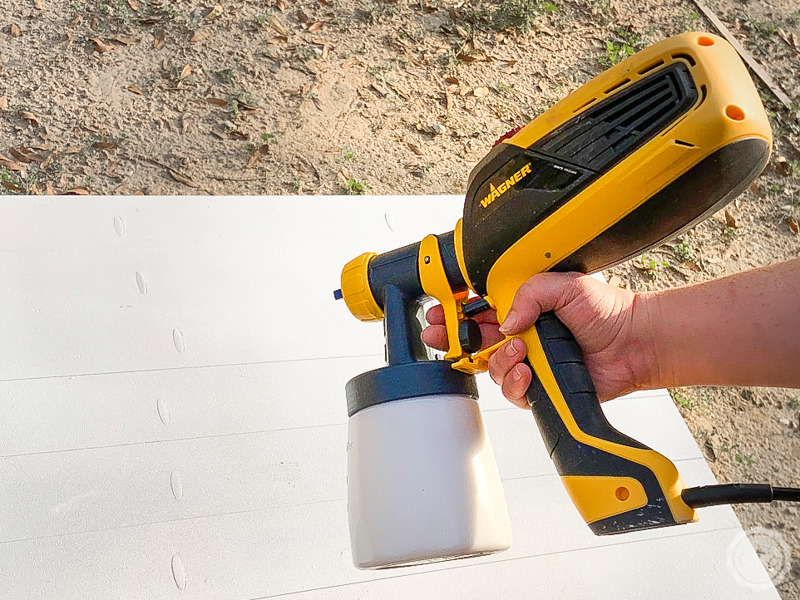

Then it’s time to start spraying! The nozzle at the front of the sprayer will control whether the “fan” of paint will spray vertically or horizontally… when you’re spraying down the front (or back) of the piece you want the nozzle to spray paint horizontally (so that you cover more distance). Then start to spray in slow even strokes… make sure to hold the sprayer about 8-10 inches from the surface of your piece and spray from edge to edge.
It’s always best to start in the air above your piece and then spray all the way off the edge to the air below your piece… this makes sure that you don’t hold the sprayer in one spot too long and get a puddle of paint. Slowly keep making passes up and down your piece, overlapping your spray pattern until the whole piece is done.
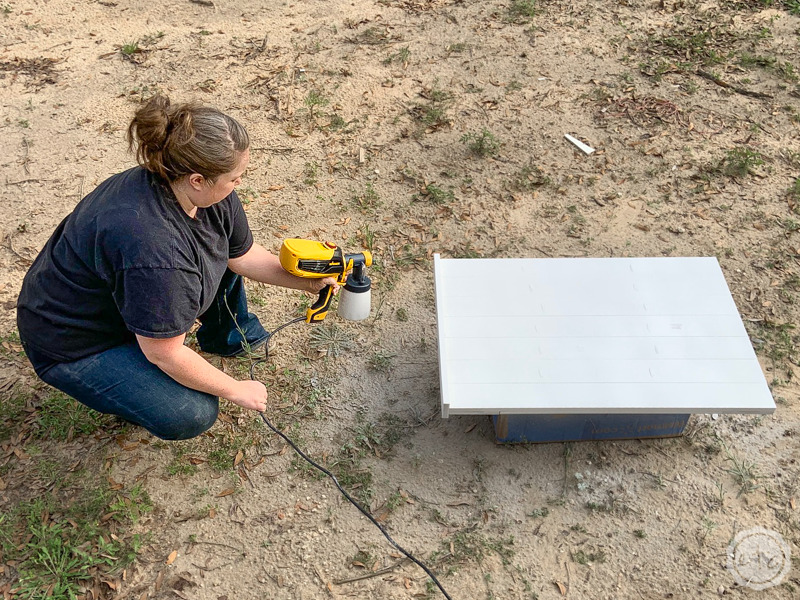
Then hit the sides, underneath the top rail and on top of the top rail. Then leave your piece to dry for about 10-15 minutes… then come back, flip it over and do the other side!
Keep in mind that if it’s a more humid day you might need to wait a little longer for your piece to dry, just double check that your piece is dry to the touch before you flip it over!
Once you’re done don’t forget to clean your sprayer out and put it away… the cleaner you keep it, the longer it will live!

Step 8: Attach the Hardware
We are so close to the finish line y’all… I can taste it!
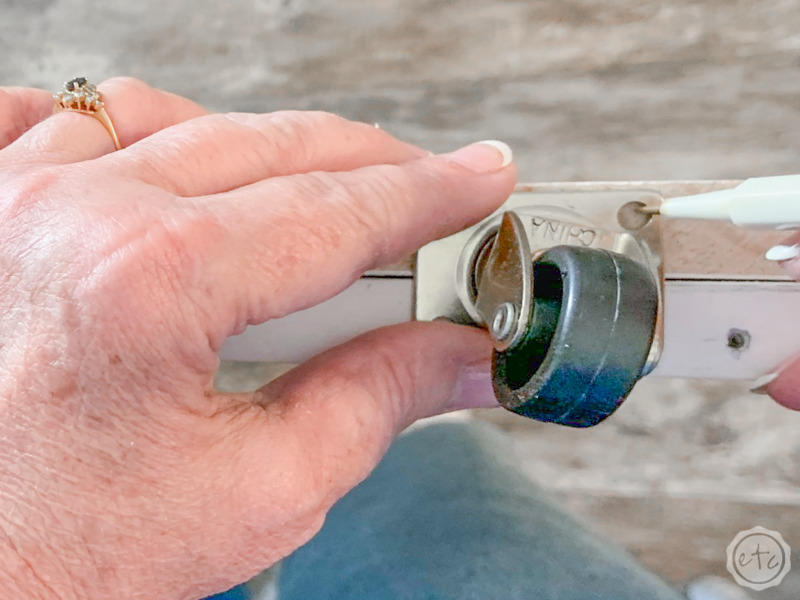
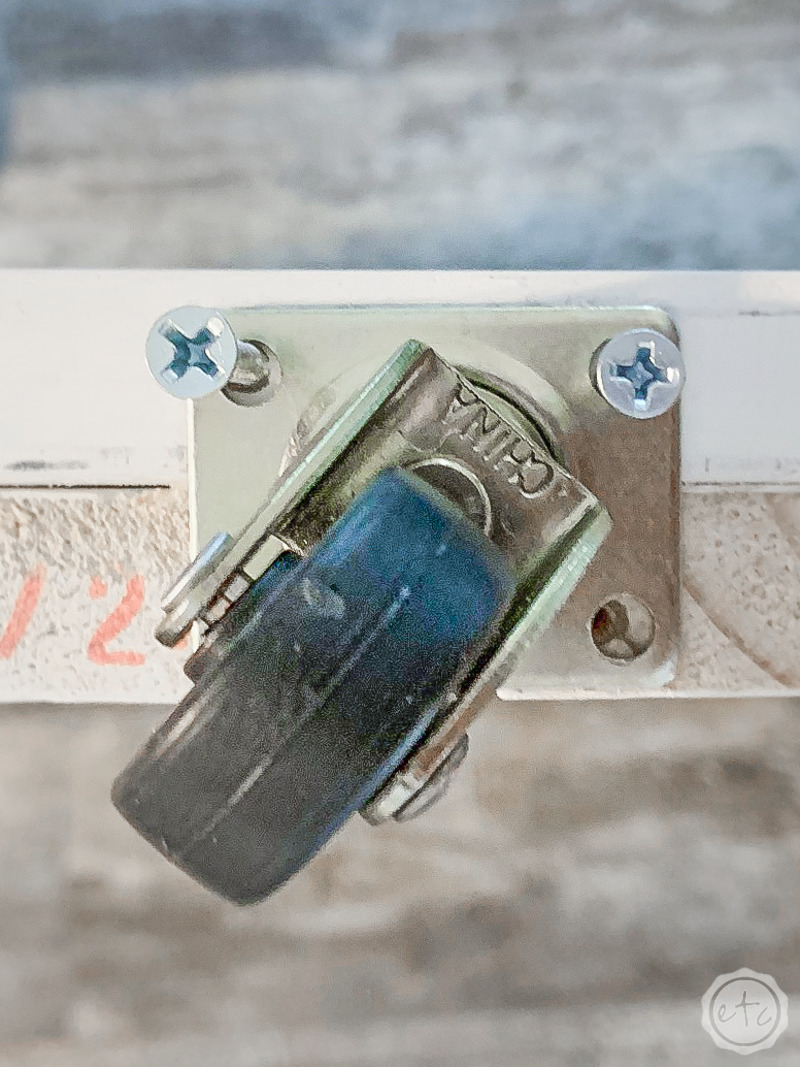
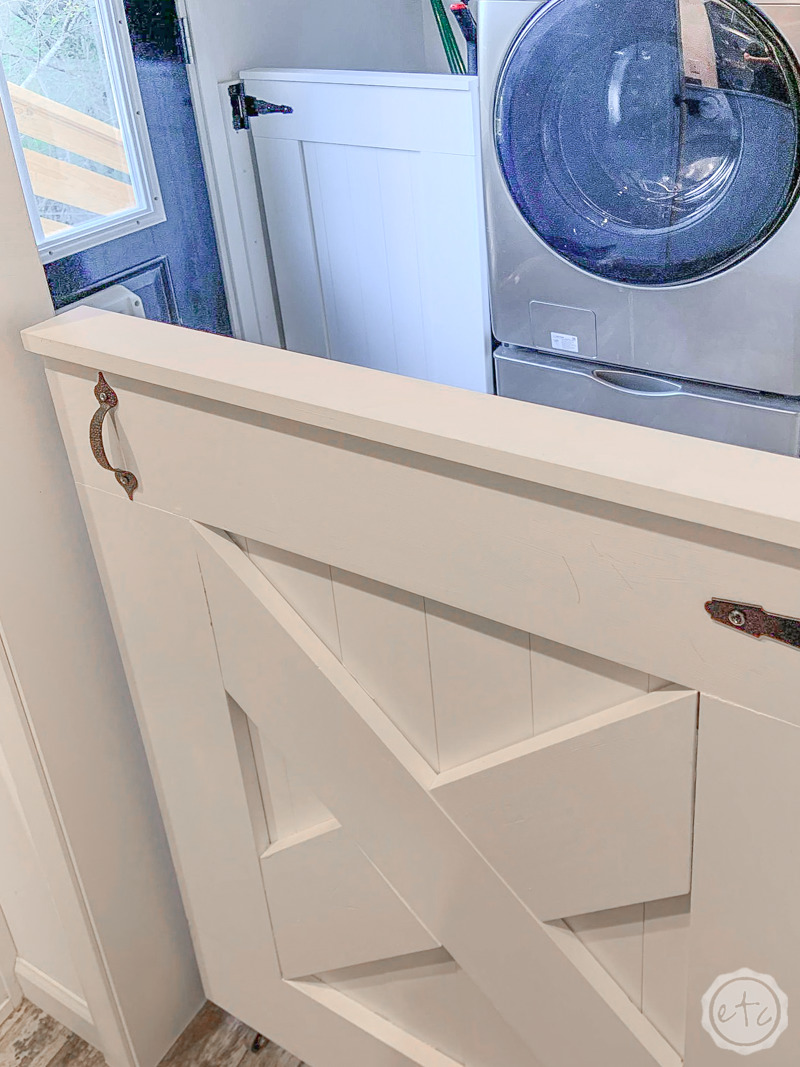
Now that our piece is painted let’s bring it inside… where we can attach all of the hardware. In this case that’s two wheels on the bottom, a handle on the front, two hinges on the front and a locking latch on the back.
Most of the pieces were easy enough… I simply placed the wheels on the bottom (making sure they were equally spaced out) marked the holes, pre-drilled them (don’t want to split the wood!) and then used the pre-packaged screws to attach the little wheels to the door.
The handle was the same way… and even the hinges were easy. I placed one hinge at the top and one at the bottom… making sure they were evenly lined up with the horizontal front pieces.
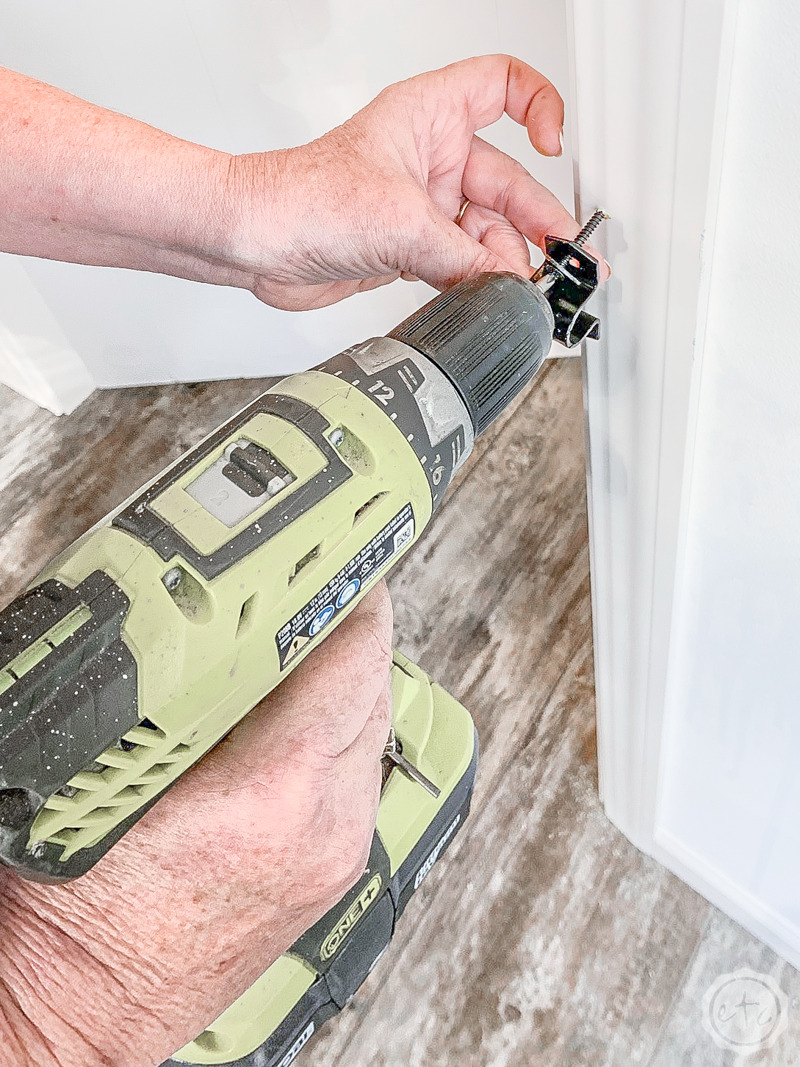
Then it’s time to attach the hinges and gate latch.
For these I was able to attach the front to the gate laying down… then I had to go place the gate in it’s new home (my laundry room doorway) to actually install the hinges (and ultimately the door).


Step 9: Hang the Dog Door
Ready for the door? This is the last step so at this point you’ll get your first look at how the door is actually going to look!
Once it’s in place and you’re happy with how it looks you can mark the screw holes of your hinge onto the doorway… then pre-drill and attach the hinge using the screws that came in the package! They should be pretty darn strong!
You also may need two people depending on where you’re putting your door and how coordinated you are… I held the door up while Mom attached the screws to hold the entire door to the door frame.

Then go around to the back of the door and attach the gate latch… making sure that the latch on the door lines up with the latch on the molding! You want to be able to actually close and lock this door… otherwise it’s not much help to us!
Luckily the latch itself is pretty big so this was a fairly easy step.
Then you’re done! Now you can celebrate by putting your doggo’s in the back room and going out for dinner. You deserve it!
Step 10: Enjoy!
Ready for all the pretty pictures?
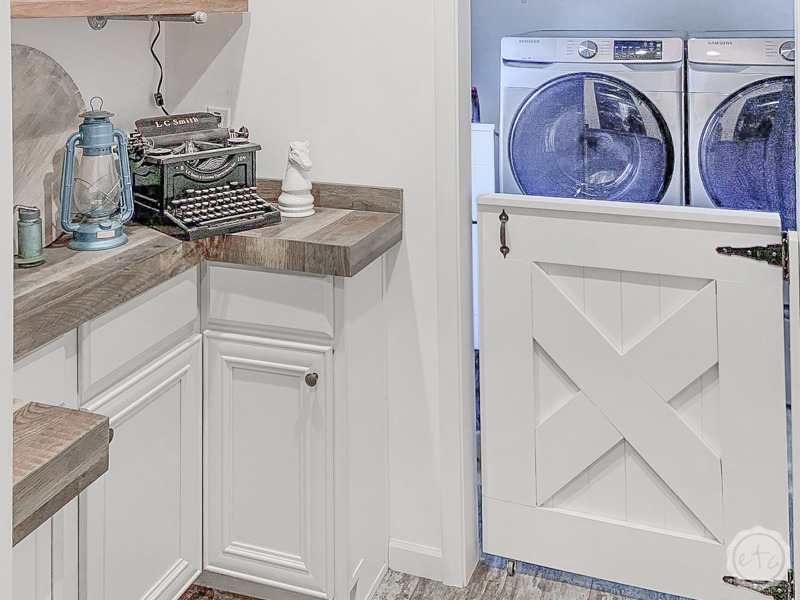
I absolutely love how this turned out… it’s one of my absolute favorite projects in the new house. And let’s be honest… I’m pretty proud that I made it myself and didn’t go out and buy a plastic baby gate instead!
Most people don’t even realize I made it and a lot of people think it came pre-installed with the house!
Nope!
Mom and I rocked the first one and I built the second one all by myself. Check it out!
Just a note: To adjust the width of the gate to perfectly fit your opening you can always cut one of your 1×4’s down to the proper size. I decided that wasn’t as *ahem* user friendly as I liked. Instead I cut an extra 1×4 to the height of the finished door and mounted it to the wall. This gave the gate added stability at the wall and extra width so it hung straight in the doorway. Score!


Speak of the devil… there’s the little trouble maker herself. Queen of mischief Cinnamon trying out the new door joints.
Don’t worry… our little diy dog door is pretty strong, she hasn’t broken out yet! Although I have had to take a magic eraser to this door a few times since she seems to think it’s the perfect spot to wipe her feet after playing in the mud out back.
Puppy paw prints everywhere.
Luckily the paint finish is pretty smooth… and the sprayer left the coverage perfect so I can just wipe it clean.
Score.


Leave a Reply