

This post is filled with affiliate links (to products I know and love!) for your convenience.

The weather’s getting colder, the pumpkins have appeared and now it’s time to start creating a few fall crafts! Which means a few fun Halloween SVG’s that we can turn into felt dog toys!
I know, I know… felt dog toys may not be home decor related but as my best friend pointed out they do end up displayed all over my house. So they’re technically decorating my home! Plus if you’re looking for even more home decor I’ve got you covered with a fun little round-up of Halloween DIY’S put together by a few blog friends of mine!
So if you’re in the mood for a few spooky decor ideas stick around… we’ve got you covered.
Halloween Projects!
- 20 Amazing and Easy Dollar Tree Halloween Crafts from Chas’ Crazy Creations
- Making Halloween Cupcakes Like Riding a Broom Stick from Life at Bella Terra
- DIY Jack O’Lantern Using A Lantern from Design Morsels
- Easy Halloween Dog Toys with your Cricut from Happily Ever After, Etc
- Setting a Fun Halloween Party Table from Celebrate and Decorate
- A Quick and Simple Fall Patio from A Life Unfolding
Supplies:
- Cricut Maker
- Rotary Blade
- Fabric Mat
- Felt (Black, White, Burgundy, Light Orange/Salmon)
- Fabric Fuse
- Scissors
- Stuffing
- Dog Toy Squeakers
- Cricut Access

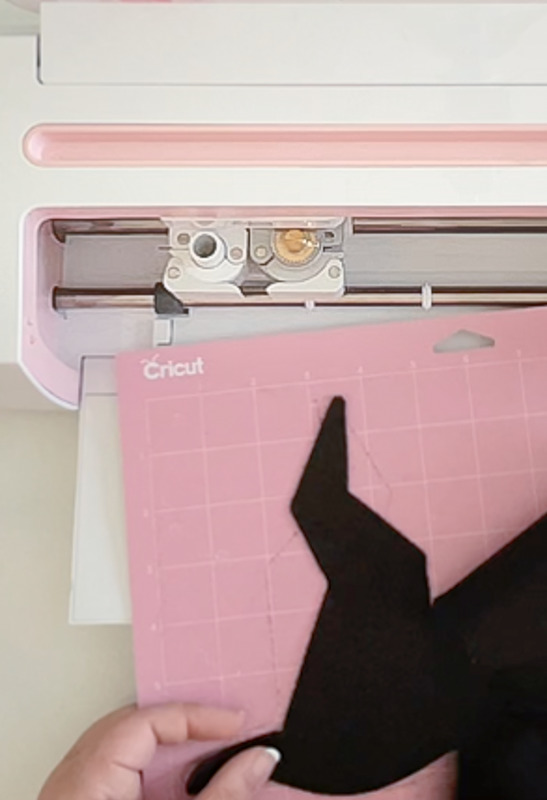
Step 1: Cut & Weed your Felt Shapes
Alright, let’s jump right into this! First things first… before we can make anything with our Cricut we need to upload our Hallowen SVG’s. So pop those babies into Cricut Design Space, set the material to felt, grab your rotary blade and let’s cut these babies out!
For these little babies I went ahead and modified the original SVG just a tad… merging the background into one solid layer, slicing out the details (like the mouth for the jack-o-lantern) so they could be an accent color and then duplicating the main solid layer and reversing it so that I’d have a layer for the front and back.
Although technically you could just cut two fronts and flip one over… it is felt over all.
Once your cut file is ready to go you can cut out your Halloween shapes… then weed all the excess felt off the cutting mat. Perfect!
Now you should be left with your fun shapes… just what we wanted.

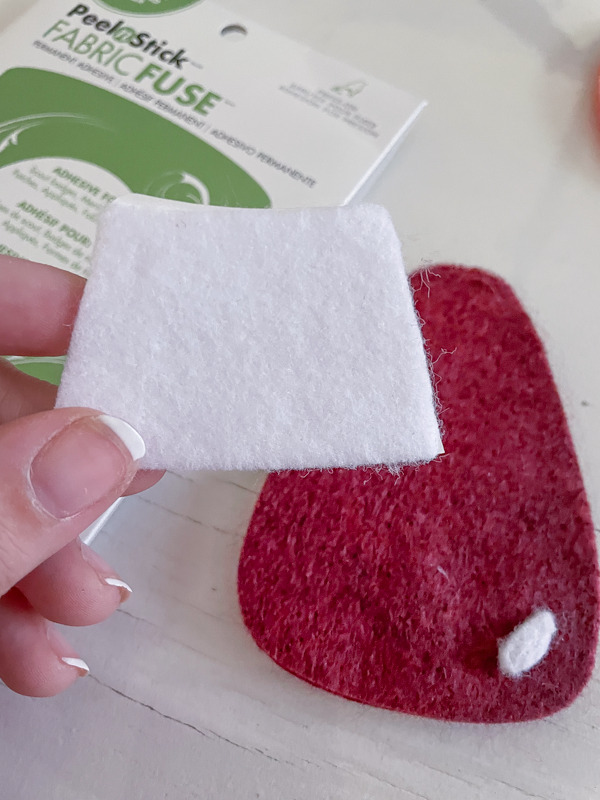
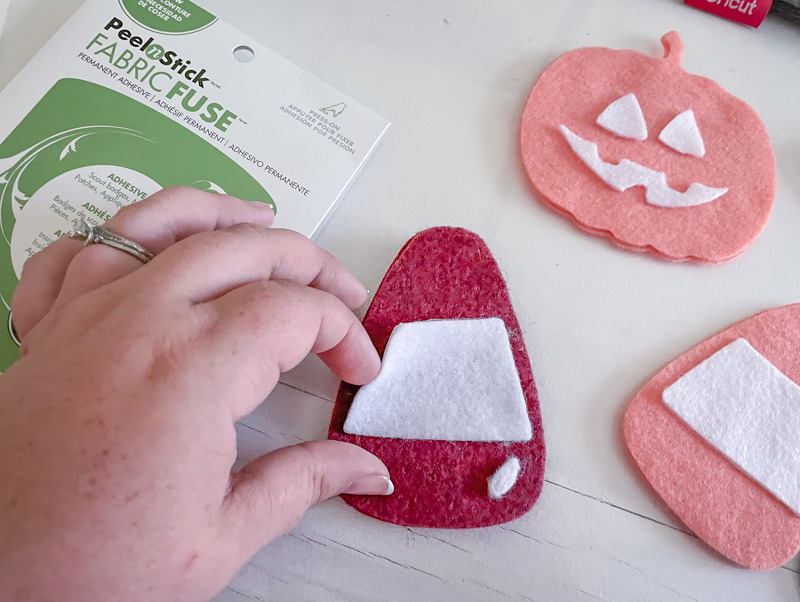
Step 2: Use Fabric Fuse to Attach any Details
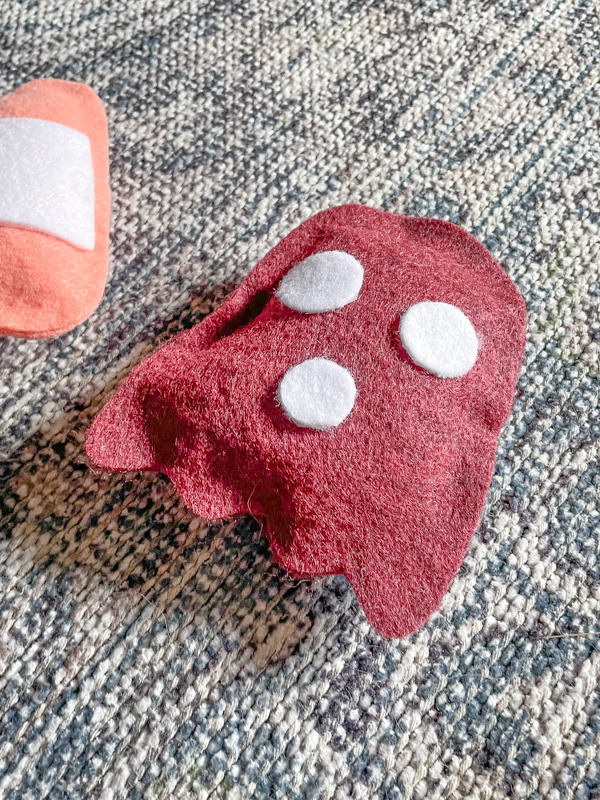
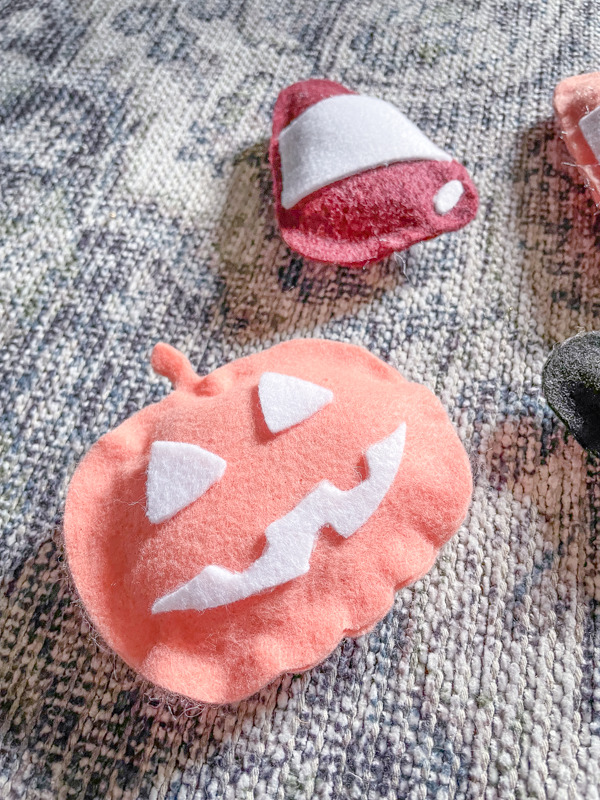
Let’s do the details! So when I say details I mean the highlights on the candy corn, the face on the pumpkin and the little eyes and mouth on the ghosty!
The easiest way I found to attach these was with fabric fuse. Simply peel one side of the fabric fuse and put your felt on it with the face side up. Now cut around the edges… then peel off the other side and place the sticky side down on the surface of your solid layer. Press firmly and volia… your little face is attached!
Now just rinse and repeat on all of your pieces and you’re good to go.


Step 3: Seal the Outside of the Shapes
Now that we have our shapes let’s seal them up! While you could stitch these I wanted to make them easy and accessible to those who don’t sew.
So instead I grabbed more fabric fuse!
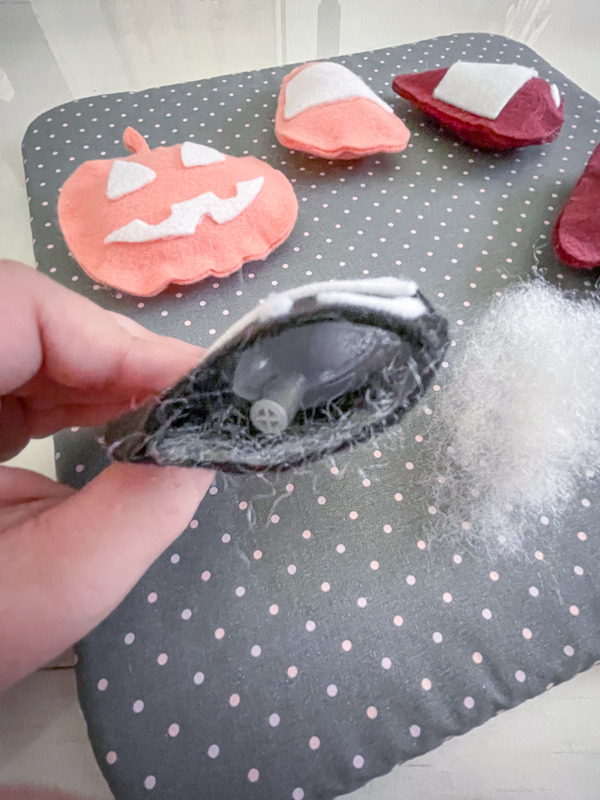
Of course, if you have a big dog, or one that’s particularly destructive you may have to sew but for my little dogs this works great! Start by cutting strips of the fabric fuse and applying it around the edges… but leave a small opening in the bottom where the squeaker can sneak in.
Once you’ve applied the fabric fuse go ahead and peel off the backing… then line up your front and back pieces before pressing them firmly together.
Volia! Now you have one piece with a small opening in the bottom.

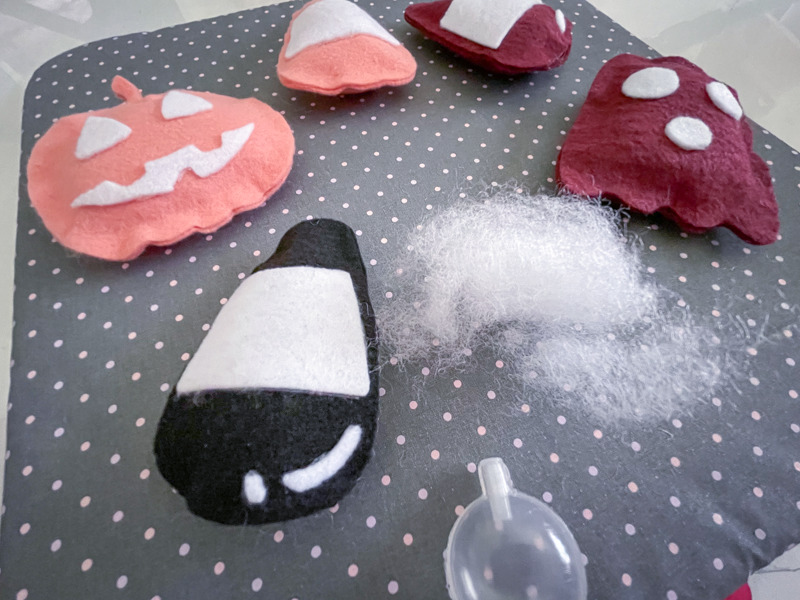
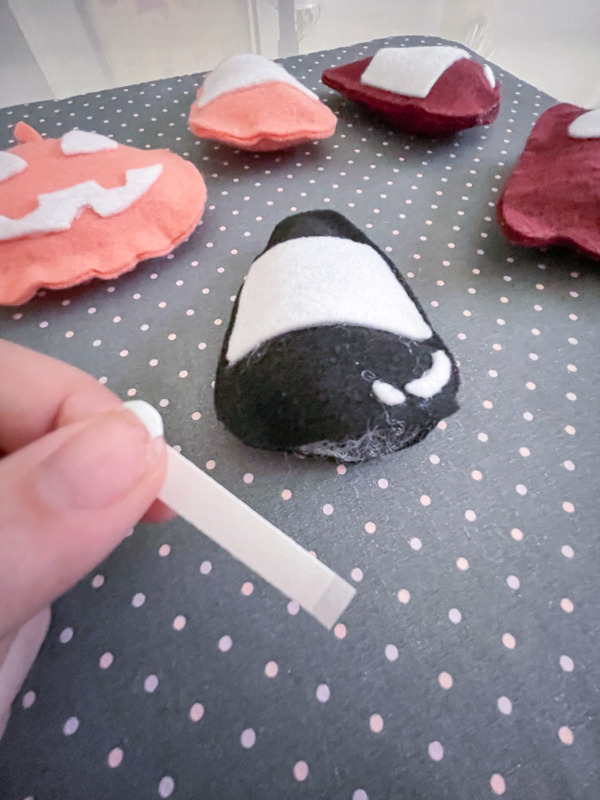
Step 4: Stuff the Toy with Stuffing and a Squeaker
This might be the best part! Although I tested the squeaker before I put it inside and the dogs were so confused. But I wanted to make sure the squeaker we were using wasn’t a dud! I mean how frustrating would it be to find a defective squeaker after you sealed it inside?
Anywho. Go ahead and add a bit of stuffing to your dog toy and then insert the squeaker… then fill the rest of the toy up with additional stuffing.
Just make sure not to over-stuff!

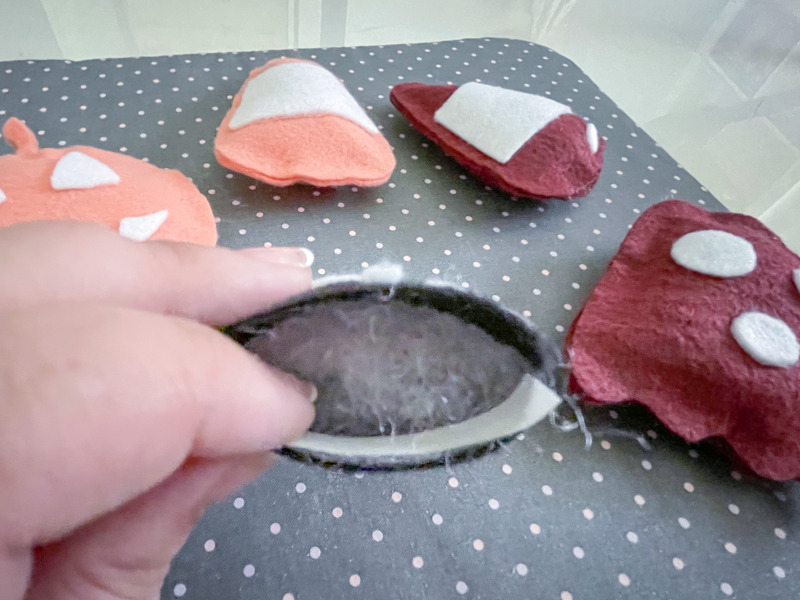
Step 5: Seal the Opening with Fabric Fuse
We’re so close to done!! We need one more piece of fabric fuse for the bottom… firmly press it to one side then remove the backing.
Now press the two sides together extra firmly and volia… you’re good to go.
One really cute Halloween themed dog toy coming up!

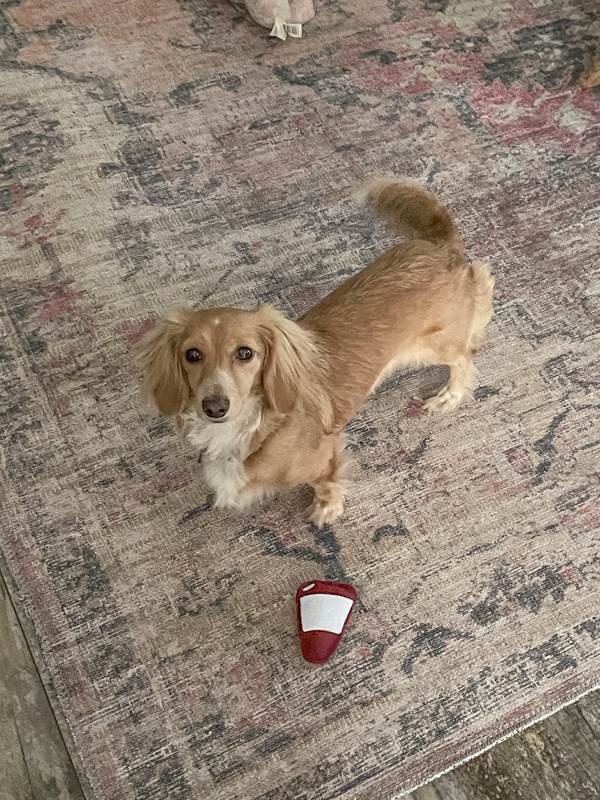
Step 6: Give to your Furry Friend to Enjoy!
All that’s left now is to give these little guys to your pups and watch the fun. My babies all enjoy a good squeaky toy but Sugar and Bitty definitely liked these the best.
It will be interesting to see which ones are their favorites over time!


These are cute as can be Betsy! Even my big dog wouldn’t tear them apart. She might lick them until the faces came off. But of course you lost me at “merging the background into one solid layer”. I guess I have A LOT to learn! These are adorable and it looks like your babies love them! Happy Halloween month!