• House Tour
    • Reveals
  • About
    • Smith Life
    • Disclosure and Privacy Policy
      • Terms and Conditions
      • Store Affiliates
  • Contact Me
    • Want a Button?
  • Shop
    • Floral Printable Planners
    • Paint eBooks and Packages
    • Wedding Binders & Extra Printables!
    • Planner Bundles
    • Planner Accessories
    • Home Decor Printables!
  • Cart
    • Bloglovin
    • Facebook
    • Instagram
    • Pinterest
    • Twitter
    • YouTube

Happily Ever After, Etc.

Creating Our Own Fairytale

  • Happily Ever After, Etc.
  • Home
  • Home Decor
    • My Home
    • Paint
    • Before and After
    • Tablescapes
    • Mood Boards
    • Furniture
  • DIY & Crafts
    • New to Cricut – Start Here
    • Cricut Projects
    • Resin
    • Scrapbooking
  • Organization & Planning
    • Cricut
    • Organization
    • Planner
  • Holidays
    • Christmas
    • Halloween
    • Thanksgiving
    • Easter
  • Wedding
    • Cricut Wedding Projects
    • Free Wedding Binder
    • Bride Bag- The Ultimate Wedding Planner
How to Cut Glitter Vinyl with the Cricut

How to Cut Glitter Vinyl with the Cricut

Hey y'all,

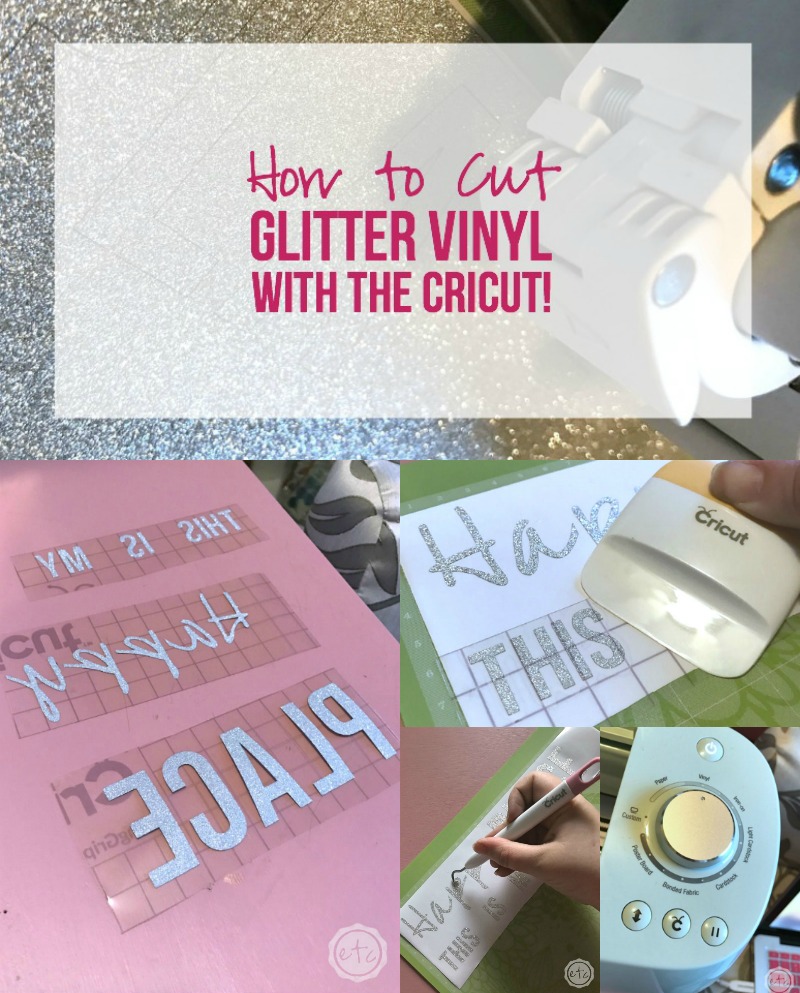
It’s been a few weeks since I finally put together my craft room and busted my brand new Cricut out of the packaging! I had a blast working on my first project (a stencil for my rose gold happy planner)(yes the rose gold part is important… I am on a very important mission to cover the world with rose gold after all!) but now it’s time to get to the good stuff. The reason I wanted a Cricut in the first place… learning how to cut glitter vinyl.

Cutting glitter vinyl… or any vinyl for that matter… gives me the ability to make new pillow covers, wine glasses, window clings, curtains! You get the idea… the list is literally endless.

So I broke out my very first role of vinyl and sat down to figure this thing out.

It was way easier than I thought it would be!

Looking for a bunch of posts on DIY & Crafts? I’ve got you covered!
Click here to see all of my how to DIY & Craft posts in one place!

How to Cut Glitter Vinyl with the Cricut

Supplies:

  • Cricut Explore Air 2
  • Fine-Point Cutting Blade
  • Standard Cutting Mat (that’s the green one!)
  • Vinyl
  • Weeding Tool
  • Transfer Tape
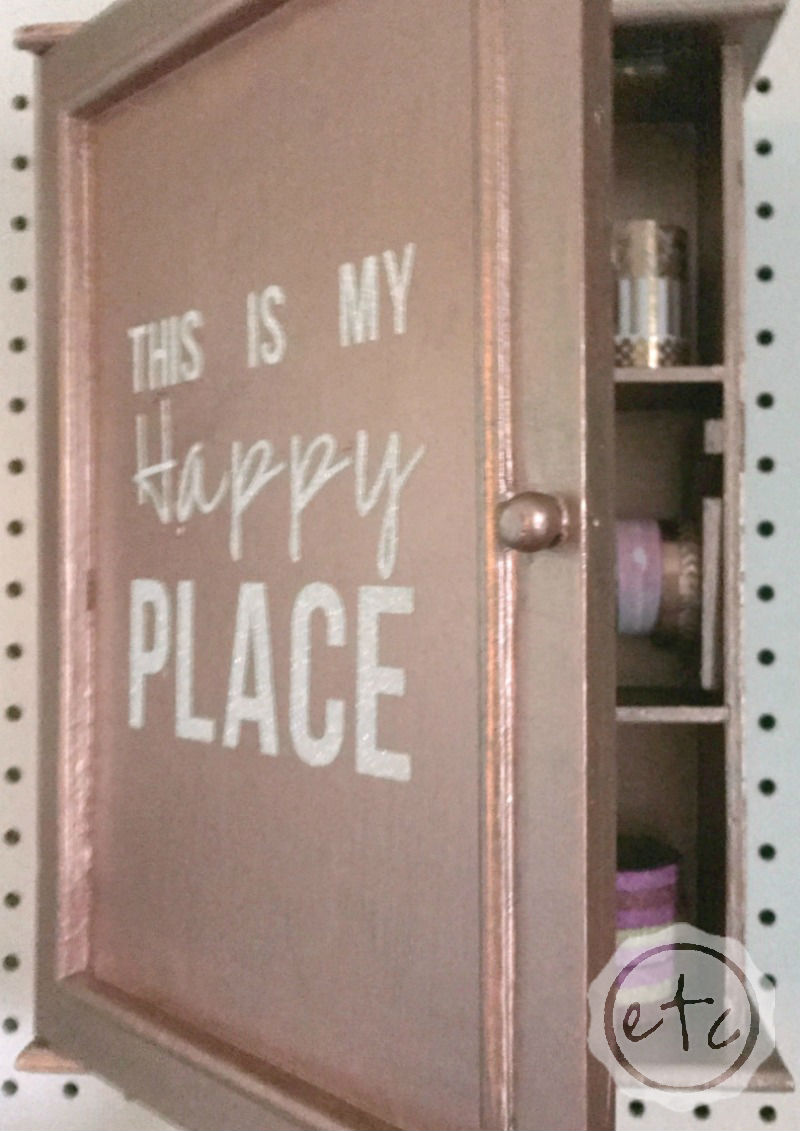
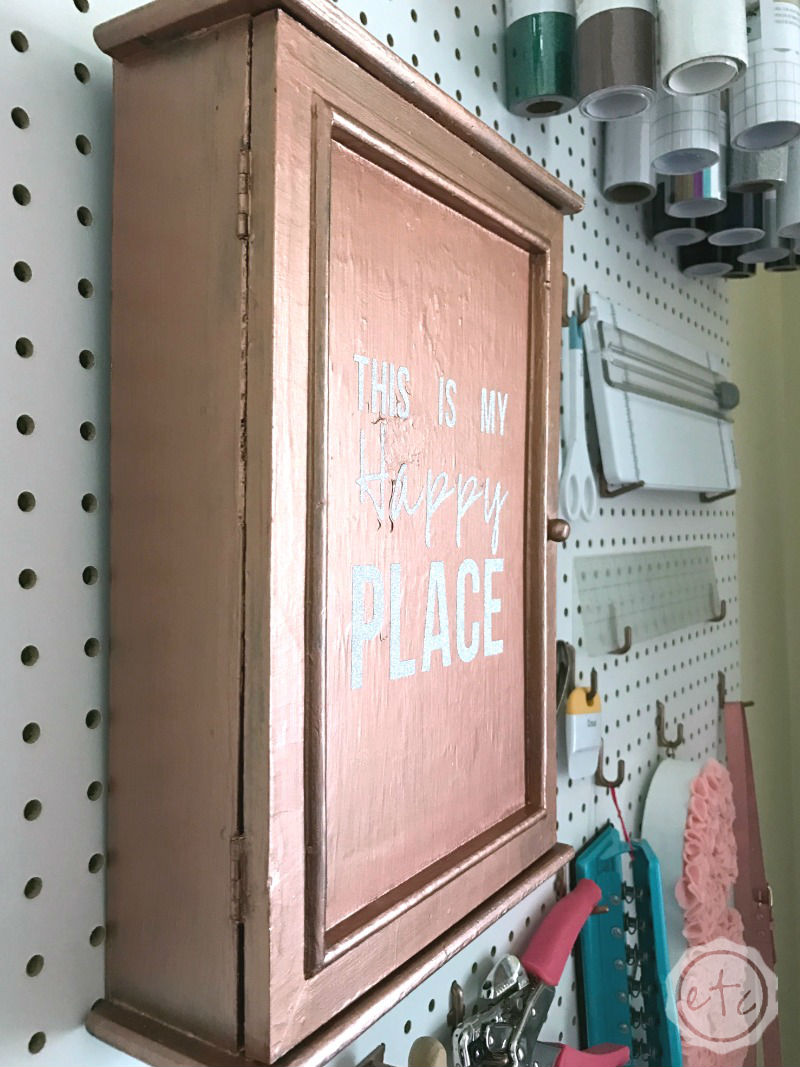
  • The object you are putting your vinyl design on (I used a wooden box that will house my washi tape in my craft room!)

Once you have all of your supplies set up it’s time to get cracking! I’m going to skip all of the basic steps… like how to load a design in Cricut Access or load and cut your vinyl. If you need help with all of those steps pause for a minute and go read through my first tutorial!

We’ll wait.

Okay now that we have our design up and running it’s time to load our vinyl.

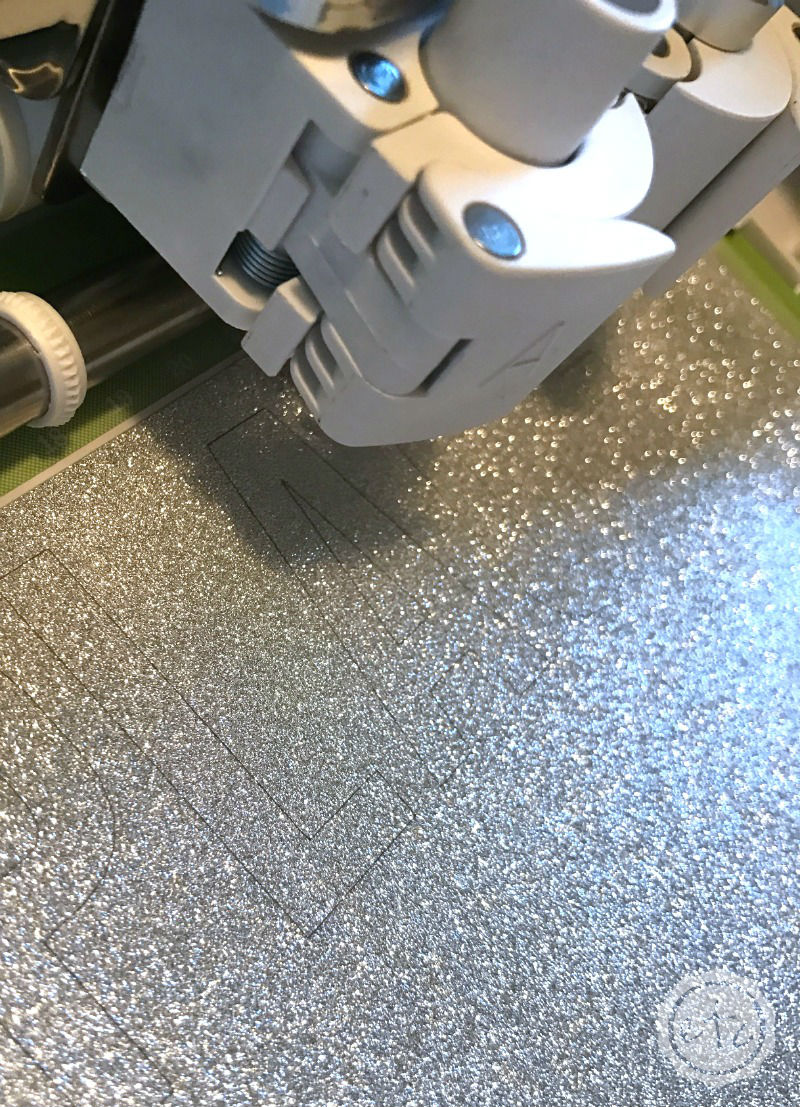
Step 1: Load and Cut

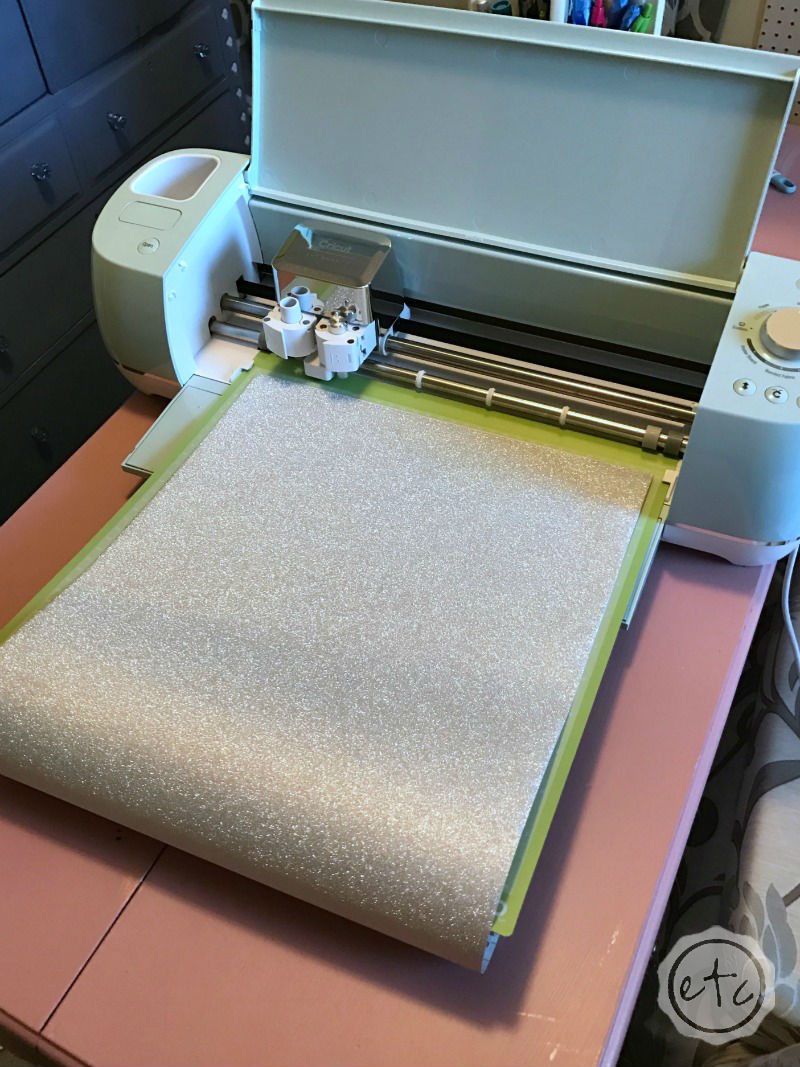
The very first step is to load your vinyl onto your cutting mat. For my last project I cut exactly the size stencil I would need and loaded it at precisely the right place on the cutting mat… and the numbered grid makes that completely possible.

However with vinyl you never know exactly how much you’ll need (if you’re using the space saving feature where it crams all your icons and letters on the vinyl as closely together as possible) so I read a handy little tip… place the vinyl on your cutting mat on the roll. Don’t cut a perfectly portioned piece and place it precisely in the right spot. Simply place your vinyl on the cutting mat and let the roll rest on the edge of your surface. Then once your finished you can cut off the excess and roll up the rest of your vinyl for next time!

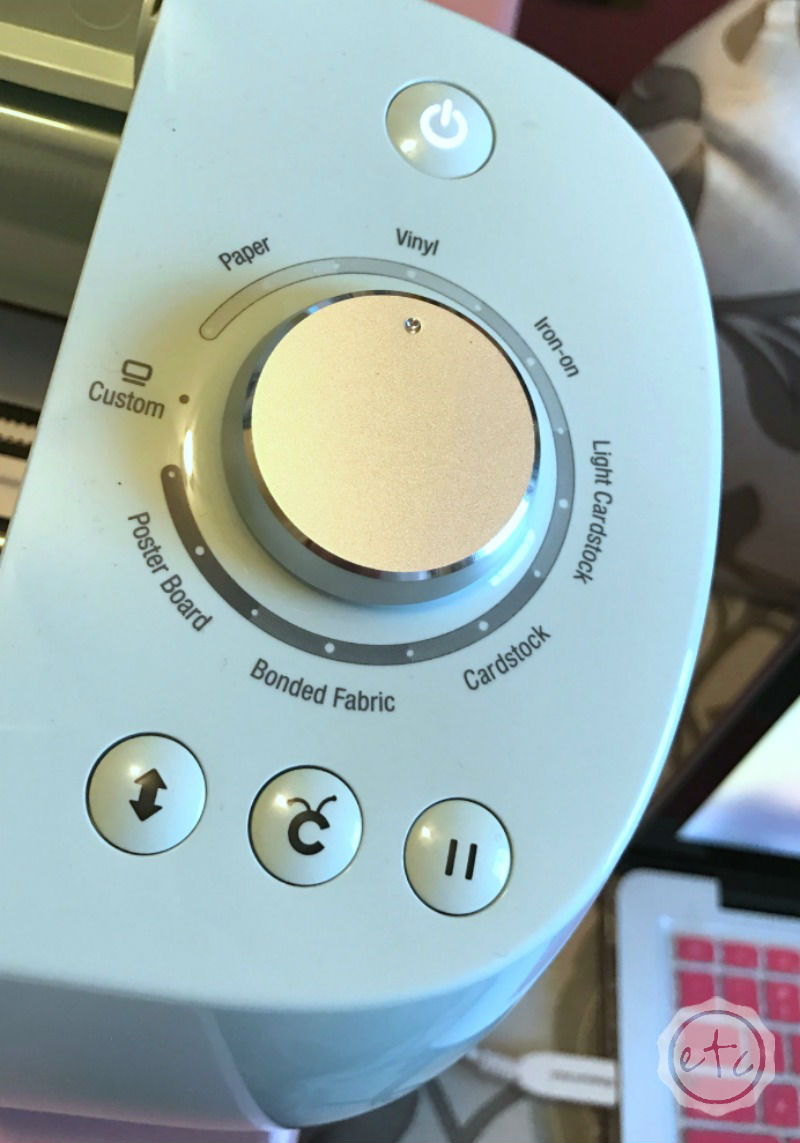
Now it’s time to cut! Make sure your machine is set on vinyl and then watch the magic happen.

Need help picking your perfect machine? I’ve got you covered!
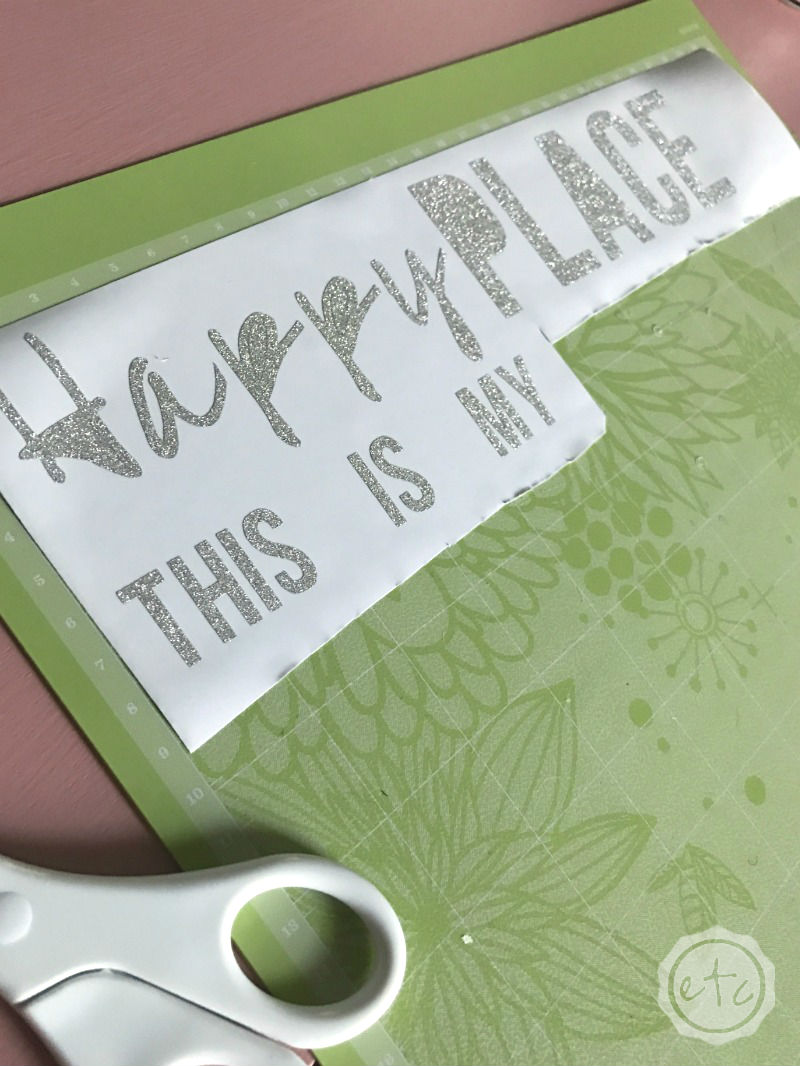

How to Cut Glitter Vinyl with the CricutHow to Cut Glitter Vinyl with the CricutHow to Cut Glitter Vinyl with the Cricut

Step Two: Weeding

No we’re not headed out to the garden! Weeding is when you remove any excess vinyl from the cutting mat so that only your final design remains. Basically you’re peeling up all those little extra bits and bobs from the final design… you should be able to do this easily by just peeling up the excess vinyl.

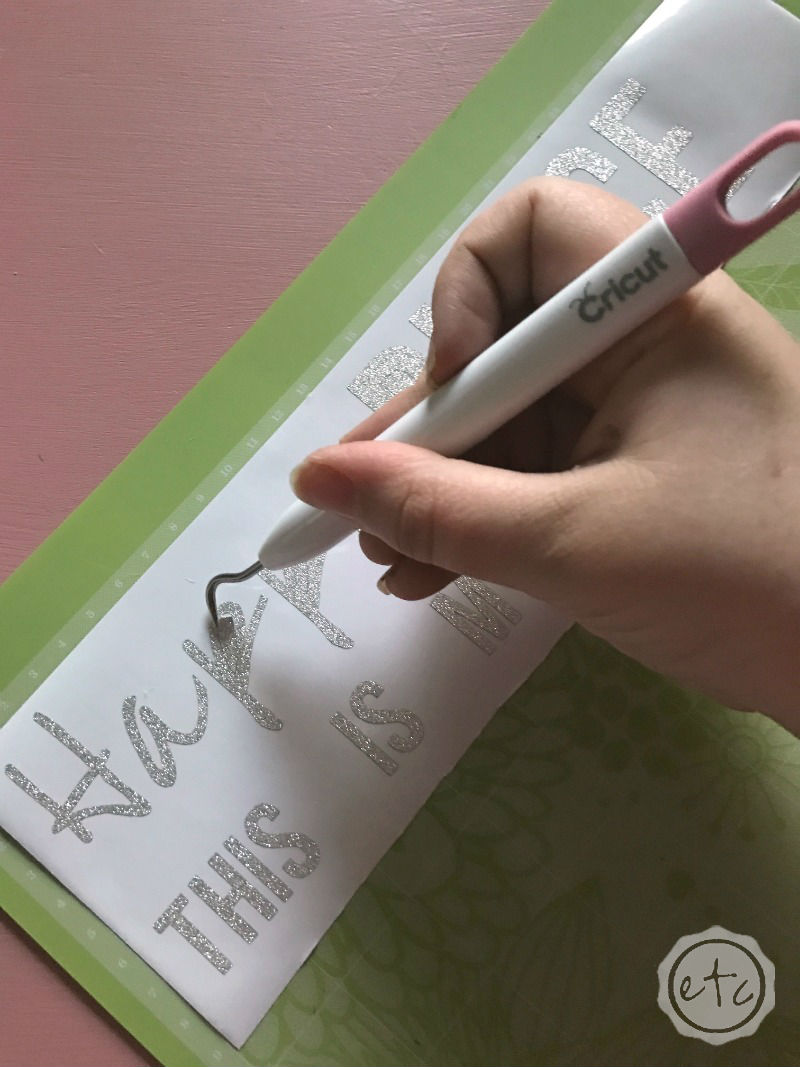
If you have the Cricut starter pack you should have a tiny awesome weeding tool to help get any small pieces like the circle inside the “p.” (If not grab one here!) Just take a look at how this looks down below.

When you are done you should have just your final design remaining on the mat.

How to Cut Glitter Vinyl with the CricutHow to Cut Glitter Vinyl with the CricutHow to Cut Glitter Vinyl with the Cricut

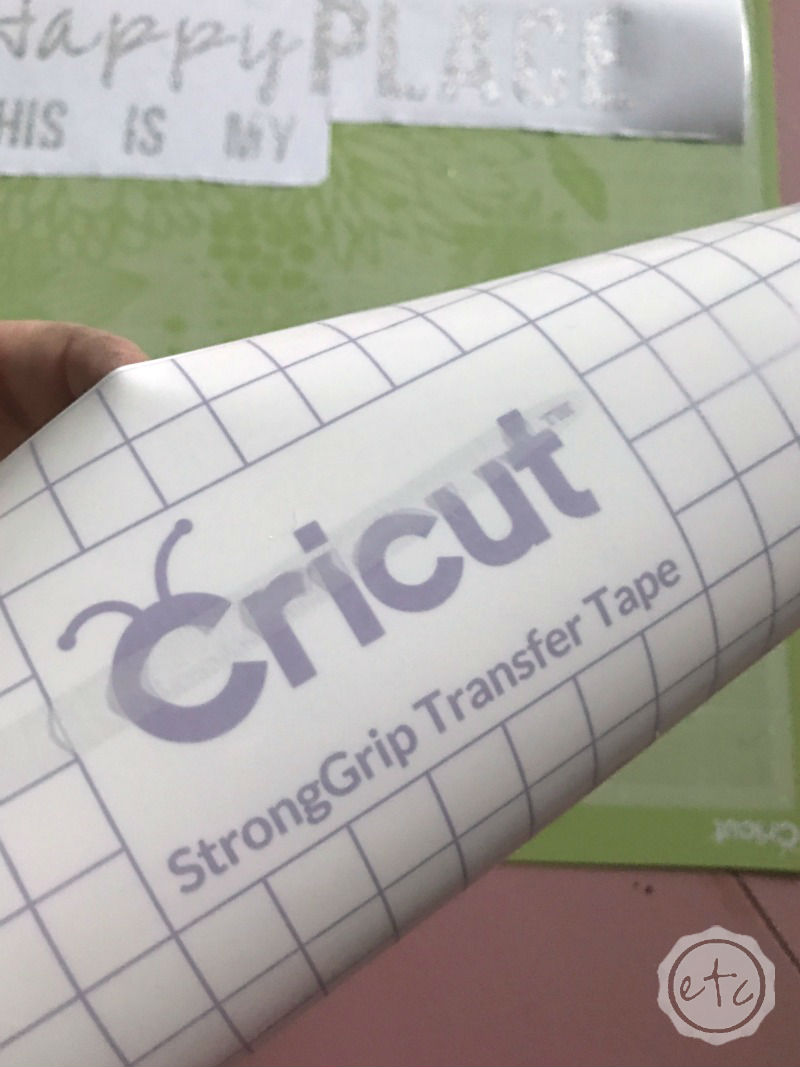
Step Three: Apply Vinyl Transfer Tape

Now it’s time for the magic to happen! (There’s a lot of magic in this post… sorry this whole cutting machine thing is still fascinating to me).  Basically transfer tape is the glue that keeps your whole design together… instead of using tweezers to slowly transfer each letter to your final piece transfer tape will transfer the entire image at once. So you don’t have to line up your design one piece at a time and hope it’s not crooked.

Score!

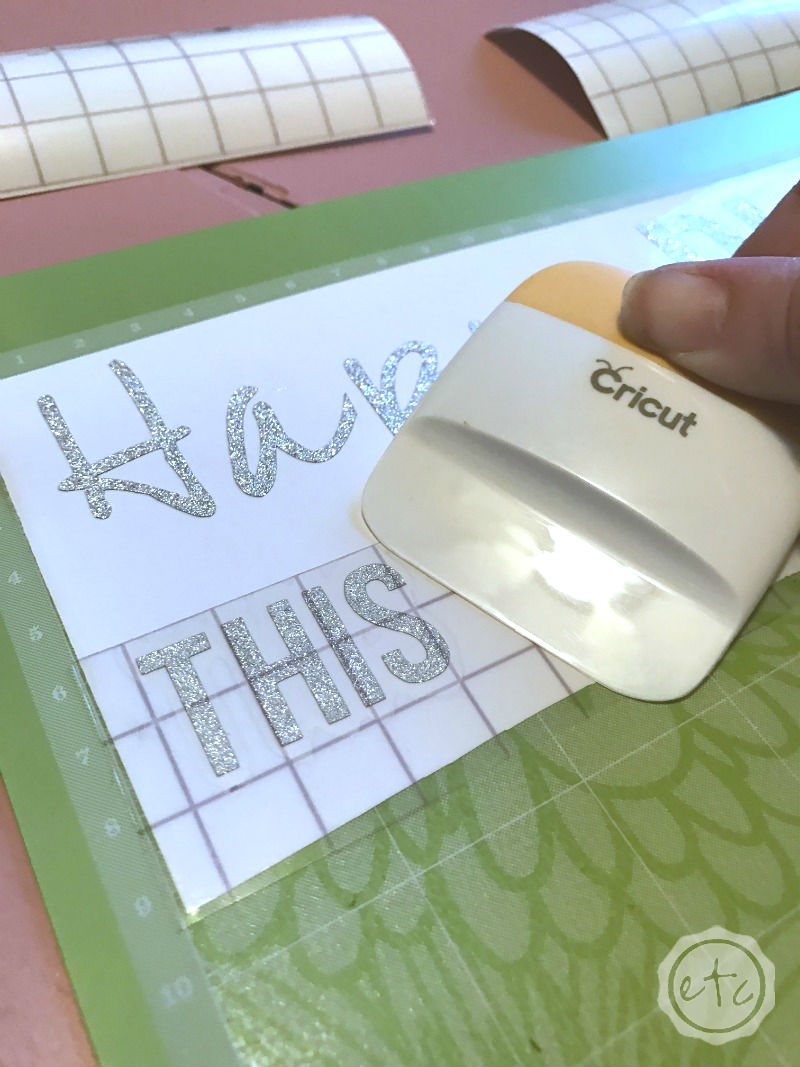
To apply your vinyl transfer paper, first peel the backing off the transfer paper. Place the transfer tape over your vinyl and use the scraper tool (or an old credit card) to make sure the design is attached tightly to the transfer paper.

See what I mean?

How to Cut Glitter Vinyl with the CricutHow to Cut Glitter Vinyl with the Cricut

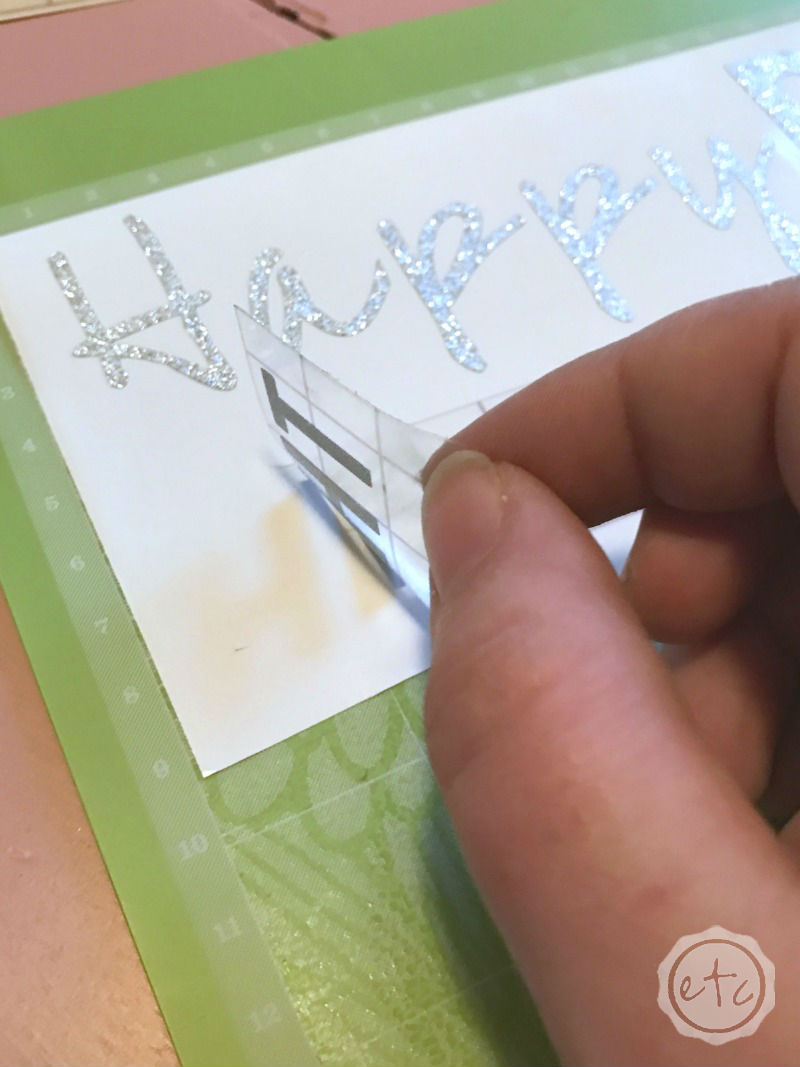
Now your design will peel up nicely from the cutting mat! Just think of the transfer tape like those old tattoo’s you put on your hand in middle school… sometimes the tattoo doesn’t all transfer in the first take. If the image isn’t quite transferring place the tape back down and press it with the scraping tool again.

Be careful with your tape once all the vinyl is picked up… I like to place mine (sticky side up) somewhere safe until I’m ready for it. Once you have all of your design on the transfer tape it’s time to place it on your final project!

How to Cut Glitter Vinyl with the Cricut

Step Four: Apply Your Vinyl!

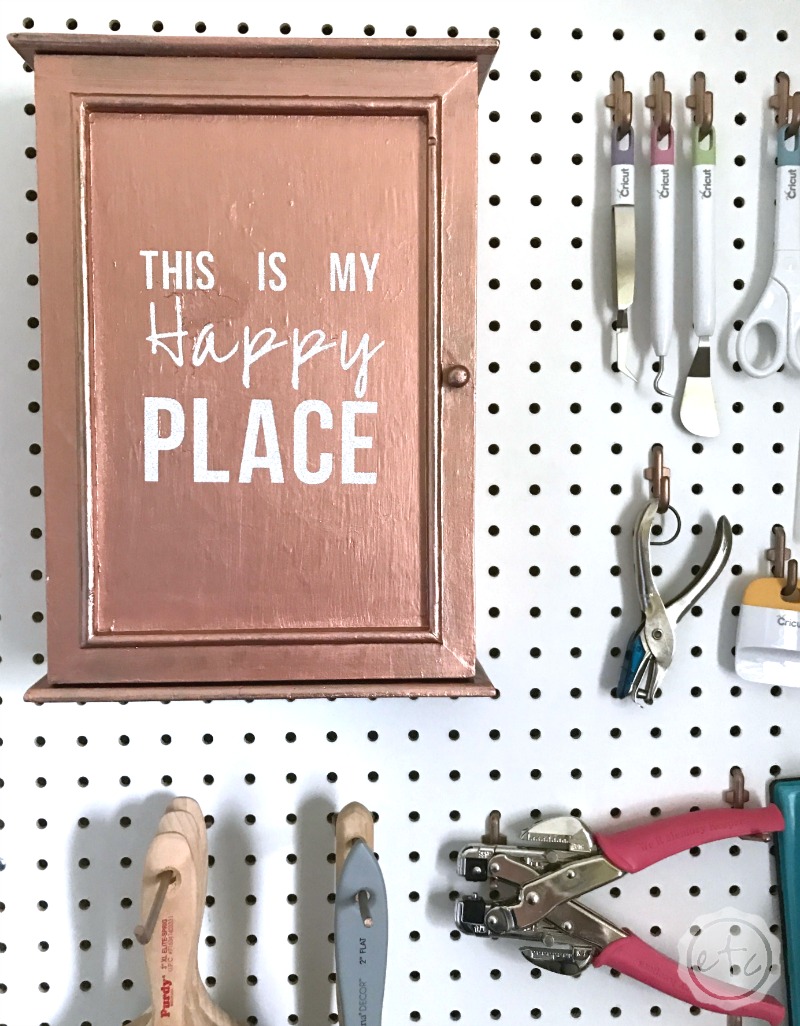
Now it’s time to apply your vinyl to your final project! Go ahead and place your transfer tape (sticky side down) exactly where you want it on your project… then go over it with the scraper tool! You’ll press the vinyl down firmly so that it bonds to the project.

Then lift off the vinyl and volia!

Instant awesomeness!

I’m kind of obsessed now and think I’ll be using my Cricut for just about everything. Wine glasses anyone?

How to Upcycle a Box into a Washi Tape Holder How to Upcycle a Box into a Washi Tape HolderHow to Upcycle a Box into a Washi Tape Holder


How to Cut Glitter Vinyl with the Cricut

You made it through the entire post? That means you're one of my new favorite people! I'd love to be friends and see what else you would like to read about! Leave me a comment and then sign up for your very own FREE paint planner.... so that you can keep track of every single paint color with ease!
Welcome back! I'd love to be friends and see what else you would like to read about! Leave me a comment and then sign up for your very own FREE paint planner.... so that you can keep track of every single paint color with ease!

Show me some LOVE y'all:

  • Facebook
  • Pinterest
  • Twitter
  • Email

Related

«
»

Cricut, DIY & Crafts 12

Comments

  1. Edward says

    October 2, 2017 at 3:40 am

    I was looking for good quality glitter vinyl and weeding hook.. This will be helpful. Thank for the links

    Reply
  2. Kristy says

    October 24, 2017 at 2:18 am

    I love what you made – it looks awesome! The glitter in the vinyl really sets it all off.

    Reply
  3. mikal shone says

    October 24, 2017 at 7:43 am

    great job,i have seen many types of vinyl sign but glitter idea is so cutee!

    Reply
  4. Imelda villarreal says

    November 13, 2017 at 8:34 pm

    On my cricut expression 2 how do I️ do the Murrow image for my iron on vinyl so my letters come out right?

    Reply
    • Idaila says

      September 26, 2018 at 3:59 pm

      You “Flip” or “Mirror” the image, horizontally.

      Reply

Trackbacks

  1. Quick and Easy Holiday Gift Idea: Sassy DIY Wine Glasses - Happily Ever After, Etc. says:
    December 10, 2017 at 5:01 am

    […] steps are the same as any cut file but I always need a refresher course so I pulled up my how to cut glitter vinyl with the cricut post to follow along. Maybe one day I’ll have this down like the back of my hand but for now […]

    Reply
  2. DIY Valentines Day Wall Project with Cricut (You'll Forever Be My Always) - Happily Ever After, Etc. says:
    January 14, 2018 at 3:52 pm

    […] it’s time to cut out your vinyl, if you haven’t done this before I wrote an entire step-by-step post on exactly how to use your cricut to cut glitter vinyl. I’ve even included the cricut cut file for this exact phrase below so you can make this […]

    Reply
  3. Quick and Easy Home Decor with Your Cricut: One Cricut SVG File 12 Ways! - Happily Ever After, Etc. says:
    September 9, 2018 at 11:12 am

    […] course, sometimes the hardest part about using a cute cricut file isn’t actually cutting out the vinyl or creating a custom cricut file but coming up with an idea of where to put […]

    Reply
  4. DIY Christmas Gift Tag Door Decor - Happily Ever After, Etc. says:
    November 10, 2018 at 2:54 pm

    […] If you haven’t used a Cricut to cut glitter vinyl (or any vinyl!) before here’s a quick tutorial on this step. […]

    Reply
  5. Quick and Easy DIY Christmas Tray - Happily Ever After, Etc. says:
    November 11, 2018 at 9:06 pm

    […] After your stencil is cut it’s time to weed the design (or take all of the negative bits of the design off your cutting mat) and use transfer tape to apply the stencil to your tray. If you haven’t used a Cricut to cut out your design and transfer it before I have a quick tutorial for this step right here. […]

    Reply
  6. DIY Holiday Pillows for your Home - Happily Ever After, Etc. says:
    November 26, 2018 at 12:20 am

    […] add your pillow form and close the whole thing up it’s time to add our little design. I used my cricut to cut a fun Christmas design out of my HTV (you can download the file at the bottom of this post if you want to make the same […]

    Reply
  7. How to Use the Basic Cricut Tool Set - Happily Ever After, Etc. says:
    March 6, 2019 at 1:57 am

    […] little weeder makes lifting out those pieces extra easy… especially with trickier materials like glitter vinyl. I use mine for poster board and cardstock as well… although it’s not always necessary […]

    Reply

Leave a Reply Cancel reply

Your email address will not be published. Required fields are marked *

sidebar betsy I'm Betsy, Home Decor Enthusiast, Yorkie Mama, Crafter, Blogger, Picky Eater, Chief Mess Maker, Antique Hoarder and Graphic Designer. You can generally find me working on (attacking with a paintbrush) the 3 bed, 2 bath home we are currently renting! Our home might not be perfect but it is ours & if you hang out long enough you'll see that what we lack in know-how we make up for in passion!
Shop My Craft Room

Shop My Home

Featured Articles

15 Fabulous Ideas to Organize your Laundry Room
25 FREE Printables For Your Home!
What to do with EXTRA Paint with Happily Ever After Etc
10 Ways to Make Your Bed EXTRA Comfy with Happily Ever After Etc.
Ready to Pick your Perfect Paint Color? We'll help you with our 6 Day FREE E-Course

Hey y’all,

Profile

I'm Betsy, Home Decor Enthusiast, Yorkie Mama, Picky Eater, Chief Mess Maker, & Graphic Designer...

A Little Note!

Many of the links on Happily Ever After, Etc. are affiliate links. If you purchase a product after clicking an affiliate link, I receive a small percentage of the sale for referring you, at zero cost to you! How awesome is that? Purchasing through affiliate links is an easy, painless way to help out your favorite bloggers. Thank you so much for your continued love and support! Read the full disclosure here!

Instagram

Load More... Follow on Instagram

Copyright © 2023 · Darling theme by Restored 316

Copyright © 2023 · Darling Theme on Genesis Framework · WordPress · Log in · Privacy Policy