
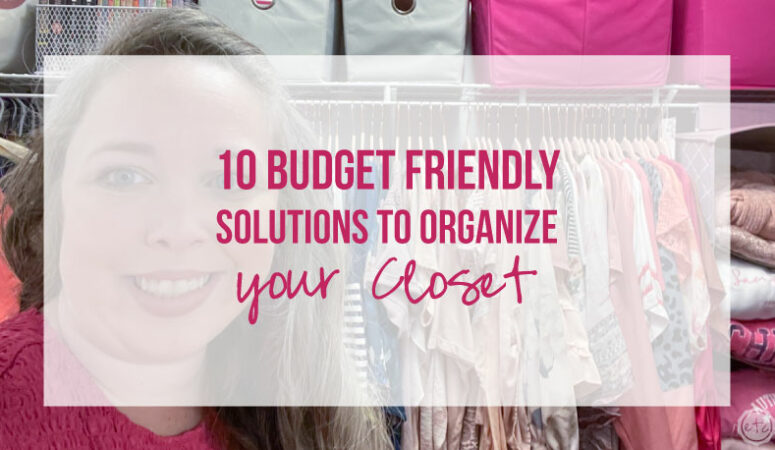


In my quest to organize the entire house we’re moving on from the kitchen cabinets, we’re leaving the Christmas closet organized and we’re moving on to the disaster of a master closet. When I say that this space looks like a bomb went off I am NOT exaggerating.
I’ve been planning to build a big custom, fancy, built-in, closet system (kind of like the built-in cabinet I put together for my laundry room) but that never happened. Between the time constraints and the *ahem* budget constraints I kept saying “next month we’ll work on the master closet” and it never happened. Instead the closet kept getting more and more un-organized as I imagined a killer messy before shot with my beautiful cabinetry.
We’ll get there one day but in the meantime we’re going to completely re-organize the closet using as many budget friendly solutions as possible.
I have so many organizers in my hoard that I’m not buying anything other than 12 tiny clear storage bins for this entire closet organization process. Let’s get started with the most dramatic before photo ever. It definitely got worse before it got better and the dogs thought my piles of keep, donate, wash were just fancy dog beds.
Shocker.
Supplies:
- Velvet Hangers
- 5 Tier Skirt/Pant Hangers with Clips
- Vertical Closet Extender
- Extendable Shoe Rack
- Shelf Hanging Closet Organizer
- Baskets and Bins
- Command Hooks
- Vacuum Space Saving Bags


What Hangers you use Matter!
Tip 1: Use Slim Hangers
Let’s get started with the tips! While you don’t necessarily need fancy blush and rose gold hangers using slim hangers does make a difference. Not only does it save space but they help keep your clothes from slipping.
In my case I had a menagerie of different hangers: large plastic hangers, thin wire hangers, GIANT wooden hangers. All the different hangers you’ve collected from different stores and places over the years. By streamlining the entire collection to these slim velvet hangers I saved quite a bit of space on the rack.
Score!
Just make sure to keep a few plastic hangers for anything that needs to be hung up to dry… you don’t want to put wet fabric on velvet.
Tip 2: Turn All your Hangers around
Once you’ve cleared everything out and are starting to re-load your closet the level of organization is completely up to you. I hung all of my short sleeve shirts over my shoe rack according to color… so I can easily see exactly what I have and where it should go back when I’m done with laundry.
But my most important tip for a big, overhauling closet clean-out like this is to turn all of your hangers around. Then when you wear a piece you’ll place the new hanger back on the rack facing front… this way you’ll be able to see *at a glance* what shirts you’ve worn and which ones you haven’t at the end of the year.


Tip 3: Move Hangers as you Use Them
Ready for one more hanger tip? I keep an empty bin on the upper rack… when I take a piece of clothing off the hanger to wear it the empty hanger immediately goes into the hanger container. That way everything stays neat and tidy… and I’m not searching for all my empty hangers every time I do laundry.
It’s a little step but it makes a big difference in keeping things color coordinated.
Which is always a challenge for me.
Tip 4: Use your Vertical Space with Closet Extenders
You didn’t think I had only short sleeve shirts did you? Since my short sleeve shirts are in the main space over my shoe rack (I live in Alabama… I do mainly wear short sleeves). That still leaves tank tops, vests, sweaters, jackets, capri’s, pants… skirts and dresses! The dresses and skirts will go on the right where they’ll have a bit more space but that leaves all of my tank tops, sweaters, jackets, capri’s and pants to fit in this four foot space on the left.
Since all of these pieces are fairly short I used a closet extender to make my one rack into two. This way I can hang all my tops on the top rack and my pants on the bottom rack! Win/win!
It doesn’t leave me any space underneath but that’s ok. I need the hanging space here so it work. Double rack… check!


Tip 5: Keep Dresses off the ground with Double the Hangers
On the other side of the closet (under my longer dresses) are two large plastic totes… one full of larger suitcase duffles and one full of memory items. They are the only two actual storage tubes in this space and while I hate that they’re here sometimes you have to store things!
In order to keep my long dresses up over these storage totes (or not touching the ground if you don’t have storage totes) I’ve used a second hanger to fold over the hem of my longer floor length dresses. This keeps them neat and tidy while giving me space below for that blasted storage.
The totes are still higher the extended rack from tip 4… giving my knee length dresses and skirts free to be hung normally. Only the floor length dresses need a second hanger to keep them in check.
Tip 6: Tiered Hangers with Clips!
Speaking of skirts… how about this tiered hanger? I actually have 2 or 3 flowy midlength skirts… and they slip right off our pretty velvet hangers. This tiered hanger lets me hang all three in one place so I always know where they are and they aren’t taking up any extra space.
Individual skirt hangers are pretty wide so this tiered hanger gives you the benefit of clips without the drawback of taking multiple spots. I’ve had this one for years so it may come in blush and rose gold… I chose not to look since I would just want to buy it.
And we’re keeping a lid on this budget!


Shoe and Purse Storage Can often Co-Exist!
Tip 7: Adjustable Shoe Racks give you lots of options
Ready to look at the bottom of the closet? It’s time to tackle the shoes! I don’t have half as many shoes as some girls… but I have my fair share! Tennis shoes, flip flops, dress shoes… all the footware needs to go somewhere. This little adjustable shoe rack will collapse down to 3 shoes wide or expand up to 6 shoes wide… so it’s really versatile for your space.
I wanted my larger purses to be easily accessible so I actually kept shoes to the bottom 3 racks and left the top rack top rack for purses. I love that I can easily see them and grab which one I want. Although I’m fairly sure they’re all eerily similar…


Tip 8: Shoe Bins for Smaller Purses
The smallest of my purses were too little to fit on the shoe rack… but I had these shoe bins from my college days. They use to hold my high heels but let’s be honest… those days are along gone. So instead I put my smaller purses in each of the drawers.
They’ll be protected and easy to grab.
Nice!
Tip 9: Hanging Cubbies for Boots and Foldable Sweaters
When it comes to my nicer sweaters and sweatshirts I don’t always want them on hangers. Sweaters can easily lose their shape if they’re hung so folding them will help them keep their shape much longer.
On the other hand folding my sweatshirts just makes it easier to find which one I’m looking for! I like to fold them so that the front design is visible, especially because most of my sweatshirts are very similar colors.
It helps avoid the age old question of “do I want the pink sweatshirt or the pink sweatshirt?”


Tip 10: Use Command Hooks for Irregular Sized Bags
While I have my large tote full of duffels and totes below my long dresses I don’t want to open that tote every time I need a tote bag to run across town. So I added 2 command hooks over my suitcase for the larger tote bags I use most often… and another two on the other side of the door for my 2 long crossbody bags that don’t fit in any of my other purse storage.
Now I can grab these easily but they’re out of the way the rest of the time. Of course, if I had 22 crossbody bags there would have to be a different solution. Unfortunitely when organizing making sure the solutions work for you and your space is one of the most important pieces of the puzzle.
That no one else can conquer for you!
So take it slowly… put your 22 crossbody bags in a tote on the top shelf, or only keep our the two you use most often like I did with my larger totes. If it’s something you REALLY use all the time… you prioritize them and switch them out on a daily basis… then give them a place of priority in your closet.
If you rarely reach for 20 of them then they can go further into hidden storage.

Tip 11: Use Baskets and Bins to Organize Things you Don’t Use as Often
Now we get to the top of the closet… and the items we only use occasionally. For me that’s things like my scarves and winter gloves. I’m in Alabama y’all so unless I go to visit family in Colorado or am on a cruise to Alaska I rarely need these things!
Of course, you don’t necessarily need a closed box in a decorative basket but living in the woods anything not in regular use (in my house!) needs to be protected. So closed, hard, storage it is! The decorative bins are just a plus. Outside of my winter accessories I’ve used bins to store books I don’t read every day, baseball hats, wide belts that I wear with my dresses, my seasonal pillows that aren’t currently on my bed and even my Letterman jacket that I probably won’t ever wear again but like to look at and remember allllll the memories.
Maybe one day I’ll get that baby framed (or maybe not, that seems like a grand gesture for something that’s a sweet memory but not a priority) either way… seeing it displayed in it’s plastic bin makes me smile.
And while the smaller bins for my winter accessories were purchased specifically for this closet I used the plastic totes/bins/bags from bedding to store more of the large fluffy pieces (like the seasonal pillows and my letterman jacket). I would prefer to purchase space saving bags but in the meantime these were on hand… might as well use them!


Tip 12: Make Sure to Adjust as your Needs Change
I love how this space functions now… I can walk in and pick an outfit without any fuss. I know exactly where everything is from my belts to my shoes and I actually change out my purses now that I can see them all lined up in a row.
I typically re-adjust my closet every January… go through the clothes and see what hangers haven’t turned around in a year. Purge things I haven’t worn that don’t have sentimental value and make sure there’s space for new things… that nothing is getting ruined somehow.
So just because this space functions beautifully now doesn’t mean it won’t change in the future. If it’s not working next year I’ll switch it up! But for now… I am so happy to see this space. I literally haven’t closed my closet door since I finished it.
One day I’ll build specific built-ins so everything is beautiful but for now I think it looks pretty darn good!


Leave a Reply