• House Tour
    • Reveals
  • About
    • Smith Life
    • Disclosure and Privacy Policy
      • Terms and Conditions
      • Store Affiliates
  • Contact Me
    • Want a Button?
  • Shop
    • Floral Printable Planners
    • Paint eBooks and Packages
    • Wedding Binders & Extra Printables!
    • Planner Bundles
    • Planner Accessories
    • Home Decor Printables!
    • Cart
    • Bloglovin
    • Facebook
    • Instagram
    • Pinterest
    • Twitter
    • YouTube

Happily Ever After, Etc.

Creating Our Own Fairytale

  • Happily Ever After, Etc.
  • Home
  • Home Decor
    • My Home
    • Paint
    • Before and After
    • Mood Boards
    • Furniture
  • DIY & Crafts
    • Cricut
    • New to Cricut – Start Here
    • Cricut Projects
    • Scrapbooking
  • Organization & Planning
    • Organization
    • Planner
  • Wedding
    • Free Wedding Binder
    • Bride Bag- The Ultimate Wedding Planner

FREE 6-Day Ecourse to Pick your Perfect Paint Color

How to Install Glass Backsplash

Hey y'all,

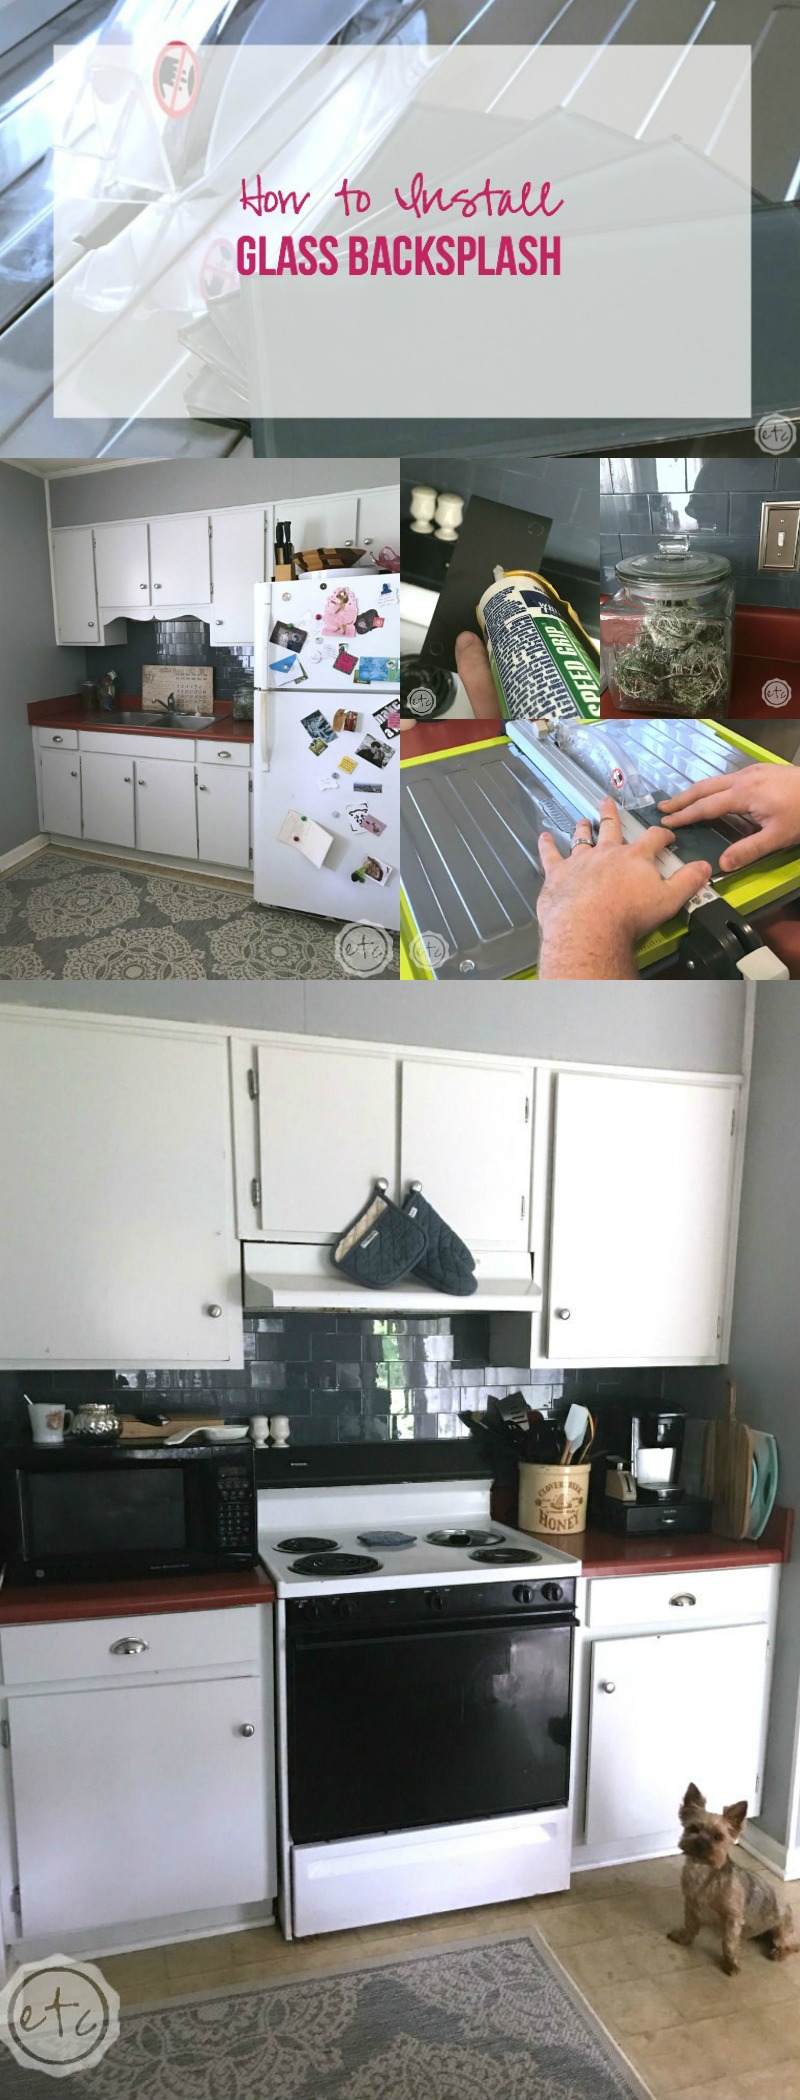
Well y’all it’s officially the second week of the spring One Room Challenge hosted by Calling It Home and we are cooking with gas! Or the equivalent of cooking with gas if the gas is glass tile and you were cutting it. *wink wink* If you missed my neutral mood board go take a quick sneak peek so you know the vision. Then it’s time to get our hands dirty and work on a fun DIY… we’re going to install glass backsplash!

Psst… check out how these glass backsplash tiles are holding up a year later!

One Room Challenge

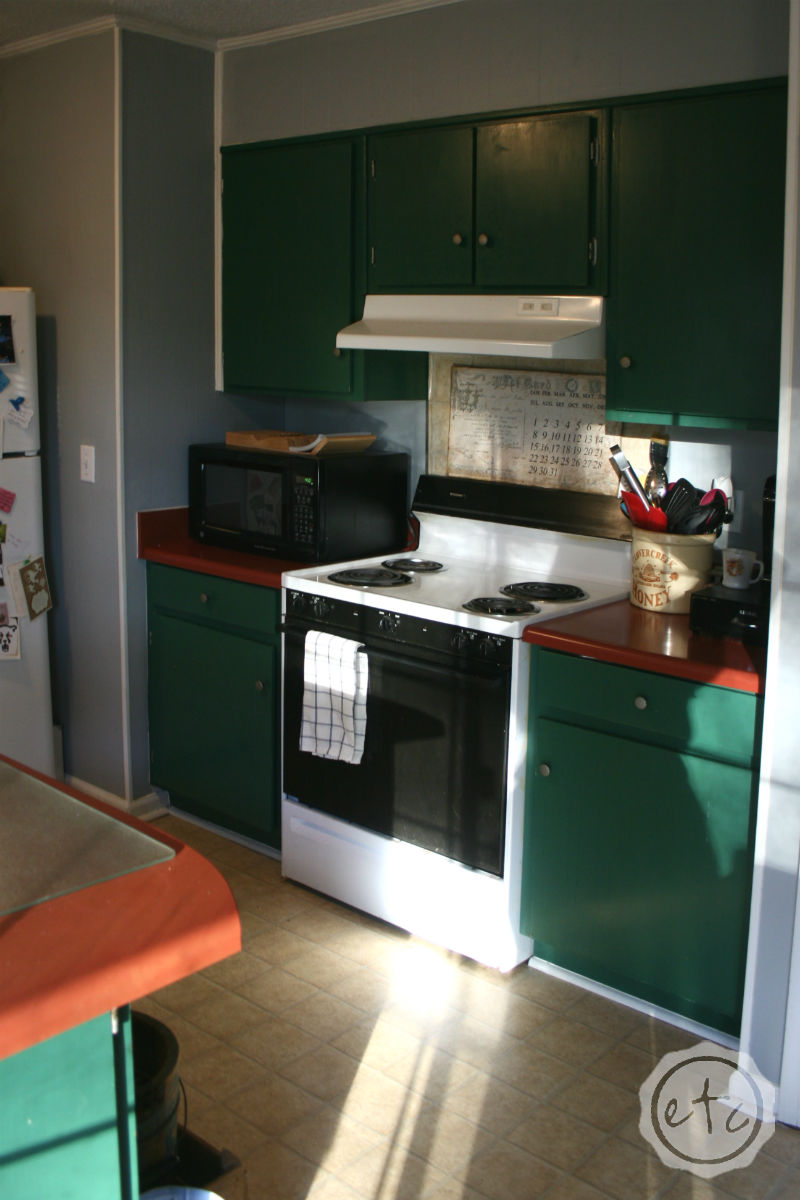
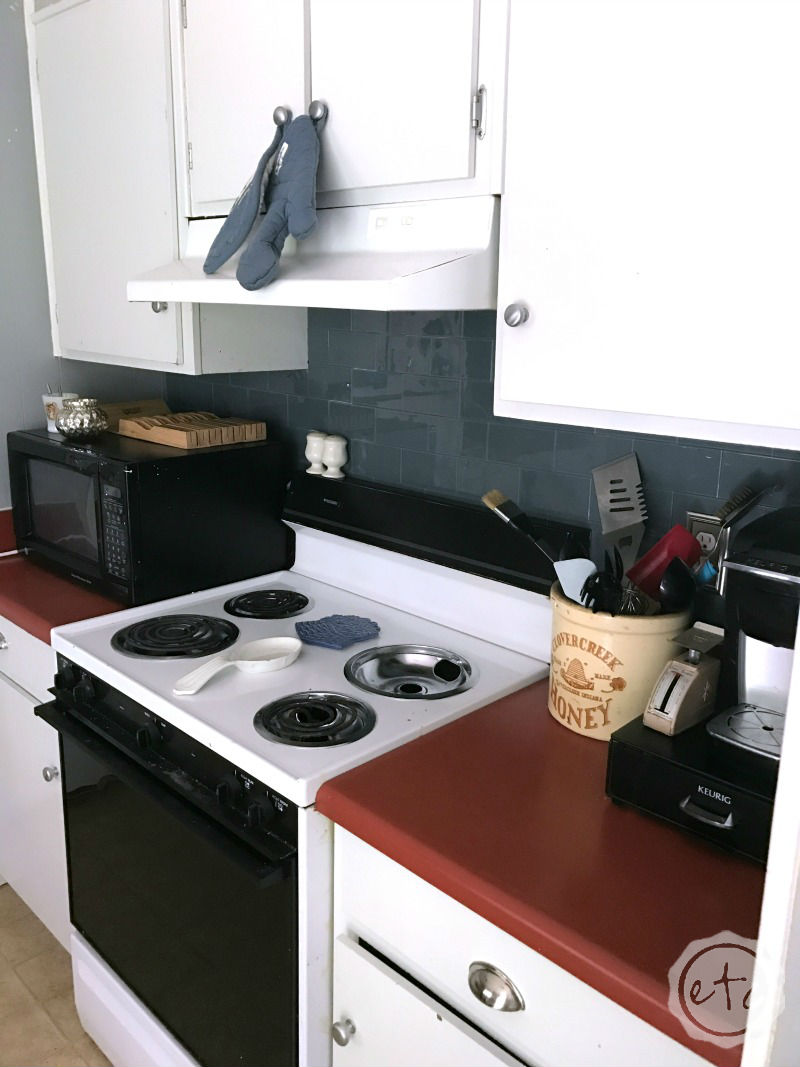
Before we get started with all the fun tile saw info (because you can’t cut glass tile without a tile saw 🙂 ) let’s take a quick look at what we’re working with. Do you remember how green this kitchen was just a week ago? In the first week we went ahead and painted the kitchen cabinets and let me tell you it made alllllll the difference. Don’t believe me?

You will!

Supply List:

Ryobi Wet Saw

Water!

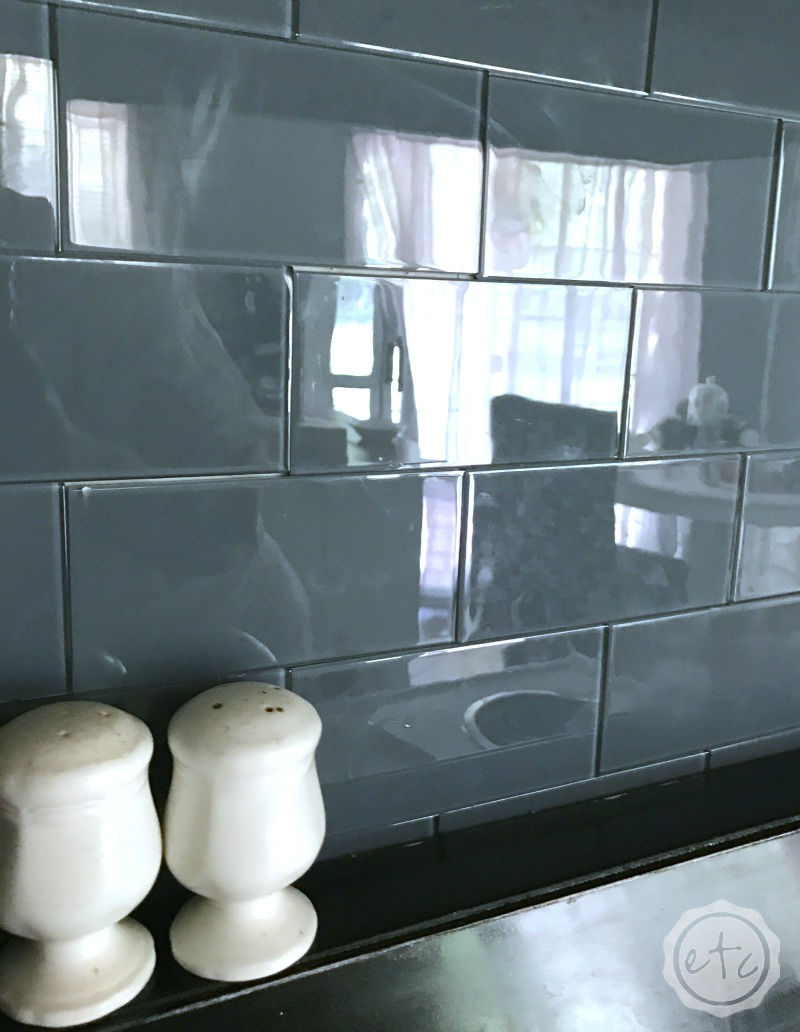
Peel and Stick Glass Tiles in Smoke

Marker

Caulk Gun

Construction Adhesive

Kitchen Reveal with Happily Ever After, Etc.How to Install Glass Backsplash

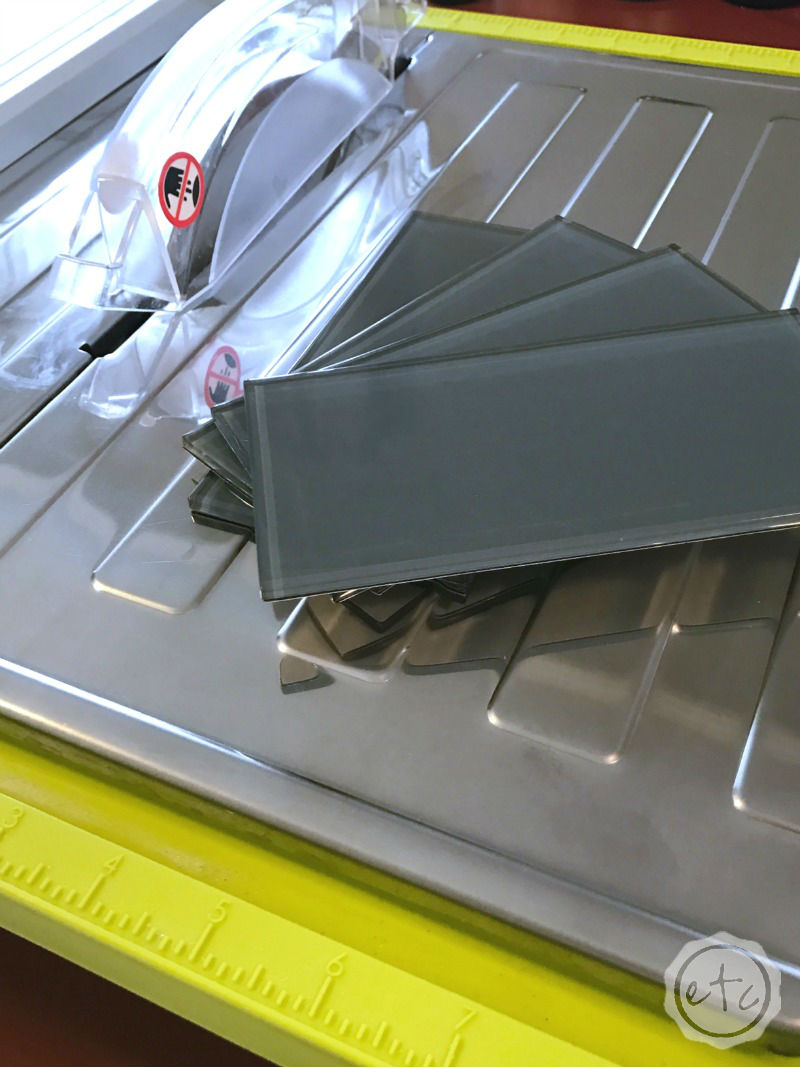
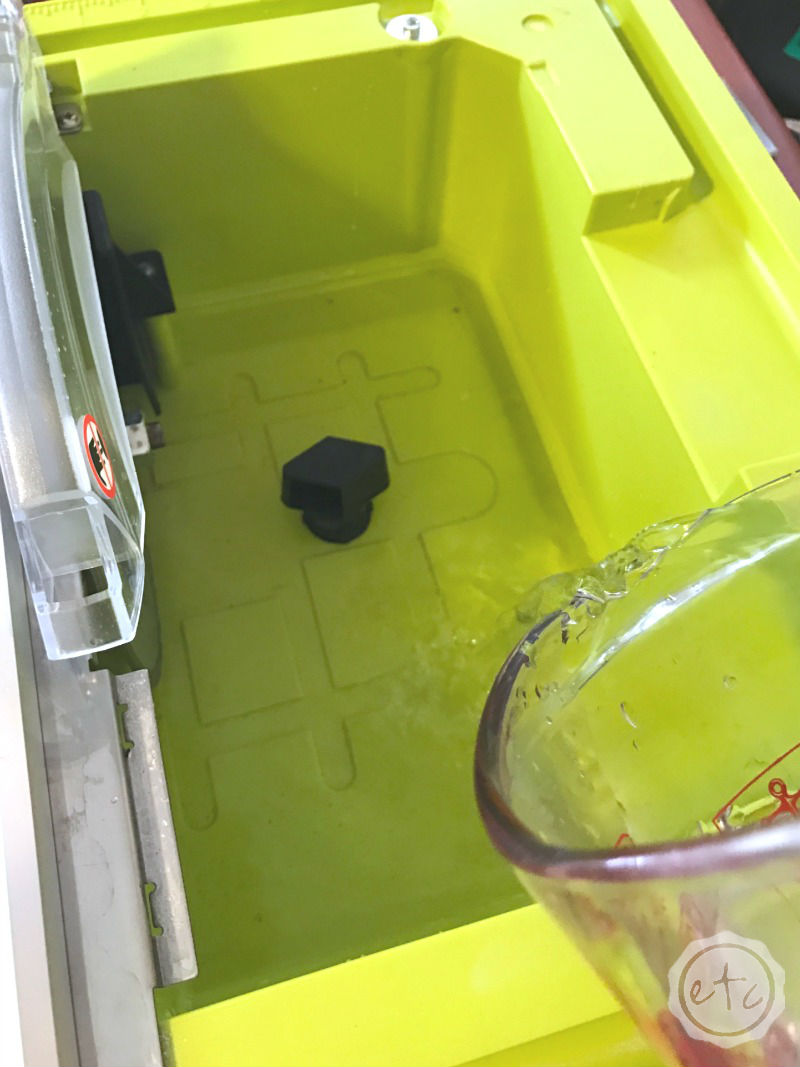
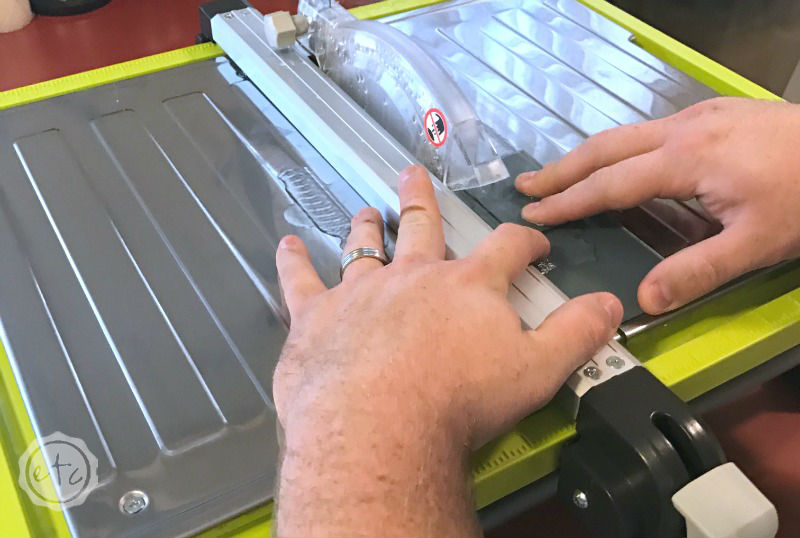
Do you see how sweet this little picture is? I came into the kitchen to get started on this little project and my adorable hubby had set up the new wet saw with a few of my smoke tiles on top… so I could take pretty blog pictures! Isn’t he the cutest?

He’s really getting the hang of this blogging thing!

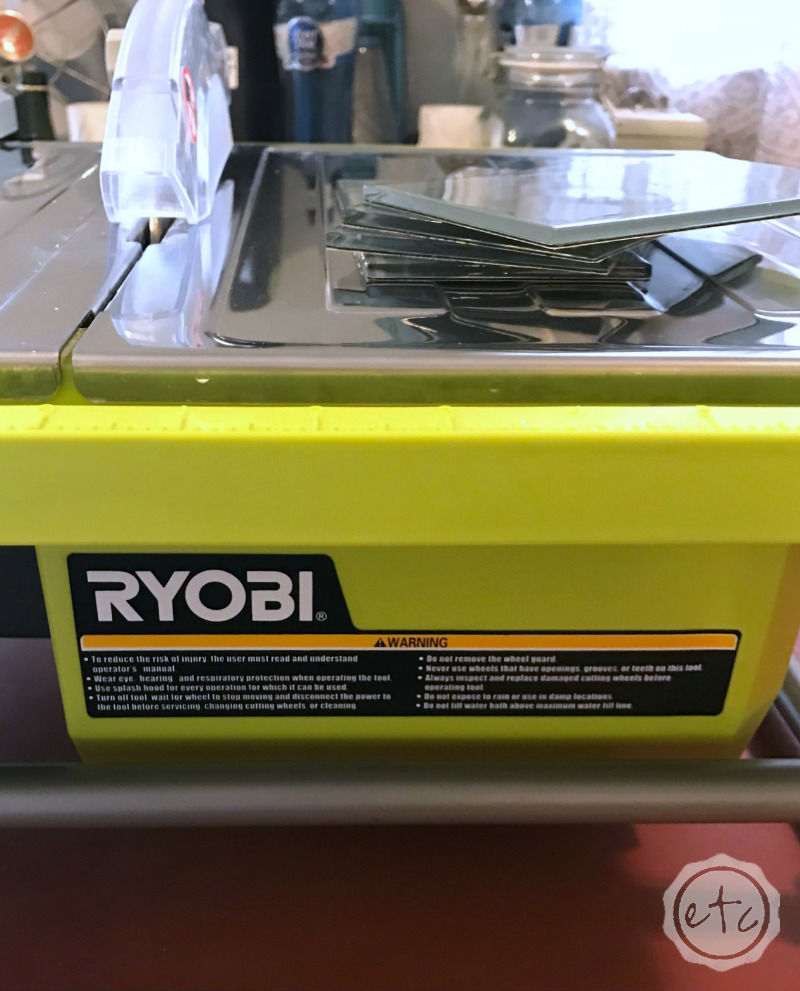
This was the first time we were trying out our new tile saw so we were nervous and excited… I told the hubster not to chop off any fingers and *spoiler alert* he didn’t.

Score!

How to Install Glass BacksplashHow to Install Glass Backsplash

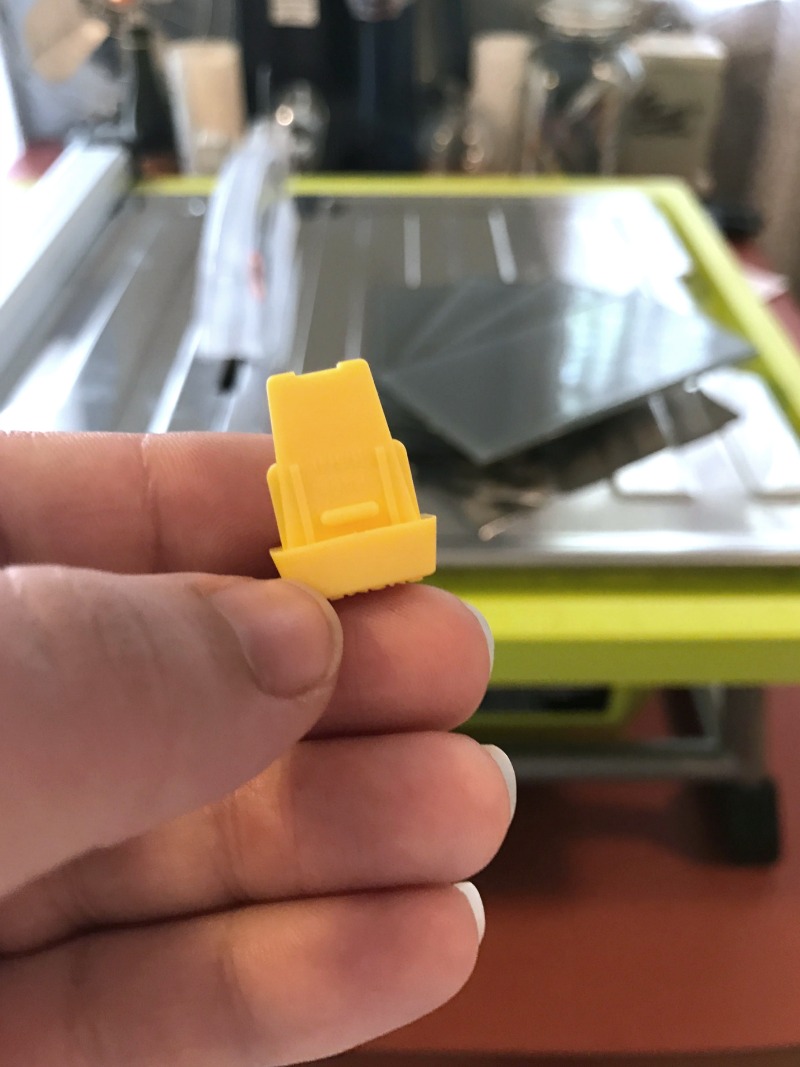
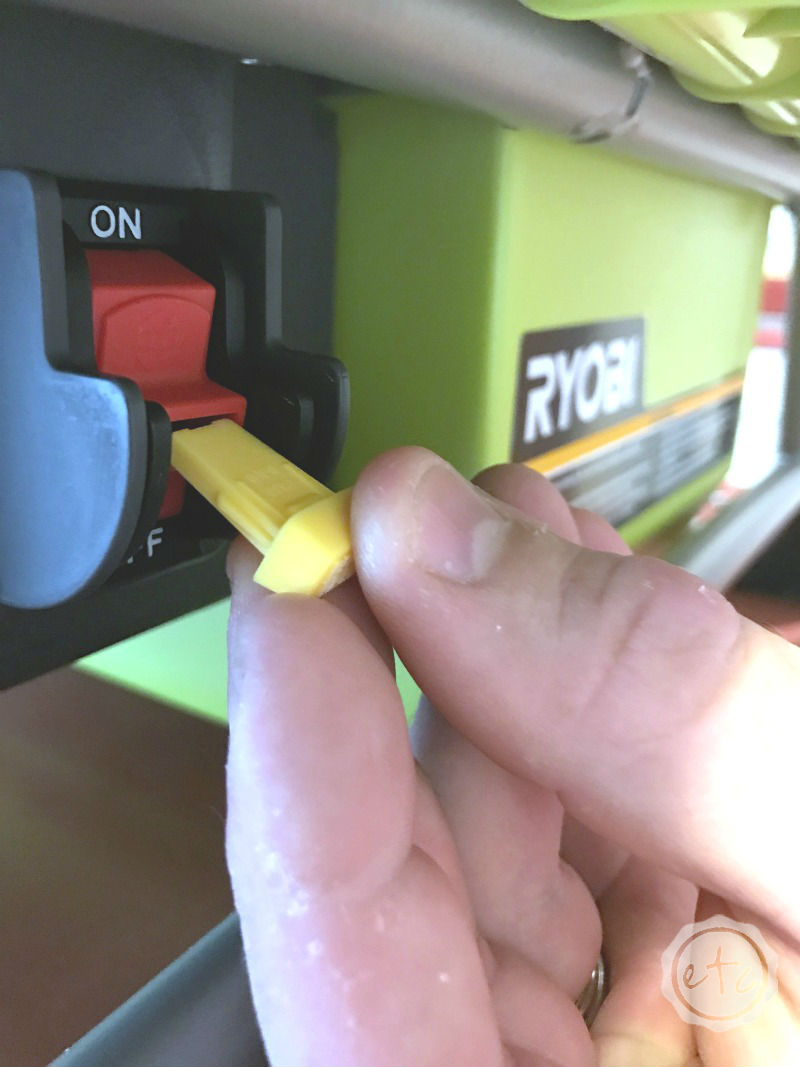
I think this little guy was the number one reason why the hubster didn’t cut off any fingers… he held it up and said “it comes with a safety key!” He cracks me up!

Once he figured out how to turn this baby on we went to the next steps: insert the blade and fill the basin with water! It even has a max fill line at the bottom there (which I completely missed the first time so the hubby won bragging rights on that one).

Looking for a bunch of posts on painting? I’ve got you covered!
Click here to see all of my helpful paint posts in one place!

How to Install Glass BacksplashHow to Install Glass Backsplash

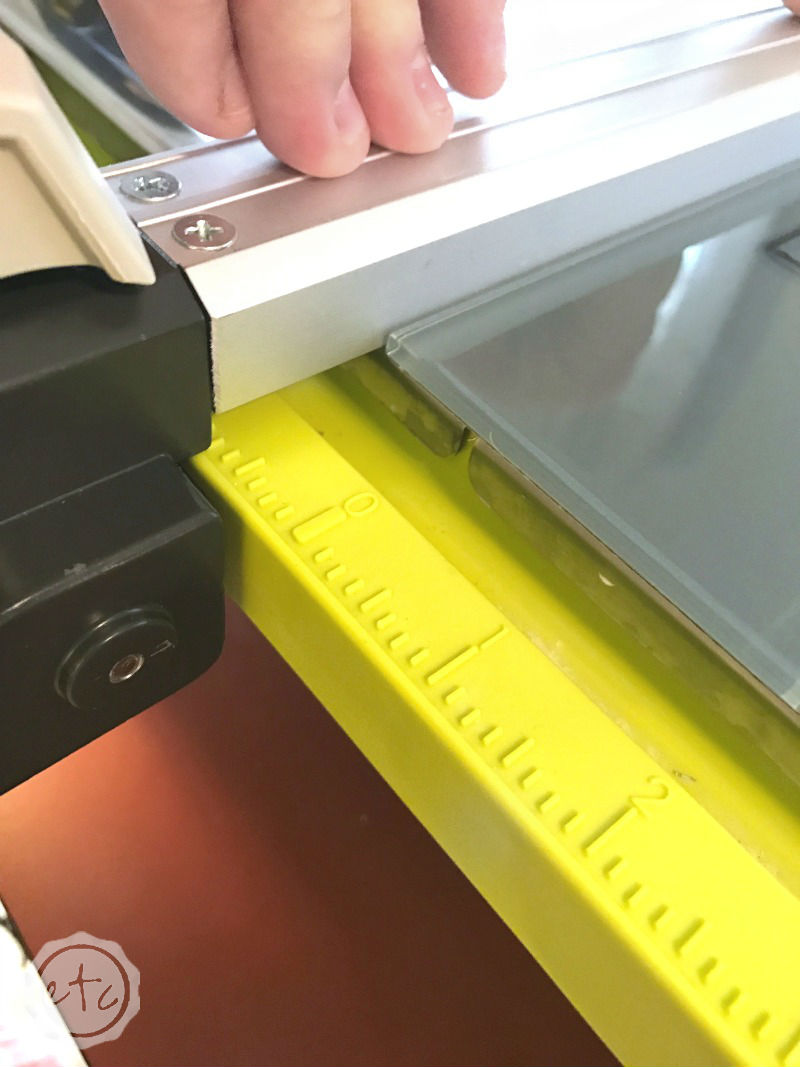
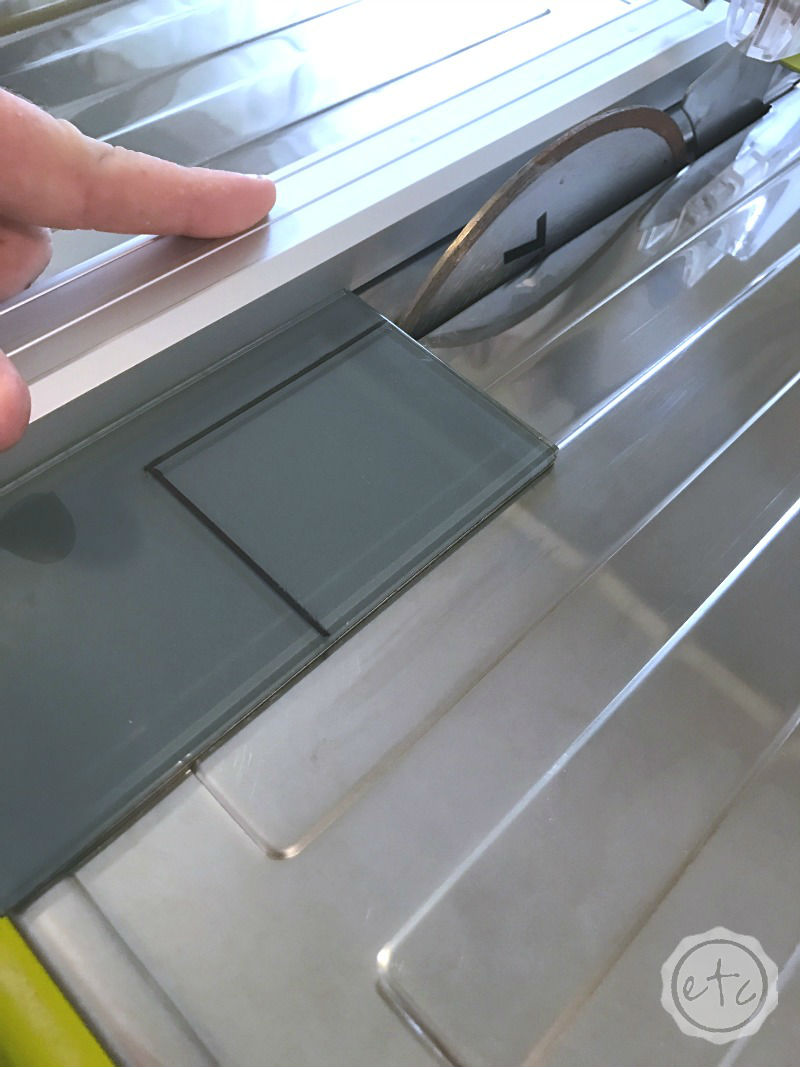
I had the hubs set the guide to the perfect measurements but he still insisted on marking the glass tiles with a marker. I guess the old saying measure twice cut once still applies! We ended up having tiles left over (only a couple!) but the whole day we were like a broken record “I hope we have enough tiles, I would hate to run out!”.

So he was definitely cutting these extra carefully so that we didn’t run out of tiles. Don’t get me wrong… there was definitely a first pancake. We threw out more tiles then I would like but most of that was user error… the tile saw was actually pretty darn easy to use.

Well the hubby said it was easy to use, I kept closing my eyes and running away when it was on. Don’t judge me… he’s realllllly accident prone!

How to Install Glass BacksplashHow to Install Glass BacksplashHow to Install Glass BacksplashHow to Install Glass Backsplash

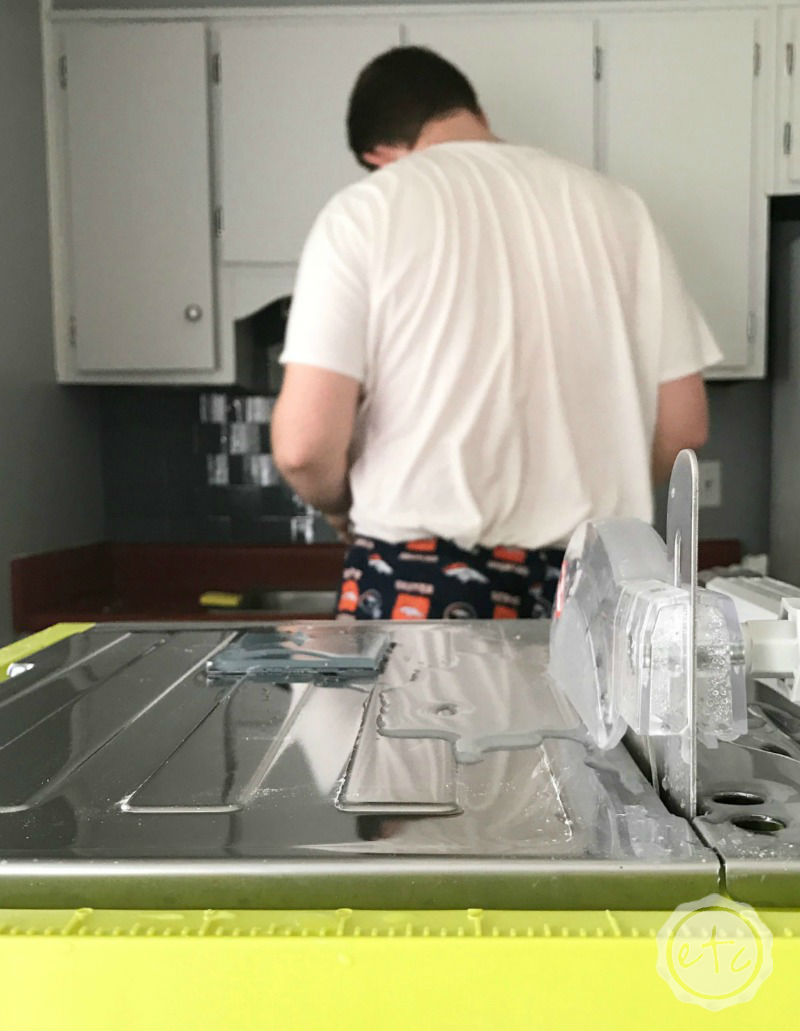
Once you’ve got a few tiles ready to go it’s time to actually put these babies on the wall! (Yes those are Broncos pajamas the hubby is wearing… what can I say. No ones perfect. I told him he could wear my Stealers jammies!).

The Aspect tiles are actually peel and stick (which is kind of amazing) but once we read the instructions we found that a construction adhesive was recommended for the best results… so we broke out the adhesive! Luckily we already had a few tubes of Super Grip so we literally just had to pull it out.

We put a bit on the corners and a bit in the middle so that the adhesive could grip from almost every area… well I should say that’s how Trevor did it. I’m not quite so talented with the caulk gun and my tiles had a more all over effect.

He was not impressed.

My tiles definitely aren’t coming off though!

How to Install Glass BacksplashHow to Install Glass BacksplashHow to Install Glass Backsplash

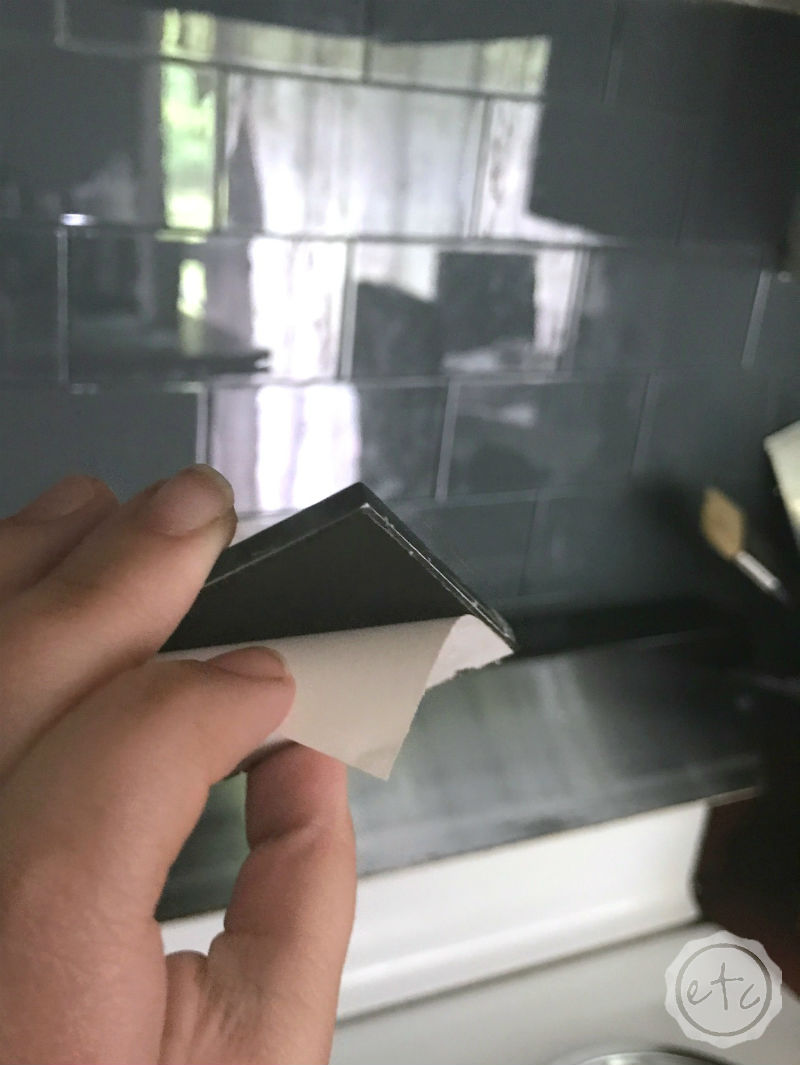
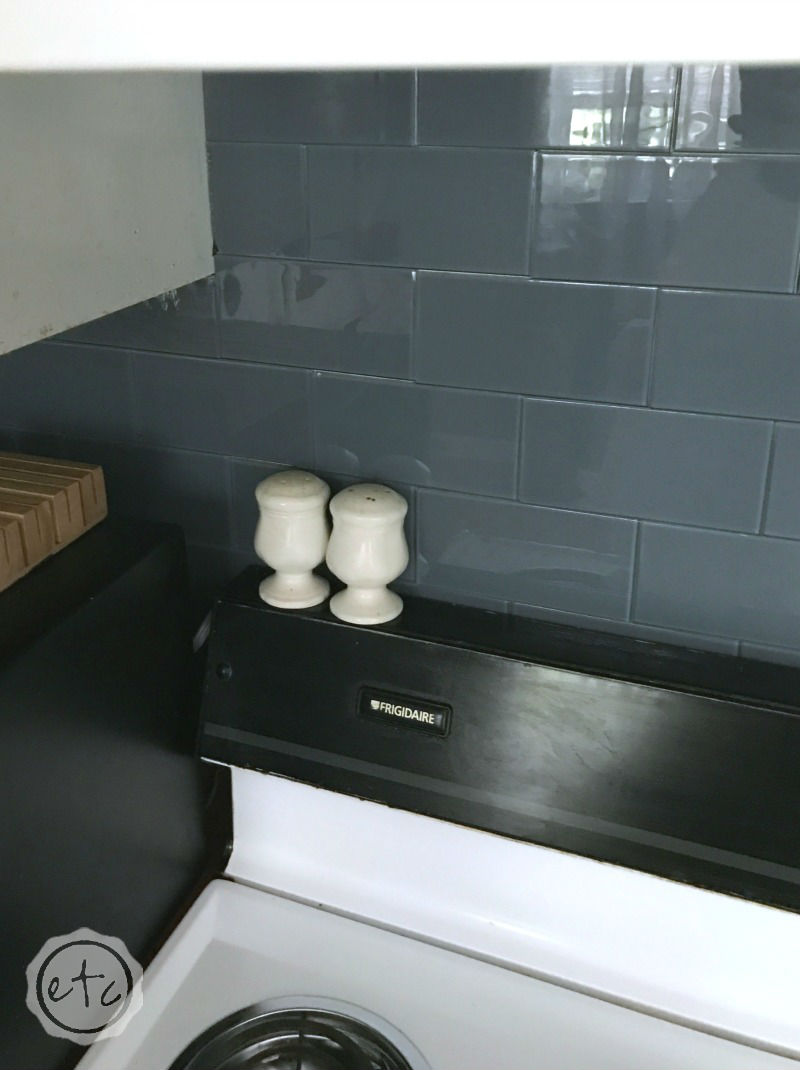
We worked our way around the kitchen starting one row of tile in the bottom left corner of the wall and working all the way across the bottom before moving on to the next row. Trust me we learned that the hard way by working our way along the middle of the first wall and quickly realizing the tiles were all verying off to the side.

We quickly pried the tiles off before the adhesive set, applied new adhesive and re-put the tiles up making sure to line them up with the bottom edge… much better!

How to Install Glass Backsplash How to Install Glass BacksplashHow to Install Glass Backsplash

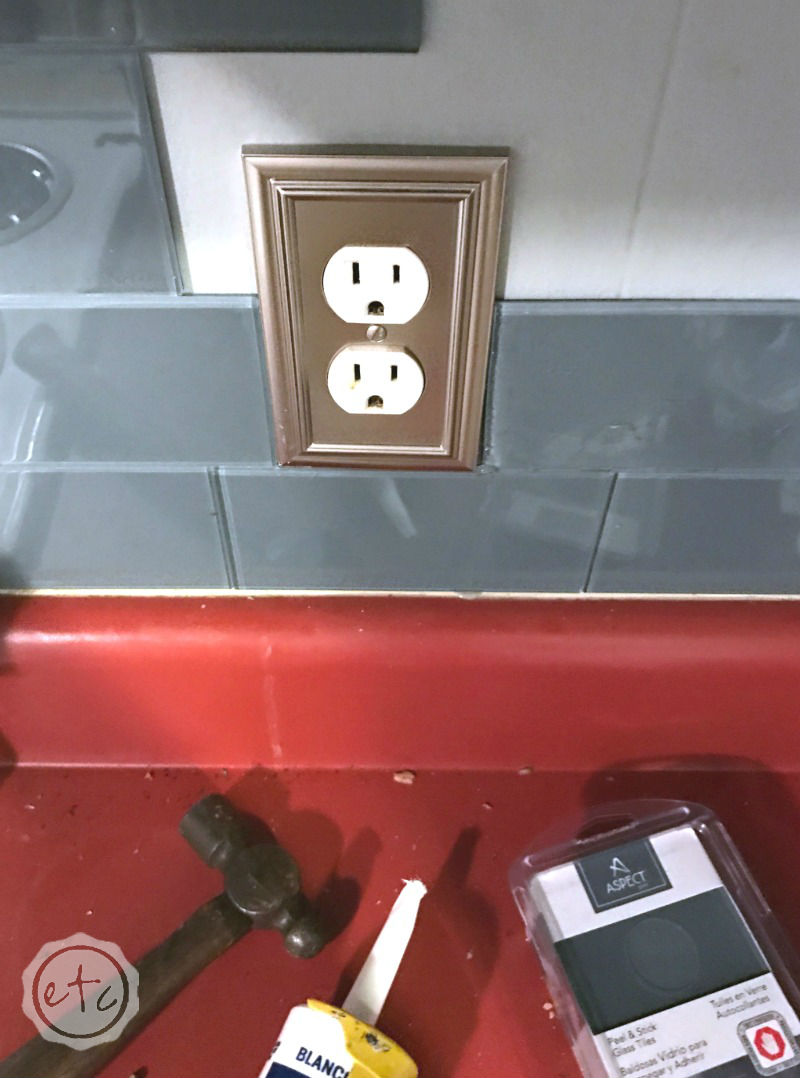
Do you love the new light switch covers? The old ones were white, cracked and dirty… they definitely needed to be replaced! I almost went back with new white covers but then I saw these silver switch plates and I knew they would look fabulous with the gray, blue and white color scheme!

I kind of love them.

Just take a look at how things are coming along!! We still have a ways to go but how much better does everything look?! Mom told me to take all the cards off the refrigerator but I told her that was part of the grand finale reveal… that’s going to be a post worthy project right there! *wink wink*

How to Install Glass Backsplash How to Install Glass Backsplash

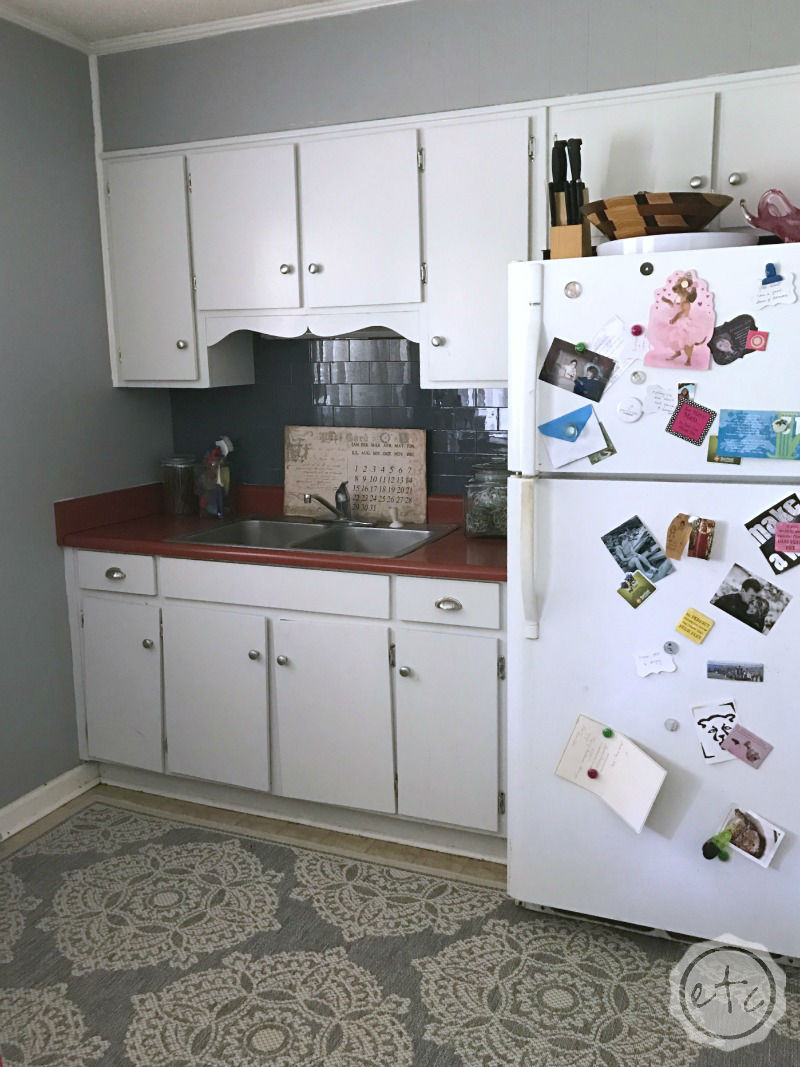
Now this is my absolute favorite part of the week… maybe of the whole makeover. Which is a little silly since the cabinets took a whole week to paint, the backsplash took 6 hours to put up… and this rug took 5 minutes to unroll.

It’s just so pretty! I love how it looks in the space! I really wish we could do a nice flooring in here but even with all the improvements we’re allowed to make we are still in a rental. Which means no new floors… so we’re improvising with a pretty patterned rug.

An outdoor rug because this little guy needs to be easy to clean. It literally fills the entire space which is excellent here… I love the subtle pattern! It’s just what the space needed.

Plus it’s super soft underfoot which I was worried about… it is an outdoor rug after all! I would say it has the consistency of a jute rug and I’m definitely comfy walking around the kitchen barefoot so it’s a winner… now I just need to decide if I need another one for under the table!

How to Install Glass Backsplash How to Install Glass BacksplashHow to Install Glass Backsplash

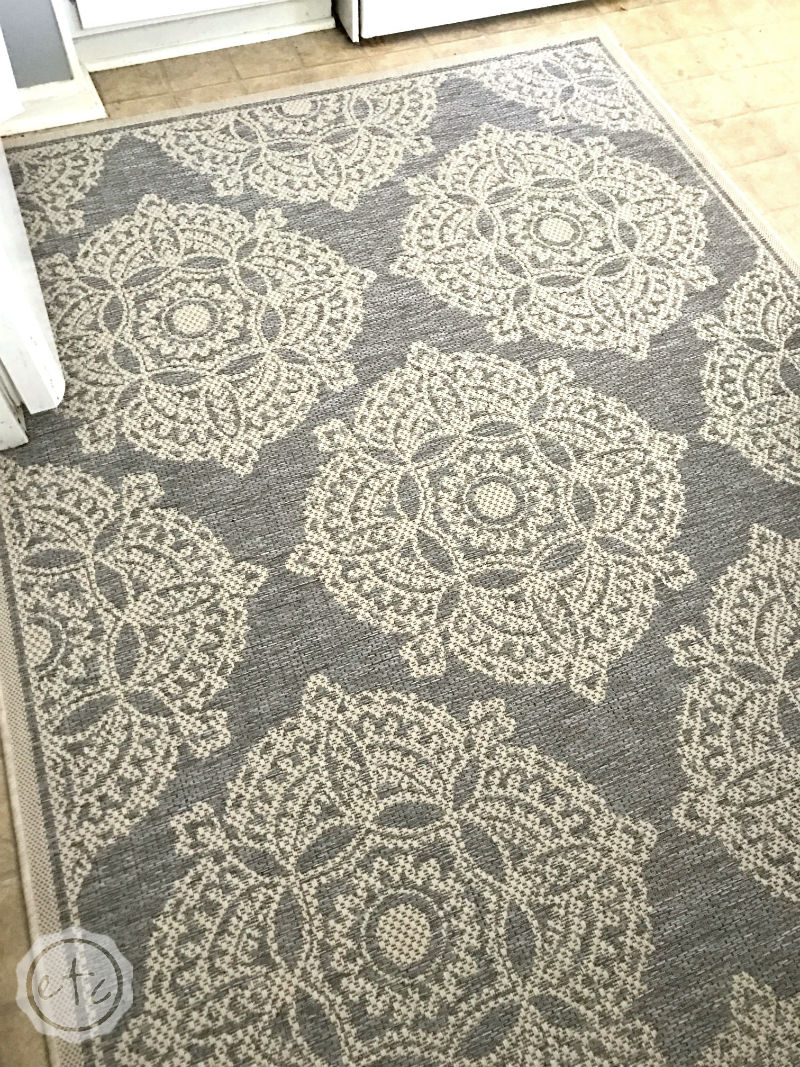
The only thing I don’t love about the rug is this angle… it hits the oven and then ends (since the island is right there!) but Bitty solved that problem by conveniently posing right in the awkward space. Think she’ll be ok with hanging out there during all of my photo shoots for the next few years? I thinks so!

She’s a little diva so she loves having her picture taken but more importantly… she loves being wherever her mama is. So if I’m in the kitchen she’ll be there sitting pretty for her close up.

We’ve still got a ways to go but the kitchen is already looking like an entirely new space. It’s amazing what a coat of paint and backsplash tile can do! Next week we’re moving to the other side of the room and working on a new padded seat for the bench.

It will look so sweet paired with the slipcovers my mama helped me make! Of course, I’m impatient so while the seating is important I can’t wait for next week when we are going to get rid of those red counter tops.

They have got to go.

I’m so excited to see what amazing projects other participants come up with for this challenge! Be sure to visit Calling It Home to check out the projects being shared.

If you’re new to Happily Ever After, Etc. I’d love to extend you a big welcome! Thanks for stopping by and I hope you follow along as I work to bring this neutral kitchen mood board to life!

Check Out the Rest of the Kitchen!

An InLinkz Link-up


Don’t Forget to Pin!

Thank You to Our Sponsors!

Home Depot | Aspect Tile | D. Lawless Hardware | Sherwin Williams | Fairfield World | Ryobi


Save

Save

Save

Save

Save

Save

Get Your FREE Wedding Binder

Black wedding binder 2

Trying to plan your perfect wedding?

Here's 42 FREE printables to help you get organized!

Success! Now check your email to confirm your subscription.

There was an error submitting your subscription. Please try again.

Powered by ConvertKit
You made it through the entire post? That means you're one of my new favorite people! I'd love to be friends and see what else you would like to read about! Leave me a comment and then sign up for your very own FREE paint planner.... so that you can keep track of every single paint color with ease!

Show me some LOVE y'all:

  • Facebook
  • Pinterest
  • Twitter
  • Email

Related

«
»

Home Decor 19

Comments

  1. Susie says

    April 13, 2017 at 6:41 am

    Hats off to you and the hubby for cutting those glass tiles. They look amazing. Love your rug, too! Can’t wait to se more! Susie from The Chelsea Project

    Reply
    • Happily Ever After, Etc. says

      June 14, 2017 at 6:22 pm

      Thanks Chelsea! I am so glad he was game to learn how to cut the tiles. It was way easier than I thought it would be, I could even do it next time!

      Reply
  2. Cassie Bustamante says

    April 13, 2017 at 10:12 am

    love the color of that tile! it’s so deep, moody, modern and awesome!

    Reply
    • Happily Ever After, Etc. says

      June 14, 2017 at 6:07 pm

      Isn’t it gorgeous?! I almost went with the white subway tiles but the smoke color is just amazing… love love love! Thanks for stopping by Cassie!

      Reply
  3. Sue Purdy says

    April 14, 2017 at 7:14 am

    So much work done. I love how it’s all coming together and those tiles are brilliant. Love them paired with that pretty rug too. The cabinets look amazing too and the whole space has been brightened up.

    Reply
    • Happily Ever After, Etc. says

      June 14, 2017 at 6:39 pm

      You’re so sweet! It definitely took a bit of work but I love how much bigger and brighter the space looks now. Thanks for stopping by!

      Reply
  4. Natalie @nelidesign says

    April 17, 2017 at 7:34 pm

    Wow! Already a major change! Your husband is so nice setting the tiles for you to take pictures!

    Reply
    • Happily Ever After, Etc. says

      June 14, 2017 at 6:13 pm

      He’s the sweetest, I love how involved he gets in the blog projects we do. I love how much of an impact tile made, it’s just so pretty!

      Reply
  5. Casey says

    April 18, 2017 at 2:15 pm

    Your backsplash looks amazing! When we did ours we borrowed a neighbours saw that was missing ALL the safety features lol

    Reply
    • Happily Ever After, Etc. says

      June 14, 2017 at 6:11 pm

      Oh my goodness! I would have been so nervous… I hid behind my hands most of the time even with the safety features. lol I’m such a chicken when it comes to saws which is strange since I grew up in my daddy’s workshop. Thanks for stopping by Casey!

      Reply
  6. Nicole @ The Inspired Hive says

    April 18, 2017 at 7:20 pm

    Great progress so far!!! Wishing I had that tile saw for our bathroom reno!

    Reply
    • Happily Ever After, Etc. says

      June 14, 2017 at 6:09 pm

      I’m so glad we gave in and bought one… I know we’ll be using it alllll the time! Thanks for stopping by Nicole!

      Reply

Trackbacks

  1. 17 Room Makeover's to Inspire You - Happily Ever After, Etc. says:
    April 15, 2017 at 7:30 pm

    […] « […]

    Reply
  2. Should I Replace my Light Switch Covers? - Happily Ever After, Etc. says:
    April 23, 2017 at 10:02 pm

    […] with the new back-splash going up I decided that white outlet covers would stand out from the smokey blue back-splash tiles […]

    Reply
  3. April 2017 Round-Up - Happily Ever After, Etc. says:
    April 26, 2017 at 8:22 pm

    […] How to Install Glass Backsplash […]

    Reply
  4. 11 Small Space Solutions - Happily Ever After, Etc. says:
    May 1, 2017 at 9:42 pm

    […] and while I am blessed to have a landlord that allows us a bit of freedom (ahem have you seen our kitchen makeover?) we definitely still have to make the best of our situation. We have small rooms and awkward […]

    Reply
  5. How to Paint Kitchen Counters to Look Like Stone - Happily Ever After, Etc. says:
    July 7, 2017 at 9:43 pm

    […] most of the steps fell into place soooo easily… painting the cabinets, adding a gorgeous glass backsplash… especially my new chrome faucet. The one thing I couldn’t decide on was what to do […]

    Reply
  6. June Round-Up 2017 - Happily Ever After, Etc. says:
    August 2, 2017 at 2:56 pm

    […] makeover most of the steps fell into place soooo easily… painting the cabinets, adding a gorgeous glass backsplash… especially my new chrome faucet. The one thing I couldn’t decide on was what to do with our […]

    Reply
  7. Peel and Stick Kitchen Backsplash Tiles: 1 Year Later How they Held Up - Happily Ever After, Etc. says:
    January 17, 2018 at 5:17 pm

    […] Alright y’all after a year of fun in our pretty new kitchen I’m back to share how our peek and stick kitchen backsplash tiles held up! I absolutely love how these babies look and they were so easy to install. […]

    Reply

Leave a Reply Cancel reply

Your email address will not be published. Required fields are marked *

sidebar betsy I'm Betsy, Home Decor Enthusiast, Yorkie Mama, Crafter, Blogger, Picky Eater, Chief Mess Maker, Antique Hoarder and Graphic Designer. You can generally find me working on (attacking with a paintbrush) the 3 bed, 2 bath home we are currently renting! Our home might not be perfect but it is ours & if you hang out long enough you'll see that what we lack in know-how we make up for in passion!
Get Your FREE 22 Page Printable New Home Registry

Featured Articles

15 Fabulous Ideas to Organize your Laundry Room
25 FREE Printables For Your Home!
What to do with EXTRA Paint with Happily Ever After Etc
10 Ways to Make Your Bed EXTRA Comfy with Happily Ever After Etc.
Ready to Pick your Perfect Paint Color? We'll help you with our 6 Day FREE E-Course

Hey y’all,

Profile

I'm Betsy, Home Decor Enthusiast, Yorkie Mama, Picky Eater, Chief Mess Maker, & Graphic Designer...

A Little Note!

Many of the links on Happily Ever After, Etc. are affiliate links. If you purchase a product after clicking an affiliate link, I receive a small percentage of the sale for referring you, at zero cost to you! How awesome is that? Purchasing through affiliate links is an easy, painless way to help out your favorite bloggers. Thank you so much for your continued love and support! Read the full disclosure here!

Instagram

Instagram post 2191556004164374218_1389840702 Did you know you can heat emboss directly on fabric? I’ll show you how to emboss cute holiday sayings right into the cuff of your Santa hats! Grab your @wagnerspraytech heat gun and we’ll get started! Link in profile! #ad #heatgunfun #rosegoldchristmas
Instagram post 2188690875622006781_1389840702 I cannot even explain how much I live this little blush and rose gold flocked Christmas Tree! I have wanted one for years but couldn’t find things I liked... so with a little DIY, a lot of hunting and imagination it turned out better then I could have ever imagined! Find all the details over on the blog along with 39 other amazing Christmas trees in this years amazing Christmas Tree Blog Hop!
Instagram post 2186914656958193763_1389840702 Getting ready for the holidays? Thanksgiving is literally minutes away so the season of giving is upon us! Luckily I’ve gathered together 27 unique and creative personalized gifts you can make with your Cricut for the loved ones in your life! Pajamas, locked, stockings... even a DIY scientists lab for the little experimenter. Link in profile! #cricutcreated #cricutmade #ad
Instagram post 2179408697393039221_1389840702 Want a sneak peek at how I updated my bedroom for winter? I'm working on a blog post all about how I updated my bed to go with my new rose gold tree and mantle... with my favorite colors: blush, grey and sherpa. The sheets, pillows and blankets are all from @CuddlDuds at @kohls ! I am absolutely in love with the sherpa blanket and the microfiber plaid sheets are super comfy... today's the last day of the sale though so if you want to shag a set on sale make sure to go grab it now! They're like 50% off y'all! #KohlsBMB #KohlsFinds #ad

Get it now ----> https://www.kohls.com/catalog/cuddl-duds-bedding-bed-bath.jsp?CN=Brand:Cuddl%20Duds+Category:Bedding+Department:Bed%20%26%20Bath
Instagram post 2176660417252775055_1389840702 Look how cute these little Infusible ink stocking tags turned out! Follow the tutorial on the blog to make your own!! #cricutcreated #ad
Instagram post 2174907225443846880_1389840702 Just a few of my favorite crafting tools that were included in this years gift guide! check it out now live on the blog! Or head over to my stories for a closer look at all the fun! @wagnerspraytech  @kregjig @digzgardening @rustoleum @dixiebellepaint @primamarketinginc
Instagram post 2167194992534309888_1389840702 Looking for a few simple (yet elegant) ornaments? I made these little guys with a bit of shrink plastic, my @wagnerspraytech heat gun (the little ht400 craft gun I’ve been using for everything lately!) my Cricut and a little rose gold wax! Check out the link in my profile! #ad #wagnerheatgun #christmasornaments #shrinkplastic
Instagram post 2154560313503234504_1389840702 Looking for a baby gift? How about a sweet little bunny lovey with the new babies name on it?! I pulled out the sewing machine and my @officialcricut easypress mini to whip these little cuties up for my cousins new babies! Directions to make your own on the blog! #ad #cricutcreated #cricutmade
Instagram post 2145493905053906561_1389840702 If you've been dreaming of a brand new Cricut Maker from @officialcricut then here's your chance! I absolutely love my Maker (and my Explore Air 2)... they let me craft and create on a level I would never be able to do by hand: professional wedding invites? check! diy cruise t-shirts? check! wreaths for my front door? check!

A few of you have been thinking of upgrading your machine to take advantage of the new adaptive tool system and here's your chance! Cricut is sharing a fun new program where you can trade-in your old machine to upgrade for a shiny new machine!

With this new #Cricut program you can trade in your old machine for a discount: You can get $30 off an Explore Air bundle or $50 off a Maker bundle. To receive the discount code, head to >>> http://inspiration.cricut.com/tradeupprogram/ <<< (the Cricut blog) and read the qualification instructions. Then, you’ll submit your name, email, and a photo of your machine’s serial number.

You must submit your qualifying information between Oct.1-16, and then purchase the machine before Oct. 31.

#ad #cricutcreated
#cricutmaker
#cricutexploreair2
#cricuttradeup 
#cricutcrafter 
#sale 
#cricutcrafts 
#discount 
#getyourcrafton 
#alwayscrafting 
#cricutmakercrafts
#cricutmade
#cricutproject
#timetoupgrade
#ilovecrafting
#diycrafts
#cricutlove
#homemadewithlove
Instagram post 2145104958536676357_1389840702 Y’all... I am in a contest!! @wagnerspraytech challenged myself and five other amazing bloggers to create a fun Halloween project! I need YOUR HELP to win! Go to @wagnerspraytech and vote for my photo... it’s the one with the fun flow art pumpkins (and the puppies!). The photo with the most likes by Oct 7th wins so help a girl out... then head over to the blog to check out the full tutorial on how I used my Wagner HT400 Heat Gun and a little bit of paint to make these awesome glow art pumpkins!
Instagram post 2141574374237569303_1389840702 I did a thing last night y’all! I whipped up a full set of wedding invitations that I’m kind of in love with! Head over to the blog (link in profile) for the full tutorial (and the free svg’s) to make these yourself!

#cricutcreated #cricutmade #ad #weddinginvitations #weddingdiyinvitation #cricutwedding #cricutweddingdiy #cricutweddingdiy #cricutmade #imsocrafty #makersgonnamake #getcrafty #craftersofinstagram #craftersgonnacraft #craftaholic #crafting #cricut #cricutcrafts #bhgstylemaker #craftroom #crafts #bhgstylemaker #bloggerstyle #homedecor #bosbloggers
Instagram post 2137322597721727175_1389840702 Just a few of the @theofficialpandora charms I picked up for my rose gold open ended bracelet! Lady bugs are very special to me so I love wearing this bracelet
Instagram post 2134368643299690222_1389840702 Okay guys I am absolutely OBSESSED with this little DIY Laundry Bin! It took less than an hour to make and came in under $20! 🤭😭😍 check the link in my profile to make your own!
.
.
.
.
 #homestyle #homedecor #interiordetails #interiorlovers #instadecor #interiordesign #interior #vintagedecor #decoration #prettylittlethings #finditliveit #prettylittlething #nothingisordinary #creativelyfound #foundforaged #livecolorfully #livethelittlethings #flashesofdelight #ABMathome #wandeleurspark #makeyousmile #thisishome #habitandhome #designsponge #morningslikethese #laundrytips #laundrybin #laundryexpress
Instagram post 2129252206833156527_1389840702 Hey y’all! I have so many new followers here from the last week that I thought I’d say hi! I’m Betsy, blogger over at Happily Ever After, Etc and the girl on the left! (That’s my best friend Rachel on the right). I live to share fun home decor tips, DIY projects and all things sparkly. If you’re working on making your house beautiful then come along for the ride... I have plenty of fun projects for you to try! 
Plus... puppies!
Instagram post 2128624590360677437_1389840702 Well y’all the armoire is sold! Don’t worry the table and chairs is still available 😂😍 I guess it’s time to work on a new piece... so I need a little inspiration! What are you painting right now? .
.
.
.
.
#paintedfurniture #dixiebellepaint #armoire #ifounditonthesideoftheroad #furniturepaint #chalkpainting #chalkpaintedfurniture #chalkpaintlove #chalkpainted #dixiebellechalkpaint #antiques #antiquestore
Load More... Follow on Instagram

Copyright © 2019 · Darling theme by Restored 316

Copyright © 2019 · Darling Theme on Genesis Framework · WordPress · Log in

Ready to Paint?

Make it a snap with our FREE Paint Planner!

Get your FREE Paint Planner!
loading Cancel
Post was not sent - check your email addresses!
Email check failed, please try again
Sorry, your blog cannot share posts by email.