


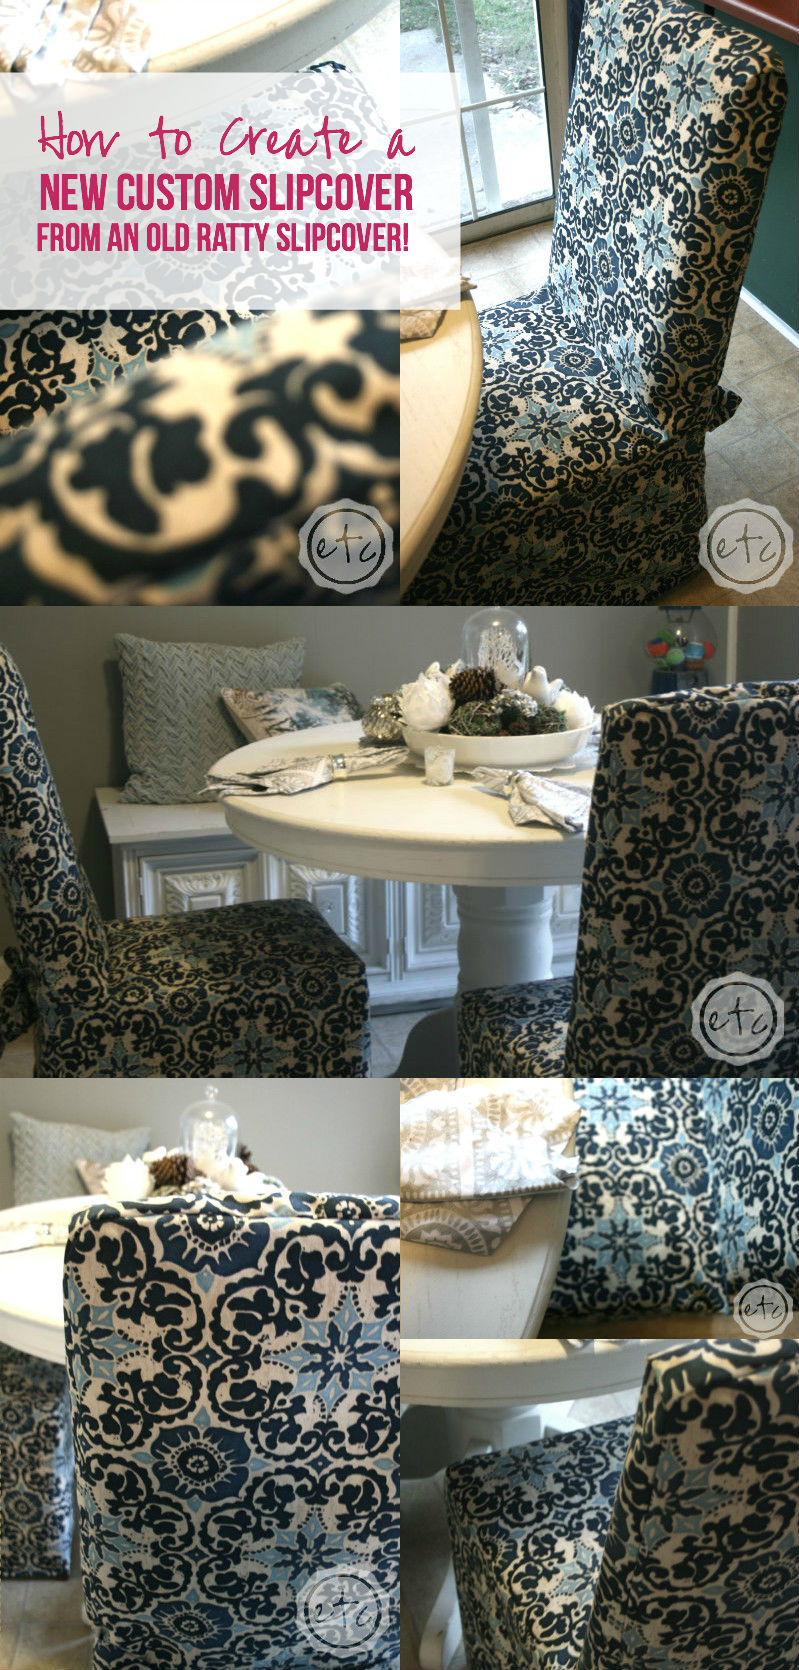
Over a year and a half ago… back when I first started this blog… one of my first posts was a to-do list for our little house. On the top of the list? New slip covers!! It took months to track down the perfect fabric and even longer to actually sit down at the sewing machine… but they’re finally done!
Of course, sewing a slipcover is the easy part (if you know how to sew! If you don’t you can always out source the sewing like I did… Mom was a semi-willing participant 😉 ). The hard part is sewing a slipcover if you don’t have a pattern to follow!
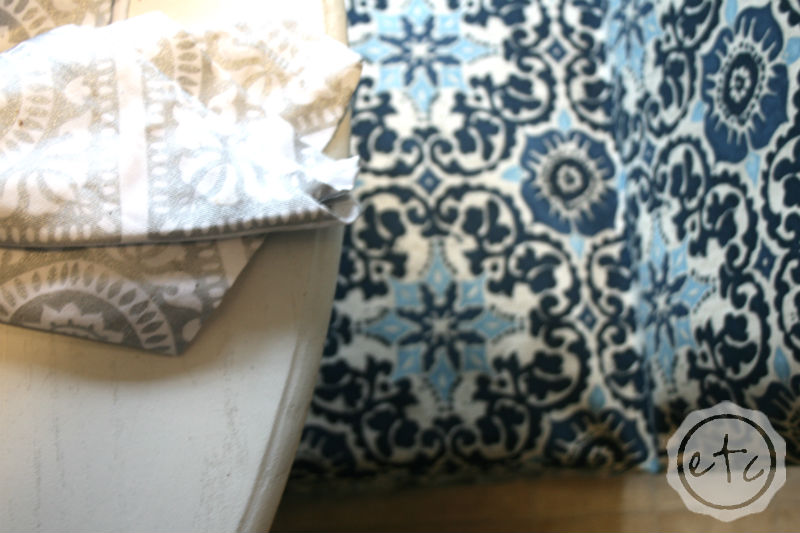
While some DIYers use the pin, cut and sew method I prefer to use the old ratty slipcover method! Here’s the easy part… four years ago Mom and I found these off-white/light yellow slipcovers in the clearance section at Bed, Bath and Beyond. They weren’t perfect but for $5 they were the perfect solution to our little ugly consignment chair problem. Plus… we knew that once we wore out the $5 covers they would make the perfect pattern!
Looking for a bunch of posts on DIY & Crafts? I’ve got you covered!
Click here to see all of my how to DIY & Craft posts in one place!
Just take a look… old, ratty… totally not the right color… these slipcovers were at their best for picture day and they still weren’t stellar! So it was time to make ones! That’s right… time for a brand new custom slipcover!
Eeek!
Supplies for a Custom Slipcover:
Old, Ratty Slipcover (or a pattern)!
Scissors
New Fabric (if you’re making a slipcover for chairs like I am make sure to buy the right type of fabric… upholstery fabric is more expensive but that’s because it’s heavy enough to hold up to all the sitting! Use a coupon to score a great deal!)
Straight Pins for Sewing
Mom (or other source of outsourced labor 😉 ).
Step 1:
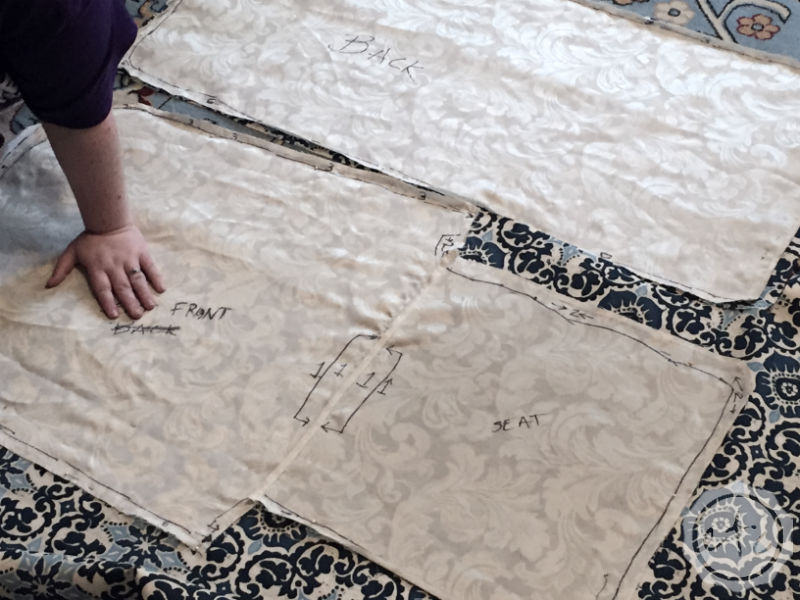
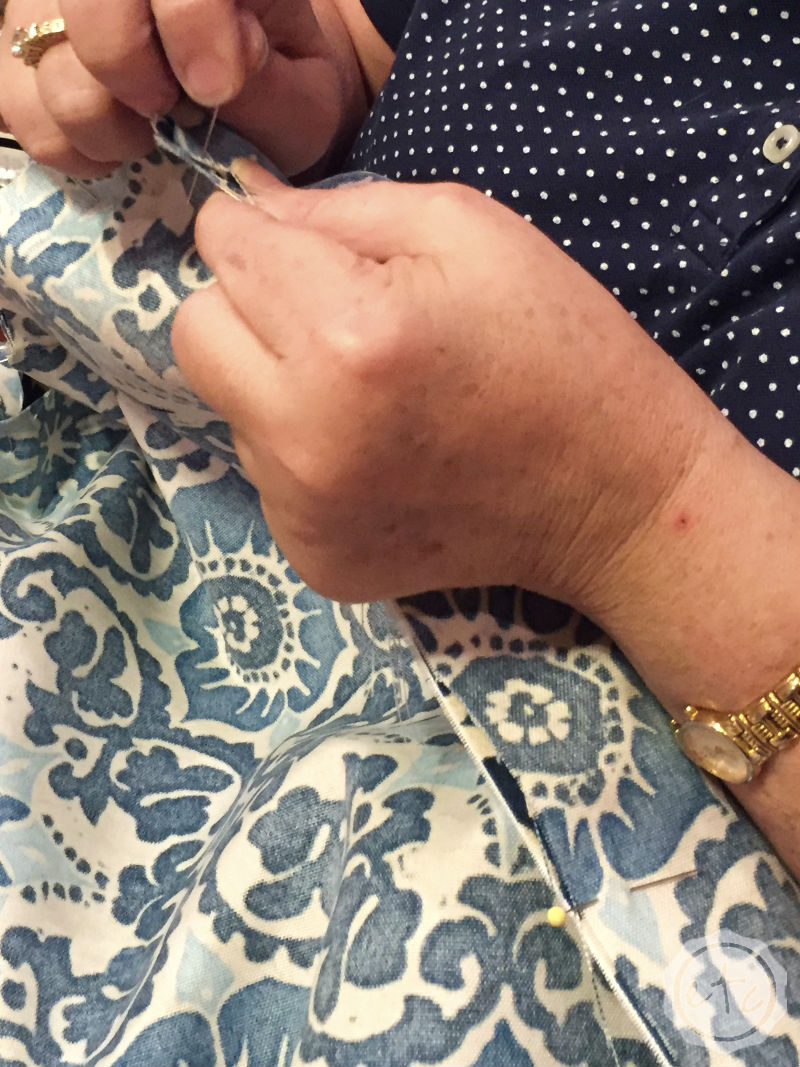
Once you’ve gathered your supplies turn your old ratty slipcover inside out… and put that seam ripper to good use! You want to take the entire piece apart: seam by seam…. but here’s the trick. Label each and every seam as you take it apart! That way you know how to put it back together!
This particular slipcover was uber simple… only three seams. So as Mom started to rip out the first seam she labeled it… seam 1. Do the entire seam… labeling both sides as you go so that you know exactly how to put the pattern back together.
Once you complete the first seam repeat the process for seam 2…. then for seam 3.
On our particular pattern the back of the chair was seam 3… so you’ll notice the number 3 labeling the entire seam on the panel labeled BACK and FRONT. Those seams will match up when we sew! The seam on the SEAT panel is labeled 2… and if you were to look at the rectangle of fabric labeled SKIRT you wold see another seam 2 label!
Make sense?
Step 2:
Cut out your fabric! This part is uber easy… with one important factor! When you’re laying your pattern on top of your fabric make sure to take into consideration 2 small things. First up: make sure all of your patterns fit on your fabric before making the first cut! There’s nothing worse than diving into a project head first… cutting the first two pieces and realizing you don’t have enough fabric to cut the third piece!
The second tip? Make sure your your patterns are lined up perfectly with your pattern… notice where the back of the chair is and how the pattern will look when the slipcover is finished. If you’re working with a repeating pattern like I am you simply have to fold your pattern in half and place it in the middle of a pattern tile!
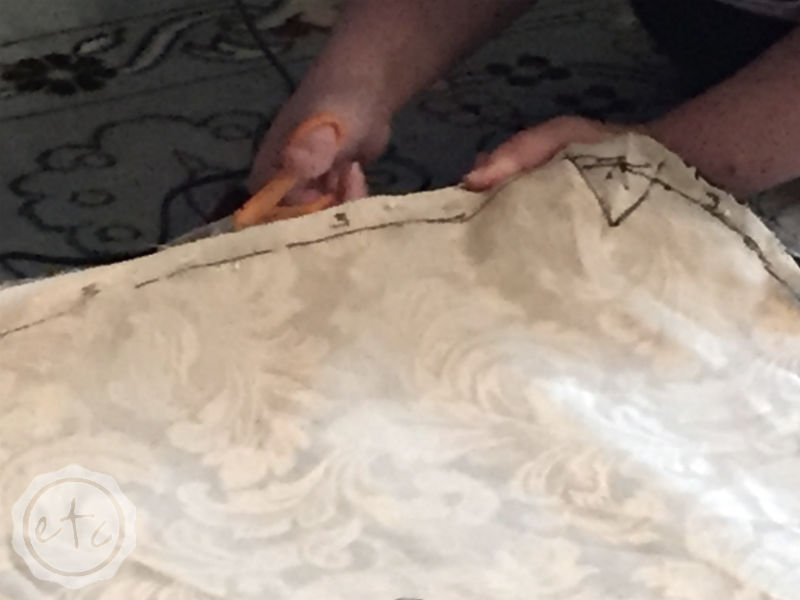
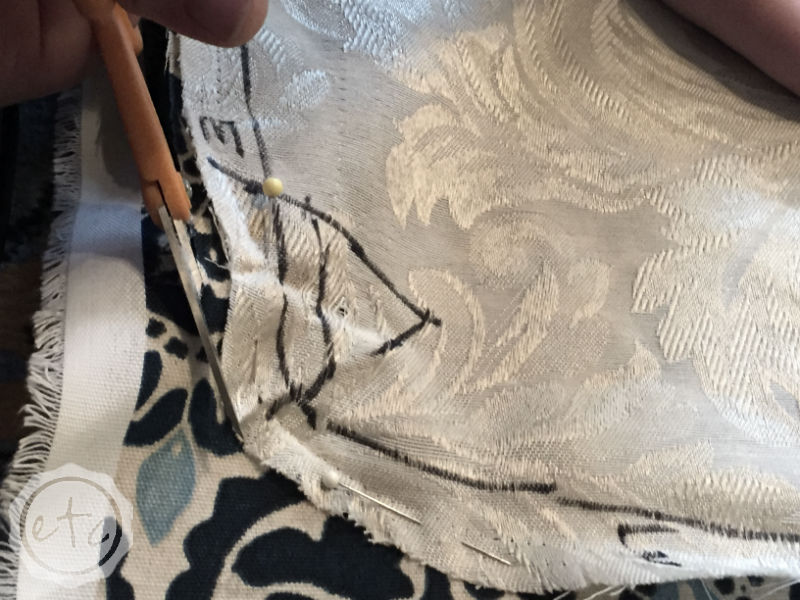
Once you have your pattern lined up with your fabric pin it in place with your straight pins… then cut! try to cut as close to the original slipcover seam as possible… we don’t want bulky seams when we’re finished!
Tip: Either unravel all of the hems and then cut your fabric exactly the same size as the pattern… or remember to cut your hems about 1/2 an inch longer than your pattern. That will allow for a quarter inch seam.
Bonus Tip: Notice how the corners of my chair seat had pleats (to go around the corners) take notice of this type of detail when you take the seams out of your original slipcover. Mom drew the detail into the pattern (the small triangle at the corners) so she knew where to gather the material. Taking notice of this type of detail will ensure that you can put your new slipcover back together in the same way! Monkey see, Monkey do! Right?! Right.
(No, Mom, I’m not calling you a monkey).

Step 3:
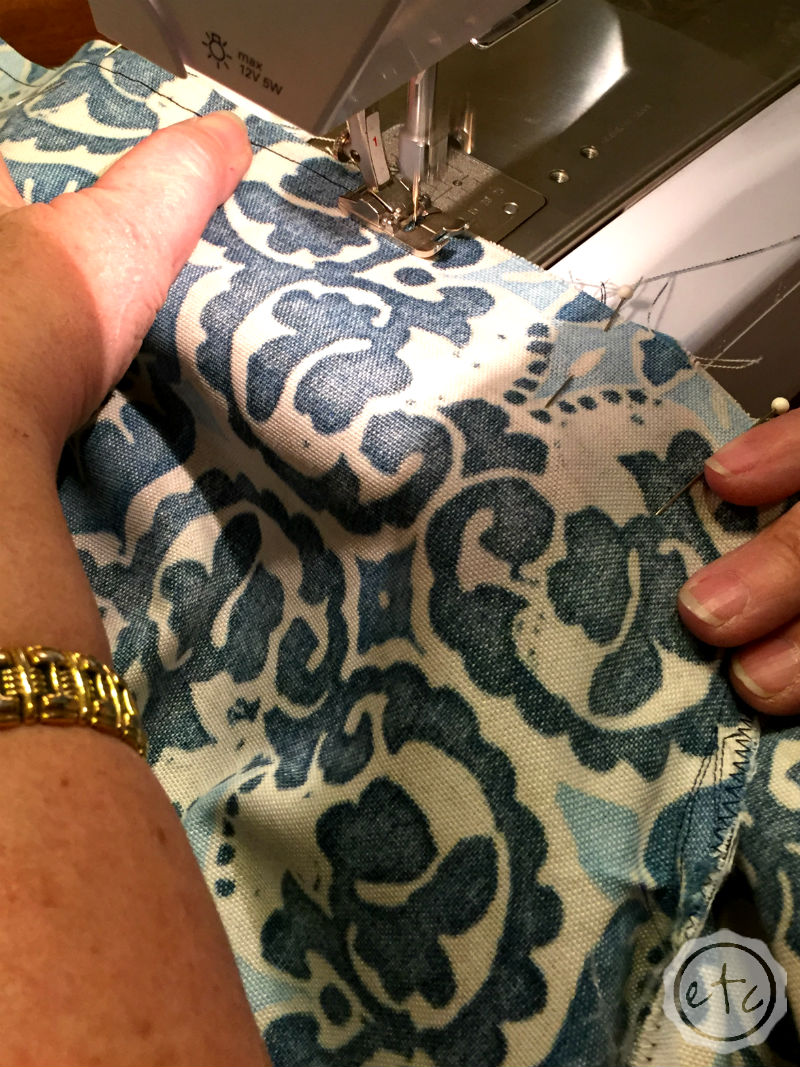
Now that you have your pattern cut out it’s time for the fun part… sewing! Take your pattern and carefully pin the labeled seams together… pin seam 1 and seam 1 together (with the good side of the fabric facing inwards! Notice how all the fabric looks dull and dim? That’s because we’re sewing the inside of the slipcover!)
Work one seam at a time… pin seam 1 and seam 1 together and then sew seam 1! Whoot whoot! We’re one third of the way through! Haha!
Bonus Tip: After you sew each seam make sure to zig-zag the edges of each seam… you might feel like you’re sewing each seam twice but this step will prevent your seams from unraveling. If you have a serger you only have to go over each seam once since it combines the steps into one solid motion. Without a serger the rig-rag stitch is your best option!
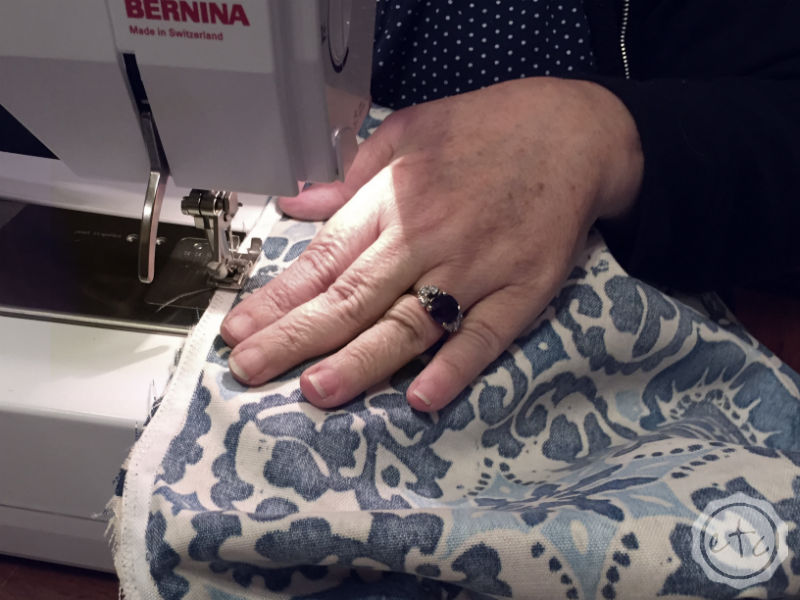
Once you’ve sewn seam 1 move on to seam 2… pin together and then sew. Then seam 3… and then the hem! We’re rocking this!
(Thanks Mom!)
Bonus Tip: Once you sew each seam make sure to iron it! Push the seam to one side and then iron the entire seam… this will help the seam lay flat when you open it right side up! As Mom says “It makes it less poofy and way more professional!”. Trust me… she’s right!

Step 4:
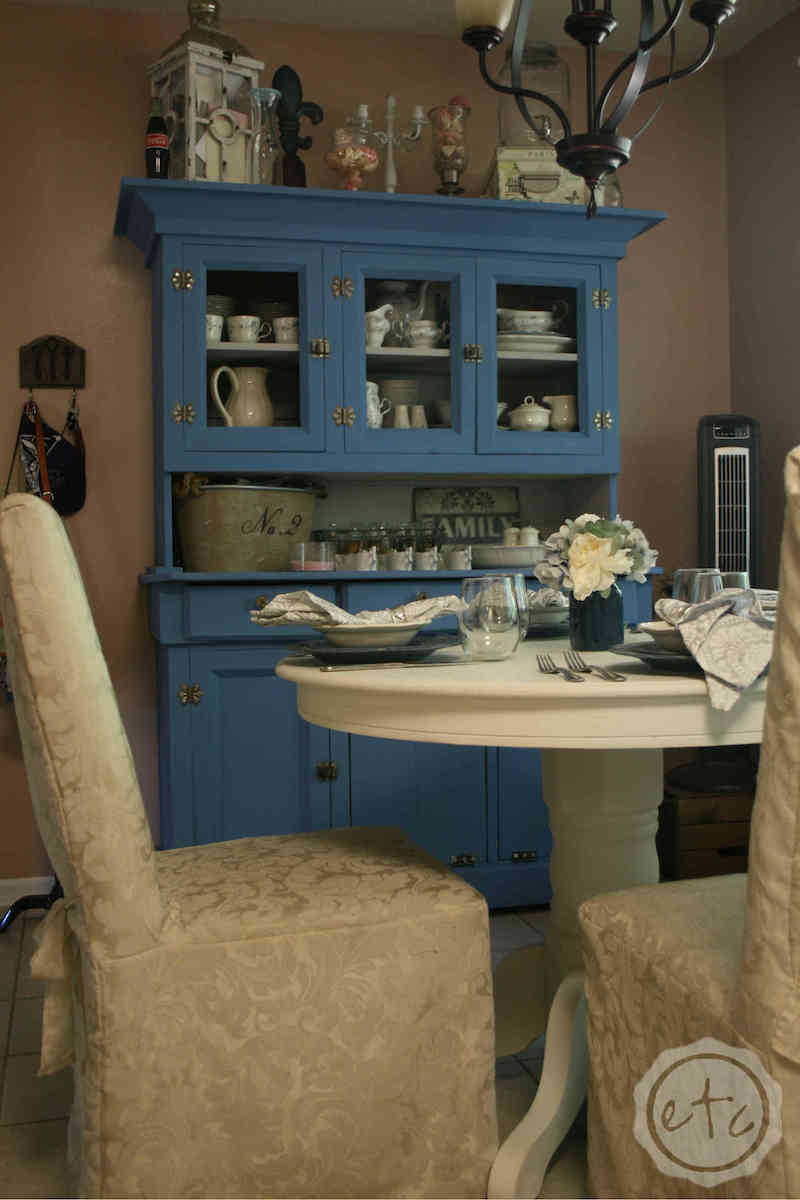
Say “Thanks Mom!” and rush home to try on your new slipcovers!!
Perfect fit!
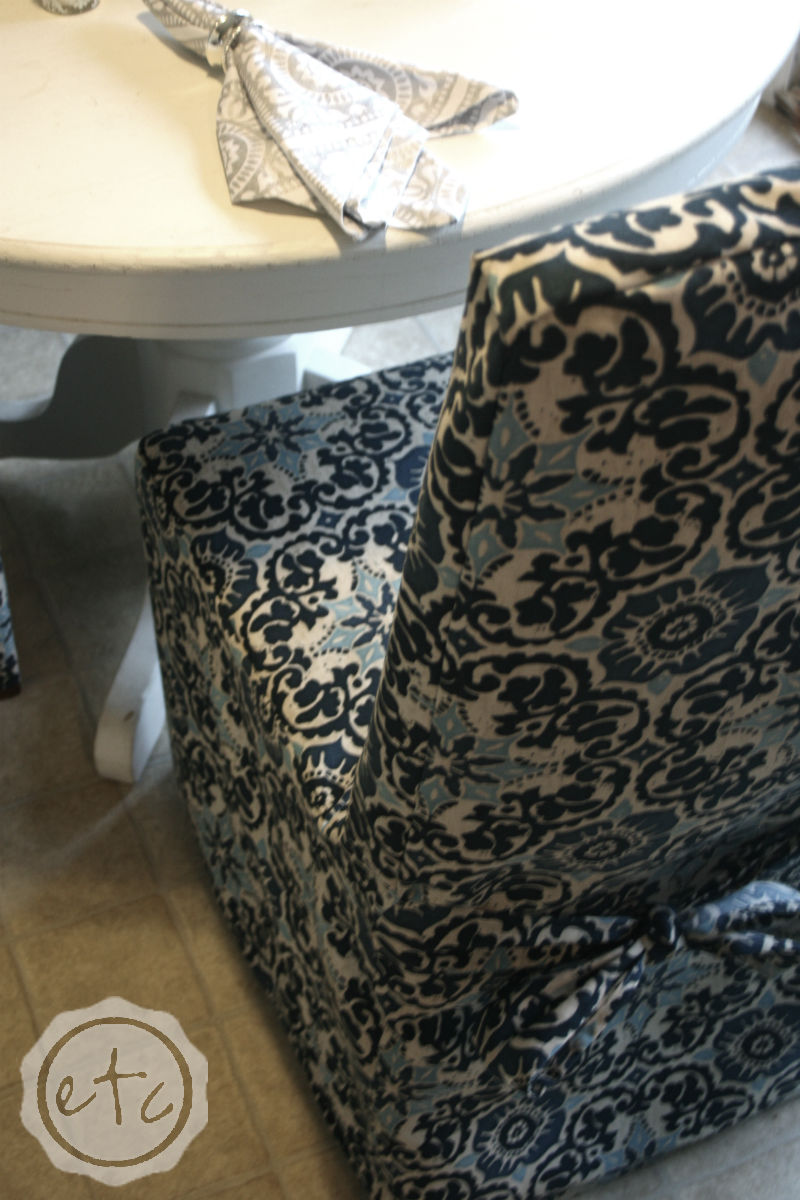


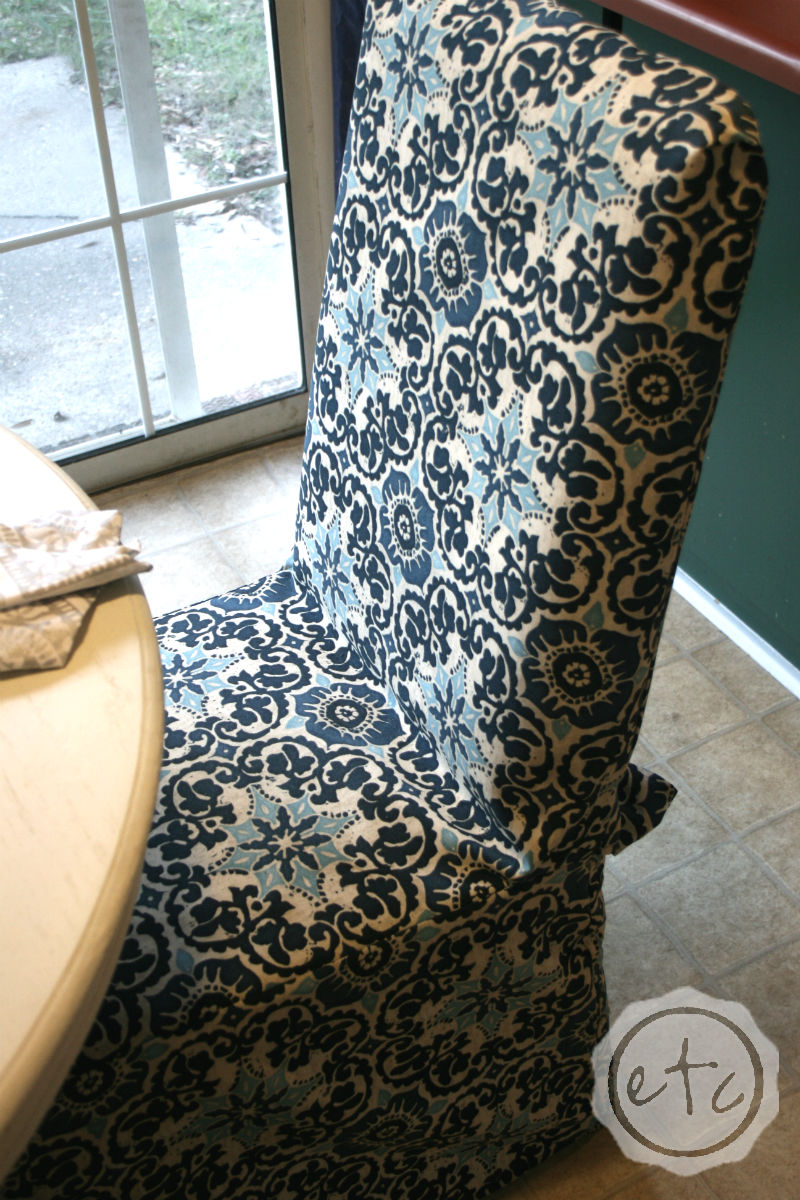

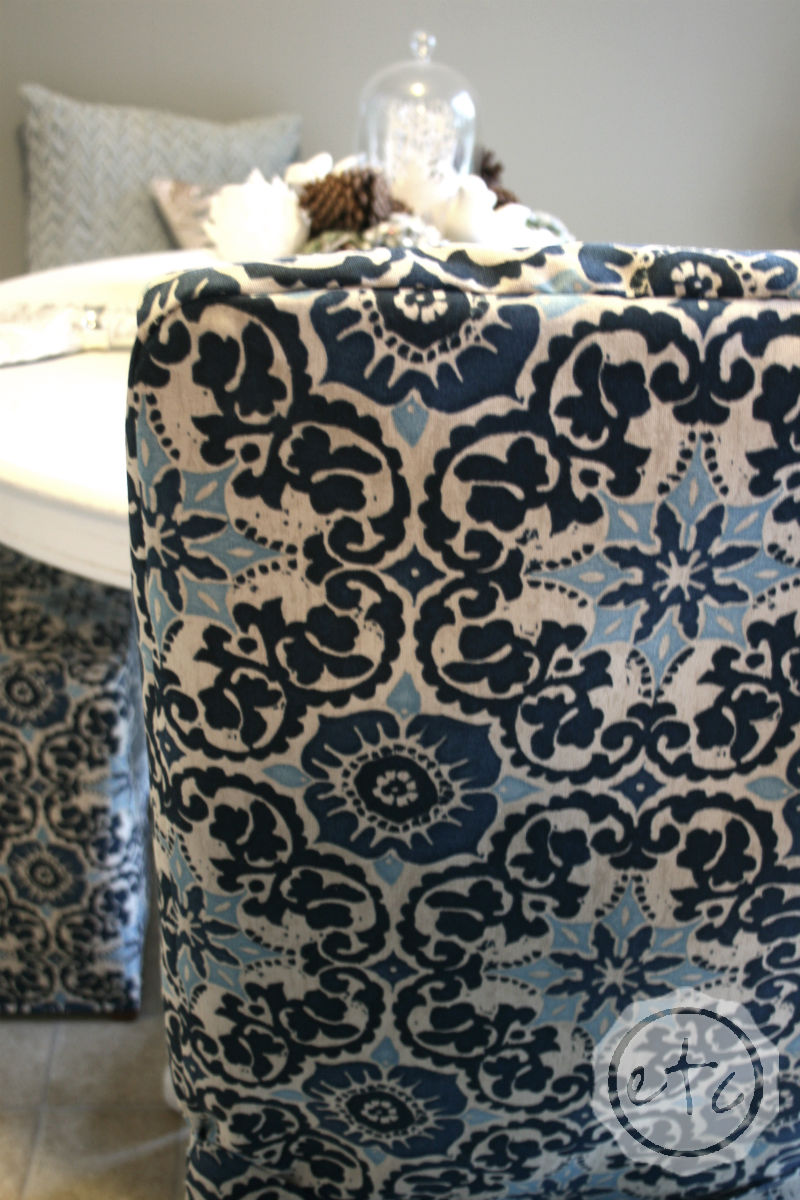
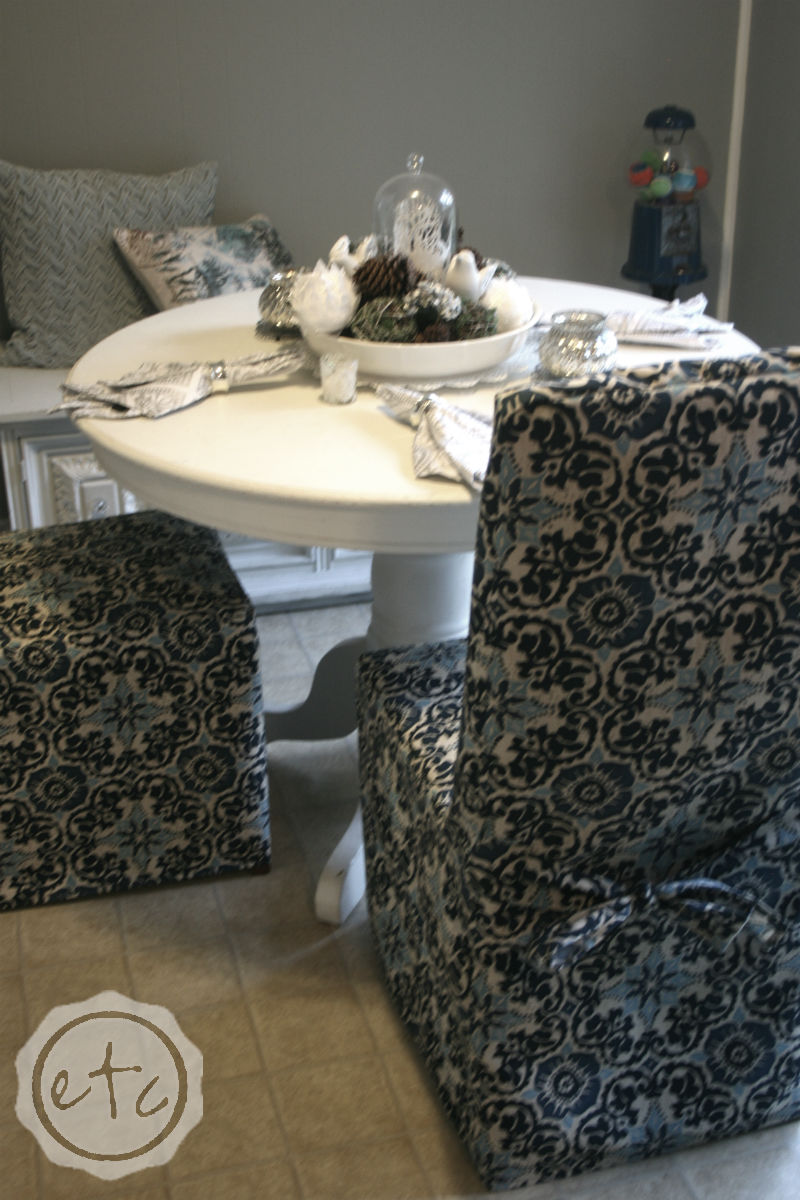
With this method you can take any old, beaten up, ratty, threadbare slipcover and make a shiny new slipcover! Easy peazy lemon squeezy!
Now if I’m lucky I can convince Mom to help me make one more slipcover… the hubby’s office chair needs a makeover!
What do you think of this little tutorial? Any plans to rush out and sew something awesome? Any steps that need a little clarification?
Sound off in the comments!
Linking Up With: Table and Hearth


Love this post. Makes me want to whip out my sewing machine….. or hang out with your Mom!! XO
Trust me… it’s always best to hang out with Mom! Lol Hope you’re feeling ok LeeAnn… come over for a sewing party anytime!