


Remember that work conference a while back? Well when you work for Sherwin Williams you can expect at least 4 hours of that conference to be painting something! We had an excellent class full of tips and tricks…. which came in handy when the hubby decided we just had to paint! So here’s my best tips on how to paint like a pro… courtesy of SWU!
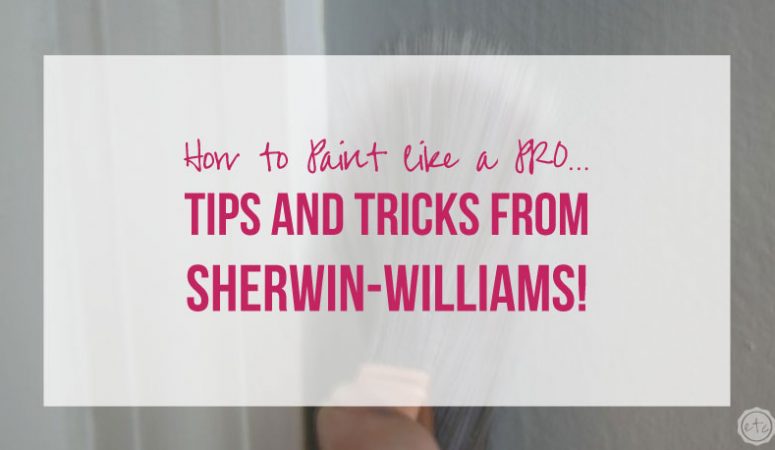
The first step? Prep work! Make sure all of your surfaces are clean, dull and dry. As long as you keep your home fairly clean you should be fine… but if you’re painting the kitchen or bathroom you might want to give certain areas an extra scrub 😉 . If you want to protect your floors and furniture feel free to throw a drop cloth over anything in the splash zone! If you have a steady hand to cut-in your moldings feel free to skip the blue painter’s tape… if however you have itty bitty molding in every single corner like we do TAPE EVERYTHING!
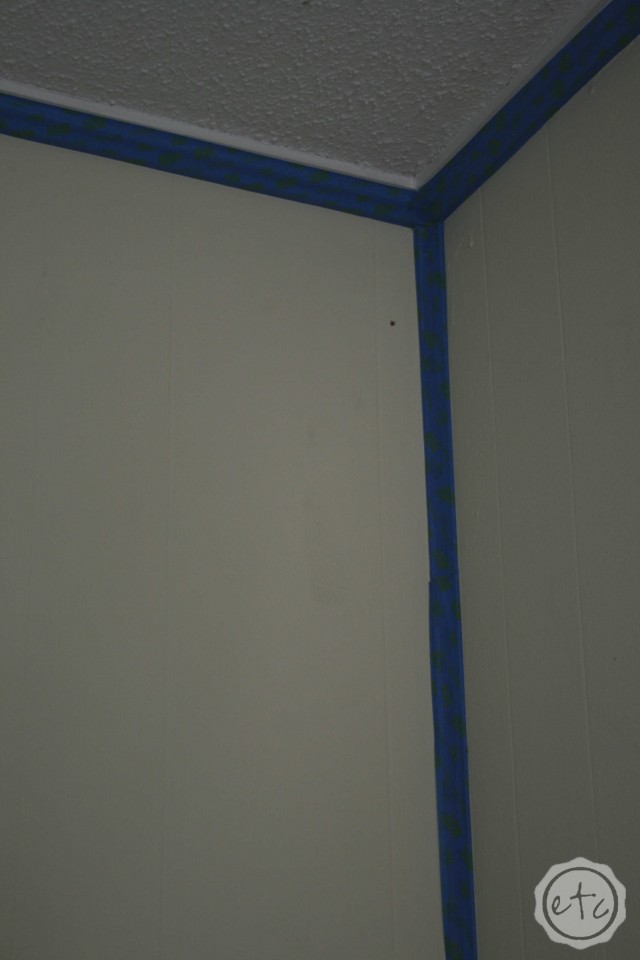
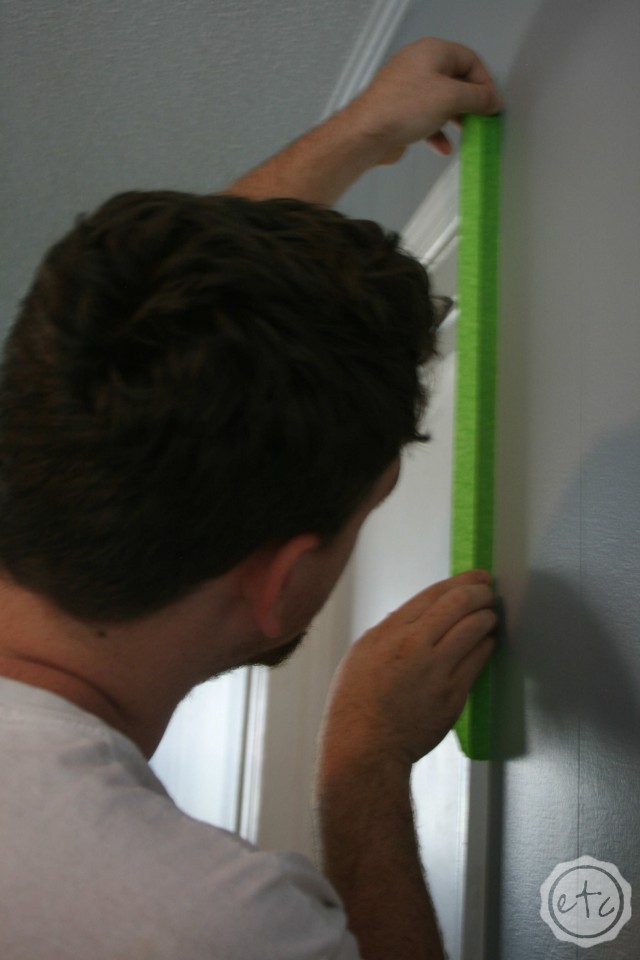
Just make sure that when you tape you are placing your tape as close as you can to the edge… and then pressing it tight! Use a fingernail or straight edge to secure the edge down to the wall. Other wise paint can seep underneath and ruin those beautiful white lines. Yuck!
Looking for a bunch of posts on painting? I’ve got you covered!
Click here to see all of my helpful paint posts in one place!
BONUS: Freebie Alert!
Looking for a little color help? I’ve put together a quick, easy and FREE Printable of my Top 10 Neutral Paint Colors and their coordinating colors. So that you can pick a color with ease. It’s at the bottom of this post so don’t forget to hit download before you go… easy peezy lemon squeezy!
Score!
Once the taping is done we can move on to the second step: Painting! Start by cutting in the edges with a small brush: try a 2″ angled sash brush. They’re small enough to cut in properly and easy to handle. Paint the entire edge of a room first… about 5 inches out from the edge will do. You want an area large enough to roll into without hitting the wall.
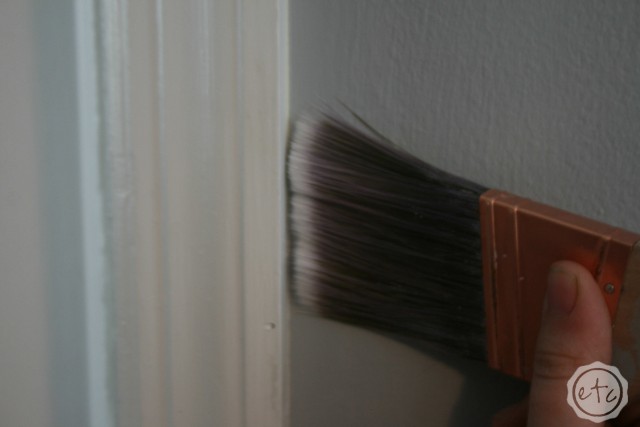
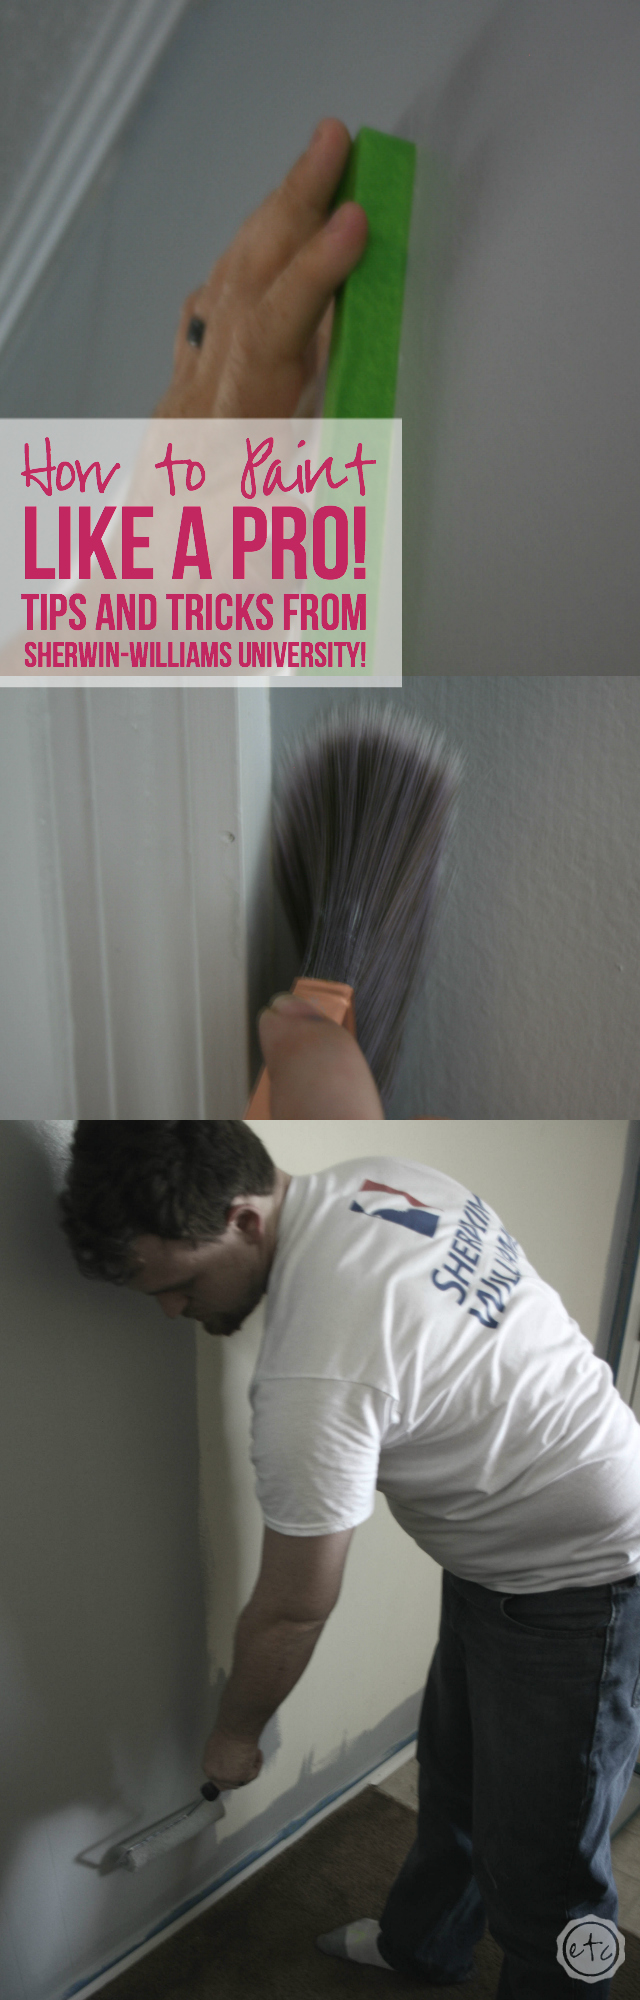
If you aren’t using tape cutting in is mucho important… it makes all the difference between a sharp crisp line and getting kool-aid in your cheerios. At SWU (Sherwin Williams University… duh!) they teach you that brushes are meant to be held vertically to cut in… take a look at the picture below.
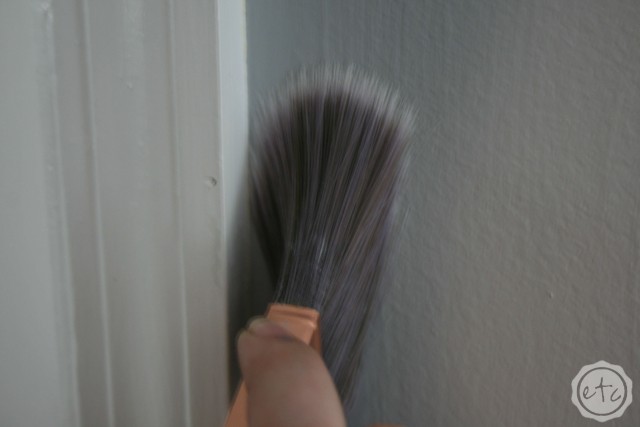
See how the bristles are pressed straight down against the wall? This makes the bottom bristles fan out… so that when you pull the brush down the wall it makes a crisp line. Load your brush up with paint AND DON’T WIPE THE EXCESS PAINT OFF… you want a lot of paint on your brush to cut in. If it starts to drip you can tap the extra back into the can… just don’t wipe. Next tap your brush against the wall to get your bristles to fan out (like the picture above)… then pull! Easy peezy! Haha… okay not easy peezy…. it definitely took a couple try’s to learn how to do this the right way. But once you have it down it works so much better!
Most people think that to cut in you need to hold you brush sideways… like the bottom picture… and paint in a straight line. Trust me this is way harder because really? Who can paint in a straight line?! No one… especially not for every wall in your house. Try it the right way… it really works!
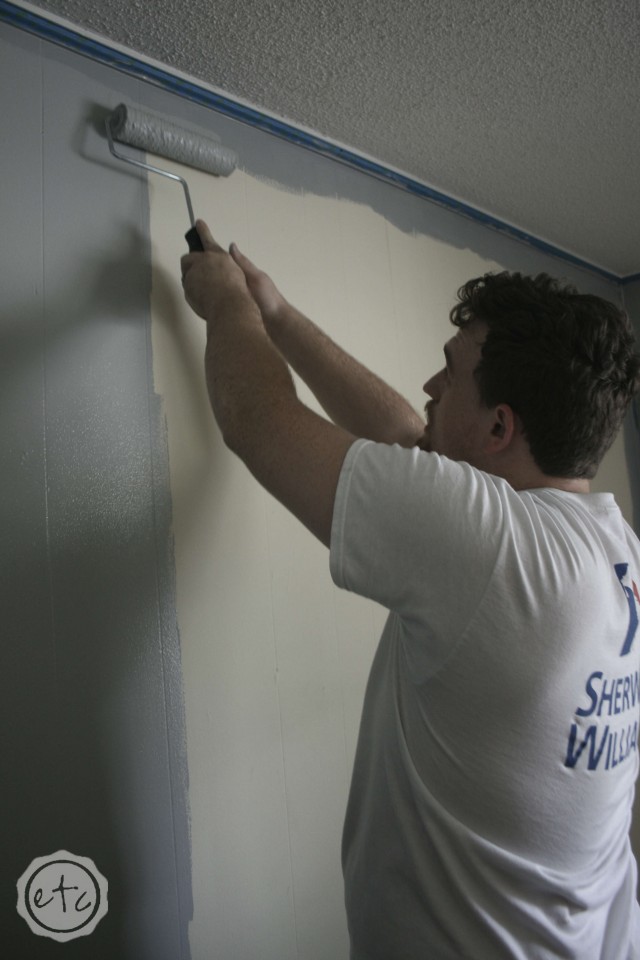
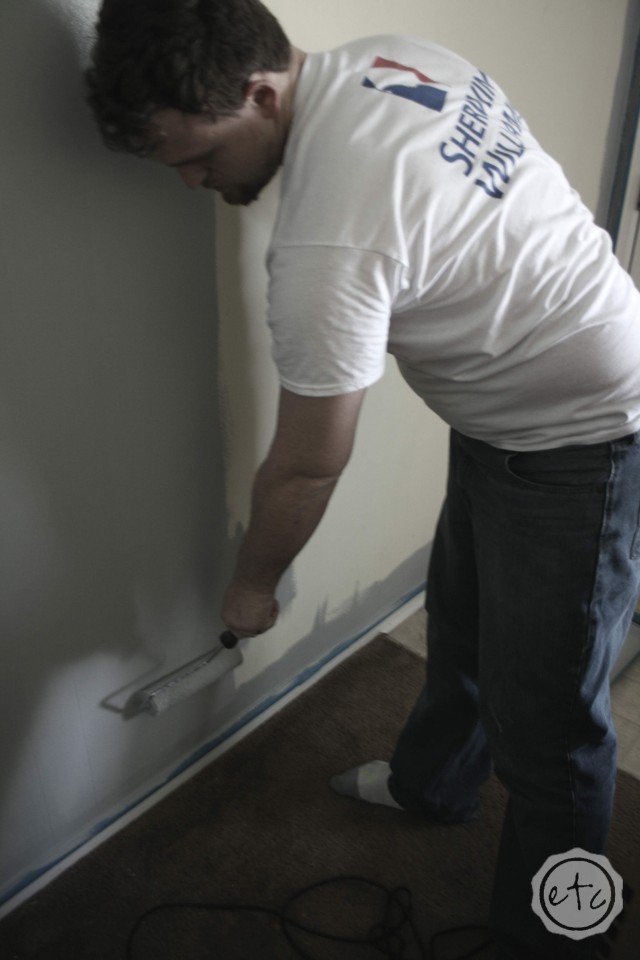
The most important part about painting is keeping the paint wet while you’re painting… so do one wall at a time. Paint the entire wall corner to corner before you move on. Once the edging is painted you can start to roll the wall… making sure to roll all the way into the wet edge of the border! You want to roll as close to the top of the wall (or side) without hitting the ceiling… this blends the brush paint with the roller paint and avoids “hatbanding.” Isn’t that a fun word? It’s the effect that happens when the part of the wall that was cut in with a brush looks completely different than the part of the wall that was rolled! Imagine a border around the edges of your wall… the same color, same paint, but a slightly different texture. No Bueno!
When you’re ready to roll your paint onto the large parts of the wall you’re almost done… this part is as easy as you are tall! You know because a tall person can roll the whole wall in one swipe (aka the hubby) where as the rest of us have to run up and down the ladder to fill the whole wall (and I’m not even short!). Now the folks at SWU completely busted the popular W paint method: you know the one on all the home improvement shows where they teach you to paint a W on your wall and then fill it in? I’ve been doing that for years and it works just fine… but this is so much better.
Start with your roller all the way at the ceiling… and paint straight down to the floor… then straight back up to the ceiling. Yes you’re painting the same line twice… just go with it… You’ve basically painted a line on your wall. A line that is covered really well with paint because you’ve gone over it twice! Now move your brush over just a bit… so that you’re going over about 1/3 of the line you just painted… and do the same thing. Let gravity pull your roller all the way down and then push it all the way up. Then move your roller over until it’s covering about 1/3 of the second line you just painted and keep going… all the way across the wall. The whole point is to keep a wet edge of paint… one edge that is always wet and being painted over. This ensures that when your paint dries it’s all one consistent color and direction… gorgeous!

If you’re working by yourself then cut in all of the edges on one entire wall first… then fill in with a roller! If you’re working with a partner-in-crime pick one person to cut in and one to roll! Now you can do double duty! Twice as fast!
Once you’re done step back and enjoy the beauty of your new paint… trust me the best part is pulling off that tape (once the paint is dry of course) and seeing those crisp lines for the first time. Breathless!
So what do you think? Do these paining tips make you want to paint a room or run for the hills? It’s a lot of information but I promise… after painting our entire house I can attest to how much it’s worth it!
P.S. 3 Quick Tips to Pick the Perfect Paint Color for your Home and How to Keep Track of the Paint Colors in your Home


I’ve been painting since I was about 10. I never had a white wall until I moved into the home I’m in now. I’m so ready to paint but there will be a ton of prep work to be done! I’m glad to see the W method is out. I don’t like doing it that way… it hurts my wrist. I’ve never had luck with painters tape either. It always bleeds through :-/ Maybe I don’t press it down hard enough. Thanks for the post!
The W method never worked for me either… sooo much work! This is way easier! This is the first time painters tape has ever worked for me, I’ve always had bleed through before! This time I used the new blue tape with the edge lock… pressing it down firmly worked like a charm! I know it’s a lot of prep work but it’s so worth it to not have blank walls! Good luck with the new home!
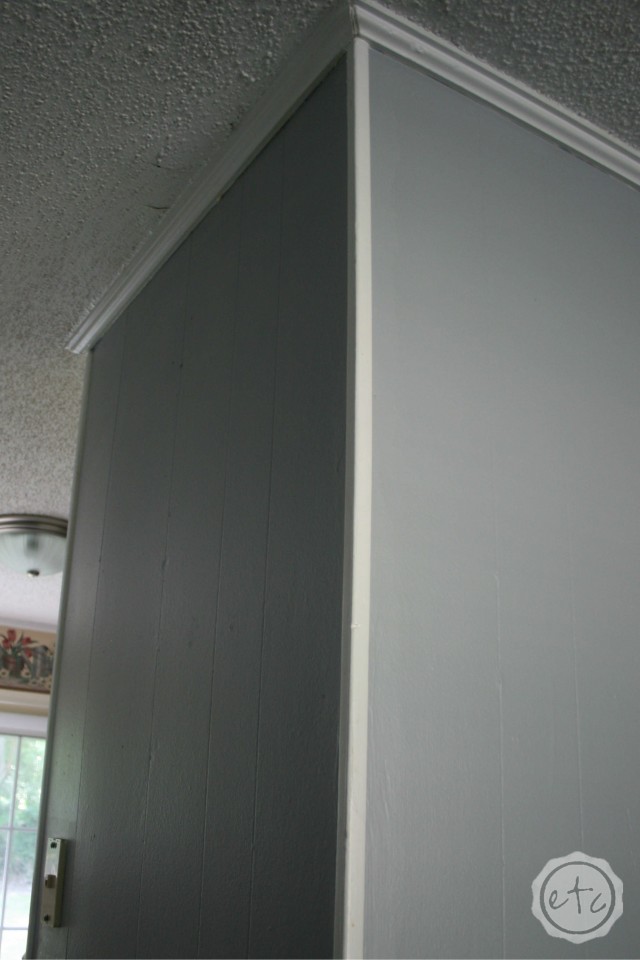
I’m totally loving gray walls these days, so the in thing right now! I’m terrible a t taking the time to prep, I’m so impatient! 🙁
That’s okay Michelle… I’m not good at the prep time either! With two people the work goes way quicker… so much easier! I love the gray, it turned out wonderfully! Thanks for stopping by!
I love painting/repainting rooms! I think I would also love attending SWU 🙂
Ha ha! I’m not sure anyone at SWU loved being there! I mean there were cool parts (don’t get me wrong) but work conferences are rarely ALL fun and games! Thanks for stopping by Brooke!
Yes! This makes me wanna reprint my living room!! The previous owners had it painted a light blue… It’s not that pretty. Hubby keeps saying we’ll hire someone to do it, but I’m a DIY gal and wanna paint ALL THE WALLS!!!
You can totally do it Ashlyn! Hiring someone is easier… but you can rock it! My hubby wasn’t sure about it either but now he’s a pro!
Oh, I have been thinking of re-painting my daughter’s room. This post of your has really helped me to understand the basics to do the job perfectly. Thanks!
I’m so glad it helped! Have a blast painting with your daughter… sounds like a fun memory!
My mom painted the rooms in our house every other month while we were growing up! I joke now that we actually lost square footage because she painted so much! Haha! Where was this post 10-15 years ago when I was being roped into painting our living room for the 4843184th time!?
4843184 times is very ambitious… maybe you can use these tips if you ever need to re-paint again 😉 We grew up in military housing so we were never allowed to paint the stark white walls! Maybe I’m making up for that now!
Great tips. I’ve done a lot of painting and find I do better cutting in with a brush and no tape, but if you’ve never done it before, tape is so handy!
I totally agree Jenny… I’ve done most of the house without tape but those little corner moldings are killer! Haha! Tape can be awesome if you need it… Or take extra time!
such an awesome post! thanks for the awesome tips 🙂 xxx, kenz
http://sincerelykenz.com
Thanks Kenzie! I’m so glad you liked it!
Tape everything! That must be the golden rule because I’ve learned it the hard way too many times. lol. I love the color you chose. My room is actually that same hue. I love it & it goes with just about any decor. Nothing like some fresh paint to really freshen a home up!
Definitely the golden ticket! The gray looks amazing… I love how it looks! Thanks for stopping by Heather!
Wow what great tips…and we are in the process of building and will be painting here VERY soon. We plan to use Sherwin Williams paint too! Thanks for the great article and tips
Ohhh building is so much fun! It’s stressful too though, you are very brave! Great choice with Sherwin-Williams paint… I love it! Even though I might be biased!
A few tricks I’ve learned, to press down tape really well, use a smooth butter knife instead of your finger nails, also they make several inexpensive paint shields, so you don’t have to tape.
Always have a damp cloth to wipe up speckles and drips as soon as they happen.
Using a paint pole eliminates going up an down a ladder when rolling.
If you are going to a dark color, paint your walls first with a tinted primer. and use 2 coats of paint.
Also I haven’t had much luck with the “1 coat ” paint or the 2 in 1 paint, (paint and primer) primer attracts stains, especially if you have smokers in your house.
Hi Madge, thanks for all your fun tips! I love using a butter knife for pressing down tape… I learned that trick in college! Those late night graphic design projects always seemed to include stolen butter knives from the cafeteria! I even kept one in my backpack for a while… until I forgot about it and had it confiscated by the airport security guys. Oops!
We sell tons of the paint shields at Sherwin-Williams… I don’t love to use them though. I would rather free-hand or tape! To each his own though… my hubby loves his paint shield!
Also just a bit of insight from a Sherwin-Williams gal… paint and primer in one? It’s a marketing gimmick… the paint will cover better but it’s not the same as using a coat of primer and 1 to 2 coats of paint! I always tell people to go with a primer! Your paint will turn out truer to color, last longer and be easier to clean!
Thanks for stopping by Hon! I always love to read peoples tips and tricks!
Thanks for your painting tips. I have used some of them in the past and learned a few things I didn’t know. The one thing I was looking for was a better way to paint the ceilings. when you pull the strips off what is the best way to fill those seemed cilings? please let me know if you have a good idea for that . Thanks so much for all your help. I’ll let you know how that works out for me
Hi Cheryl, once you tape off the walls you would paint the ceiling in the same fashion as the wall. Trim out the edges first and then roll the large middle area! Hope that helps!
An extension pole for rolling walls is invaluable! It makes us 5’5′ people as efficient as 6 footers!
A good extension pole definitely helps… as long as you can control it! I’m always hitting the ceiling! Haha! Thanks for stopping by Gina!
Do you recommend lightly sanding the kitchen walls before painting them? We are painting our kitchen walls red, and I don’t want to mess up and have to redo it. Haha.
It depends what is on your walls. If they are glossy (like a varnish or shiny plank) then sanding and using a bonding primer would be perfect. If it’s bare drywall then a drywall primer is the ticket. If it’s already painted then you’re good to go! Just a little tip when painting red walls… White primer or tinting the primer red often leaves your red paint looking pink! Red paint doesn’t cover very well so it picks up a bit of the color underneath… For best results tint your primer light grey! The grey will give the red just enough hide to leave that topcoat true to color. Good luck and let me know if you have any other questions!!
What is an easy to hold cup with an easy to hold strap and where do you get it?
The handy paint pal! You can find them at a bunch of different stores (I know we sell them at sherwin williams!), here’s a link if you’d rather prime it up!
Great tips! I’m about to paint my new craft room. Can’t wait to get at it but need to do the prep first. My question is if the recommendation is hold the brust vertically when you cut in, how do you cut in at the ceiling/wall edge?
Also, have you ever used an edge painter pad that you drag horizontally?
Thanks!
You’ll hold the brush horizontally when cutting in the ceiling… parallel to the surface that you’re cutting into. I have used an edger and they have their charm. Some people love them and some hate them. I find the trick is keeping the little wheels and top edge clear. Roll a little and then wipe clean.
Good luck!
If you are doing two coats of paint, do you do both coats of cut in, then two coats with the roller? Or one cut in and roll, then second cut in and roll?
Good question! Do the first coat cut in and then roll into the wet edge, then the second coat the same way: cut in and then roll into the wet edge. You always want to roll into a wet portion of paint. If you roll into dry paint you risk the paint not matching when it dries. Which is a weird concept but true! Good luck!
Thanks for the heads up. I’m really eager to learn how to paint so I can be able to save money from hiring pro painters.
I’ve enjoyed reading your tips.. Very helpful!!