

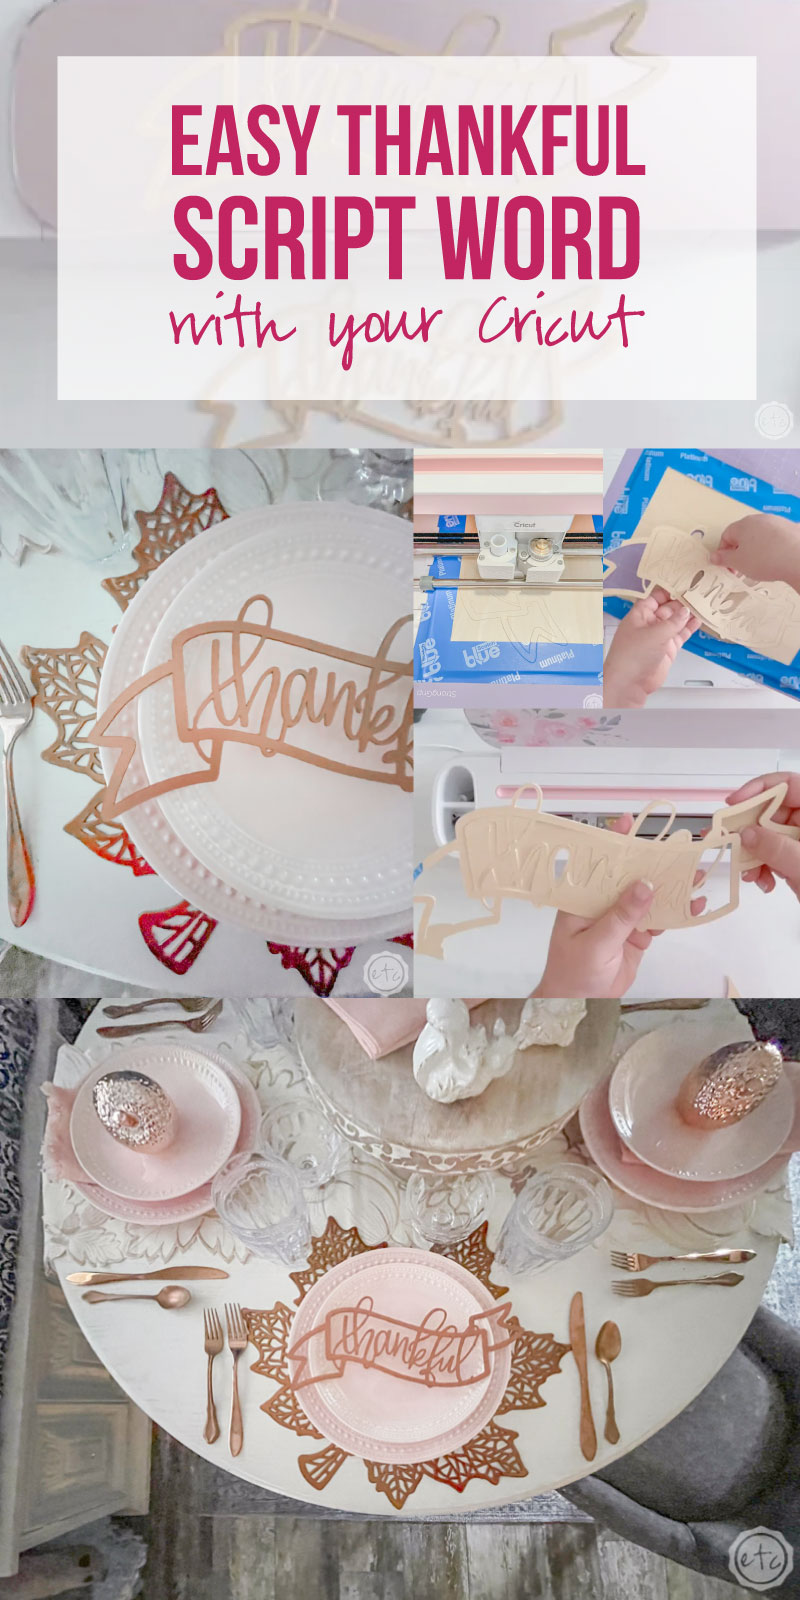
For a few years now I’ve seen pretty wooden scripted words set delicately across plates… and like the rest of the world I want to do that! Of course, I could buy a couple, I could buy a bunch! But I didn’t really want to spend money on something I knew I could make myself. So I grabbed my Cricut Maker, a knife point blade and a few sheets of basswood. A few hours later I was good to go!
Instead of making my own cut files with the pretty thin swirls on either side I grabbed a fun file from the Cricut Access library with a banner in the background. I thought this would make my little thankful words a bit more substantial across my dinner plates… and therefore easier to cut on my Cricut. Of course, you can use the font tool to design any word you like… and then cut them out with the same techniques in this post.
Ready to jump in and get started?
Supplies:

Step 1: Customize your Cricut Access Cut File
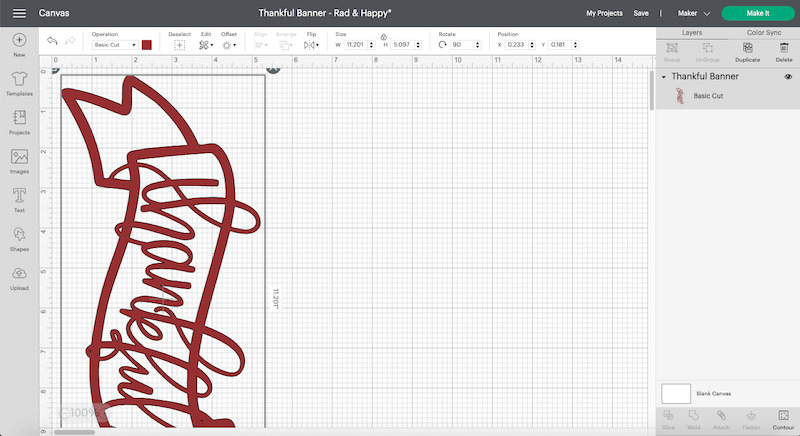
Even though we’re using a Cricut Access File we do need to customize it just a little bit! For this project I have 9×12 sheets of basswood… so I want to my cut file to take up almost 12 inches of space. Of course we need a little room for error so instead of resizing my cut file to be 12 inches exactly I typed 11.2 into the width window for size.
If you’re not sure what size is best you can always re-size your image and then click make it to check if it fits properly on your cutting mat. For a 12 inch sheet 11.2 is the widest an image can be before it says you need a bigger mat.
Then I turned my cut file vertically so that I would avoid the star wheels on my machine… and I’m good to go!

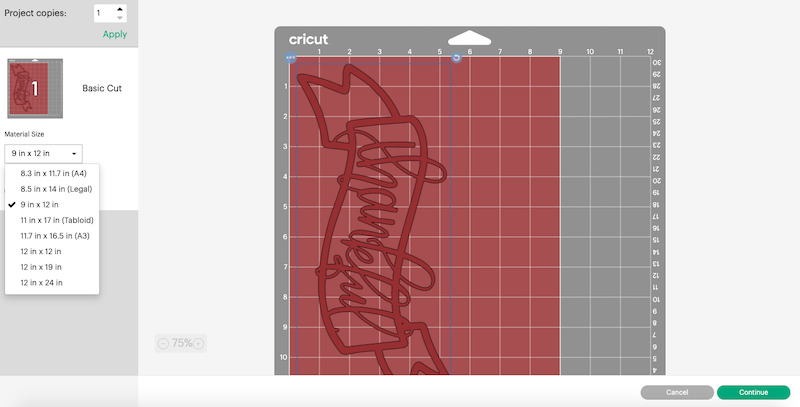
One last tip? Once you hit make it don’t forget to set your material size in the drop down to the left. In this case I selected 9×12 from the drop down and then hit continue. However If you’re using an 11 x 11 (which is the larger Cricut basswood size) then you’ll need resize your piece to 10.2 to begin with and then select 11×11 now from the drop down.
Step 2: Cut your Basswood
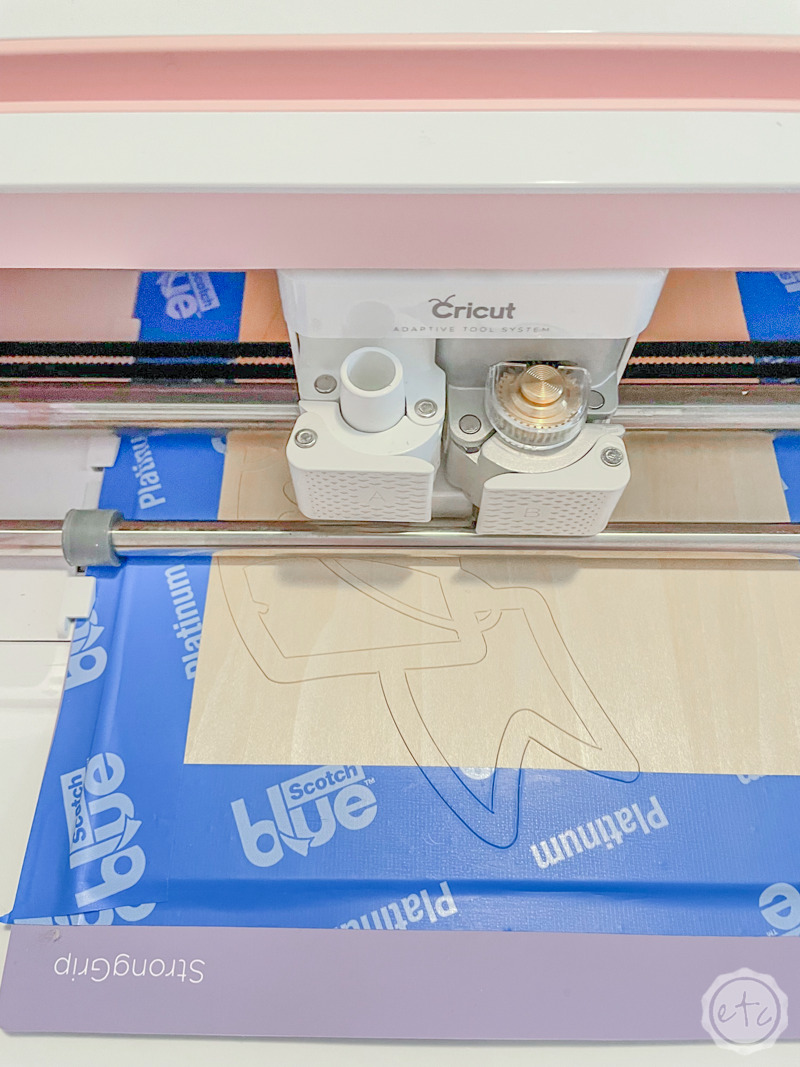
Now that our cut file is set up it’s time to cut this baby out!! Of course, when working with basswood there are a few steps more than normal. Make sure to place your basswood on your cutting mat in the upper left hand corner and then press it down firmly.
The knife blade makes many, many passes over the basswood to cut all the way through the material so you want to make sure that the basswoodd doesn’t move… otherwise those many, many cuts won’t line up and you’ll be left with a mess instead of a properly cut thankful script word.
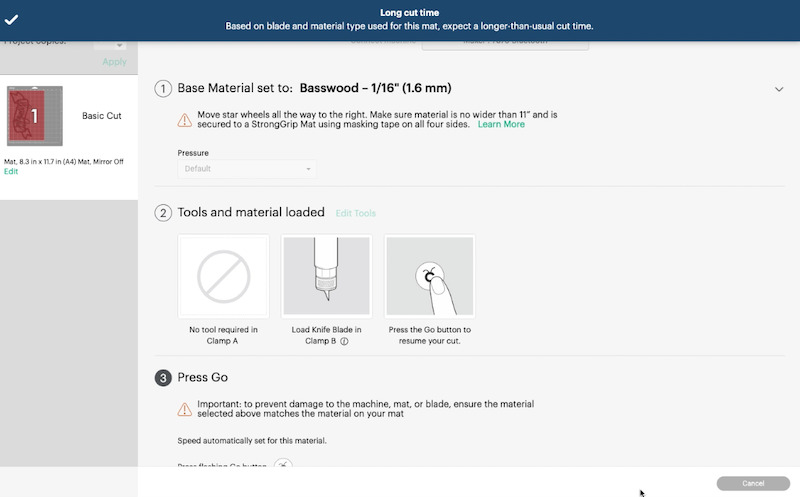
Cricut Design Space does remind you of allllll of this if you aren’t familiar with the process.
Basically once you’ve placed the basswood down on a strong grip cutting mat make sure it’s really secure by going over it a few times with your brayer. Then use a bit of painters tape to secure the basswood on all 4 sides. Once you’ve done this you can move the star wheels over (the four little spinning wheels on the Cricut) so that they don’t interfere with the basswood itself.
These star wheels will leave tracks on your basswood which is why you can’t use basswood that’s wider than 11 inches with your cricut (9×12 is fine as long as it’s vertical and not horizontal).
Last but not least go ahead and load your knife blade… and make sure it’s sharp. If it’s dull it won’t cut all the way through. I like to change my knife blade out every 3-4 projects (way more often than my normal cutting blades) so that I never have a project that isn’t cut all the way through.
Trust me, I learned that lesson the hard way.
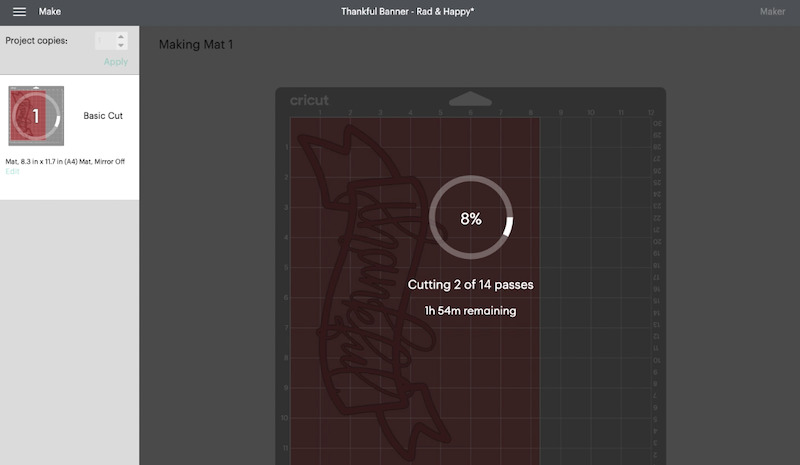
Now click cut! It’s going to make 14 cuts and take about 2 hours to complete the first piece. You don’t need to stay with your Cricut for the entire 2 hours but I do like to watch the first pass to make sure the knife blade doesn’t get stuck anywhere… then I’ll check in every 15-20 minutes to double check that everything is good to go!
Step 3: Weed your Basswood
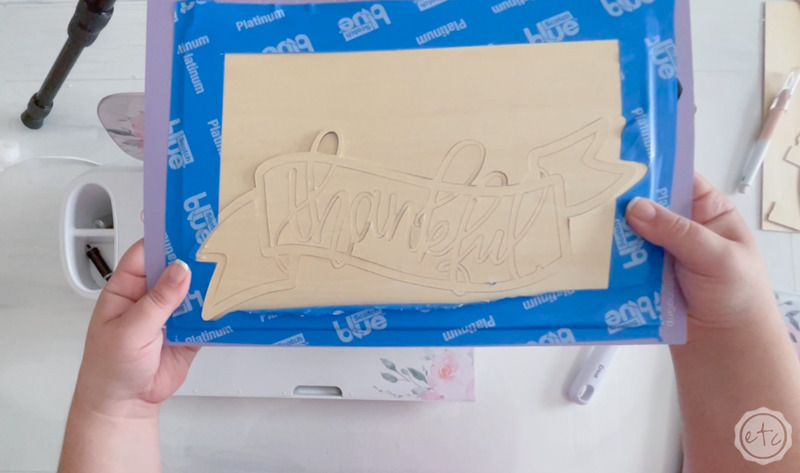
Weeding basswood… it’s just a little different than weeding vinyl. You definitely don’t need a weeding tool! Start by gently twisting your cutting mat just a little and you’ll see how the pieces start to separate. Make sure not to twist toooo much because the rigid wood will definitely snap and leave you sad after 2 hours of waiting!
Then I like to carefully lift the entire piece off the cutting mat… it should come easily off the back ground but watch each little loop and swirl because the cutting mat itself is still sticky and sometimes you need to individually lift the loop of a an l or the bottom of an n.
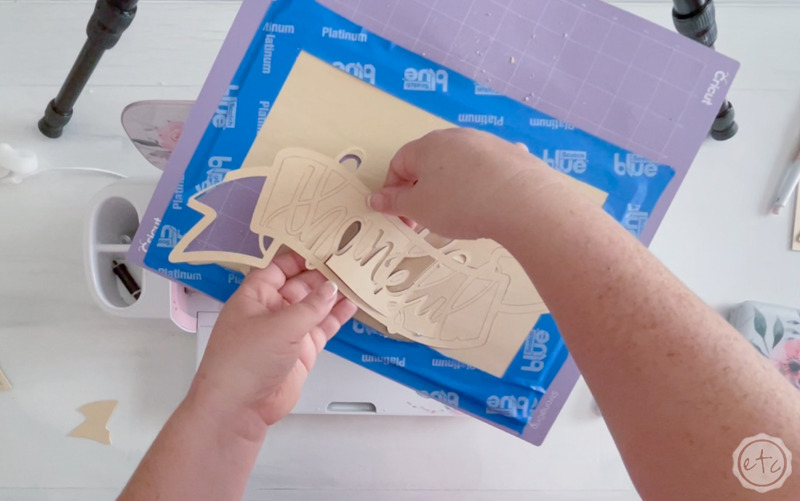
Once you have your piece removed from the cutting mat simply work your way across the piece removing the negative space. Most of it should simply lift right out… but there were one of two spots where having my true control knife handy helped. Sometimes you need to cut through the last bit of a corner.
Once you’re done you can celebrate! 2 hours later and you have a free little wooden script word for your fall table! At least… I’m counting mine as free since I had a large pack of basswood on hand left over from this large name sign that I made to go over my friends daughters crib. I didn’t have to buy any supplies for this project. Yay!
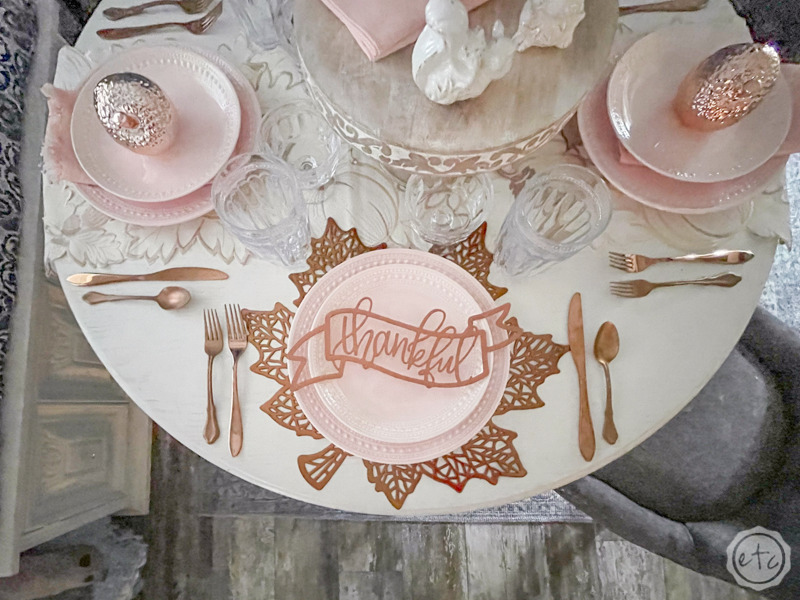
Bonus Tip: While the wood looks amazing I did run my little basswood pieces outside for a bit of spray paint. Now they match my cooper acorns for my fall tablescape! Use a bit of spray paint to coordinate your new pieces to your latest project!


Step 4: Enjoy
Now you can put these babies on your table and enjoy! I wanted mine to match the little rose gold acorns I had for my other two plates so I’m pretty happy with how they turned out. Plus I love that I made them… somehow that handmade touch always makes things sweeter than if I had bought these in a store.
Want to check out the whole table? You can see how I put together the entire Beautiful Blush and Rose Gold Fall Tablescape HERE.


Leave a Reply