
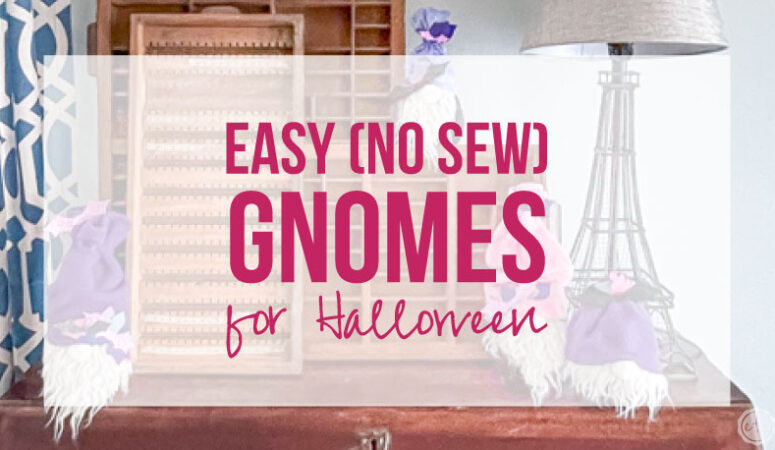


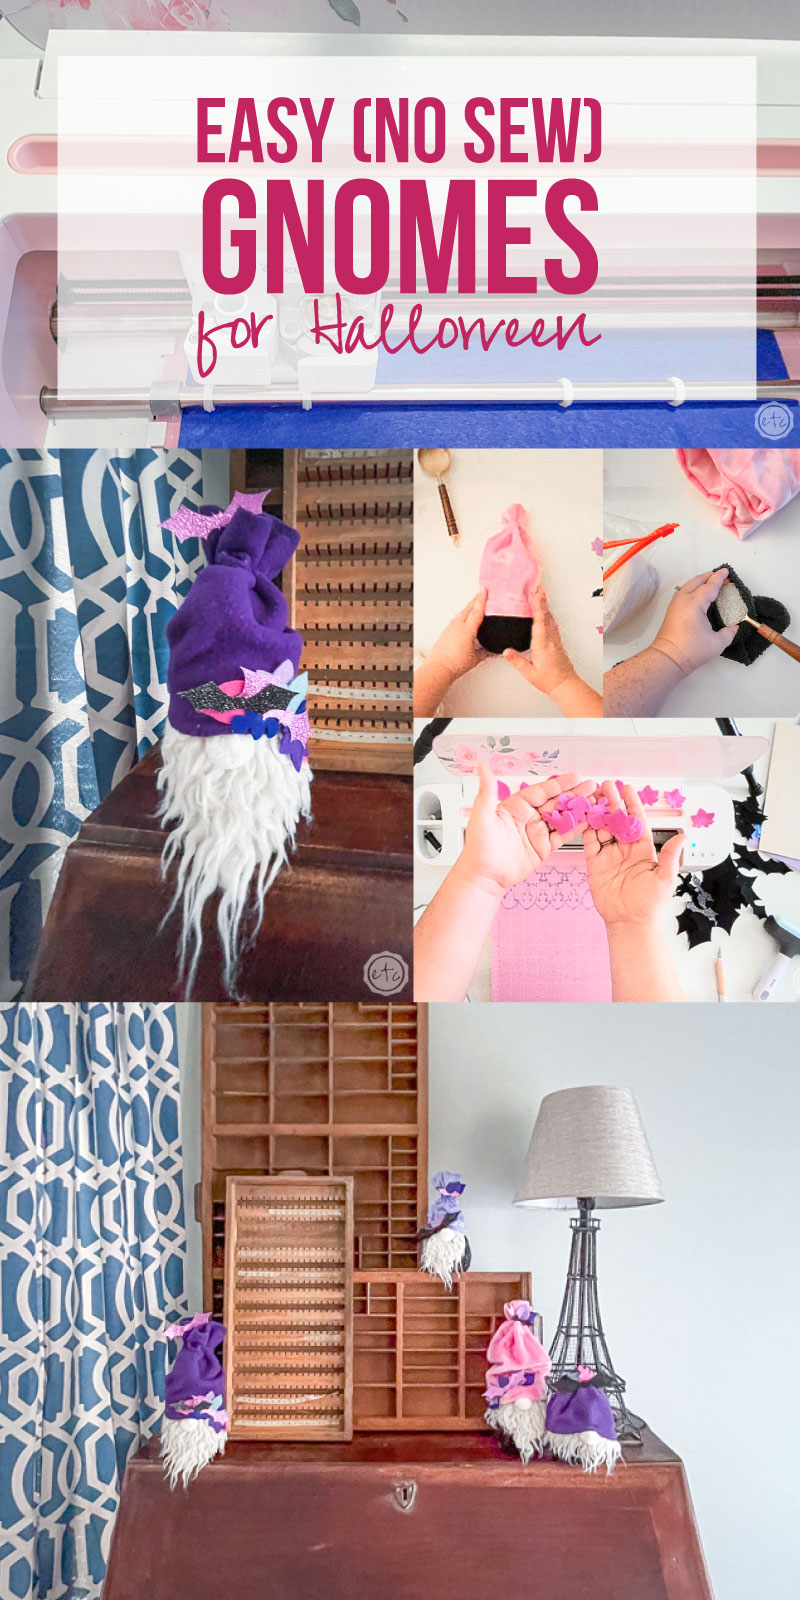
Ready for a fun and easy project for fall? Last year I whipped up a few No Sew Gnomes with bunny ears for Easter and they were just soooo cute. I think I need a few for every season (hello adorable Christmas themed gnomes!)… so I decided to sit down for a few minutes and whip up a few for the spookier season.
I decided to make these little guys with blacks, purples and a few pinks with adorable leaves and bats! Which works perfectly for Halloween but if you wanted to switch these babies to fall gnomes you could easily leave off the bats and add a few more leaves for a leaf crown.
Ready to jump in?
Supplies:
- Cricut Maker
- Rotary Blade
- Fabric Grip Mat
- Felt
- Faux Leather with Glitter
- Fuzzy Socks (I used Black!)
- Fabric for Hats
- Hot Glue/Hot Glue Gun
- String or Cord
- Rice
- Measuring Scoop or Spoon
- Faux Fur
- Pom Pom
- Cricut Access

Step 1: Cut Out your Felt Pieces
Alright y’all… the cutest part of these little gnomes are the details on their hats! So while we added bunny ears and flowers for our Easter Gnomes and a few festive holiday themed bows for our Christmas gnomes (think snowflakes and antlers) today we’re going to add leaves and bats for our Halloweeny Fall Gnomes.
I used my Cricut Maker to cut these pieces out (which makes the entire process sooooo easy) but you could easily cut the shapes out by hand if you don’t have a Cricut machine.
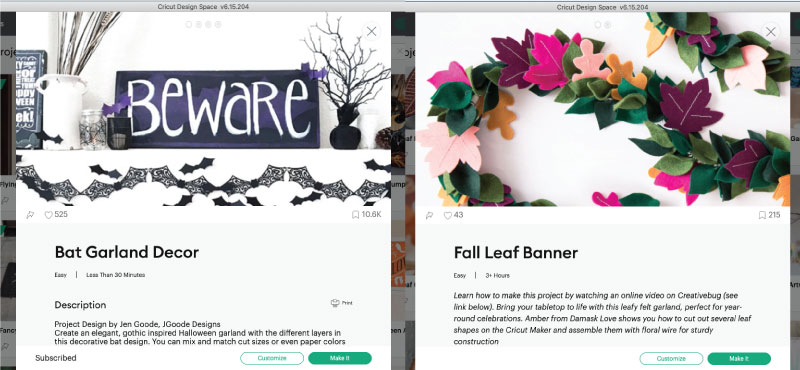
For this particular project I headed to the Cricut Access Library and searched for bats and leaves.
I ended up using this: Bat Garland Decor project for the bats and this Fall Leaf Banner project for the leaves. I cut out a few bats in different sizes and colors (mainly purple and black) using my felt and the faux leather glitter sheets. Then I re-sized the leaf files to 1″ for allllll the leaf variations and cut them out of a variety of colors: dark purple, lilac, hot pink, navy and light blue. That way our leaf crowns will coordinate with all our gnome hats.
Once you’ve cut out all your pieces and removed them from the felt sheets you’re ready to make your first gnome.


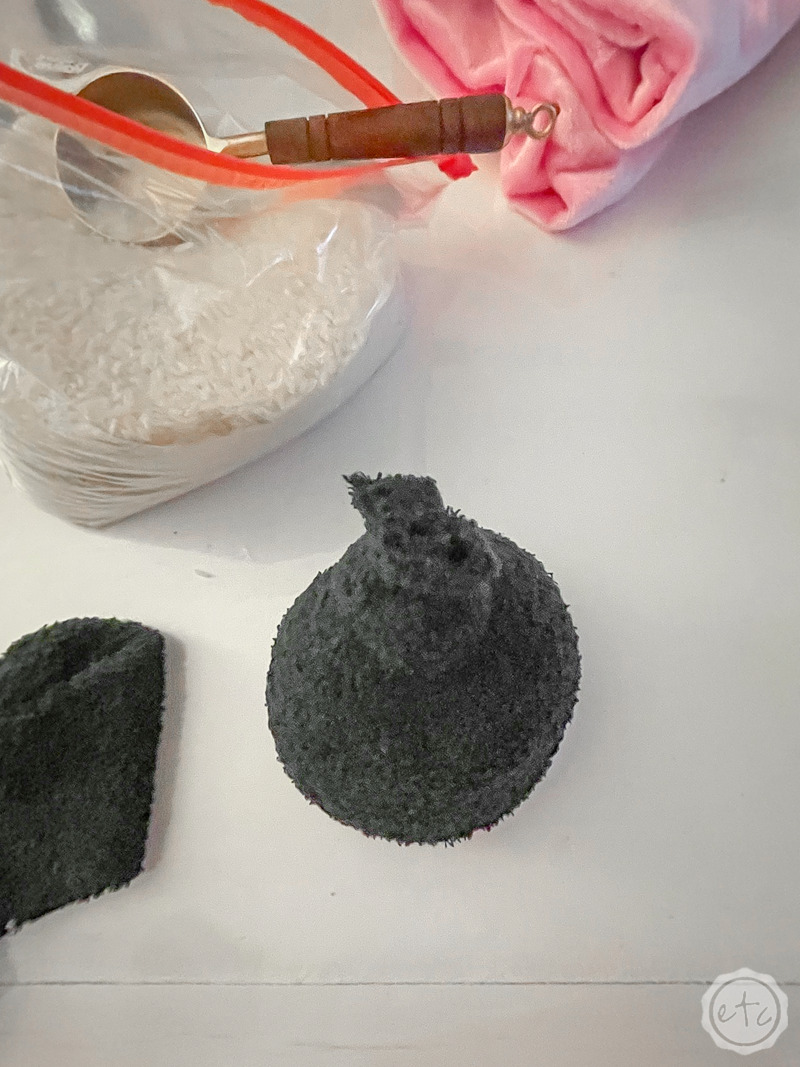
Step 2: Fill your Fuzzy Socks with Rice
Our little gnomes are actually pretty easy to make… start by taking your fuzzy sock and filling it with rice. The more rice you put inside the bigger your gnome will be!
So make sure to think about whether you want a tall skinny gnome or a short fat gnome… then fill your little fuzzy sock with a bit of rice or a bunch of rice depending on what you’re looking for.
Once your little gnome body is full go ahead and tie a knot in the top of the sock (making sure it’s snug to the rice so there isn’t a bunch of air inside the fuzzy sock). If you have a long tail left over you can cut it shorter so that the tail of the knot will be hidden by the gnomes hat.
Then we’ll move on to the next step!
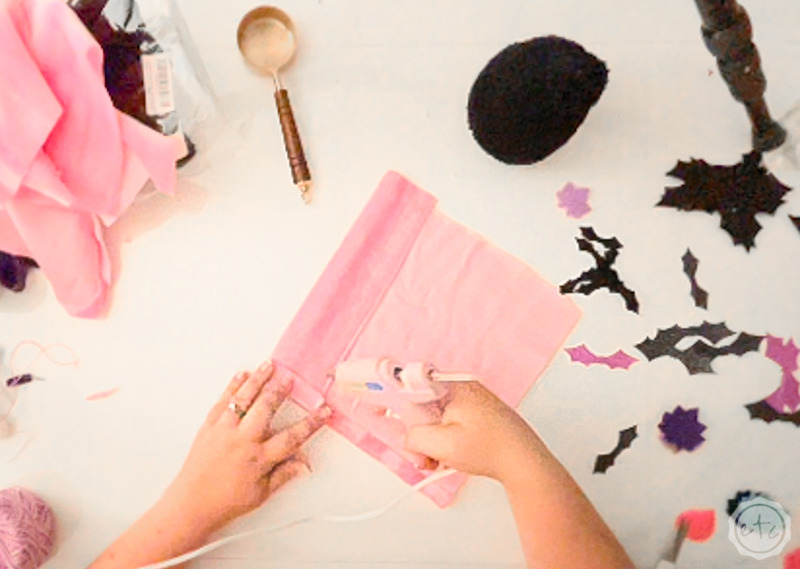
Step 2: Make your Hat!
Now it’s time to make our little gnome hat! This hat is quite a bit easier than the cone hats we made last time… but they look adorable in different ways.
To start with cut your fabric to size… I measure each hat individually by placing the fabric around my gnomes body and then cutting it to fit. You want your hat to be a bit taller than it is wide so that it can slouch down around the gnomes beard.
Once your fabric is cut go ahead and fold over the bottom to make a cuff… and hot glue it in place. Then hot glue the sides together so that the entire hat is one continuous loop. I find that the easiest way to do this is to place the hat with the fuzzy side down, then fold up the left side exposing the fuzzy side on the top. Now run a bead of hot glue down that edge.
Now while the glue is still hot fold over the right side and firmly press it down into the hot glue along the edge. Don’t forget to make sure that the cuff lines up all along the bottom as you do this… that way the entire hat will be straight.
Once it’s glued and dry you can pull the hat down over your tiny gnome, making sure that the cuff is around the gnomes middle. Then use a string to tie the top of the gnomes hat and give it a little shape. Perfect!


Step 3: Cut your Gnomes Beard
Ready to give this little guy a fuzzy beard? Start by grabbing your faux fur and wrapping it around your gnome. You want it to go about half way around (theoretically that would be ear to ear… if gnomes had ears). Once you have the fur measured go ahead and cut a triangle out of the faux fur.
A few tips? If you’re making a short fat gnome your triangle should be short and fat… you want the beard to kiss the ground. On the other hand if you’re making a tall skinny gnome his beard should be tall and skinny too!
My next tip is crucial. Make sure that when you’re cutting the fur you separate the fur strands and cut in between them. If you simply cut a triangle you’ll have blunt, short fur strands… not long flowing locks. I’ve cut two different pieces below if you need an example of what to do… and what not to do!
Once your beard is cut go ahead and flip the cuff of your gnomes hat up one time… now glue your beard directly under that cuff. Use lots of hot glue so the beard doesn’t go anywhere! Once you’ve gone from ear to hypothetical ear I like to place a bead of hot glue on top of the faux fur and glue the hat in place.
I do this once over each ear so that the hat is anchored on each side… and in the middle where we put our nose.


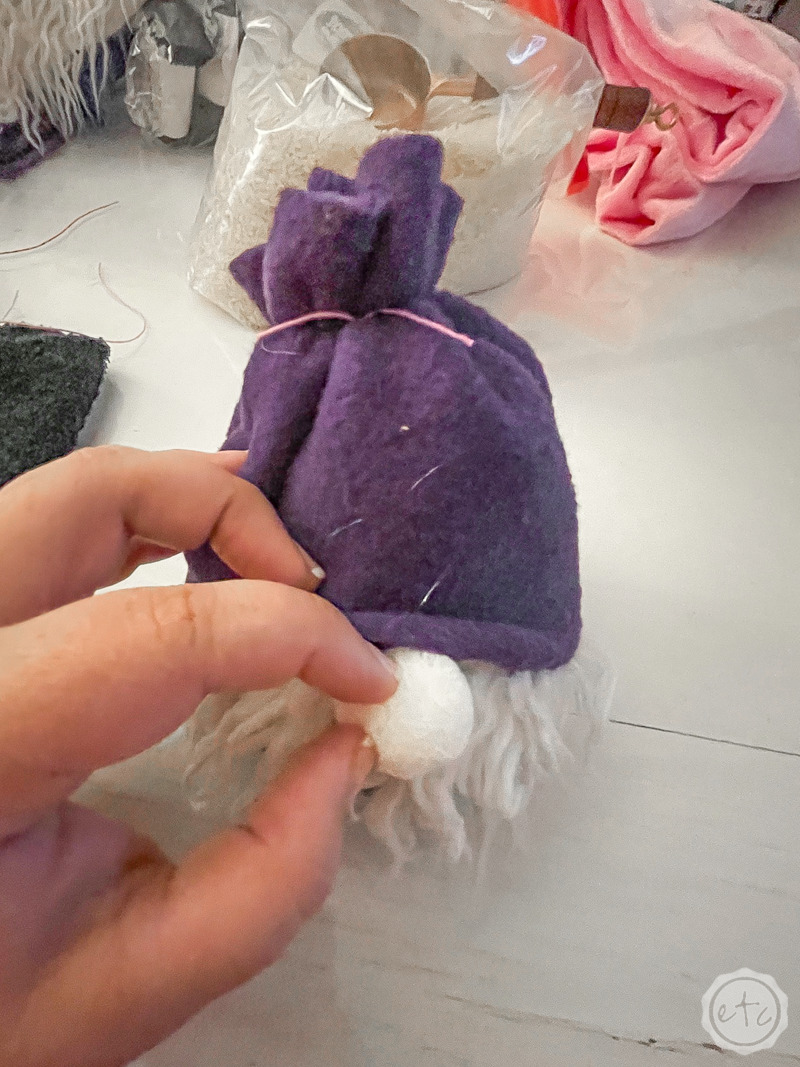
Step 4: Glue on your Gnome’s Nose
We’re so close to finished!! Before we put the cuff of our hat back down let’s grab a pom pom and give this guy a nose! I like to put mine right in the middle so add a dab of hot glue and then squish the pom pom in place. Once it’s dry go ahead and add a bit of hot glue to the top of the pom pom (making sure it’s high enough up that it will be covered by the hat) and then lower the hat’s cuff into place.
So cute!
At this point your gnome is really finished… but we’re going to add a few extra touches to make this guy extra spooky.

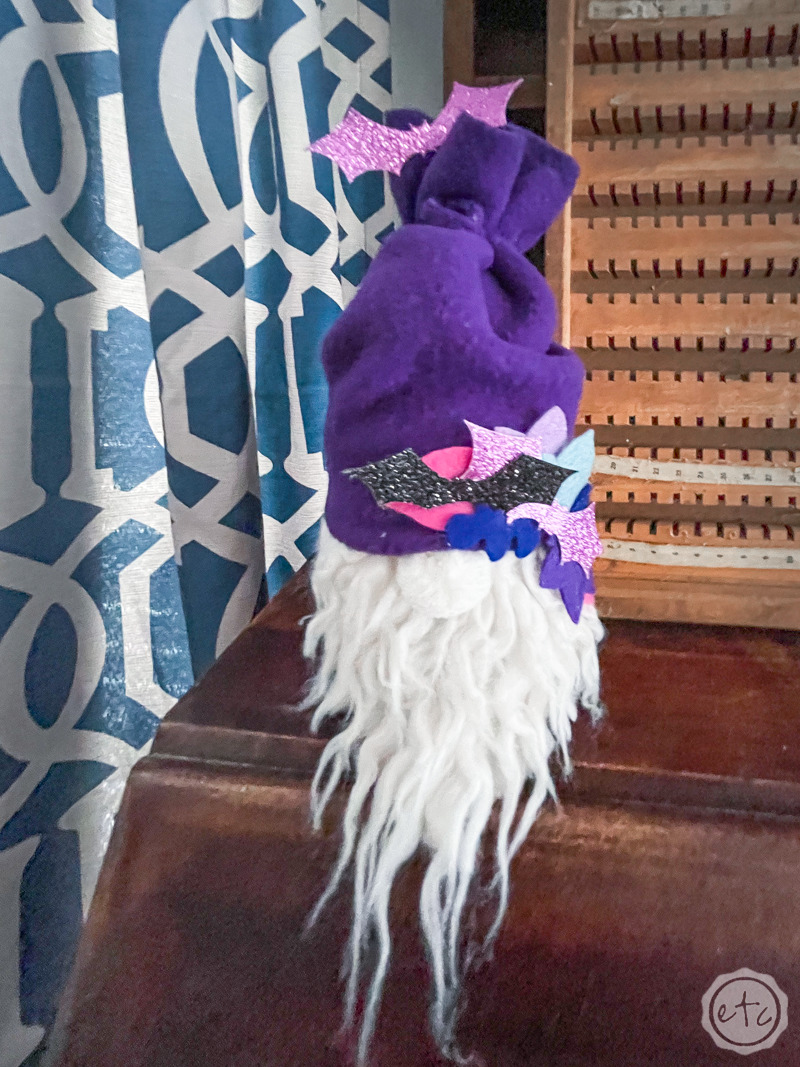
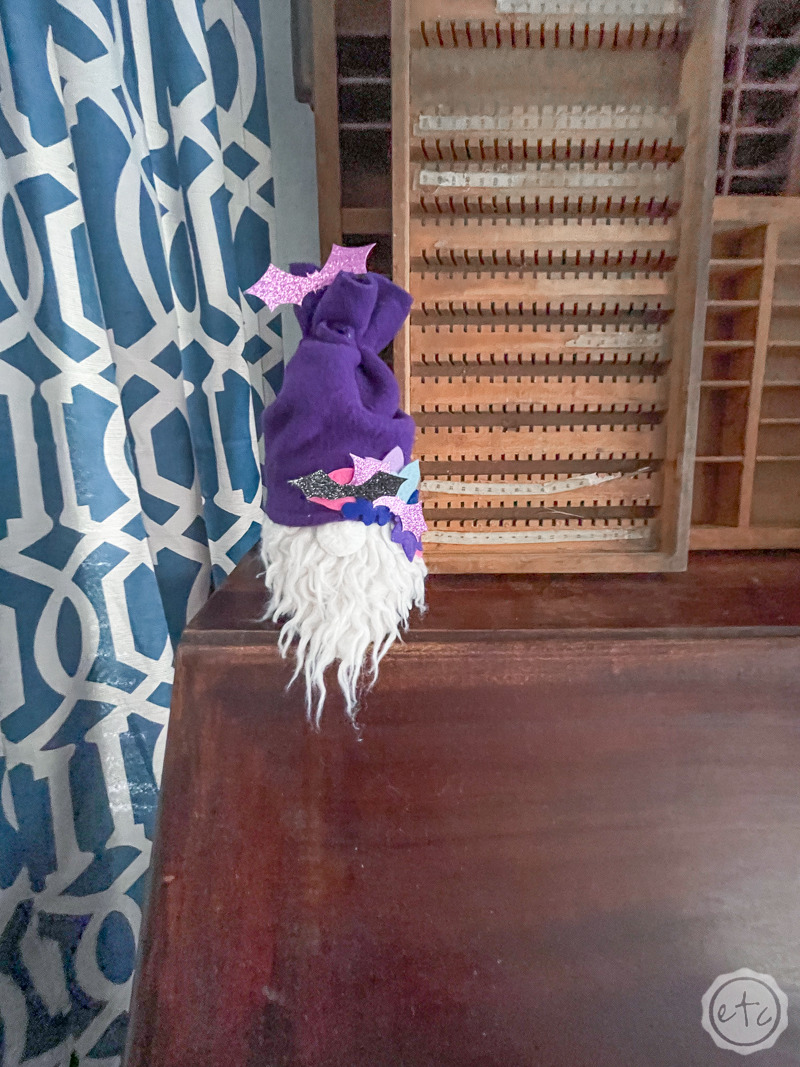
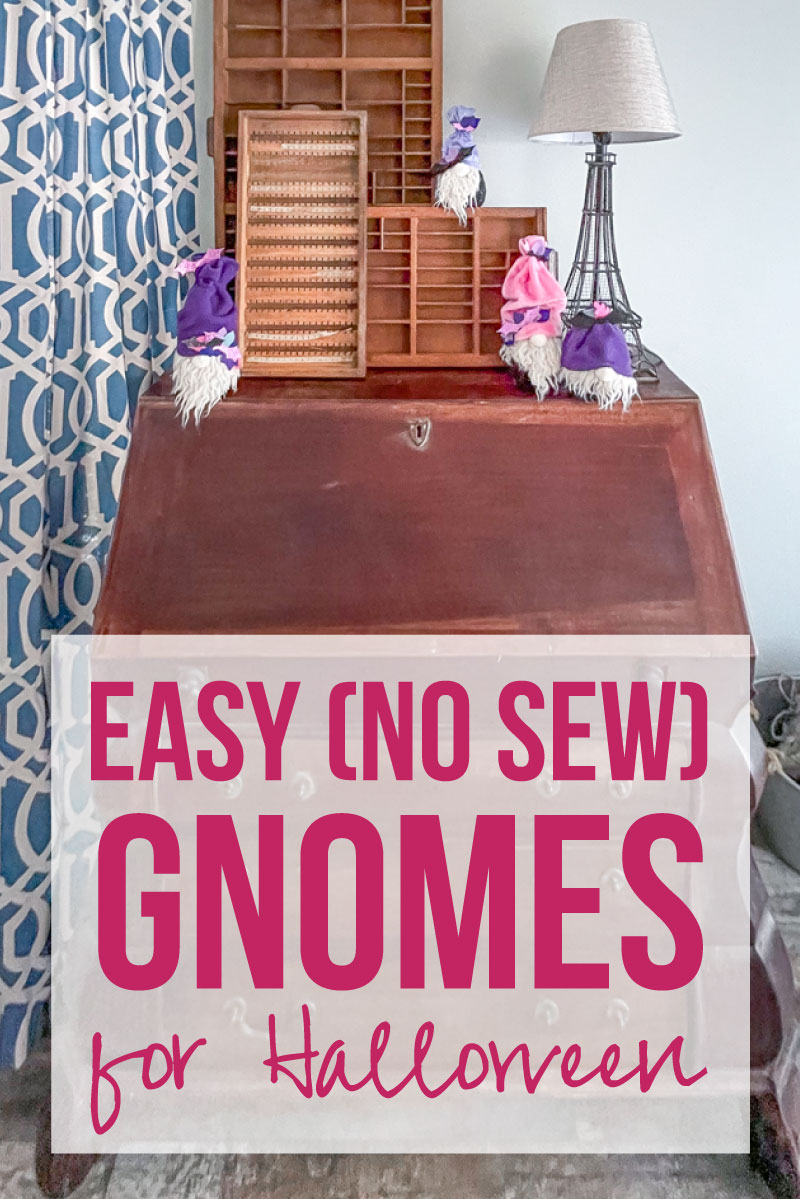
Step 5: Add Fall/Halloween Embellishments
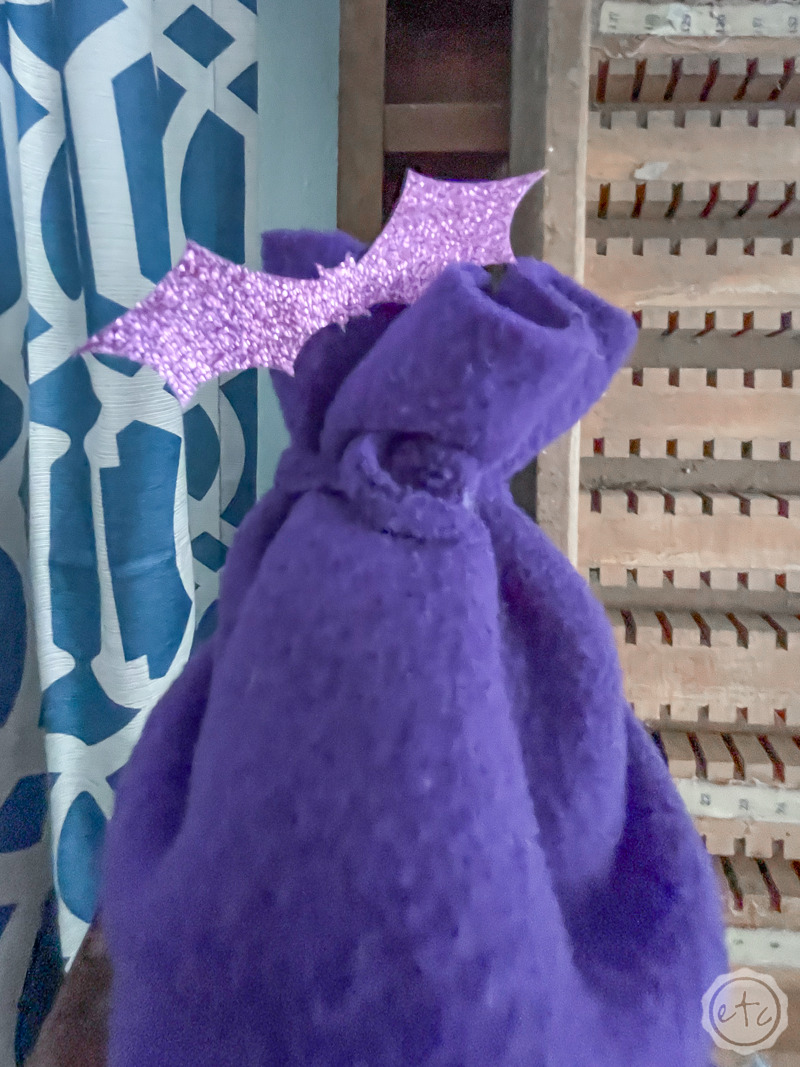
Ready for the fun part? Go ahead and add a few fun pieces… a bat here and there, a leaf crown, a few leaf’s behind a bat.
One small bat and a medium size bat?
Go wild!
I like to add a few pieces to the cuff of the hat and a few more on the top. They look so cute this way!
Check it out!


Leave a Reply