
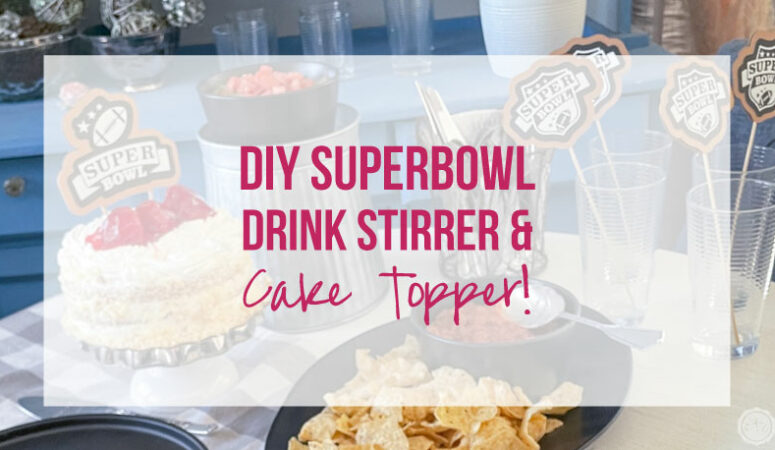


It’s time for the biggest game in football… which means we need to whip up the cutest football decorations you ever saw! Our tailgate table can’t exactly be naked! I already added a bit of removable vinyl to my black plates to make re-usable football plates and today we’re making a Superbowl specific Cake Topper and matching drink stirrer set.
These babies are going to be iron-on and kraftboard so they’ll be cute, inexpensive and sturdy… we can use them over and over again!
Let’s get started!
Supplies:
- Cricut Maker 3
- Cricut Access (for the cut files!)
- Cricut Roll Holder (for smart vinyl)
- Fine-Point Cutting Blade
- Cricut Standard Grip Mat (that’s the green one!)
- SVG Cut Files (FREE at the bottom of this post).
- Bright 360 Floor Lamp
- Weeding Tool
- Scraping Tool
- Smart Iron-On
- Mini Easy Press
- Smart Sticker Cardstock
- Kraftboard
- Transfer Tape
- Acrylic Ruler
- Bamboo Skewers (you can also use straws!)
- Hot Glue and Hot Glue Gun
Step 1: Prep Design Files
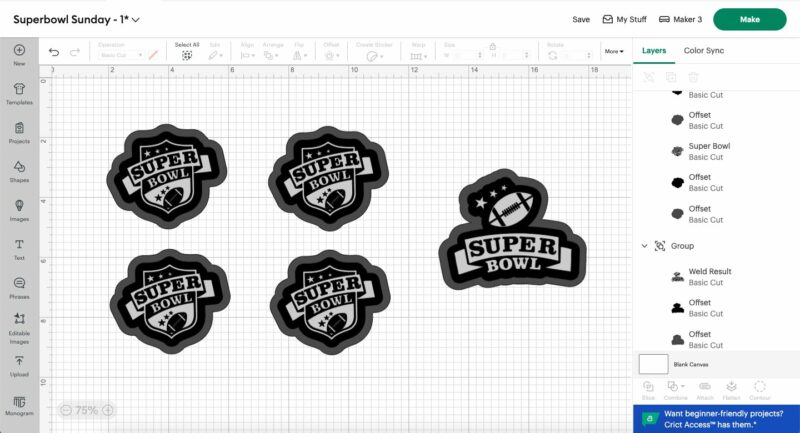
In this case I did NOT want to design brand new Superbowl SVG’s so I just hit up the Cricut Access Library… a quick search for “Superbowl” later and I found so MANY cute designs! I loved these matching designs from Almesdesign and decided to work with the third design for my drink stirrers.
I wanted something more horizontal for the cake topper but I didn’t want the year so I spliced off the 2024 from the second design and added just the football and stars from the first design… welded those babies together and volia! Instant cake topper!
Of course, we have one more step before these design files are ready. I welded each piece individually and then created an offset. The offset is a single layer that goes behind your design… it’s essentially a background that’s a bit bigger. I have an entire tutorial on creating an offset in Cricut Design Space here but you can follow the video tutorial for these Superbowl goodies if you need project specific help.
You’ll want to preview the offset and make sure it’s a continuous layer with no holes cut into it… if it’s not continuous keep bumping up the size of the offset until it is continuous. Once you’re happy with the preview hit ok. THEN make a second offset of the first offset so we have 3 layers total. Our Superbowl design on the top and 2 bigger offsets behind it.
Perfect! Let’s get to cutting!


Step 2: Cut your Design File
Now that all of your design files are ready to roll let’s cut them out! We’ll click the make it button and then tell design space that we’re using multiple ways of cutting… 2 of my materials are smart and don’t need a cutting mat but that back layer still needs an actual cutting mat.
Darn you kraft board for being amazing and not smart!
Oh well… a cutting mat isn’t that big of a deal.
I’m getting ahead of myself… we have 3 layers. The first layer with all our details that actually says Superbowl is going to be cut out of smart iron-on. We’ll need to mirror that design and cut into the back of our iron-on… make sure you load the roll into the machine shiny (face) side down and you’re good to go.
Then the second layer (the middle of our super bowl sandwhich) is going to be smart cardstock sticker paper… this way we won’t need any glue and the middle layer can sticker right onto the kraftboard. SCORE!
Since the smart cardstock sticker paper (say that five times fast!) is a smart material we can load that straight into our machine with no problems. Select the material in Design Space and slide the paper right into the machine. Easy peezy.
Last but not least I’m cutting our last layer (the very back layer, our second offset) our of kraftboard. I wanted it to be a fun brown, football color and this kraft board fit the bill. I loaded a sheet onto a cutting mat and popped it in the machine.
Volia!
3 different materials all cut out and ready to be joined together!

Bonus TIP: When peeling sturdy paper off your cutting mat make sure to flip everything over and peel the cutting mat away from your paper. The paper will stay flat on the surface of your table so that it doesn’t curl and is ready to go with no bends.


Step 3: Weed your Design
Ready to weed? In this case we’re going to weed the iron-on for our first layer. Use a weeding tool to carefully remove all the negative pieces and leave the portions of our design we’ll need for our cake topper.
If you’re ever un-sure just check the design in Cricut Design Space… you want your real life piece to look just like the one on the screen.
In this case we have letters that have to be removed leaving behind negative space in the banner AND vinyl we need to remove leaving the actual letters behind. So if you’re not sure what to weed out of the design check, check and check again.


Step 4: Apply Iron-On to Sticker Paper
Let’s put everything together! I left the sticker paper together (and un-weeded) for this part… although I did cut all the different pieces into individual designs.
Then I heated up my mini easy-press to the third (and highest) heat. It only take a minute to heat up so I spent this time lining up the iron-on design on the sticker paper. Once the mini easy press was hot I carefully pressed down half of the iron-on making sure to hold the easy press in place for 5 seconds… then I moved my hand and did the other half of the design for 5 seconds.
It only takes a couple seconds to glue that iron-on in place on the sticker paper… after you’ve done both sides take the sticker paper/iron-on combo off the cutting mat and place it on a flat surface. I use my desk! Then firmly scrape over the entire design with your scraping tool while everything is still hot… then turn it over and scrape the back a few times as well!
This helps the iron-on bond and it really flattens out the entire sheet of sticker paper… so it’s a win-win! Now you can remove the carrier sheet and your iron-on will be firmly attached to the sticker paper.


Step 5: Layer your Sticker Paper and Kraftboard
Our first layer is finished so let’s go ahead and finish this bad boy!
Add your sticker paper to the back kraftboard layer and use a bit of hot glue to the back of your kraftboard layer for your stir stick (I like bamboo skewers since they’re inexpensive and come in a big pack… you can also use cute straws!).
You can be done at this point but I like to add a second later of identical kraftboard behind the stir stick so everything is clean and there’s no ugly hot glue exposed on our project! Score!


Step 6: Set your Table
How cute did these turn out!! I’m absolutely OBSESSED! I want to make a bunch of smaller ones with just the football for cupcake toppers… how cute would that be?
Of course, they’re even cuter once they’re layered onto our little food table for the big party… I love how they look with our football plates! It’s the cutest combo!


Leave a Reply