• House Tour
    • Reveals
  • About
    • Smith Life
    • Disclosure and Privacy Policy
      • Terms and Conditions
      • Store Affiliates
  • Contact Me
    • Want a Button?
  • Shop
    • Floral Printable Planners
    • Paint eBooks and Packages
    • Wedding Binders & Extra Printables!
    • Planner Bundles
    • Planner Accessories
    • Home Decor Printables!
    • Cart
    • Bloglovin
    • Facebook
    • Instagram
    • Pinterest
    • Twitter
    • YouTube

Happily Ever After, Etc.

Creating Our Own Fairytale

  • Happily Ever After, Etc.
  • Home
  • Home Decor
    • My Home
    • Paint
    • Before and After
    • Tablescapes
    • Mood Boards
    • Furniture
  • DIY & Crafts
    • New to Cricut – Start Here
    • Cricut Projects
    • Resin
    • Scrapbooking
  • Organization & Planning
    • Cricut
    • Organization
    • Planner
  • Wedding
    • Cricut Wedding Projects
    • Free Wedding Binder
    • Bride Bag- The Ultimate Wedding Planner

DIY Buffalo Check Easter Wreath

Hey y'all,

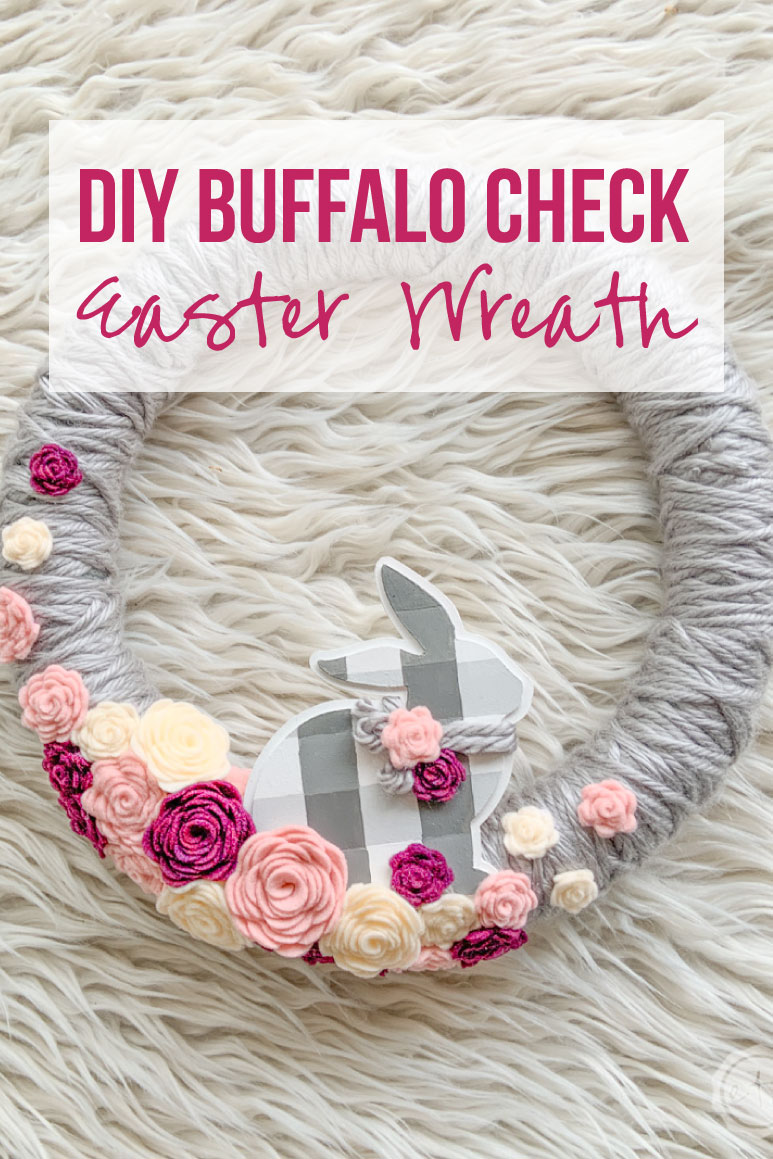
Ready for a quick and easy Easter craft?! This little wreath is inexpensive and so much fun to make. A few felt flowers, one buffalo check bunny and you’re ready to rock.

Let’s get started.

Supplies:

  • Wreath Form
  • Gray Yarn
  • Scissors
  • Hot Glue/Hot Glue Gun
  • Power Drill and Drill Bit large enough to match your yarn)
  • Basswood Buffalo Check Bunny (Follow the DIY tutorial here)
  • Felt Flowers (3 colors: 2small, 4medium and 2large)

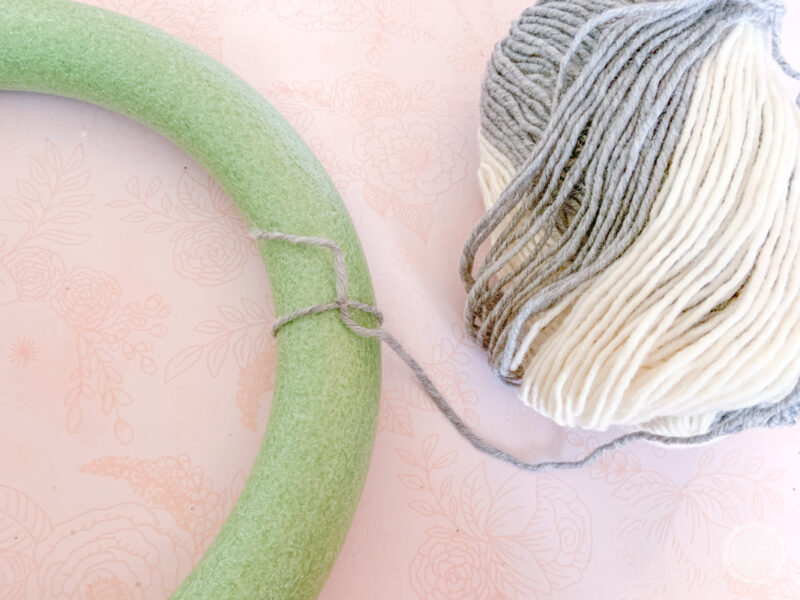
Step 1: Wrap Yarn Around your Wreath

This first step is probably the easiest… start by tying your yarn snugly around your wreath form. Then wrap, wrap, wrap your yarn. You want the entire wreath form to be covered, that means you can’t see any green through the finished yarn.

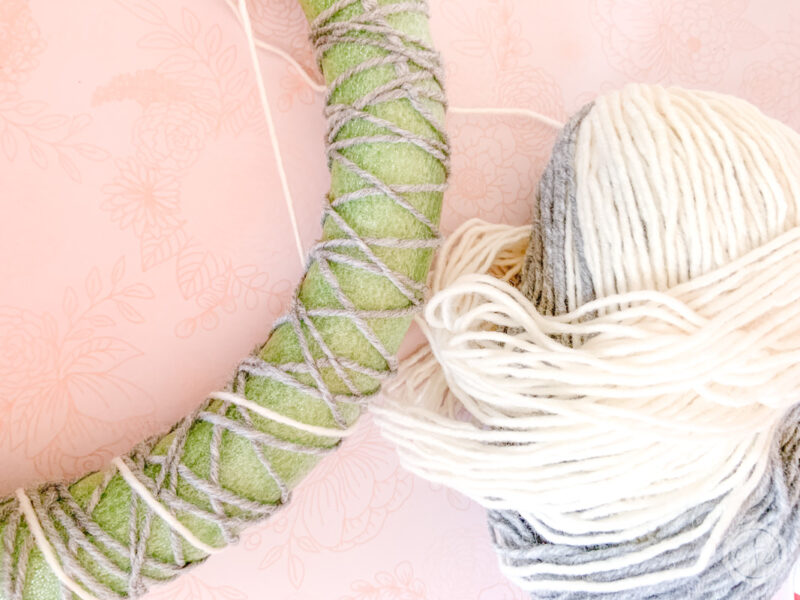
Just one continuous wrapped wreath.

There isn’t really a rhyme or reason to this since I wanted it to look very carefree and whimsical, just wrap until you can’t wrap anymore!

And if you’re trying to figure out why my finished wreath has no white yarn that’s because I decided the wreath would look better with only gray yarn… so I took this yarn off and started over with a large chunky gray yarn. It looked much better matched with the felt flowers and cute little bunny.

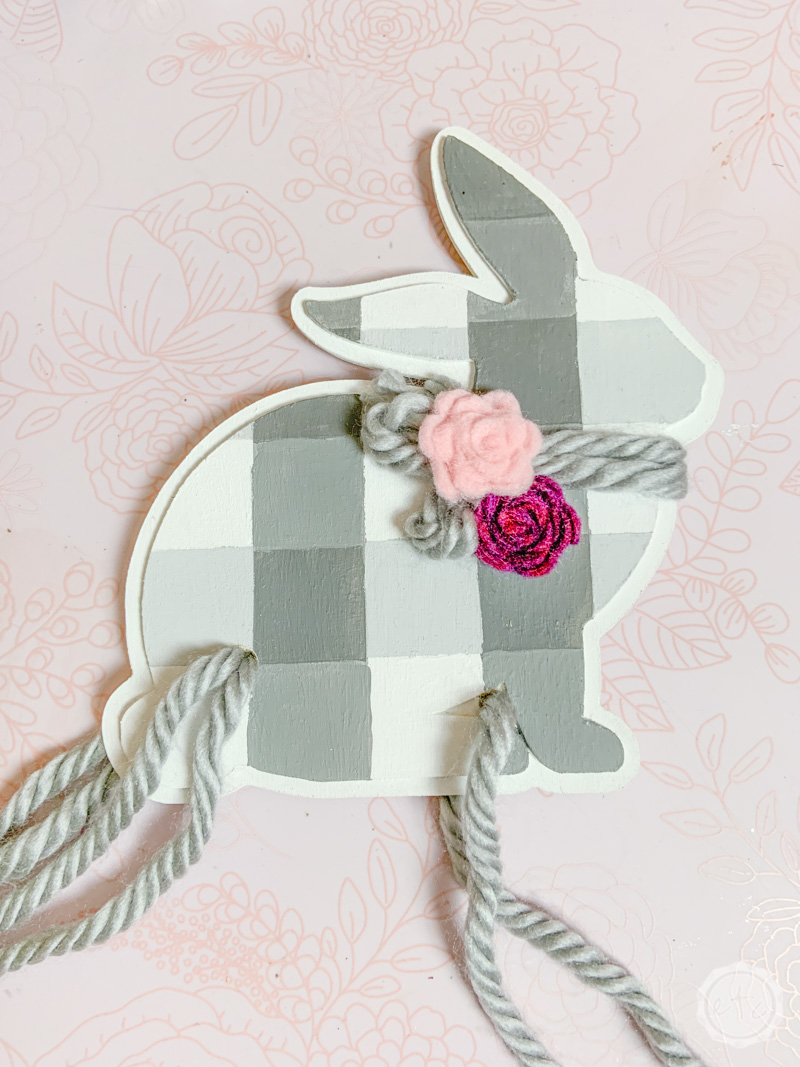
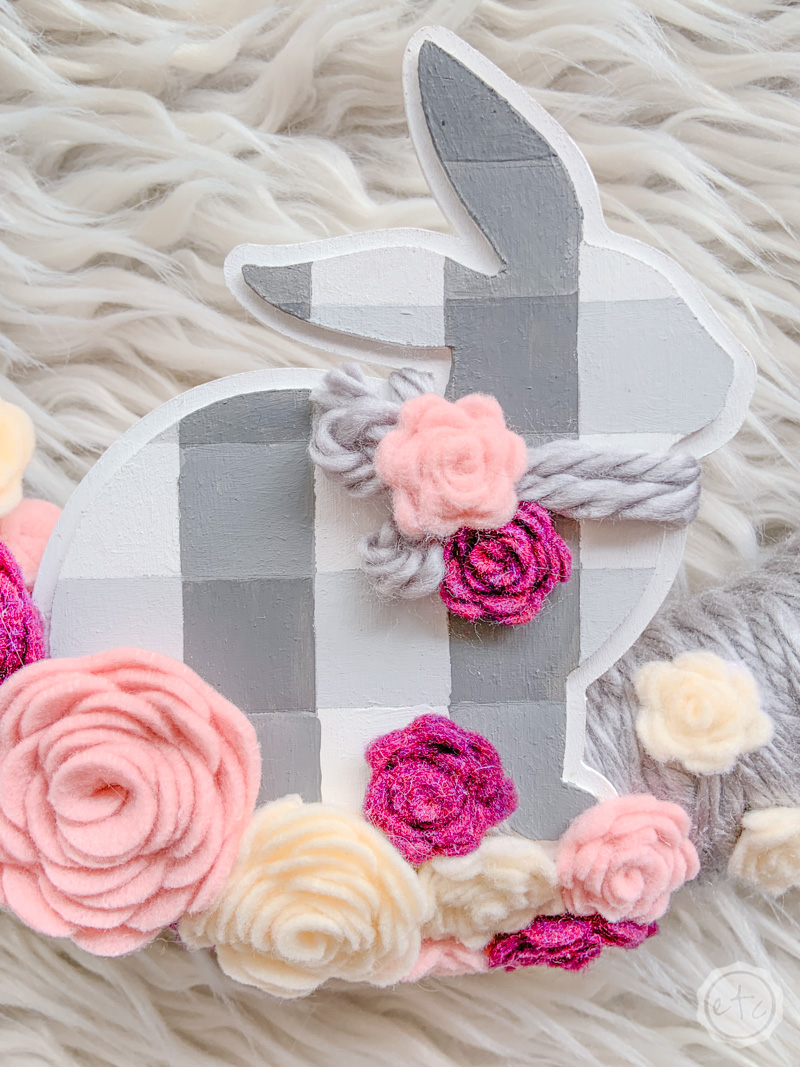
Step 2: Add your Bunny

Okay y’all now that our wreath is wrapped go ahead and add your little buffalo check bunny! This little guy was cut out of basswood on my Cricut Maker and then painted with a fun buffalo check pattern.

You can follow the entire tutorial (from first cut to the painted pattern) in my little DIY Buffalo Check Bunny tutorial.

Once you have your bunny ready to rock we have to get him ready to fasten to our wreath. I did this by drilling two holes in the bottom of the bunny. The first one I put in the little negative space between the bunnies front paws and the second I put a little higher up by his tail.

This way the little guy will sit evenly on the wreath form.

Once your holes are drilled go ahead and put two pieces of yarn through the back hole and one through the front hole. Each piece of yarn should be about 8 inches long although this doesn’t have to be precise as we’ll cut off the extra.

Now go ahead and position your bunny so that he’s siting straight on the bottom of your wreath. Then pull the yarn tight around your wreath form and tie all 3 yarn pieces tight in the back.

Go ahead and trim the ends of the yarn ties and then weave them into the yarn on the wreath so that they’re hidden and not too obnoxious.

Then it’s time to move on to flowers!

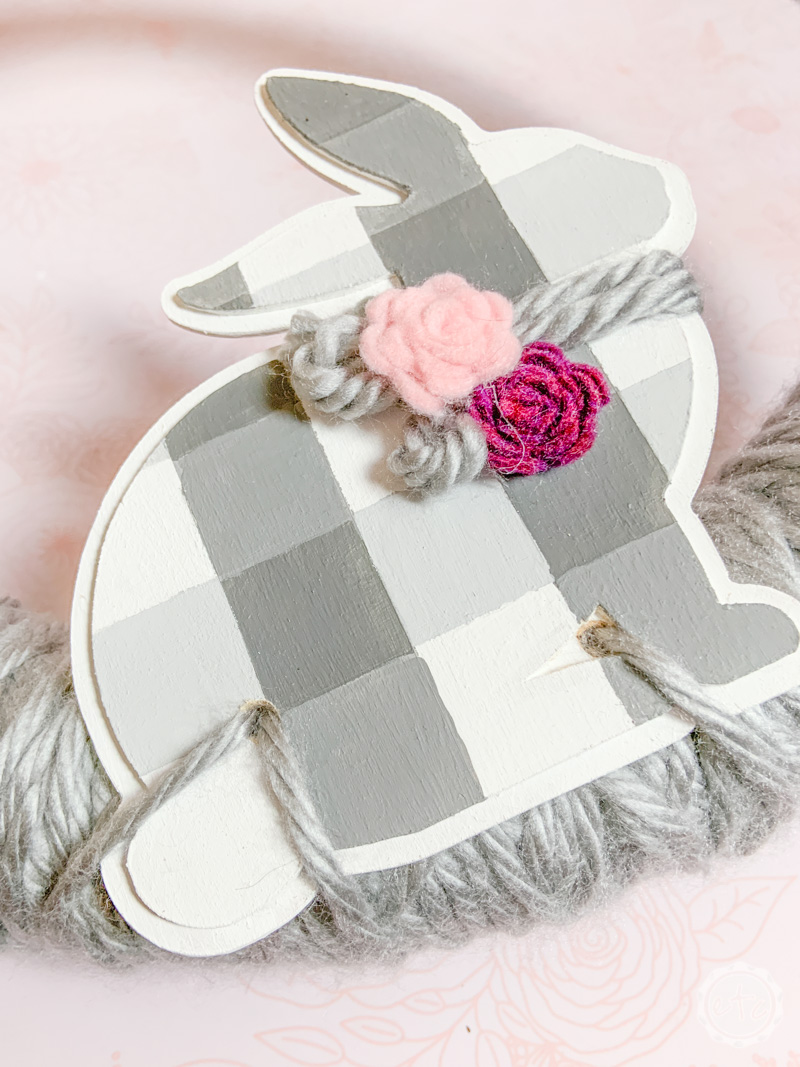
Step 3: Add the Flowers!

Now it’s time for the fun stuff… adding a few felt flowers. Go ahead and plug in your hot glue gun now so that it can start heating up. Then it’s time to get started on your flowers!

I always have felt flowers lying around (since I use them on all. the. crafts.) but if you don’t have any it’s ok… they’re really easy to make. This wreath used 3 different colored felt pieces to make all the needed flowers.

Just make sure to whip them up in different sizes so that they aren’t all the same! For these little flowers just grab your Cricut Maker and follow my rolled felt flower tutorial… easy peezy lemon squeezy.

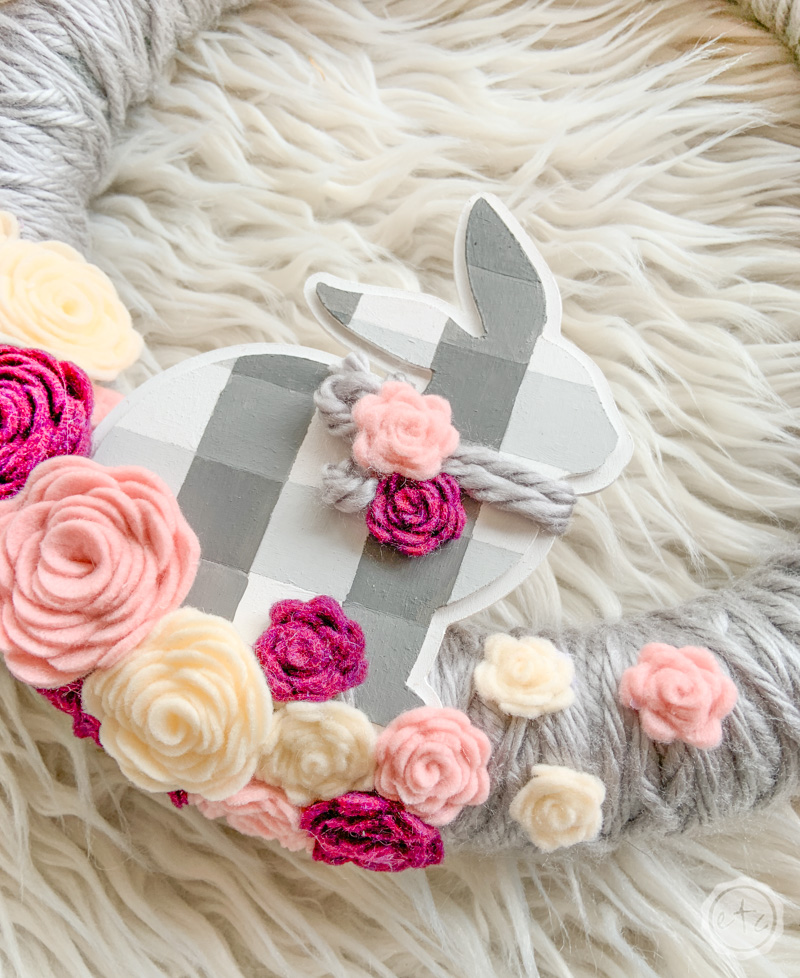
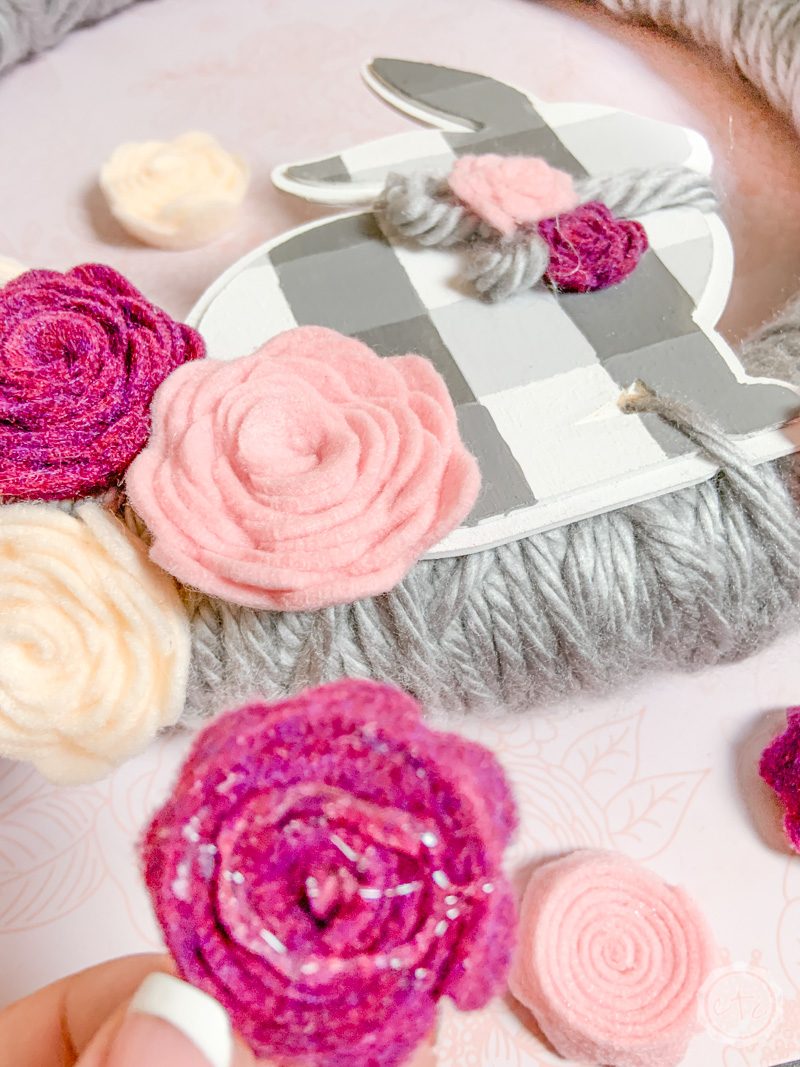
Once you have the flowers ready to go I like to lay all of the flowers out on the wreath so that I know I like the arrangement. I started with the larger flowers in the middle moving on to the smaller flowers as I neared the sides of the bunny. You can see the first arrangement in the picture above, the flowers are simply placed on the wreath to see how it looks.

I try to keep the flowers as separate in color as I can (peach, pink, purple) but with only 3 colors occasionally two of the same color will end up next to each other… that’s ok too.

Once you have all of your flowers laid out go ahead and start adding glue! Pick each flower up one at a time and add hot glue on the back before placing them back.

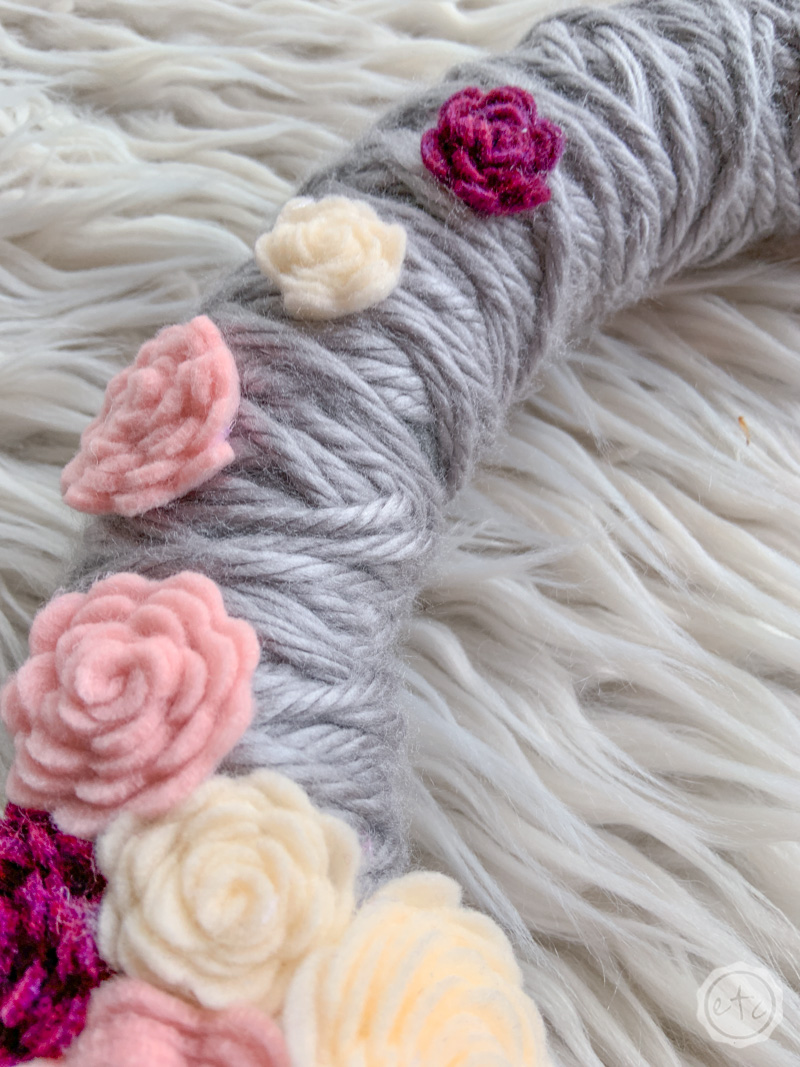
Make sure to snug them close together as you glue them down so that there isn’t a bunch of space in between each flower… then just keep gluing! At the edges I glued the tiniest flowers a bit apart so that they are trailing off.

Then you’re done! It’s time to hang up your wreath and enjoy!

Get Your FREE Wedding Binder

Trying to plan your perfect wedding?

Here's 42 FREE printables to help you get organized!

Success! Now check your email to confirm your subscription.

There was an error submitting your subscription. Please try again.

Powered by ConvertKit
You made it through the entire post? That means you're one of my new favorite people! I'd love to be friends and see what else you would like to read about! Leave me a comment and then sign up for your very own FREE paint planner.... so that you can keep track of every single paint color with ease!
Welcome back! I'd love to be friends and see what else you would like to read about! Leave me a comment and then sign up for your very own FREE paint planner.... so that you can keep track of every single paint color with ease!

Show me some LOVE y'all:

  • Facebook
  • Pinterest
  • Twitter
  • Email

Related

«
»

Cricut, DIY & Crafts, Holidays 1

Trackbacks

  1. DIY Buffalo Check Bunny - Happily Ever After, Etc. says:
    March 11, 2020 at 11:32 pm

    […] Check out the full tutorial for your very own felt flower wreath here. […]

    Reply

Leave a Reply Cancel reply

Your email address will not be published. Required fields are marked *

sidebar betsy I'm Betsy, Home Decor Enthusiast, Yorkie Mama, Crafter, Blogger, Picky Eater, Chief Mess Maker, Antique Hoarder and Graphic Designer. You can generally find me working on (attacking with a paintbrush) the 3 bed, 2 bath home we are currently renting! Our home might not be perfect but it is ours & if you hang out long enough you'll see that what we lack in know-how we make up for in passion!
Shop My Craft Room

Shop My Home

Featured Articles

15 Fabulous Ideas to Organize your Laundry Room
25 FREE Printables For Your Home!
What to do with EXTRA Paint with Happily Ever After Etc
10 Ways to Make Your Bed EXTRA Comfy with Happily Ever After Etc.
Ready to Pick your Perfect Paint Color? We'll help you with our 6 Day FREE E-Course

Hey y’all,

Profile

I'm Betsy, Home Decor Enthusiast, Yorkie Mama, Picky Eater, Chief Mess Maker, & Graphic Designer...

A Little Note!

Many of the links on Happily Ever After, Etc. are affiliate links. If you purchase a product after clicking an affiliate link, I receive a small percentage of the sale for referring you, at zero cost to you! How awesome is that? Purchasing through affiliate links is an easy, painless way to help out your favorite bloggers. Thank you so much for your continued love and support! Read the full disclosure here!

Instagram

The number one question people ask when they watch The number one question people ask when they watch my new home tour on YouTube? Why is there so much clutter... um excuse me I like stuff! The second question? How did you frost the doors? Don’t worry... I wrote out the whole process, check out the step by step tutorial on the blog!
With Christmas fast approaching I’m having secon With Christmas fast approaching I’m having second thoughts... about taking down my holiday decorations! I absolutely love all the blush and rose gold this year and think I might have to add more pink to my every day decor. Until then maybe it will just stay Christmas at the Smith house! Tutorials for both the “Merry Christmas” resin sign and the “Dear Santa” Cricut sign are in my profile! #pinkchristmas #pinkchristmastree #pinkchristmasdecor
Well y’all Christmas is coming up quick... which Well y’all Christmas is coming up quick... which means I need to get a move on with all that wrapping! I got a jump start this morning after whipping up a few little resin light bulbs! Check out the full tutorial over on the blog if you’d like to wrap your presents with a few resin goodies this year... and tell me in the comments below. Are you finished wrapping or (like me) are you still getting started? #pinkchristmas #pinkchristmasdecor #resinchristmas #giftwrappingideas
Ready for another fun and easy resin project? Thes Ready for another fun and easy resin project? These little Christmas trees are the perfect beginner level project so if you’ve never done resin before don’t let it intimidate you!! Grab your heat gun and jump in... I’ll walk you through it! Check out the full blog post for these little guys on the blog (link in profile!)
If you haven’t joined Michelle at @weekendcraft If you haven’t joined Michelle at @weekendcraft SVG membership then WHAT ARE YOU WAITING FOR?! I am obsessed with all the cute svg’s and y’all she is doing a live craft night every month to walk you through making one of her designs... and the first craft night is tomorrow! She’ll be making this “Merry everything and Happy always” SVG and it’s so cute! You don’t want to miss it! See you there! 

(Also who noticed the sneak peek at my new kitchen?!)

#cricutsvgfiles #christmassvg #cricutsled
Well y’all I’m getting this close to unpacked Well y’all I’m getting this close to unpacked in my new house!! And since I’m a blogger Christmas is going up! So here’s the question... do you want a 1 month house update or do you want to wait for the Christmas tour? #lulamaefarmhouse #rosegoldchristmastree #newhouse
Well it’s still a work in progress but I finally Well it’s still a work in progress but I finally have a house!! They have to put it together and do all the detailing before I get keys... but we’re in the end game now! Check out my stories for a sneak peek at the moving process... full YouTube video coming soon!
#ad how amazing did these little fall coasters tur #ad how amazing did these little fall coasters turn out?! Plus I absolutely love the matching tray! The best part? This is such a quick and easy resin project... a silicone mold, a little resin and your trusty heat gun and I promise you can make this baby!! Link in profile for the tutorial!! #fallresin #resinforbeginners #cheetahprint
Okay... is it bad if you just want to make coaster Okay... is it bad if you just want to make coasters in the same mold with the same technique but different colors?? They turn out soo differently! Just a sneak peek of my fall coasters and the blush ones I made last year!
Happy #nationaldogday to the fur babies that are ( Happy #nationaldogday to the fur babies that are (literally) behind (beside... or underneath!) all Of my projects! These sweet little cuddle muffins make everything better 😊🐶😘
GIVEAWAY CLOSED Our winner is @kamikvega Check you GIVEAWAY CLOSED
Our winner is @kamikvega Check your inbox girl, this little machine is headed your way! Thanks to everyone who participated... I can’t wait to see where we go from here!

🥳📦🥳 GIVEAWAY🥳📦🥳
If you have loved all of the Cricut projects I make here is your chance to win a Cricut Joy of your very own! If you’re ready for a little craftiness (maybe a little time to relax) then this giveaway is for you! I’m teaming up with a few of my cavities crafty bloggers so that one of you can win your very own mini crafting machine. Good Luck!!!!

TO ENTER GIVEAWAY:
1.) Follow
@creativeramblings 
@weekendcraft 
@craftylumberjacks 
@this.is.tisa 
@justcallmehomegirl 
@happilyeverafteretc
@lovebird_heartworks 
2.) Like this post
3.) Tag a friend in the comments.
.
.
.
Hurry! Giveaway ends Saturday 8/29/20 at 11:59PM PST. Winner will be notified via Direct Message. Share or tag a friend who'd love to win a Cricut. .
.
.
This contest is in no way affiliated with or sponsored by Instagram or Cricut. To enter you must have a U.S shipping address.
A little peek into the fun summery Tablescape I pu A little peek into the fun summery Tablescape I put together for a little garden party! Want to check out the full table? Wondering where to find all the pieces... click the link in my profile for all the details!
#ad Did you know you can put infusible ink onto al #ad Did you know you can put infusible ink onto aluminum? It's sooooo simple... honestly it's one of the easiest projects I've ever done. Even if you've never used your Cricut before you. can. do. this. I'll show you how every step of the way! Follow along with the full tutorial video over on YouTube! The best part? These little aluminum signs look amazing as part of a larger project! Check out how I added mine to a larger resin wave project on the last slide! @officialcricut #cricutcreated https://lnk2.io/wvMllZf
Okay so It’s no secret that I’ve been obsessed Okay so It’s no secret that I’ve been obsessed with resin for a while now but this week I’ve been playing around with resin waves! Including this tiny resin sea shell! Check out the link in my profile for the full tutorial!
After a lot of struggle, loss and frustration I am After a lot of struggle, loss and frustration I am finally dotting the i’s and crossing the t’s on my next chapter. Yesterday I went and signed the million and one papers to close on my new house! I cannot wait to share the moving (and decorating) process with all of you... next step: keys! #firsttimehomebuyer #newhouse
Load More... Follow on Instagram

Copyright © 2021 · Darling theme by Restored 316

Copyright © 2021 · Darling Theme on Genesis Framework · WordPress · Log in · Privacy Policy

loading Cancel
Post was not sent - check your email addresses!
Email check failed, please try again
Sorry, your blog cannot share posts by email.