

In the world of embroidery there are SO MANY PATTERNS to pick from… I literally have a never ending list of patterns I would love to work on… but while I love to embroider new and unique patterns I hate to transfer them myself. I’ve gravitated to pieces that have have pre-printed kits to avoid transferring designs but there’s only so many of those I really want to do! So today I’m going to show you how to convert a PDF Pattern (one you’ve purchased or found for FREE online) into a png so that you can upload it to Cricut Design Space and have your Cricut draw the pattern instead.
Once we’ve converted our PDF into a PNG and uploaded it into Cricut Design Space if you need help I have an entire tutorial on How to Draw an Embroidery Pattern with your Cricut Maker.
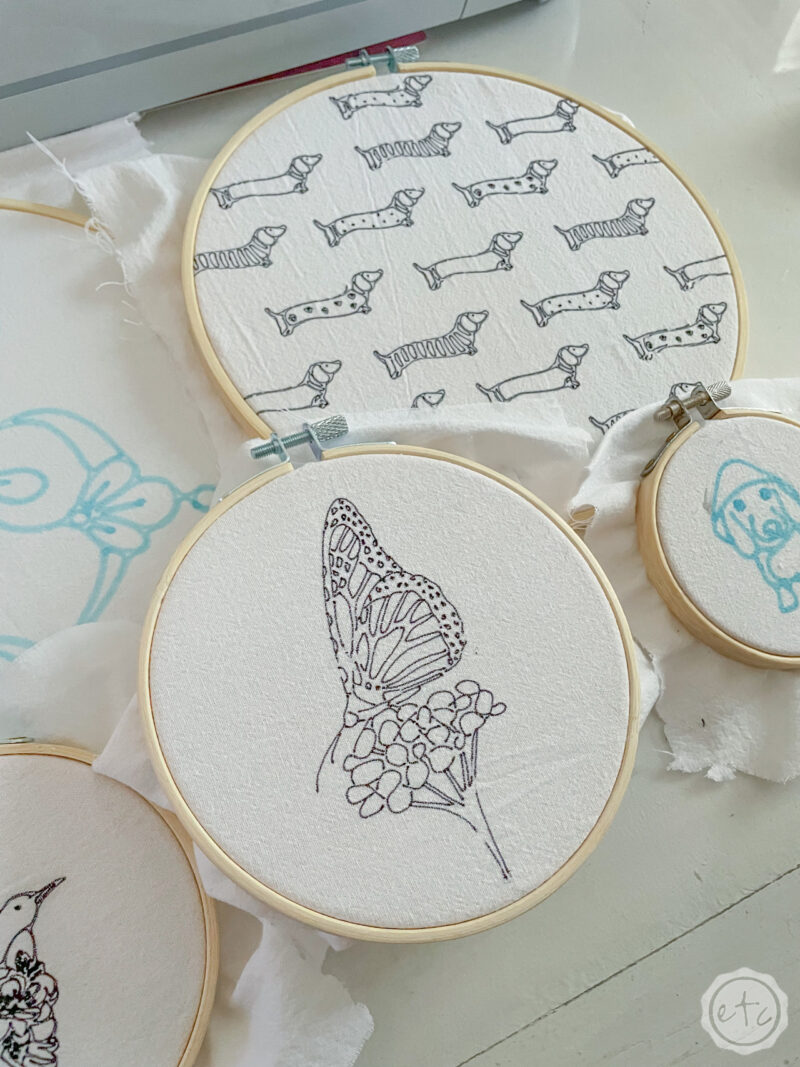
We are going to embroider so many things!!
Let’s get started by grabbing a PDF pattern to convert.
In this case I’ll be working with this FREE Doggie Pattern that I received when I purchased the larger Dachshund Design from Get Stitch Done Designs. It’s a simple and easy design to show examples of but this exact process will work with any pdf design.
Let’s go!

Step 1: Open your PDF Pattern
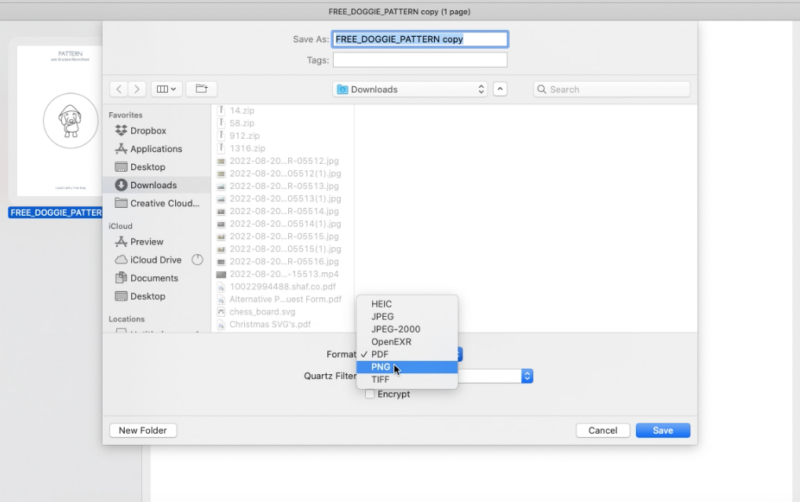
Start by using a PDF reader to open your new PDF pattern… I typically use preview on my Mac but any PDF reader will work.
From here we’ll need to save our pdf as a png or a jpeg… either will work but I typically pick png when working with Cricut Design Space. If your project will not let you save it as a new document you should be able to duplicate it (file, duplicate) and then save the duplicated file as a png.
Perfect.

Step 2: Crop the Pattern
From here we’ll crop out only the portion of our document that’s actually our pattern… in this case the cute little doxie wearing his raincoat. In most programs you’ll draw a box and then select crop from the drop down menu of operations in the top menu.
Once you’ve cropped out just the pattern go ahead and hit save to finalize the changes.
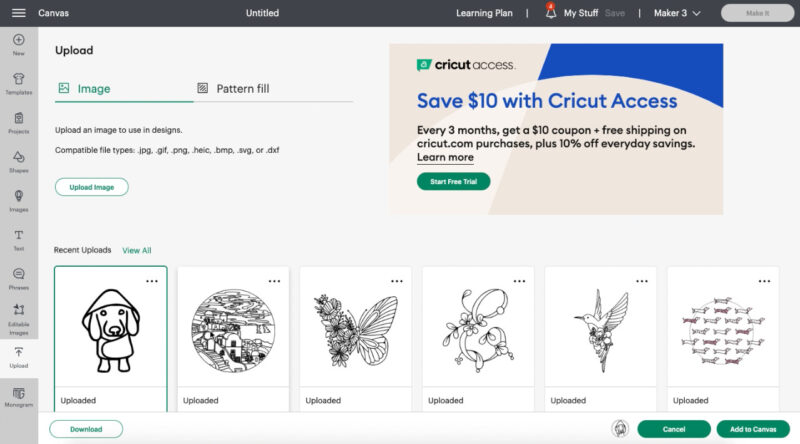
Now we’ll upload our new png into Cricut Design Space.

Step 3: Upload your PNG to Cricut Design Space
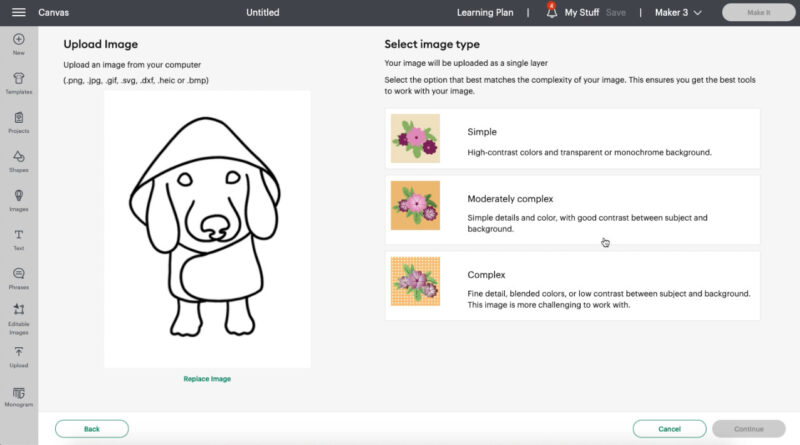
We’re cooking with gas now! Grab your PNG and upload it to Cricut Design Space. You’ll have a few options to pick from here but I always pick “complex” as my image type. Even with a simple line image like our Dachshund I find that the complex option gives us the most detail which is what we’re looking for.
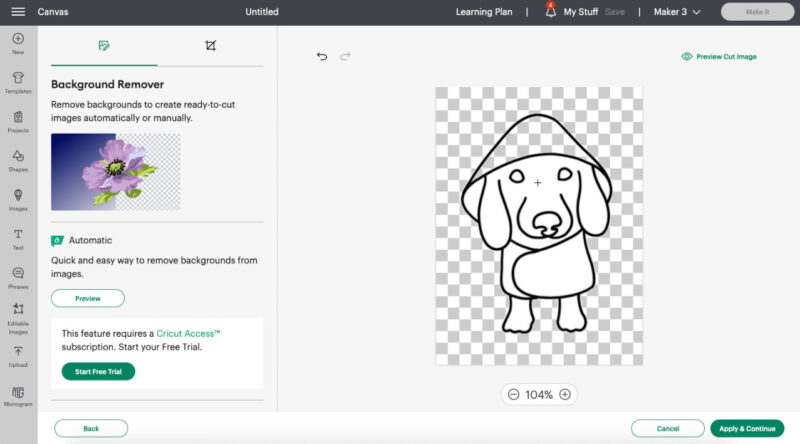
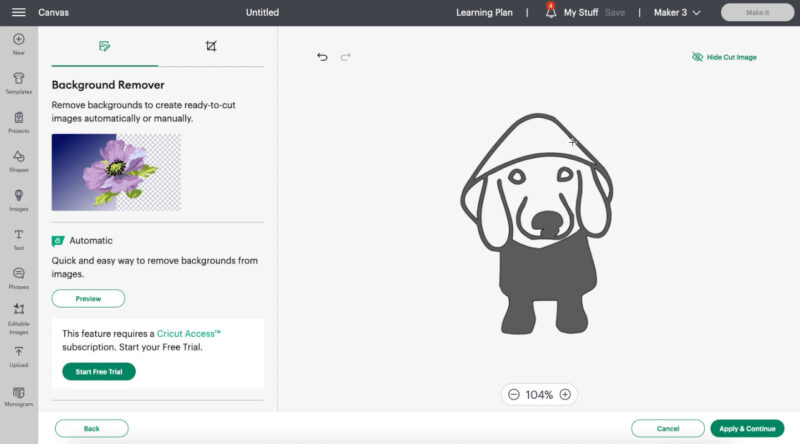
Once we’ve selected our image type we’ll be able to remove the background to reveal our dachshund. At this stage if we don’t remove anything from the original PNG the program will literally upload a gray box onto our canvas. Instead use your mouse to select every single piece of the white background… leaving only the lines we want to draw on our fabric.
Make sure to hit each piece of the pattern you don’t want so inside the eyes, the nose, the rainbcoat… his little ears and the sides of his hat. As the white background goes away you’ll reveal a checkerboard pattern which is the new background… you want to be left with all checkerboard and only the outline of your pattern.
If you’re not sure if you’ve hit the smaller pieces you can hit “preview cut image” in the upper right corner and it will show you a different view to double check. Once you’re sure you’ve removed the entire background go ahead and hit apply and continue.
BOOM!
Step 4: Save your Pattern
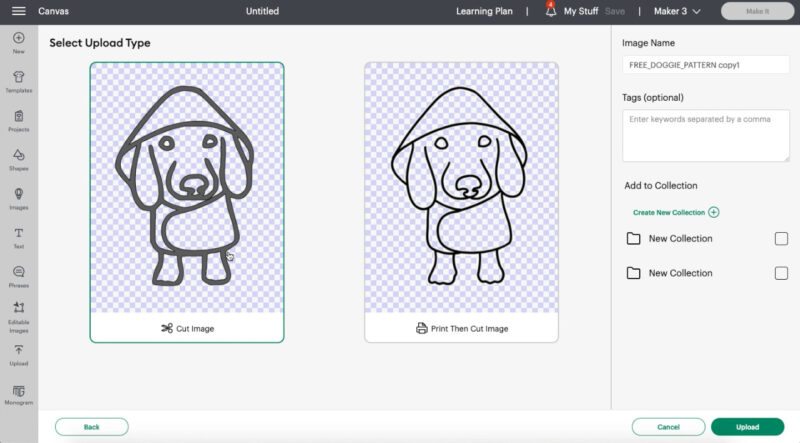
Now that our doggie is cut out and our pattern is good to go we can upload it and save it to our gallery. Make sure to select “cut image” (even though we’re not cutting) as we’ll be able to convert those cut lines to drawing lines in a minute.
Then add an image name and any tags you’d like to find your pattern in the future. Then hit upload to add this baby to your existing image gallery.
You can see a few of the other patterns I’ve done recently that have quite a few more lines… they take longer (and you’ll want to zoom in while removing the background to get all the little details) but it’s 100% possible.
Step 5: Update the Line Type
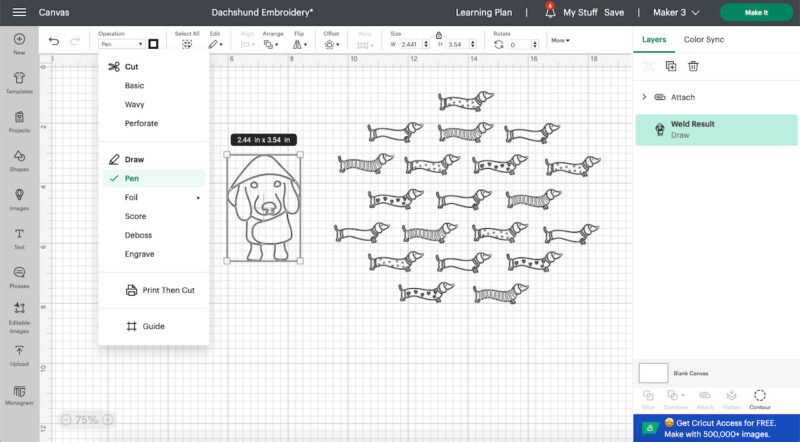
We are this close y’all! Now that your pattern is uploaded to the Image Gallery we can add it to our canvas.
Perfect!
As always Cricut Design Space will add all images as a basic cut design… go ahead and change that by selection the operation drop down menu (in the top menu bar) and then selecting the pen option (under draw).
This will change the line type from a line that will be cut with a cutting blade to a line that will be drawn with a pen.
WHICH IS EXACTLY WHAT WE WANTED!
Now we can draw our puppy on our fabric and get to embroidering.
Of course, if you need more help from this step you can follow my How to Draw an Embroidery Pattern with your Cricut Maker tutorial.
Enjoy!